This is the container automation deployment architecture diagram I made:
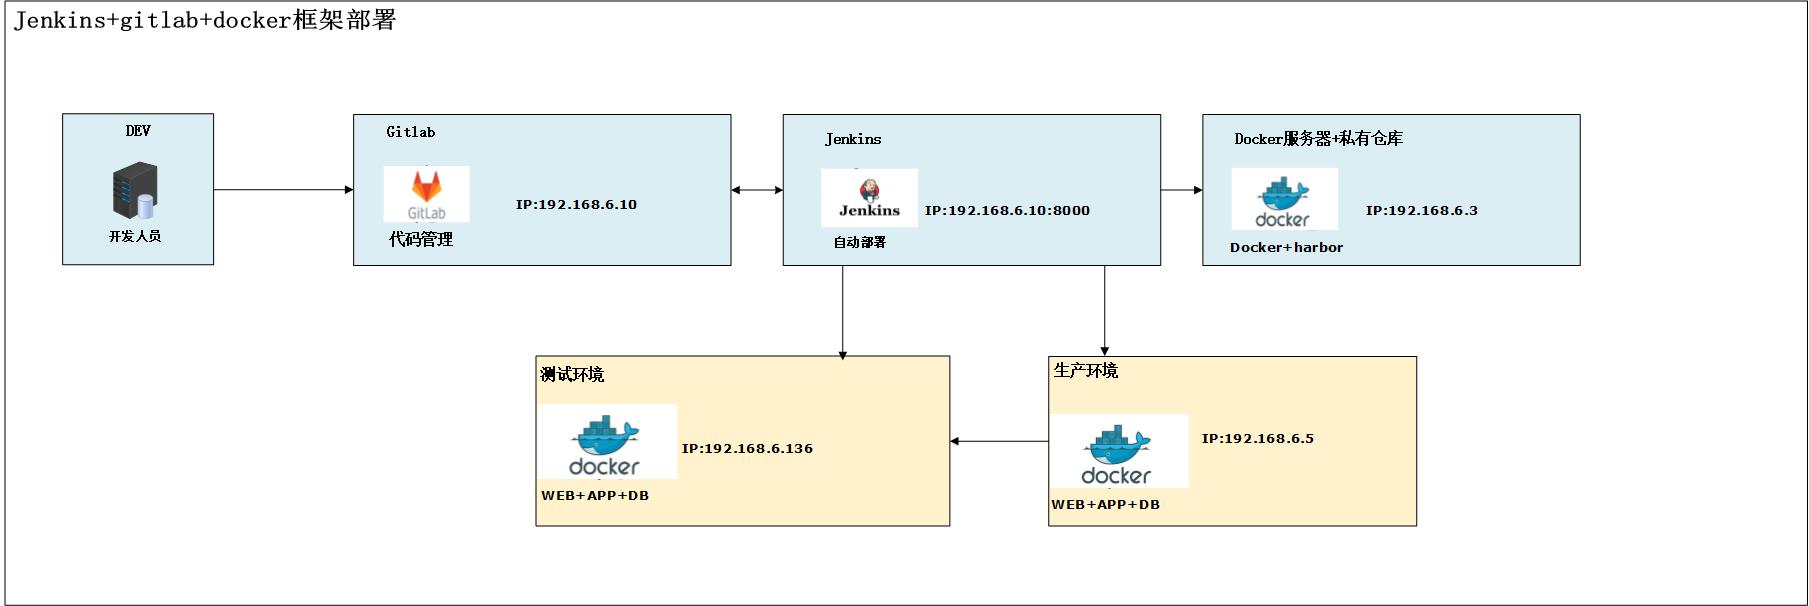
Here I deploy gitlab and jenkins on one machine: 192.168.6.10
Docker harbor server: 192.168.6.3
Test environment: 192.168.6.136
Production environment: 192.168.6.5
Firstly, docker needs to be installed on the jenkins server, test environment and formal environment, and the configuration can log in to the Harbor service to pull the image. It is not introduced. For details, please refer to the previous posts. Secondly, git needs to be installed on the jenkins machine so that the code on gitlab can be pulled from the jenkins server later.
Note that git, jdk, maven and docker should be installed on jenkins machine and configured to log in to Harbor private library. For details, please refer to the posts above.
#Basic configuration
① . it needs to be configured on the business machine (test machine, formal machine):
# visudo
#
#Defaults requiretty
Defaults:root !requiretty
Otherwise, an error will be reported when executing the remote script.
② Secondly, you need to enable jenkins users to use the docker command:
Execute visudo and add the following:
jenkins ALL = (root) NOPASSWD: / ~ / dokcer (here is the installation directory of docker)
Defaults:jenkins !requiretty
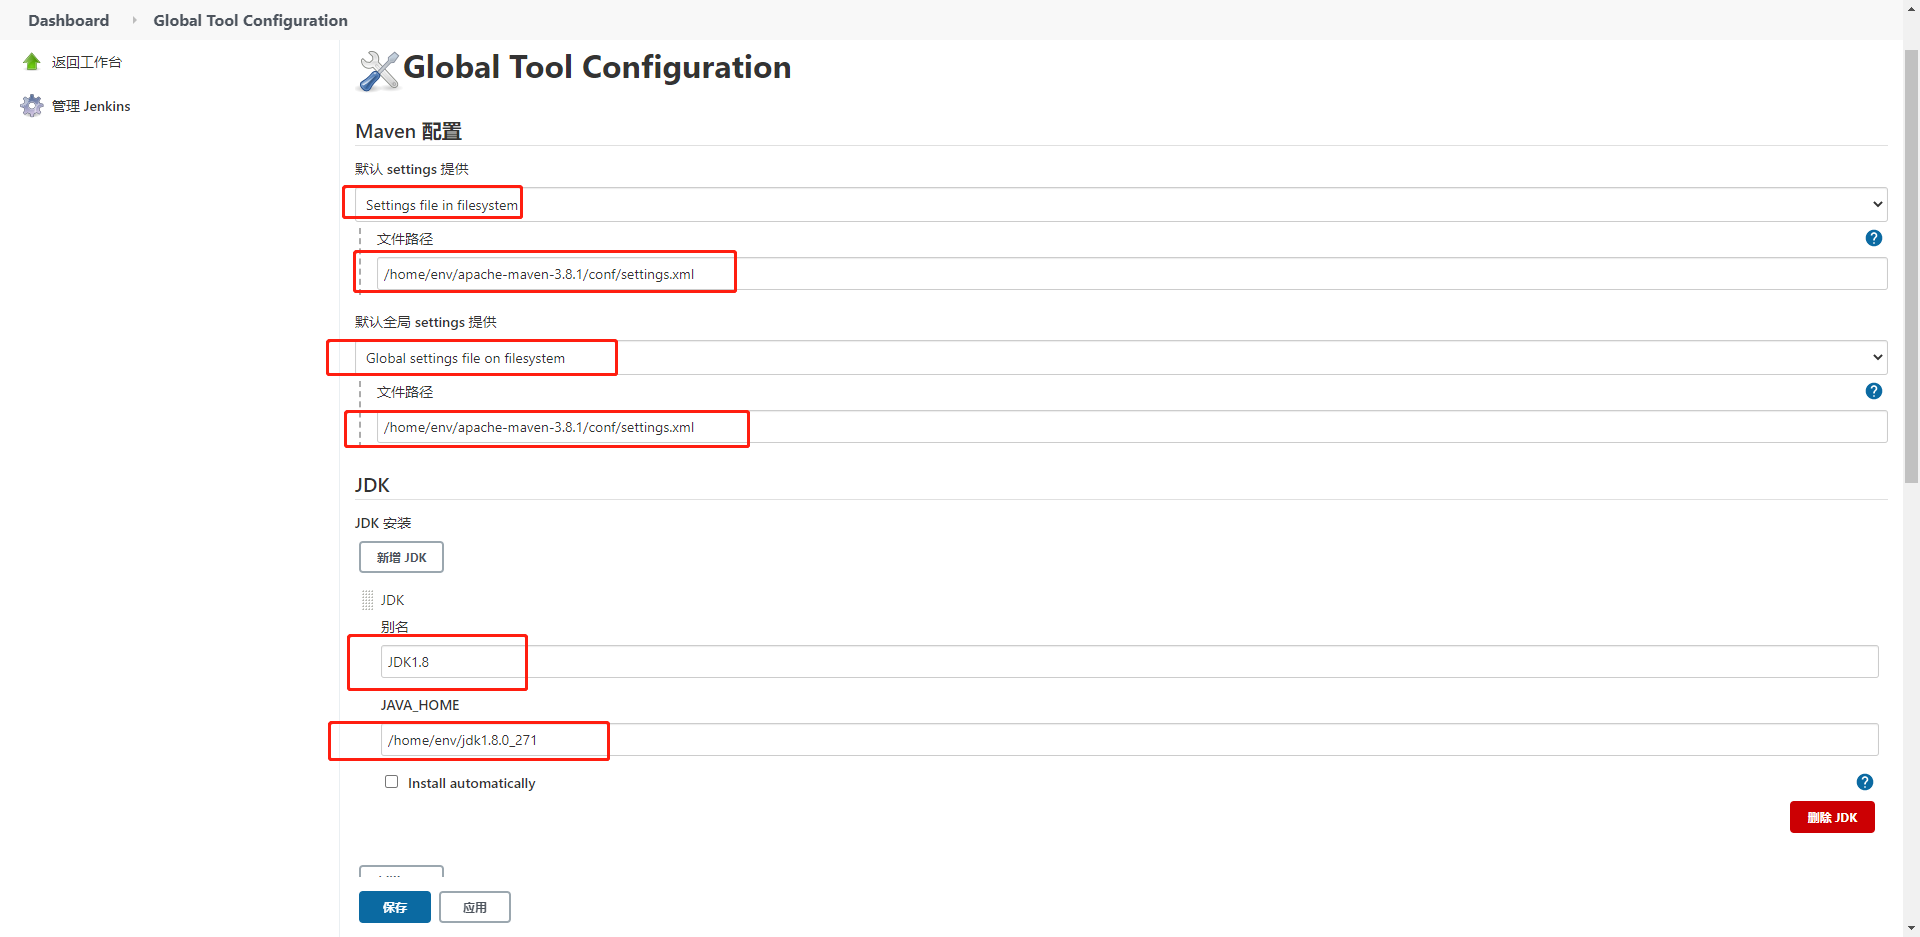
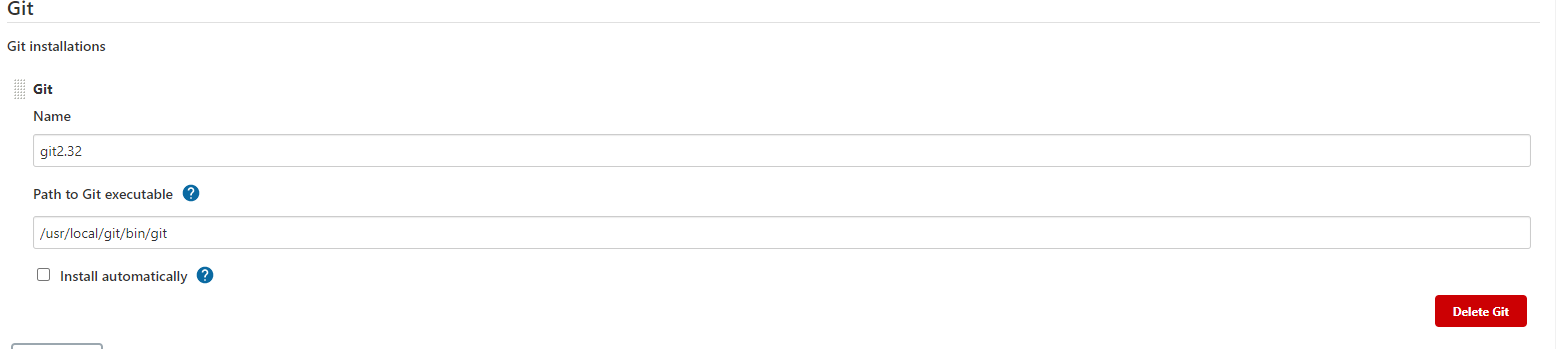
1. Configuration environment
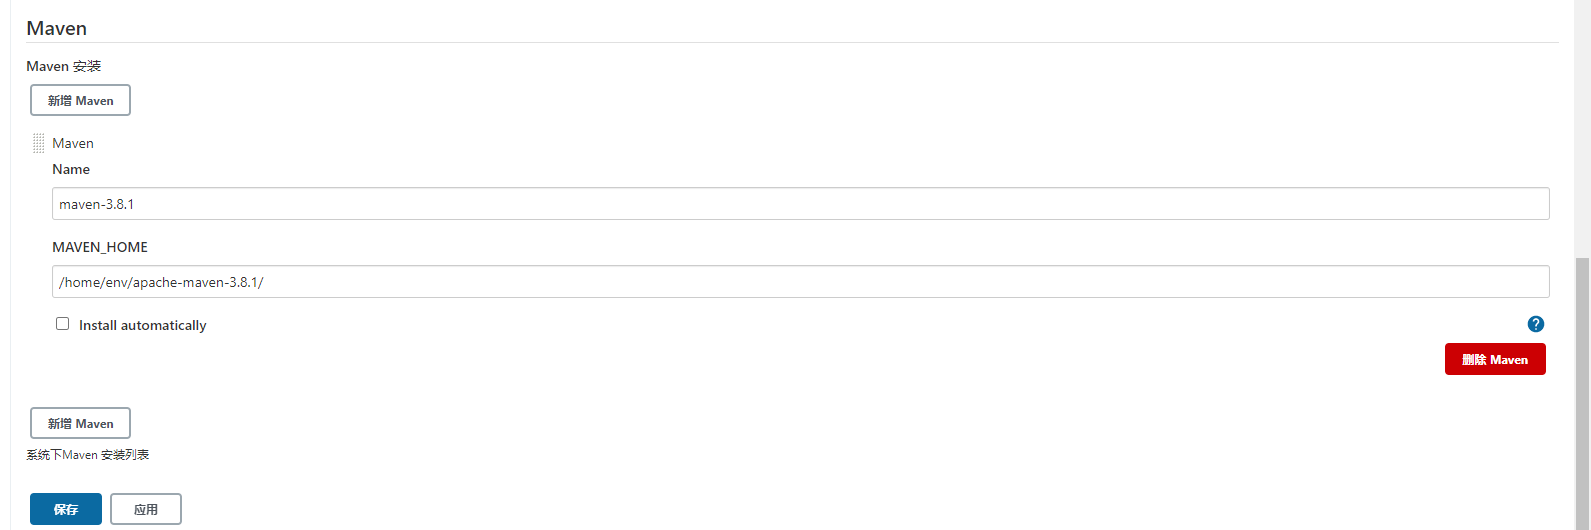
After jenkins is installed and the recommended plug-ins are installed, and the account, password, mailbox, etc. are set, JDK, git, maven, etc. need to be configured later. If the above environment is not installed, install the corresponding services as described above.
Note: if the server has installed the corresponding service and environment, you must not select automatic installation, otherwise it will conflict. In addition, you can start the alias at will. You must write the directory correctly, otherwise an error will be reported when you use it later. If you don't know where the installation location is, you can use the command:
[root@localhost ~]# which java
/home/env/jdk1.8.0_271/bin/java
[root@localhost ~]# which git
/usr/local/git/bin/git
[root@localhost ~]# which mvn
/home/env/apache-maven-3.8.1/bin/mvn
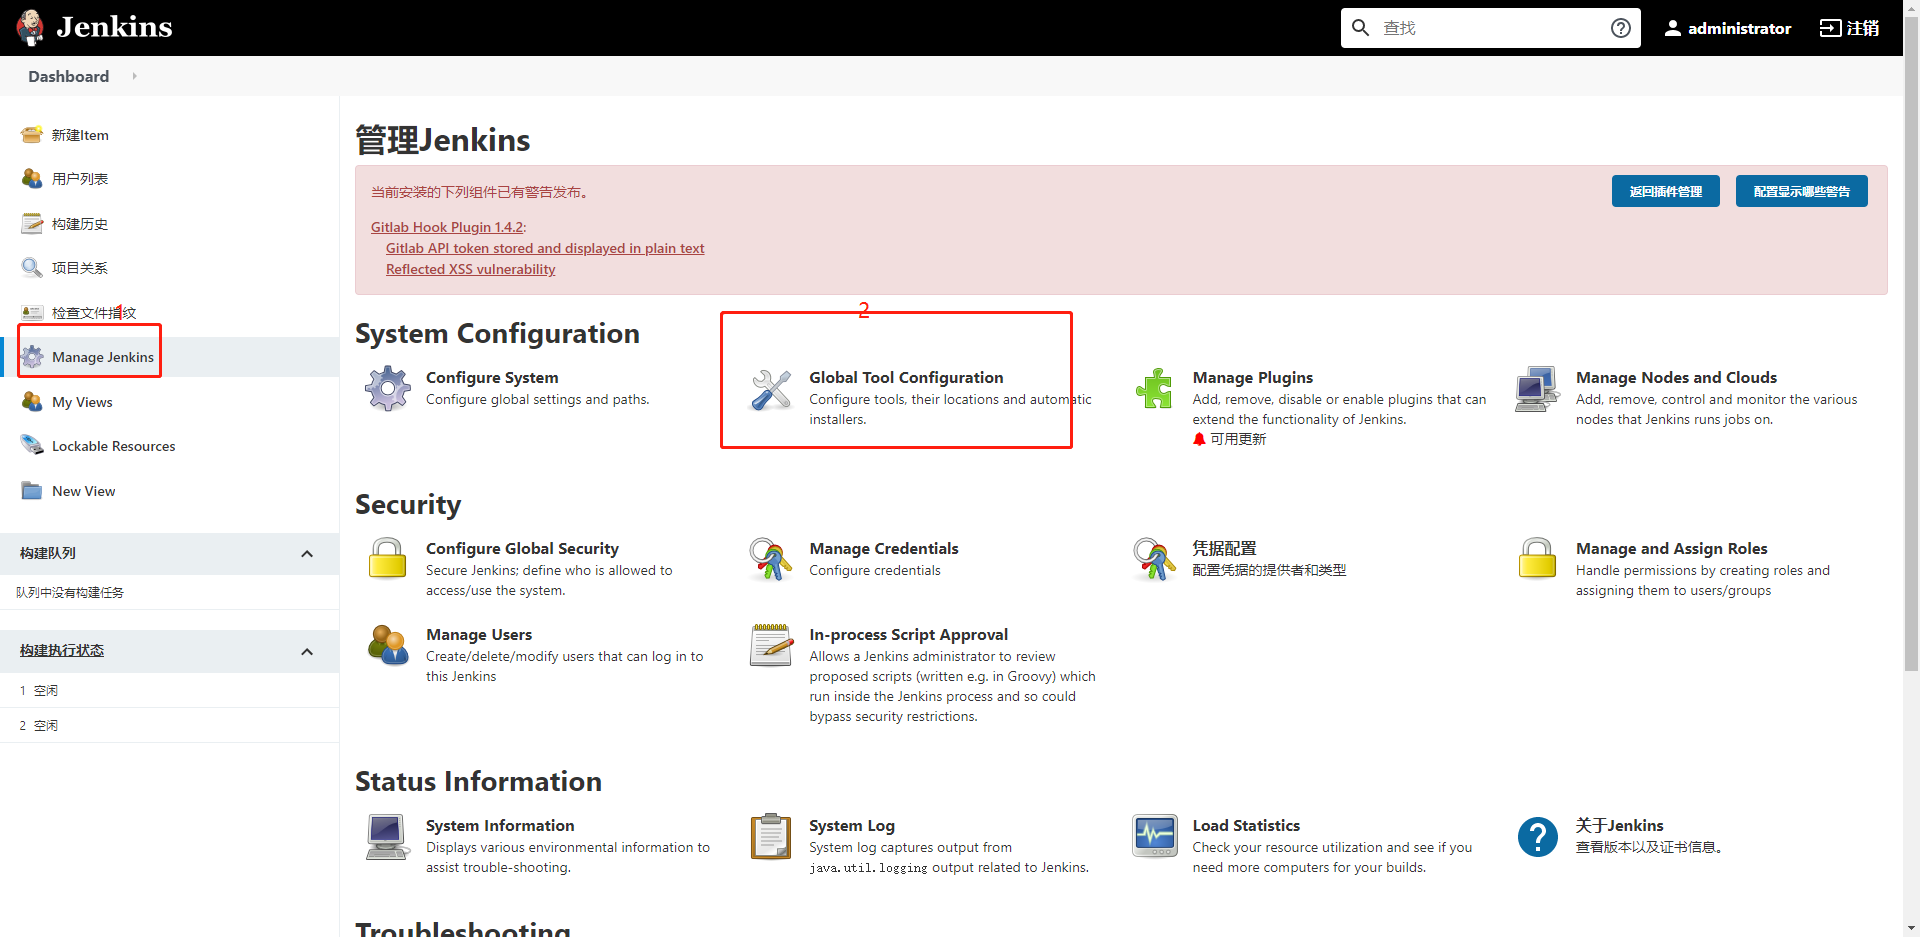
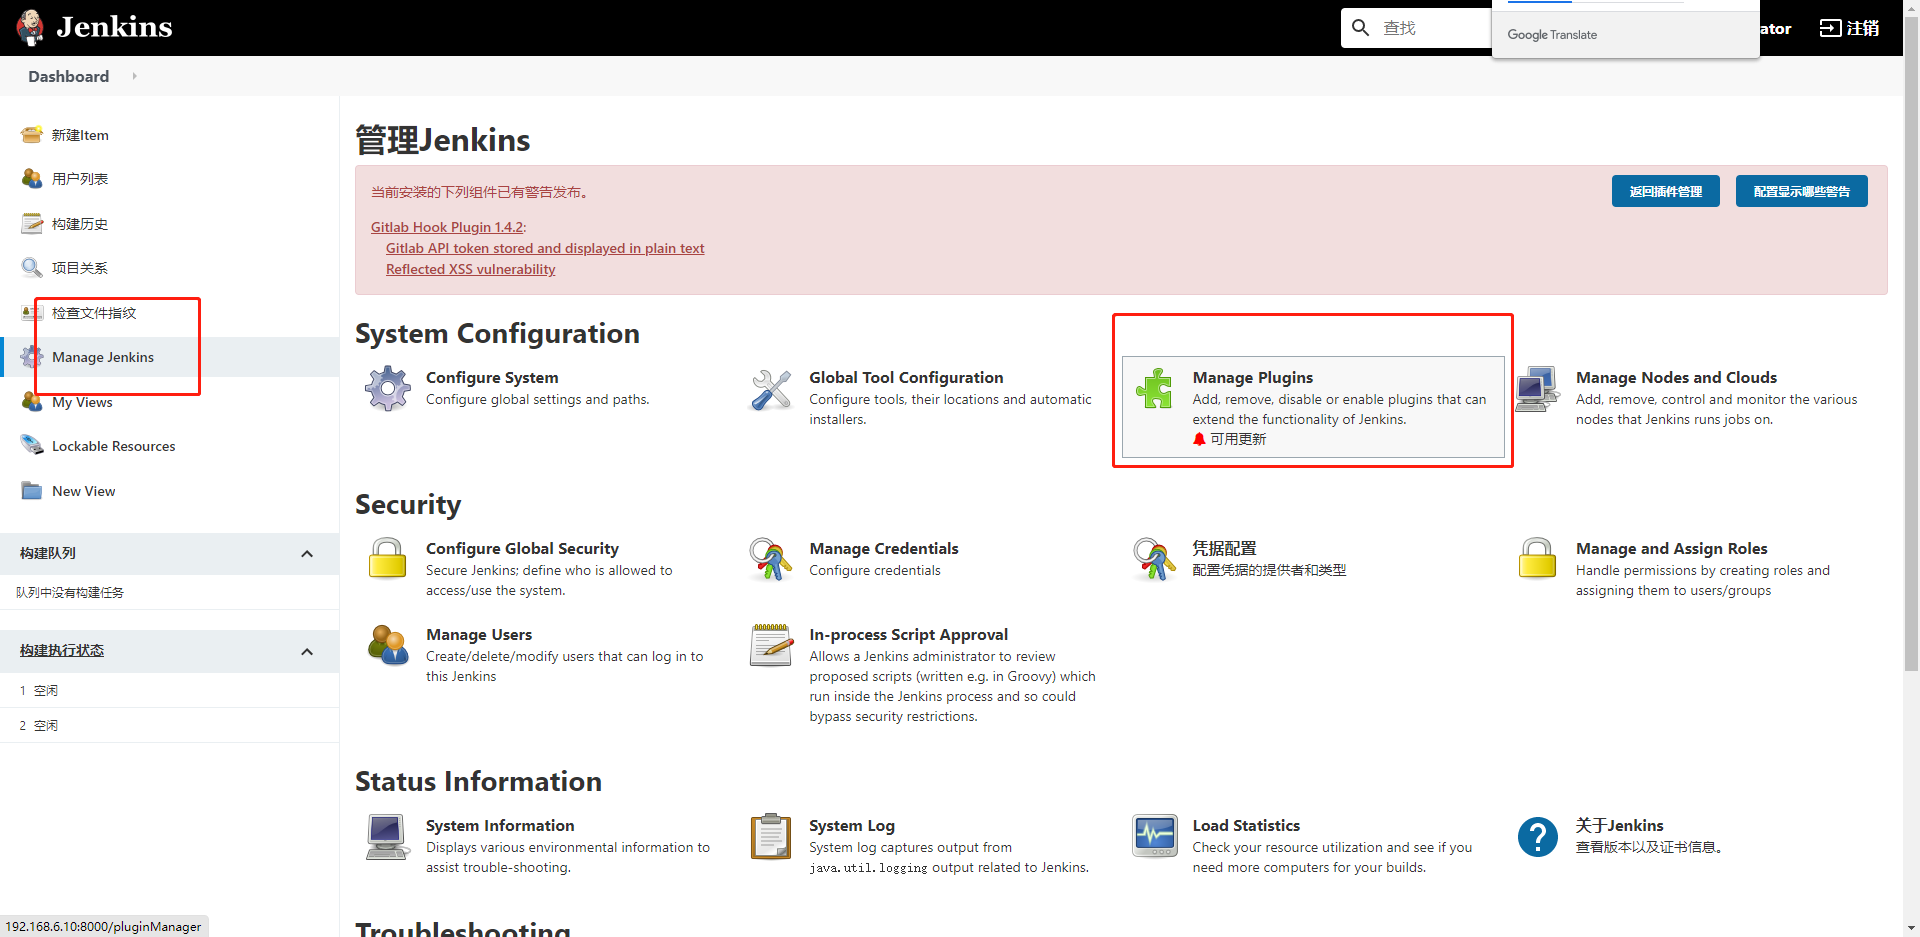
2. Plug in installation
The recommended plug-ins for the first login are not enough. You need to choose to install some plug-ins:
Role-based-Authorization Strategy,Authorize Project,Maven Integration,SSH plugin,Gitlab Hook Plugin,GitLab Plugin
Note: the plug-in needs to be restarted after installation. The quick restart method is to add restart after the address, such as: http://localhost/restart This allows a quick restart.
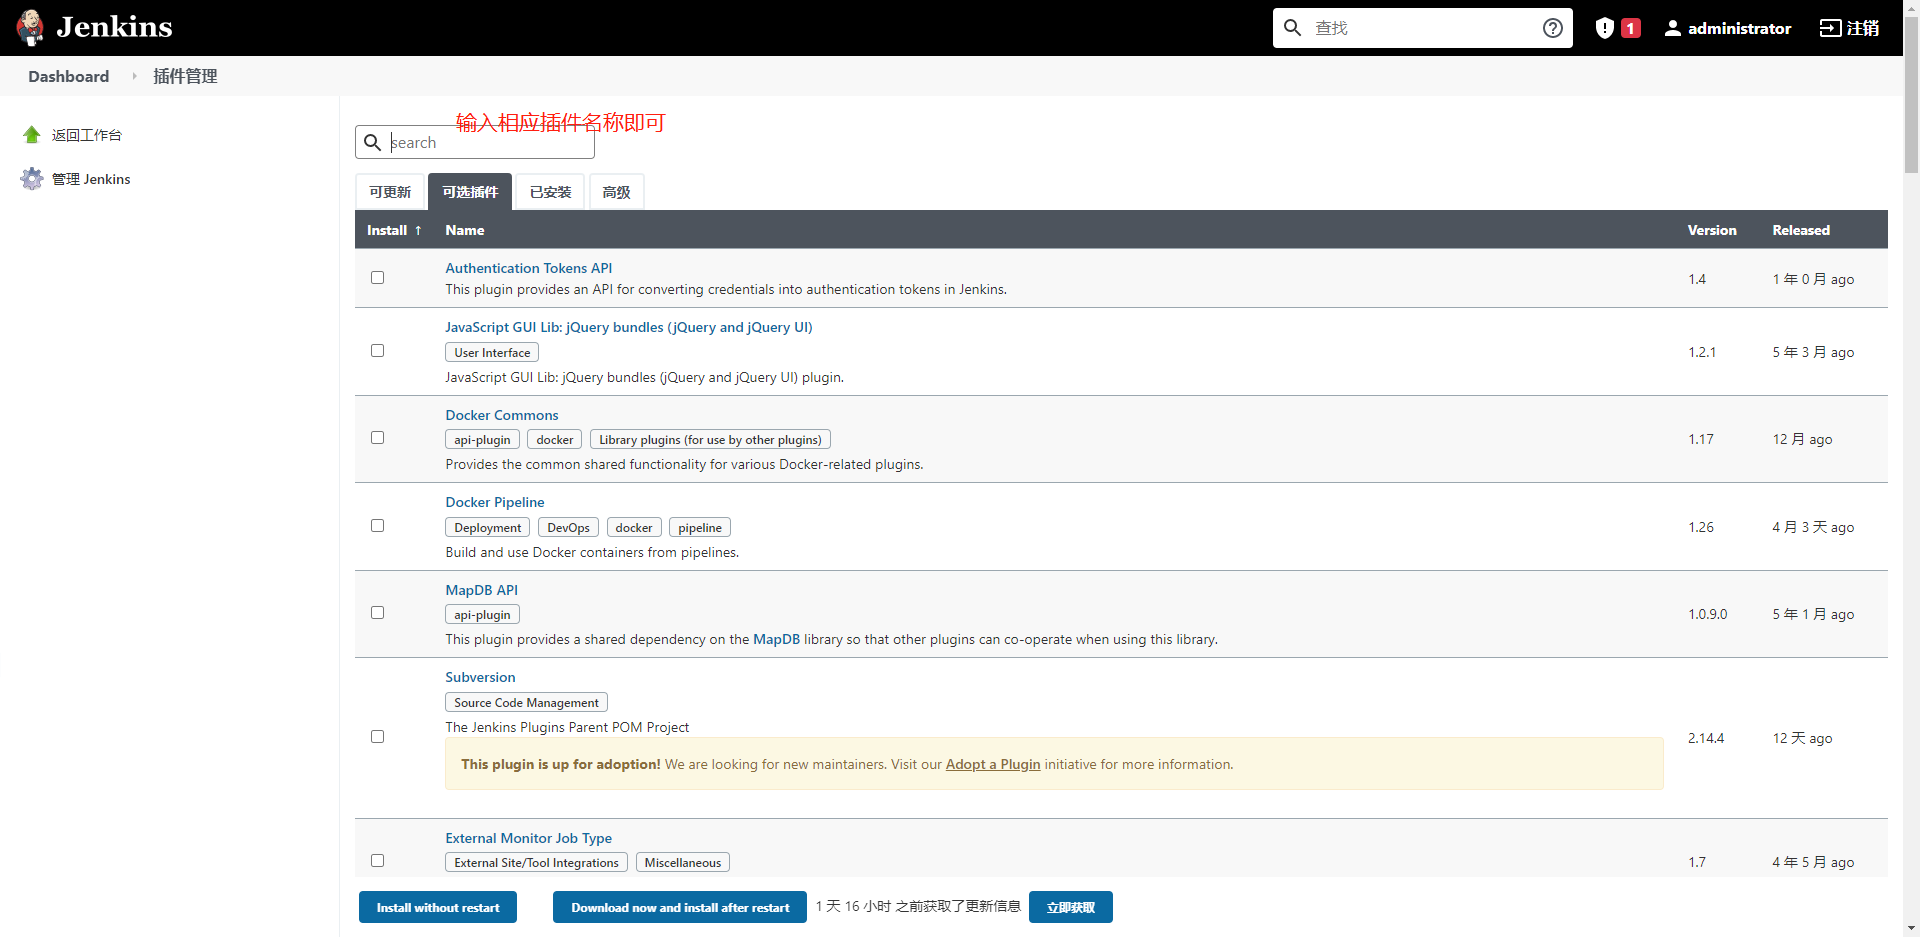
After installing the plug-in, you need to turn on the plug-in function
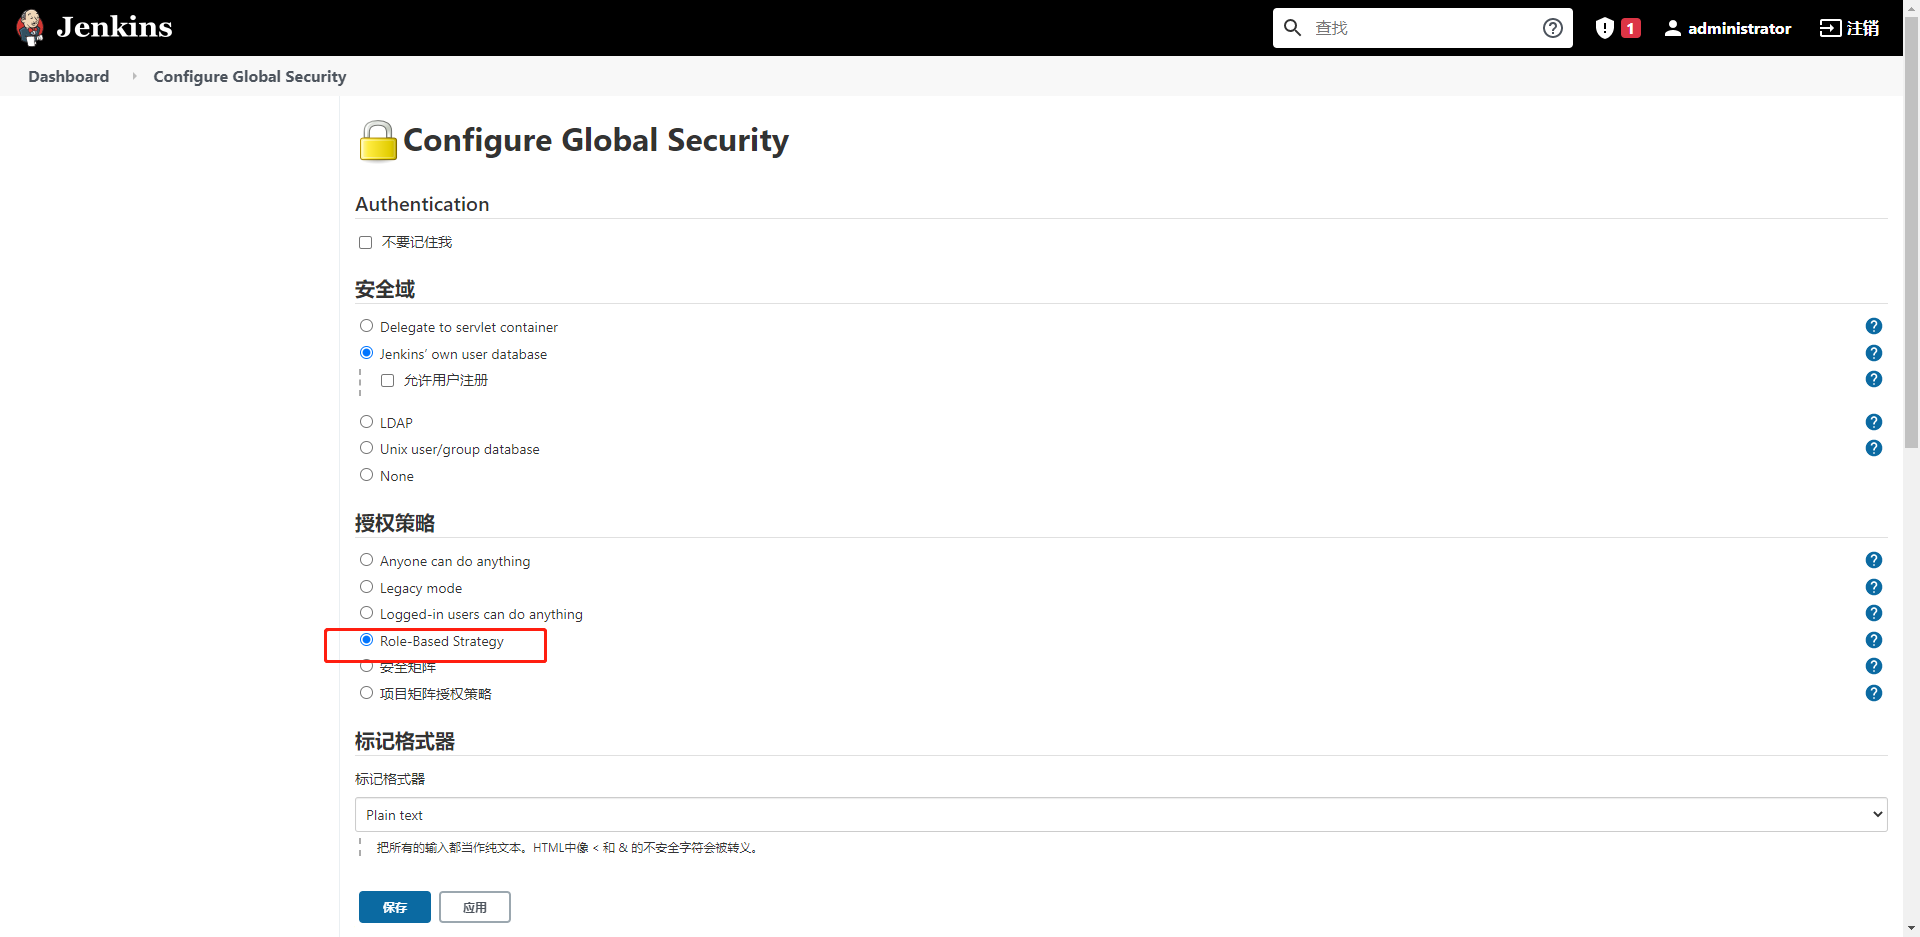
The above plug-ins have the function of permission management. The specific permission allocation and account registration are not introduced one by one.
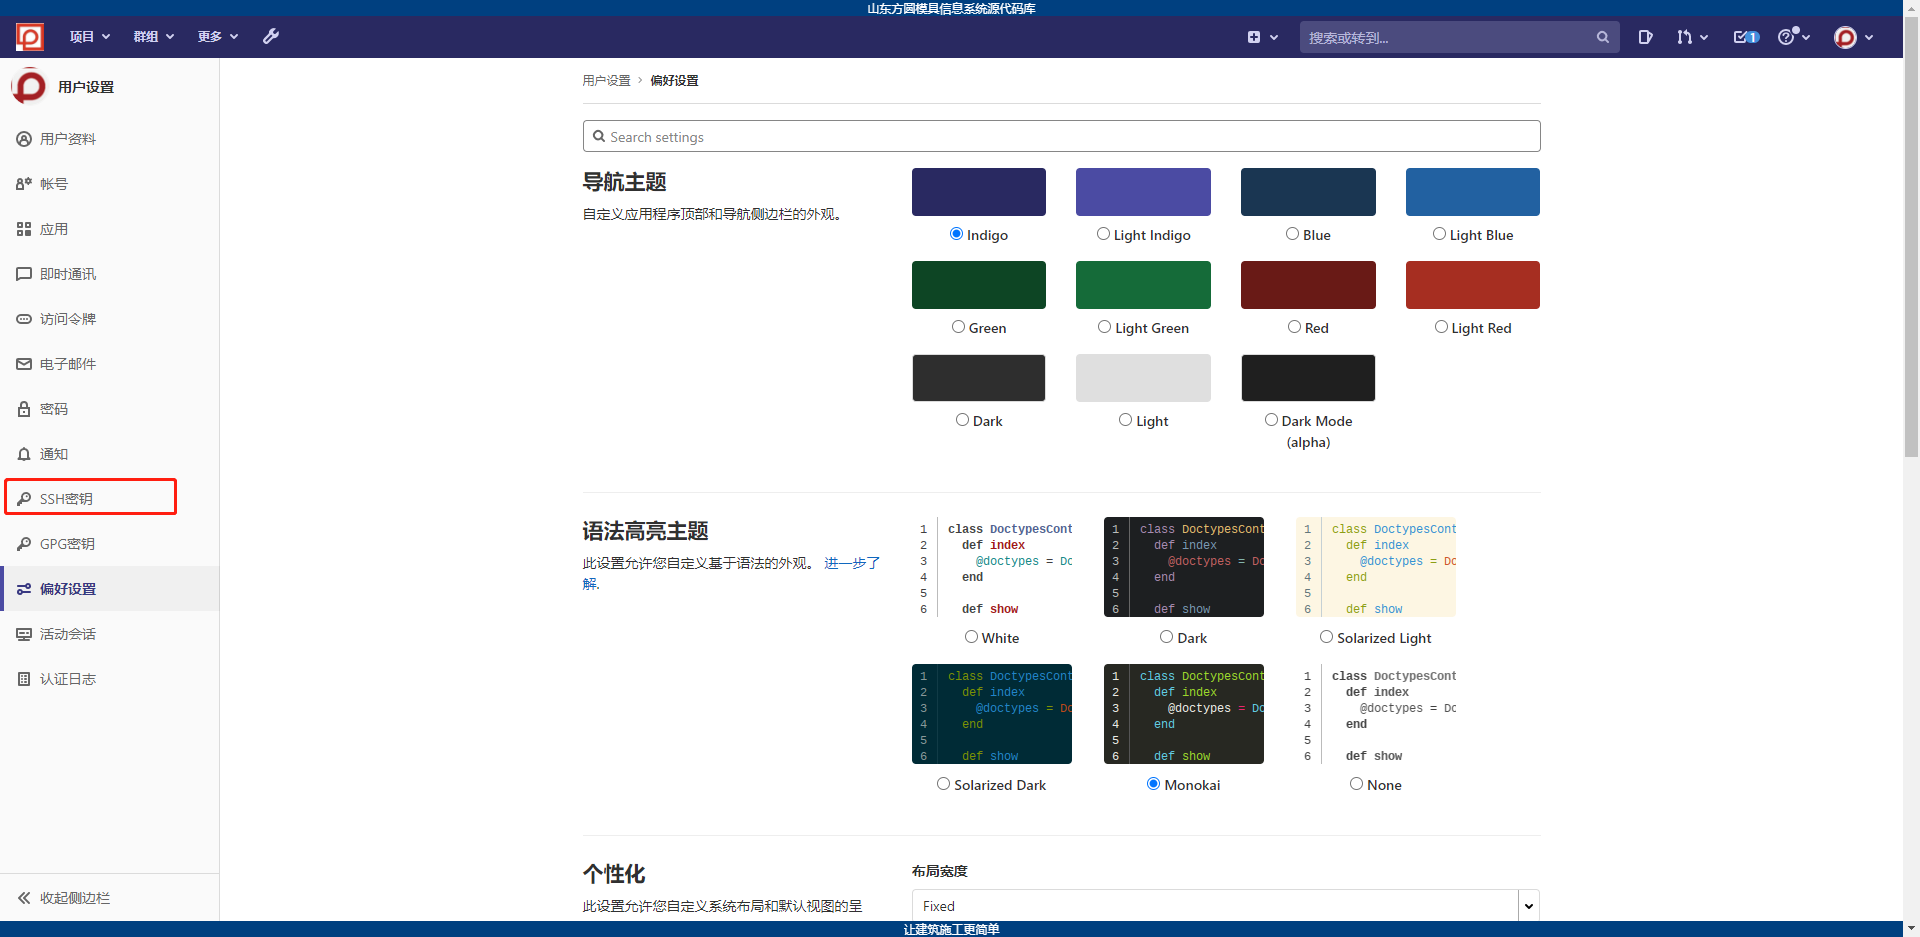
3. jenkins+gitlab key pairing
First, you need to generate the secret key on the jenkins server, enter the command and press enter all the way:
[root@localhost ~]# ssh-keygen -t rsa
Generating public/private rsa key pair.
Enter file in which to save the key (/root/.ssh/id_rsa):
Created directory '/root/.ssh'.
Enter passphrase (empty for no passphrase):
Enter same passphrase again:
Your identification has been saved in /root/.ssh/id_rsa.
Your public key has been saved in /root/.ssh/id_rsa.pub.
The key fingerprint is:
SHA256:six0/vQ50KNkelV5n3EEnDnixe7v8MhkOYJCkxsKwYs root@localhost.localdomain
The key's randomart image is:
+---[RSA 2048]----+
|             o.+ |
|   .        . B .|
|    o      . = o |
|   . o   .  + o..|
|  E + o S. . o .+|
|   . = =+++.  .o.|
|    . =+++... *. |
|     ..ooo.. = =.|
|       .. o.  o.o|
+----[SHA256]-----+
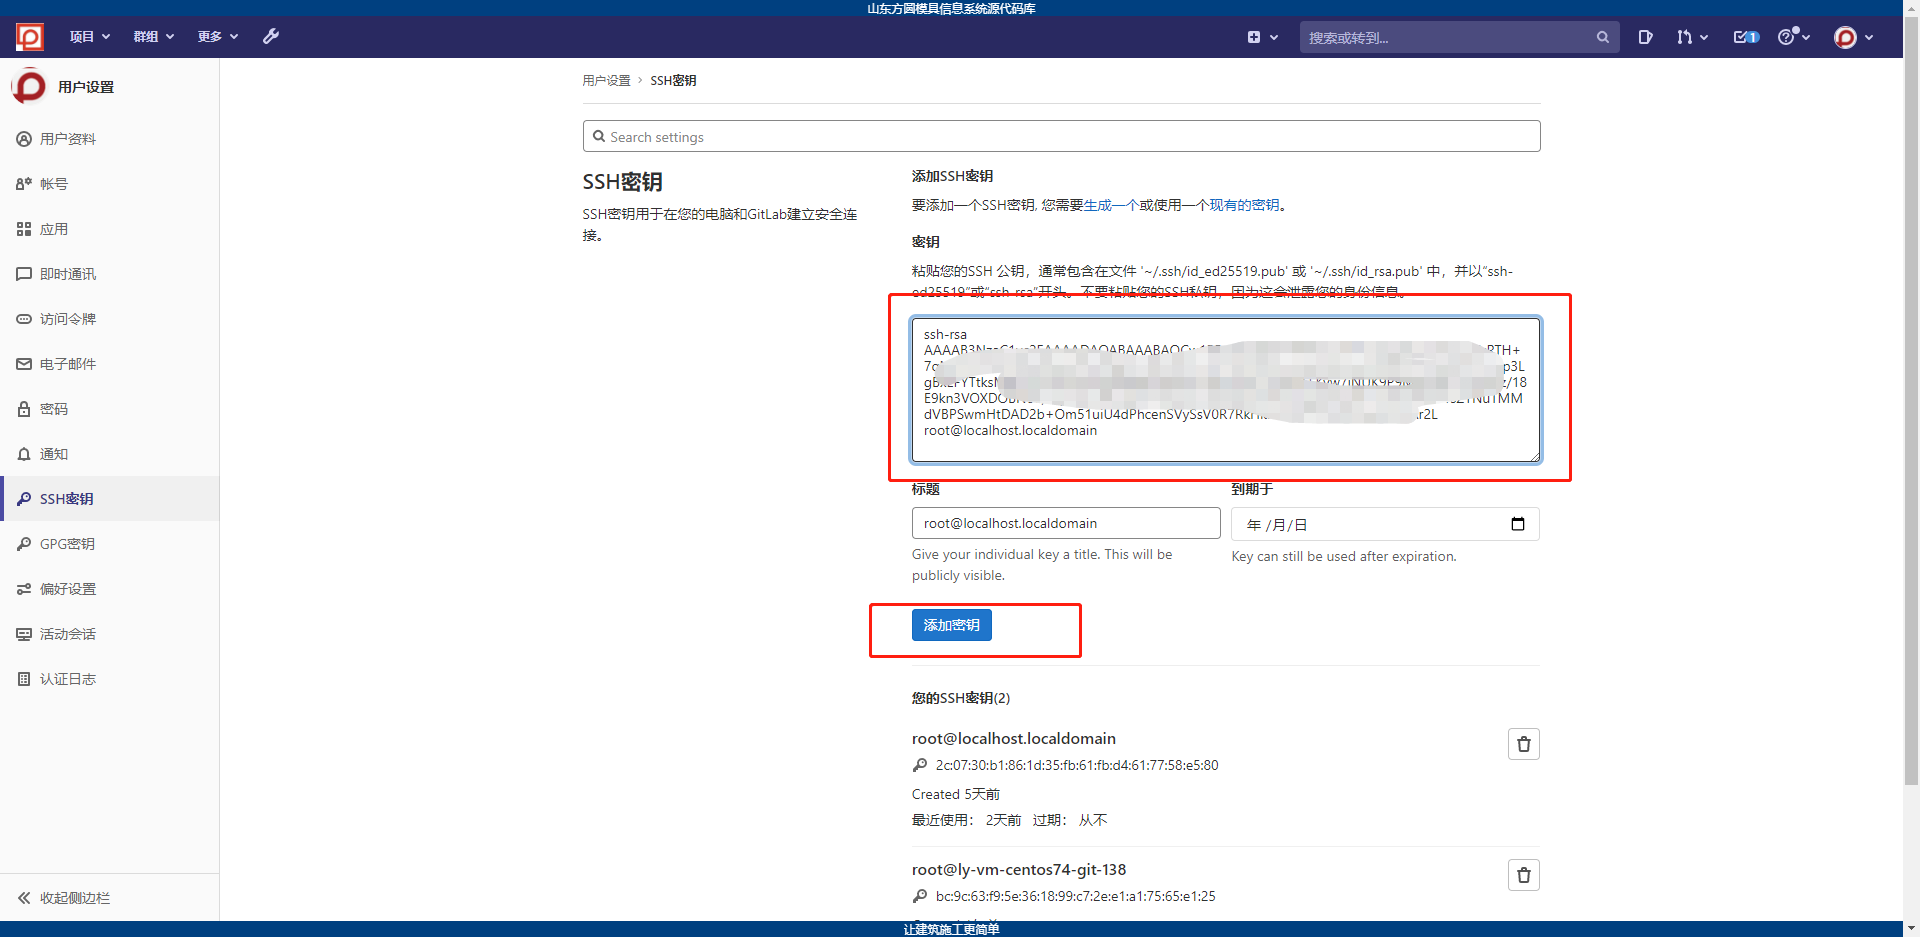
In / root / Two files are generated in the SSH Directory: id_rsa (private key), id_rsa.pub (public key), copy the contents of the public key to gitlab. The specific operations are as follows:

Click add after copying and pasting.
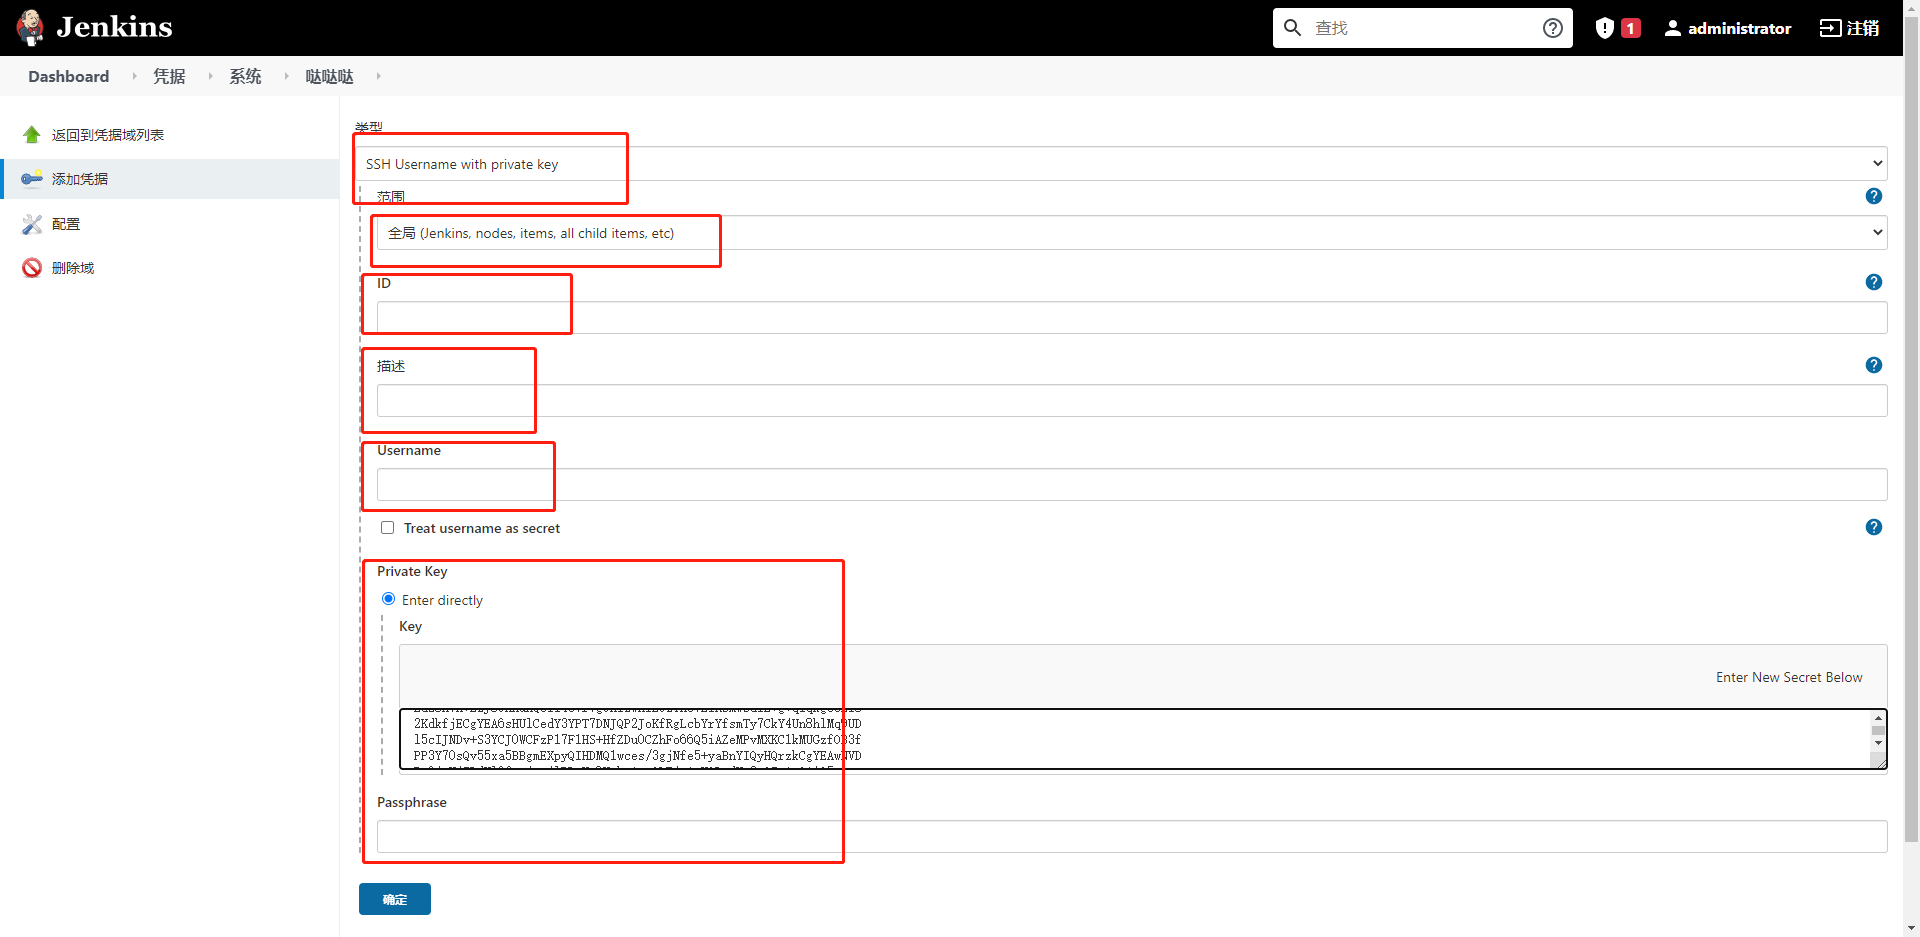
Then copy the private key to jenkins as follows:
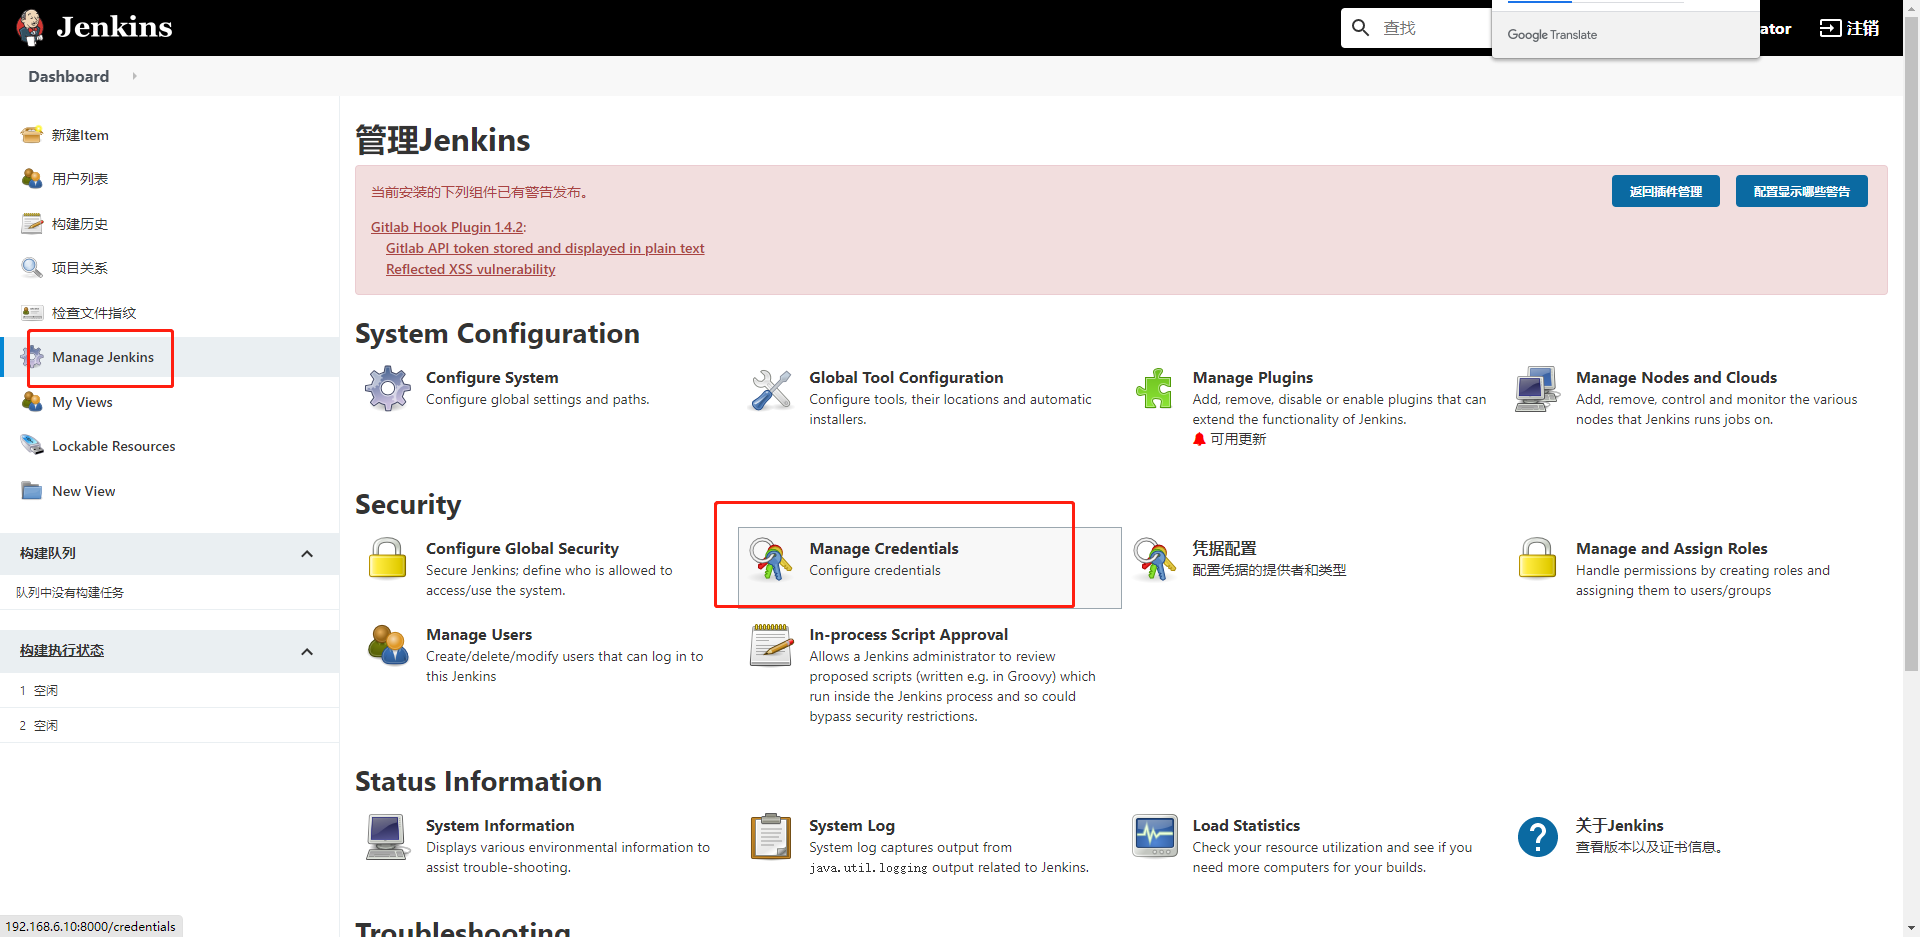

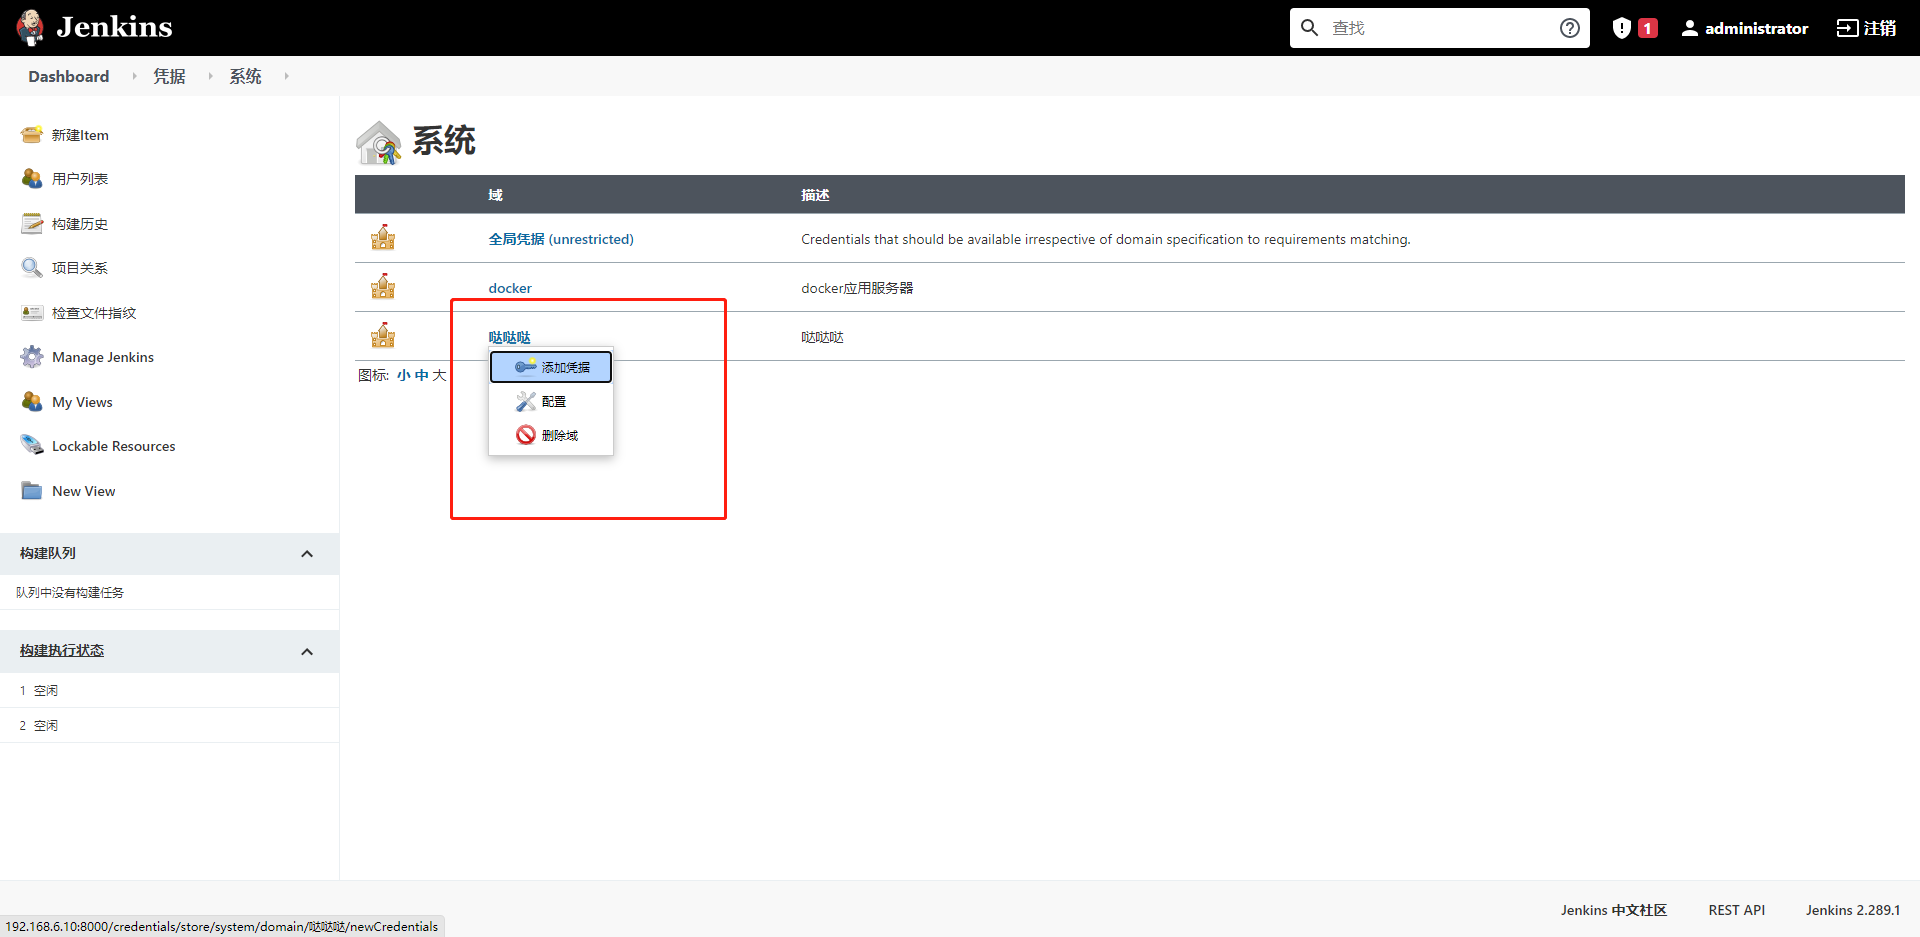
Select Add credentials
Here, you need to select "SSH username with private key". By default, the range is unique. Username is the user name of gitlab server, and copy the copied private key to the input box. Note: the lines BEGIN and END are also the range of copied content. Then confirm.
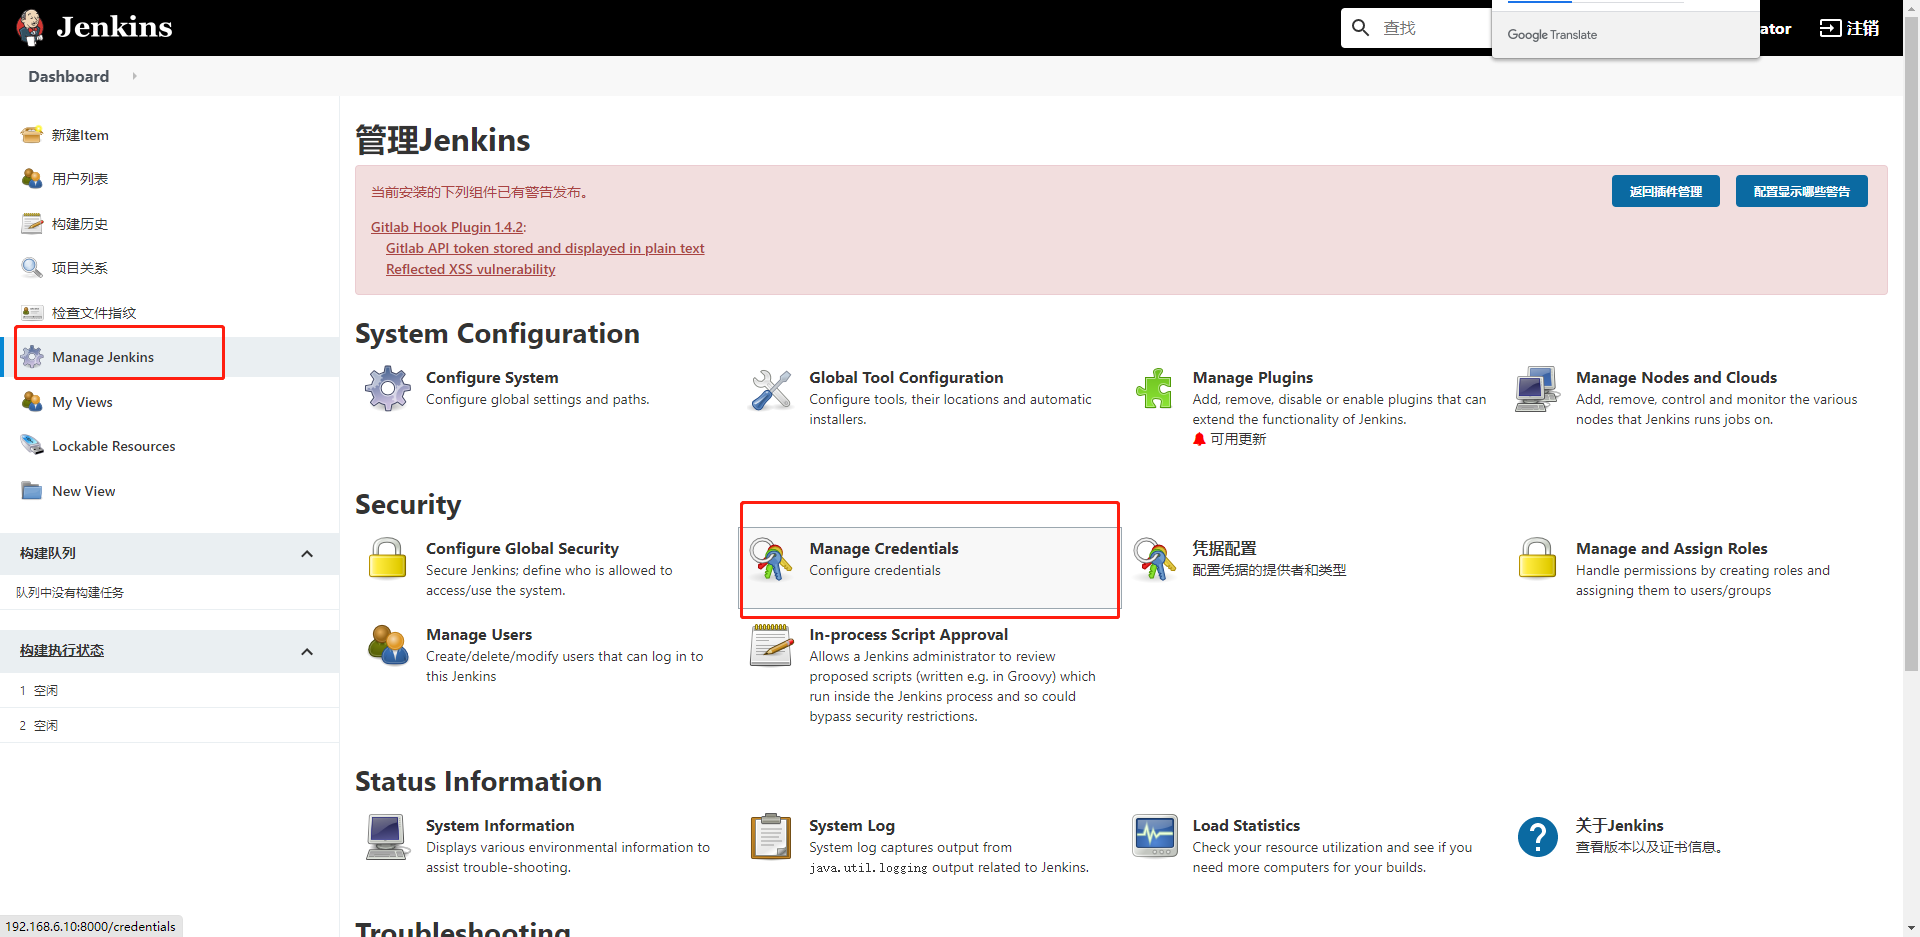
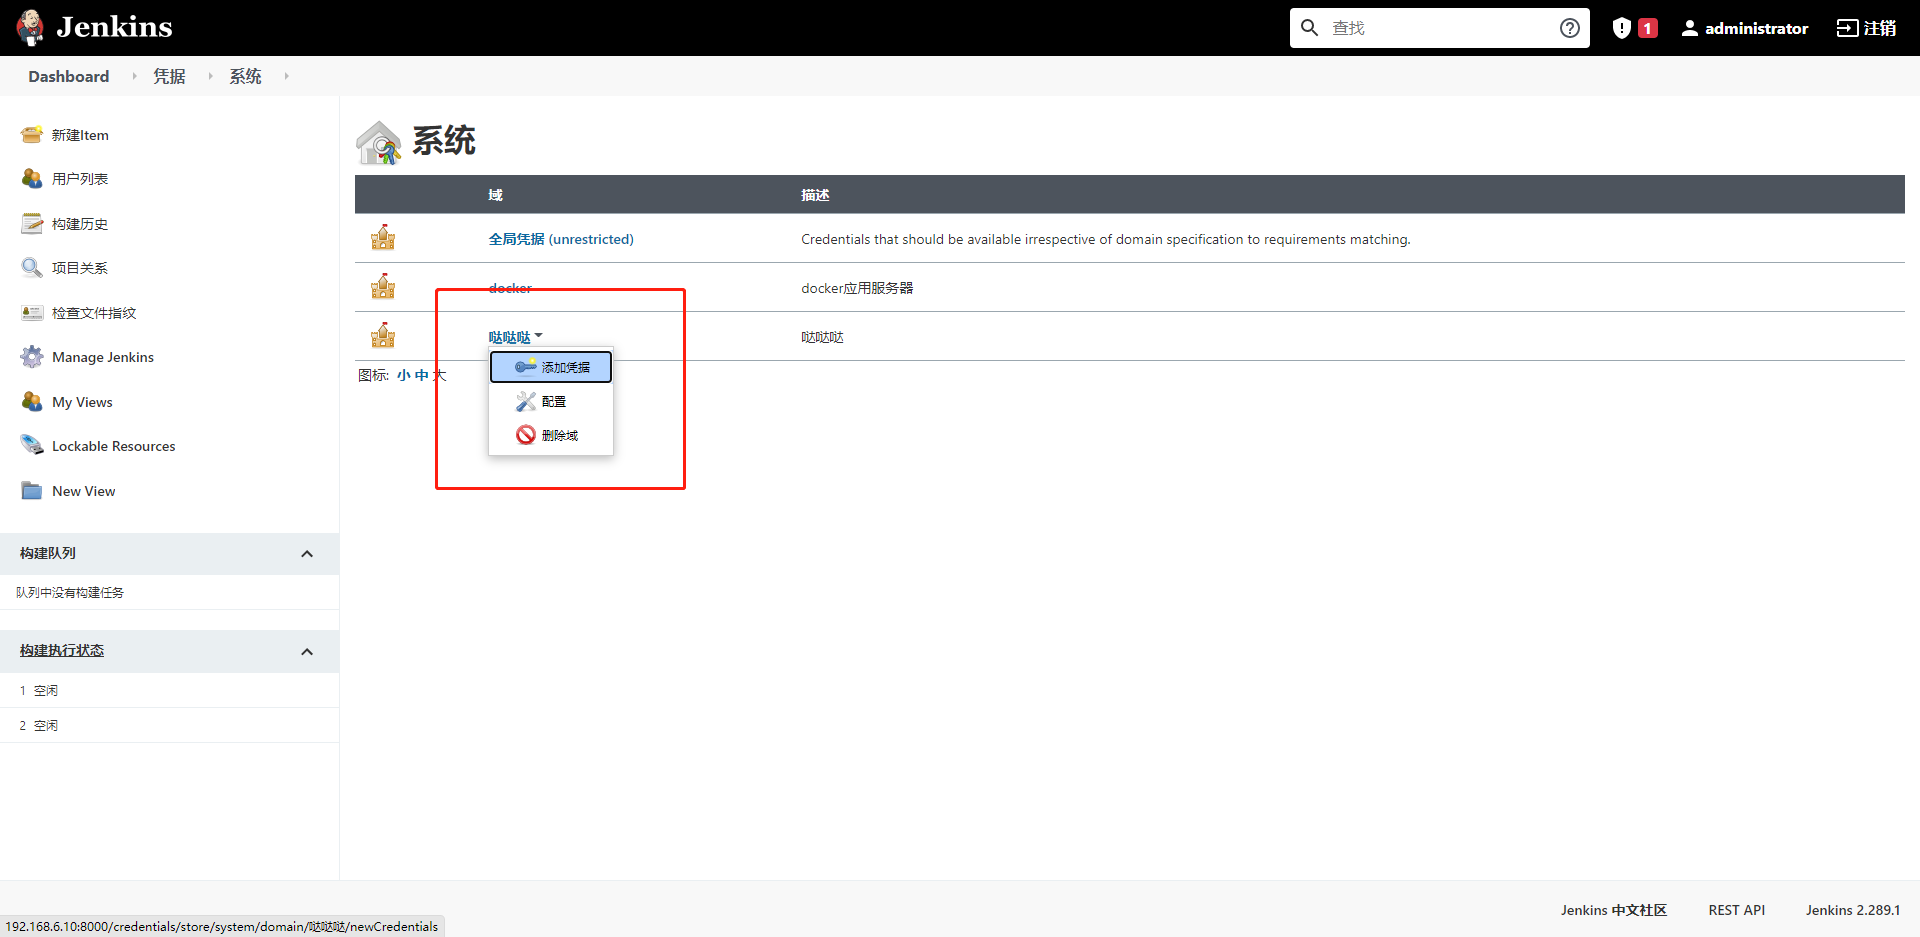
4. Configure remote machines (Harbor, test environment, formal environment and jenkins global credentials)
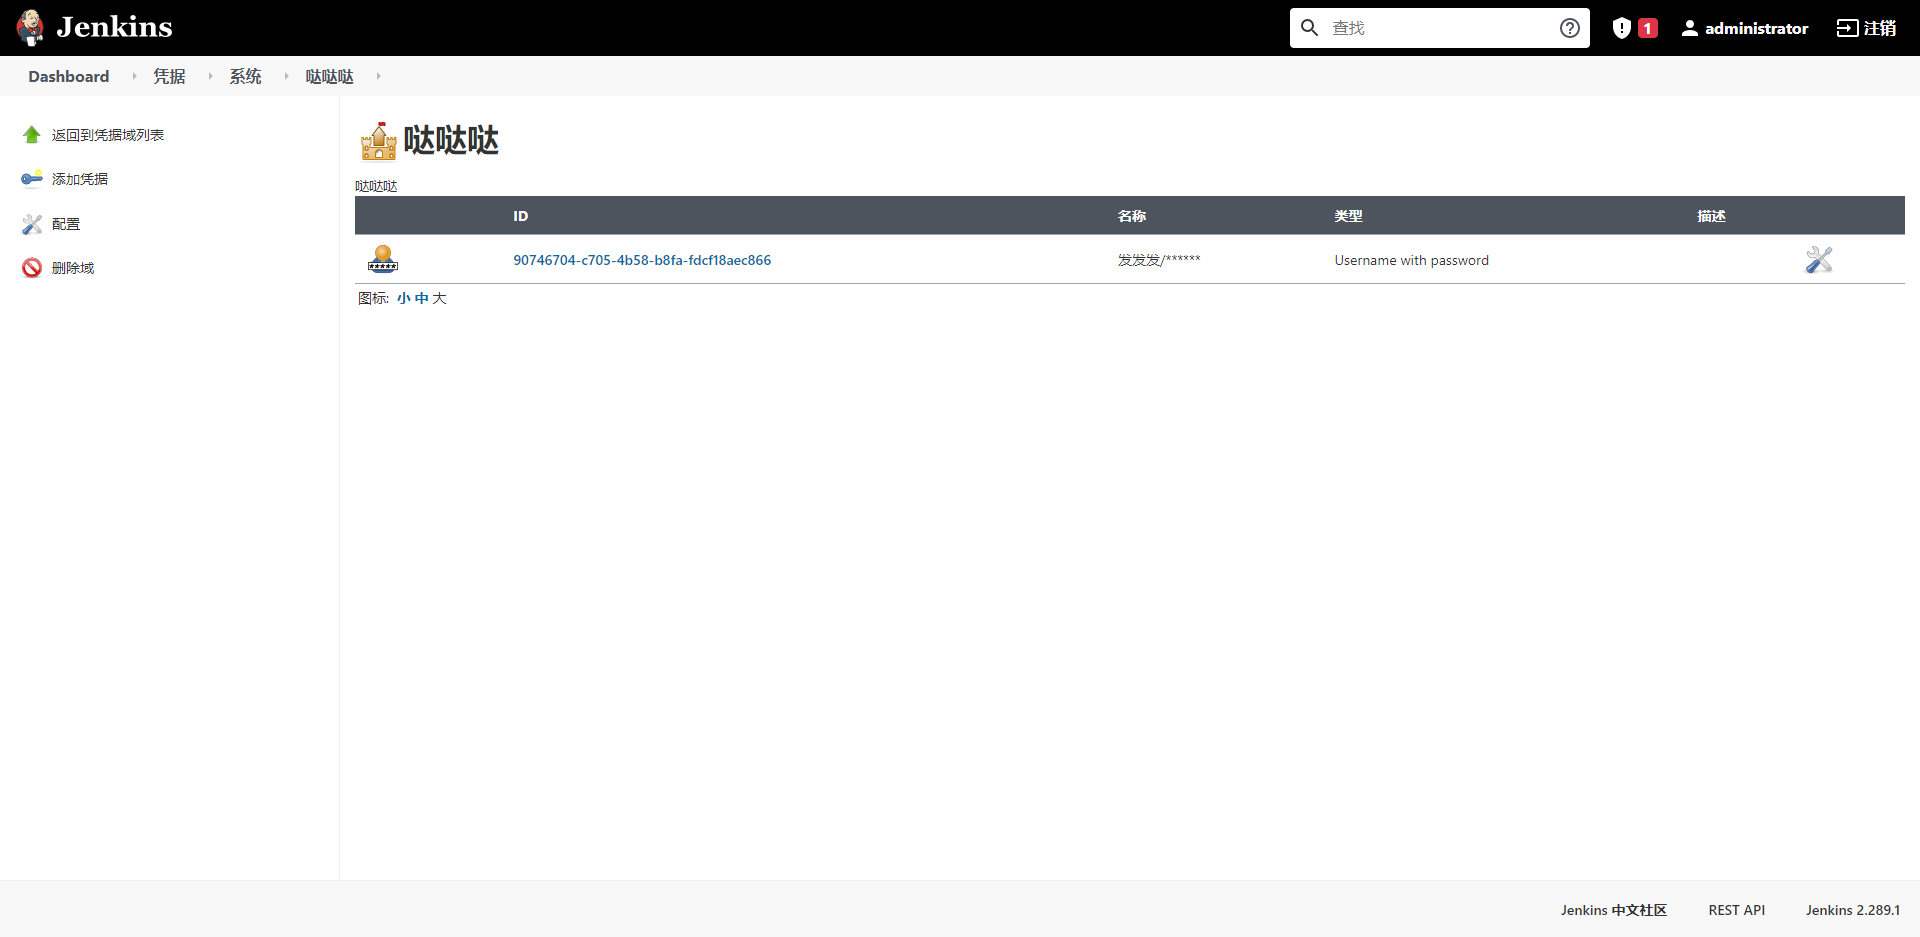
After adding the domain name and description according to your own specifications, click "OK". When the following interface appears, click "return to the credential domain list"

Add credentials to the domain you just created
The default type and range can be used. The user name and password are the login account and password of the server. The ID and description are customized. Note: the ID is unique and cannot be repeated. After entering, confirm to enter the following interface, indicating that the current credential is successfully added.
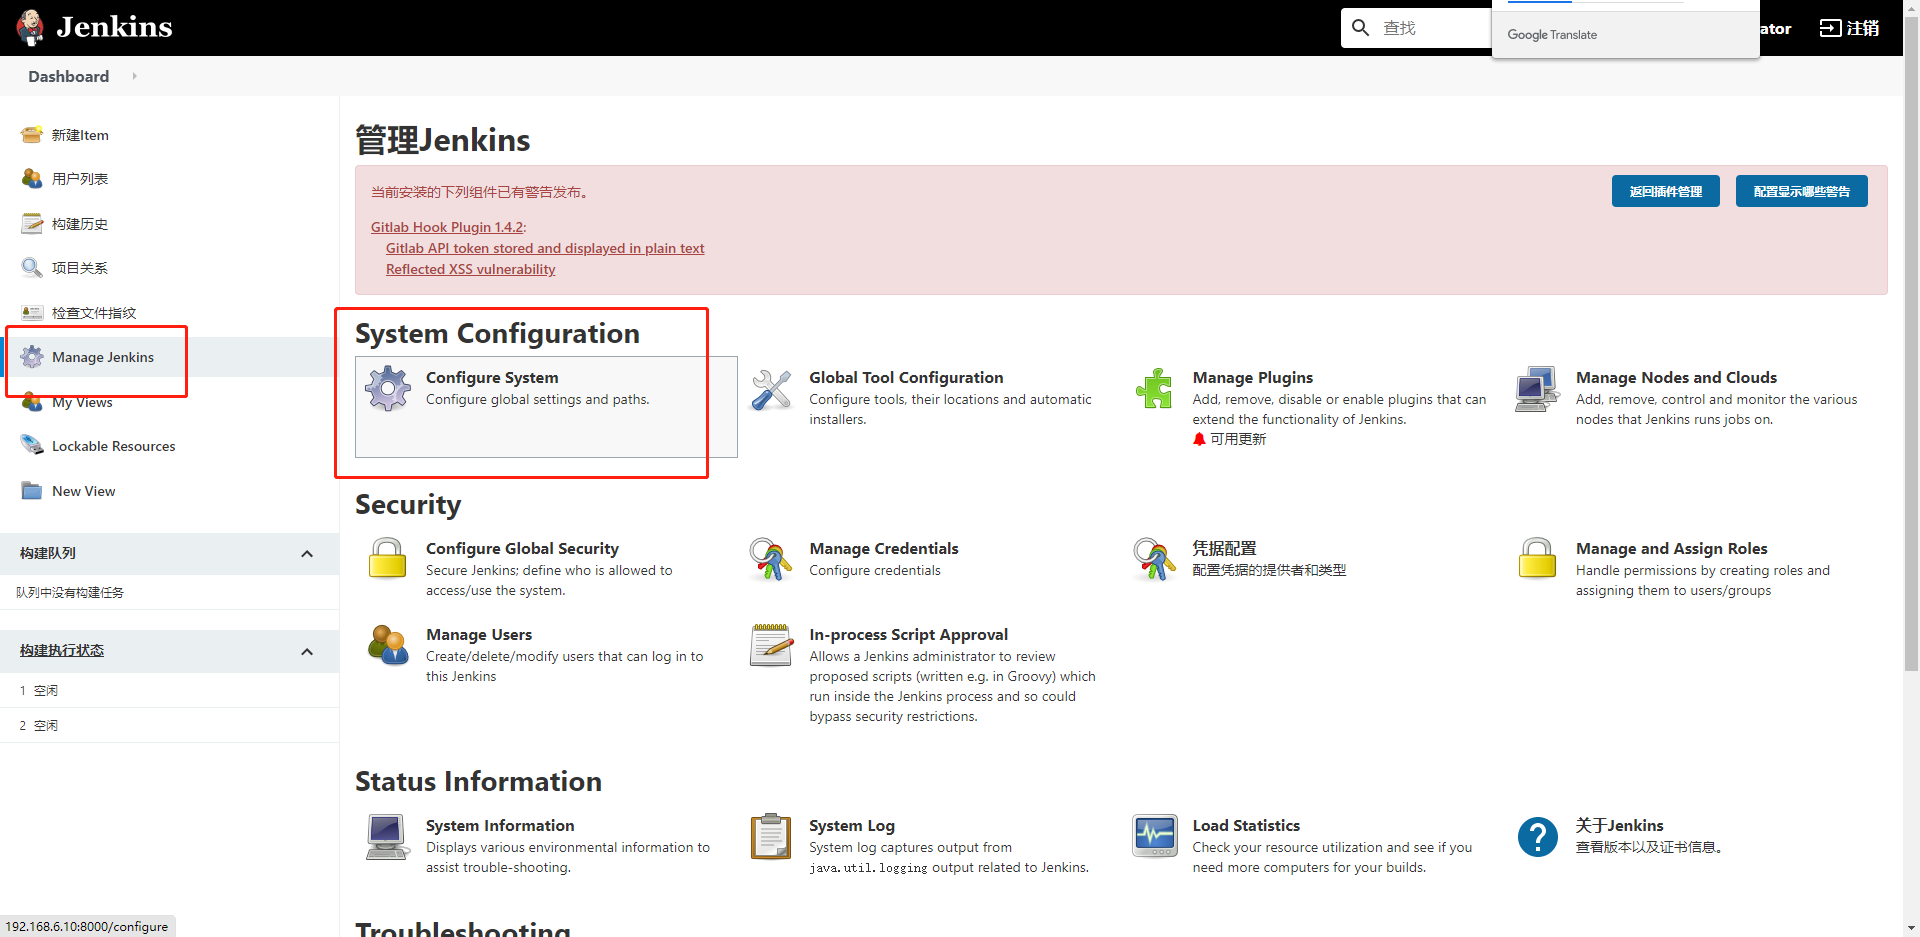
Configure remote machine --- configure remote machine
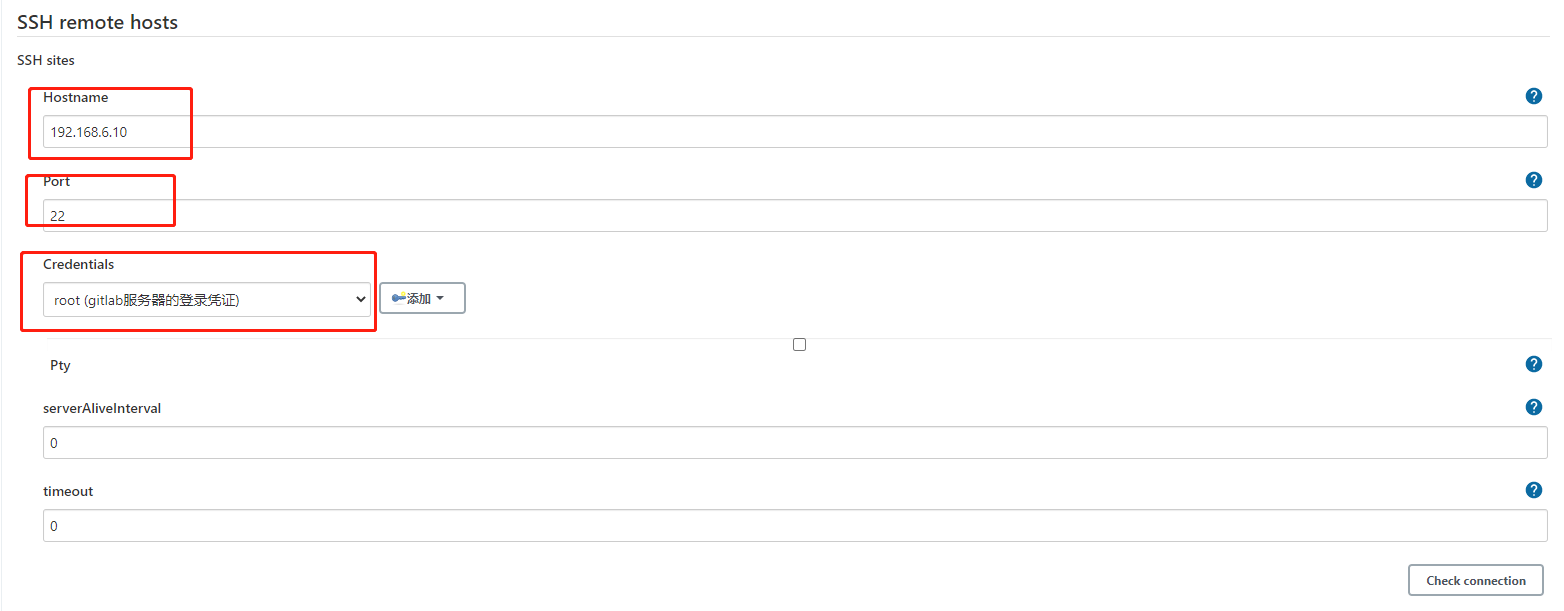
Find "SSH remote hosts" and add corresponding server information, including hostname (IP address), port (port) and Credentials (select the Credentials just added). After adding, click "Check connection" in the lower right corner to test whether the current IP and port can be connected according to this credential. When "successful connection" appears, the connection is successful. Add other hosts (formal machine, test machine, Harbor machine, gitlab machine, etc.) according to your actual situation. Because gitlab is configured above, you can not configure it here.
Here, jenkins+gitlab+docker has completed the connection, and the project can be built below.
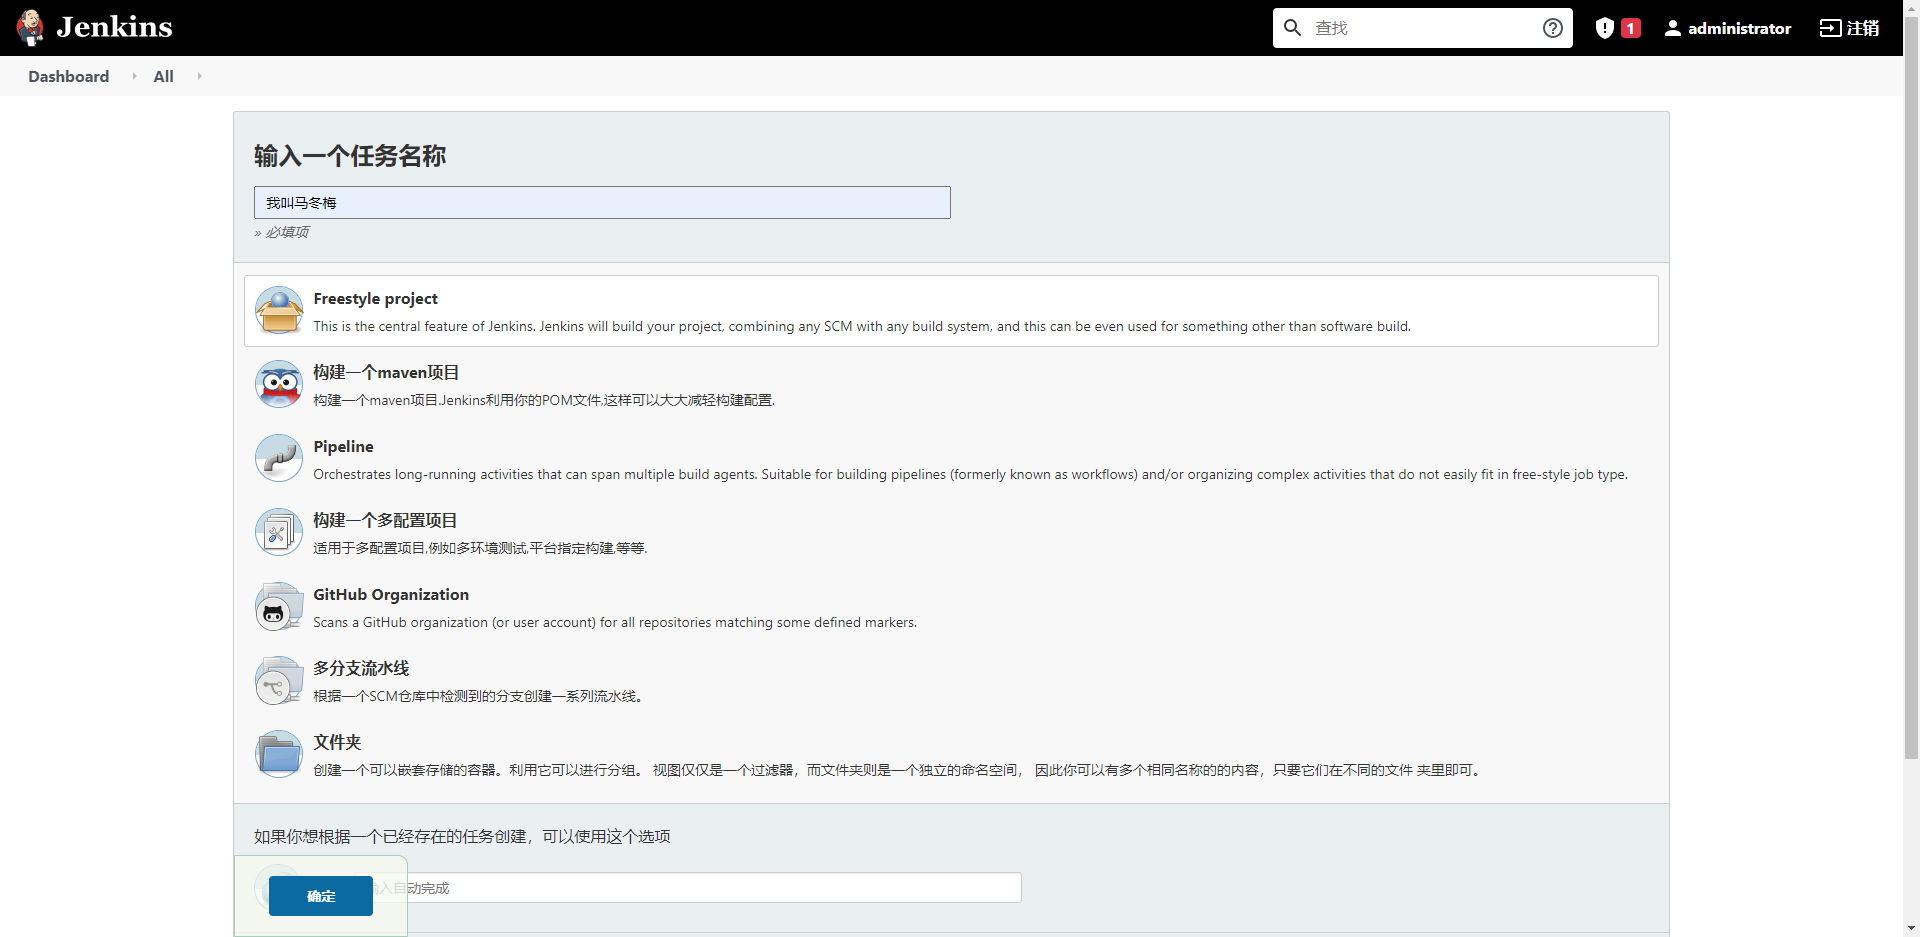
5. New project
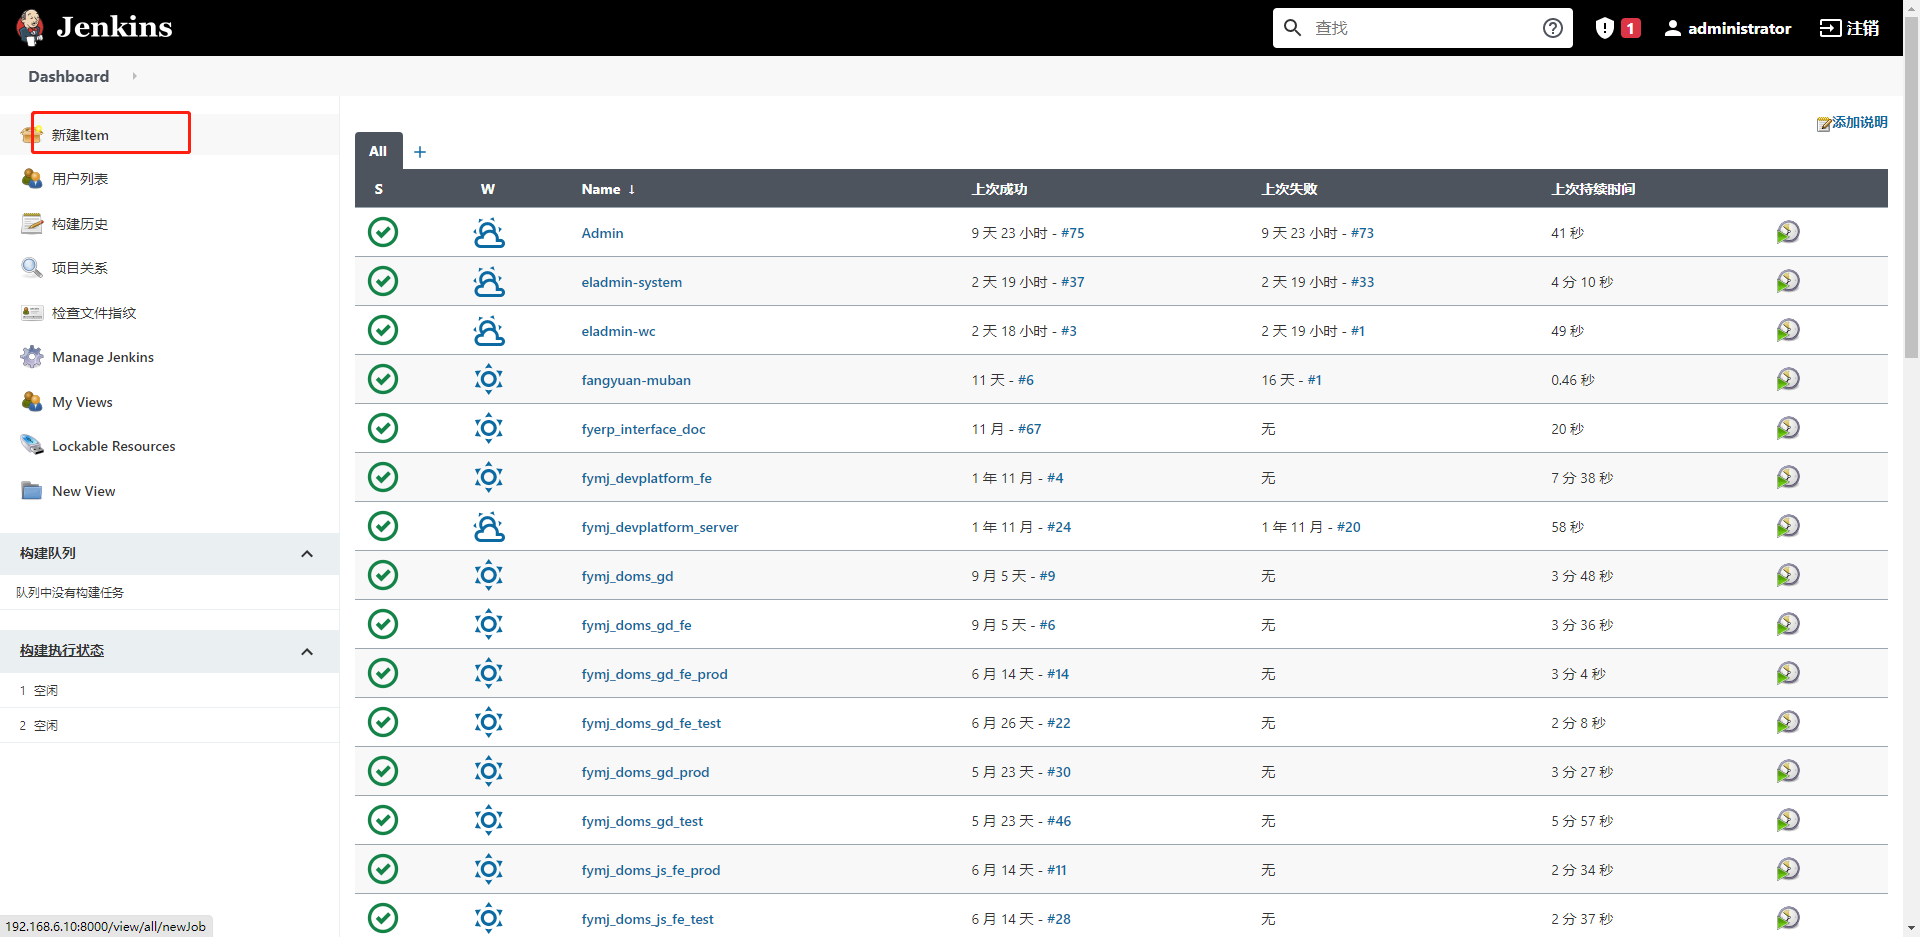
After adding a name, select a free style and click OK.
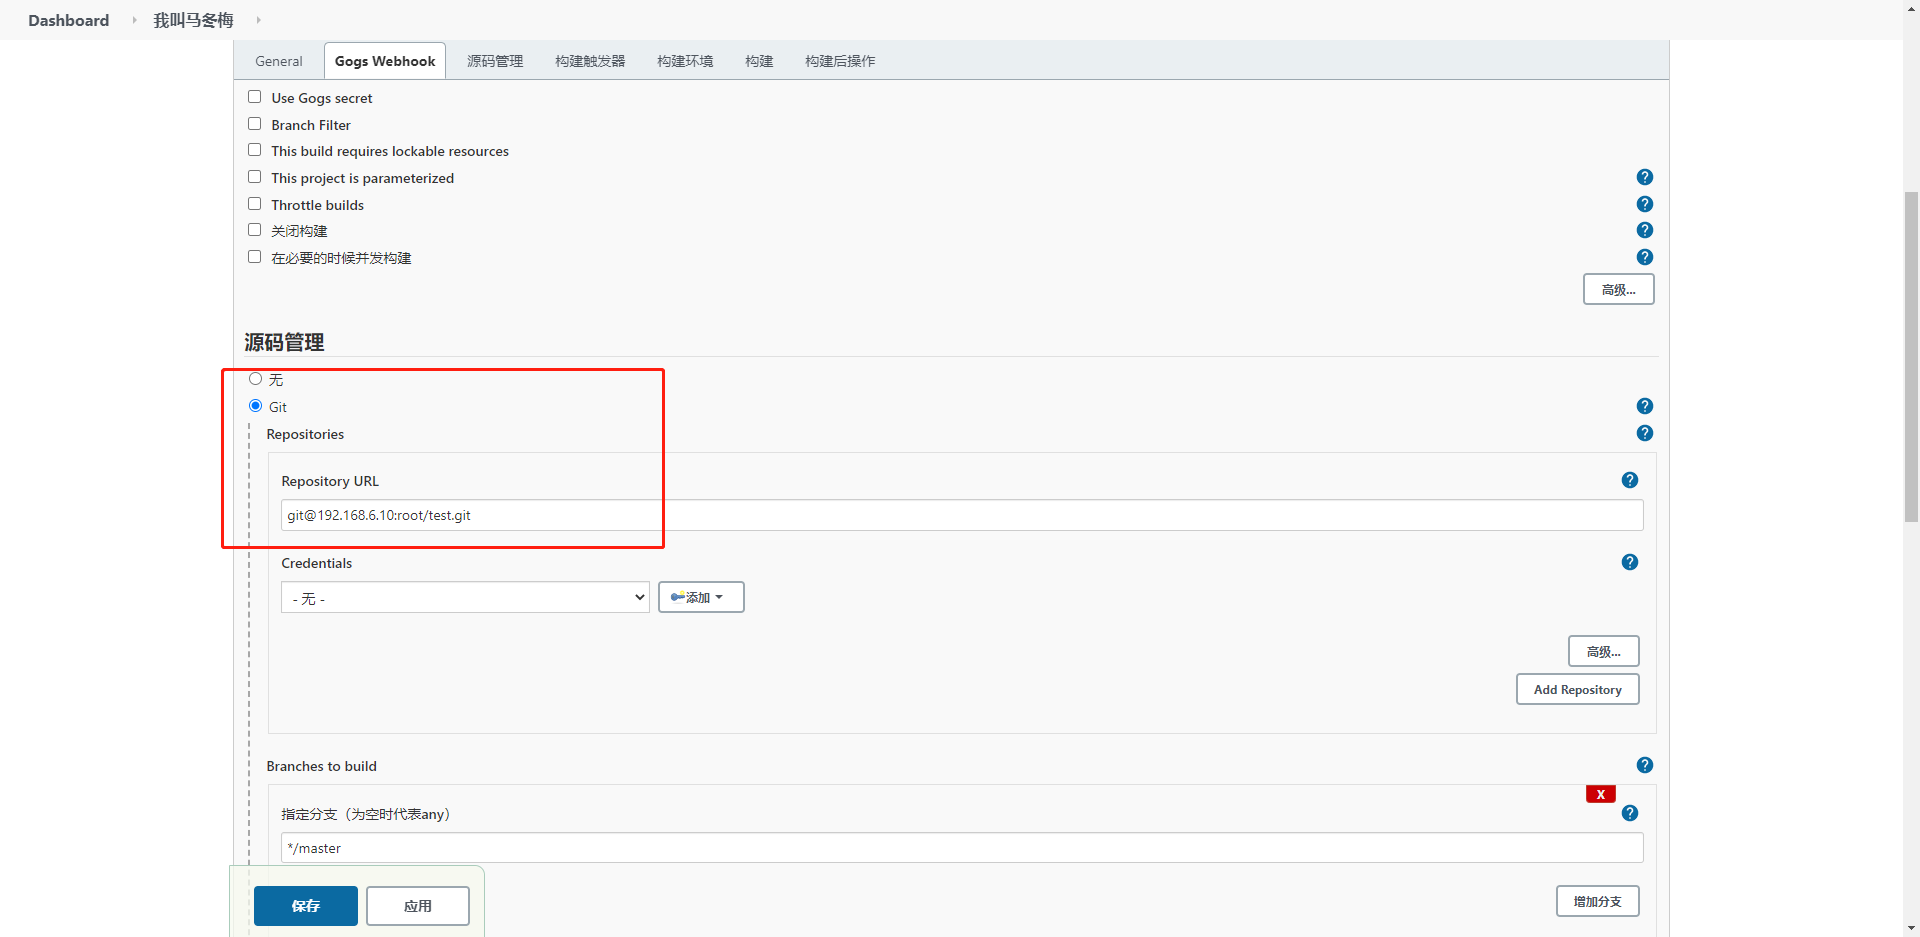
For source code management, git is selected. Both gitlab and GitHub support it. As long as the public key and private key are configured, there will be no error.
Select "add build steps" > > > "extract shell" in the following build, and enter the shell script I wrote here:

#!bin/bash

# Jenkins machine: after compiling, build generates a new version image and push es it to the remote docker warehouse

# Variables
JENKINS_WAR_HOME='/root/.jenkins/workspace/test'
DOCKERFILE_HOME1='/root/jenkins/test/1'
DOCKERFILE_HOME2='/root/jenkins/test/2'
HARBOR_IP='192.168.6.3'
REPOSITORIES1='jenkins/eladmin-system'
REPOSITORIES2='jenkins/eladmin-wc'
HARBOR_USER='admin'
HARBOR_USER_PASSWD='fymj@2021DK'
HARBOR_USER_EMAIL='gaohuazheng@sc-model.cn'

# Copy the newest war to docker-file directory.
\cp -f ${JENKINS_WAR_HOME}/eladmin-system-2.6.jar ${DOCKERFILE_HOME1}/
\cp -f ${JENKINS_WAR_HOME}/eladmin-wc-2.6.jar ${DOCKERFILE_HOME2}/

# Delete image early version.
sudo docker login -u ${HARBOR_USER} -p ${HARBOR_USER_PASSWD} ${HARBOR_IP}
IMAGE_ID=`sudo docker images | grep ${REPOSITORIES} | awk '{print $3}'`
if [ -n "${IMAGE_ID}" ];then
    sudo docker rmi -f ${IMAGE_ID}
fi

# Build image.
cd ${DOCKERFILE_HOME1}
TAG=`date +%Y%m%d`
sudo docker build -t ${HARBOR_IP}/$REPOSITORIES1:${TAG} . &>/dev/null

# Push to the harbor registry.
sudo docker push ${HARBOR_IP}/$REPOSITORIES1:${TAG} &>/dev/null

cd ${DOCKERFILE_HOME2}
TAG=`date +%Y%m%d`
sudo docker build -t ${HARBOR_IP}/$REPOSITORIES2:${TAG} . &>/dev/null

# Push to the harbor registry.
sudo docker push ${HARBOR_IP}/$REPOSITORIES2:${TAG} &>/dev/null
Above, I am a gitlab warehouse with two jar packages, so I used two directories and wrote two dockerfiles to make my jar package into a docker image. After making the docker image, add a time tag to it, log in to the private library and upload the self-made image to the private library.
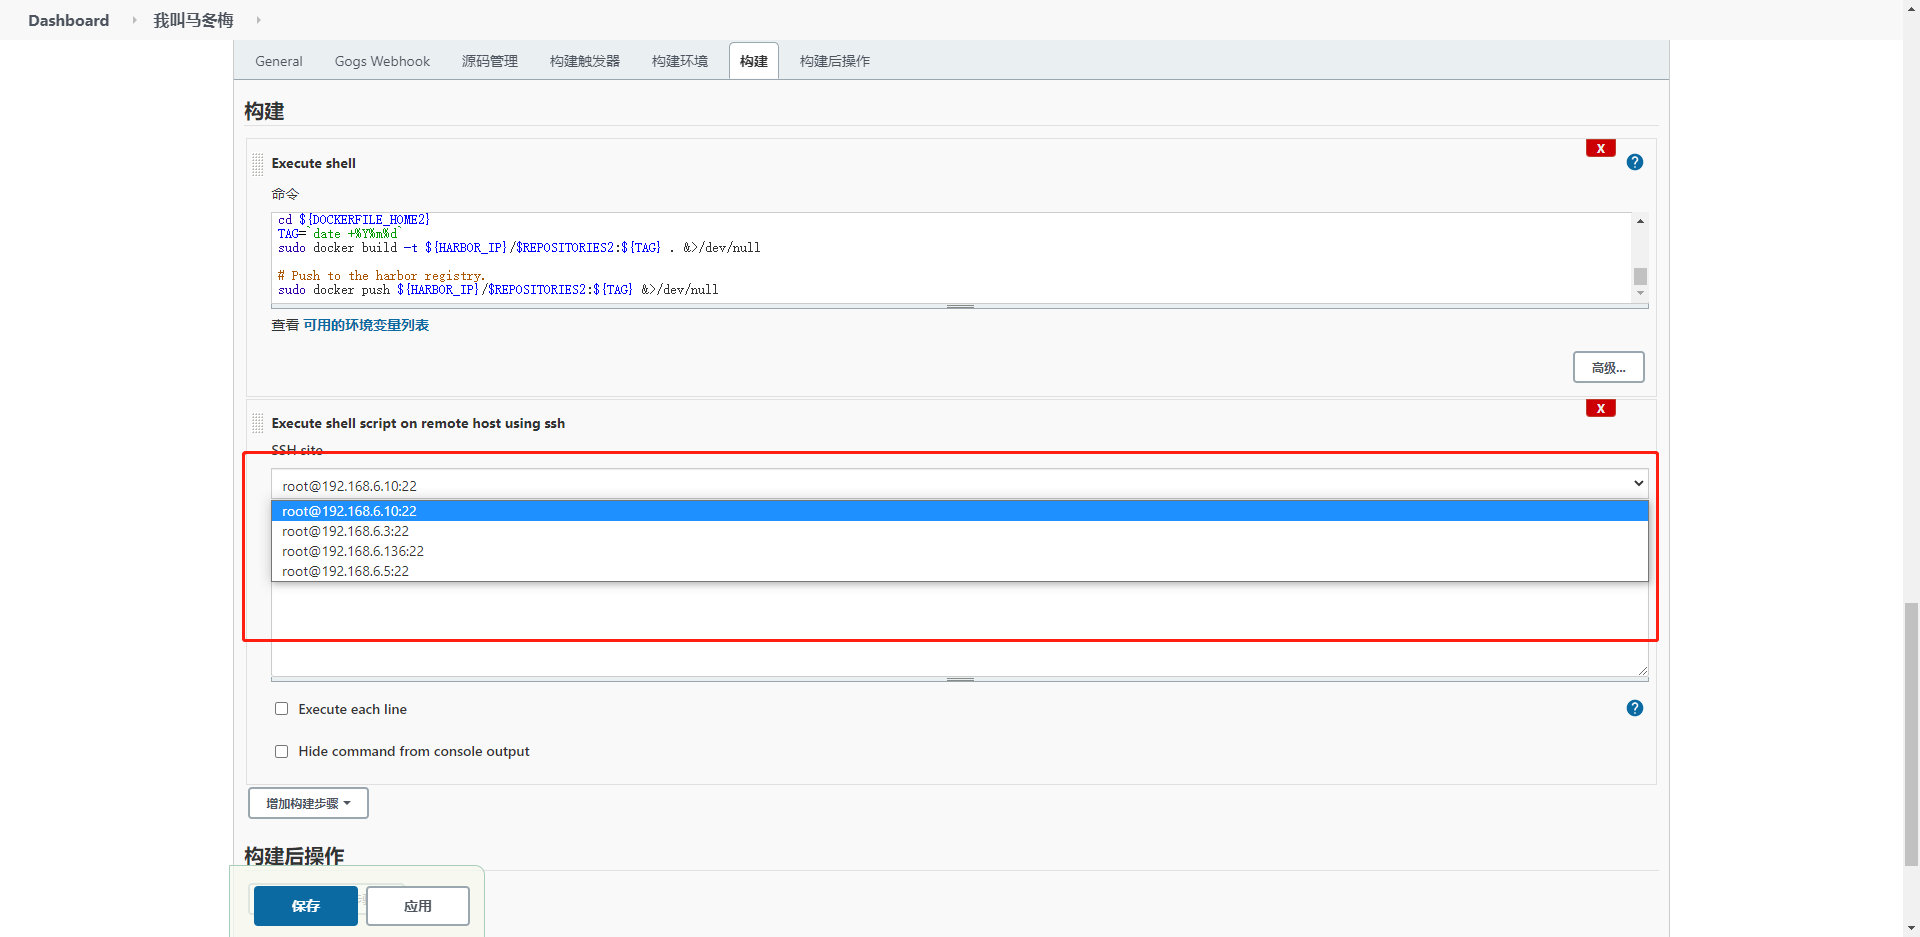
Then click "add build steps" > > > "extract shell script on remote host Using SSH"
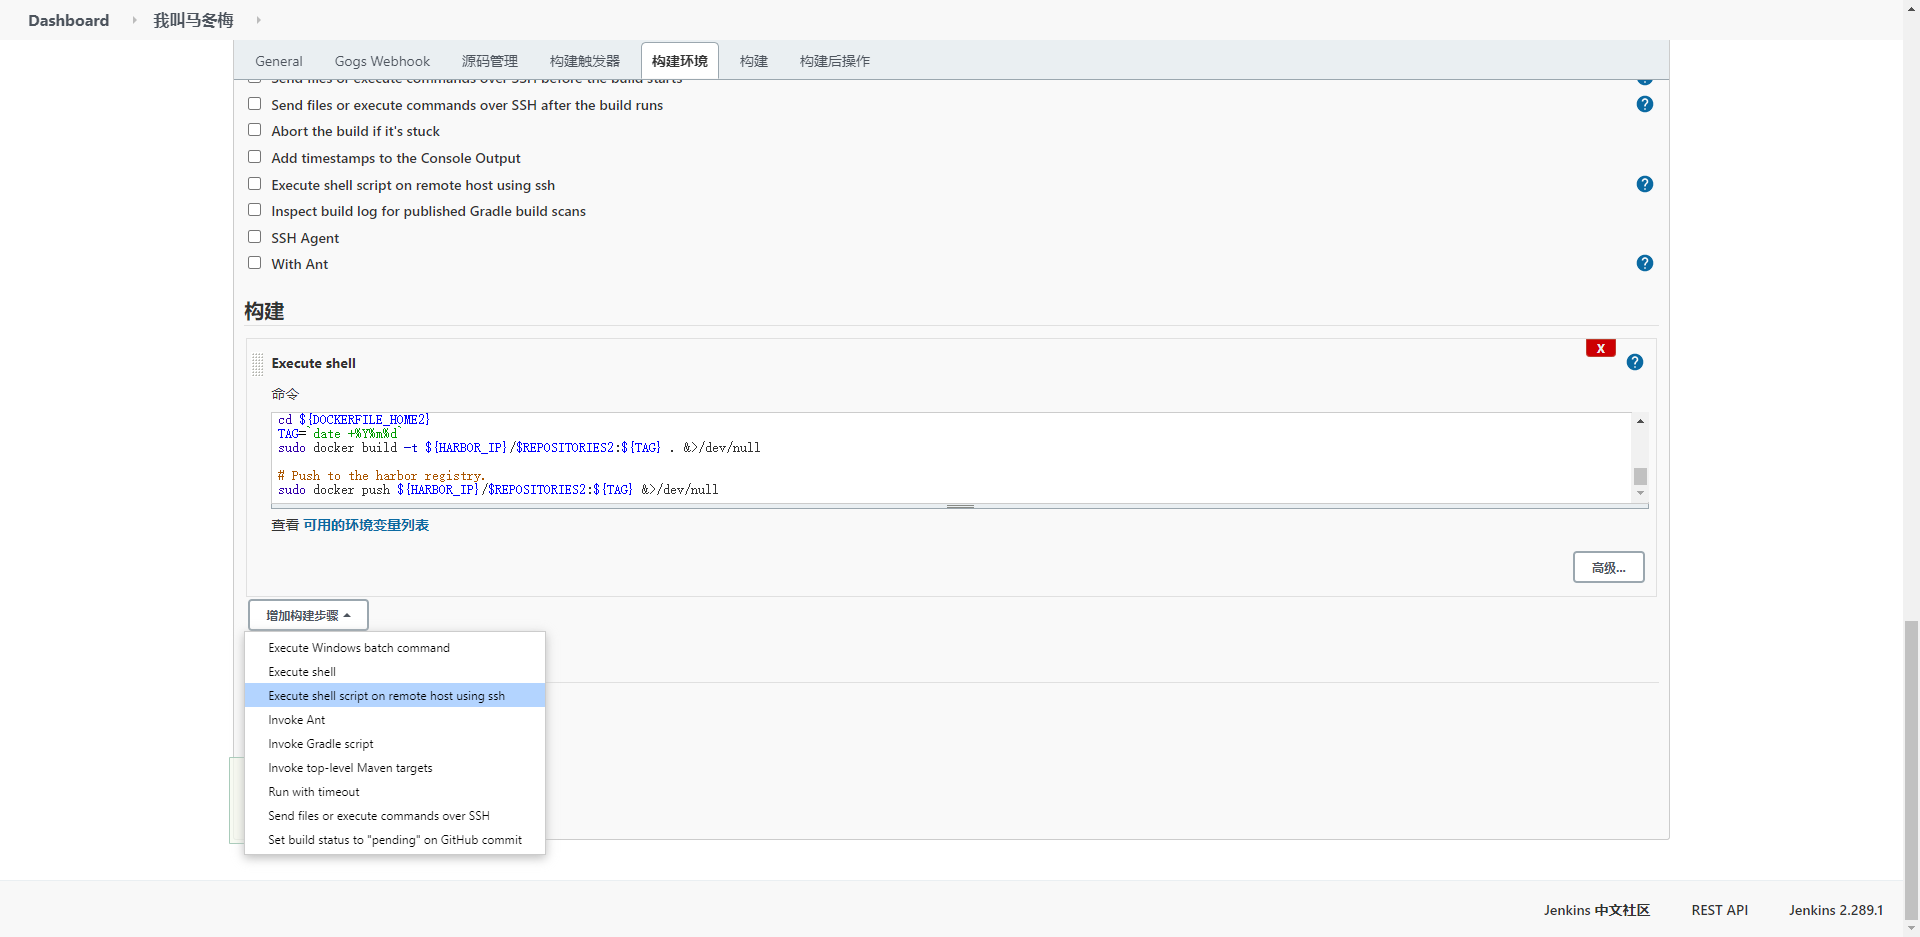
After selection, you will be prompted for the machine you want to remotely execute the script. Select the machine according to your own needs. As long as the front configuration is correct, there will be no error. If there is an error, you need to check whether there are errors in the previous steps again.
Then add the shell script in the command:

My script is as follows:
#/bin/bash

# Pull image and publish
HARBOR_IP='192.168.6.3'
REPOSITORIES1='jenkins/eladmin-system'
REPOSITORIES2='jenkins/eladmin-wc'
HARBOR_USER='admin'
HARBOR_USER_PASSWD='fymj@2021DK'

# Log in to harbor
docker login -u ${HARBOR_USER} -p ${HARBOR_USER_PASSWD} ${HARBOR_IP}

# Stop container, and delete the container.
CONTAINER_ID=`docker ps | grep -v CONTAINER |awk '{print $1}'`
if [ -n "$CONTAINER_ID" ]; then
    docker stop $CONTAINER_ID
    docker rm $CONTAINER_ID
else #If the container fails to start, docker ps -a is required to find the container
    CONTAINER_ID=`docker ps -a |grep -v CONTAINER | awk '{print $1}'`
    if [ -n "$CONTAINER_ID" ]; then  # If it is the first time to pull the operation container on this machine, docker ps -a cannot find this container
        docker rm $CONTAINER_ID
    fi
fi

# Deleteeasy-springmvc-maven image early version.
IMAGE_ID=`sudo docker images | grep ${REPOSITORIES} | awk '{print $3}'`
if [ -n "${IMAGE_ID}" ];then
    docker rmi ${IMAGE_ID}
fi

echo "container ID testing/"Delete complete"
# Pull image.

TAG=`date +%Y%m%d`

echo The current date is: $TAG

sudo docker pull ${HARBOR_IP}/${REPOSITORIES1}:${TAG} &>/dev/null
sudo docker pull ${HARBOR_IP}/${REPOSITORIES2}:${TAG} &>/dev/null

echo "Private warehouse image( Harbor-docker-images)Pull successful"

# Run.
docker run -d --name eladmin-system -p 8000:8000 ${HARBOR_IP}/${REPOSITORIES1}:${TAG}
docker run -d --name eladmin-wc -p 8020:8020 ${HARBOR_IP}/${REPOSITORIES2}:${TAG}

echo "Successfully run the mirror as a container, please visit "test"
This means first log in to the Harbor private database, and then detect the currently running container and docker image. If any, delete it. After deletion, define a time tag. Because the script will be executed after the previous script is successfully executed, and the date shown remains the same, the tags are the same. Based on this tag, pull the image from the private database and start the image as a container, Run defines the name and port of the container.
6. Build project
After clicking "build now" in the project, the green check mark appears below, which indicates that the project has been successfully built. At this time, you can view the obtained jar package, the produced image on the jenkins machine, view the uploaded image in Harbor, the image pulled from the private library on the remote script execution machine, and the running container.

At this time, you can find the content you want to see through the browser.

If the project is not built successfully, follow the above steps to check and find out the errors, modify the shell script and build again until the construction is successful. If the above script is used after direct copying, there may be errors, and it needs to be written according to your own situation.