In the last article, we introduced some basic knowledge of electron, Get started with Electron and teach you to write complete practical cases Here, we will continue to introduce the packaging and automatic update of Electron based on this project.
Generate Icon
Before packaging the application, prepare an icon for the application as the installation package icon. The formats of icons required by different operating systems are different. The corresponding format of Mac is icns and that of Windows is ico.
Icon can be generated with the help of electron icon builder.
- First, prepare a 1024 * 1024 png image and put it in the project folder. Here, we choose to put it in the task / public folder.

-
To install the electron icon Builder:
npm i electron-icon-builder --D
-
In package JSON scripts add instruction:
"build-icon": "electron-icon-builder --input=./public/icon.png --output=build --flatten"
-
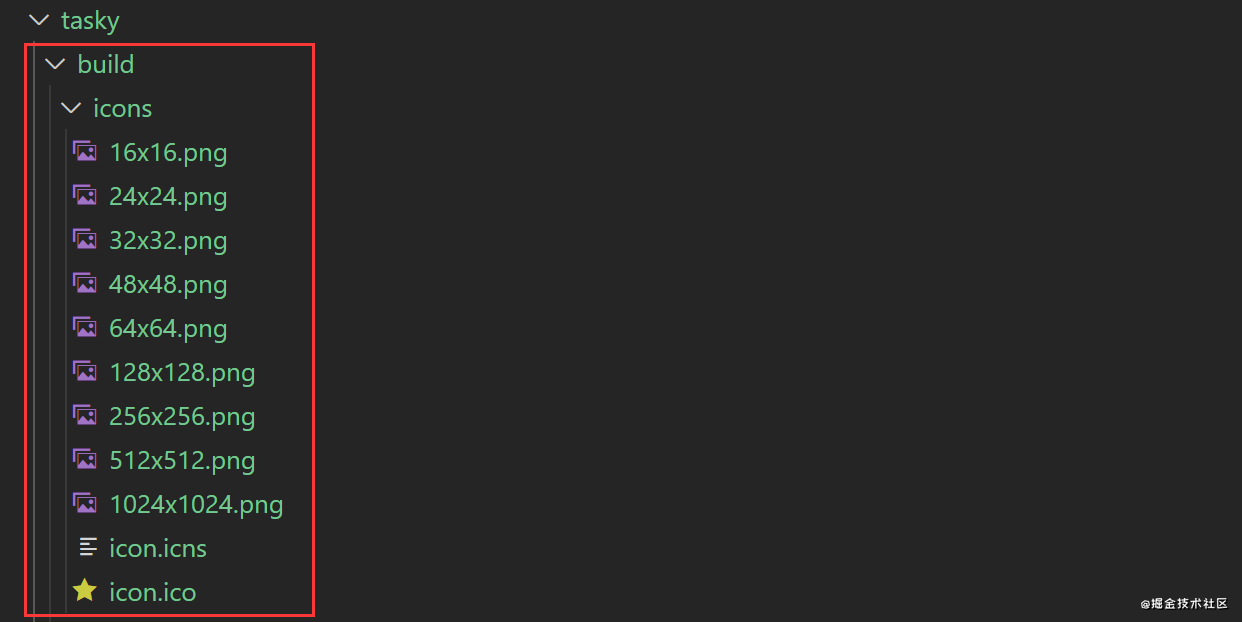
Running NPM run build icon will generate a series of icon files required for packaging in the build folder.
Packaged application
There are two common packaging tools in Electron Ecology: Electron builder and Electron packer.
The configuration of electron builder is more flexible and widely used. Next, we use electron builder to package.
install
npm i electron-builder --D
to configure
Electronic builder is mainly used to package various configurations. It supports two configuration modes:
- In package Add the build field to JSON:
"build": {
  "appId": "your.app.id"
}
- Specifies a configuration file in which configuration items are written. The default is electron builder under the root directory of the project yml.
appId: "your.app.id"
In daily development, package JSON is a common configuration method, and we mainly use this method.
Basic configuration
"build": {
    "appId": "this.is.tasky",
    "productName": "Tasky",
    "copyright": "Copyright © 2021 Alaso",
    "directories": {
      "buildResources": "build",   //Specify the static resources required for packaging. The default is build
      "output": "dist",  //The directory generated by packaging. The default is dist
    }
 },
The build folder contains the default static files required by electron builder in the packaging process, such as the icon file generated above; The dist folder holds various files generated by packaging.
- In package JSON scripts add instruction: "pack": "electron builder"
- Run npm run pack
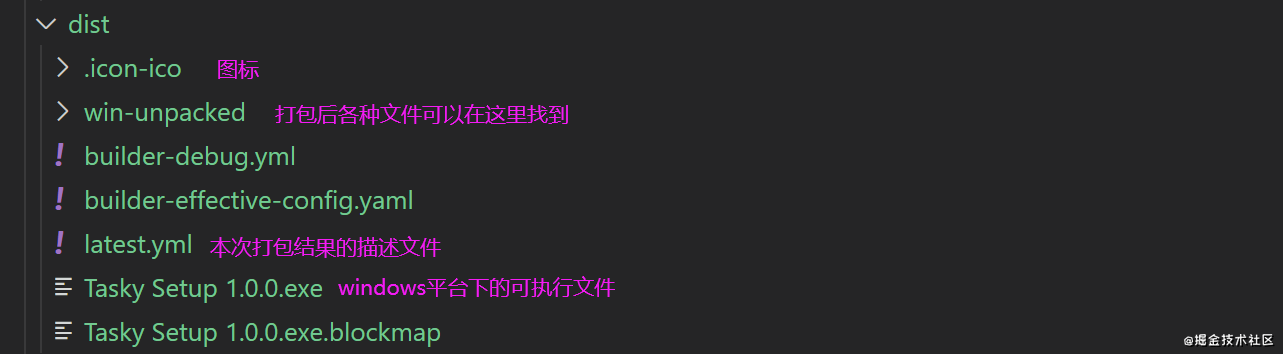
Based on the above configuration, electron builder will package the default files according to the current operating system. For example, on the windows platform, the packaging results are as follows:
Platform related configuration
Electronic builder will automatically identify the current operating system and print the installation package corresponding to the system. This also means that if you want to generate exe\msi, it needs to be in the Windows operating system. If it is dmg, it needs to be in the Mac operating system.
There are many operating system related configurations in the configuration options of electron builder, which can make some customized effects on the packaging of different platforms. Next, take Windows and Mac as examples to introduce some common platform related configurations.
- Windows
"build": {
...
"win": {
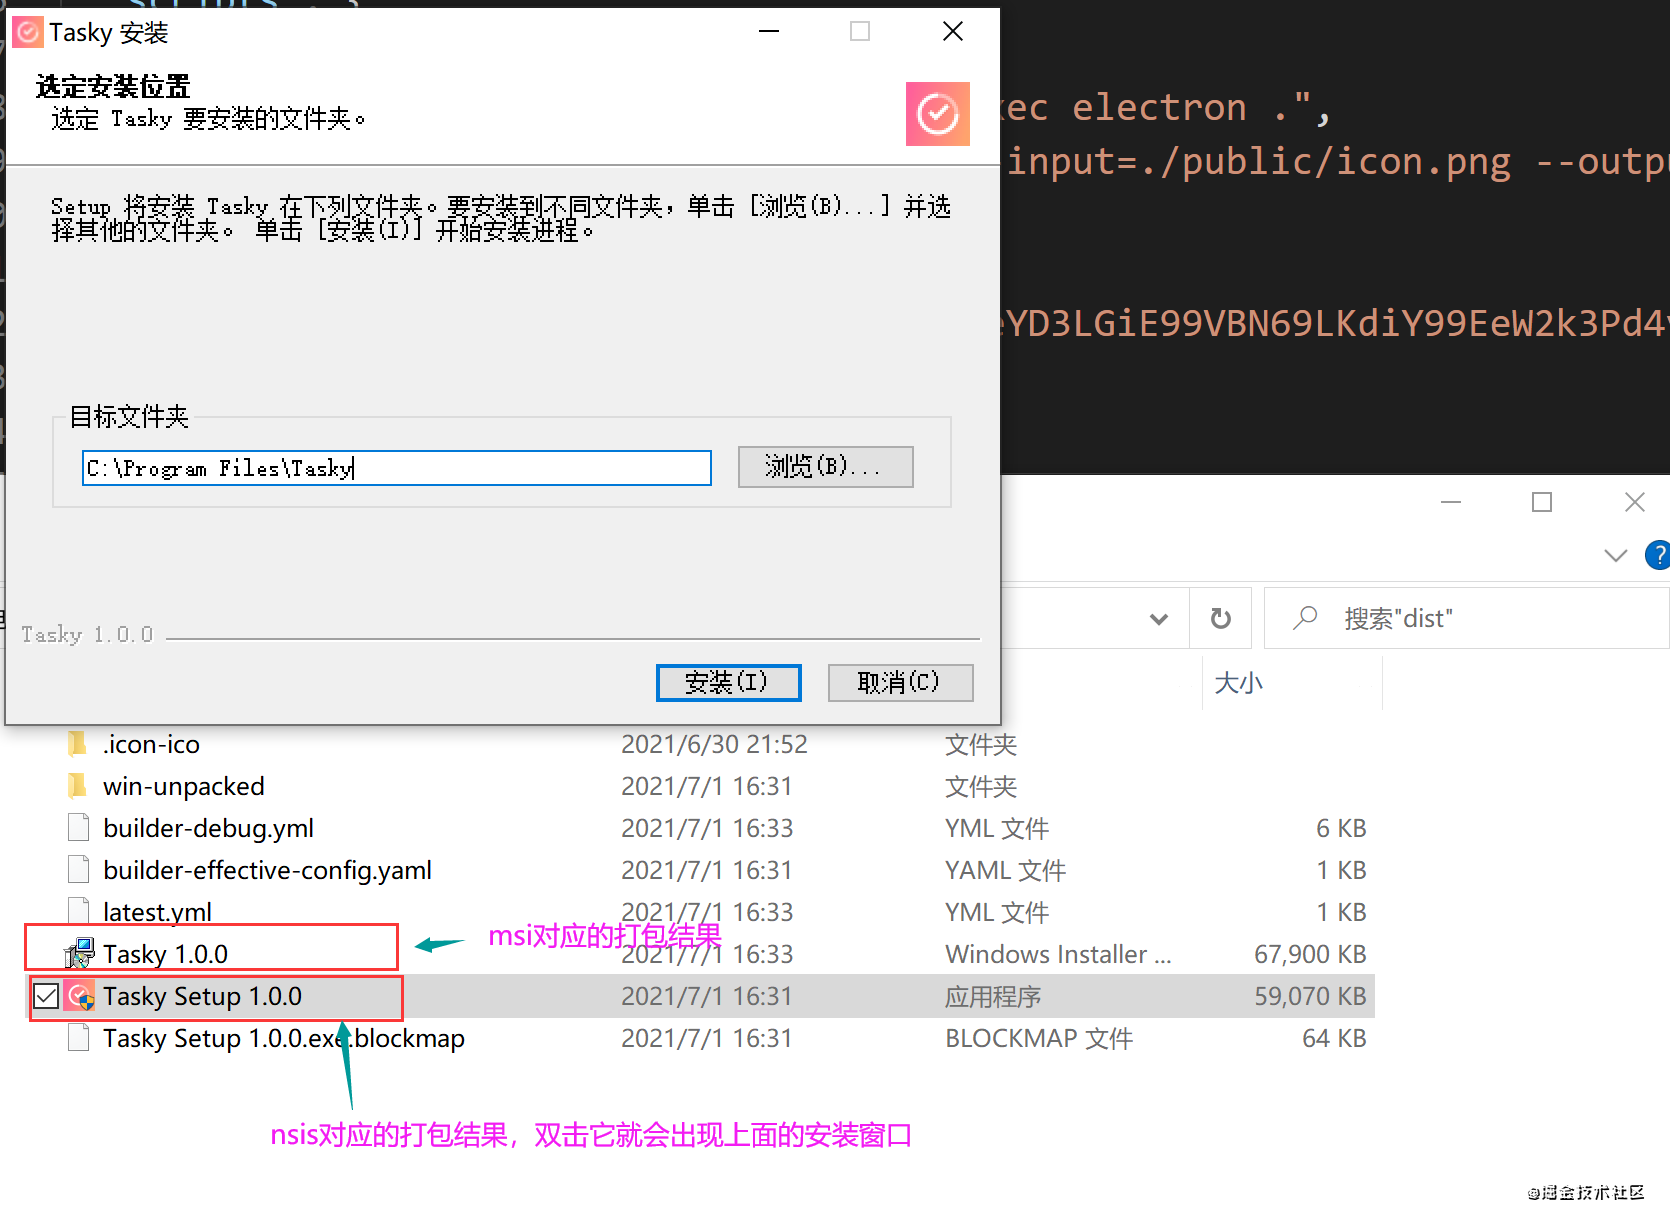
"target": ["msi","nsis"], //The format of the installation package is "nsis" by default
"icon": "build/icons/icon.ico" //Icon for installation package
},
//The "target" value "nsis" is packaged as an exe file
//nsis is the production program of windows system installation package. It provides the functions of installation, uninstall, system setting and so on
//Some configurations of "nsis"
"nsis": {
"oneClick": false, //Whether to install with one click. The default value is true
"language": "2052", //Installation language, 2052 corresponds to Chinese
"perMachine": true, //Install the application for all users of the current system
"allowToChangeInstallationDirectory": true //Allows the user to select the installation directory
}
}
2. Mac
...
"build": {
"mac": {
"target": ["dmg", "zip"], //The format of the installation package is "dmg" and "zip" by default
"category": "public.app-category.utilities" //Under which category the application is installed and which categories can be found on Apple's official website
},
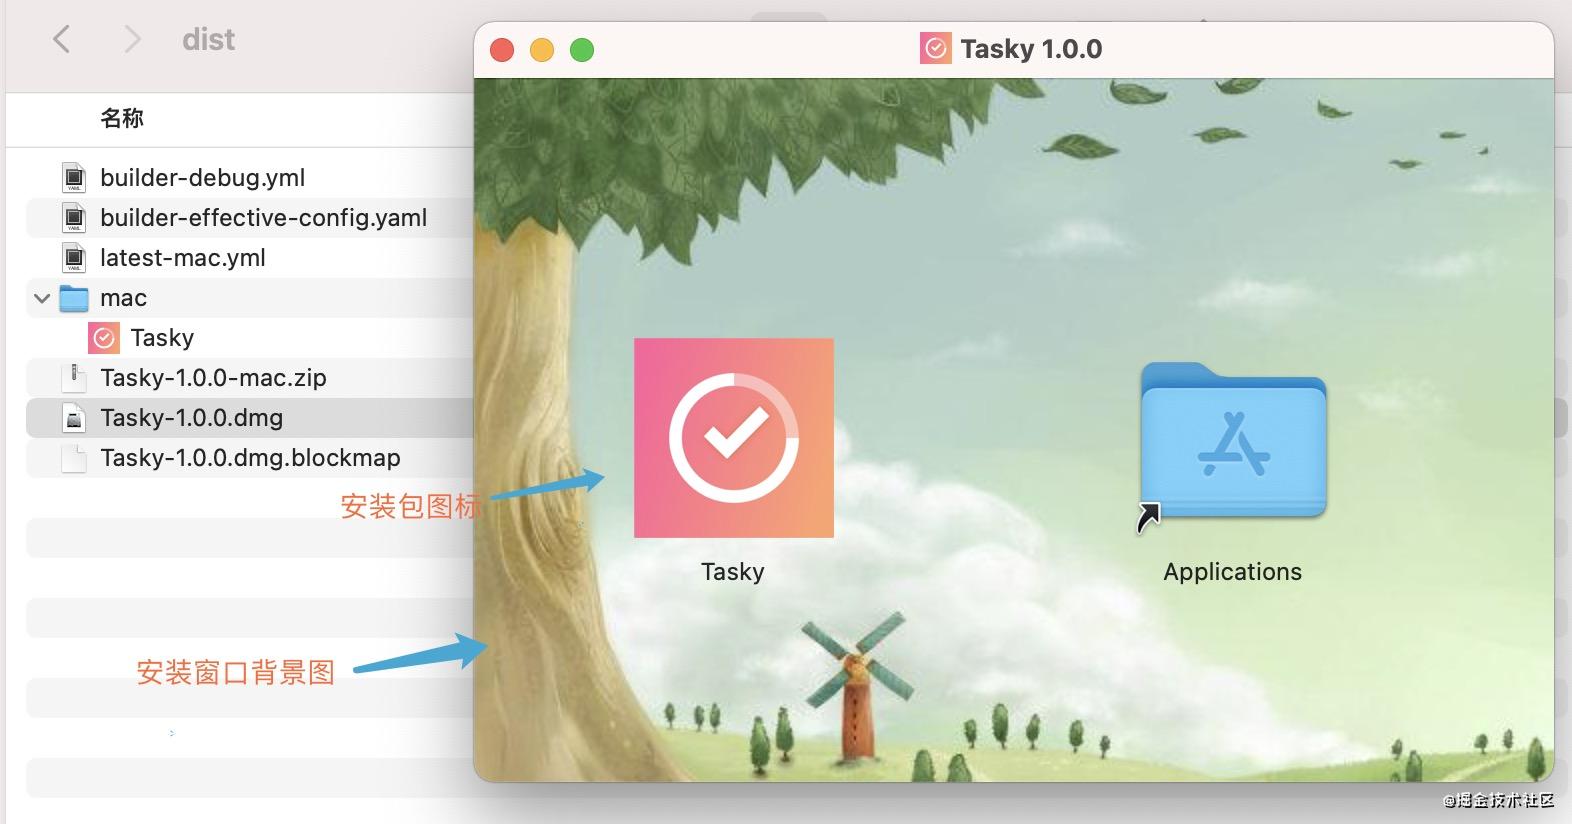
"dmg": {
"background": "build/background.jfif", //Background drawing of installation window
"icon": "build/icons/icon.icns", //Installation Icon
"iconSize": 100, //Size of Icon
"contents": [ //Coordinate information of the installation icon in the installation window
{
"x": 380,
"y": 180,
"type": "link",
"path": "/Applications"
},
{
"x": 130,
"y": 180,
"type": "file"
}
],
"window": { //Size of the installation window
"width": 540,
"height": 380
}
}
}
Which files will be packed into the installation package
In the package generated folder, there will be an app ASAR, which is the compressed package of the main business file of the Electron application. To know which files in the project are packed into the installation package, you can unzip the app ASAR to view.
Unzip app asar needs asar tools to install: npm i asar -g.
Then switch to app Directory of ASAR, execute ASAR extract app asar ./ app-folder.
Take windows as an example, app ASAR is located in the task \ dist \ win unpacked \ resources directory. After decompression, you can see the contents in the app folder as follows:
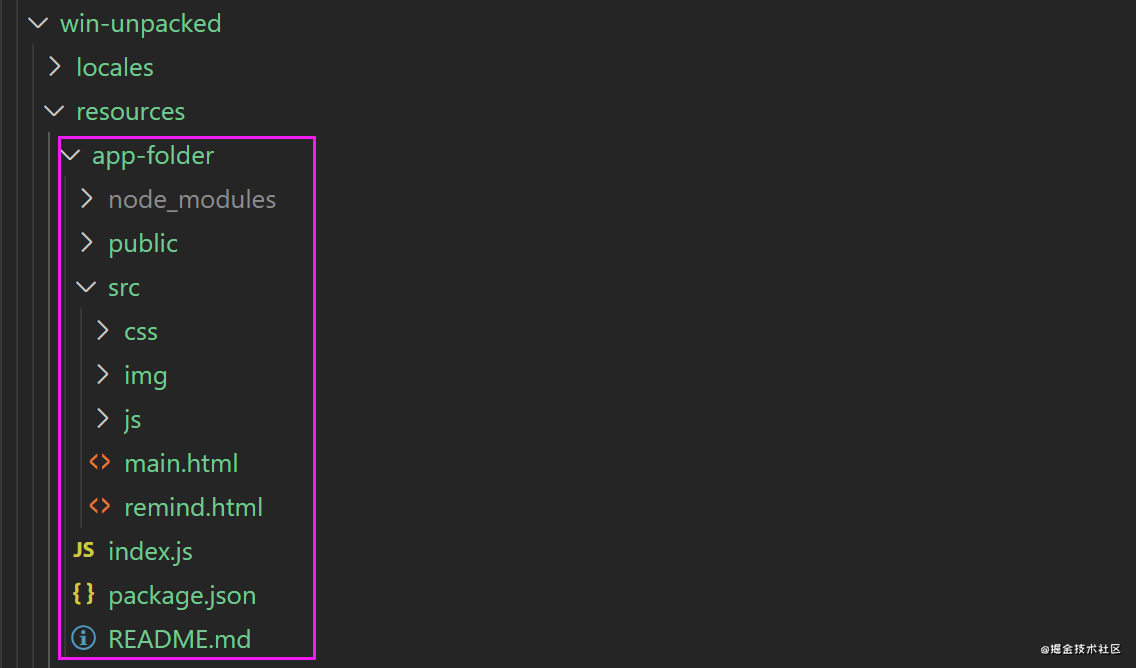
As you can see, there are basically all the files of the project (except the package lock. JSON \. Gitignore \ build folder) and node_modules.
For node_modules, not all nodes_ Modules will be packaged into the installation package, only package The dependencies in the dependencies field in JSON are packaged, while the dependencies in the devdependences field are not. This is the only rule and has nothing to do with whether the project actually uses dependencies.
Therefore, in order to reduce the volume of the installation package, it is recommended that all external packages used in the rendering process be installed in devdependences, and then use webpack to package the code of the external package and the business code, which will be described in detail in later articles.
Of course, you can specify which content to package by configuring the files field.
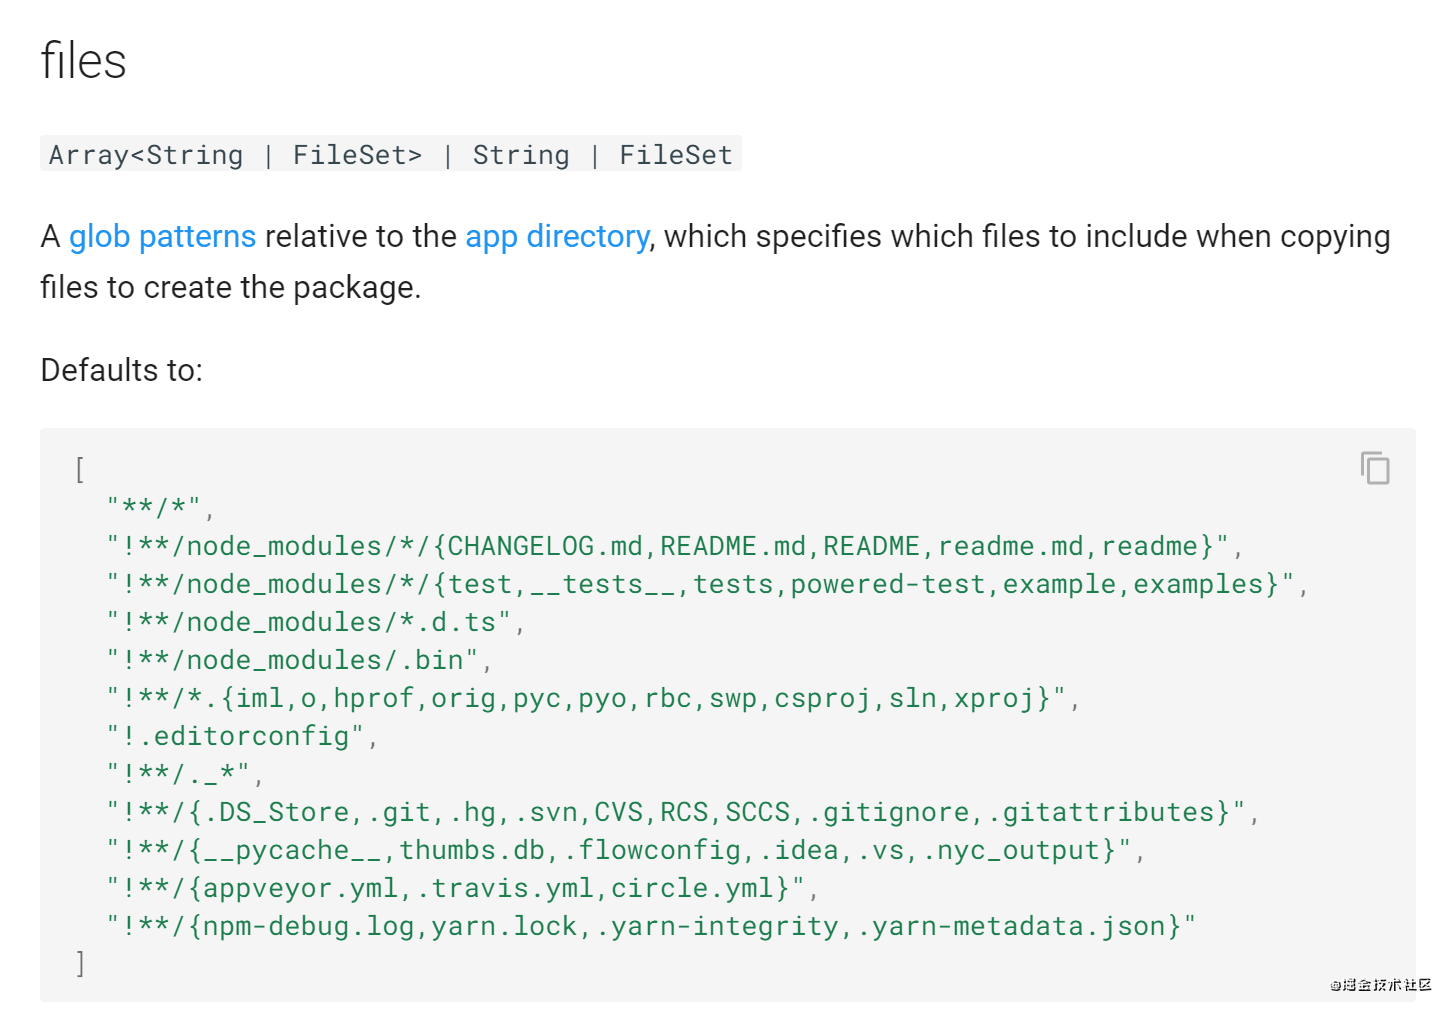
For example, we only package src folder and index JS and package JSON, which can be configured as follows:
"build": {
  "files": [
    "package.json",
    "index.js",
    "src/**/*"
  ]
}
Automatic update
To automatically update, the installation package of the application should be stored on a server on the Internet. Each time the application is opened, it will be automatically detected. It will be matched according to the version of the current application and the online version. When a new version is found, it will be automatically downloaded. After downloading, ask the user whether to install the new version.

Package different versions
In package JSON, there is a "version" field, which is used to determine the current version.
- step1: set "version": "1.0.0", run npm run pack
- Step 2: set "version": "1.0.1", run npm run pack
Although we did not change the content of the application, it will be recognized as "1.0.0" and "1.0.1".
Build a server to put the installation package
We start a server locally and put the latest version of the installation package resources.
- 1. Initialization
mkdir tasky-server
cd tasky-server
npm init -y
npm install koa koa-static --save
- 2. Create a new index in the task server directory JS, as follows:
const Koa = require('koa')
const app = new Koa()

const static = require('koa-static')
const path = require('path')

app.use(static(path.join(__dirname,'./static')));

app.listen(9005)
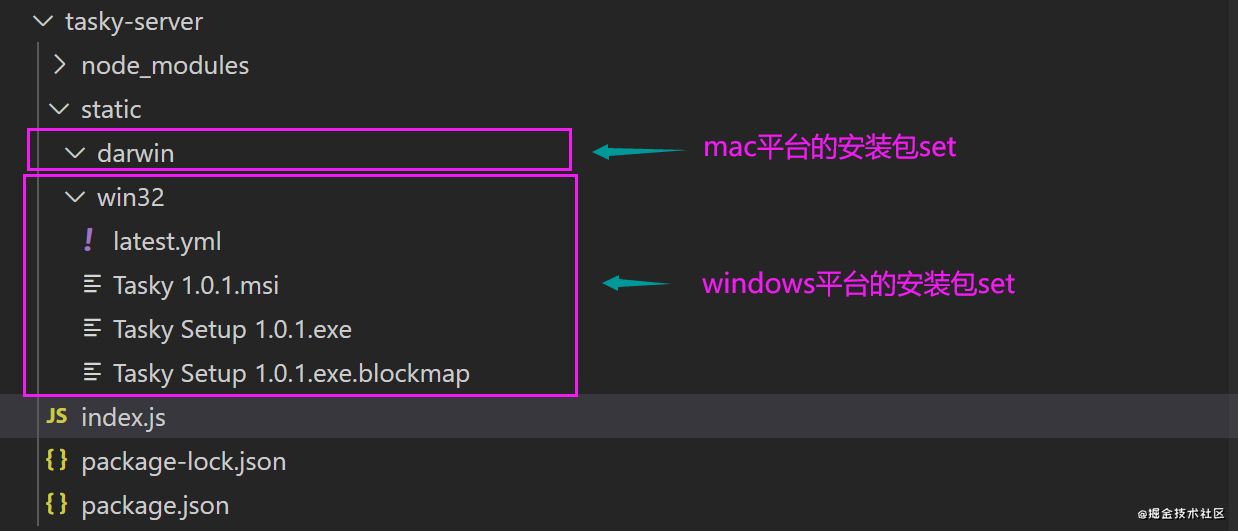
- 3. Create a static folder and put the latest version of the installation package set. What documents are included? If the latest version is "1.0.1".
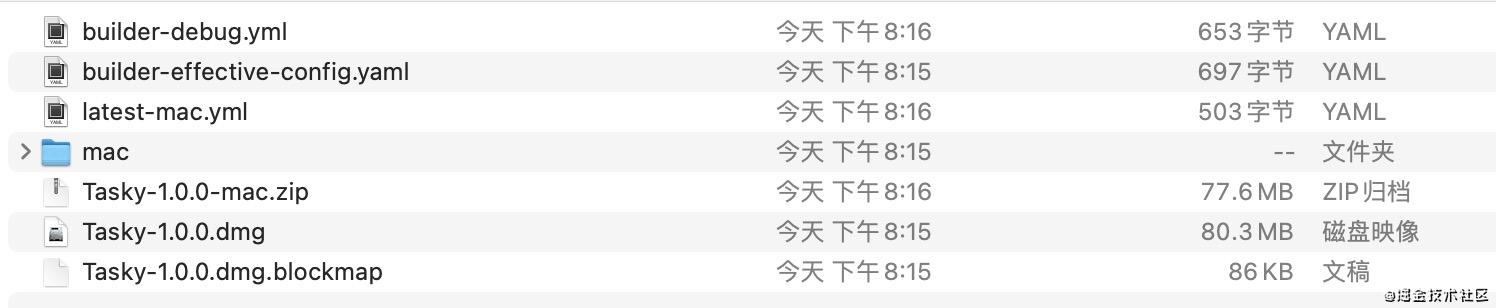
Mac platform: latest Mac yml, Tasky-1.0.1-mac.zip,Tasky-1.0.1.dmg,Tasky-1.0.1.dmg.blockmap
Windows Platform: latest yml,Tasky 1.0.1.msi,Tasky Setup 1.0.1.exe,Tasky Setup 1.0.1.exe.blockmap
- 4. Start the server. node index.js
Detect updates
The detection of updates can be realized with the help of electron Updater. It combines with electron builder and is very simple to implement. Directly on the code.
- Step 1: configure the "publish" field in build:
"build": {
    ...
    "publish": [
      {
         "provider": "generic",
         "url": "http://127.0.0.1:9005/"
      }
    ]
}
The second step is to call the electron-updater module to detect updates in the main process of the application.
const { autoUpdater } = require('electron-updater')
function checkUpdate(){
if(process.platform == 'darwin'){
//We set the static directory as the static folder using koa static,
//So visit http://127.0.0.1:9005/darwin , it is equivalent to accessing the static/darwin folder. The same is true for win32
autoUpdater.setFeedURL('http://127.0.0.1:9005/darwin ') / / set the path to detect updates
}else{
autoUpdater.setFeedURL('http://127.0.0.1:9005/win32')
}
//Detect updates
autoUpdater.checkForUpdates()
//Listening for 'error' events
autoUpdater.on('error', (err) => {
console.log(err)
})
//Listen to the 'update available' event and trigger it when a new version is found
autoUpdater.on('update-available', () => {
console.log('found new version')
})
//The new version will be downloaded automatically by default. If you don't want to download it automatically, set AutoUpdater autoDownload = false
//Listen for the 'update downloaded' event, which is triggered when the download of the new version is completed
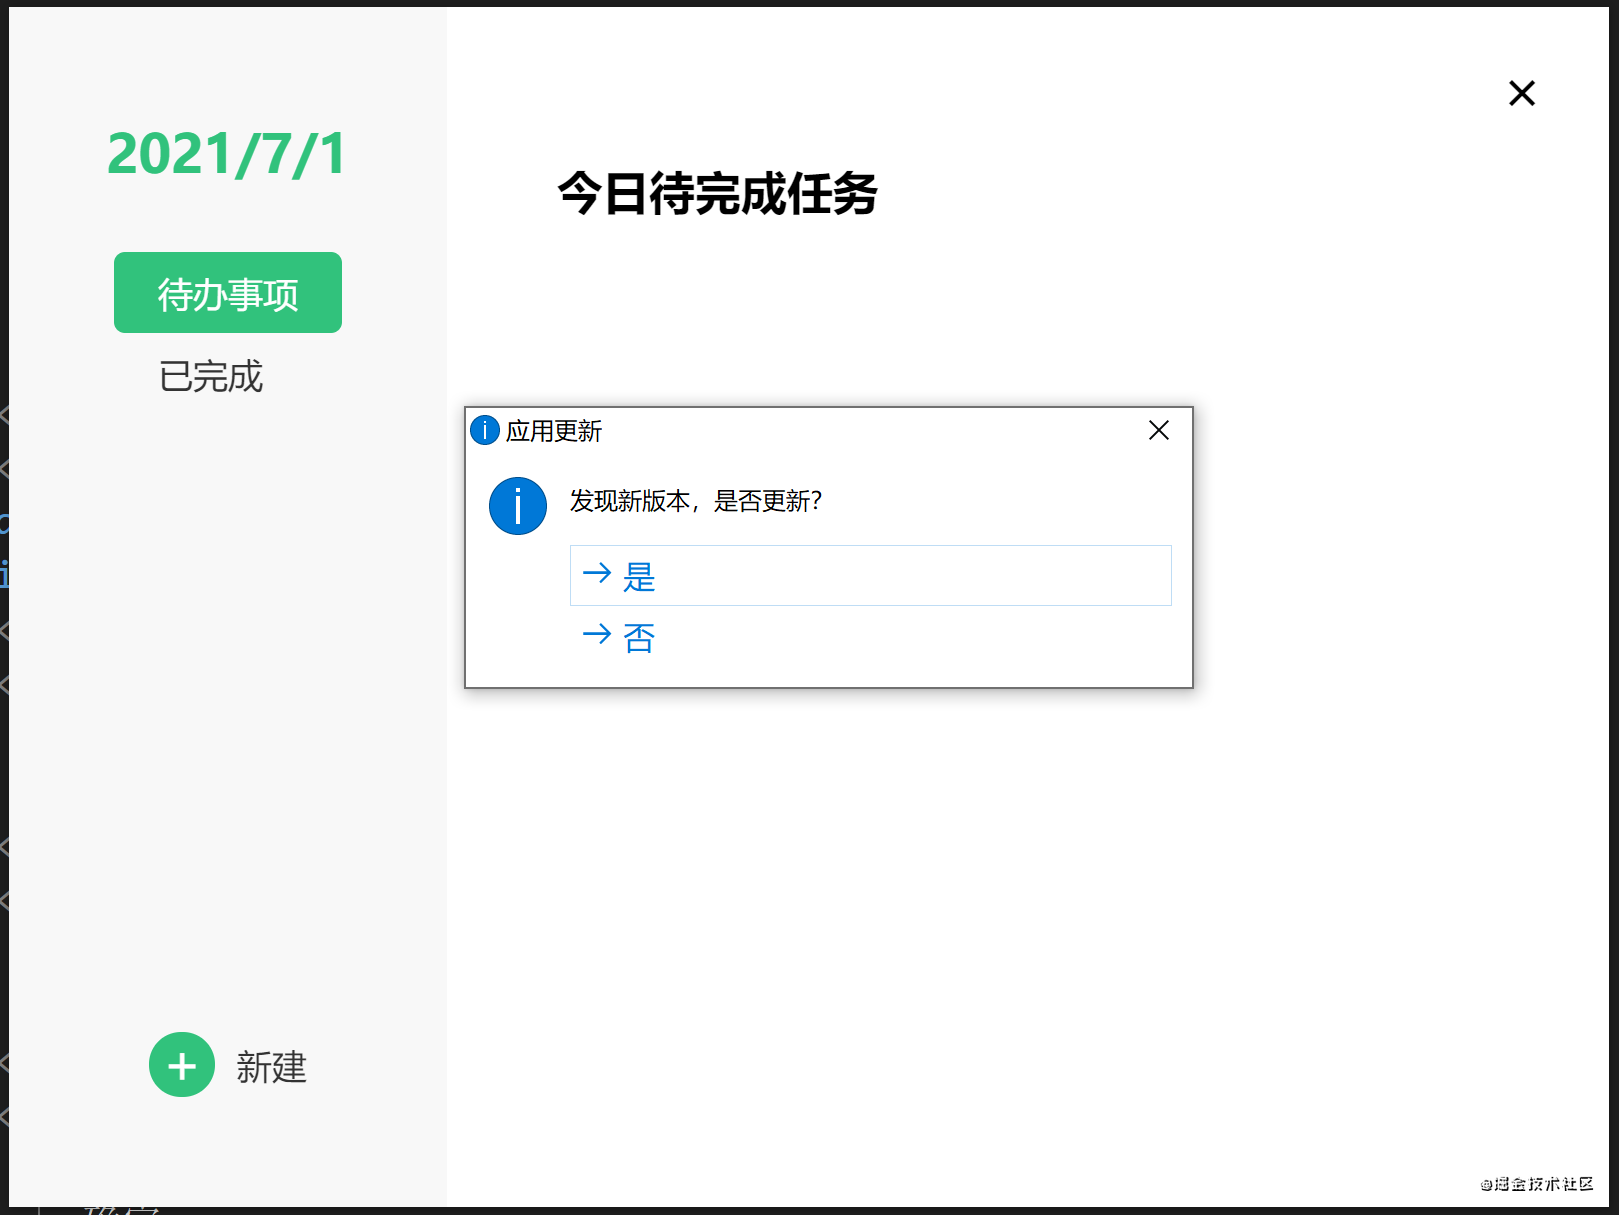
autoUpdater.on('update-downloaded', () => {
dialog.showMessageBox({
type: 'info',
title: 'Apply updates',
message: 'New version found, update?',
buttons: ['yes', 'no']
}).then((buttonIndex) => {
if(buttonIndex.response == 0) { //Select Yes to exit the program and install the new version
autoUpdater.quitAndInstall()
app.quit()
}
})
})
}
app.on('ready', () => {
//Check for updates every time you start the program
checkUpdate()
}
What is the basis for judging whether it needs to be updated?
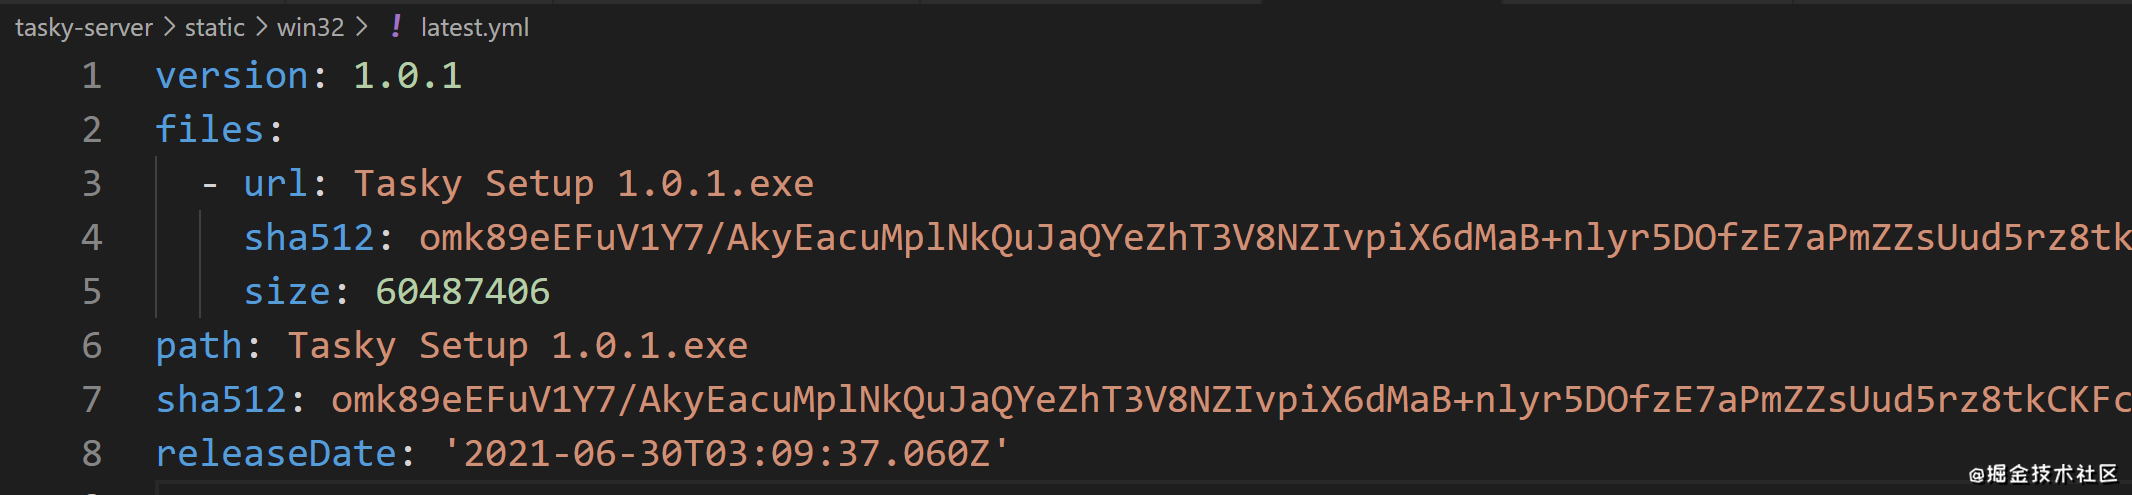
The electron Updater will specify the latest. In the path according to the setFeedURL above The version in yml is used to determine whether it needs to be updated. If the version is greater than the current version, it needs to be updated, otherwise it will not be updated yml is also a kind of configuration file, which is a bit similar to our common configuration file json configuration files are written differently.
github based solution
If you don't want to build your own server, you can also use github. Use github to publish automatically without manually uploading the latest installation package resources every time.
Auto publish
The first step is still to configure the "publish" field.
"build": {
    ...
    "publish": ['github']
}
Step 2: configure new instructions in "scripts". GH is required due to GitHub permission control_ Token, you can https://github.com/settings/tokens Generate GH in_ TOKEN.
"scripts": {
...
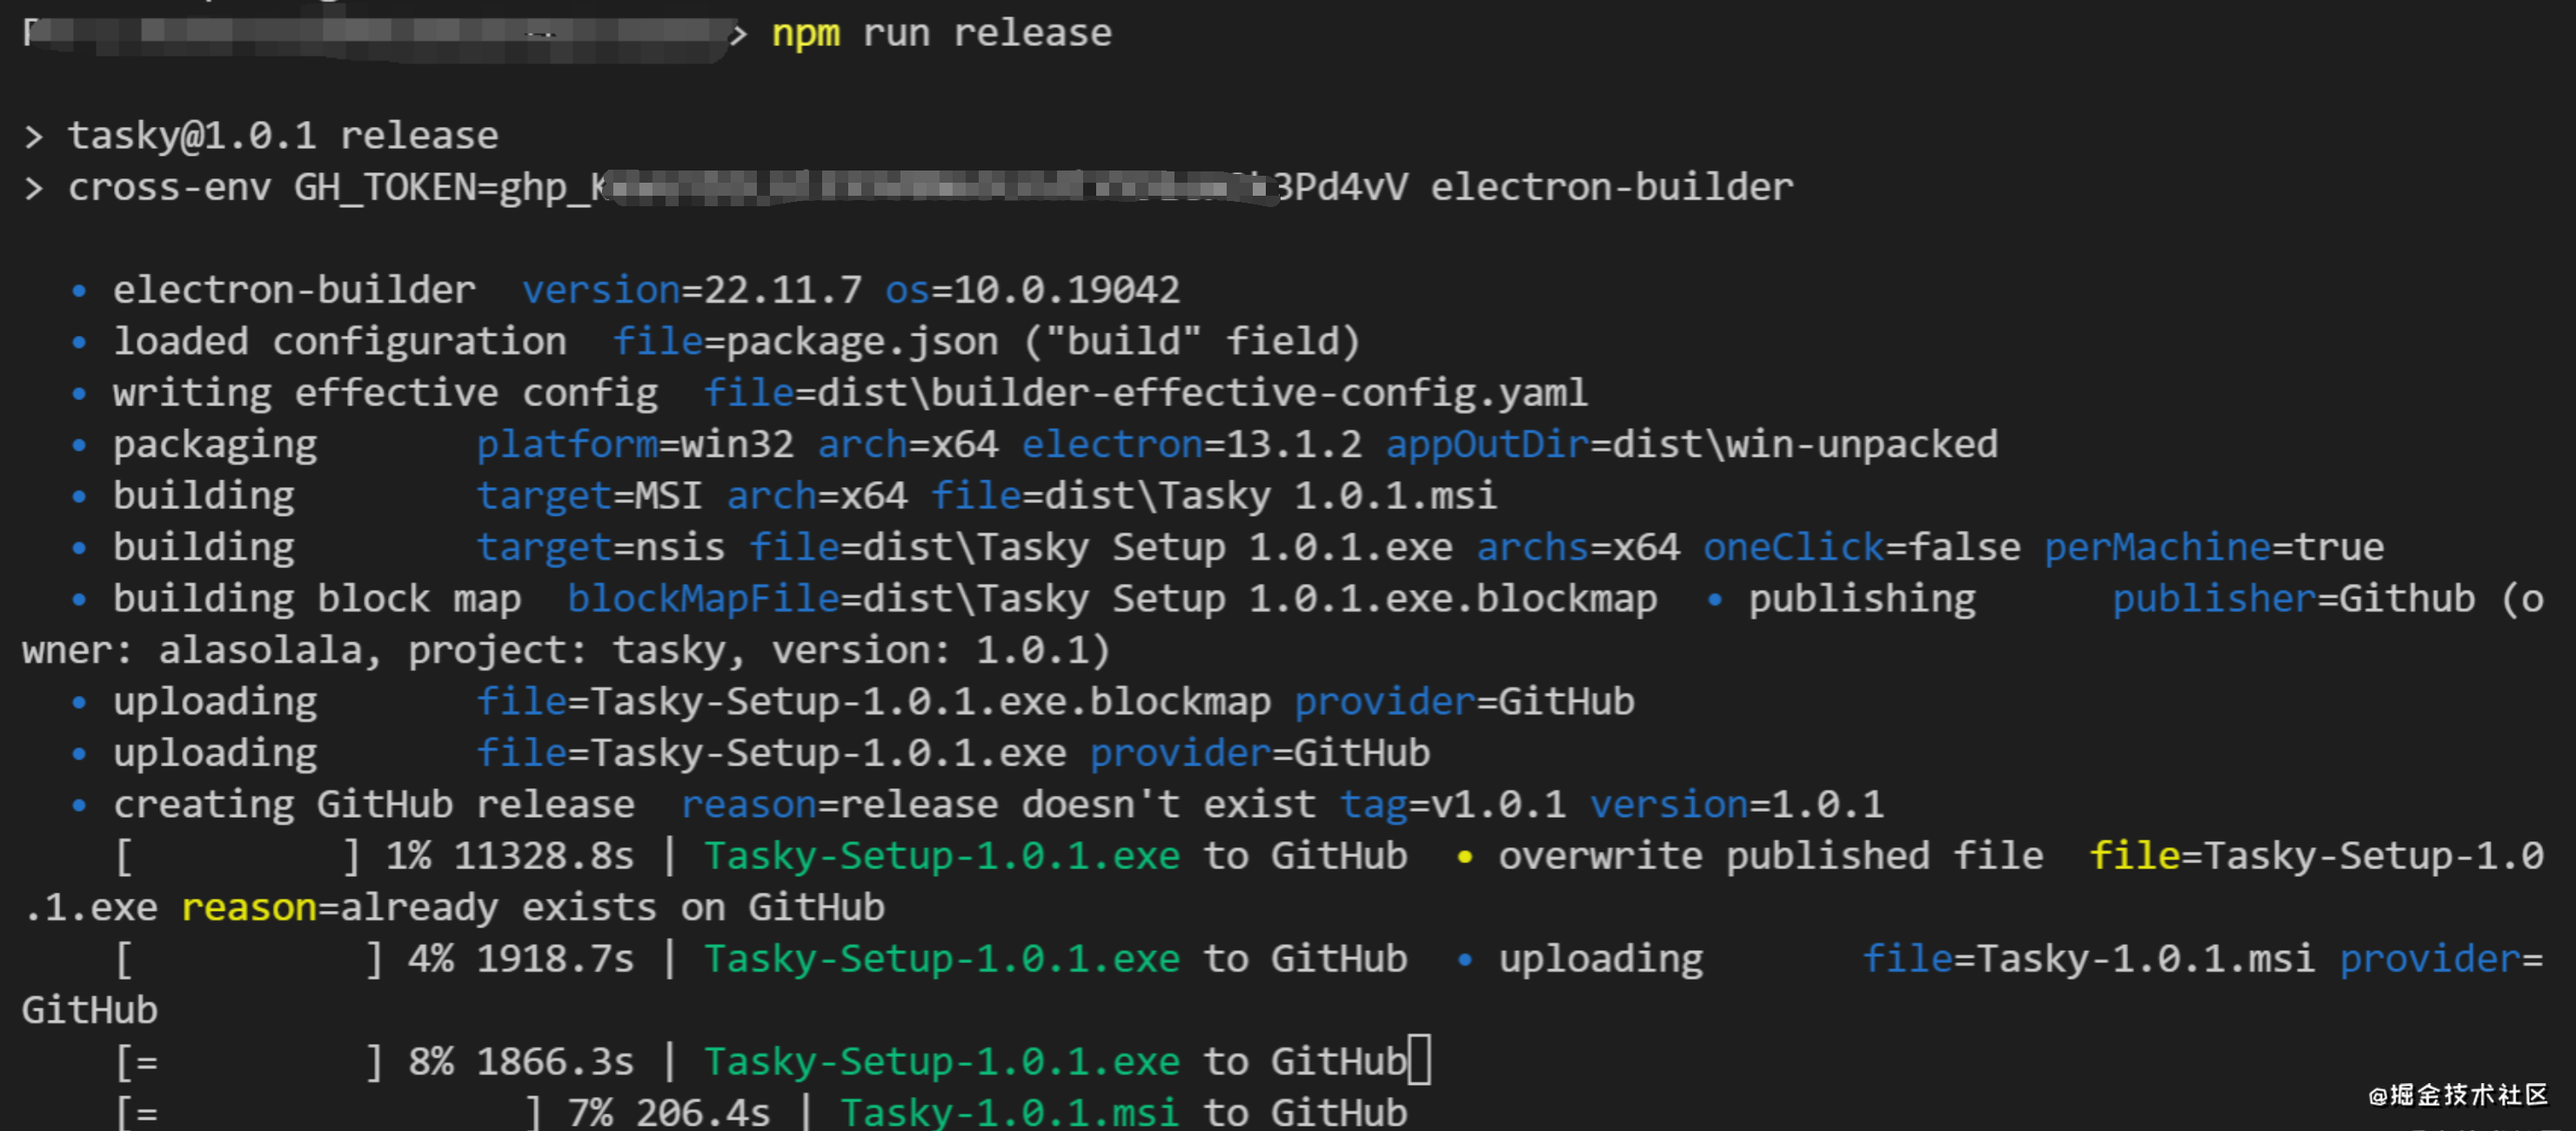
"release": "cross-env GH_TOKEN=ghp_KmVD3.......W2k3Pd4vV electron-builder"
}
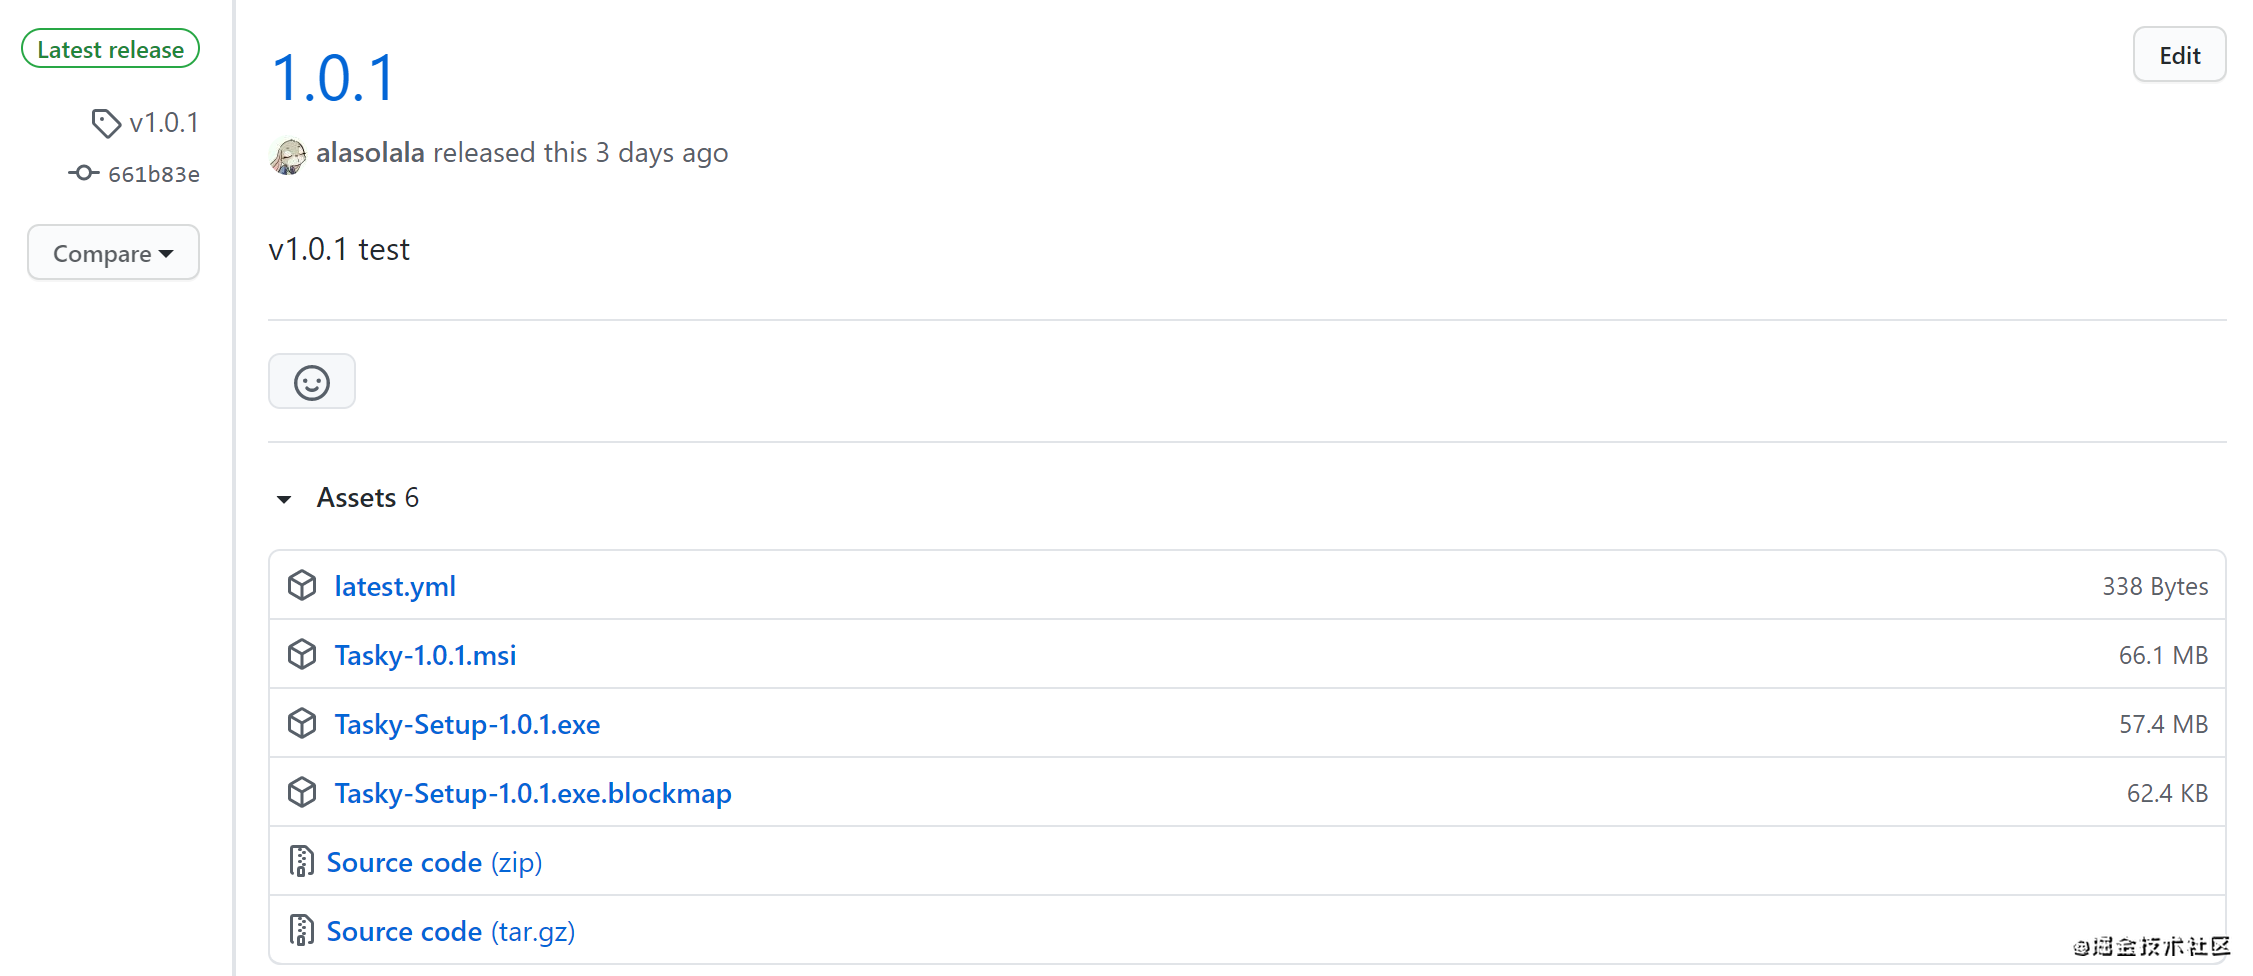
Step 3: npm run release. After packaging, upload the resources to github to generate a release draft. You can find this draft in the github project and publish release.
Detect updates
Similar to the above, take Windows as an example, and the code is as follows.
const { autoUpdater } = require('electron-updater')
function checkUpdate(){
  //Detect updates
  autoUpdater.checkForUpdates()

  //Listening for 'error' events
  autoUpdater.on('error', (err) => {
    console.log(err)
  })

  //Listen to the 'update available' event and trigger it when a new version is found
  autoUpdater.on('update-available', () => {
    console.log('found new version')
  })

  //The new version will be downloaded automatically by default. If you don't want to download it automatically, set AutoUpdater autoDownload = false

  //Listen for the 'update downloaded' event, which is triggered when the download of the new version is completed
  autoUpdater.on('update-downloaded', () => {
    dialog.showMessageBox({
      type: 'info',
      title: 'Apply updates',
      message: 'New version found, update?',
      buttons: ['yes', 'no']
    }).then((buttonIndex) => {
      if(buttonIndex.response == 0) {  //Select Yes to exit the program and install the new version
        autoUpdater.quitAndInstall()
        app.quit()
      }
    })
  })
}

app.on('ready', () => {
  //Check for updates every time you start the program
  checkUpdate()
}
epilogue
In the above example, the web resources of the page are packaged into the installation package. Another case is that the web resources are separated from the "app shell". The web resources are placed on the server and loaded dynamically through the network every time, as follows:
mainWindow.loadURL('https://juejin.cn')
In scenarios where the business needs to be updated frequently, this method can be used to update quickly and without obstacles. In this case, we can package and update the "shell" in the above way, that is, the main process is related; The packaging of page resources is the same as that of ordinary front-end projects, which will not be repeated here.
This article mainly explains the use of Electron builder to package applications and automatic updates. In the next article, we will explore the combination of Electron and Vue.
Original address: https://juejin.cn/post/6980105328801087518