4G intelligent unmanned vehicle press forward, let go, stop and turn speed regulation scheme code
1 code at the bottom code at the bottom code at the bottom code at the bottom 1
Today, when 5G has become popular, various devices have been oriented to digitization. Today, let's learn DIY, a 4G intelligent unmanned vehicle
Hardware preparation:
1. Chip module: ESP8266-12E (USB to TTL module with CH340G)
2.L298N motor drive
3.12V battery pack (18650 batteries can be used, 6 recommended)
4. Voltage indication module
5.DIY trolley
Principle: ESP8266 is connected with L298N drive, and the drive is connected with motor. ESP8266 sends PWM wave to control motor rotation and adjust rotation direction
DIY's first step: assemble the unmanned vehicle
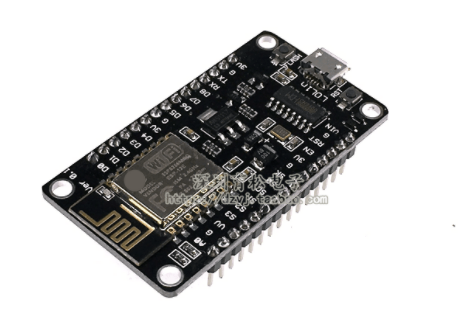


The above is the physical drawing
Step 2 of DIY: burn MQTT firmware
Step 1: log in to the official website of Anxin, find the software to download, find the MQTT firmware to download, download the FLASH software at the same time, and burn the firmware
(you can also contact me for the latest, QQ1406678649)
FLASH
firmware

Step 2: open flash_download_tool_3.9.2.exe
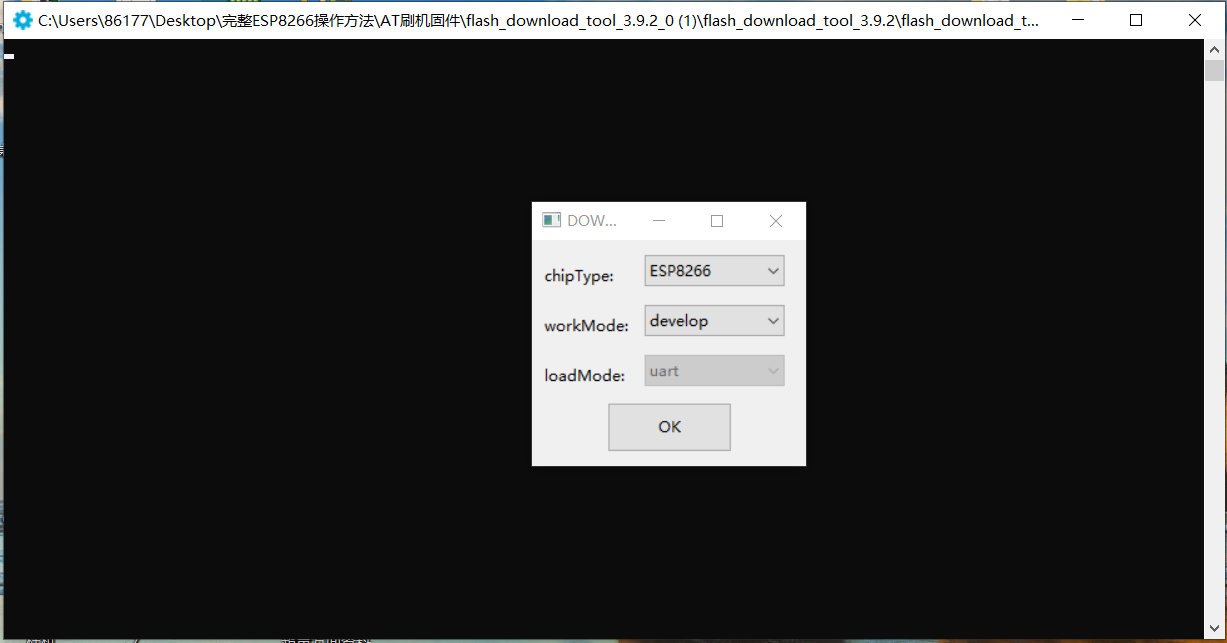
Click OK
You must choose the right one here
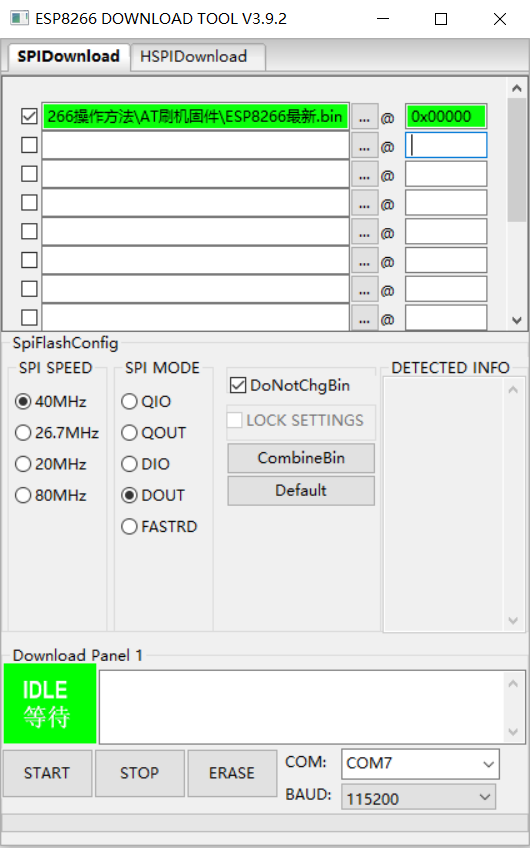
Then click START in the lower left corner to upload
After that, it's OK. Oh, the firmware is complete
Step 3 of DIY: burn code
There are two types of codes,
First, directly burn the WIFI account and password, and select the WIFI you will connect to the car. After burning the complete code, start up and the ESP8266 module will be connected automatically. Some connection code forms are shown below:
/*Technical support QQ: 1406678649 ***************** technical wechat: RanBaiWan1688****************/
/**If you need business cooperation, please contact me************************************************************/
/**The following 4G smart car code can be used for forward speed regulation * turning speed regulation * * * if you want to control the car anywhere in the country * you need to replace the firmware * if you need firmware, please contact me*/
#define BLINKER_PRINT Serial
#define BLINKER_WIFI
//#define BLINKER_ESP_SMARTCONFIG//
#include <Blinker.h>
char auth[] = "92acbbb5aff";//Fill in your electric light technology key
char ssid[] = "c2580";//Your WIFI name
char pswd[] = "ran7758258";//Your WIFI password
Second: one key distribution network mode
After the device is powered on, ESP8266 sends out WIFI by itself. After the mobile phone is connected, a pop-up window forces the user to enter the web page, allowing the user to fill in the WIFI name, password and lighting technology key. After the configuration is completed, ESP8266 automatically turns off WIFI, and then actively connects to the WIFI specified by you.

Partial code display
const char* AP_NAME = "4G smart car ";//wifi name
//Temporarily store wifi account password
char sta_ssid[32] = {0};
char sta_password[64] = {0};
//Distribution network page code
const char* page_html = "\
<!DOCTYPE html>\r\n\
<html lang='en'>\r\n\
<head>\r\n\
  <meta charset='UTF-8'>\r\n\
  <meta name='viewport' content='width=device-width, initial-scale=1.0'>\r\n\
  <title>Document</title>\r\n\
</head>\r\n\
<body>\r\n\
  <form name='input' action='/' method='POST'>\r\n\
        4G smart car  wifi name: <br>\r\n\
        <input type='text' name='ssid'><br>\r\n\
        4G smart car  wifi password:<br>\r\n\
        <input type='text' name='password'><br>\r\n\
        Lighting technology key:<br>\r\n\
        <input type='text' name='key'><br>\r\n\
        <input type='submit' value='preservation'>\r\n\
    </form>\r\n\
</body>\r\n\
</html>\r\n\
";
This code involves commercial use. If it is open, it will disrupt the market. It needs private chat QQ:1406678649
The complete first code: press and keep moving forward, and press again to stop moving forward
#define BLINKER_PRINT Serial
#define BLINKER_WIFI
//#define BLINKER_ESP_SMARTCONFIG//
#include <Blinker.h>


char auth[] = "92acbbb54aff";
char ssid[] = "c2851";
char pswd[] = "12345678";


#define BUTTON_1 "b1"
#define BUTTON_2 "b2"
#define BUTTON_3 "b3"
#define BUTTON_4 "b4"
#define BUTTON_5 "b5"
#define BUTTON_6 "b6"
#define BUTTON_7 "b7"
#define BUTTON_8 "b8"
#define BUTTON_9 "b9"


#define slider_0 "r1"
#define slider_1 "r2"


BlinkerButton Button1(BUTTON_1);
BlinkerButton Button2(BUTTON_2);
BlinkerButton Button3(BUTTON_3);
BlinkerButton Button4(BUTTON_4);
BlinkerButton Button5(BUTTON_5);
BlinkerButton Button6(BUTTON_6);
BlinkerButton Button7(BUTTON_7);
BlinkerButton Button8(BUTTON_8);
BlinkerButton Button9(BUTTON_9);


BlinkerSlider Slider0(slider_0);
BlinkerSlider Slider1(slider_1);


int pwm1=60;
int pwm2=60;

int flag;//Judge the current state


void button1_callback(const String &state)
{

 digitalWrite(12, LOW);
}


void button2_callback(const String &state)//forward
{
 BLINKER_LOG("get button state: ", state);
 if (state != "pressup")
 {
 flag=1;
  analogWrite(16, pwm1);
 digitalWrite(5, LOW);
 analogWrite(4, pwm2);
 digitalWrite(2, LOW);

 }
}


void button3_callback(const String &state)  //Garbage bag open
{
  digitalWrite(13, LOW);

}


void button4_callback(const String &state)//Turn left
{
  digitalWrite(16, LOW);
  analogWrite(5, pwm1);

 analogWrite(4, pwm2);
 digitalWrite(2, LOW);

flag=3;

}


void button5_callback(const String &state)//stop it
{
 BLINKER_LOG("get button state: ", state);
 if (state != "pressup")
 {
 digitalWrite(16, HIGH);
 digitalWrite(5, HIGH);
 digitalWrite(4, HIGH);
 digitalWrite(2, HIGH);
flag=5;
 }
}


void button6_callback(const String &state)//Turn right
{
 BLINKER_LOG("get button state: ", state);
 if (state != "pressup")
 {
  analogWrite(16, pwm1);
 digitalWrite(5,LOW);

 digitalWrite(4, LOW);
 analogWrite(2,pwm2);
flag=4;
 }
}

void button7_callback(const String &state)//Mao Shuguan
{

 digitalWrite(12, HIGH);

}

void button8_callback(const String &state)//back off
{
 BLINKER_LOG("get button state: ", state);
 if (state != "pressup")
 {
  digitalWrite(16, LOW);
 analogWrite(5,pwm1);
 digitalWrite(4, LOW);
 analogWrite(2,pwm2);
flag=2;
 }
}


void button9_callback(const String &state)//Garbage bag off
{
 BLINKER_LOG("get button state: ", state);
 if (state != "pressup")
 {
   digitalWrite(13, HIGH);


 }
}

void slider0_callback(int32_t value)
{
 BLINKER_LOG("slider:", value);
    pwm1=value;
  switch(flag)
    {
    case 1: analogWrite(16, pwm1);    break;
    case 2: analogWrite(5, pwm1);    break;
    case 3: analogWrite(5, pwm1);       break;
    case 4: analogWrite(16, pwm1);     break;
    case 5:     break;
     default:break;

    }

}


void slider1_callback(int32_t value)
{
 BLINKER_LOG("slider:", value);
     pwm2=value;
  switch(flag)
    {
    case 1: analogWrite(4, pwm2);    break;
    case 2: analogWrite(2, pwm2);    break;
    case 3: analogWrite(2, pwm2);       break;
    case 4: analogWrite(4, pwm2);     break;
    case 5:     break;
     default:break;

    }

}


//blinker initialization
void blinker_car_init()
{
 //Pins 1-4 are set to output mode
 pinMode(16, OUTPUT);//
 pinMode(5, OUTPUT);//
 pinMode(4, OUTPUT);//
 pinMode(2, OUTPUT);//
 pinMode(12, OUTPUT);//
 pinMode(13, OUTPUT);//


}


void setup()
{
    digitalWrite(D0, HIGH);
    digitalWrite(D1, HIGH);
    digitalWrite(D2, HIGH);
    digitalWrite(D4, HIGH);
    analogWriteRange(100);
    analogWriteFreq(50);

    //analogWrite(D2, 50);//0-100  50
 //Initialize trolley parameters
    blinker_car_init();

//Button binding
 Button1.attach(button1_callback);
 Button2.attach(button2_callback);
 Button3.attach(button3_callback);
 Button4.attach(button4_callback);
 Button5.attach(button5_callback);
 Button6.attach(button6_callback);
 Button7.attach(button7_callback);
 Button8.attach(button8_callback);
 Button9.attach(button9_callback);

 Slider0.attach(slider0_callback);
 Slider1.attach(slider1_callback);


Blinker.begin(auth,ssid,pswd);

  //   Blinker.begin(auth);

}


void loop()
{
    Blinker.run();

}
The second code: press to move forward, let go and stop immediately
This is a judgment sentence. Experts can see it at a glance
Advance when pressed, otherwise stop
If you are Xiaobai, ask me for it, QQ: 1406678649
Master, please copy and paste yourself
void button2_callback(const String &state)//forward
{
if (state == BLINKER_CMD_BUTTON_PRESSED)
{
  analogWrite(16, too1);
 digitalWrite(5, LOW);
 analogWrite(4, too2);
 digitalWrite(2, LOW);
}
 else if (state == BLINKER_CMD_BUTTON_PRESSUP)
 {
 digitalWrite(16, HIGH);
 digitalWrite(5, HIGH);
 digitalWrite(4, HIGH);
 digitalWrite(2, HIGH);
 }
}
Statement of turning speed regulation
In the complete code: you can see
BlinkerSlider Slider0(slider_0);
BlinkerSlider Slider1(slider_1);
as well as
void slider0_callback(int32_t value) //too1
{
 BLINKER_LOG("slider:", value);
    too1=value;
  switch(flag)
    {
    case 1: analogWrite(16, too1);   break;
    case 2: analogWrite(5, too1);    break;
    case 3: analogWrite(5, too1);    break;
    case 4: analogWrite(16, too1);   break;
    case 5:                          break;
    default:break;

    }
}
This is the direction to move forward and backward,
You need to add new PWM3 and pwm4, and copy and modify them in the complete code
give an example:
BlinkerSlider Slider0(slider_0);
BlinkerSlider Slider1(slider_1);
BlinkerSlider Slider2(slider_2);
BlinkerSlider Slider3(slider_3);

int too1=60;
int too2=60;
int too3=40;
int too4=40;

int flag;
t001 is the code of PWM1 wave and t002 is the code of PWM2 wave
Burn after modification
Note: Xiaobai can add the code I want!!! Paid,, 31 copies
If it is one key distribution network code: 51 copies
You can also learn it slowly by yourself. I'll give you the code
!!! The above code is guaranteed to be available!!!