1.Vue-Cli
1.1 introduction to Vue cli
A scaffold officially provided by vue cli is used to quickly generate a vue project template;
The pre-defined directory structure and basic code are just like when we create Maven project, we can choose to create a skeleton project, which is the scaffold, and our development is faster;
Main functions:
- Unified directory structure
- Local debugging
- Hot deployment
- unit testing
- Integrated packaging Online
1.2 environmental preparation
- Node.js
node.js Download: http://nodejs.cn/download/
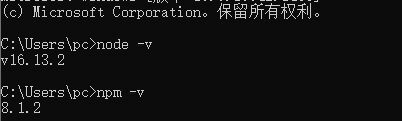
Download installation test
node -v Command to see if the version number can be output
npm -v Command to see if the version number can be output
- Install vue
npm install vue
- Install node JS Taobao image accelerator (cnpm)
npm install -g cnpm --registry=https://registry.npm.taobao.org
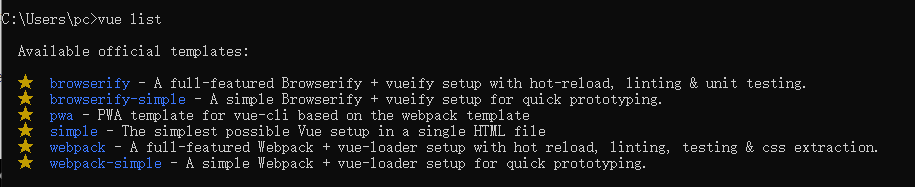
- Install Vue cli
cnpm instal1 vue-cli-g
#Test whether the installation is successful#To see which templates can be used to create vue applications, we usually choose webpack
vue list
Reference article on error reporting:
https://www.cnblogs.com/xu360/articles/12307609.html
1.3 first Vue cli program
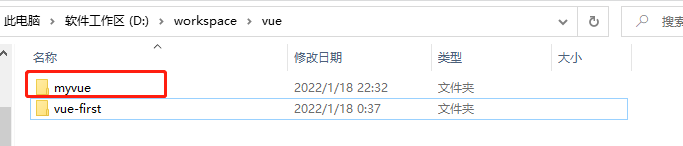
- Found a project path (empty folder)
- Create a vue application based on the webpack template
#1. First, you need to enter the corresponding directory cd D:\workspace\vue
#2. myvue here is the name of the top day, which can be named according to your own needs
vue init webpack myvue
-
Actions required for the creation process
Choose no all the way
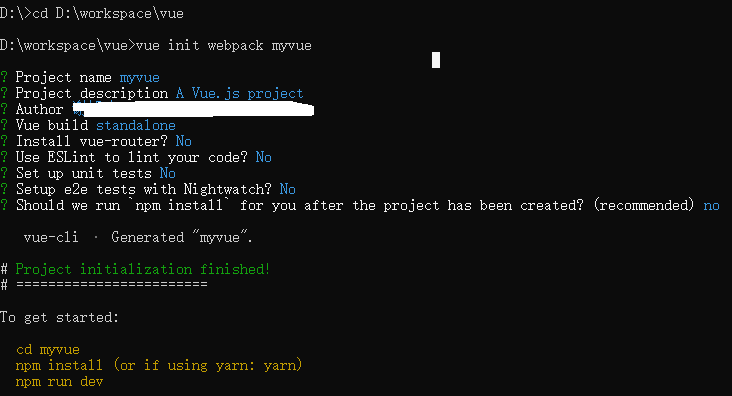
-
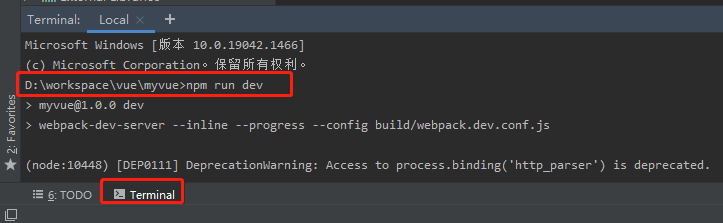
Initialize and run
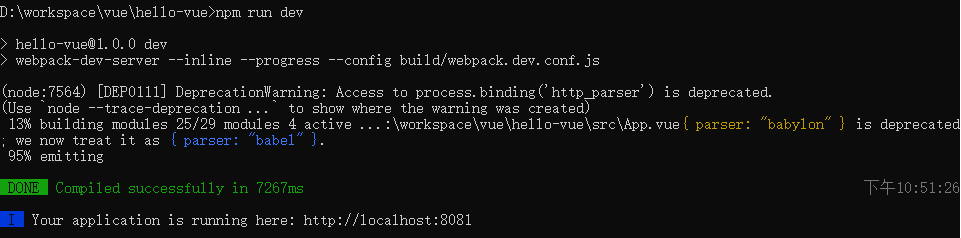
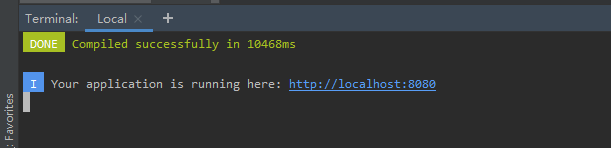
cd myvue
npm install
npm run dev
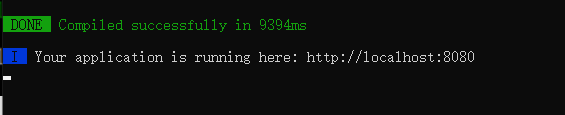
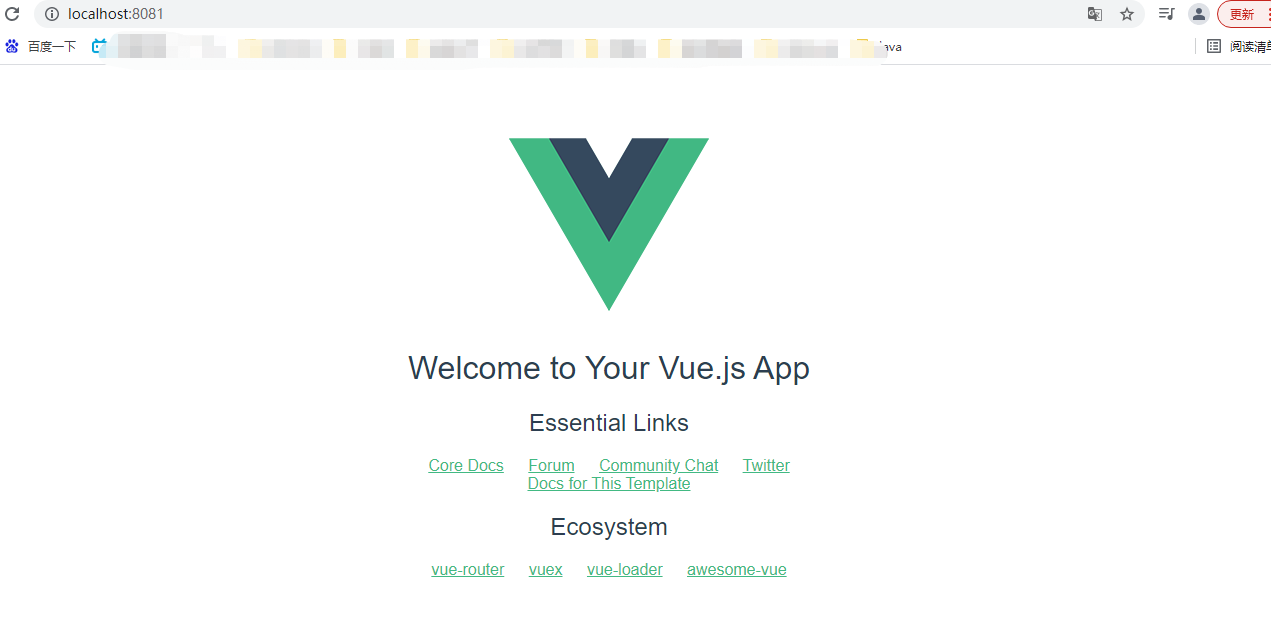
Visit localhost:8080
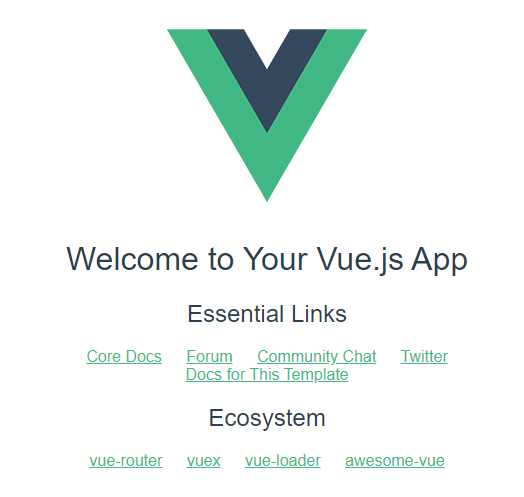
- Use idea to import and open the file directory, which can be started in idea.
1.4 use of webpack
1.4.1 installing Webpack
WebPack is a module loader and packaging tool, which can process and use various resources, such as JS, JSX, ES 6, SASS, LESS, pictures, etc. as modules
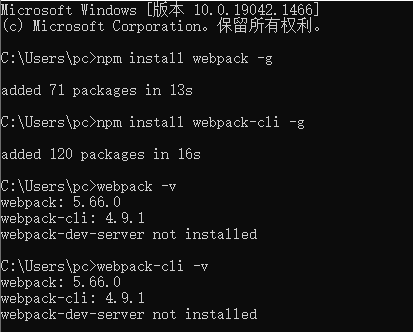
install
# Installation tools
npm install webpack -g
# client
npm install webpack-cli -g
Test installation succeeded:
webpack -v
webpack-cli -v
to configure:
webpack.config.js
- Entry: entry file, which specifies which file the Web Pack uses as the entry of the project
- Output: output, specifying that the WebPack will place the processed files in the specified path
- Module: a module used to process various types of files
- plugins: plug-ins, such as hot update, code reuse, etc
- resolve: set the path to
- watch: monitor, which is used to set the direct packaging after file changes
module.exports = {
	entry:"",
	output:{
		path:"",
		filename:""
	},
	module:{
		loaders:[
			{test:/\.js$/,;\loade:""}
		]
	},
	plugins:{},
	resolve:{},
	watch:true
}
Directly run the webpack command to package
1.4.2 using webpack
- Create project
Create the folder webpack study in D:\workspace\vue and open it with IDEA
- Create a directory named modules to place resource files such as JS modules
- Create the module file hello. Under modules js
//One method of exposure: sayHi
exports.sayHi = function(){
    document.write("<div>Hello Webpack</div>");
}
- Under modules, create a file named main JS entry file main JS, which is used to set the entry attribute when packaging
//If you import a module, you can call the methods in the module
var hello = require("./hello");
hello.sayHi();
- Create webpack.com in the project directory config. JS configuration file, packaged with webpack command
module.exports = {
    entry:"./modules/main.js",
    output:{
        filename:"./js/bundle.js"
    }
}
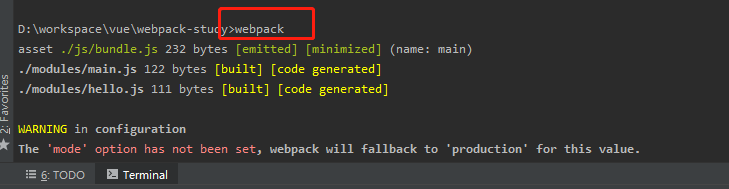
- pack:
Note: if packaging fails, run webpack with administrator privileges
- Create an HTML page under the project directory, such as index HTML, import the JS file packaged by webpack
<!doctype html>
<html lang="en">
    <head>
        <meta charset="UTF-8">
        <title>Jiang Xiaonan</title>
    </head>
    <body>
        <script src="dist/js/bundle.js"></script>
    </body>
</html>
Directly open index html

remarks
# The parameter -- watch is used to monitor changes. If something to be packaged changes, it will be repackaged
webpack --watch
2. Vue router routing
2.1 installation
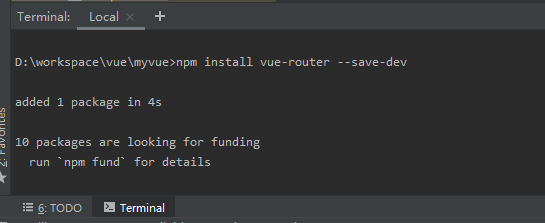
- Test learning based on the first Vue cli; First check whether there is a Vue router in node modules. Vue router is a plug-in package, so we still need to install it with npm/cnpm. Note that the location of executing the command is under your current project
npm install vue-router --save-dev
- If you use it in a modular project, you must pass Vue Use () explicitly installs the routing function (note the index.js later)
import Vue from 'vue'
import VueRouter from 'vue-router'

Vue.use(VueRouter);
2.2 test routing
- Remove useless items from the first Vue cli project
- The components directory stores the components written by ourselves
- Define several components of your own content vue ,Main.vue,Myvue.vue
Content.vue
<template>
  <h1>Content page</h1>
</template>

<script>
    export default {
        name: "Content"
    }
</script>

<style scoped>
</style>
Main.vue
<template>
    <h1>home page</h1>
</template>

<script>
    export default {
        name: "Main"
    }
</script>

<style scoped>
</style>
Myvue.vue
<template>
    <h1>My-vue</h1>
</template>

<script>
    export default {
        name: "Myvue"
    }
</script>

<style scoped>
</style>
- Import components into routing
index.js
import Vue from 'vue'
import VueRouter from 'vue-router'

import Content from '../components/Content'
import Main from '../components/Main'
import Myvue from '../components/Myvue'

// Install route display
Vue.use(VueRouter);

// Configure export routes
export default new VueRouter({
  routes:[
      {
      // Routing path
      path: '/content',
      // Jump components
      name: 'content',
      component:Content
    },{
      // Routing path
      path: '/main',
      // Jump components
      name: 'main',
      component:Main
    },{
      // Routing path
      path: '/myvue',
      // Jump components
      name: 'myvue',
      component:Myvue
    }
  ]
});
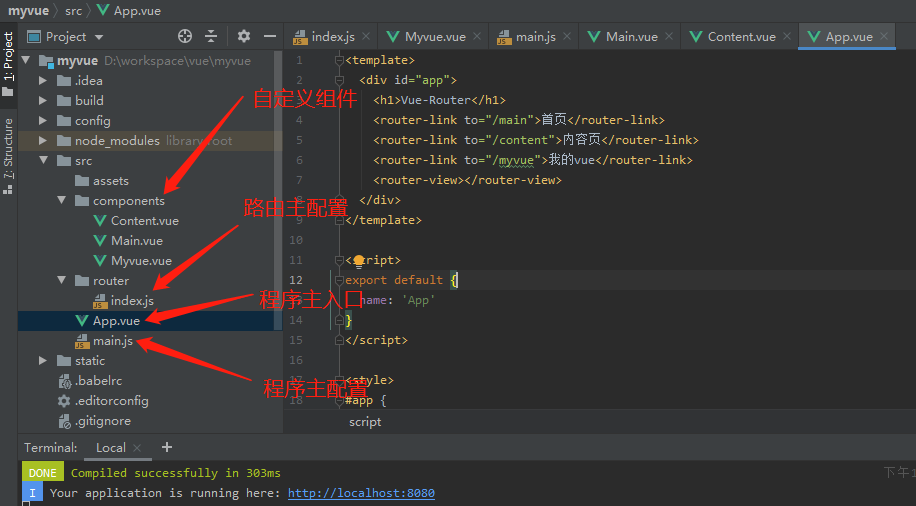
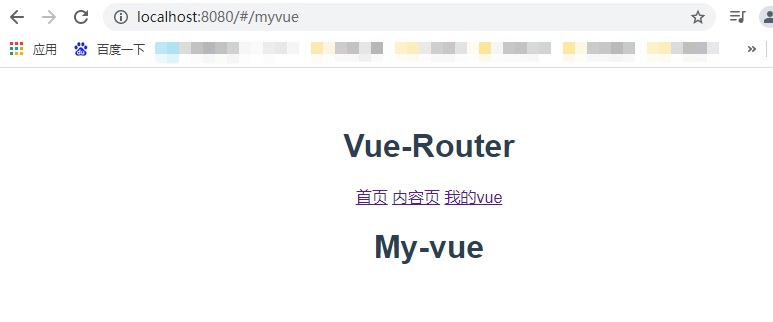
- Write the main entry of the program (realize the jump function)
App.vue
<template>
  <div id="app">
    <h1>Vue-Router</h1>
    <!--
          router-link: By default, it will be rendered as a<a>label, to Property to specify the link
          router-view: Used to render the component to which the route matches
        -->
    <router-link to="/main">home page</router-link>
    <router-link to="/content">Content page</router-link>
    <router-link to="/myvue">my vue</router-link>
    <router-view></router-view>
  </div>
</template>

<script>
export default {
  name: 'App'
}
</script>

<style>
#app {
  font-family: 'Avenir', Helvetica, Arial, sans-serif;
  -webkit-font-smoothing: antialiased;
  -moz-osx-font-smoothing: grayscale;
  text-align: center;
  color: #2c3e50;
  margin-top: 60px;
}
</style>
- Write program master configuration
main.js
import Vue from 'vue'
import App from './App'
import router from './router'  // Automatically scan the routing configuration inside

Vue.config.productionTip = false

new Vue({
  el: '#app',
  // Configure routing
  router,
  components: { App },
  template: '<App/>'
})
Conclusion:
export in the component and import in the route. And in main JS. In this way, you can import components into the main configuration main JS.
main.js does not need to be changed in the development process. All we have to do is add components and add components to the route.
3. vue+elementuUI
elementuUI official website:
https://element.eleme.io/#/zh-CN
Actual combat demo
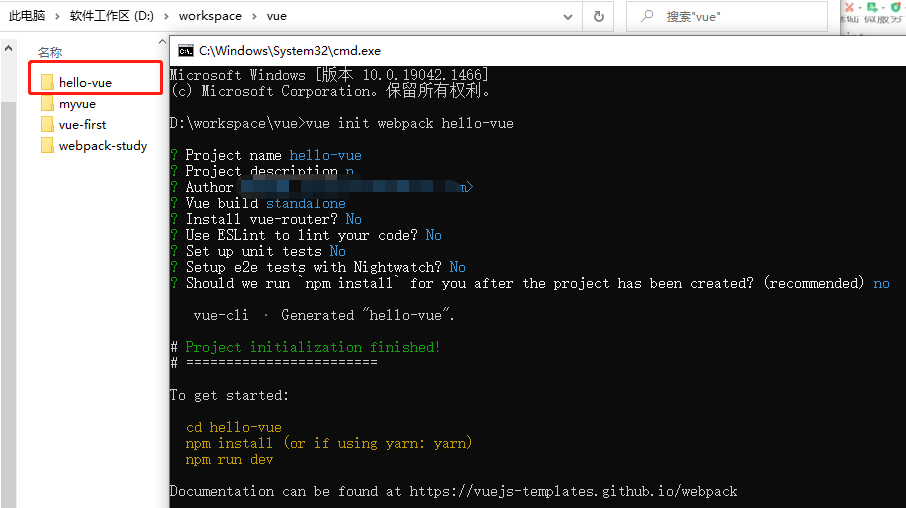
3.1 create project
- Create a project named Hello Vue
vue init webpack hello-vue
- Install dependency, Vue router, element UI, sass loader and node sass
#Enter project directory
cd hello-vue
#Install Vue router
npm install vue-router --save-dev
#Install element UI
npm i element-ui -S
#Installation dependency
npm install
# Install SASS loader
cnpm install sass-loader node-sass --save-dev
#Starting test
npm run dev
-
idea opens the created project
-
First delete useless files (such as HelloWorld components)
3.2 create login page
- The project structure is as follows

explain:
assets: used to store resource files
Components: used to store Vue functional components
views: used to store Vue view components
Router: used to store Vue router configuration
- Create the home page view main in the views directory Vue component
<template>
    <h1>home page</h1>
</template>

<script>
    export default {
        name: "Main"
    }
</script>

<style scoped>
</style>
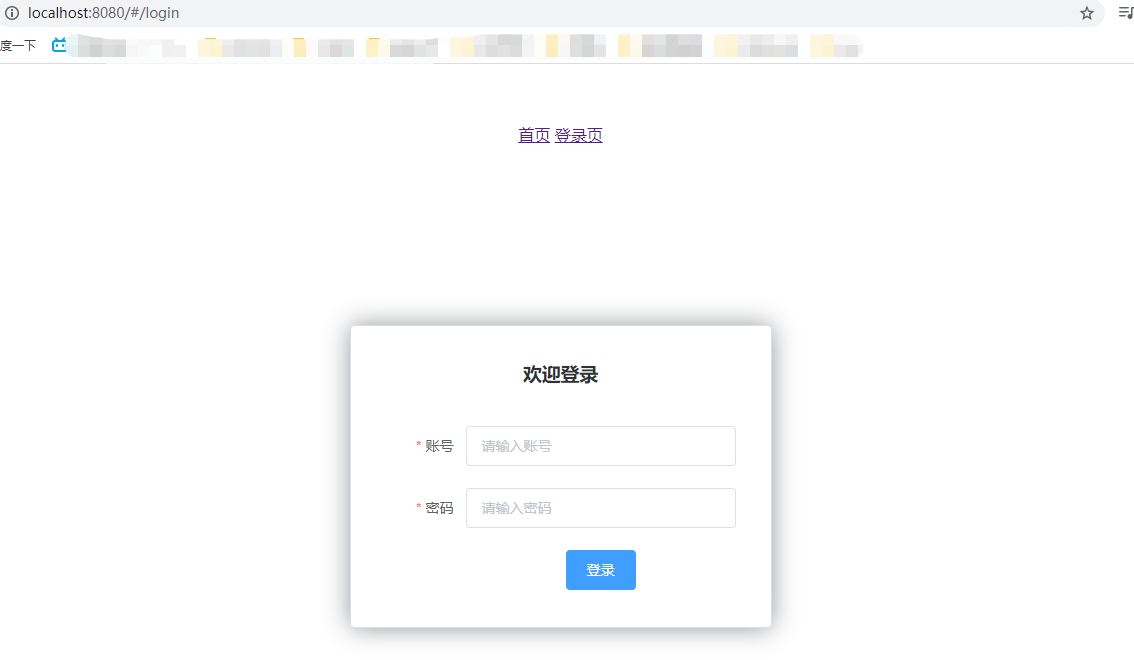
- Create the login page view login. In the views directory Vue component
<template>
  <div>
    <el-form ref="loginForm" :model="form" :rules="rules" label-width="80px" class="login-box">
      <h3 class="login-title">Welcome to login</h3>
      <el-form-item label="account number" prop="username">
        <el-input type="text" placeholder="Please enter the account number" v-model="form.username"/>
      </el-form-item>
      <el-form-item label="password" prop="password">
        <el-input type="password" placeholder="Please input a password" v-model="form.password"/>
      </el-form-item>
      <el-form-item>
        <el-button type="primary" v-on:click="onsubmit('loginForm')">Sign in</el-button>
      </el-form-item>
    </el-form>

    <el-dialog title="reminder" :visible.sync="dialogVisiable" width="30%" :before-close="handleClose">
      <span>Please enter your account and password</span>
      <span slot="footer" class="dialog-footer">
          <el-button type="primary" @click="dialogVisible = false">determine</el-button>
        </span>
    </el-dialog>
  </div>
</template>

<script>
    export default {
        name: "Login",
      data(){
          return{
            form:{
              username:'',
              password:''
            },
            //For form validation, add prop attribute in El form item element
            rules:{
              username:[
                {required:true,message:"Account number cannot be empty",trigger:"blur"}
              ],
              password:[
                {required:true,message:"Password cannot be empty",tigger:"blur"}
              ]
            },

            //Dialog box display and hide
            dialogVisible:false
          }
      },
      methods:{
          onSubmit(formName){
            //Bind validation function for form
            this.$refs[formName].validate((valid)=>{
              if(valid){
                //Using Vue router to route to the specified interface is called programmed navigation
                this.$router.push('/main');
              }else{
                this.dialogVisible=true;
                return false;
              }
            });
          }
      }
    }
</script>

<style lang="scss" scoped>
  .login-box{
    border:1px solid #DCDFE6;
    width: 350px;
    margin:180px auto;
    padding: 35px 35px 15px 35px;
    border-radius: 5px;
    -webkit-border-radius: 5px;
    -moz-border-radius: 5px;
    box-shadow: 0 0 25px #909399;
  }
  .login-title{
    text-align:center;
    margin: 0 auto 40px auto;
    color: #303133;
  }
</style>
- Create a directory named index. In the router directory Vue router routing configuration file of JS
//Import vue
import Vue from 'vue';
import VueRouter from 'vue-router';
//Import components
import Main from "../views/Main";
import Login from "../views/Login";
//use
Vue.use(VueRouter);
//export
export default new VueRouter({
  routes: [
    {
      //Login page
      path: '/main',
      component: Main
    },
    //home page
    {
      path: '/login',
      component: Login
    },
  ]
})
- Prepare app vue
<template>
  <div id="app">
    <router-link to="/main">home page</router-link>
    <router-link to="/login">Login page</router-link>
    <router-view></router-view>
  </div>
</template>

<script>

export default {
  name: 'App'
}
</script>

<style>
  #app {
    font-family: 'Avenir', Helvetica, Arial, sans-serif;
    -webkit-font-smoothing: antialiased;
    -moz-osx-font-smoothing: grayscale;
    text-align: center;
    color: #2c3e50;
    margin-top: 60px;
  }
</style>
- In main Configure routing in JS
import Vue from 'vue'
import App from './App'
import router from "./router"

import ElementUI from 'element-ui'
import 'element-ui/lib/theme-chalk/index.css'

Vue.config.productionTip = false

Vue.use(router)
Vue.use(ElementUI)

new Vue({
  el: '#app',
  router,
  render:h=>h(App)
})
- Test npm run dev
If an error is reported, the version of SASS loader (in package.json file) may be too high. Change it to 7.3.1. Then use cnpm install to reinstall. Start the test at.
See article: https://blog.csdn.net/a2986467829/article/details/121788853
4. Nested route (sub route)
Nested routing is also called sub routing. In practical application, it is usually composed of multi-layer nested components
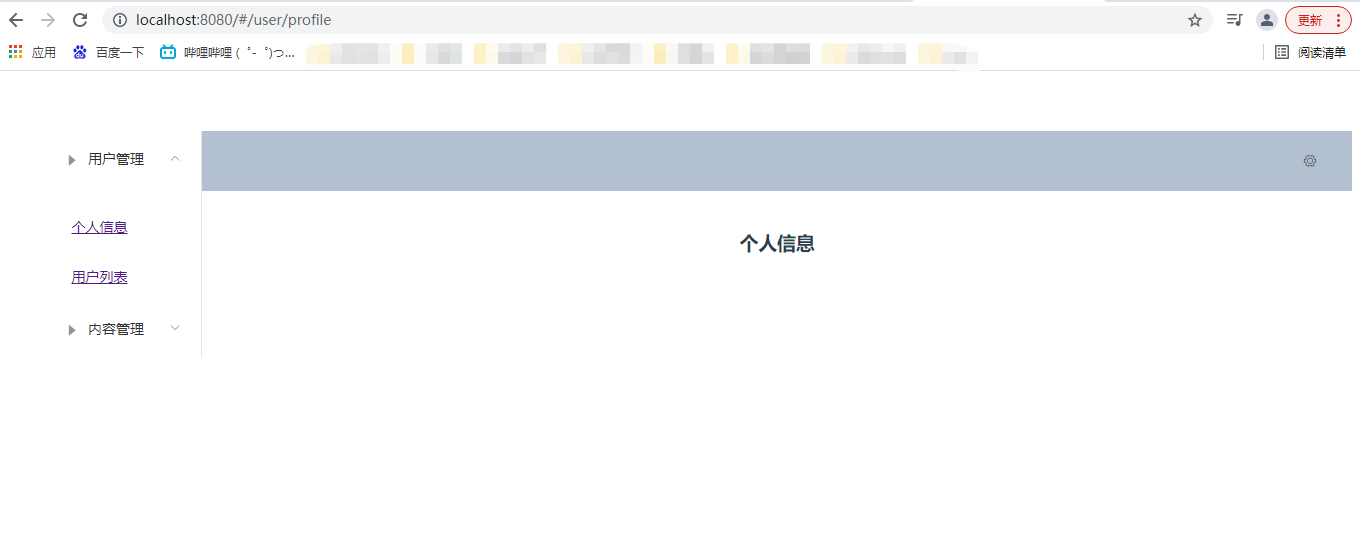
- Create a user information component, and create a profile under the views/user directory View components of Vue
<template>
  <h1>personal information</h1>
</template>
<script>
  export default {
    name: "UserProfile"
  }
</script>
<style scoped>
</style>
- In the user list component, create a file named list in the views/user directory View components of Vue
<template>
  <h1>User list</h1>
</template>
<script>
  export default {
    name: "UserList"
  }
</script>
<style scoped>
</style>
- To modify the home page view, we modify main Vue view component, where the ElementUI layout container component is used
<template>
    <div>
      <el-container>
        <el-aside width="200px">
          <el-menu :default-openeds="['1']">
            <el-submenu index="1">
              <template slot="title"><i class="el-icon-caret-right"></i>user management </template>
              <el-menu-item-group>
                <el-menu-item index="1-1">
                <!--Where to insert-->
                  <router-link to="/user/profile">personal information</router-link>
                </el-menu-item>
                <el-menu-item index="1-2">
                <!--Where to insert-->
                  <router-link to="/user/list">User list</router-link>
                </el-menu-item>
              </el-menu-item-group>
            </el-submenu>
            <el-submenu index="2">
              <template slot="title"><i class="el-icon-caret-right"></i>Content management</template>
              <el-menu-item-group>
                <el-menu-item index="2-1">Classified management</el-menu-item>
                <el-menu-item index="2-2">Content list</el-menu-item>
              </el-menu-item-group>
            </el-submenu>
          </el-menu>
        </el-aside>

        <el-container>
          <el-header style="text-align: right; font-size: 12px">
            <el-dropdown>
              <i class="el-icon-setting" style="margin-right: 15px"></i>
              <el-dropdown-menu slot="dropdown">
                <el-dropdown-item>personal information</el-dropdown-item>
                <el-dropdown-item>Log out</el-dropdown-item>
              </el-dropdown-menu>
            </el-dropdown>
          </el-header>
          <el-main>
          <!--Show the view here-->
            <router-view />
          </el-main>
        </el-container>
      </el-container>
    </div>
</template>
<script>
    export default {
        name: "Main"
    }
</script>
<style scoped lang="scss">
  .el-header {
    background-color: #B3C0D1;
    color: #333;
    line-height: 60px;
  }
  .el-aside {
    color: #333;
  }
</style>
- Add components and modify the configuration file of router
//Import vue
import Vue from 'vue';
import VueRouter from 'vue-router';
//Import components
import Main from "../views/Main";
import Login from "../views/Login";
//Import sub module
import UserList from "../views/user/List";
import UserProfile from "../views/user/Profile";

//use
Vue.use(VueRouter);
//export
export default new VueRouter({
  routes: [
    {
      //Login page
      path: '/main',
      component: Main,
      //  Write sub module
      children: [
        {
          path: '/user/profile',
          component: UserProfile,
        }, {
          path: '/user/list',
          component: UserList,
        },
      ]
    },
    //home page
    {
      path: '/login',
      component: Login

    },
  ]
})
- Run test
5. Parameter passing and redirection
5.1 parameter transfer
Method 1
- Modify the routing configuration, mainly the index under the router A placeholder such as id is added to the path attribute in JS
{
	path: '/user/profile/:id',
	name:'UserProfile',
	component: UserProfile
}
- View layer transfer parameters
<!--name Is the name of the component params It is a parameter passed. If you want to pass a parameter, you need to use it v:bind:To bind-->
<router-link :to="{name:'UserProfile',params:{id:1}}">personal information</router-link>
Note: at this time, we are in main To at the route link position in Vue is changed to: to, in order to use this attribute as an object. Note that the name of the name attribute in the route link must match the name of the name attribute in the route, because in this way, Vue can find the corresponding route path
- Receive parameters
<template>
  <!--  All elements must be under the root node,Just put it in div In the label-->
  <div>
    <h1>personal information</h1>
    {{$route.params.id}}
  </div>
</template>
Note: all elements must be under the root node, otherwise an error will be reported
- test

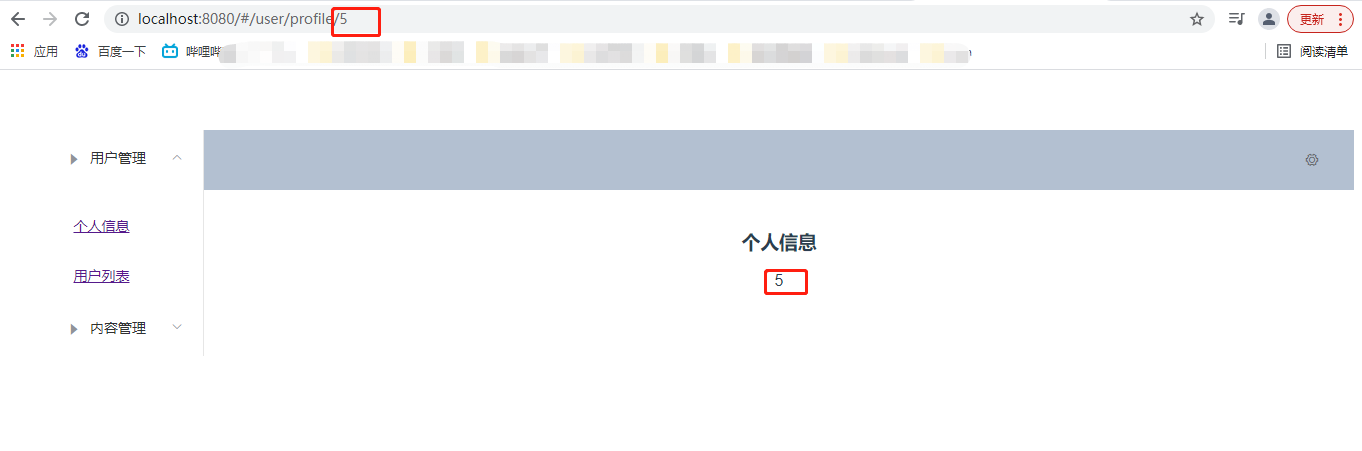
Method 2: using props to reduce coupling
- Modify the routing configuration, mainly in index. Under router props: true attribute is added to the routing attribute in JS
{
	path: '/user/profile/:id',
	name:'UserProfile',
	component: UserProfile,
	props: true
}
- The parameters passed are the same as before
- In profile Vue receives parameters and adds props attribute to the target component
<template>
  <div>
    personal information
    {{ id }}
  </div>
</template>
<script>
    export default {
      props: ['id'],
      name: "UserProfile"
    }
</script>
<style scoped>
</style>
- test
5.2 redirection
Redirection in Vue is used when the paths are different but the components are the same
- In router / index JS configuration redirection path
{
  path: '/main',
  name: 'Main',
  component: Main
},
{
  path: '/goHome',
  redirect: '/main'
}
- View increase
<el-menu-item index="1-3">
    <!--Where to insert-->
    <router-link to="/goHome">Return to home page</router-link>
</el-menu-item>
- test
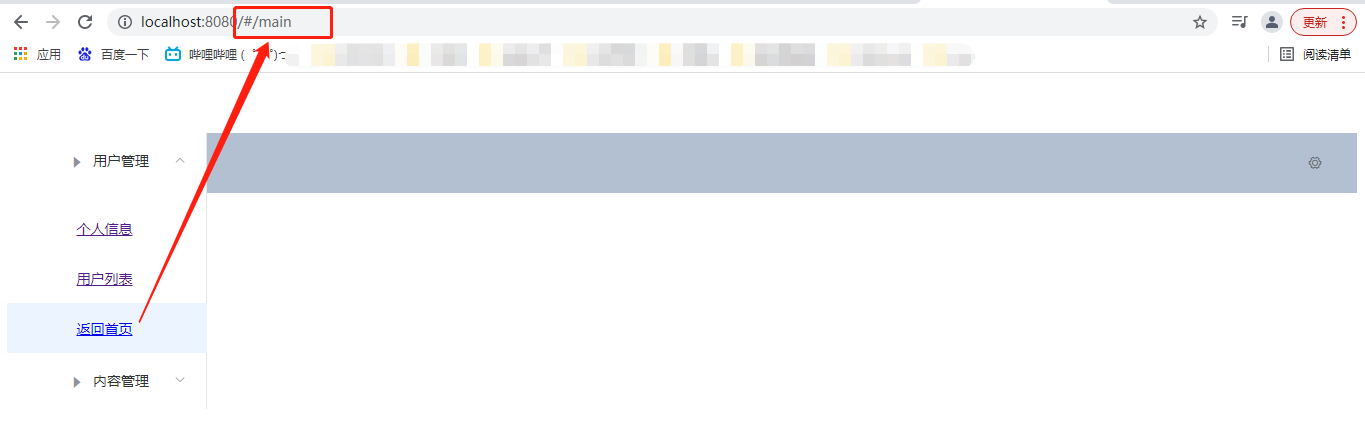
Click to return to the home page. The actual path is main
6 routing mode, 404 and routing hook
6.1 routing mode
There are two routing modes
- hash: path with # symbol, such as http://localhost/#/login
- history: path without # symbol, such as http://localhost/login
Modify routing configuration
export default new VueRouter({
  mode:'history',
  routes: []
)}
Modify in routing configuration
6.2 404 page
- Create a notfound Vue view
<template>
  <div>
    <h1>404,Your page is lost</h1>
  </div>
</template>
<script>
    export default {
        name: "NotFound"
    }
</script>
<style scoped>
</style>
- Modify routing configuration index js
import NotFound from '../views/NotFound'
// Add a route and match "*"
{
   path: '*',
   component: NotFound
}
- test

6.3 routing hook
In addition to the previous hook function, there are two hook functions
beforeRouteEnter: execute before entering the route
Before route leave: execute before leaving the route
- In profile Vue use
Parameter Description:
To: route information to jump
from: path information before path jump
next: control parameters of route
next() jumps to the next page
next('/ path') changes the jump direction of the route to make it jump to another route
next(false) returns to the original page
Next ((vm) = > {}) is only available in beforeRouteEnter. vm is a component instance
- Asynchronous request in hook function
- Install Axios
Official documents:
http://www.axios-js.com/zh-cn/docs/vue-axios.html
cnpm install --save vue-axios
- main.js reference Axios
import axios from 'axios'
import VueAxios from 'vue-axios'
Vue.use(VueAxios, axios)
- Prepare data
{
  "name": "Jiangnan",
  "url": "https://blog.csdn.net/weixin_45842494/article/details/122592812",
  "page": 1,
  "isNonProfit": true,
  "address": {
    "street": "Light gate",
    "city": "Xi'an, Shaanxi",
    "country": "China"
  },
  "links": [
    {
      "name": "bilibili",
      "url": "https://bilibili.com"
    },
    {
      "name": "Jiangnan",
      "url": "https://blog.csdn.net/weixin_45842494/article/details/122592812"
    },
    {
      "name": "Baidu",
      "url": "https://www.baidu.com/"
    }
  ]
}
Note: only the files in our static directory can be accessed, so we put the static files in this directory/ static/mock/data.json
<script>
export default {
name: "UserProfile",
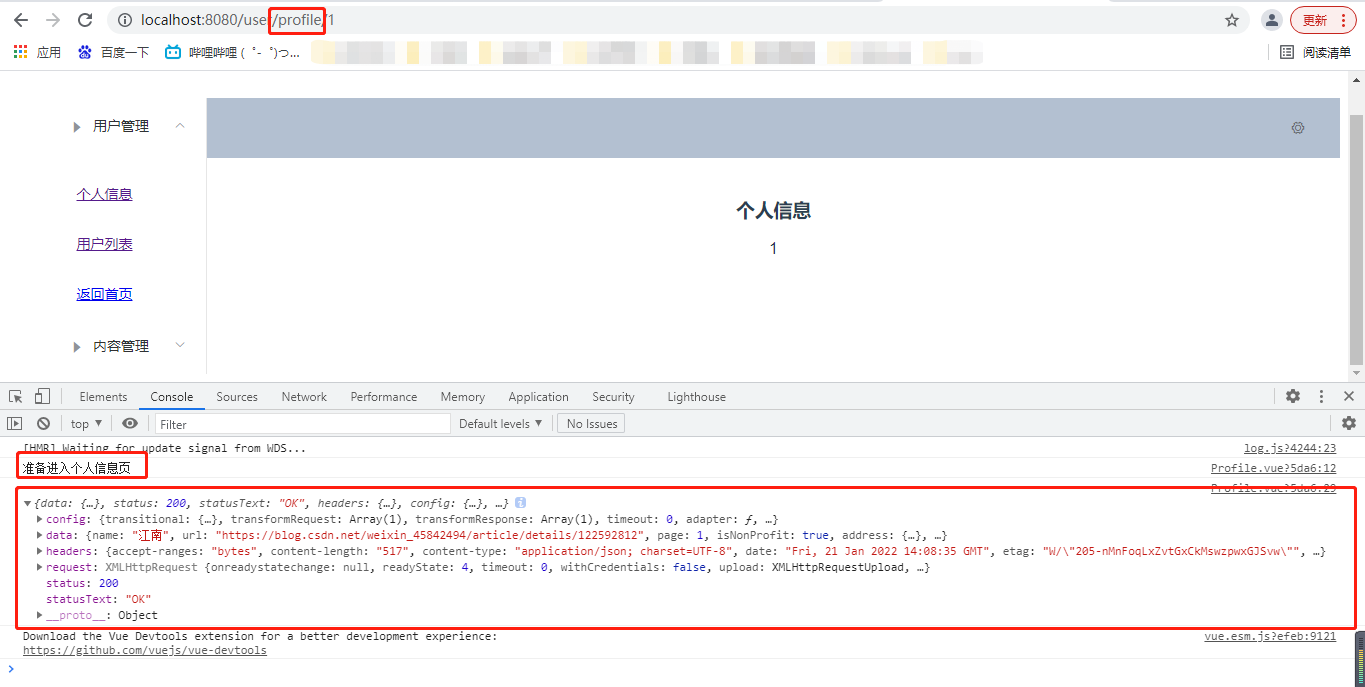
beforeRouteEnter: (to, from, next) => {
console.log("Ready to enter the personal information page");
next(vm => {
//Execute the getData method before entering the route
vm.getData()
});
},
beforeRouteLeave: (to, from, next) => {
console.log("Ready to leave the profile page");
next();
},
//axios
methods: {
getData: function () {
this.axios({
method: 'get',
url: 'http://localhost:8080/static/mock/data.json'
}).then(function (response) {
console.log(response)
})
}
}
}
</script>
Note: in beforeRouteEnter, we call the method getData() in methods, so that we can get the data we want and display it before we refresh the page.
- test