[Tencent] deployment practice of single version of Lanjing Zhiyun operation and maintenance platform
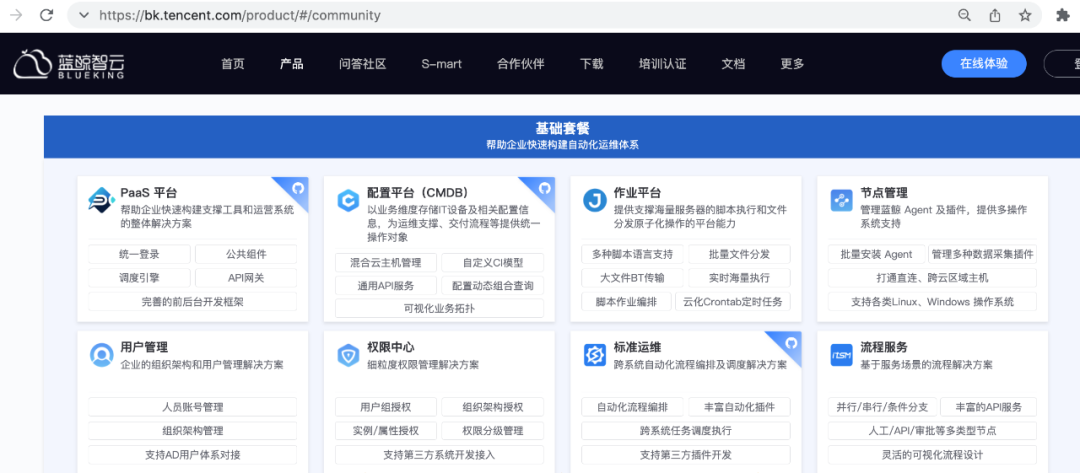
[blue whale Zhiyun community version] is a set of permanently free operation and maintenance solutions supporting privatization deployment opened by Tencent.
This version includes CMDB management, job script execution, process arrangement, log retrieval, monitoring alarm, fault self-healing, micro service container management and continuous integration (CI), which helps enterprise technicians quickly build the ability of integrated operation and maintenance support and R & D efficiency improvement, and promote the digital transformation of enterprises.
(click to enlarge the picture)
1. Basic environmental preparation
The recommended operating system is CentOS 7 Version 6 and above, computing resources: 8-core 16G memory and above
yum source and other basic environment initialization commands
wget -O /etc/yum.repos.d/CentOS-Base.repo http://mirrors.cloud.tencent.com/repo/centos7_base.repo
wget -O /etc/yum.repos.d/epel.repo http://mirrors.cloud.tencent.com/repo/epel-7.repo
yum clean all
yum makecache
sestatus
setenforce 0
sed -i 's/^SELINUX=enforcing/SELINUX=disabled/g' /etc/selinux/config
systemctl stop firewalld
systemctl disable firewalld
yum -y install rsync
cat >> /etc/security/limits.conf << EOF
root soft nofile 102400
root hard nofile 102400
EOF
Last time synchronization
ntpdate ntp.aliyun.com
You can refer to the official environmental preparation detailed documents
https://bk.tencent.com/docs/document/6.0/127/7543
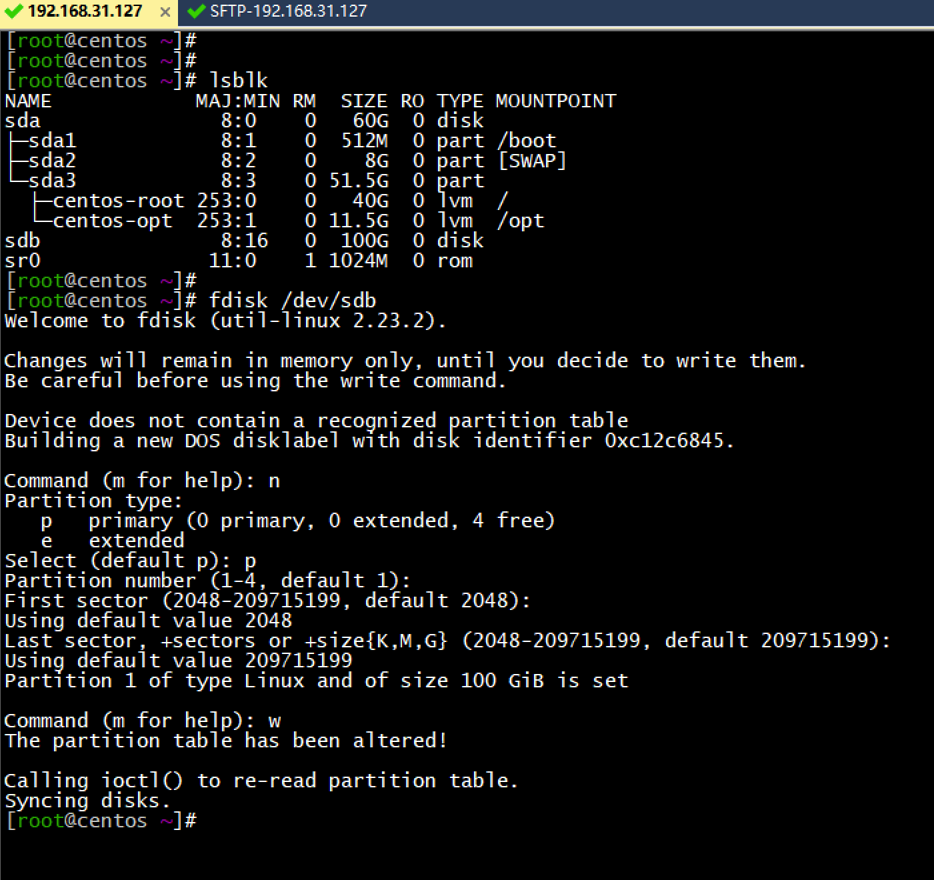
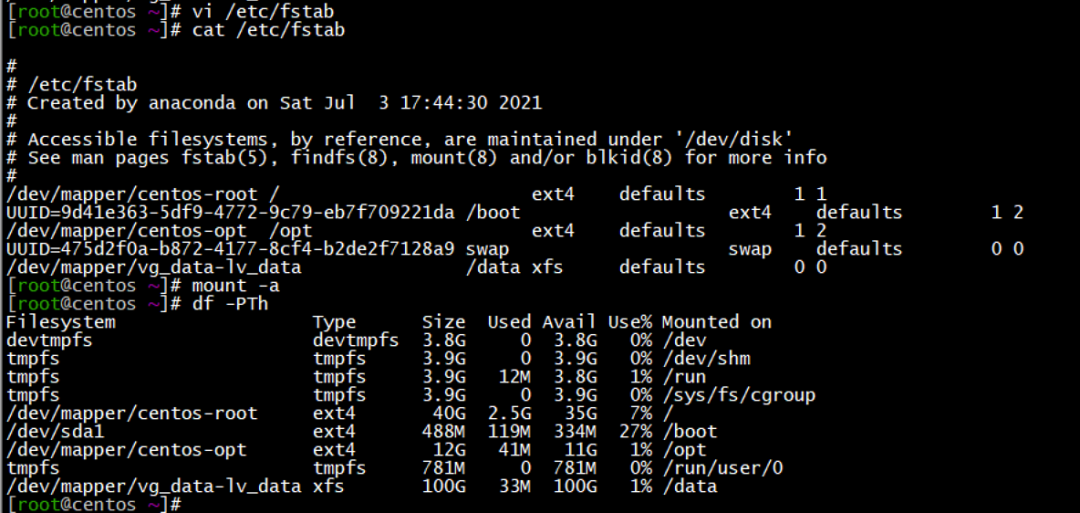
2. Disk partition preparation
It is recommended to prepare a separate disk larger than 100G for / data partition
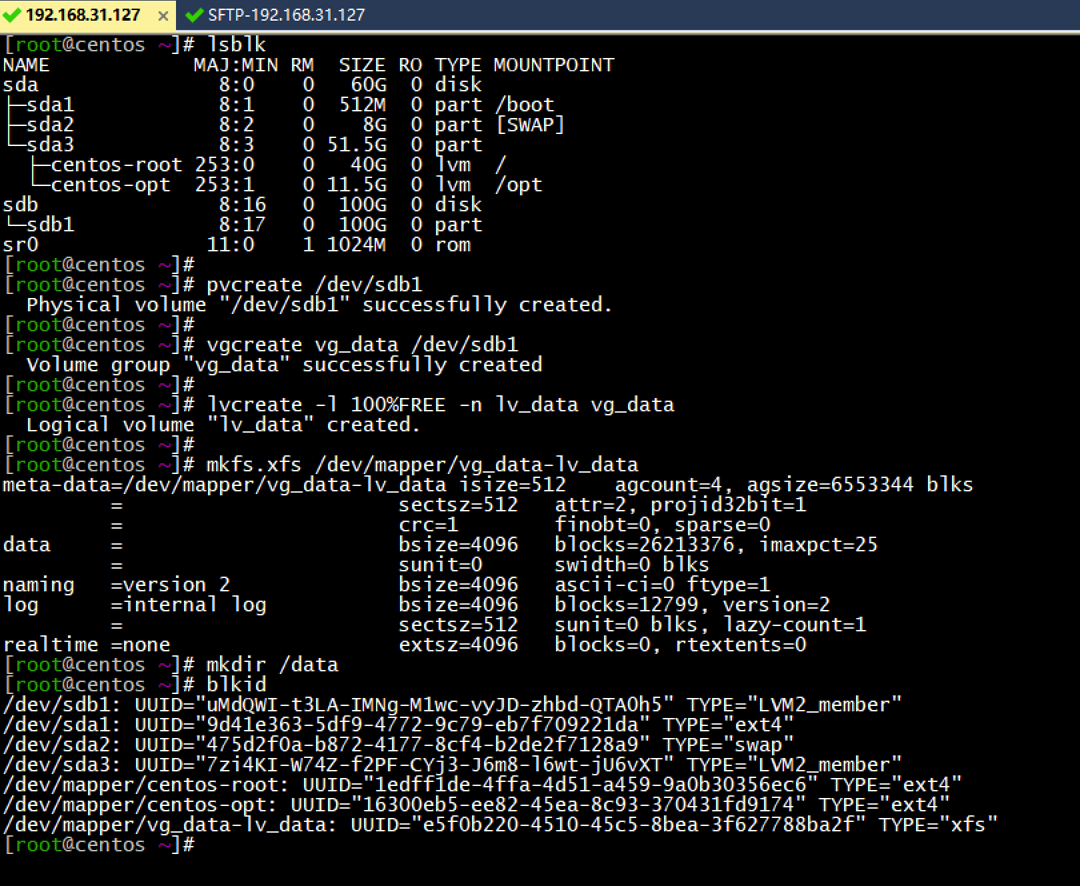
For example, sdb disk and mount it to the / data directory in the way of LVM
fdisk /dev/sdb
#There is only one area
lsblk
pvcreate /dev/sdb1
vgcreate vg_data /dev/sdb1
lvcreate -l 100%FREE -n lv_data vg_data
mkfs.xfs /dev/mapper/vg_data-lv_data
mkdir /data
blkid
vi /etc/fstab
#Add a row
/dev/mapper/vg_data-lv_data /data xfs defaults 0 0
cat /etc/fstab
mount -a
(click to enlarge the picture)
(click to enlarge the picture)
(click to enlarge the picture)
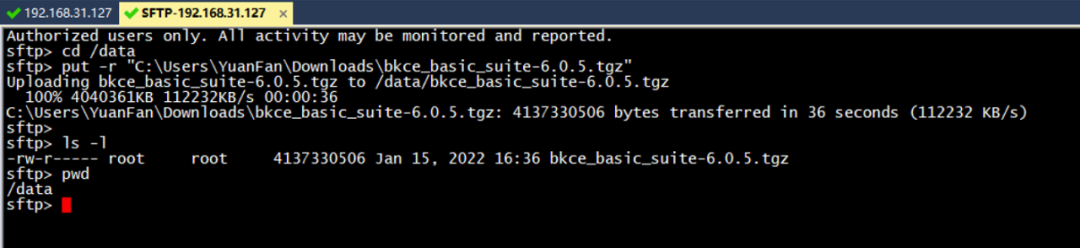
3. Install bk
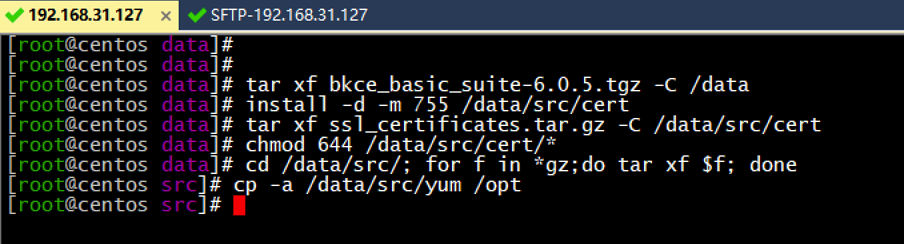
1. Download the basic installation package from the official website and unzip it to / data
Please download the actual version from the official website of blue whale.
tar xf bkce_basic_suite-6.0.5.tgz -C /data
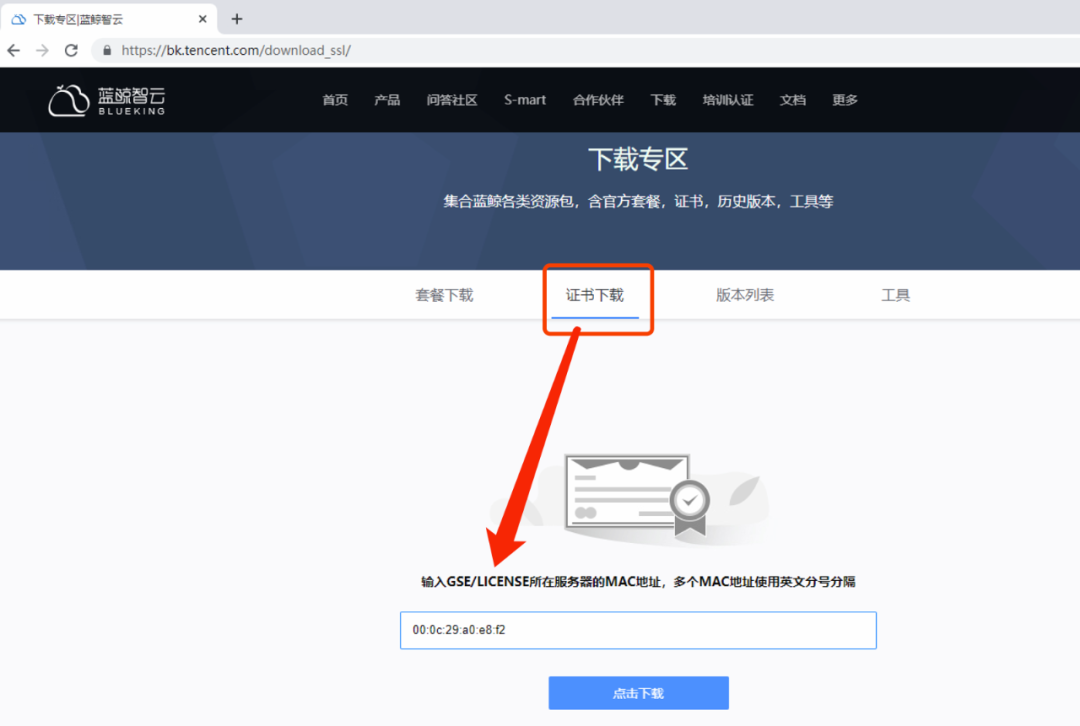
2. After obtaining the MAC address of the machine, download the certificate file and extract it to the / data/src/cert directory
install -d -m 755 /data/src/cert
tar xf ssl_certificates.tar.gz -C /data/src/cert
chmod 644 /data/src/cert/*
#Unzip each product package
cd /data/src/; for f in *gz;do tar xf $f; done
#Copy rpm package
cp -a /data/src/yum /opt
(click to enlarge the picture)

(click to enlarge the picture)
(click to enlarge the picture)
3. Modify bk_install script
cd /data/install
sed -i '/start job/i\\t./pcmd.sh\ -m\ job\ \"sed -i '\'/JAVA_OPTS/c\ JAVA_OPTS="-Xms128m -Xmx128m"\'\ /etc/sysconfig/bk-job-*\" bk_install
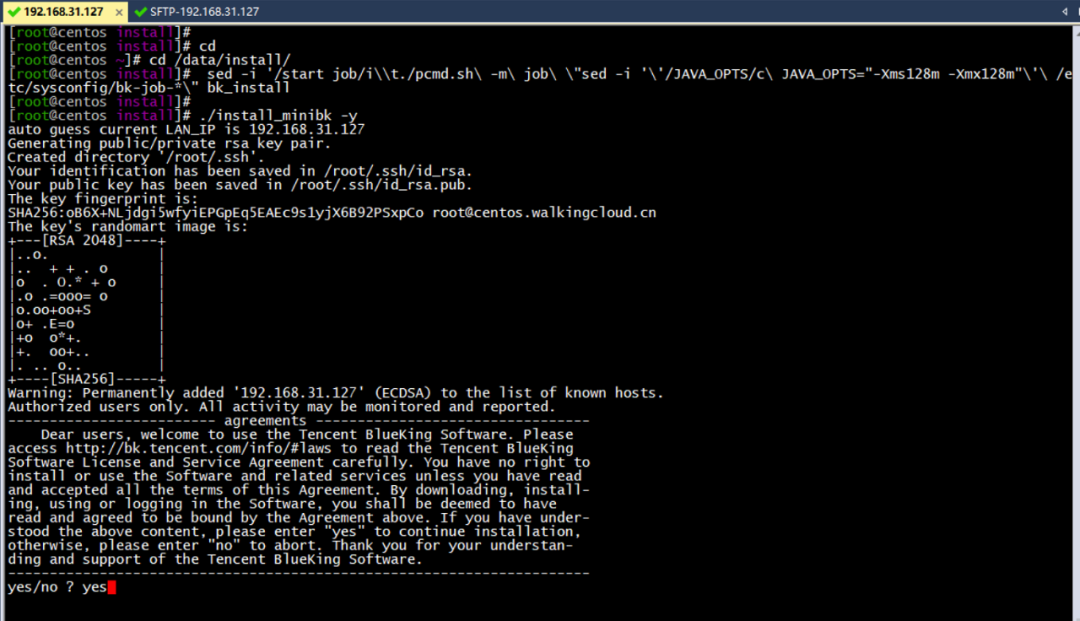
4. Installation
cd /data/install
./install_minibk -y
(click to enlarge the picture)
In case of failure in the installation process, please locate and solve it first, and then rerun the installation instructions in case of failure.
5. After the deployment, execute the script to reduce memory consumption to ensure the stability of the environment
#Execute script to reduce memory consumption
cd /data/install/
bash bin/single_host_low_memory_config.sh tweak all
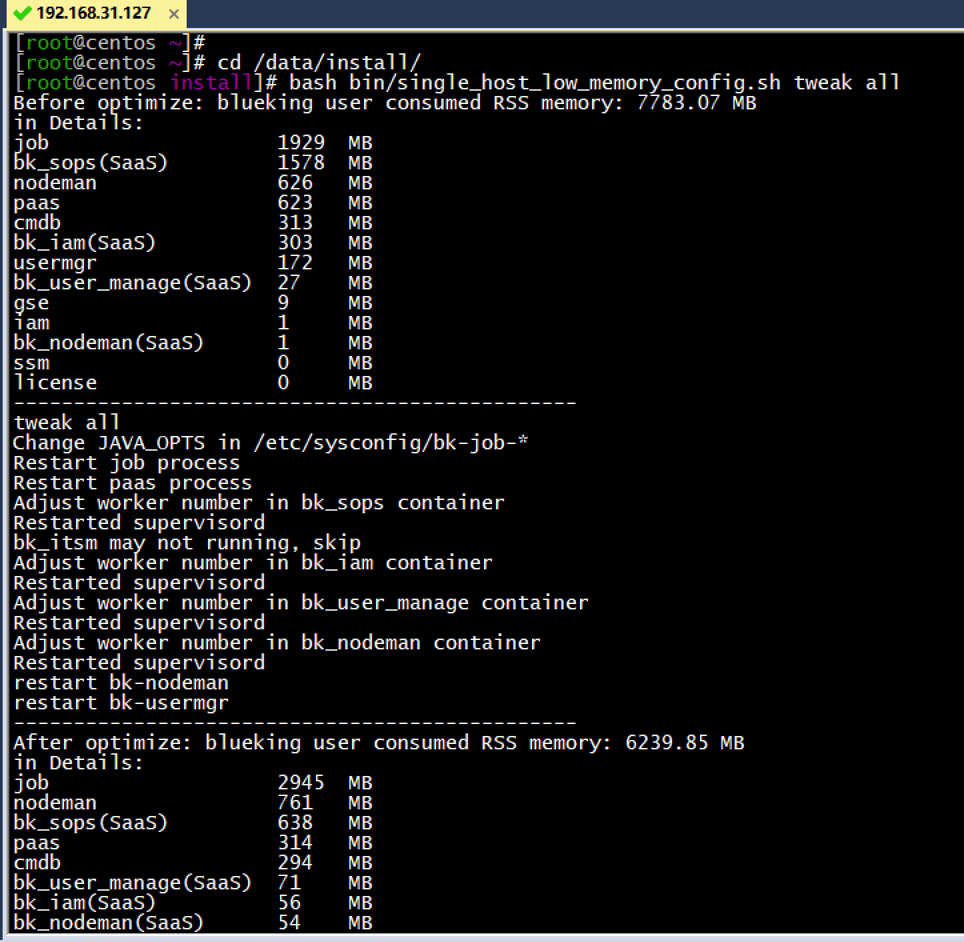
(click to enlarge the picture)
6. Loading blue whale related maintenance commands
source ~/.bashrc
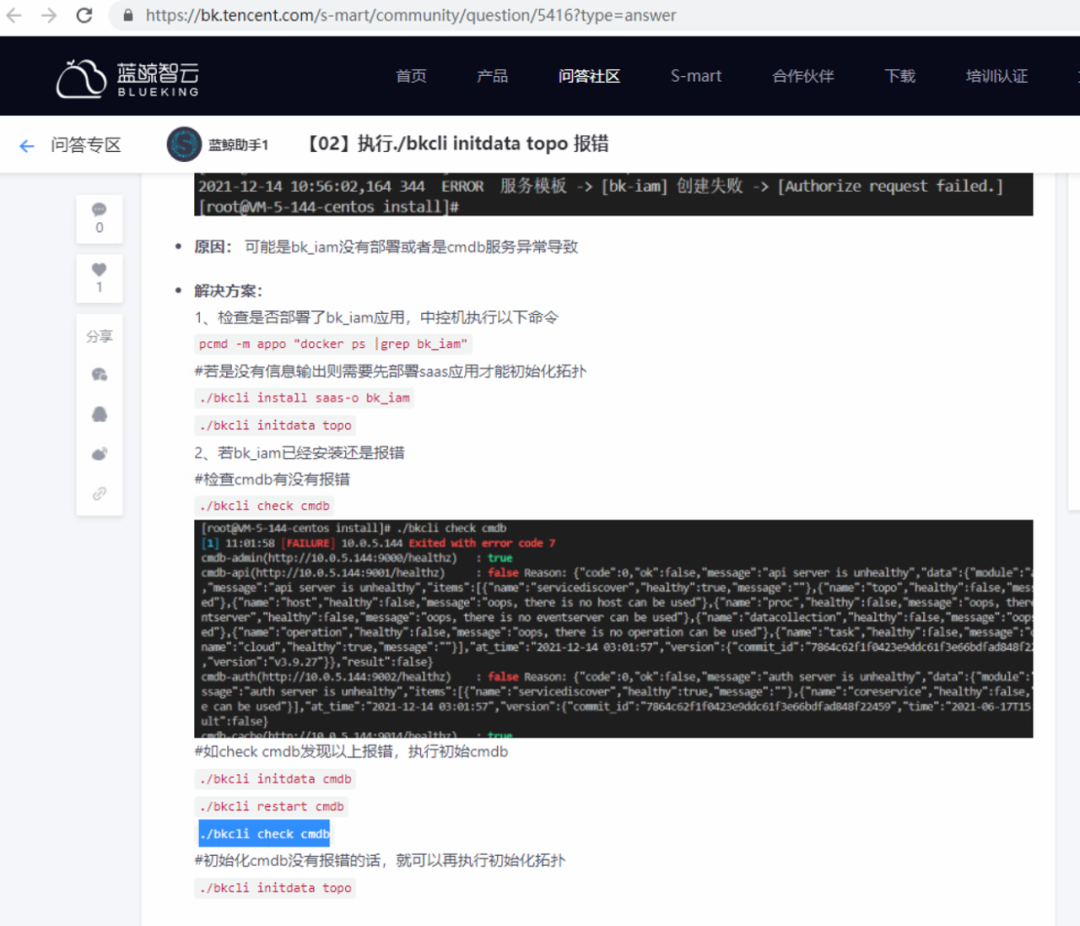
7. Initialize blue whale service topology
cd /data/install/
./bkcli initdata topo
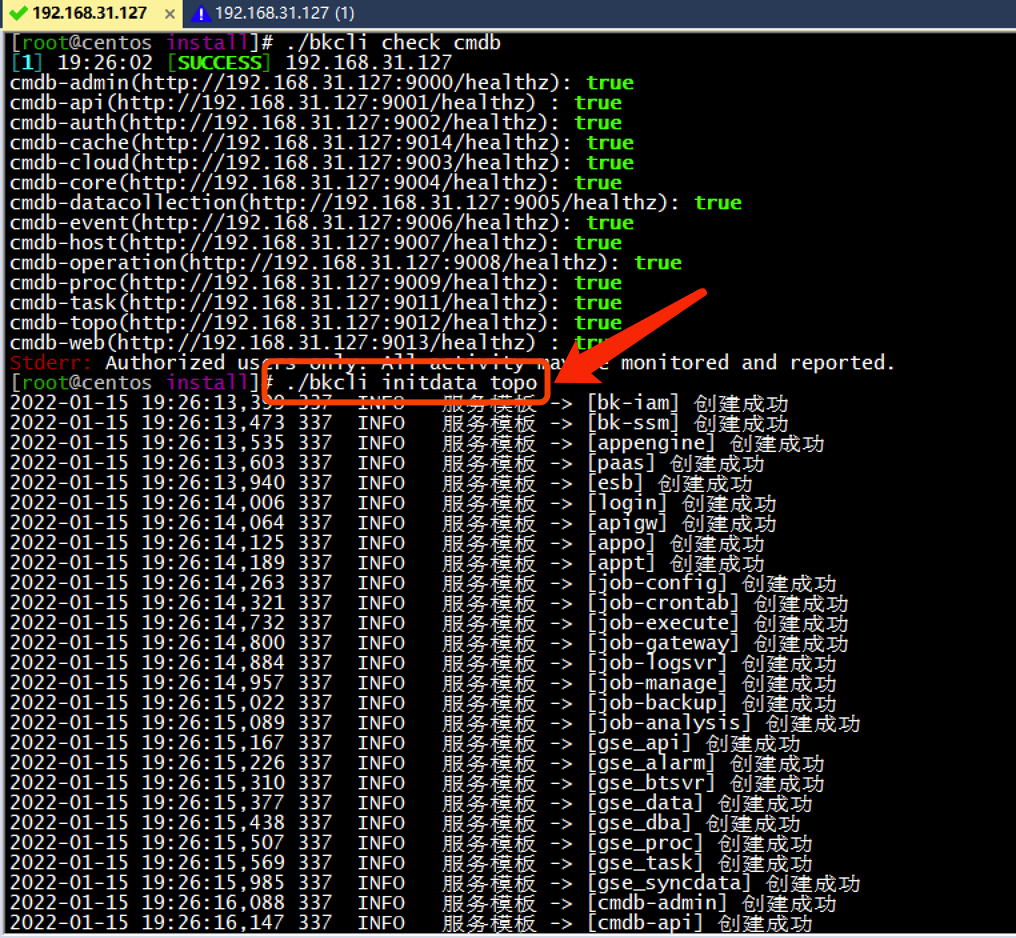
(click to enlarge the picture)
(click to enlarge the picture)
8. Detect relevant service status
cd /data/install/
echo bkssm bkiam usermgr paas cmdb gse job consul | xargs -n 1 ./bkcli check
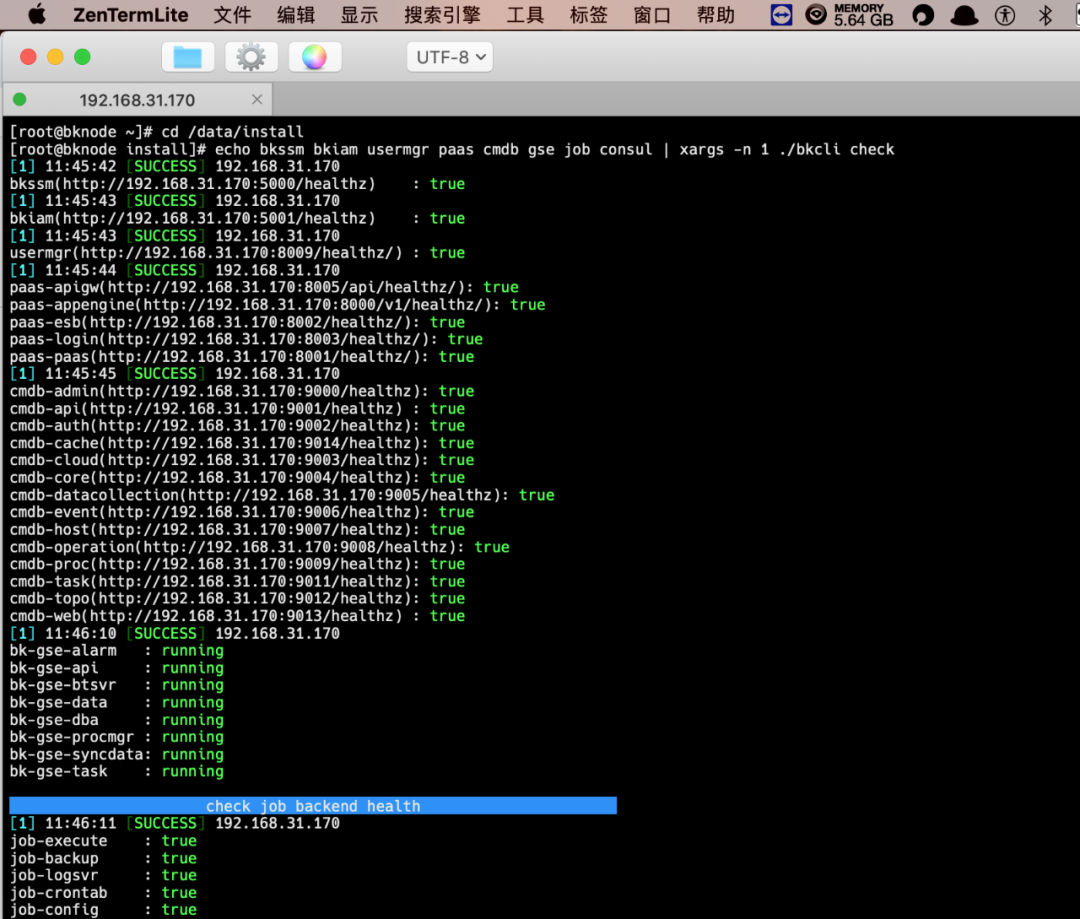
(click to enlarge the picture)
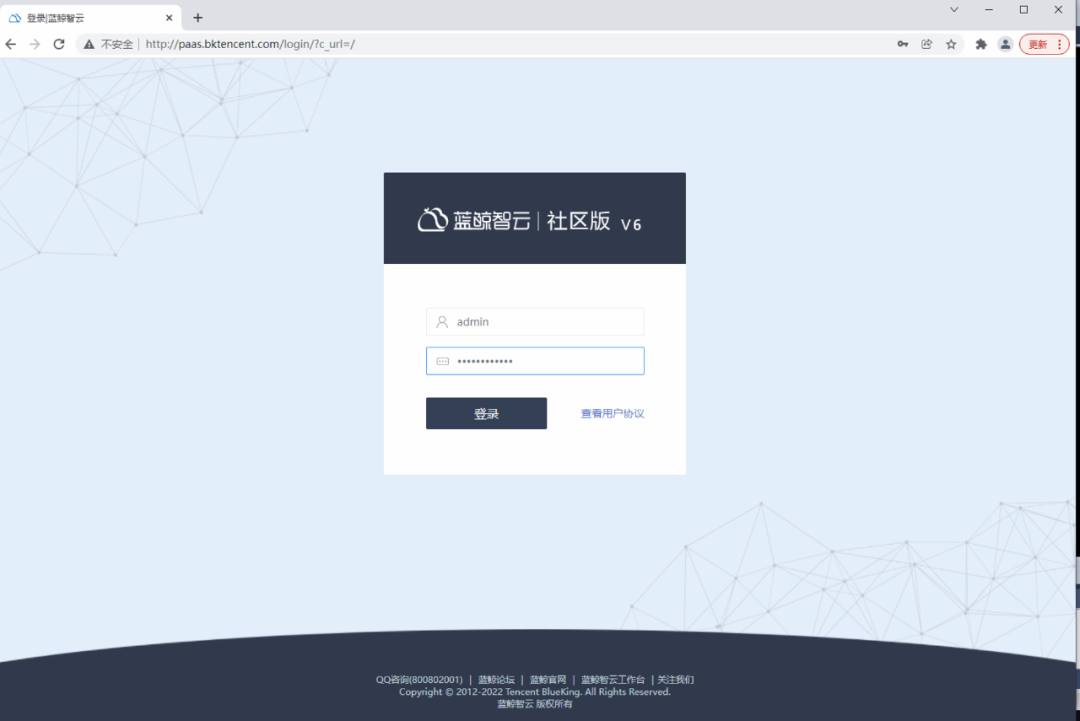
4. Visit blue whale and log in
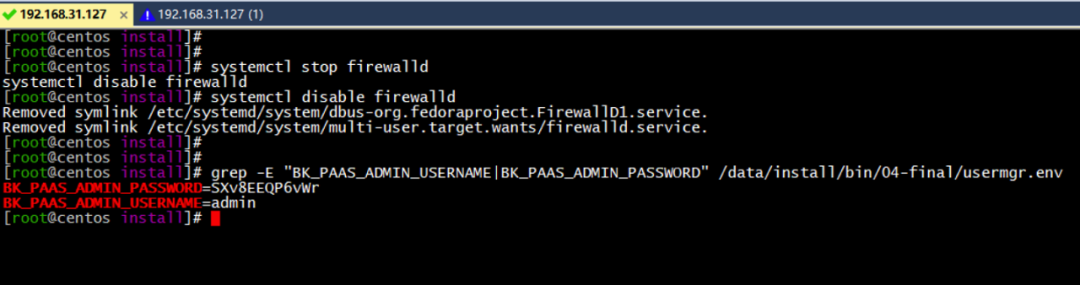
Execute the following command to obtain the administrator account and password.
grep -E "BK_PAAS_ADMIN_USERNAME|BK_PAAS_ADMIN_PASSWORD" /data/install/bin/04-final/usermgr.env
(click to enlarge the picture)
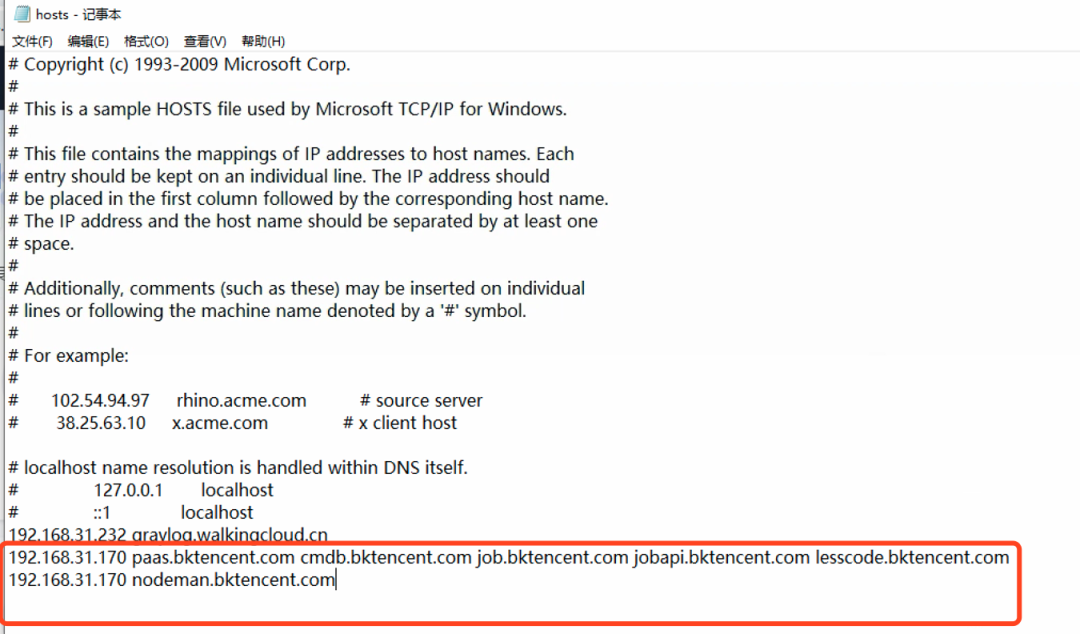
Local host modify hosts local parsing file login
(click to enlarge the picture)
(click to enlarge the picture)
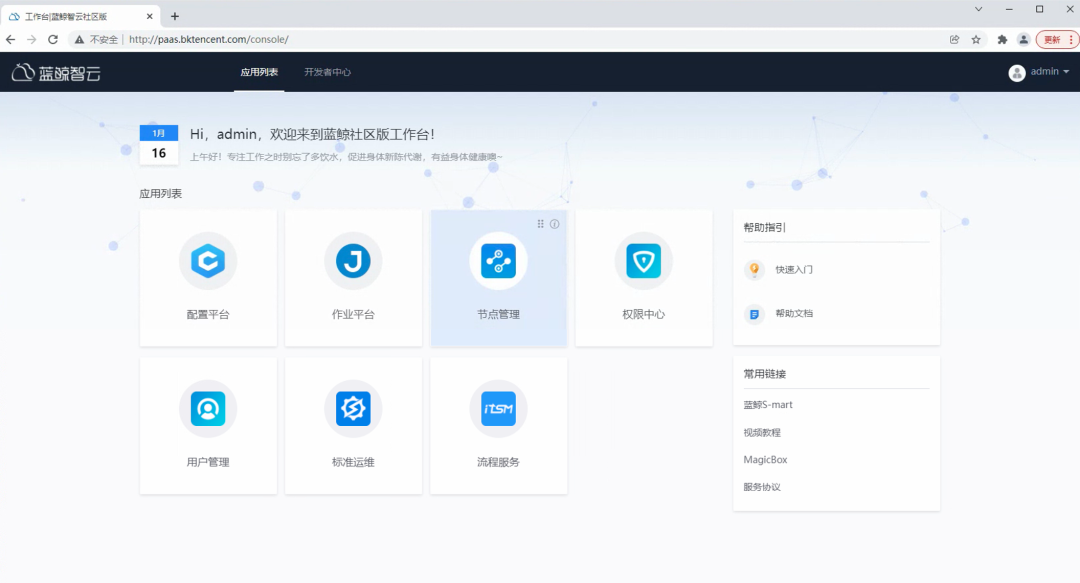
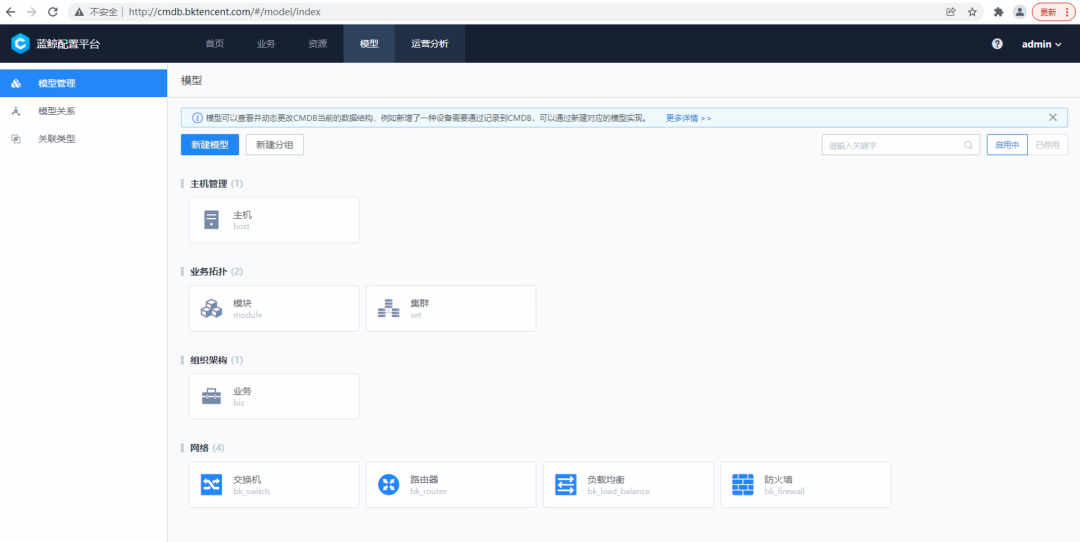
There are 7 modules for login by default
(click to enlarge the picture)
Their functions can be studied by themselves
(click to enlarge the picture)