1, Introduction to Django framework
Refer to official documents: Django official documents https://docs.djangoproject.com/zh-hans/3.2/
2, Create the first Django project
Create a new project - > select Django
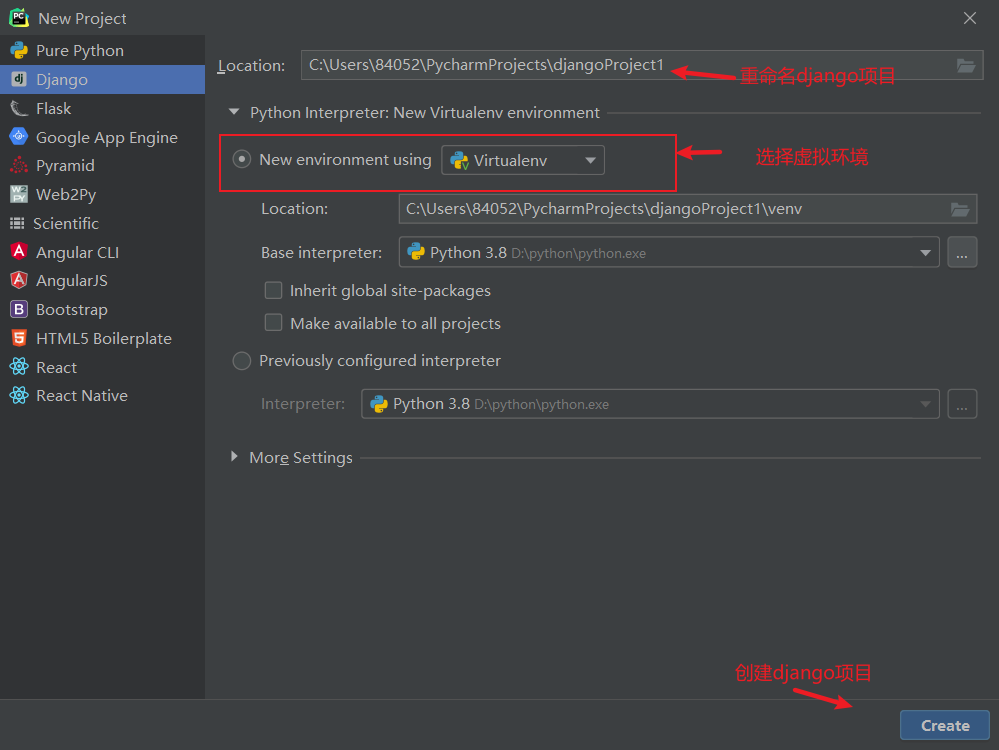
Django will be installed automatically
If the network speed is too slow, you need to modify the pip source
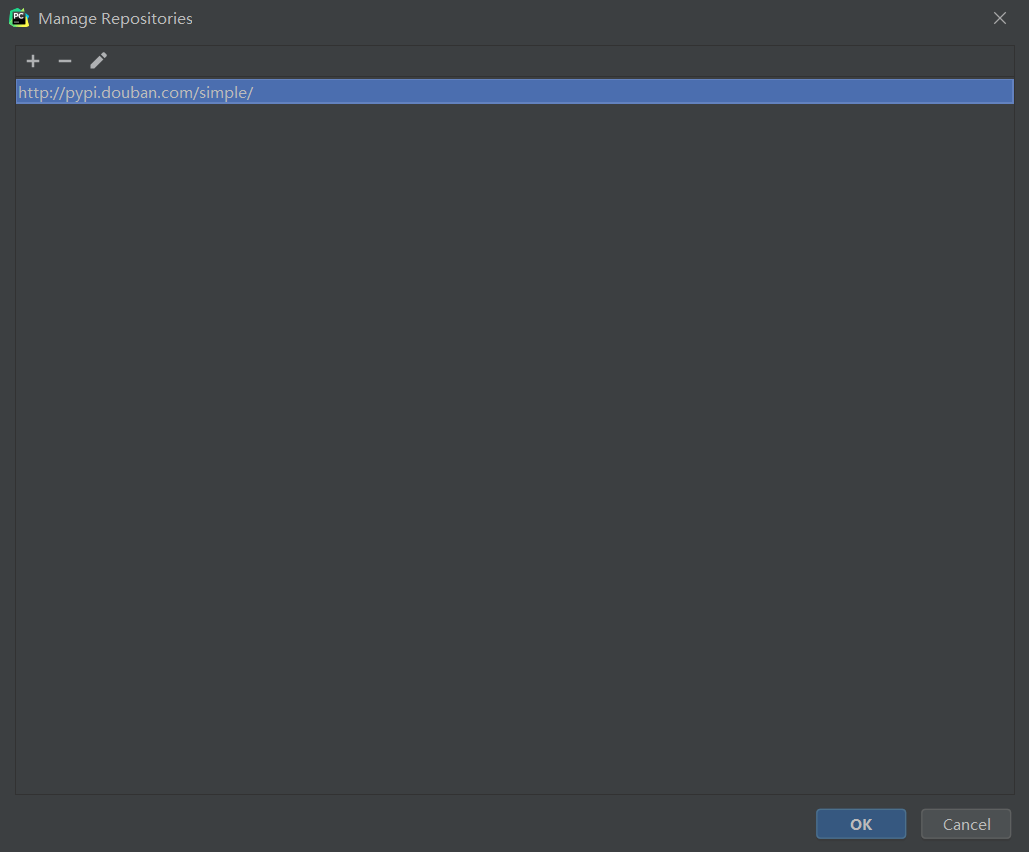
Modify pip source:

Click the + sign
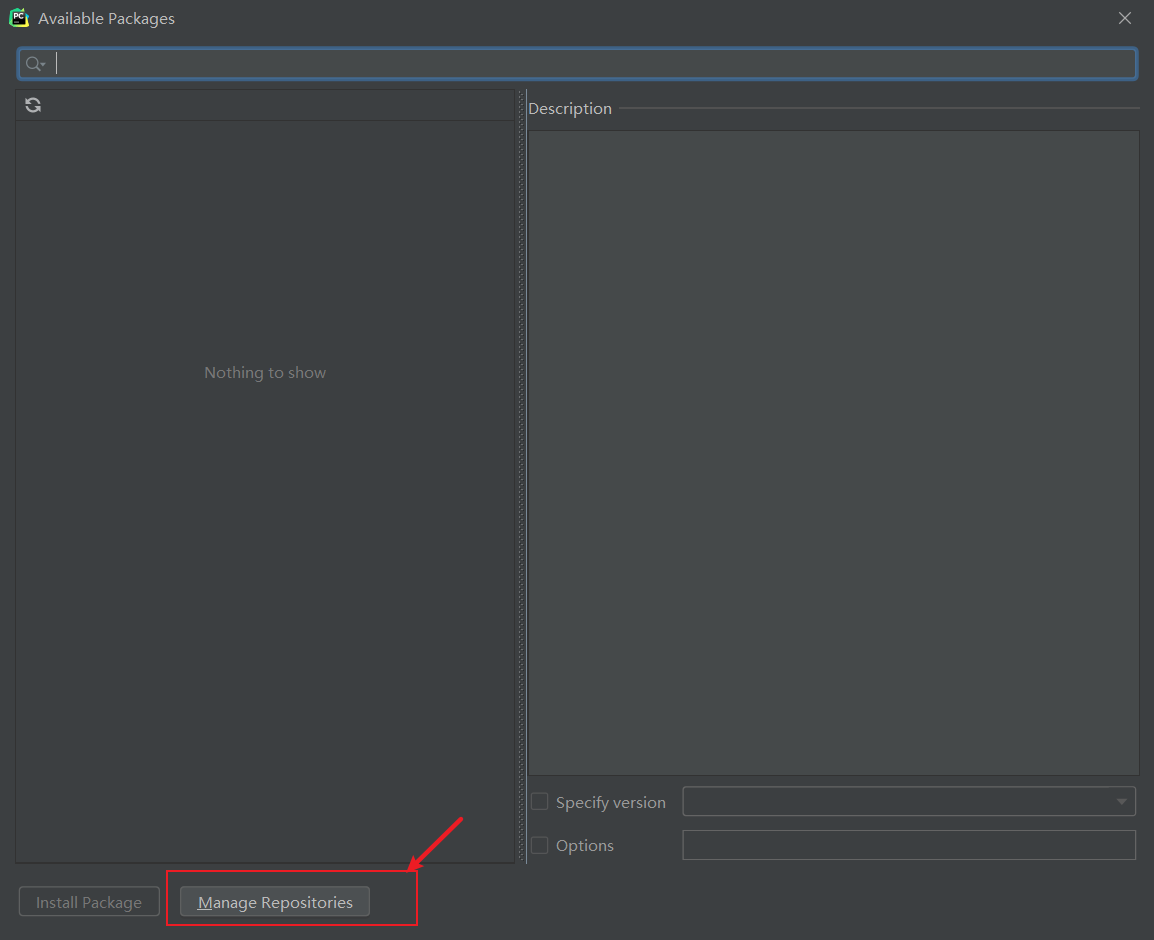
Then click Manage Repositories
Add Qinghua source (more complete from east to West) or Douban source (faster)
Once you create it again, you can find that django installation is faster.
Test:
terminal ----> python manage. Py runserver 6789 run Django
Enter the web page: http://127.0.0.1:6789/
3, Creation and use of applications
terminal window input
python manage.py startapp BookApp
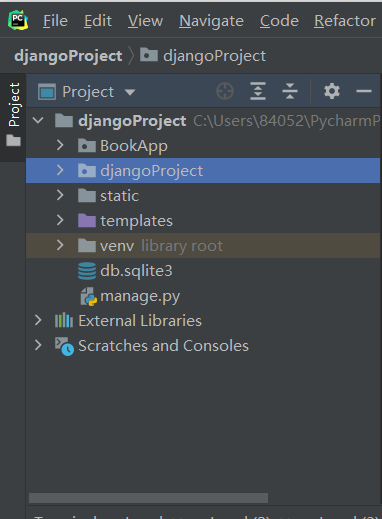
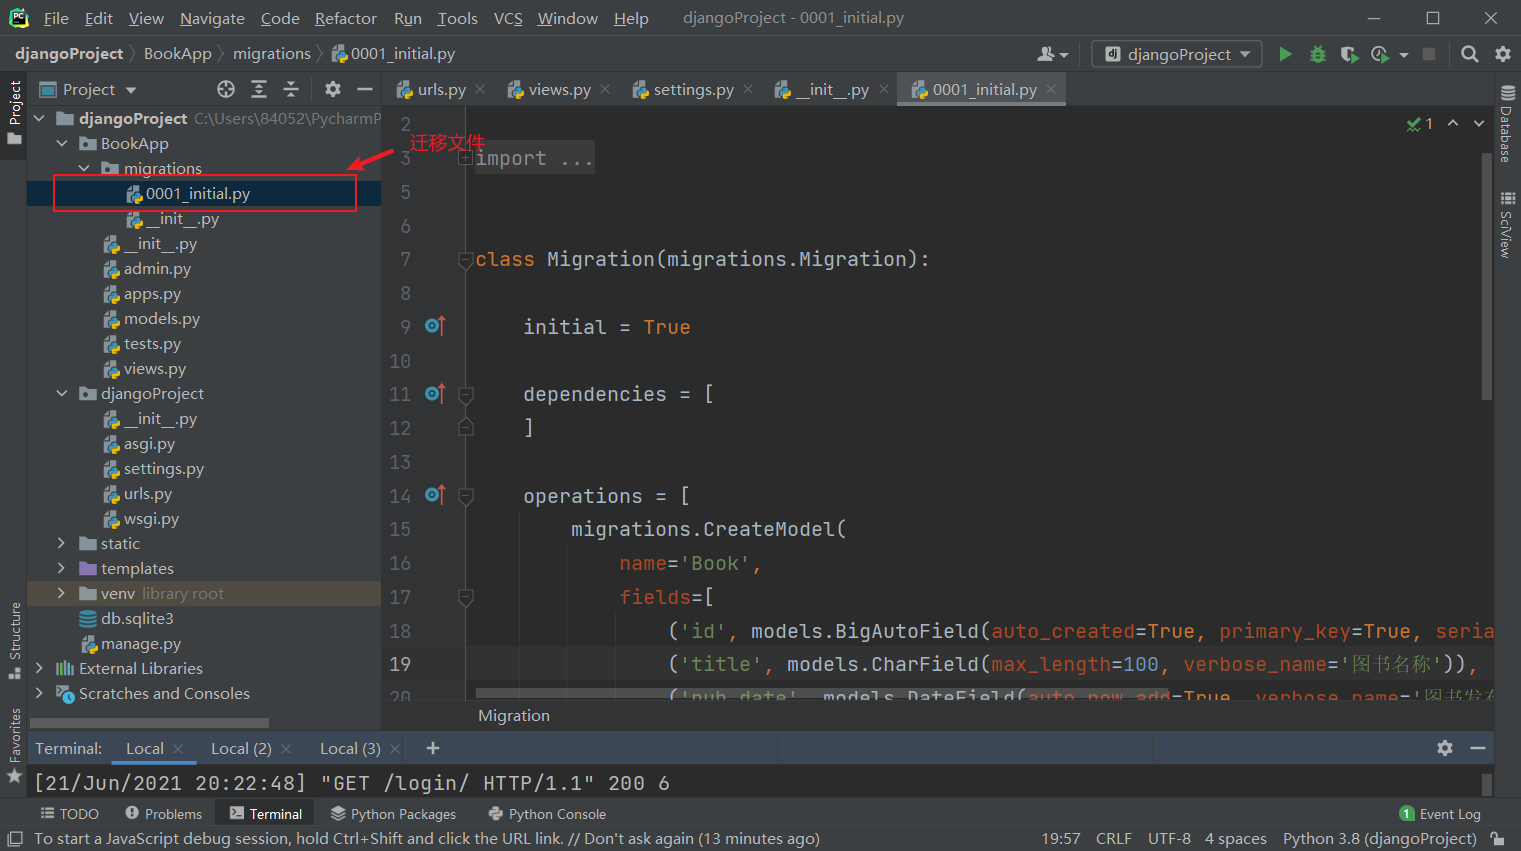
djangoproject under Project on the left
Routing configuration: set the function (business logic) that the user executes when accessing a path
Edit URLs py
from BookApp.views import index, login, logout, register
# Routing configuration: set the function (business logic) that the user executes when accessing a path
urlpatterns = [
    path('admin/', admin.site.urls),
    path('', index),
    path('login/', login),
    path('register/', register),
    path('logout/', logout),
]
The view function is written. All view functions of django receive requests and return responses
Edit bookapp / views py
from django.http import HttpRequest, HttpResponse
# Create your views here.

# View function (processing logic): all view functions of django receive requests and return responses
def index(request):
    return HttpResponse('Book management system')

def login(request):
    return HttpResponse('land')

def logout(request):
    return HttpResponse('cancellation')

def register(request):
    return HttpResponse('register')
terminal ---->
python manage.py runserver 6789 open websites and visit them one by one


(key understanding) access process analysis:
- Browser input http://127.0.0.1:6789/login/ Send a request to port 6789 of 127.0.0.1, requesting path=/login/
- The wsgi of Django web server receives the request, loads the configuration file, and reads the main route configuration file, diangoproject / URLs py
- Find the path=/login / function to be executed (view function) login according to the matching rules
- Execute the function, return the response and display it on the browser
4, Database model of the project
ORM object relational mapping
Because developers are not familiar with sql statements but need to operate, they can operate the database in an object-oriented way through ORM.
ORM object relational mapping: create tables, add, delete, modify and query database in an object-oriented way
ORM advantages and disadvantages:
advantage:
1.ORM makes our general database interaction simple and easy, and doesn't need to consider the damn SQL statements at all. Rapid development comes from this.
2. It can avoid the performance problems caused by some novice programs writing sql statements.
Disadvantages:
1. Performance has been sacrificed, but now various ORM frameworks are trying various methods, such as caching and delayed loading login, to alleviate this problem. The effect is remarkable.
Establishment, import and management of sqlite database
Edit models py
In django framework, class is equivalent to database table, attribute is equivalent to column name of database, and object is equivalent to a record of database table.
from django.db import models

# Create your models here.
from django.db import models

# Create your models here.
# doubt? Database operations are performed through sql statements. Why don't you see sql statements here?
"""
Requirements:
    books Book There are 2 columns of information: title,pub_date
    id    title    pub_date
    1       xxx     xx-xx-xx

"""


# Class - > database table
class Book(models.Model):
    # Attribute - > column name of database
    title = models.CharField('Book name', max_length=100)
    # auto_now=True, the time is automatically updated every time you save, auto_now_add=True, the time is automatically generated when creating a new one and will not be modified later
    pub_date = models.DateField('Book release time', auto_now_add=True)
    change_time = models.DateTimeField('Last change time', auto_now=True)

    def __str__(self):
        return self.title

    # A record in object - > database table: b = Book(title='xxx ')


class Hero(models.Model):
    gender_chioce = (
        (1, 'male'),
        (2, 'female'),
        (0, 'other'),
    )
    name = models.CharField("Character name", max_length=20)
    gender = models.IntegerField("Gender", choices=gender_chioce)
    content = models.CharField("Character description", max_length=100)
    # Book - foreign key Association, book: person = 1: n (one to many relationship, foreign key is written at the end of many)
    hbook = models.ForeignKey(Book, on_delete=models.CASCADE)  # Cascade deletion

    def __str__(self):
        return self.name
Set setting to activate sub application

python manage.py makemigrations
#Generate migration file
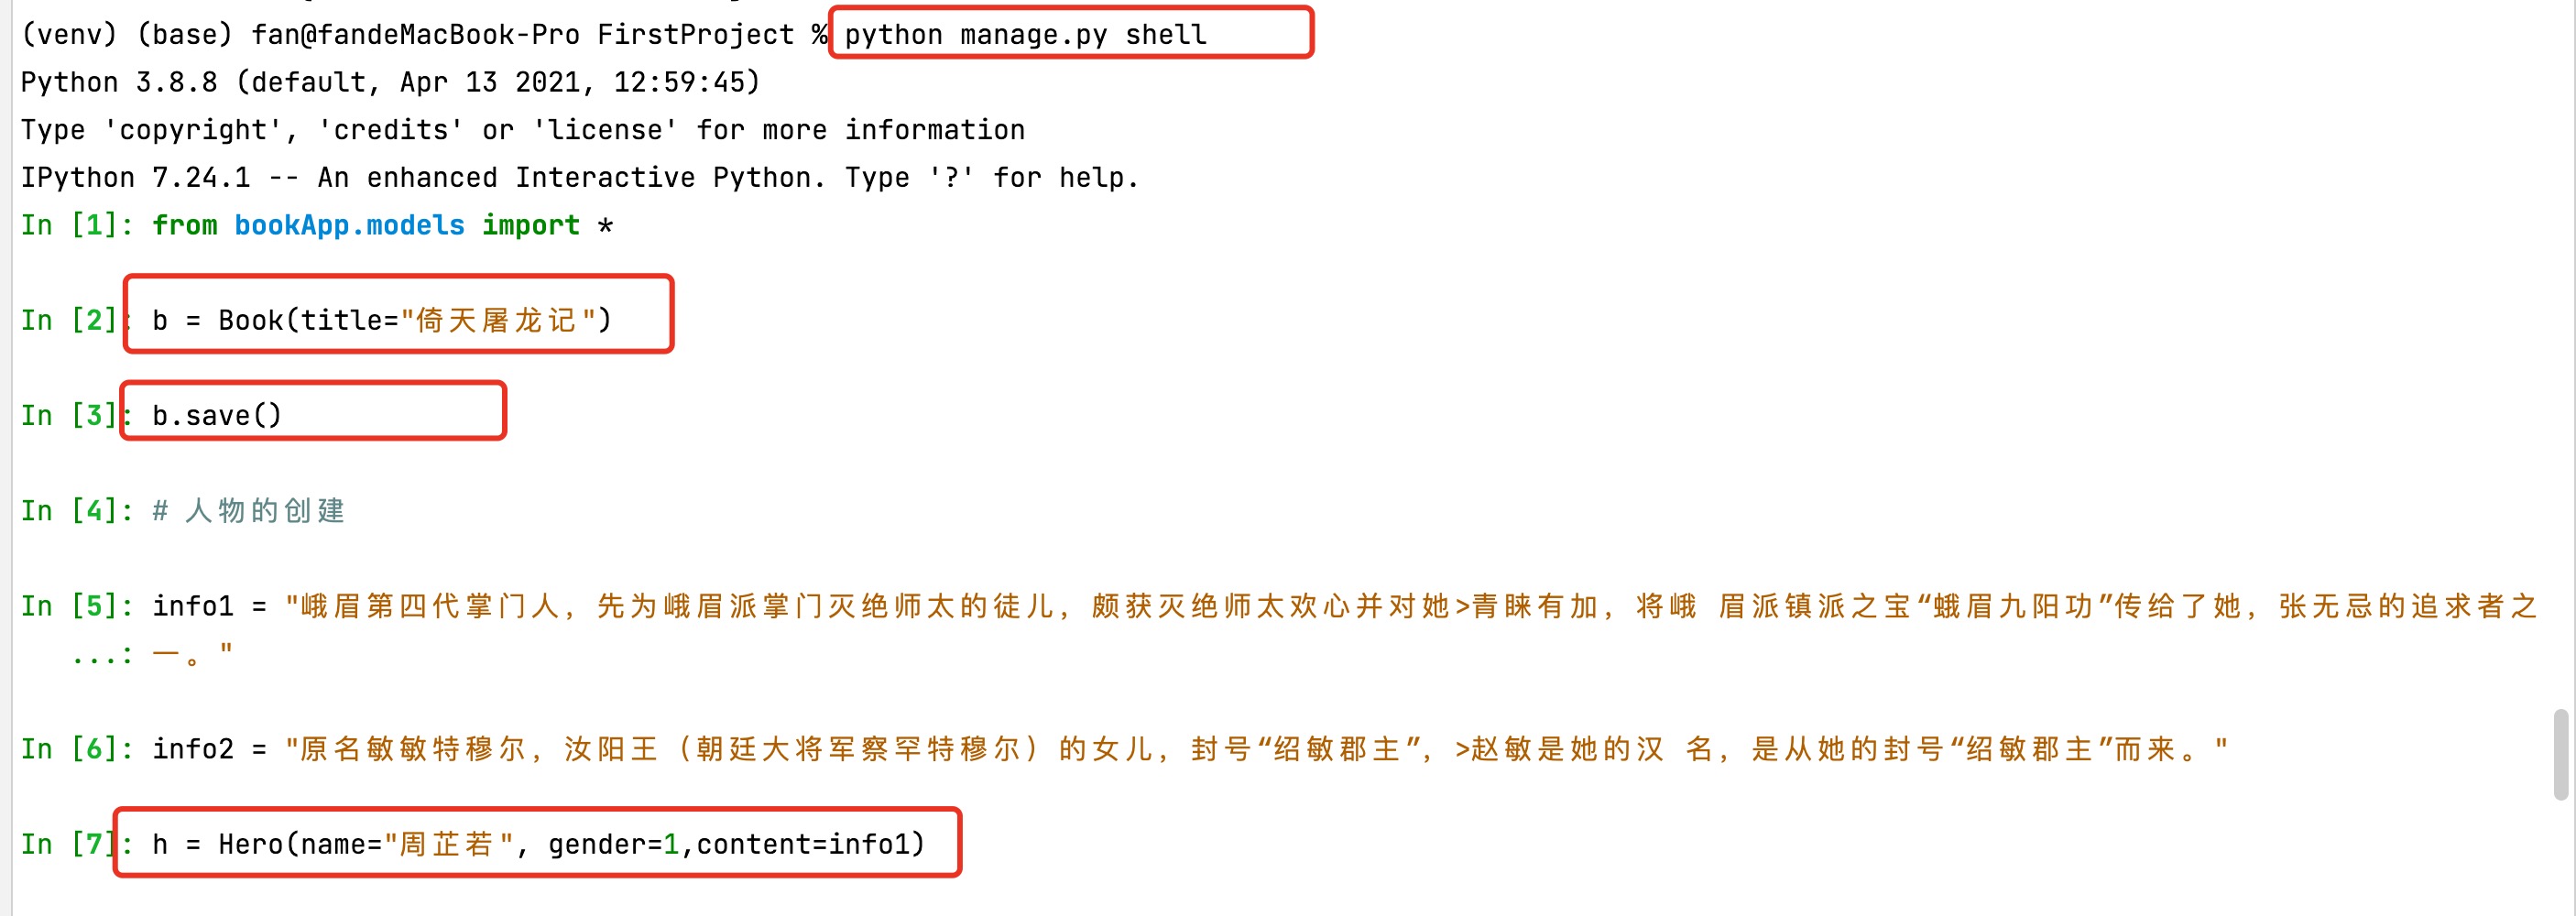
python manage.py migrate #Generate data table
python manage.py shell 	Interactive management database
pip install ipython  shell Can be supplemented in
from BookApp.models import Book,Hero
# View all books
Book.objects.all()
b = Book(title = 'booktest')
b.save()
Book.objects.all()

# query
b1 = Book.objects.get(id = 1)
b1
b1.title
b1.pub_date
from datetime import date
my_date = date(2021,1,1)
my_date
Book.objects.filter(pub_date__lt=my_date).all() #Release date is less than my_date's book
Book.objects.filter(pub_date__gt=my_date).all() #Release date is greater than my_date's book

# Book information modification
b1
b1.pub_date = date(2019,1,2)
b1.save()
b1.pub_date

# Deletion of book information
Book.objects.all()
b1.delete()
Book.objects.all()
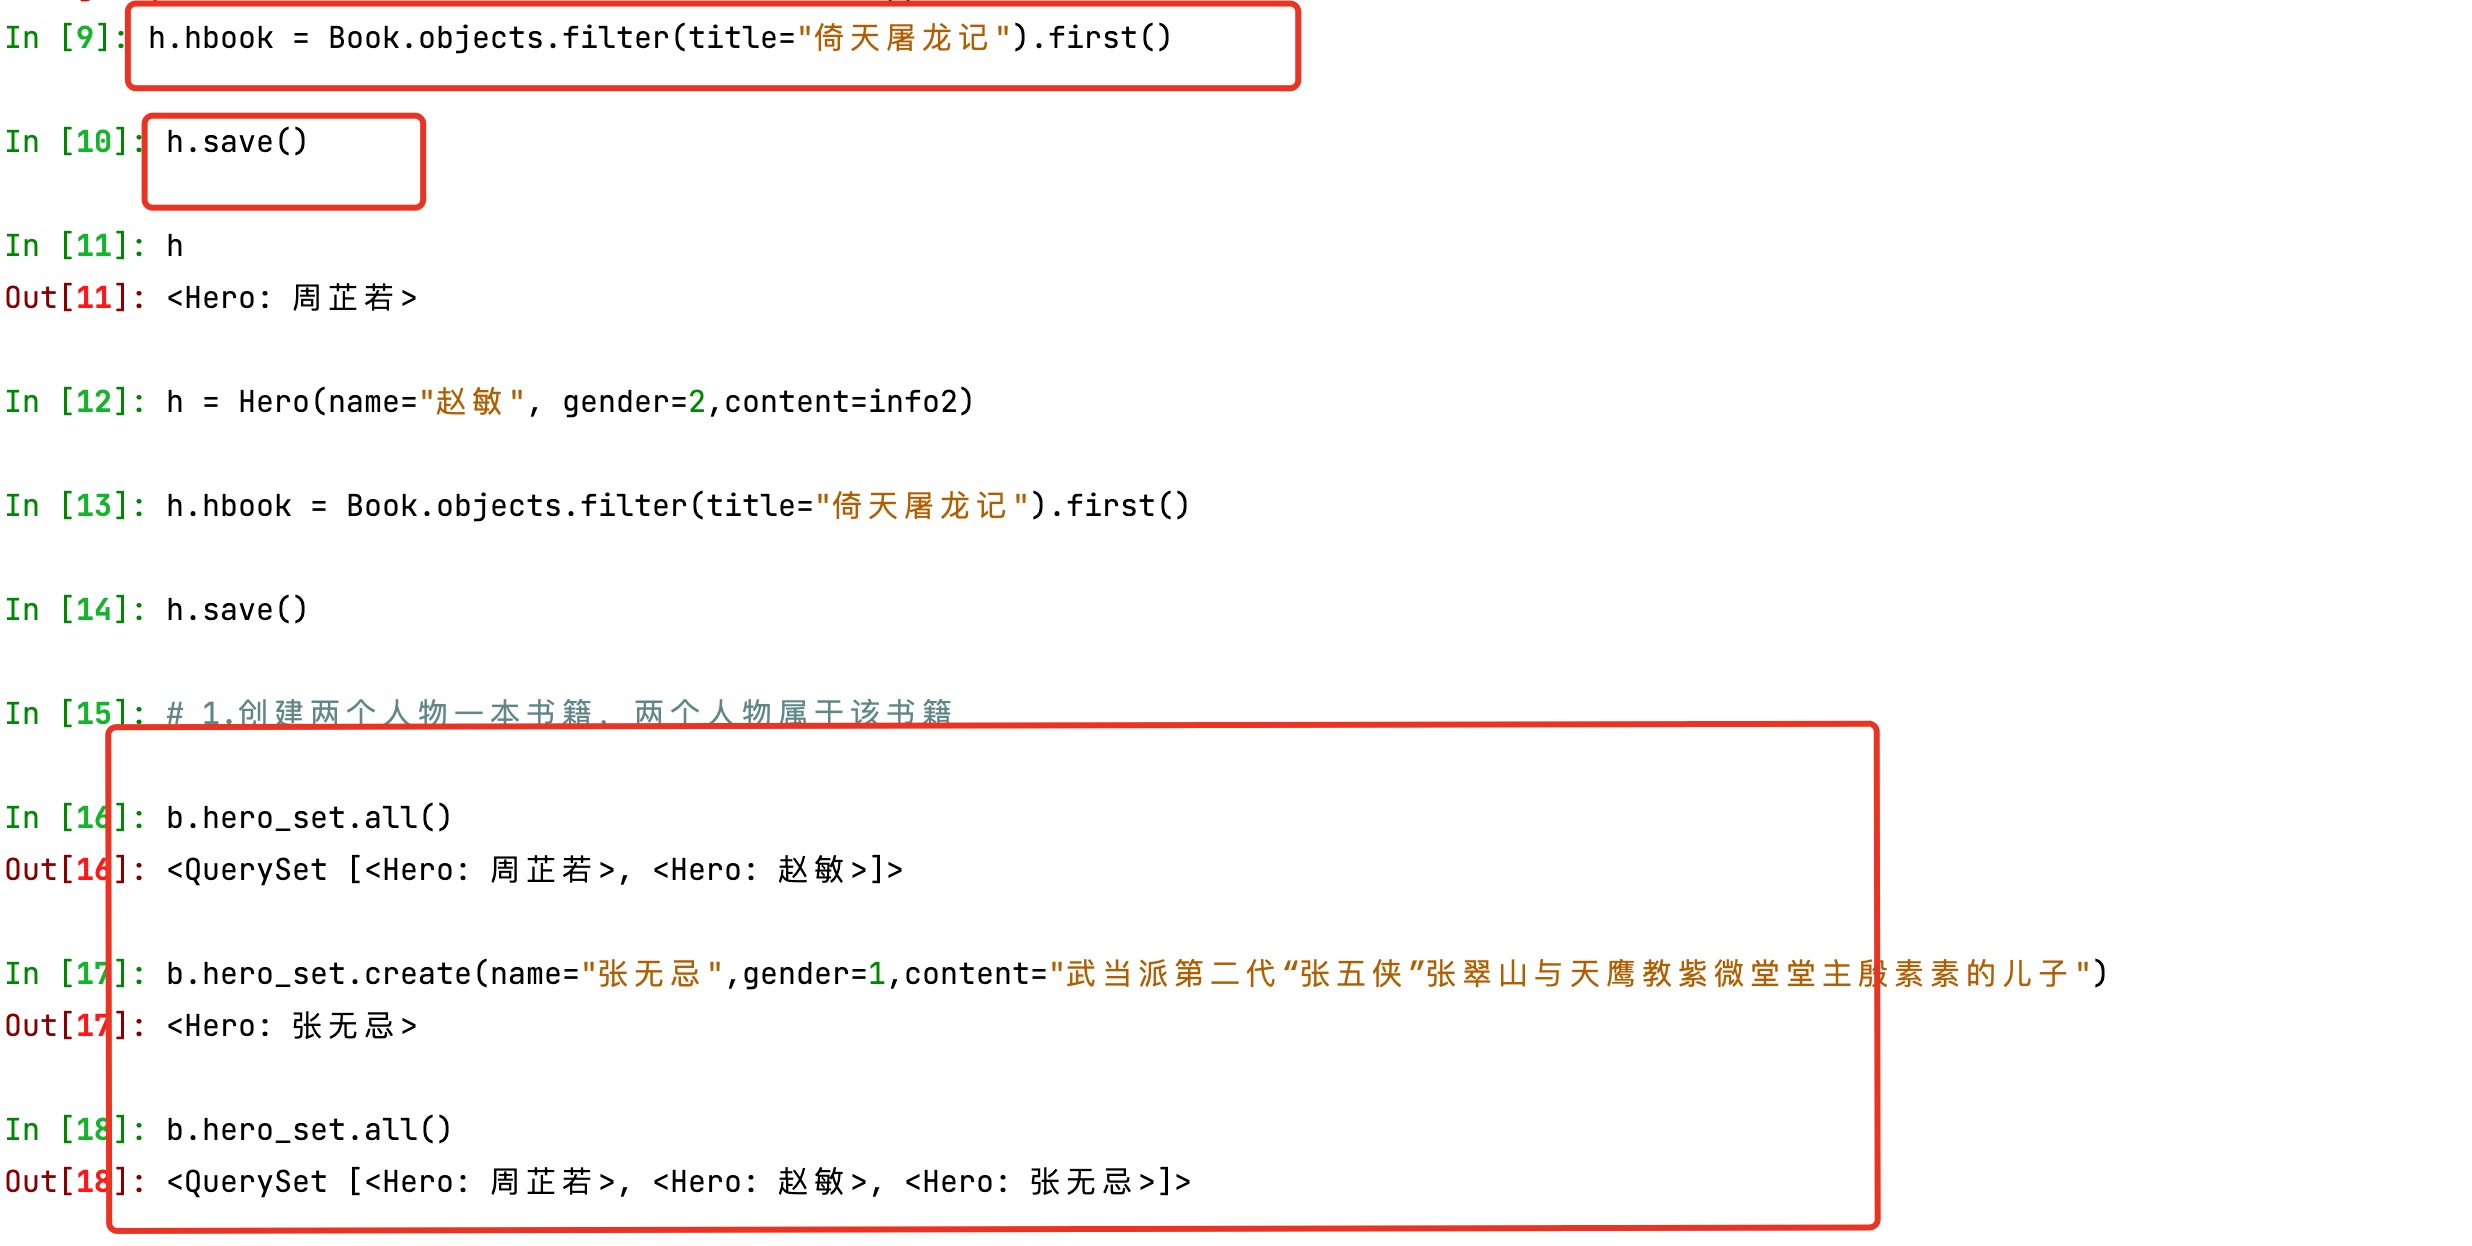
How to associate one to many relationships
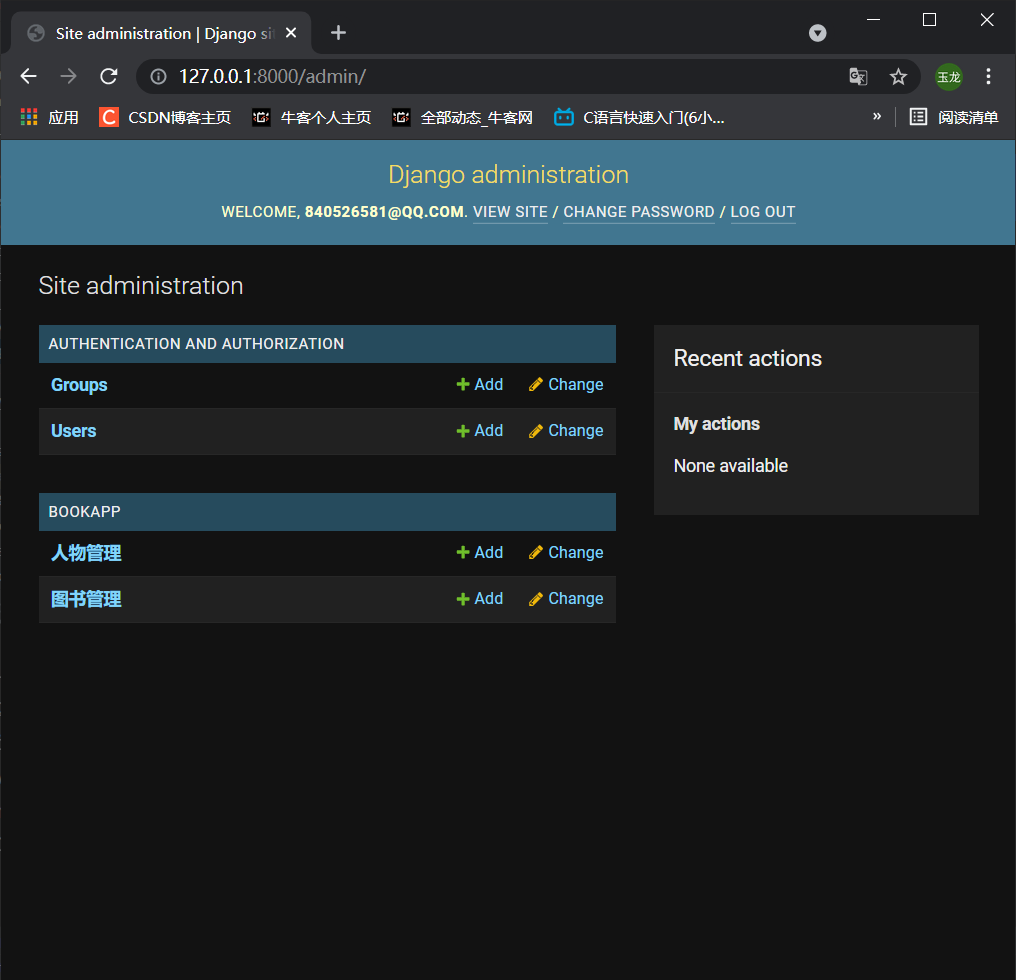
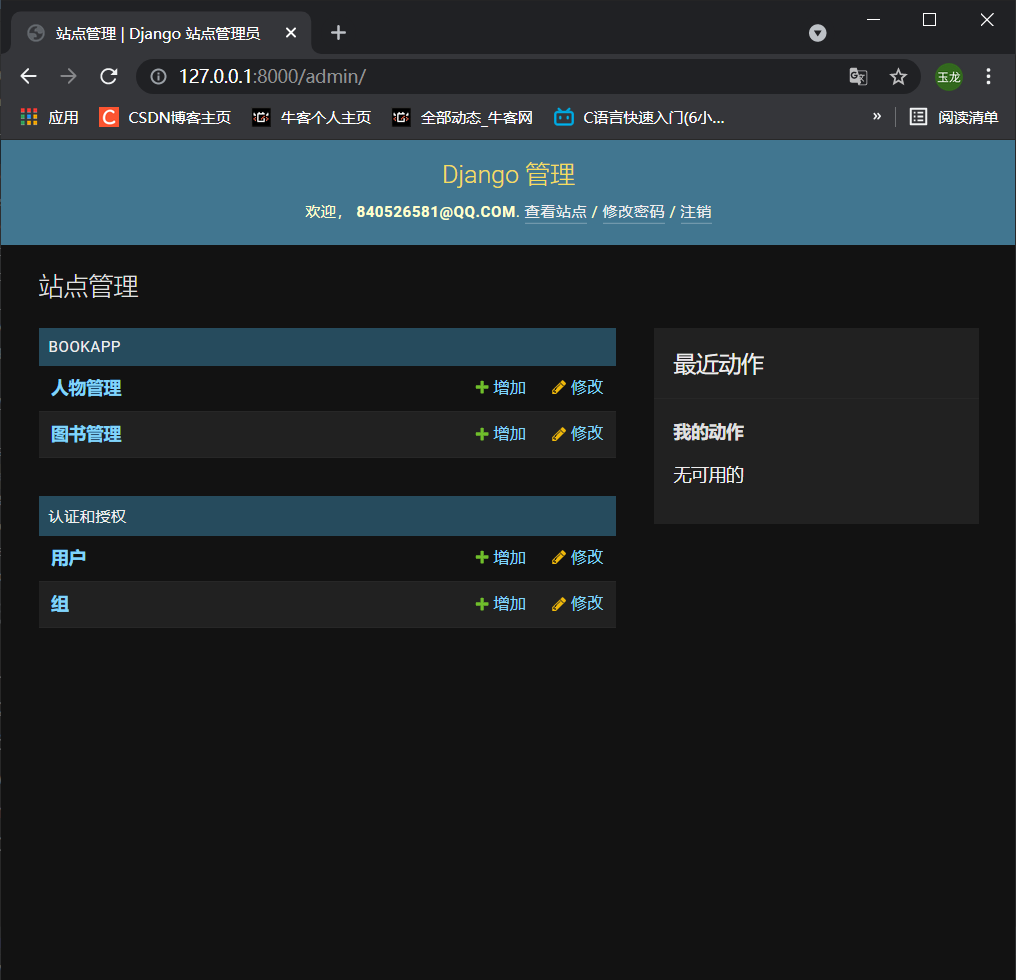
5, admin background management
python manage.py createsuperuser # creates a super administrative user. Enter the user name and password
127.0.0.1:8000/admin direct access
Set language:
settings.py
LANGUAGE_CODE = 'zh-Hans'

TIME_ZONE = 'Asia/Shanghai'
Add custom mode to background management
BookApp/admin.py
from django.contrib import admin
# Register your models here.
from  BookApp.models import Book,Hero
admin.site.register(Book)
admin.site.register(Hero)
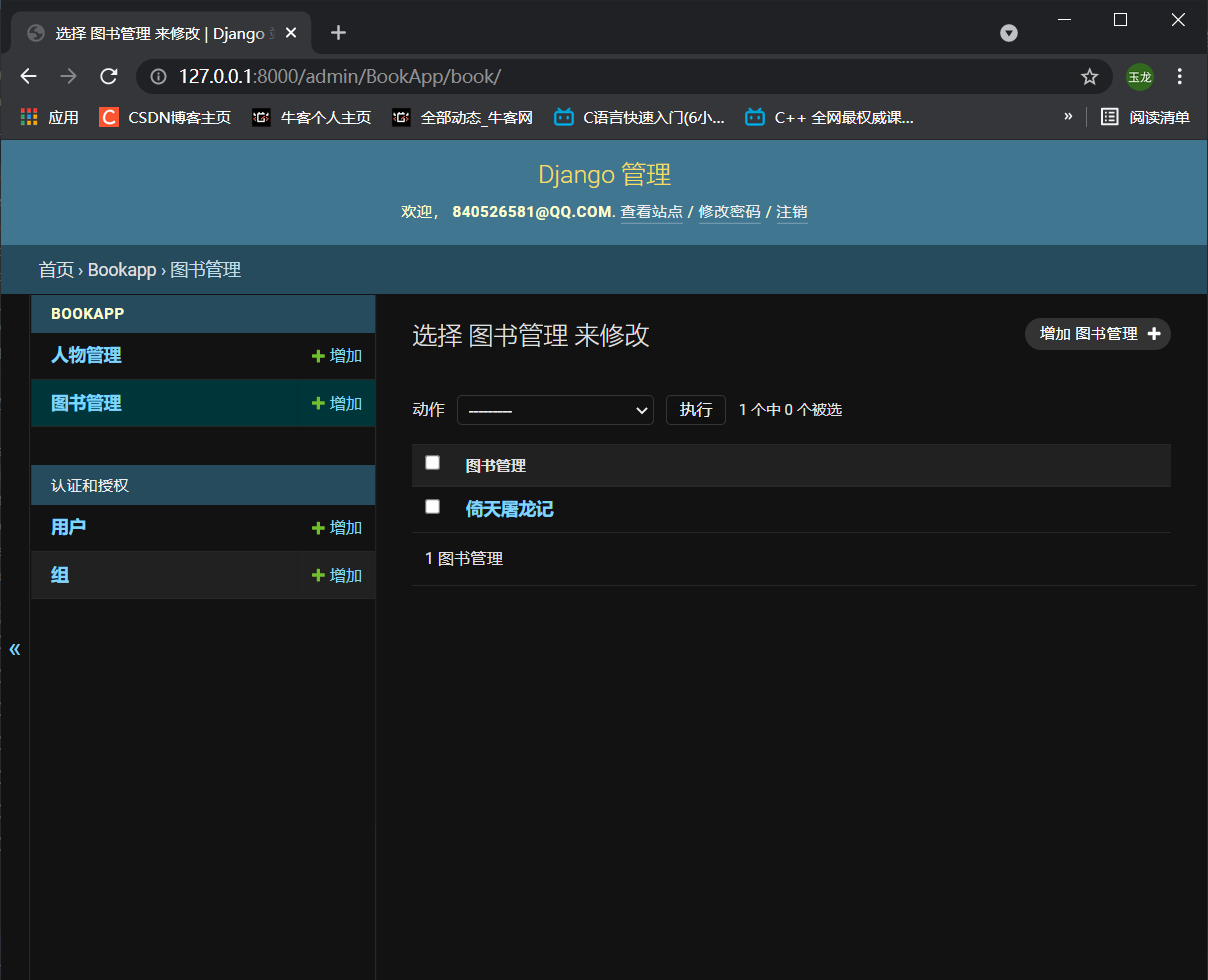
Chinese display add module:
BookApp/models.py, add parameters to each main class to be displayed
class Meta:
    verbose_name = 'Library management'
    verbose_name_plural = verbose_name #There is no singular or plural in Chinese, so the two are equal
class Meta:
    verbose_name = 'Character management'
    verbose_name_plural = verbose_name
Result after change:
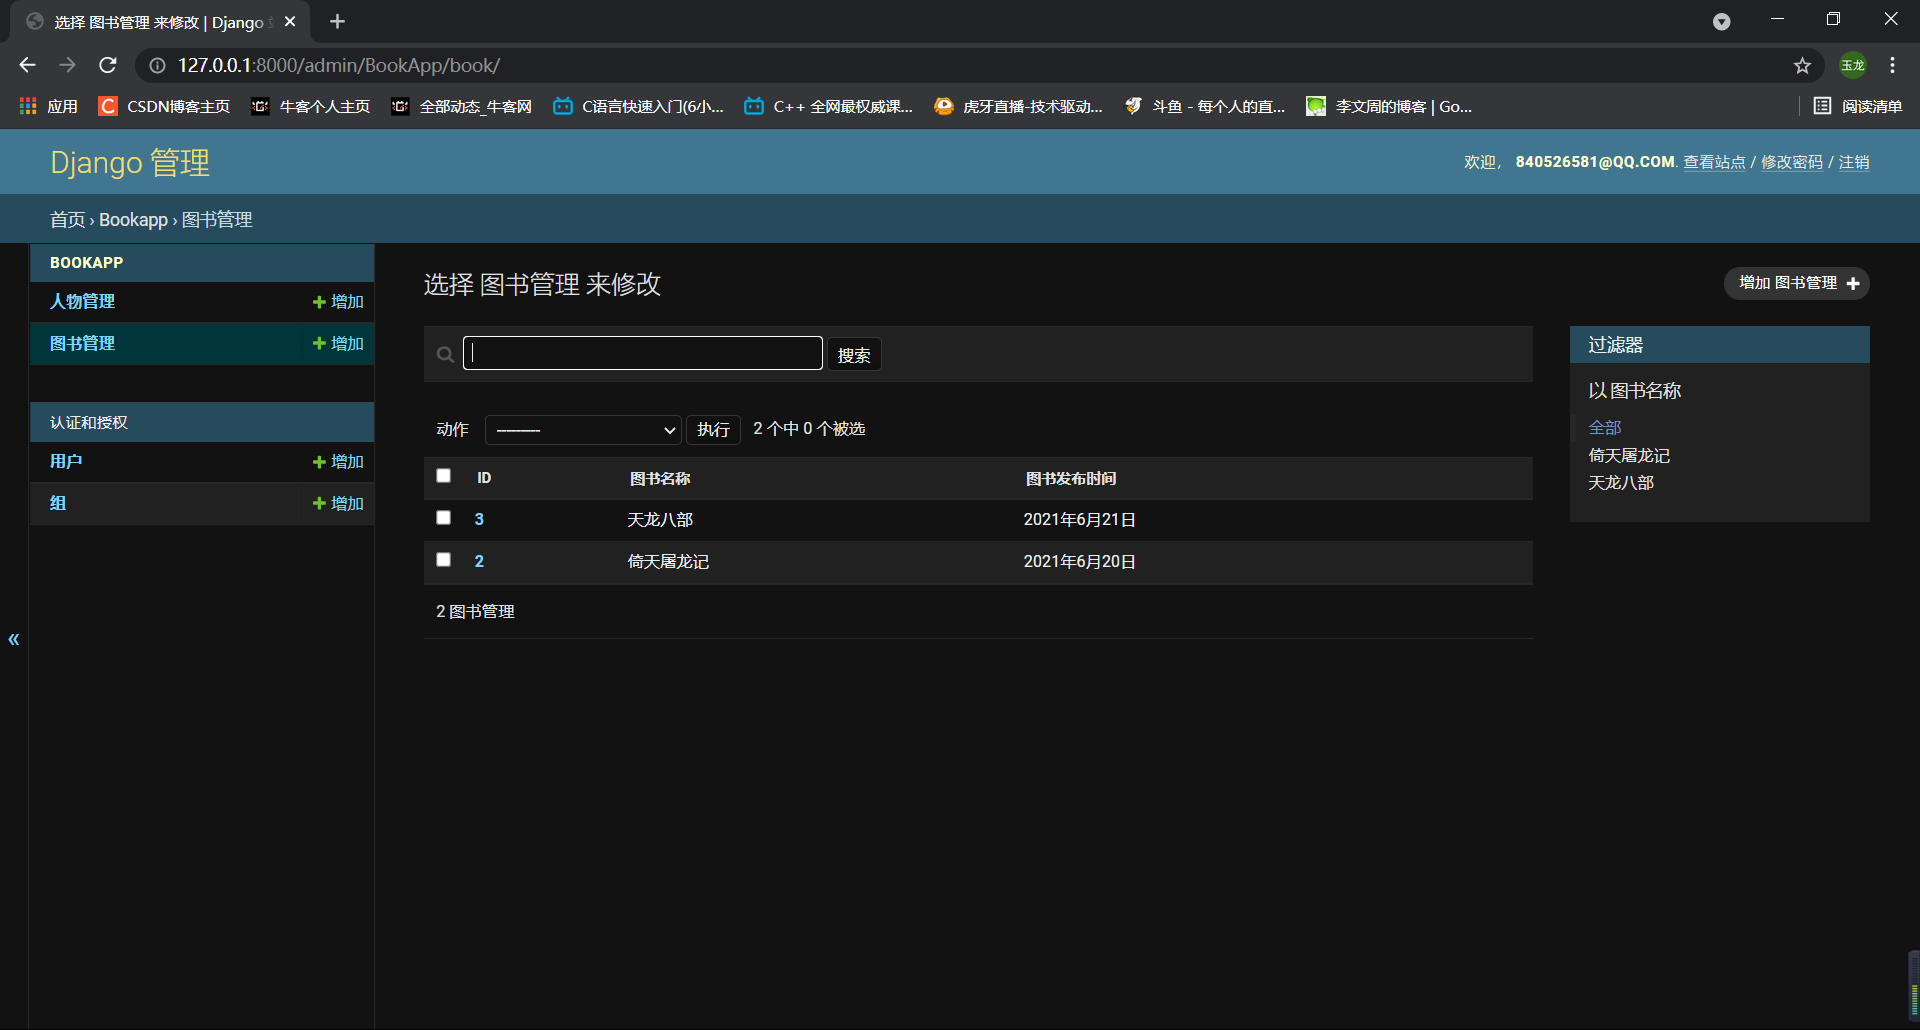
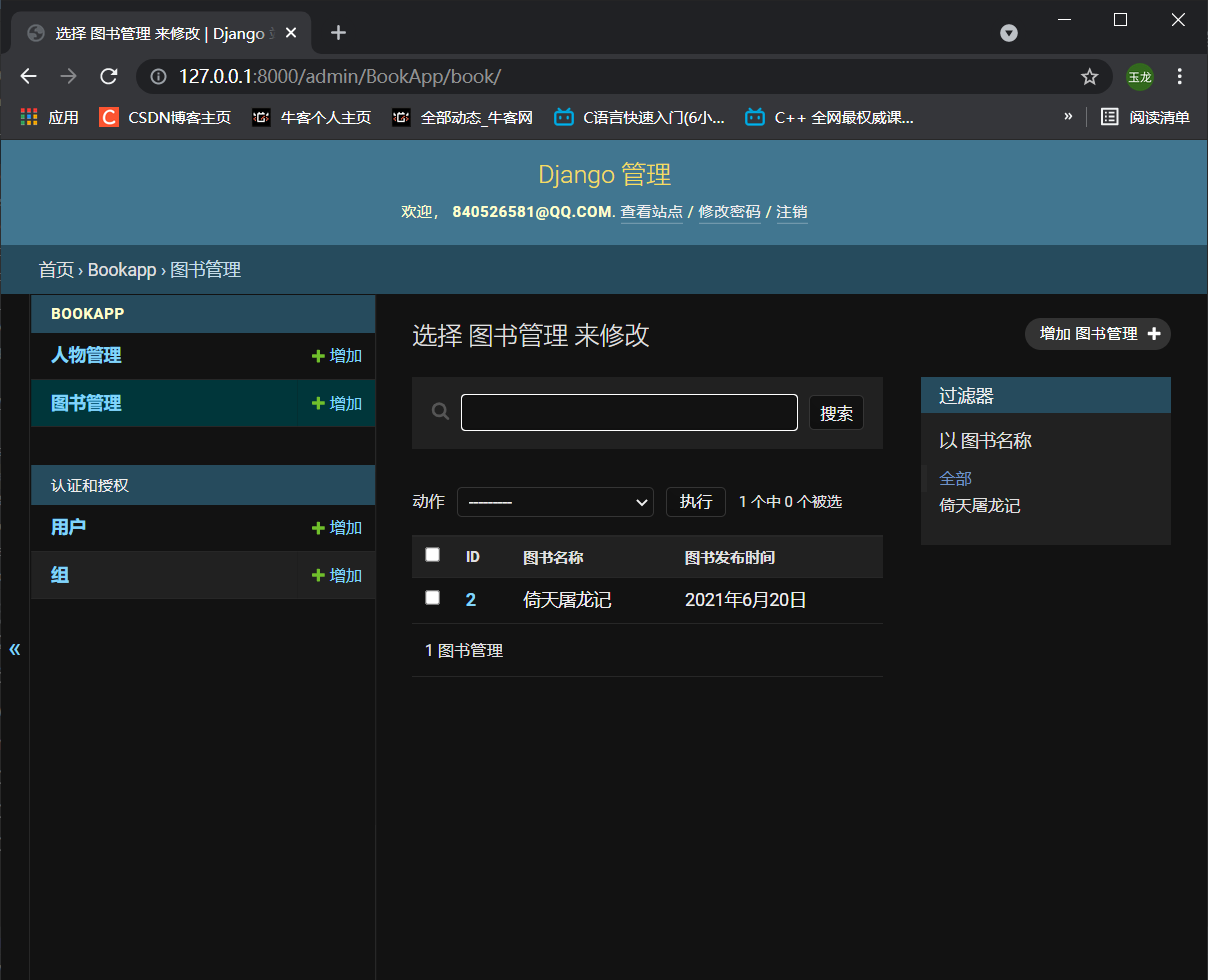
List page information setting modification
BookApp/admin.py
class BookAdmin(admin.ModelAdmin):
# Information that can be set on the list page
# list_display: displays the fields. You can click the column header to sort
list_display = ['id', 'title', 'pub_date']
# list_filter: filter field, and the filter box will appear on the right
list_filter = ['title']
# search_fields: search field, and the search box will appear on the upper side
search_fields = ['title']
# list_per_page: page, and the page box will appear on the lower side
list_per_page = 10
# inlines = [HeroInline]
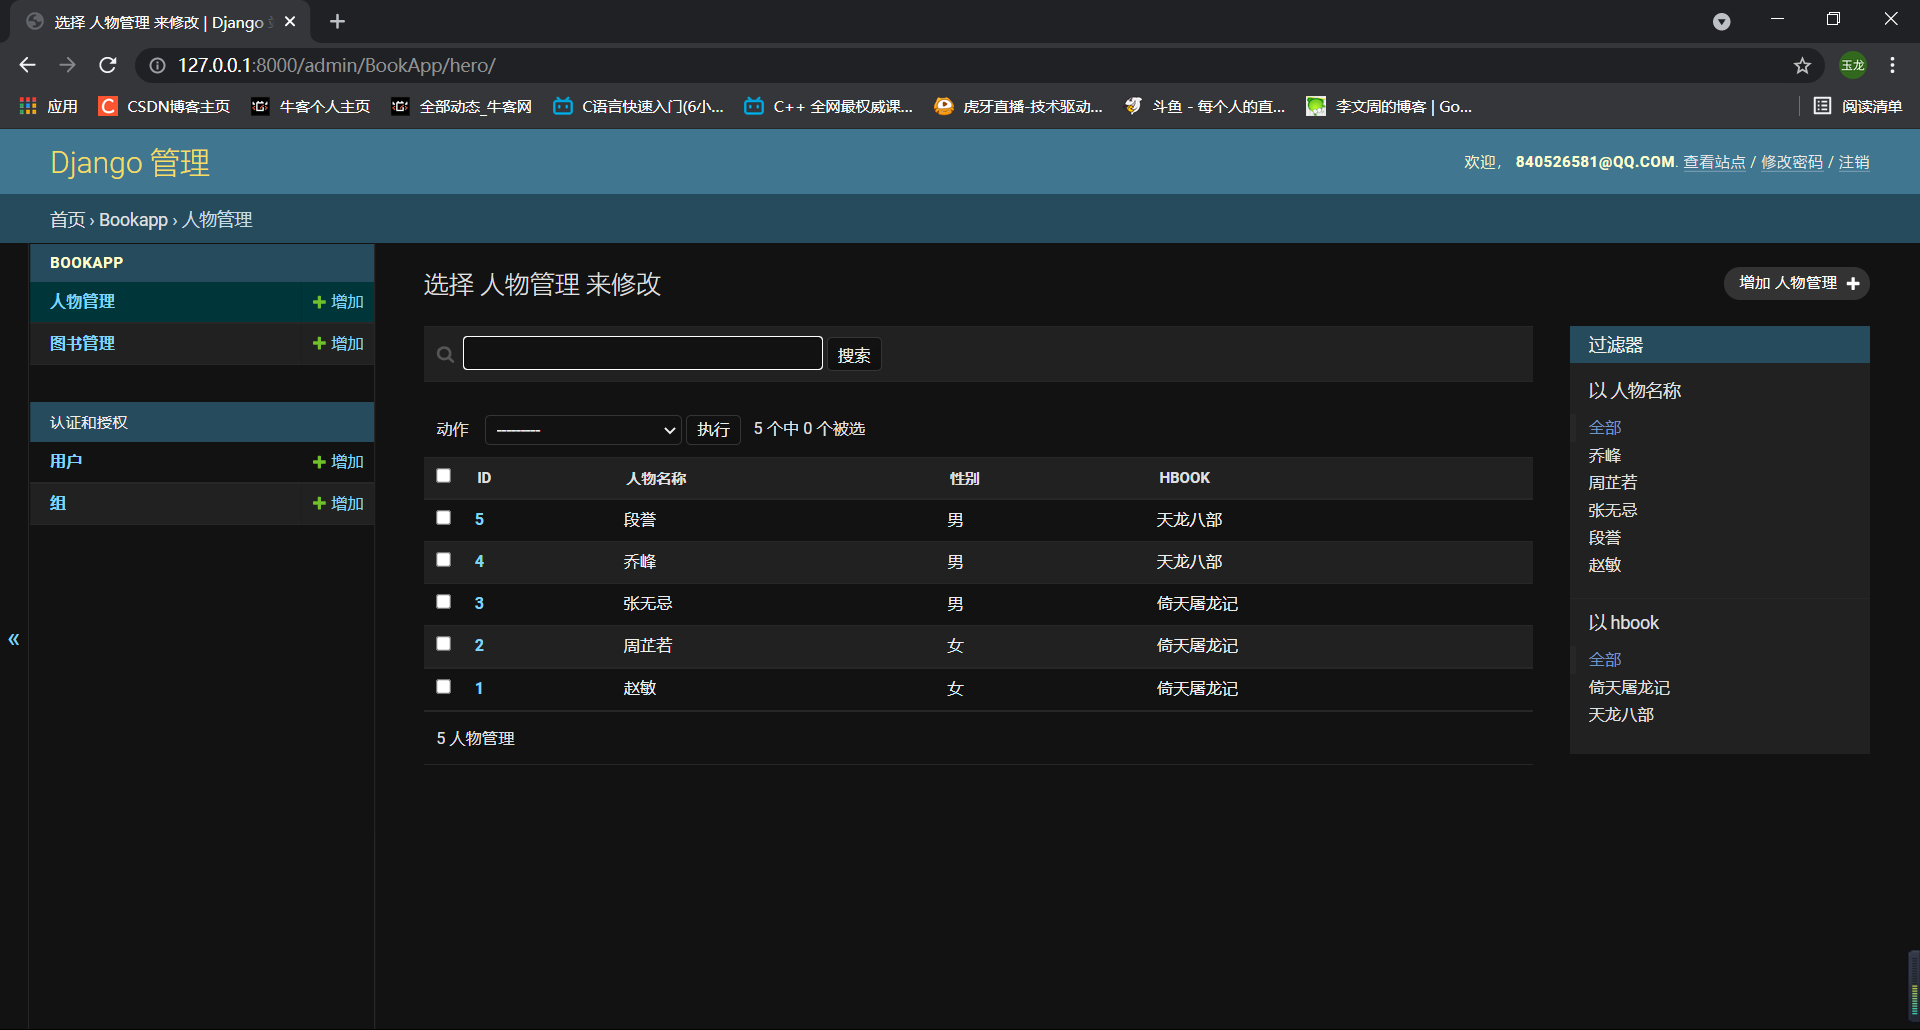
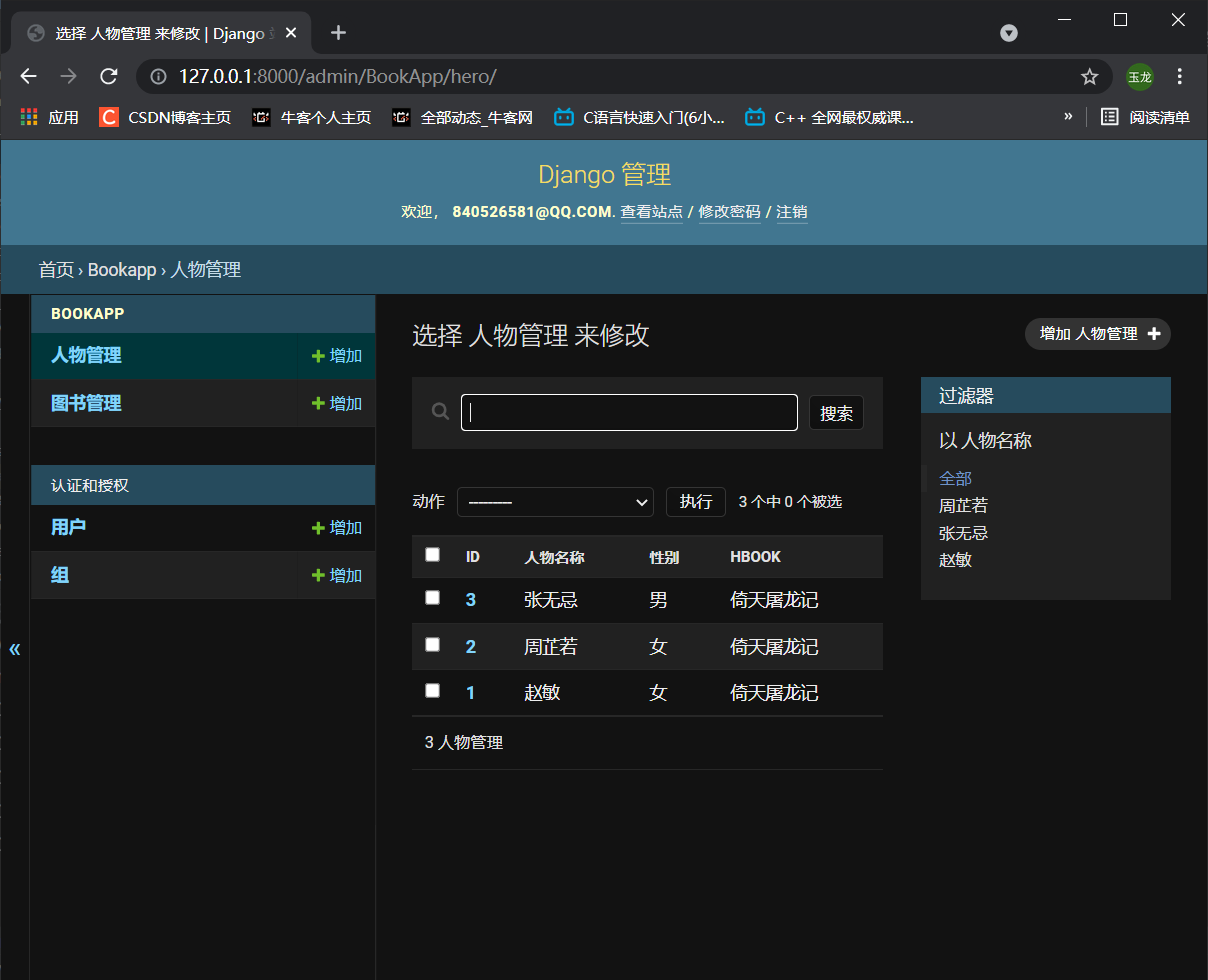
class HeroAdmin(admin.ModelAdmin):
# Information that can be set on the list page
# list_display: displays the fields. You can click the column header to sort
list_display = ['id', 'name', 'gender', 'hbook']
# list_filter: filter field, and the filter box will appear on the right
list_filter = ['name', 'hbook']
# search_fields: search field, and the search box will appear on the upper side
search_fields = ['name']
# list_per_page: page, and the page box will appear on the lower side
list_per_page = 10
Don't forget to call the class that modifies the property
BookApp/admin.py
admin.site.register(Book, BookAdmin)
admin.site.register(Hero, HeroAdmin)
fields modify the order of adding interface attributes
BookApp/admin.py
# Add and modify page properties
# fields: order of attributes
fields = ['name', 'hbook', 'gender', 'content']
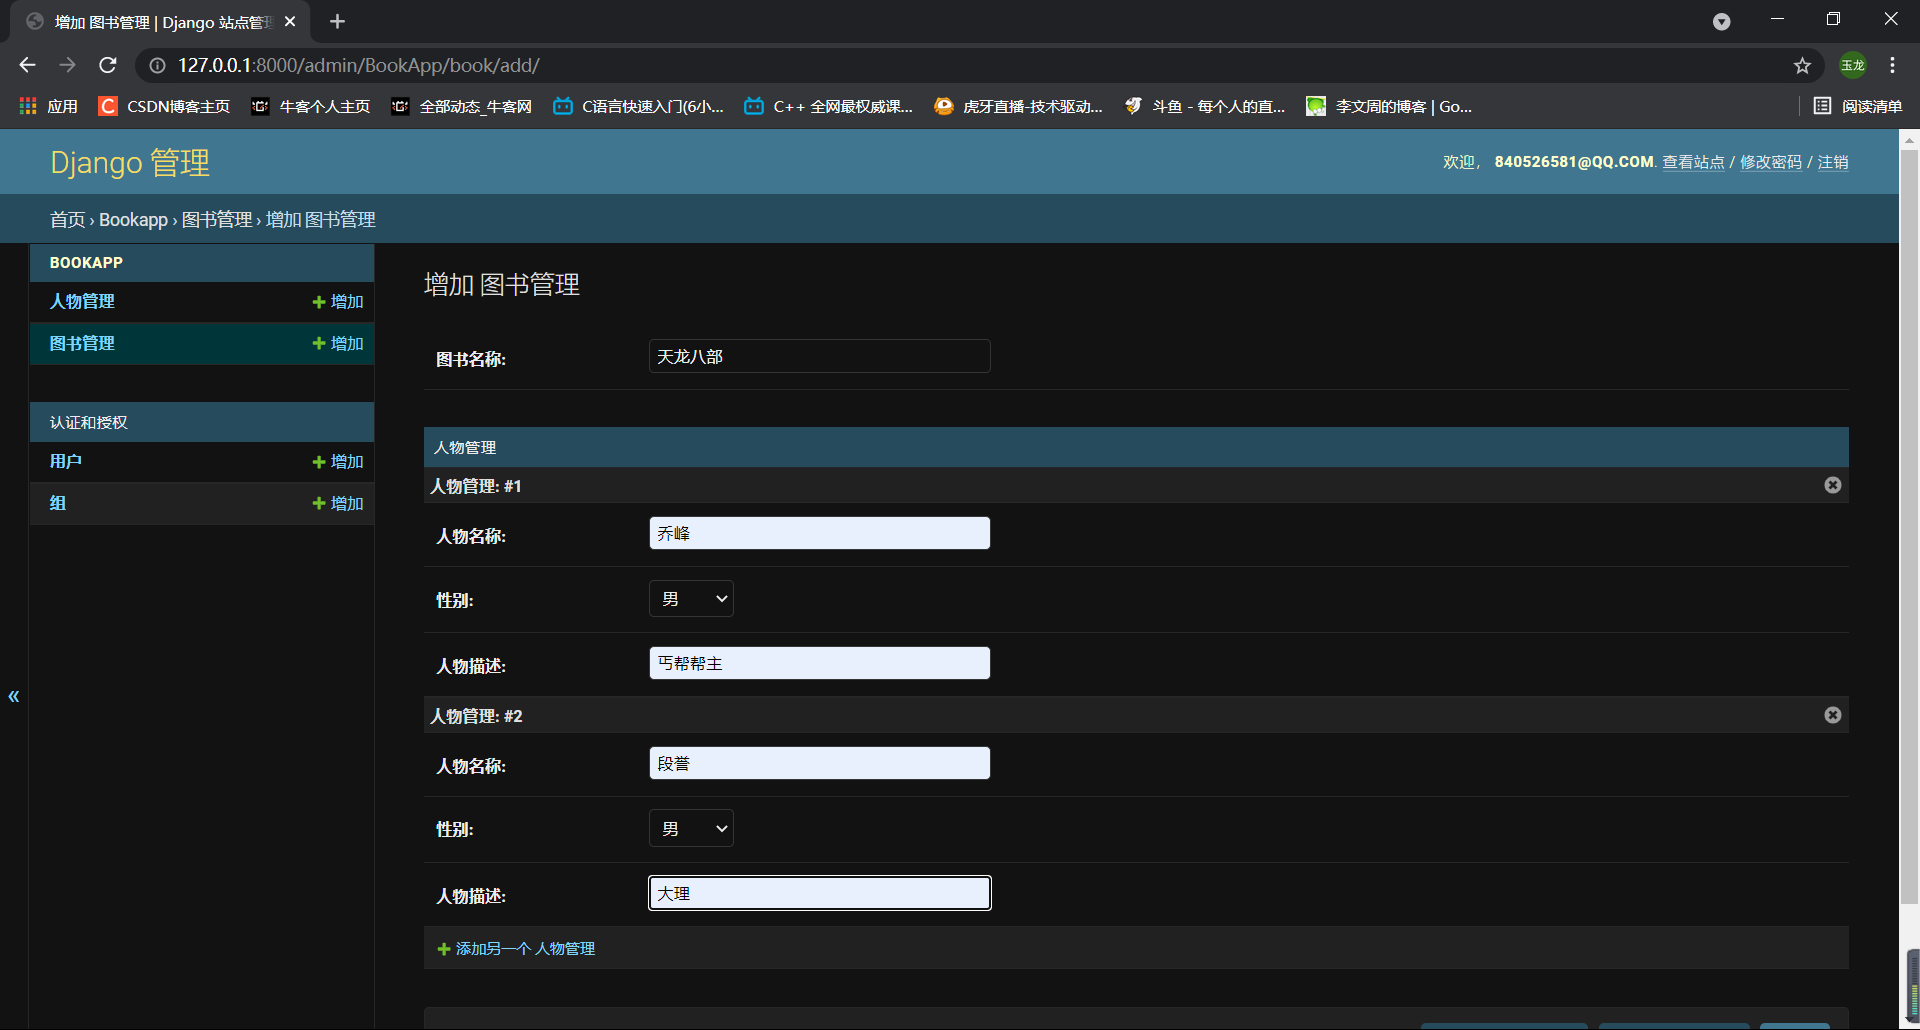
Associated object:
Usually add a book and three associated people. Usually you need to add books before adding people
Requirements:
Associate, add the associated person when adding the book
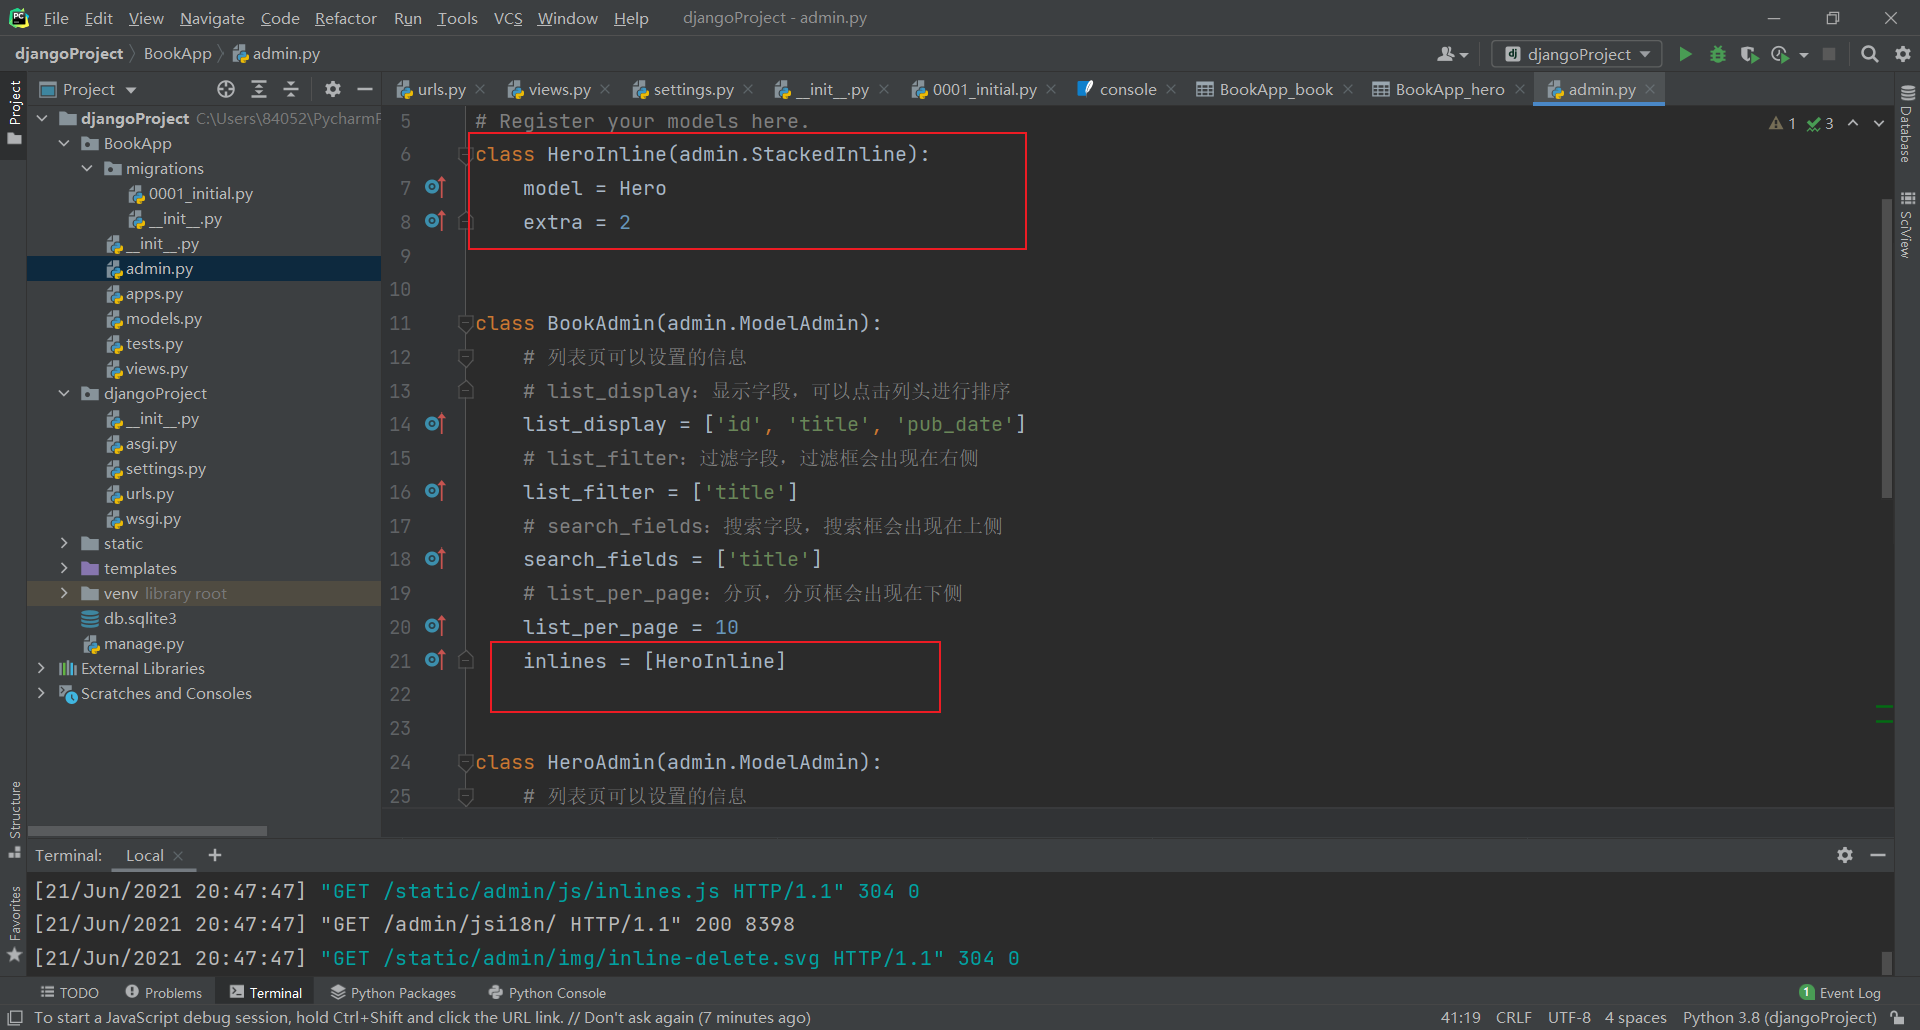
BookApp/admin.py
class HeroInline(admin.StackedInline):
    model = Hero
    extra = 2
Add a call in the BookAdmin class to ensure that at least two associated characters can be added when adding books
inlines = [HeroInline]
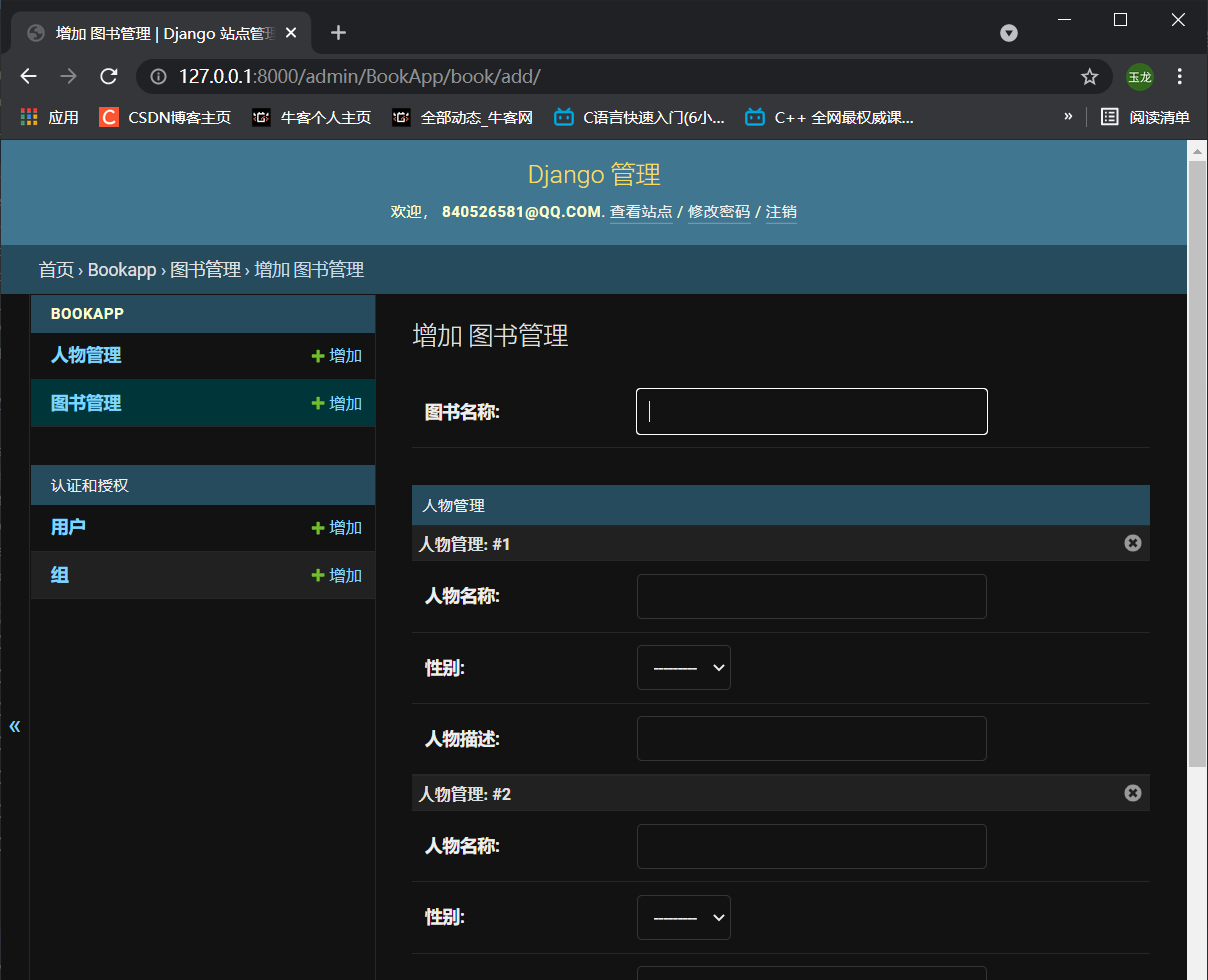
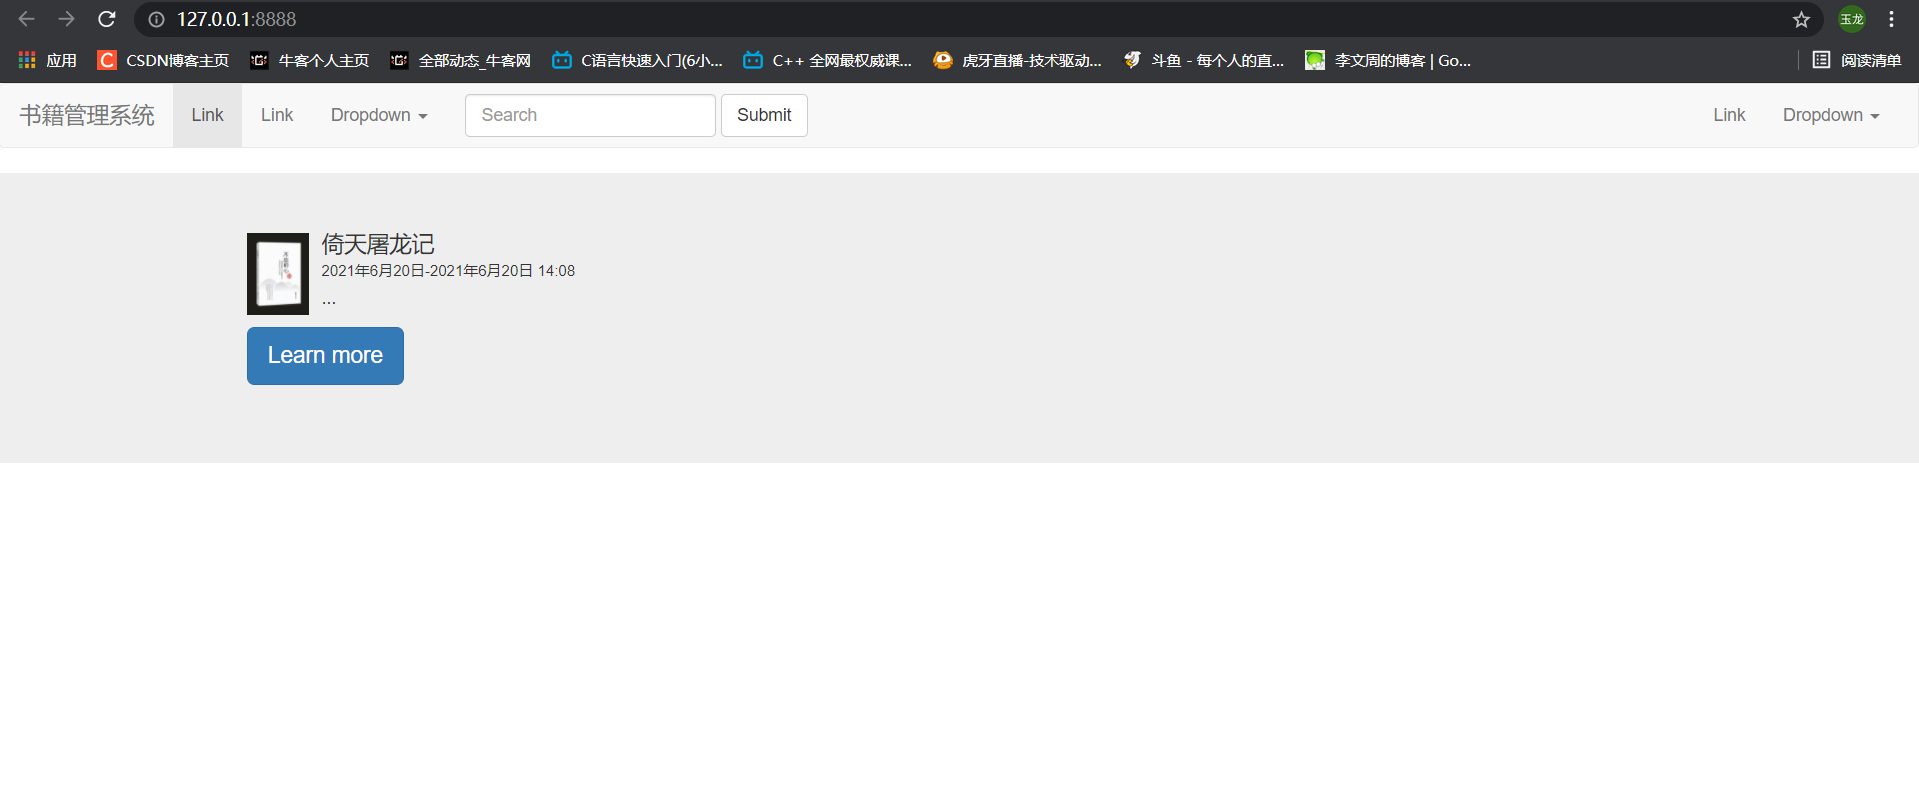
In this way, a simple library management system background management module is done
Test:
Add a book and its associated tasks.