Recently, because of the great innovation, I began to learn machine learning. In the process of learning decision tree, I saw the related operations of decision tree visualization.
Firstly, the tree object of sklearn library is used for tree building and model training:
from sklearn import tree
# Establish decision tree classifier
    dtc = tree.DecisionTreeClassifier()
# Training decision tree model
    dtc.fit(x_train, y_train)
Of course, this is not the focus of this paper. Due to the training model generated in this way, the internal information is not intuitive, and only some functions such as The value of score() to roughly judge the adaptability of the model to a new dataset is obviously not in line with the current trend of visualization. Therefore, the tree object itself defines some export methods to transform the decision tree algorithm originally an abstract data matrix into a text language with high readability.
Let's take a look at the first method:
tree.export_text(dtc)
What this method does, like its name, is to express the original tree object (called dtc in the code) as a piece of text. The following is the actual effect of printing
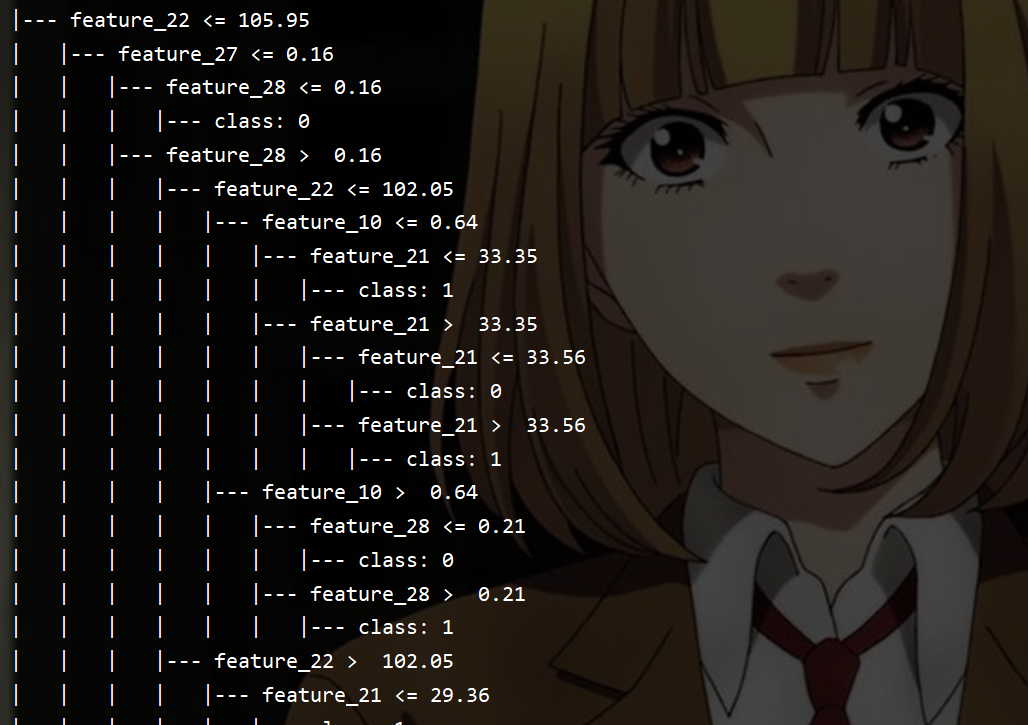
It is still not intuitive. What each feature is is is not reflected in the text. I try to solve this problem, although there is a feature in this method_ The parameters of names, but I set them. As a result, I made this error:

I took its source code and looked back and forth several times, but I didn't find the problem. Xin Kui was quick and wise. He searched the meaning of the last a.any() and a.all() of the error report. He vaguely felt that there was a problem with the data type (my feature_names parameter specifies an array of ndarray), so he converted the array type of ndarray into a list. Try:
tree.export_text(dtc, feature_names=list(feature_names))
result:
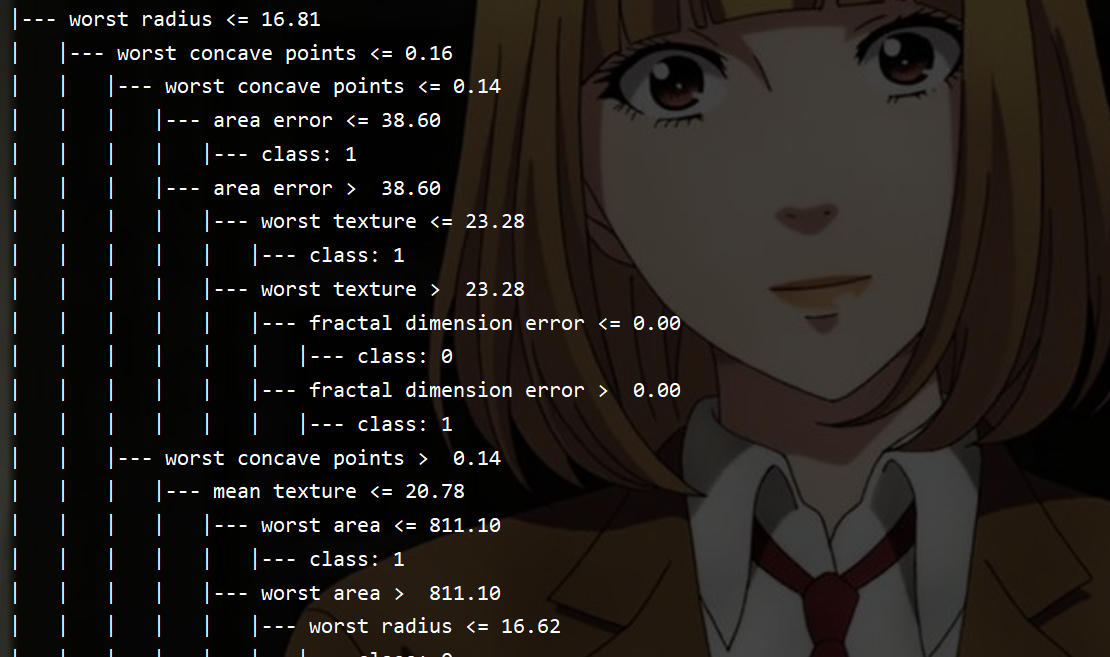
Nice!
However, this representation method is still too lengthy and not very readable, so I decided to adopt the second method:
# Export a visual decision tree
with open('breast_tree_graph.dot', 'w') as dot_file:
    tree.export_graphviz(dtc, out_file=dot_file, feature_names=feature_names)
This method generates a Dot document, which stores information about the decision tree. Because Windows itself will edit the document according to the format of the document Open dot, so you can see such a document:
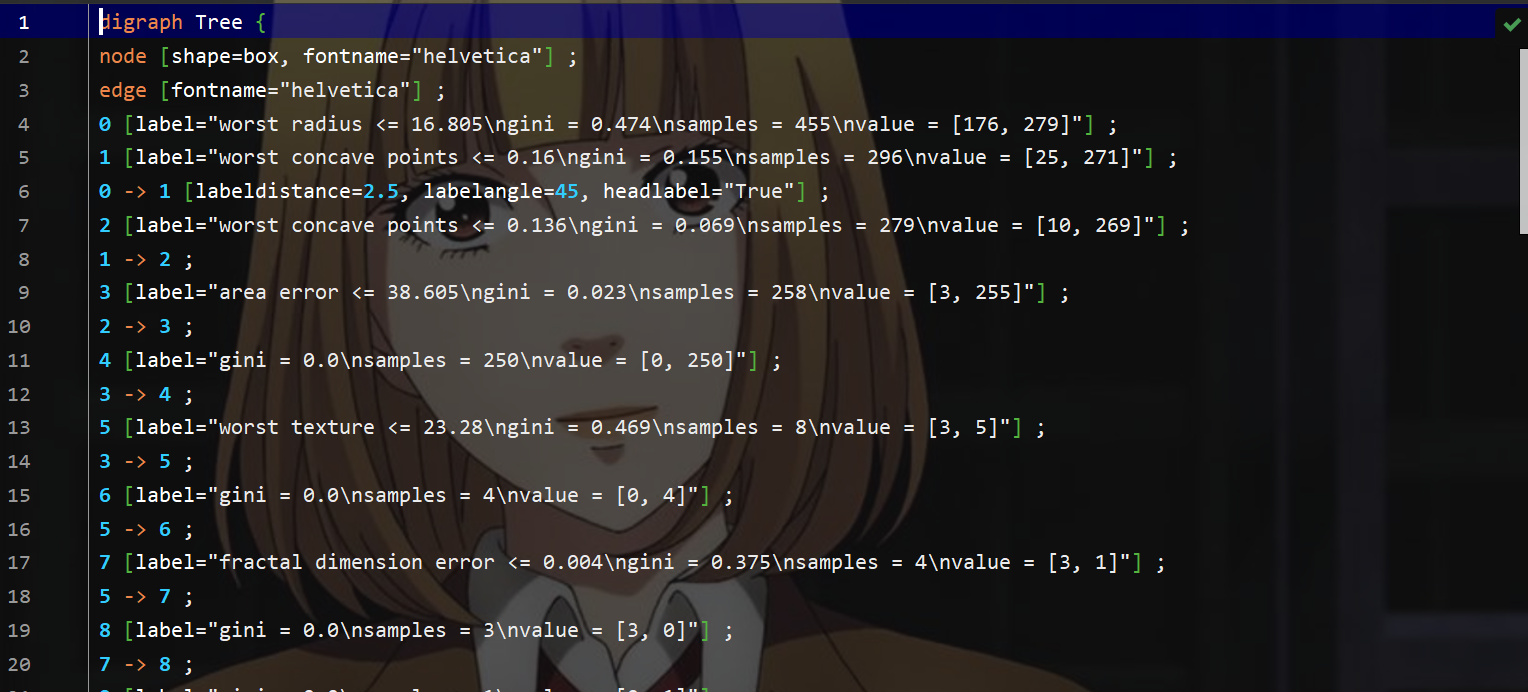
To install the Graphviz Library:
This is obviously not the intuitive representation I want. If you want to parse the decision tree in graphical form, you also need to install the Graphviz library
(in fact, the pycharm professional I use can download and parse the extension of. dot documents, but after all, I use the education mailbox just in case, and the effect loaded through the extension is not very good, the definition is very low, and it can't be scaled and saved)
Tip: the Graphviz library downloaded by using the package management tool in pycharm does not seem to contain the tools we will use later. Therefore, it is recommended to download the installation package from the official website.
Graphviz download address
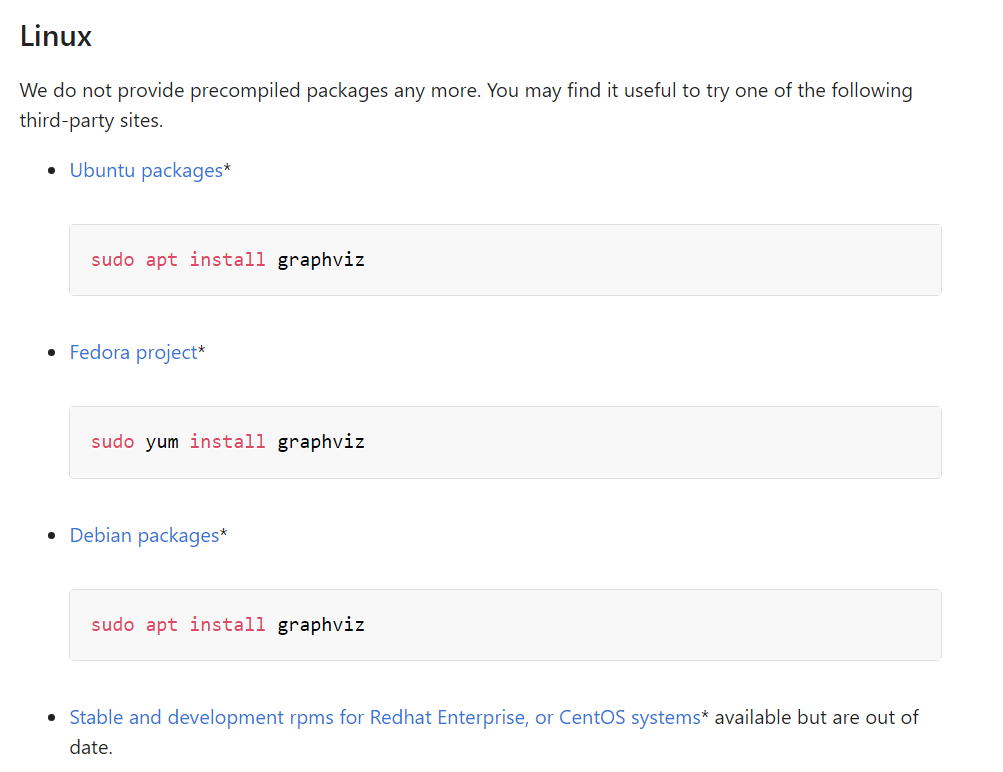
The following is the official website of Graphviz Library:
From the above information, it seems that Linux system can be downloaded directly through sudo command, but Windows can only download the installation package honestly. Here I download the latest version 2.50.0.
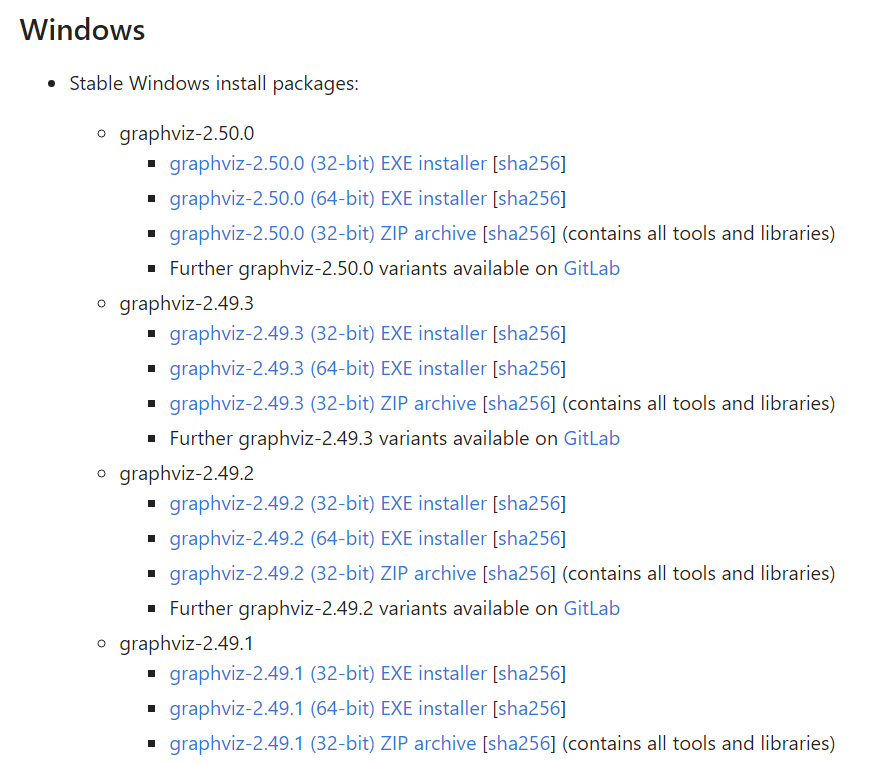
After that, follow the prompts for installation. The process will not be repeated here. After installation, you need to configure the path environment variable for the bin folder in the installation folder:
Environment variable configuration:
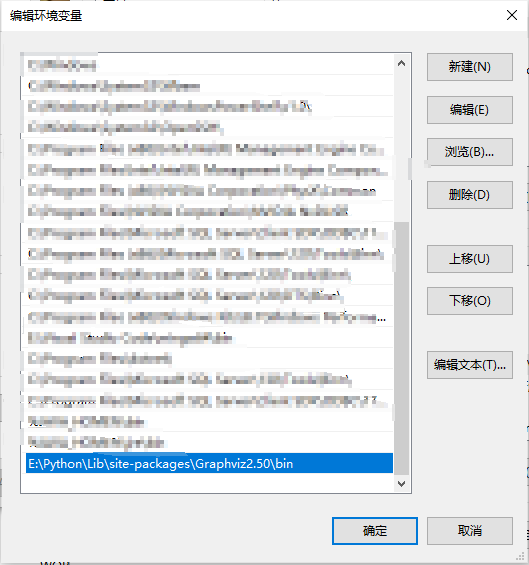
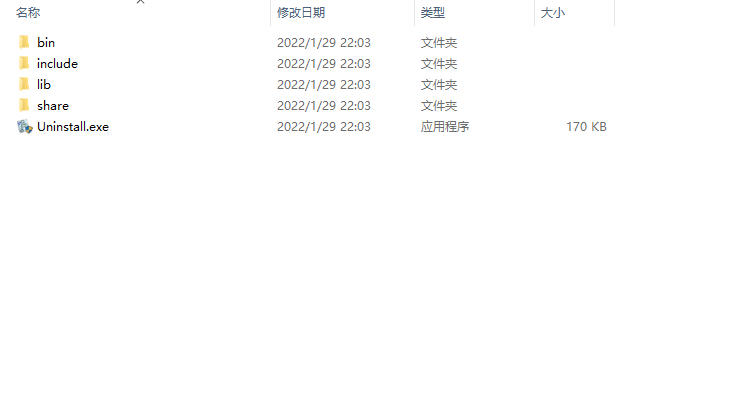
Graphviz2.50 is the total installation directory. The following four folders should be opened. We need to add the first bin folder to the path environment variable. The specific method is to find the relevant articles and tutorials on the configuration of environment variables by ourselves. In general, create a new line, and then fill the absolute path of bin folder into the input box, as shown in the above figure.
After configuration, we can enter dot -version on the command line to check whether the Graphviz library is successfully installed and configured:

After successful installation, we can start the last step of conversion:
In the command line, first switch to the directory The directory where the dot document is located, and then enter the following instructions:
dot -Tpng breast_cancer_tree_graph.dot -o tree.png
breast_cancer_tree_graph.dot: . Dot document name
tree.png must be a png file name if it is not required
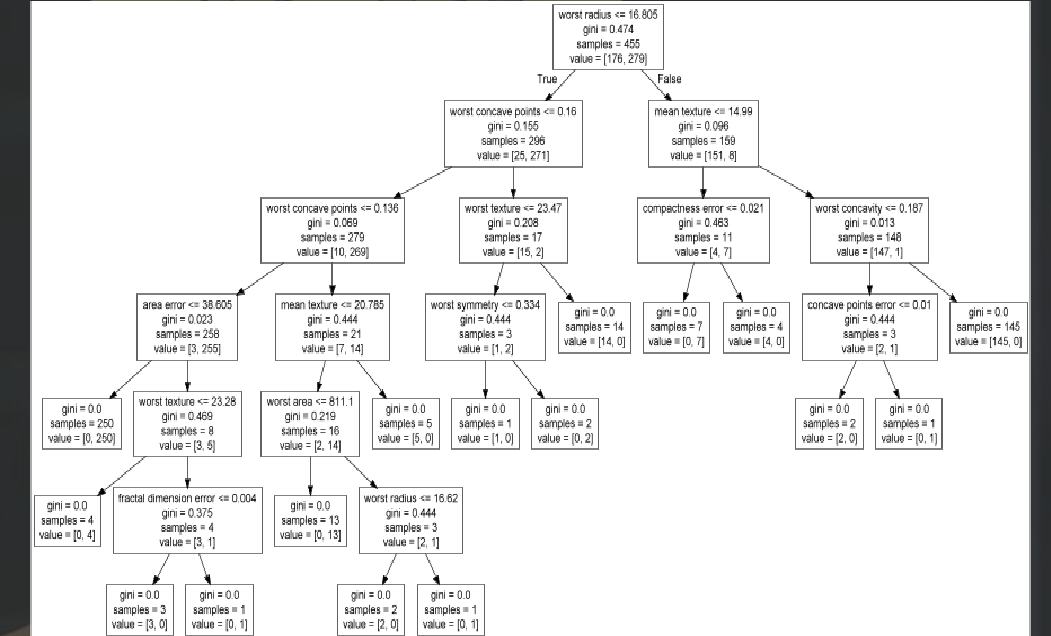
Then we get the image file we want that can be scaled freely:
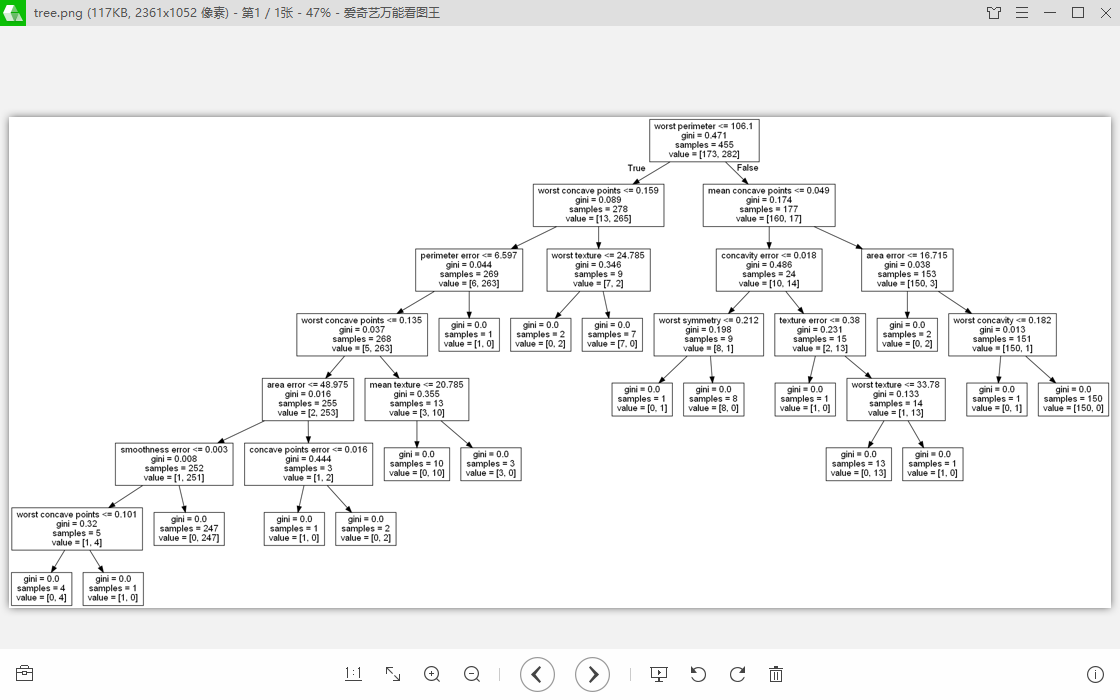
It can be seen that such an image representation is much clearer than the previous plain text form
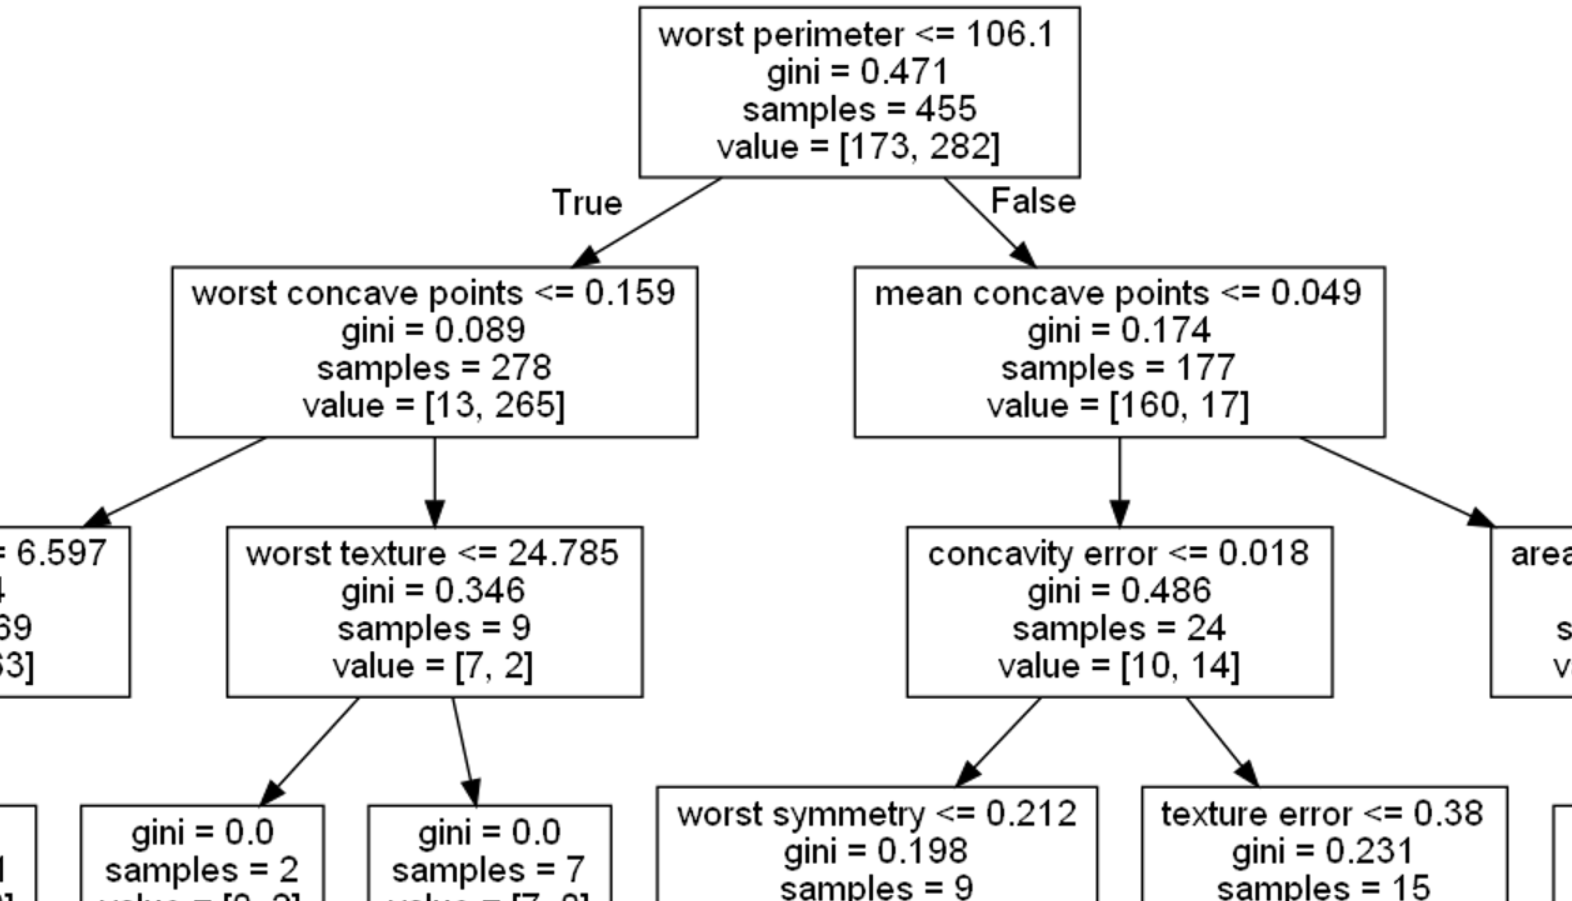
But when you think about it, you always feel something is wrong
by the way! Every time we generate an image, we need to enter the command line, switch direction, and then enter the long string of commands above. In the dark command line, if you are not careful, you will enter the wrong letter, which is very annoying. If only such a picture could be generated directly through a simple line of code call in the IDE!
That's what I really want to do.
It's 1:25 a.m. don't talk nonsense. Start with the code:
# _*_ coding utf-8 _*_
# Designer: はなちゃん
# Time: 2022/1/29 19:20
# Name: dot2png.py
from pathlib import Path
import subprocess


def check_valid_path(path):
    """Check whether the file path is valid and return to'/'Split file path"""
    if '\\' in path:
        elements = str(Path(path)).split(sep='\\')
        final_path = Path('/'.join(elements))
    elif '/' in path:
        final_path = Path(path)
    else:
        if not Path(path).exists():
            raise Exception("Error: File path pattern is not correct.")
        else:
            final_path = Path(path)
    if not final_path.exists():
        raise Exception("Error: Your file path does not exist.")
    if final_path != '':
        return final_path
    else:
        return None


def dot2png(dot_file_path=None, img_path=None):
    """Decision tree visualization.dot Convert file to.png Function of picture"""
    if not dot_file_path:
        raise Exception(".dot file is not given.")
    elif not dot_file_path.endswith('.dot'):
        raise Exception("file provided is not '.dot' type.")

    DOT_PATH = check_valid_path(dot_file_path)

    if not img_path:
        img_path = 'dt_png.png'
    elif not img_path.endswith('.png'):
        raise Exception("image file not end with '.png'.")

    IMG_PATH = img_path

    cmd_args = ['dot', '-Tpng', DOT_PATH, '-o', IMG_PATH]

    cmd_pro = subprocess.Popen(args=cmd_args, stdout=subprocess.PIPE, stderr=subprocess.STDOUT)
    retval = cmd_pro.stdout.read().decode('gbk')
    if retval == '':
        print("successfully create file " + IMG_PATH)
    else:
        print("The program encountered some error: ")
        print(retval)
The subprocess library is used to start the subprocess in the background (I just learned it today. Oh, no, it was yesterday). The Path object is used in file Path processing. This is a file Path processing module that I have forgotten for a long time, but it is really easy to use.
First check_ valid_ There is nothing to say about the path function, which is to process paths and throw exceptions when appropriate to deal with users' strange file path errors; The dot2png function is generated by The main function of generating pictures from dot documents is given two parameters:
dot_file_path: . The path of dot document is absolutely relative, but it must point to the file correctly, otherwise there should be exceptions if there is no accident
img_path: the path to generate the picture. Optional parameters. If it is not written, a new picture named DT will be created under the current cwd by default_ Png pictures
Finally, Popen calls the command line. I tested it. It seems that if it is normally executed, the returned value retval will not have content. On the contrary, if an exception occurs, a string describing the exception will be returned. Therefore, this identification is used to determine whether the generation is successful.

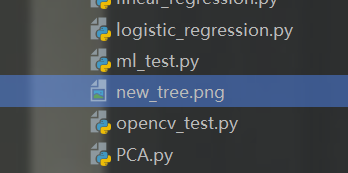
Of course, there must be many undetected and tested vulnerabilities in this applet. If you encounter any problems in the use process, you are welcome to raise them in the comment area. Although I put it forward, I don't necessarily want to answer - because I'm lazy.
Episode:
When I was writing this blog at more than 11:00 p.m., I accidentally pressed ctrl+z because I typed the wrong return. In a flash, the whole blog returned to the place where it had just started. Panicked, I immediately subconsciously pressed ctrl+y, and the redo box was gone... I was stunned for a while, wondering if I hadn't written for too long, The computer thinks my style of writing is too wordy.
Finally, I wish you a happy New Year!