catalogue
1. mysql website and download the installation package
2. Click to unzip to the directory you want to store
4. Create front end engineering catalog
5. mysql database and table creation
6. Service and debugging interface
1. mysql website and download the installation package
Download address: https://dev.mysql.com/downloads/mysql/
A. Select the version MySQL Community Server.
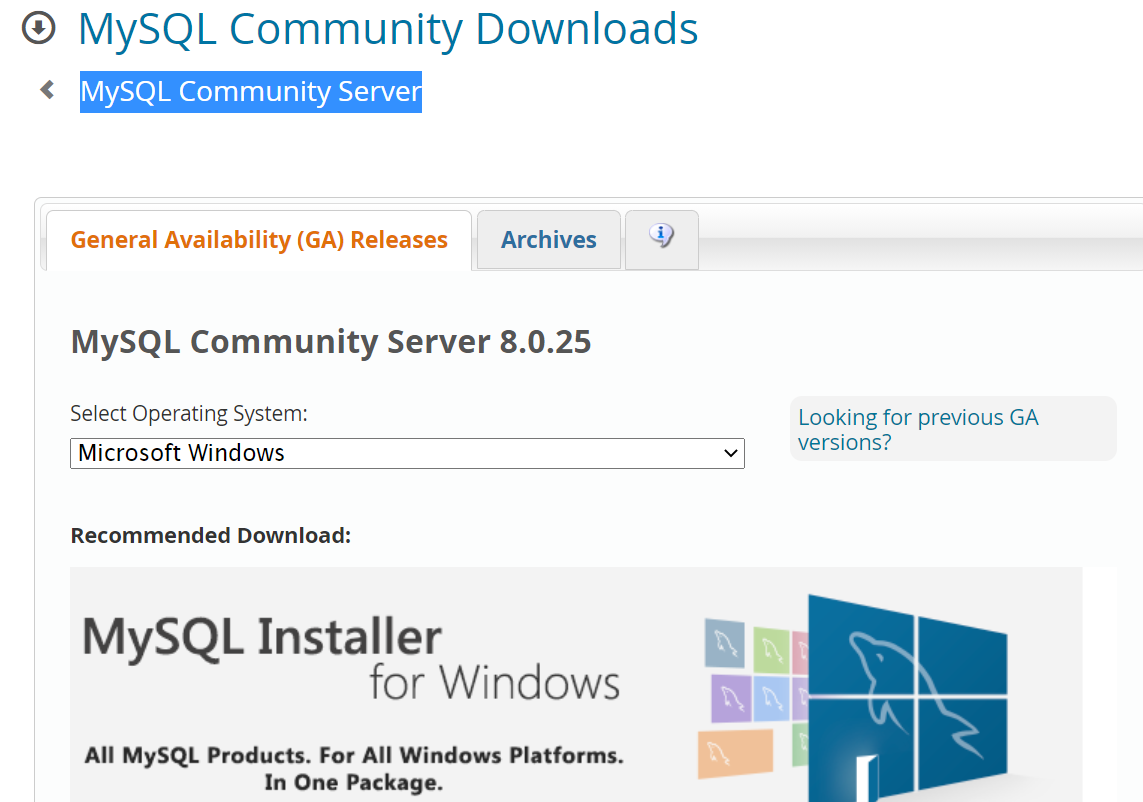
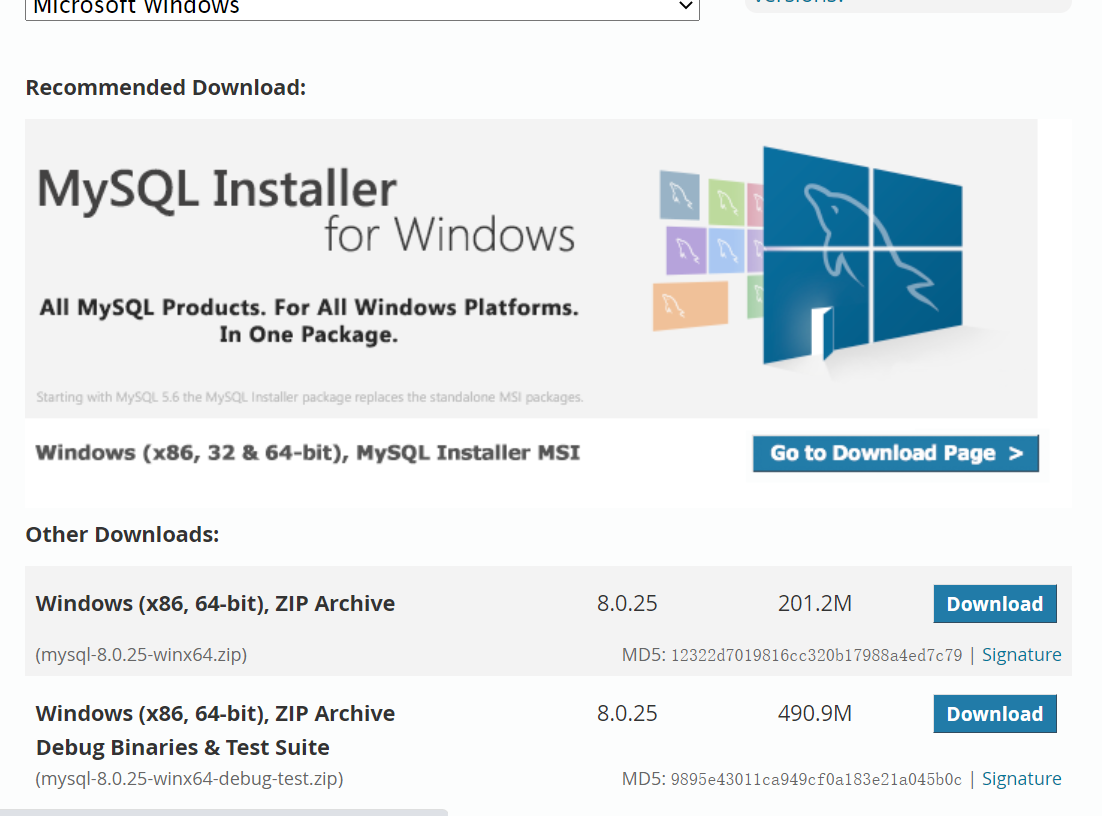
B. Select the first installation free version to download.
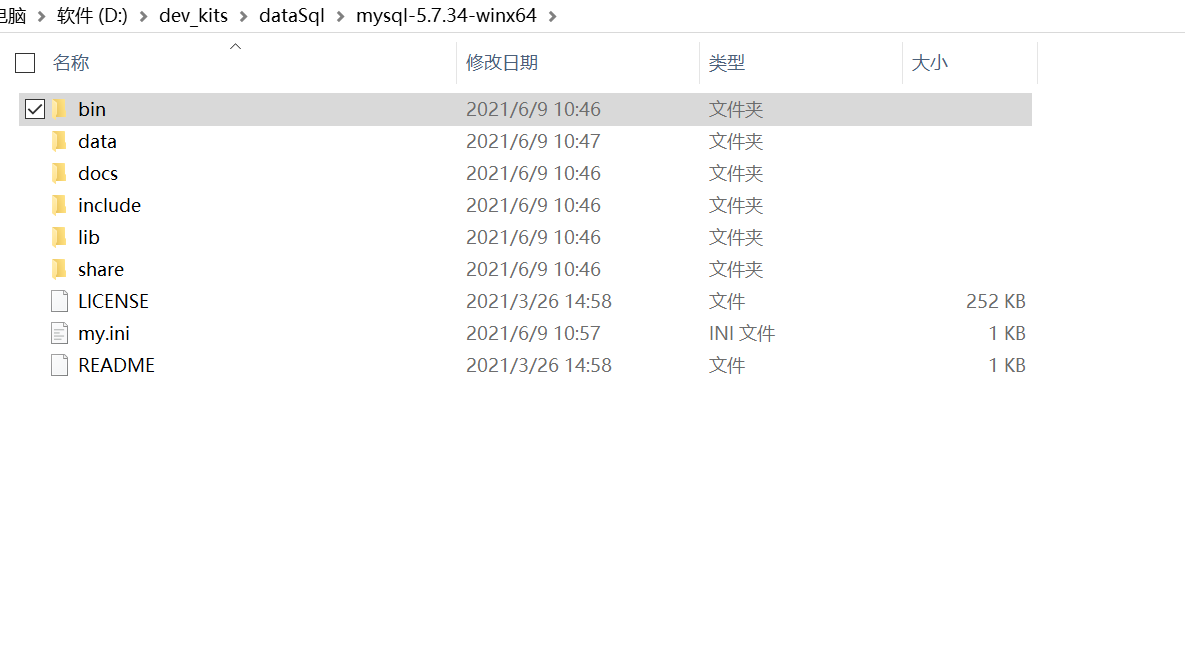
2. Click to unzip to the directory you want to store
It is recommended to decompress to a disk with large capacity, because the disk space will increase as the amount of data increases.
A. After decompression, create a new data folder # and my. In the root directory INI file; As shown below
B,my. Write the following configuration in the INI file
[mysqld]
port = 3306
# MySQL program installation directory
basedir=D:\dev_kits\dataSql\mysql-5.7.34-winx64
# Database file storage address
datadir=D:\dev_kits\dataSql\mysql-5.7.34-winx64\data
#Set the maximum number of connections
max_connections=512
#Size allowed to be temporarily stored in query cache
query_cache_size=0
#Set the character set of mysql server
character-set-server=utf8
# The database uses the engine by default
default-storage-engine=INNODB
[mysql]
# The default character set of mysql client is only available in 5.7, and there is no default character set attribute in 5.6 and earlier versions
default-character-set=utf8
3. Configure SQL
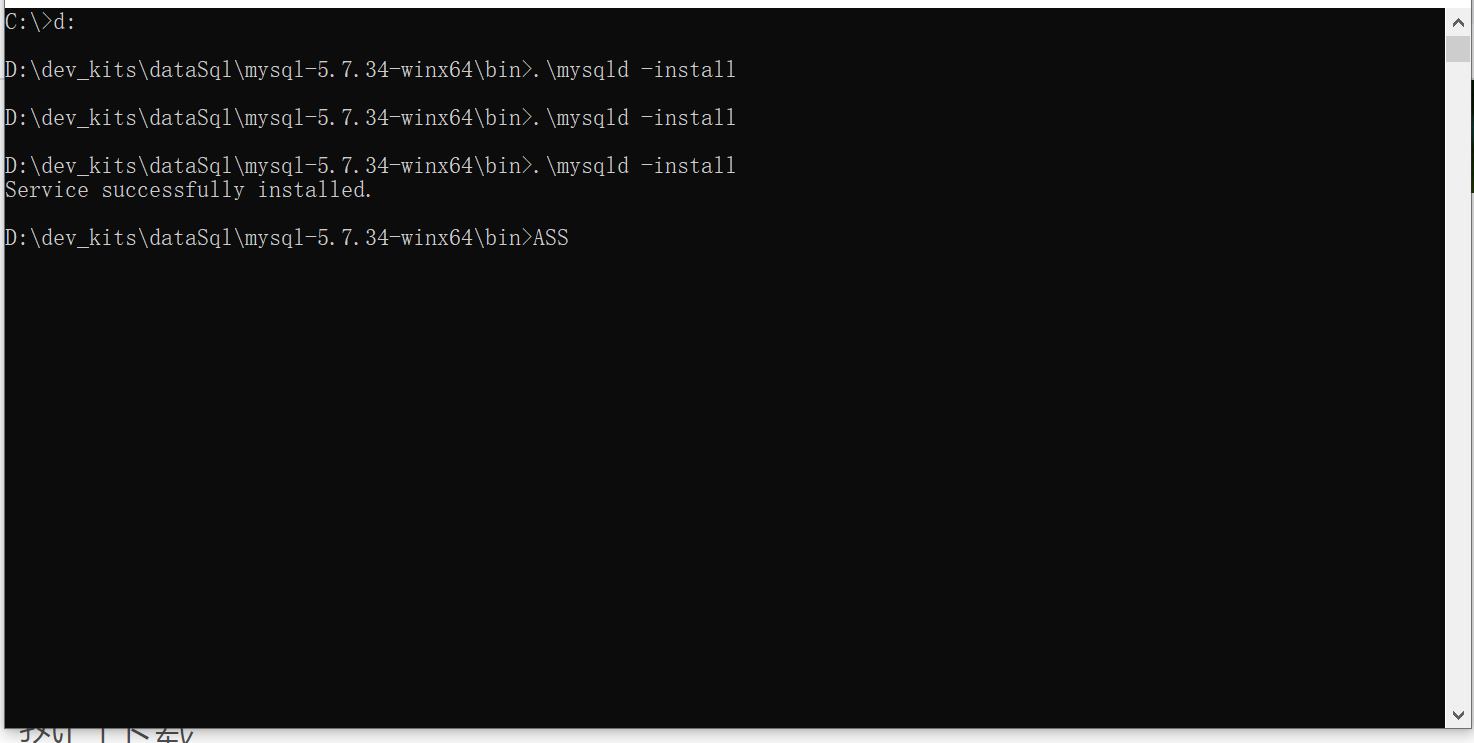
A. Enter the bin folder of the installation directory as an administrator

B. Install mysqld
Run the following command:
.\mysqld -install
Note: if an error is reported during operation, such as msvcr120 DLL} not found. You need to download the corresponding Visual C++ Redistributable Packages for Visual Studio 2013. You can install them directly by default.
The installation address is: https://www.microsoft.com/zh-cn/download/confirmation.aspx?id=40784.
Then run again, and the following is success.
C. Initialize the database and obtain the administrator password
The initial administrator password is MySQL's default, so take it down first and save it.
Run command:
.\mysqld --initialize --user=mysql --console
At this time, the console will print out the default password. Pay attention to finding it root@localhost In this field, after the colon is the initialization password. Pay attention to case sensitivity.
C. Start mysql service
Run command:
net start mysql
D. log in to MySQL database with the initial password
mysql -u root -p
Note here that if you forget your login password, just enter one. Then go to the bin directory to find the file with the suffix err, search for "A temporary password", and there is a password behind it root@localhost , is your initial password.

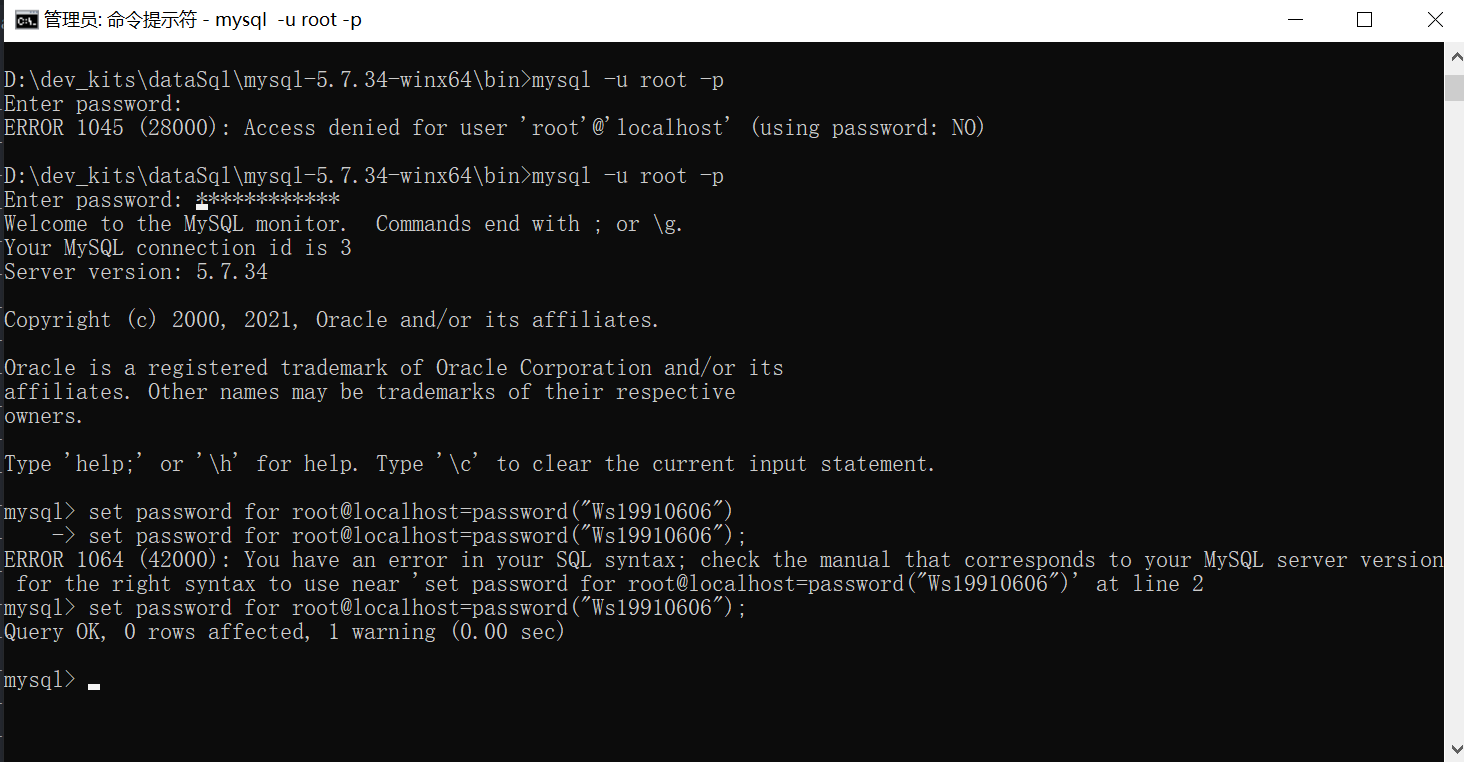
E. set your own password
set password for root@localhost=password("The password you need to set");Pay attention to the in the back; Don't lose it.
After modifying the password, MySQL is installed successfully. As follows:
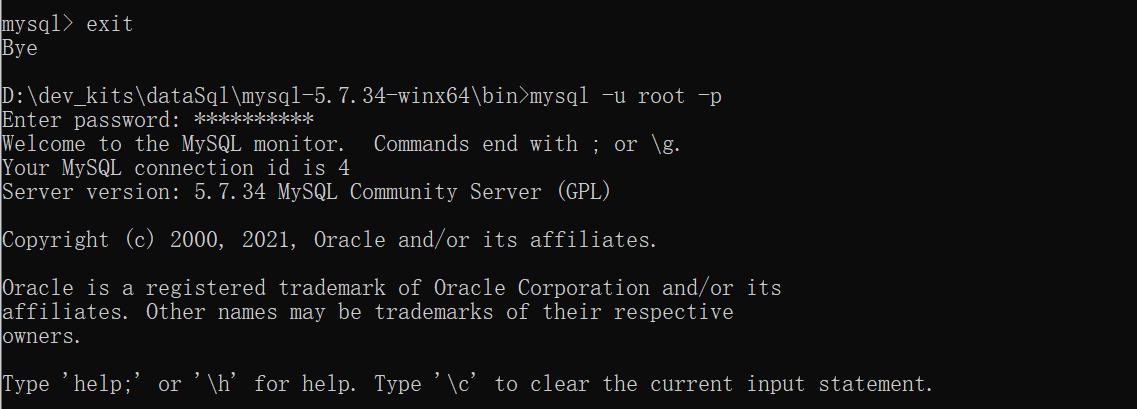
You can quit and try your password again.
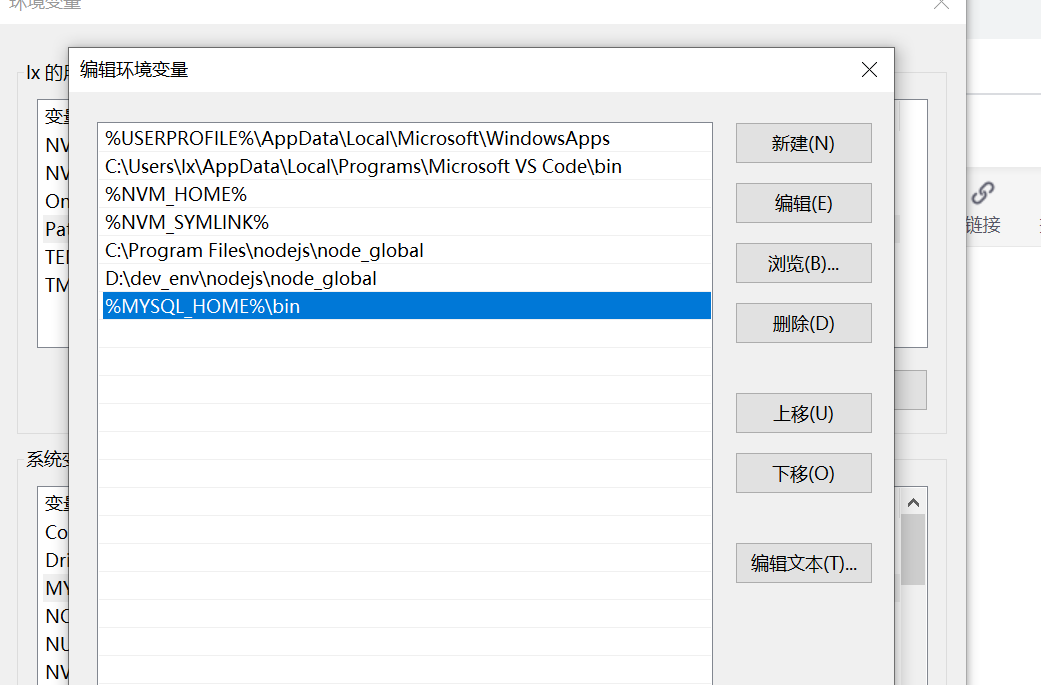
F. configure environment variables
In order to facilitate the login operation of mysql, we set a global variable here.
Create a new one in the system variable

The value is your mysql installation directory.
Add one in the path of the user variable, as follows
Then open the cmd window and directly enter the login command as follows

mysql login and convenient operation are realized.
4. Create front end engineering catalog
vue creates a project file and installs express and mysql dependencies;
npm i -S express mysql
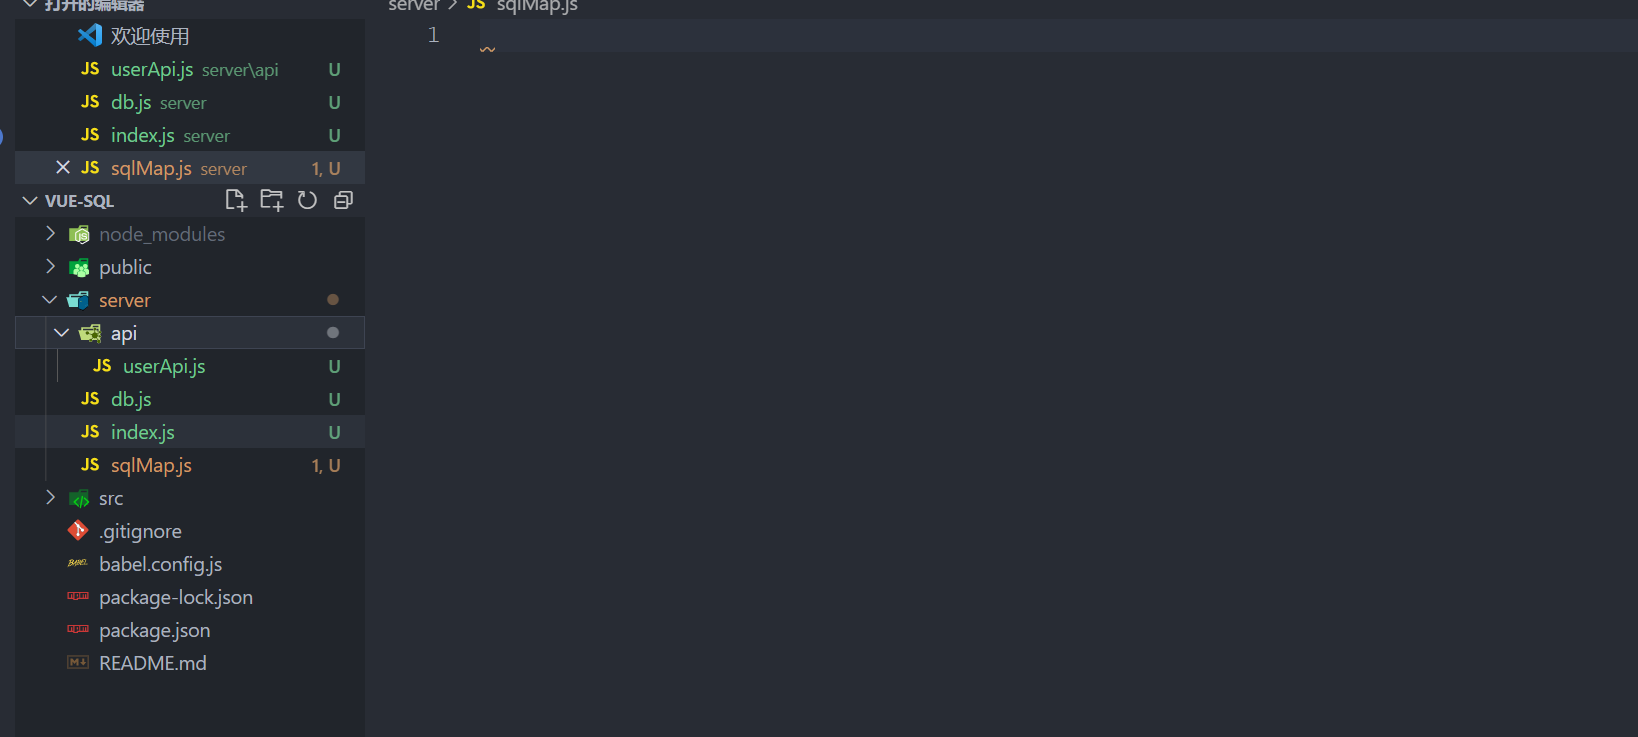
Create a server folder under the root directory of the project, and create several files under the folder, as shown in the following figure:
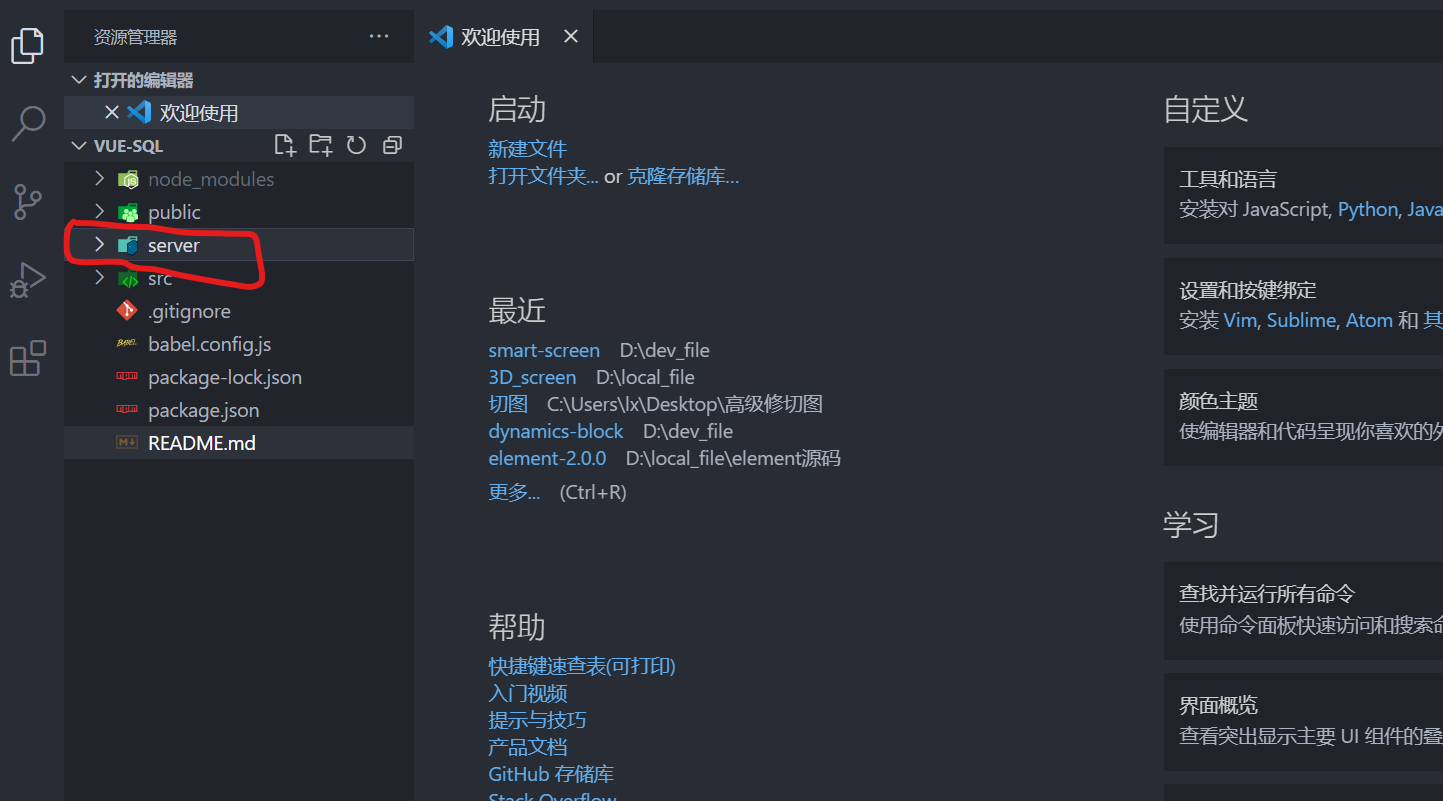 Create a new api folder and DB under the server folder js,index. js,sqlMap.js. (api files store relevant api interface paths and methods, db.js configures relevant databases, index.js configures back-end ports and api routes)
The contents of several documents are listed below:
A,index.js
// node backend server

const userApi = require('./api/userApi');
const bodyParser = require('body-parser');
const express = require('express');
const app = express();

// app.use(bodyParser.json());
// app.use(bodyParser.urlencoded({extended: false}));

// parse application/x-www-form-urlencoded
// bodyParser has been deprecated. Now use the following code. Remember to configure it before introducing routing
app.use(express.urlencoded({ extended: false }))
// parse application/json
app.use(express.json())

//Solve cross domain
app.all('*', function(req, res, next) {
	res.header("Access-Control-Allow-Origin", "*");
	res.header("Access-Control-Allow-Headers", "X-Requested-With");
	res.header("Access-Control-Allow-Methods", "PUT,POST,GET,DELETE,OPTIONS");
	res.header("X-Powered-By", ' 3.2.1')
	res.header("Content-Type", "application/json;charset=utf-8");
	next();
});

// Backend api routing
app.use('/api', userApi);

// Listening port
app.listen(3000);
console.log('success listen at port:3000......');
B,db.js
module.exports ={
  mysql:{
    host: 'localhost',
    user: 'root',
    password: '*******',// Here is the login password set by your mysql
    database: 'test',
    port: '3306'
  }
}
C,sqlMap.js
// sql statement
var sqlMap = {
  // user
  user: {
      add: 'insert into t_test(id, name) values (566, ?)'
  }
}

module.exports = sqlMap;
D,userApi.js
var models = require('../db');
var express = require('express');
var router = express.Router();
var mysql = require('mysql');
var $sql = require('../sqlMap');

// Connect database
var conn = mysql.createConnection(models.mysql);

conn.connect();
var jsonWrite = function(res, ret) {
    if(typeof ret === 'undefined') {
        res.json({
            code: '1',
            msg: 'operation failed'
        });
    } else {
        res.json(ret);
    }
};

// Add user interface
router.post('/addUser', (req, res) => {
    var sql = $sql.user.add;
    var params = req.body;
    console.log(params,"===");
    conn.query(sql, [params.username], function(err, result) {
        if (err) {
            console.log(err);
        }
        if (result) {
            jsonWrite(res, result);
        }
    })
});

module.exports = router;
Finally, write a front-end page to submit data, as follows (remember to install axios yourself and don't write the installation method)
<template>
  <div class="hello">
    <h1>{{ msg }}</h1>
    <form>
      <input type="text" name="username" v-model="userName"> <br>
      <a href="javascript:;" @click="addUser">Submit</a>
    </form>
  </div>
</template>

<script>
export default {
  name: 'HelloWorld',
  data () {
    return {
      msg: 'Welcome to Your Vue.js App',
      userName: '',
    }
  },
  methods: {
    // Add users
    addUser () {
      var name = this.userName;
      this.$http.post('api/addUser', {
        username: name,
      },{}).then((response) => {
        console.log(response);
      })
    }
  }
}
</script>

<!-- Add "scoped" attribute to limit CSS to this component only -->
<style scoped>
h3 {
  margin: 40px 0 0;
}
ul {
  list-style-type: none;
  padding: 0;
}
li {
  display: inline-block;
  margin: 0 10px;
}
a {
  color: #42b983;
}
</style>
Finally, it is crucial to solve cross domain problems. Need to be in Vue config. JS. (of course, the background can also be configured. This is just by the way).
// agent
 proxy: {
          "/api": {
              target: "http://localhost:3000/api ", / / target proxy interface address
              secure: false,// https
              changeOrigin: true, // Open the agent and create a virtual server locally
              // ws: true, / / whether to enable websockets
              pathRewrite: {
                  "^/api": "/"
              }
          }
        }
5. mysql database and table creation
The preparations above are almost done. But it still doesn't work. Because there are no related databases and tables in your mysql. So we need to build the database and tables first.
A. Start and login mysql
(right click to open as administrator) cmd runs the following command:
Start------
net start mysql
Login------
mysql -u root -p
Enter the password to log in.
B. Database and table building
(1) , create datebase database name "to create a database.
We give the database a name, such as "test"
create database test
(2) After building the database, you can look at all your current databases. There is a command "show databases" (note that it is plural)


(3) . you can see the test at the bottom, which is the database we established ourselves. At this time, we need to use the database we established. There is a command, "use test";
use test
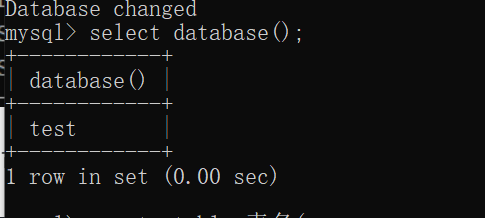
(4) . view the currently used database and type "select database();"
select database()
(5) . add a table in the current database and type the name of create table () {/ / the field requires}. Then we indicate that it is the t written in the above sql statement_ Test, so here should be:
create table t_test(id int(32), name varchar(32));
Now our library and tables have been built.
(6) View this table
desc t_test;
 So far, the libraries and tables we have seen have been completed and verified.
6. Service and debugging interface
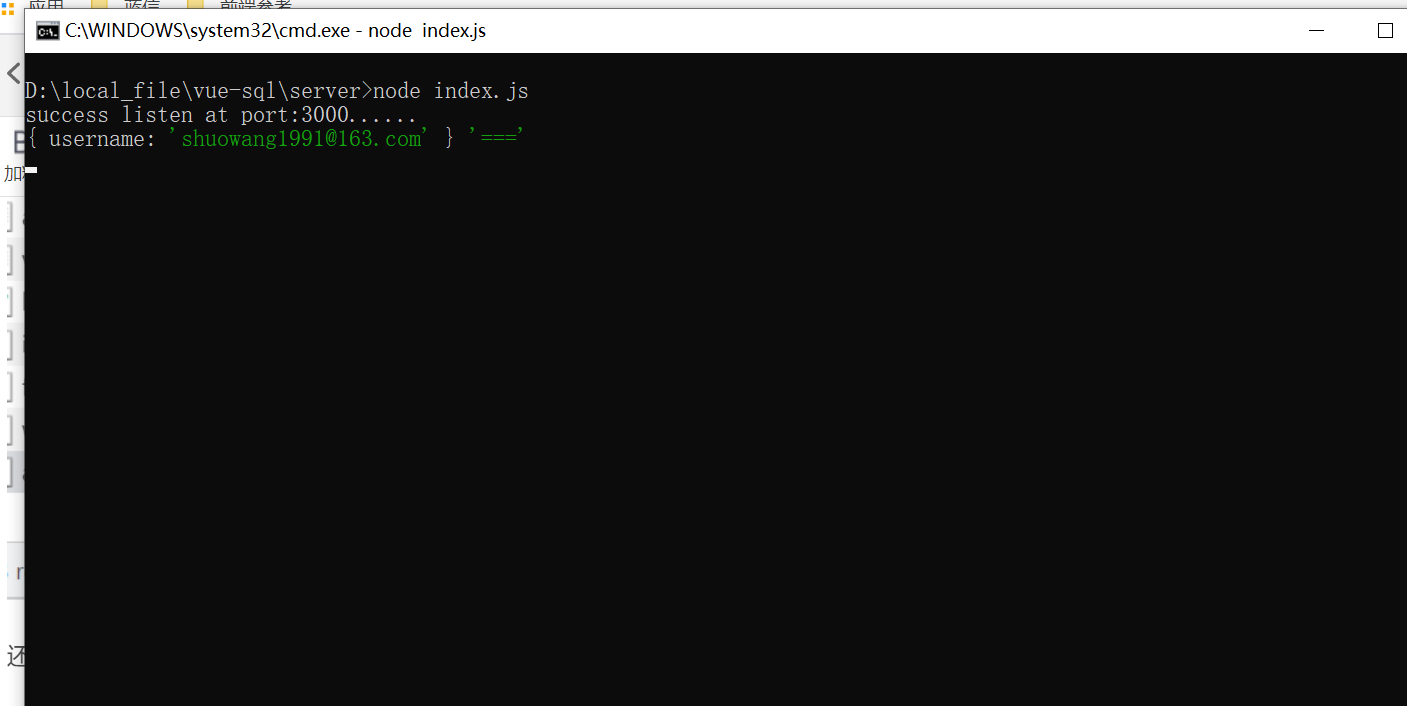
Enter the server folder and run
node index.js
You will see a message indicating that the service is started successfully. Our service port is 3000, so don't forget to solve the cross domain problem.

Then run the vue page as follows

Fill in some content on the form, such as email, and click Submit. Then you can see the success of the request in the developer tool.
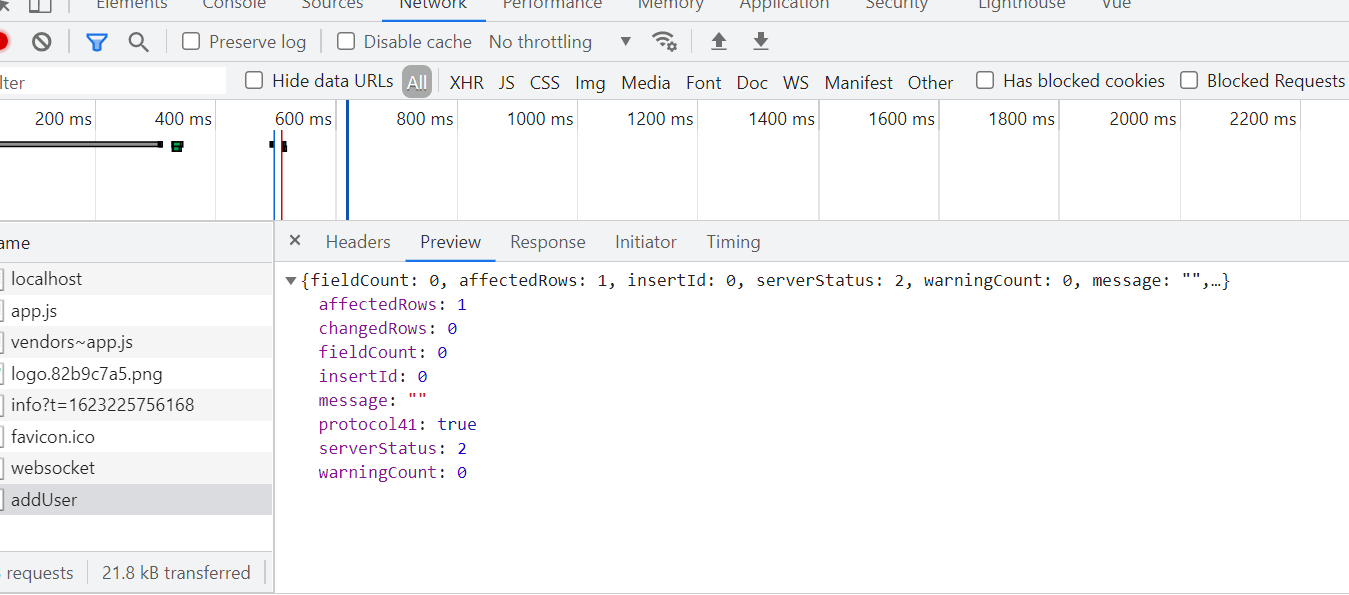
You can also check whether data is returned in the console:
The database connection will also have a log display:
Here, we have finished the whole mysql process. If we want to do more complex functions, we should not only learn the use and development of exprss middleware, but also learn some important concepts in mysql and sql statements.