
Start to build FastDFS environment. We build a stand-alone version.
Operating system: CentOS7 X64. If you don't understand, you can check my blog: https://blog.csdn.net/BiandanLoveyou/article/details/81113406
Fix your own CentOS IP address and view the blog: https://blog.csdn.net/BiandanLoveyou/article/details/116384534
Step 1: Download and install libfastcommon
1. Ensure that the GCC is installed in CentOS
[root@localhost ~]# yum -y install gcc-c++
2. Install libevent. FastDFS relies on the libevent library and needs to be installed.
[root@localhost ~]# yum -y install libevent
3. Install libfastcommon. Libfastcommon is officially provided by FastDFS. Libfastcommon contains some basic libraries required for the operation of FastDFS.
View FastDFS version: https://github.com/happyfish100/libfastcommon/releases
We choose the version of 1.0.39 (don't choose too high version, it's difficult to troubleshoot problems!), And install it in the directory: / usr/local/src /.
[root@localhost ~]# cd /usr/local/src/
[root@localhost src]# wget -O libfastcommon-1.0.39.tar.gz  https://codeload.github.com/happyfish100/libfastcommon/tar.gz/V1.0.39
If an error is reported: - bash: wget: command not found, execute the yum -y install wget command first.
4. Decompress
[root@localhost src]# tar -zxvf libfastcommon-1.0.39.tar.gz
5. Enter libfastcommon-1.0.39 Directory:
[root@localhost src]# cd libfastcommon-1.0.39
6. Installation
[root@localhost libfastcommon-1.0.39]# ./make.sh
After execution, continue to execute the following statement:
[root@localhost libfastcommon-1.0.39]# ./make.sh install
Step 2: install FastDFS
View FastDFS version: https://github.com/happyfish100/fastdfs/releases
We choose V5 Version 11 (don't choose too high version, it's difficult to troubleshoot problems!).
Switch to the download directory:
[root@localhost libfastcommon-1.0.39]# cd /usr/local/src/
download
[root@localhost src]# wget -O fastdfs-5.11.tar.gz https://codeload.github.com/happyfish100/fastdfs/tar.gz/V5.11
Decompression:
[root@localhost src]# tar -zxvf fastdfs-5.11.tar.gz
Enter FastDFS Directory:
[root@localhost src]# cd fastdfs-5.11
Installation:
[root@localhost fastdfs-5.11]# ./make.sh
An error is found, and the error information is as follows:
[root@localhost fastdfs-5.11]# ./make.sh
./make.sh:Line 120: perl: Command not found
./make.sh:Line 121: perl: Command not found
./make.sh:Line 122: perl: Command not found
./make.sh:Line 123: perl: Command not found
./make.sh:Line 124: perl: Command not found
cc  -c -o tracker_service.o tracker_service.c  -I../common -I/usr/local/include
tracker_service.c: In function'tracker_service_init'in:
tracker_service.c:139:18: Error:'O_NOATIME'Undeclared(First use in this function)
     O_NONBLOCK | O_NOATIME)) != 0)
                  ^
tracker_service.c:139:18: Note: each undeclared identifier is reported only once in the function in which it appears
make: *** [tracker_service.o] Error 1
./make.sh:Line 129: perl: Command not found
./make.sh:Line 130: perl: Command not found
./make.sh:Line 131: perl: Command not found
./make.sh:Line 132: perl: Command not found
./make.sh:Line 133: perl: Command not found
cc  -c -o storage_service.o storage_service.c  -I. -Itrunk_mgr -I../common -I../tracker -I../client -Ifdht_client -I/usr/include/fastcommon
storage_service.c: In function'storage_service_init'in:
storage_service.c:1665:18: Error:'O_NOATIME'Undeclared(First use in this function)
     O_NONBLOCK | O_NOATIME)) != 0)
                  ^
storage_service.c:1665:18: Note: each undeclared identifier is reported only once in the function in which it appears
make: *** [storage_service.o] Error 1
Cause: the corresponding command is not found. Just find and install the corresponding command.
Solution: execute the following statement:
yum -y install zlib zlib-devel pcre pcre-devel gcc gcc-c++ openssl openssl-devel libevent libevent-devel perl unzip net-tools wget
Then proceed/ make.sh
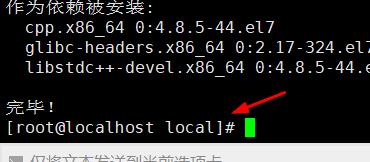
After execution, continue to execute the following statement:
[root@localhost fastdfs-5.11]# ./make.sh install
Default installation method: corresponding files and directories after installation:
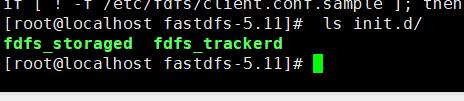
Service script:
/etc/init.d/fdfs_storaged
/etc/init.d/fdfs_trackerd
View:[ root@localhost fastdfs-5.11]# ls init. d/
Configuration files (these three are sample configuration files given by the developer)
/etc/fdfs/client.conf.sample
/etc/fdfs/storage.conf.sample
/etc/fdfs/tracker.conf.sample
The command tool is in the / usr/bin / directory
[root@localhost ~]# ls /usr/bin/
Step 3: configure FastDFS tracker
1. Enter / etc/fdfs and copy the FastDFS tracker sample configuration file tracker Conf.sample and rename it tracker.sample conf
[root@localhost fastdfs-5.11]# cd /etc/fdfs/
[root@localhost fdfs]# cp tracker.conf.sample tracker.conf
2. Edit Tracker Conf, modify base_path, Tracker data and log directory address (the root directory must exist, and the subdirectory will be created automatically). Other defaults are OK.
[root@localhost fdfs]# vi tracker.conf
Modify the red part. Other configurations may not be changed. It is recommended to modify the port number. The default is 8080. To prevent conflict, it is changed to 9080
#Whether the configuration file does not take effect. false means it takes effect
disabled=false
#Service providing port
port=22122
#Tracker data and log directory address (the root directory must exist, and the subdirectory will be created automatically)
base_path=/fastdfs/tracker
#The default HTTP service port is 8080. It is recommended to modify it to prevent conflicts
http.server_port=9080
3. Create the tracker basic data directory, i.e. base_ Directory corresponding to path
[root@localhost fdfs]# mkdir -p /fastdfs/tracker
4. Open the tracking port in the firewall (22122 by default) (in the development stage, it is recommended to close the firewall. Open the firewall in the formal environment!)
# vi /etc/sysconfig/iptables

Add the following port line:
-A INPUT -m state --state NEW -m tcp -p tcp --dport 22122 -j ACCEPT

Restart firewall:
# service iptables restart
Don't understand firewall commands? View blog: https://blog.csdn.net/BiandanLoveyou/article/details/116399225
5. Start Tracker. Any of the following three commands can be started. Let's choose the third one: systemctl start fdfs_trackerd
[root@localhost fdfs]# /etc/init.d/fdfs_trackerd start
[root@localhost fdfs]# service fdfs_trackerd start
[root@localhost fdfs]# systemctl start fdfs_trackerd
After successful startup for the first time, data and logs directories will be created under / fdfsdfs/tracker / (configured base_path).
You can use the command to view:
[root@localhost fdfs]# ls /fastdfs/tracker/
Results:

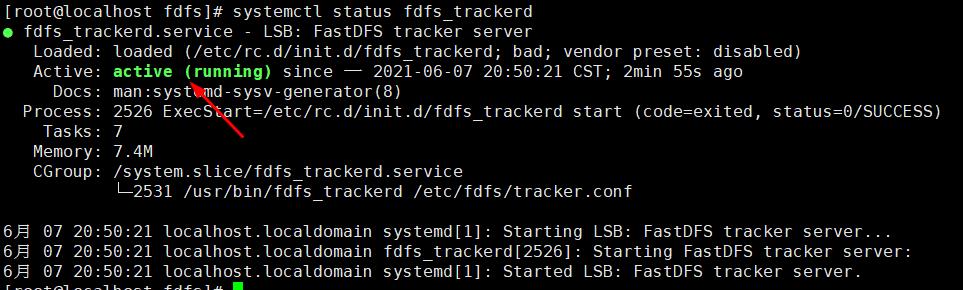
6. Check whether FastDFS Tracker has started successfully
[root@localhost fdfs]# systemctl status fdfs_trackerd
result:
7. Set Tracker startup
[root@localhost fdfs]# chkconfig fdfs_trackerd on
8. Close Tracker command
[root@localhost fdfs]# systemctl stop fdfs_trackerd
After the Tracker service is started successfully, it will be displayed in the base_ Create data and logs directories under path. The directory structure is as follows:
${base_path}
|__data
| |__storage_groups.dat: Storing grouping information
| |__storage_servers.dat: Storage server list
|__logs
| |__trackerd.log:  tracker server log file
Step 4: configure FastDFS storage
1. Enter the / etc/fdfs directory and copy the FastDFS storage sample configuration file storage Conf.sample and rename it storage conf
[root@localhost fdfs]# cd /etc/fdfs/
[root@localhost fdfs]# cp storage.conf.sample storage.conf
2. Edit storage Conf, the red part needs to be modified, and others can not be modified.
[root@localhost fdfs]# vi storage.conf
#Whether the configuration file does not take effect. false means it takes effect
disabled=false
#Specify the group (volume) where this storage server is located
group_name=group1
#storage server service port
port=23000
#Heartbeat interval, in seconds (this refers to actively sending heartbeat to the tracker server)
heart_beat_interval=30
#Address of Storage data and log directory (the root directory must exist, and the subdirectory will be generated automatically) (Note: This is not the address where the uploaded files are stored, but the previous version is, and it has been changed after a certain version)
base_path=/fastdfs/storage/base
#When storing files, the storage server supports multiple paths. Here, the number of base paths for storing files is configured. Usually, there is only one directory.
store_path_count=1
#Configure the store one by one_ path_ Count paths, index number based on 0.
#If store is not configured_ Path0, then it is the same as base_path corresponds to the same path.
store_path0=/fastdfs/storage
#FastDFS uses two-level directories when storing files. The number of directories in which files are stored is configured here.
#If this parameter is only N (e.g. 256), the storage server will be in store when running for the first time_ Path automatically creates N * N subdirectories for storing files.
subdir_count_per_path=256
# tracker_ The list of servers will actively connect to the tracker_server
#When there are multiple tracker servers, write one line for each tracker server. Please modify the IP address according to the actual situation
tracker_server=192.168.0.105:22122
#The time period during which the system is allowed to synchronize (the default is all day). It is generally set to avoid some problems caused by peak synchronization.
sync_start_time=00:00
sync_end_time=23:59
#The default access port is 8888. We change it to 9888
http.server_port=9888
3. Create Storage basic data directory, corresponding to base_path directory
[root@localhost fdfs]# mkdir -p /fastdfs/storage/base
The following is the configured store_path0 path, there are multiple paths to create
[root@localhost fdfs]# mkdir -p /fastdfs/storage
4. Open the storage port in the firewall (23000 by default) (it is recommended to turn off the firewall in the development environment and turn it on when it is online)
[root@localhost fdfs]# vim /etc/sysconfig/iptables
Add the following port line:
-A INPUT -m state --state NEW -m tcp -p tcp --dport 23000 -j ACCEPT
Restart firewall:
[root@localhost fdfs]# service iptables restart
5. Start Storage. Make sure the Tracker is started before starting Storage. If the initial startup is successful, data and logs directories will be created under / fastdfs/storage/base (base_path).
The following two startup commands can be started. It is recommended to use the second one. systemctl start fdfs_storaged
[root@localhost fdfs]# /etc/init.d/fdfs_storaged start
[root@localhost fdfs]# systemctl start fdfs_storaged
To see if Storage started successfully:
[root@localhost fdfs]# netstat -unltp|grep fdfs
23000 port is being monitored, indicating that the Storage is started successfully. The effect picture is as follows:

6. Turn off Storage. Both commands can be closed.
[root@localhost fdfs]# systemctl stop fdfs_storaged
[root@localhost fdfs]# /etc/init.d/fdfs_storaged stop
7. Set Storage boot
[root@localhost fdfs]# chkconfig fdfs_storaged on
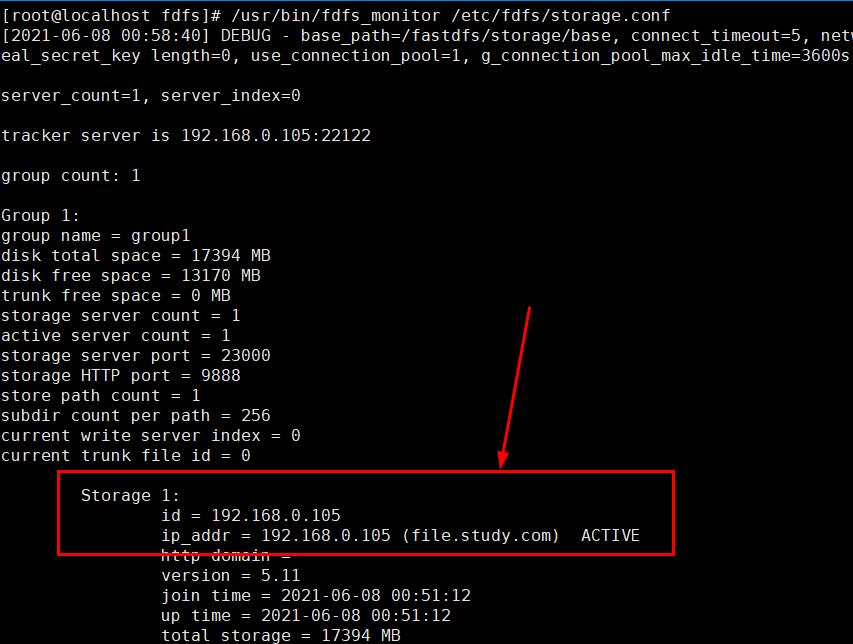
8. Check whether Storage and Tracker are communicating
/usr/bin/fdfs_monitor /etc/fdfs/storage.conf
Result diagram:
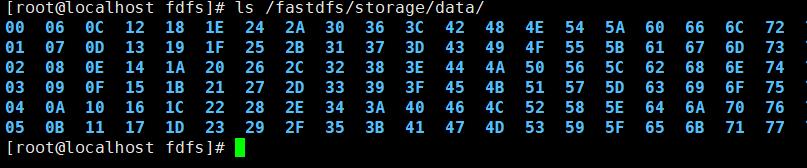
9. Storage is in storage_ Path0 = / fastdfs / storage creates an N*N subdirectory under the data directory.
[root@localhost fdfs]# ls /fastdfs/storage/data/
Renderings:
Step 5: upload test
1. Modify the client configuration file in the Tracker server
[root@localhost fdfs]# cd /etc/fdfs/
[root@localhost fdfs]# cp client.conf.sample client.conf
2. Modify client Conf configuration
[root@localhost fdfs]# vi client.conf
#Client's data and log directory
base_path=/fastdfs/client
#Please modify the Tracker port and IP address according to the actual situation
tracker_server=192.168.0.105:22122
Then create the configured base_path=/fastdfs/client (this step should not be less, otherwise an error will be reported. Error - file:... / client / client_func. C, line: 257, "/ fastdfs / client" can't be accessed, error Info: no such file or directory):
[root@localhost fdfs]# mkdir -p /fastdfs/client
3. Upload test
Let's create a test text first:
[root@localhost ~]# cd /etc/fdfs/
[root@localhost fdfs]# vi 2021-6-8.txt
Enter what you want:

Then execute the following statement:
[root@localhost fdfs]# /usr/bin/fdfs_upload_file /etc/fdfs/client.conf /etc/fdfs/2021-6-8.txt
design sketch:

The returned file ID is composed of group (group1), storage directory (M00), two-level subdirectories (00 / 00), fileid (wkgaaawc-v_iaoj6faaaaugrqkji740) and file suffix (txt) (specified by the client and mainly used to distinguish file types).
OK, FastDFS is set up in the Linux environment.