Detailed explanation of Uncrustify configuration of C & C + + code beautification tool in VScode
catalog:
1: Overview
2: Download
3: Installation
4: Play Uncrustify in vscode
0: update Journal
2022 / 2 / 5 update: Chapter 3.3: use. Later, other usage methods will be updated and various ides may be used to use Uncrustify.
1: Overview
Due to the use of IDEA and pycharm in school, it's hard to use any editor now. The level is not up. Obsessive-compulsive disorder and various requirements are up. Now it's urgent to find a comfortable editor by yourself. It's really good to try atom before [([miscellaneous] win10 build atom+cpp environment)]( https://blog.csdn.net/qq_39949271/article/details/122143445?spm=1001.2014.3001.5502 )However, the problem is that atom is always stuck under windows, and there are limitations in configuration in many places. For example, UE4 can't use atom ~ ~ of course, you can use VS ~ ~. When doing projects, it's still difficult to configure because of your own dishes. So I decided to try something else. The use of VScode has never been used as a vegetable chicken this time. When I went in, I encountered the above technical problems ~ ~ people are addicted to vegetables and people are stupid and dull ~ ~. In this paper, the code is formatted by using Uncrustify tool to achieve the effect of beautification.2: Download
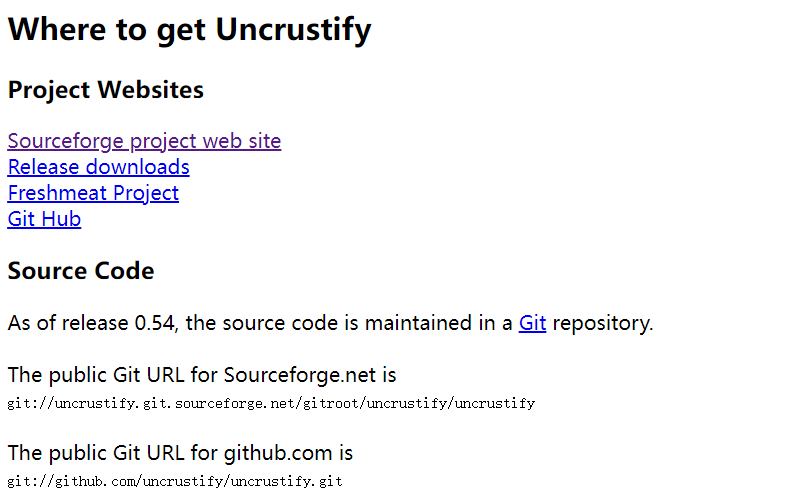
Uncrustify download is simple** Link * *:[ http://uncrustify.sourceforge.net/](http://uncrustify.sourceforge.net/ )You can find the link of SourceForge in Where to get below. Just click to download it. At the same time, you can also click in the address of GitHub project.
3: Installation
#####3.1: unzip your Uncrustify. Unzip your Uncrustify anywhere you like (if you unzip it to the package directory of atom, you will see it in the plug-in management). There will be a bin and a share document in it. Bin is the program we need, while share is some reference documents, configuration sharing, etc! [insert picture description here]( https://img-blog.csdnimg.cn/e2f70c23ed0a48f39ccff8c15736c3c6.png )####### 3.2: environment variable # configure environment variable path and add a bin directory of Uncrustify directory! [insert picture description here]( https://img-blog.csdnimg.cn/f66d591e4c034e849229d5f11b85ce37.png?x -oss-process=image/watermark,type_ d3F5LXplbmhlaQ,shadow_ 50,text_ Q1NETiBA54ix5YaS6Zmp55qEcc-AKHMsYSk=,size_ 20,color_ FFFFFF,t_ 70,g_ se,x_ 16) ####### 3.3: then you can use Uncrustify, and the configuration file will not be analyzed. It took an afternoon to change your configuration file. The template is in 'Uncrustify/share/doc/uncrustify/examples'. You can use these templates and change them yourself, or you can download my: [link: https://pan.baidu.com/s/1DlwaLpKqgXUHd4BxCq-aUA : ]( https://pan.baidu.com/s/1DlwaLpKqgXUHd4BxCq-aUA )Extraction code: nm5vAfter making the configuration file, put it where you like. Next, let's see how to use it. If you use qt or atom, they all have methods to load Uncrustify. Regardless of them here, let's start from the command line (we'll play in vscode, so it's convenient to see the directory tree and files).
Enter uncrustify on the command line and you will see its man page (you should see the following figure. If uncrustify is not an internal command, it is mostly an environmental variable problem):

The contents of the manual page are posted directly below:
PS G:\cProject\LearnOpenGL> uncrustify
Usage:
uncrustify.exe [options] [files ...]

If no input files are specified, the input is read from stdin
If reading from stdin, you should specify the language using -l
or specify a filename using --assume for automatic language detection.

If -F is used or files are specified on the command line,
the output filename is 'prefix/filename' + suffix

When reading from stdin or doing a single file via the '-f' option,
the output is dumped to stdout, unless redirected with -o FILE.

Errors are always dumped to stderr

The '-f' and '-o' options may not be used with '-F' or '--replace'.
The '--prefix' and '--suffix' options may not be used with '--replace'.

Basic Options:
 -c CFG       : Use the config file CFG, or defaults if CFG is set to '-'.
 -f FILE      : Process the single file FILE (output to stdout, use with -o).
 -o FILE      : Redirect stdout to FILE.
 -F FILE      : Read files to process from FILE, one filename per line (- is stdin).
 --check      : Do not output the new text, instead verify that nothing changes when
                the file(s) are processed.
                The status of every file is printed to stderr.
                The exit code is EXIT_SUCCESS if there were no changes, EXIT_FAILURE otherwise.
 files        : Files to process (can be combined with -F).
 --suffix SFX : Append SFX to the output filename. The default is '.uncrustify'
 --prefix PFX : Prepend PFX to the output filename path.
 --replace    : Replace source files (creates a backup).
 --no-backup  : Do not create backup and md5 files. Useful if files are under source control.
 --if-changed : Write to stdout (or create output FILE) only if a change was detected.
 -l           : Language override: C, CPP, D, CS, JAVA, PAWN, OC, OC+, VALA.
 -t           : Load a file with types (usually not needed).
 -q           : Quiet mode - no output on stderr (-L will override).
 --frag       : Code fragment, assume the first line is indented correctly.
 --assume FN  : Uses the filename FN for automatic language detection if reading
                from stdin unless -l is specified.

Config/Help Options:
 -h -? --help --usage     : Print this message and exit.
 --version                : Print the version and exit.
 --count-options          : Print the number of available options and exit.
 --show-config            : Print out option documentation and exit.
 --update-config          : Output a new config file. Use with -o FILE.
 --update-config-with-doc : Output a new config file. Use with -o FILE.
 --universalindent        : Output a config file for Universal Indent GUI.
 --detect                 : Detects the config from a source file. Use with '-f FILE'.
                            Detection is fairly limited.
 --set <option>=<value>   : Sets a new value to a config option.

Debug Options:
 -p FILE               : Dump debug info into FILE, or to stdout if FILE is set to '-'.
                         Must be used in combination with '-f FILE'
 -ds FILE              : Dump parsing info at various moments of the formatting process.
 --dump-steps FILE       This creates a series of files named 'FILE_nnn.log', each
                         corresponding to a formatting step in uncrustify.
                         The file 'FILE_000.log' lists the formatting options in use.
                         Must be used in combination with '-f FILE'
 -L SEV                : Set the log severity (see log_levels.h; note 'A' = 'all')
 -s                    : Show the log severity in the logs.
 --decode              : Decode remaining args (chunk flags) and exit.
 --tracking_space FILE : Prepare tracking informations for debugging.
                         Cannot be used with the -o option'

Usage Examples
cat foo.d | uncrustify -q -c my.cfg -l d
uncrustify -c my.cfg -f foo.d
uncrustify -c my.cfg -f foo.d -L0-2,20-23,51
uncrustify -c my.cfg -f foo.d -o foo.d
uncrustify -c my.cfg -f foo.d -o foo.d -ds dump
uncrustify -c my.cfg foo.d
uncrustify -c my.cfg --replace foo.d
uncrustify -c my.cfg --no-backup foo.d
uncrustify -c my.cfg --prefix=out -F files.txt

Note: Use comments containing ' *INDENT-OFF*' and ' *INDENT-ON*' to disable
      processing of parts of the source file (these can be overridden with
      enable_processing_cmt and disable_processing_cmt).

There are currently 787 options and minimal documentation.
Try UniversalIndentGUI and good luck.
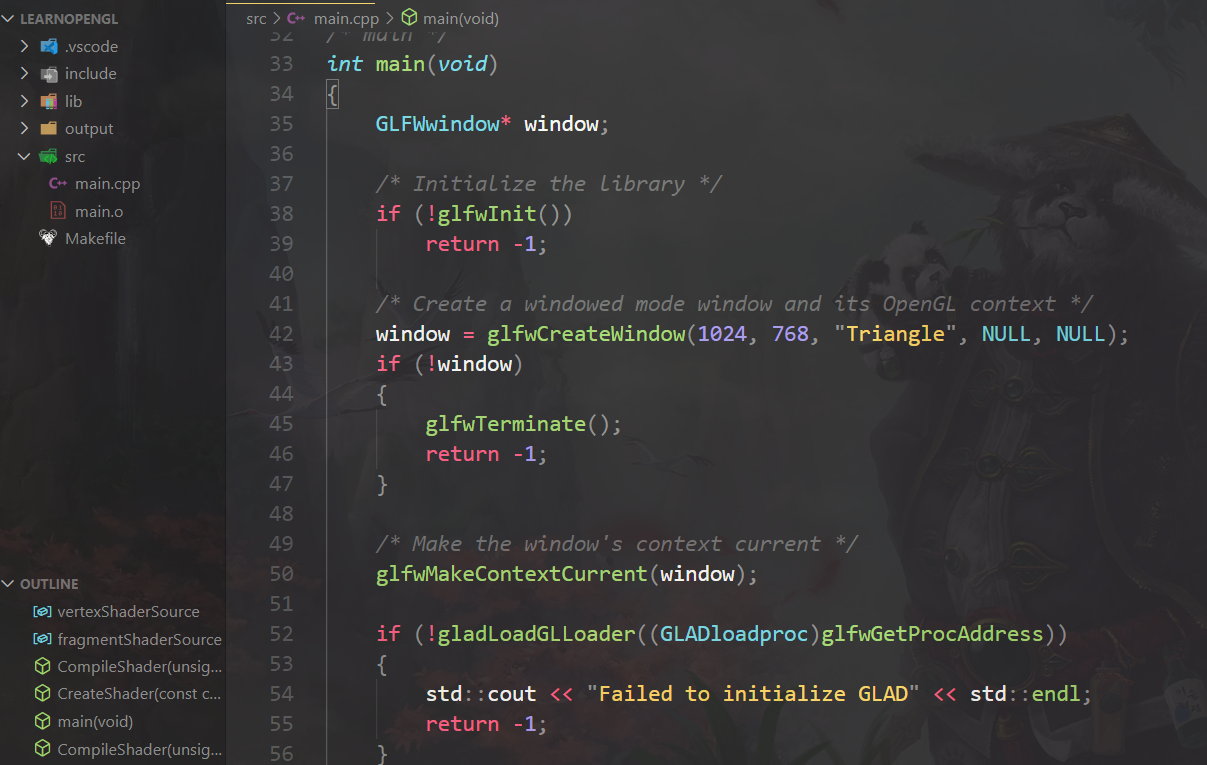
We need to use the above configuration file to process a source file and get a formatted output. For example, the following figure is a program of my new toy glad, including opengl context and so on. It obviously adopts the style of aligning braces up and down, and only statements without parentheses after if and for. Of course, I liked this style when I first learned c, but I was forced to learn the annoying java because I reformed later, Decide to use the new style (see the formatted style later).
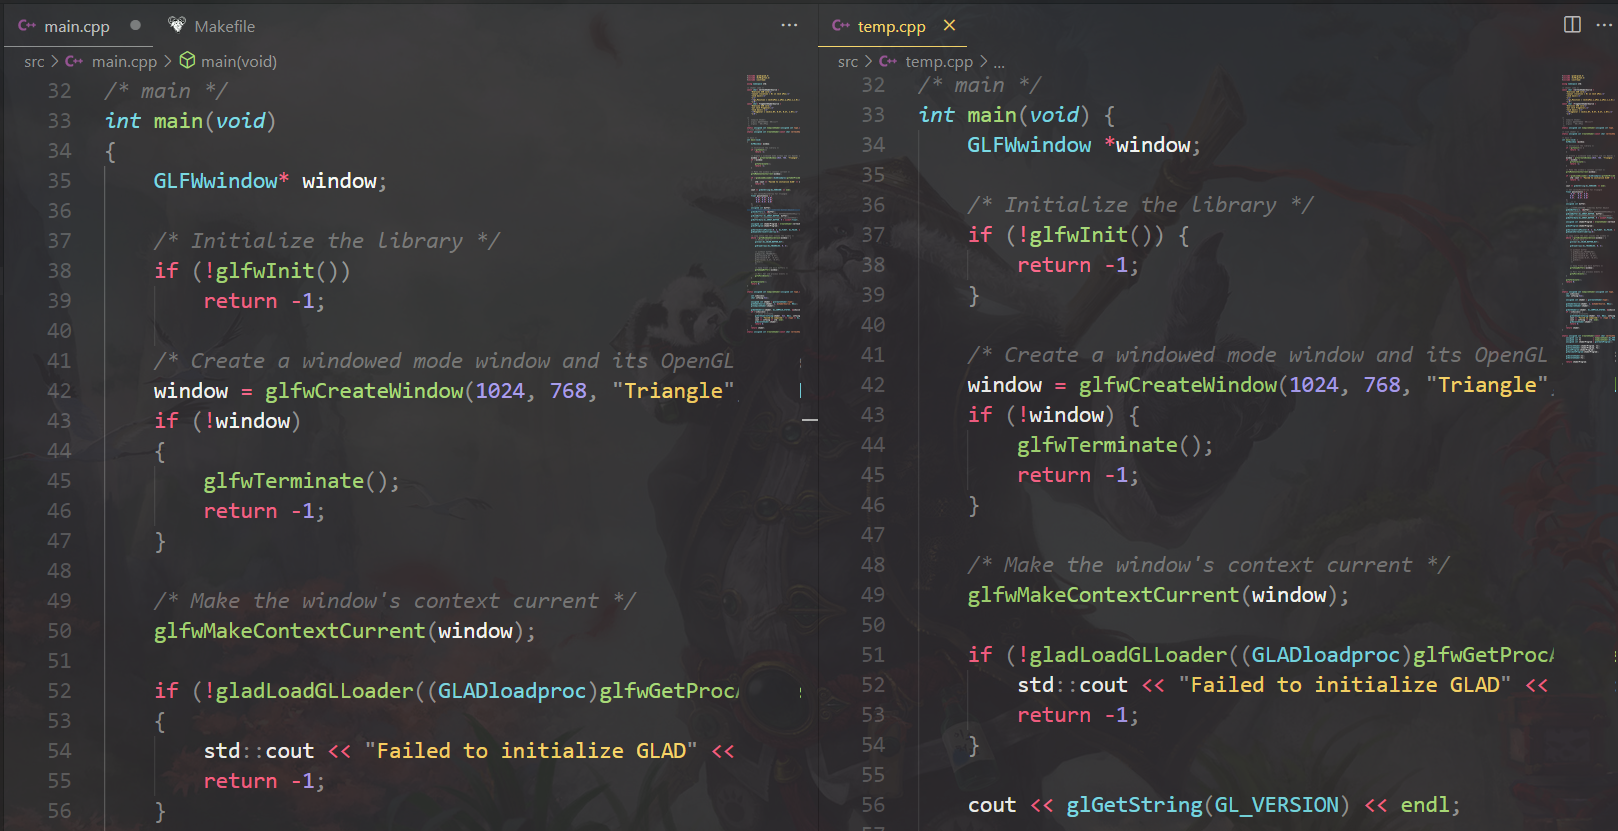
Then we call up terminal, and then enter the command uncritify - c configuration directory - f source file - O output file. The new file is shown in the left temp CPP (my command is uncrustify -c - F. \ SRC \ main.cpp - o. \ SRC \ temp.cpp because I have the default configuration, there is no directory parameter after - c):

It can be observed that the new file on the right has been formatted according to the configuration file (* * *. cgf) file adjusted the previous afternoon. Isn't it great?
4: Configure Uncrustify in vscode
First, you need to download the Uncrustify plug-in:
Then something strange happened. How to call it in vsc? It's impossible to strike orders like the above in the command line. It's a little scary. Some configurations of VSCode are not very friendly to friends who have just come into contact, because they are all made of Jason strings. The threshold for configuration is a little high, so it can't be configured by clicking the mouse.
Directly press shift+alt+f in the text. This is the instruction of vscode formatting code. After pressing, format will be executed If you press the document command for the first time, it will prompt you that you have not specified the format code. The program will have a dialog box to select uncrustify. However, this dialog box will only appear once and crash.


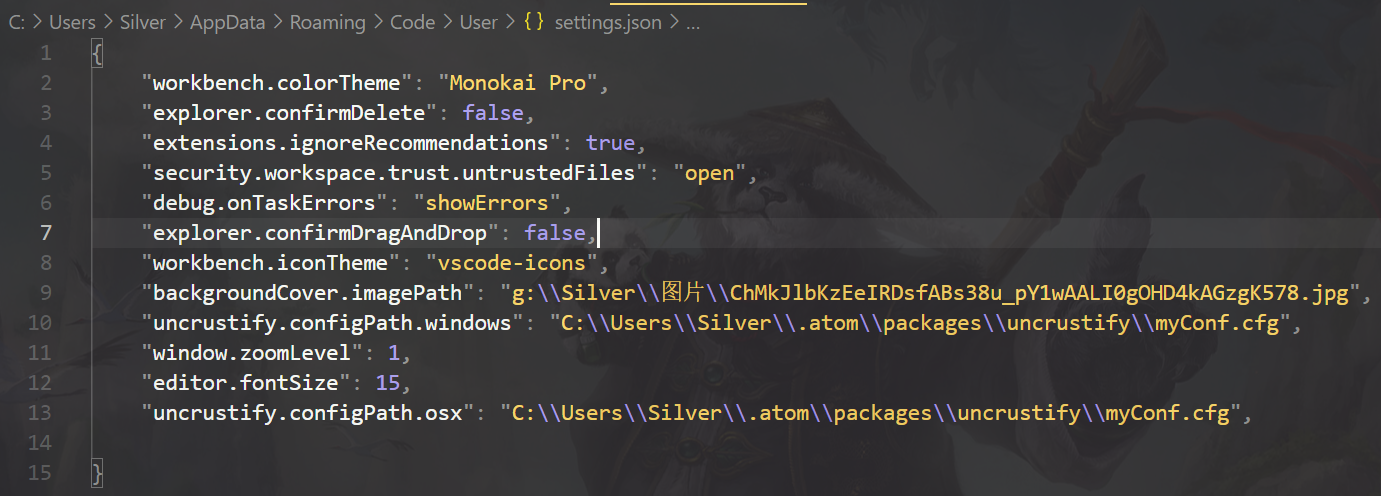
So what if you want to change uncrustify now, for example, change to clang format or MS vscode What about the cpptools tool. Enter the setting and click the small button in the upper right corner. (enter jason file)

After entering, you will find that I added more configPath in the figure below. If you download, there should be no such line, but if you set uncrustify, there will be (don't put the plug-in how to use it, just set the extension setting of uncrustify directly).
If we previously set the default formatting tool in the form of dialog box, there will be one more one.

So if you want to change, just remove this line or change the string. But why is the string so long? It's because the plug-in will have an Extension id, which can be used to find the target plug-in.
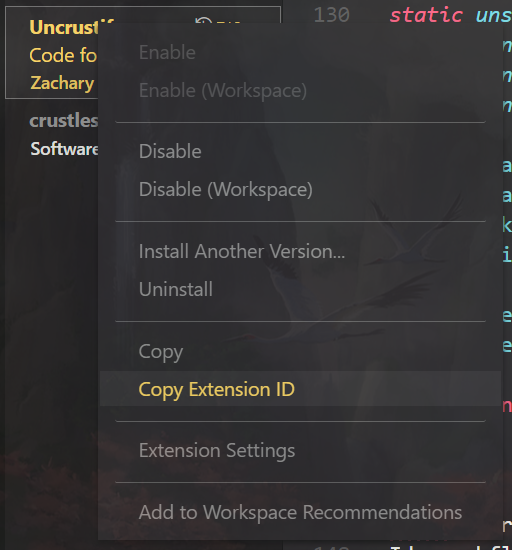
Click Copy and copy extension id at the top and you will get the following figure

When you complete all the above configurations, you can press the default key of shift+alt+f to format your c + + code. If you need other tools to format, you can also set it in the same way, but this means that you need to make more plug-ins and extensions.