catalogue
2. Check whether the hardware information supports virtualization
3. Closure of essential services
Install and configure KVM service
1. Install kvm dependent packages
4.KVM virtual machine management
5. Log in to the KVM virtual machine from the local machine
Configure the web management interface of KVM
2. Install and configure cherrypy and wok
Younger martial sister: are you there? Elder martial brother, I don't want to work hard. I think I'd better find you! Brother Han: I don't know. I can learn a lot of skills like this, Shixuan. By the way, elder martial brother just saw KVM virtualization recently. Can you tell me about it? Han: let's open a video (ps: after the video is opened, you can't see anything). Junior sister: tell me, senior brother. I'll listen
brief introduction
Kvm (full name: kernel based virtual machine) is a full-featured virtualization solution on x86 hardware platform under Linux, including a loadable kernel module Kvm Ko provides and virtualizes the core architecture and processor specification modules. Using Kvm allows multiple virtual machines, including Linux and Windows, and each virtual machine has private hardware, including network card, disk and graphics adapter card. At present, virtualization technology is very popular in the world. The two common mainstream technologies are Vmware and Kvm.
structure
- Device driver / dev/kvm.
- KVM needs the support of virtualization function in CPU and can only run on CPU with virtualization, that is, Intel CPU with VT function and AMD CPU with AMD-V function.
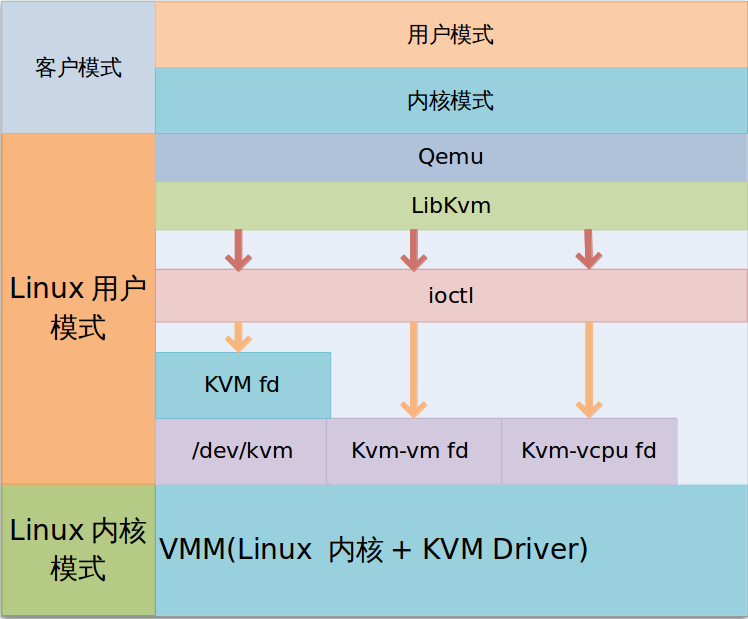
characteristic
- Embedded in Linux kernel (improved compatibility)
- Code level resource invocation (improve performance)
- A virtual machine is a process (memory is easy to manage)
- Directly support NUMA Technology (improve scalability)
- Red Hat acquired KVM
- Maintain the open source development model
- Better business support and service guarantee
Environmental preparation
1. Experimental description
Centos 7.9 image # 4-core 8G # hard disk 50G # host name: kvm-node01 # IP: 10.10.10.130 # ps: I'm experimenting with VMware workstation, a desktop virtualization software. And the working environment is almost the same.
2. Check whether the hardware information supports virtualization
2.1 virtual machine settings
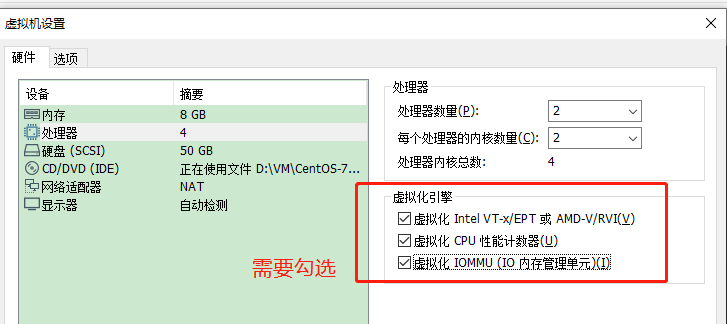
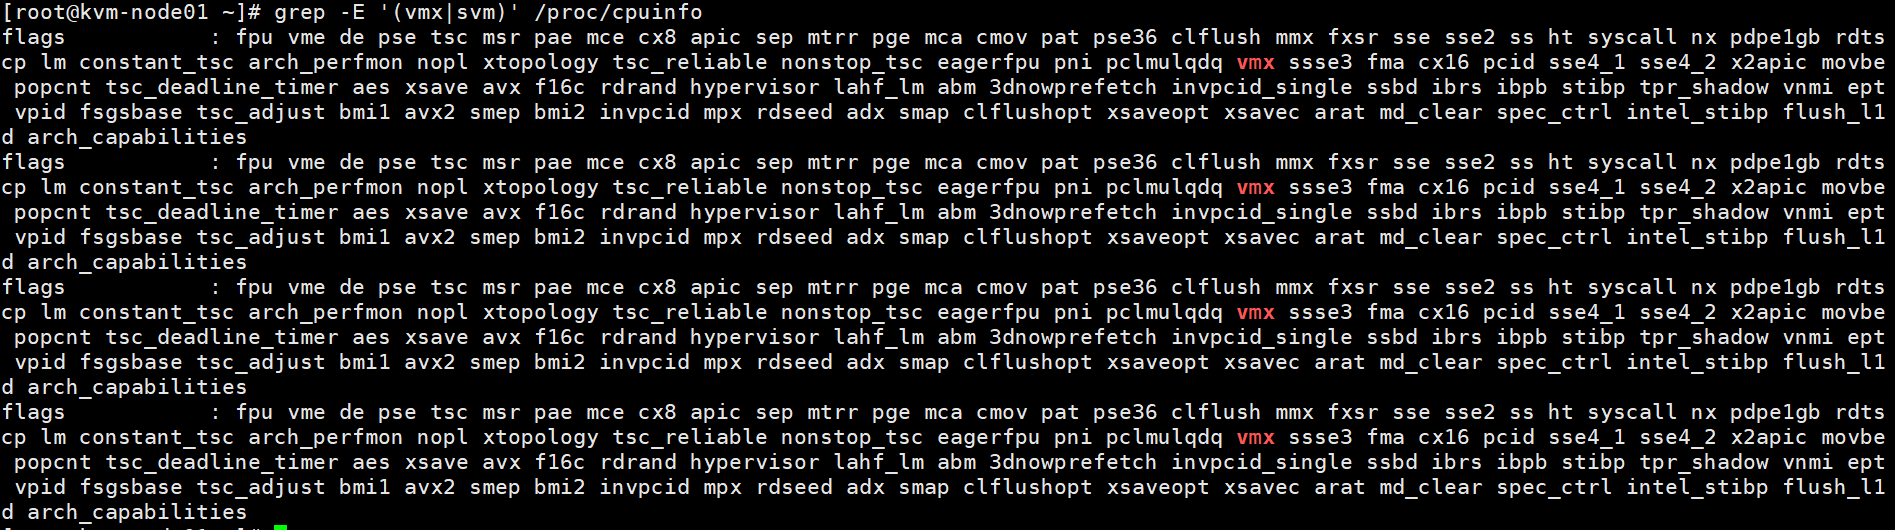
2.2 check whether the cpu supports virtualization
[root@kvm-node01 ~]# grep -E '(vmx|svm)' /proc/cpuinfo
3. Closure of essential services
3.1 permanently close setenforce
[root@kvm-node01 ~]# setenforce 0
[root@kvm-node01 ~]# vim /etc/selinux/config
SELINUX=disabled
3.2 permanently close the firewall
[root@kvm-node01 ~]# systemctl  stop firewalld
[root@kvm-node01 ~]# systemctl  disable firewalld
Removed symlink /etc/systemd/system/multi-user.target.wants/firewalld.service.
Removed symlink /etc/systemd/system/dbus-org.fedoraproject.FirewallD1.service.
Install and configure KVM service
1. Install kvm dependent packages
[root@kvm-node01 ~]# yum -y install qeum-kvm qemu-kvm-tools virt-manager libvirt virt-install qemu-kvm
2. Start libvirtd service
[root@kvm-node01 ~]# lsmod | grep kvm     #View kvm module
kvm_intel             188740  0
kvm                   637515  1 kvm_intel
irqbypass              13503  1 kvm
[root@kvm-node01 ~]# systemctl  start libvirtd
[root@kvm-node01 ~]# systemctl  enable libvirtd
3. Create virtual machine
3.1 making virtual machine image
[root@kvm-node01 ~]# qemu-img create -f qcow2 /opt/centos7.qcow2 10G    #Create hard disk
Formatting '/opt/centos7.qcow2', fmt=qcow2 size=10737418240 encryption=off cluster_size=65536 lazy_refcounts=off
-f: Format, used here qcow2 Format (common) raw and qcow2)
/opt/centos7.qcow2: Disk storage path
10G: Disk size

[root@kvm-node01 ~]# dd if=/dev/cdrom of=/opt/centos7.iso  #Here I use the image of the system itself, and I can also remount other images
 18354176 recorded+0 Read in
 18354176 recorded+0 Writing
9397338112 byte(9.4 GB)Copied, 168.816 Seconds, 55.7 MB/second
3.2 graphical installation of virtual machine
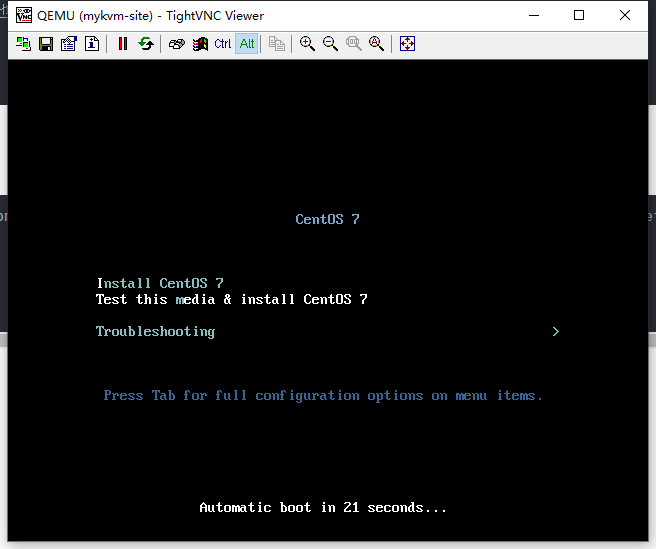
[root@kvm-node01 ~]# virt-install --name mykvm-site --virt-type kvm --ram 2048 --cdrom=/opt/centos7.iso --disk path=/opt/centos7.qcow2 --network network=default --graphics vnc,listen=0.0.0.0 --noautoconsole

Start installation......
Domain installation is still in progress. You can reconnect
 To the console to complete the installation process.
3.3 VNC connection for installation (installation steps omitted)
4.KVM virtual machine management
4.1 view, start, edit and delete virtual machines
[root@kvm-node01 ~]# virsh list --all
 Id    name                         state
----------------------------------------------------
 -     mykvm-site                     close

[root@kvm-node01 ~]# virsh start mykvm-site
 field mykvm-site Started

[root@kvm-node01 ~]# virsh edit mykvm-site
##Configuration of mykvm site virtual machine

[root@kvm-node01 ~]# virsh undefine mykvm-site  #Delete virtual machine
4.2 modify the number of CPUs of the virtual machine (CPUs can be hot added, not hot reduced. The number of CPUs cannot be higher than the number of CPUs of the physical machine)
[root@kvm-node01 ~]# virsh edit mykvm-site
<vcpu placement='auto' current='1'>2</vcpu>   #It means that there are currently 1 CPUs and the maximum is 2
[root@kvm-node01 ~]# virsh setvcpus mykvm-site 2 --live --config   #Hot add cpu

#Perform hot activation cpu1 on the mykvm site machine via vnc
echo 1 > /sys/devices/system/cpu/cpu1/online
[root@localhost ~] lscpu | grep CPU

4.3 modifying memory
[root@kvm-node01 opt]# virsh  qemu-monitor-command mykvm-site --hmp --cmd info balloon  #View current memory
balloon: actual=2048
[root@kvm-node01 opt]# virsh  qemu-monitor-command mykvm-site --hmp --cmd balloon 600  #Adjust to 600
[root@kvm-node01 opt]# virsh  qemu-monitor-command mykvm-site --hmp --cmd info balloon
balloon: actual=600
##Memory can also be hot adjusted, provided that the memory is less than the value set in the virtual machine configuration file, that is, the following value
<memory unit='KiB'>2097152</memory>   #At present, the maximum is 2G, that is to say, no more than 2G can be adjusted
4.4 hard disk
[root@kvm-node01 opt]# qemu-img -help   #Format supported by hard disk
Supported formats: vvfat vpc vmdk vhdx vdi ssh sheepdog rbd raw host_cdrom host_floppy host_device file qed qcow2 qcow parallels nbd iscsi gluster dmg tftp ftps ftp https http cloop bochs blkverify blkdebug

Full mirror mode: raw
 Sparse mode: qcow2

#Add a new hard disk to mykvm site
[root@kvm-node01 opt]# qemu-img create -f qcow2 /opt/centos-disk01.qcow2 10G
Formatting '/opt/centos-disk01.qcow2', fmt=qcow2 size=10737418240 encryption=off cluster_size=65536 lazy_refcounts=off
[root@kvm-node01 opt]# qemu-img info /opt/centos-disk01.qcow2
image: /opt/centos-disk01.qcow2
file format: qcow2
virtual size: 10G (10737418240 bytes)
disk size: 196K
cluster_size: 65536
Format specific information:
    compat: 1.1
    lazy refcounts: false
#The following command means that / opt / centos-disk01 The disk qcow2 is added to the virtual machine mykvm site, and the name of the hard disk displayed in the virtual machine is vdb
[root@kvm-node01 opt]# virsh attach-disk mykvm-site /opt/centos-disk01.qcow2 vdb
 Successfully attached disk
##Then is the normal operation, such as formatting and mounting this hard disk partition
4.5 network settings
[root@kvm-node01 opt]# brctl show   #View network information
bridge name	bridge id		STP enabled	interfaces
virbr0		8000.525400d4eb48	yes		virbr0-nic
							vnet0
[root@kvm-node01 opt]# brctl addbr br0  #Add bridge brctl delbr br0 this command deletes the bridge
[root@kvm-node01 opt]# brctl show
bridge name	bridge id		STP enabled	interfaces
br0		8000.000000000000	no
virbr0		8000.525400d4eb48	yes		virbr0-nic
							vnet0
[root@kvm-node01 opt]# brctl addif br0 ens33  #Add the network card of the host to br0
5. Log in to the KVM virtual machine from the local machine
5.1 configuring the console
[root@kvm-node01 ~]# vim /etc/default/grub
6 GRUB_CMDLINE_LINUX="crashkernel=auto rd.lvm.lv=centos/root rd.lvm.lv=centos/swap rhgb quiet c    onsole=ttyS0"
[root@kvm-node01 ~]# grub2-mkconfig -o /boot/grub2/grub.cfg   #to update grub2[root@kvm-node01 [root@kvm-node01 ~]# reboot  #restart
Virtual machine login
[root@kvm-node01 ~]# systemctl start serial-getty@ttyS0
[root@kvm-node01 ~]# virsh start mykvm-site
 field mykvm-site Started
[root@kvm-node01 ~]# virsh console mykvm-site
 connect to a domain mykvm-site
 The escape character is ^]


CentOS Linux 7 (Core)
Kernel 3.10.0-862.el7.x86_64 on an x86_64

localhost login:
If this happens (try the following solution):


Configure the web management interface of KVM
1. General
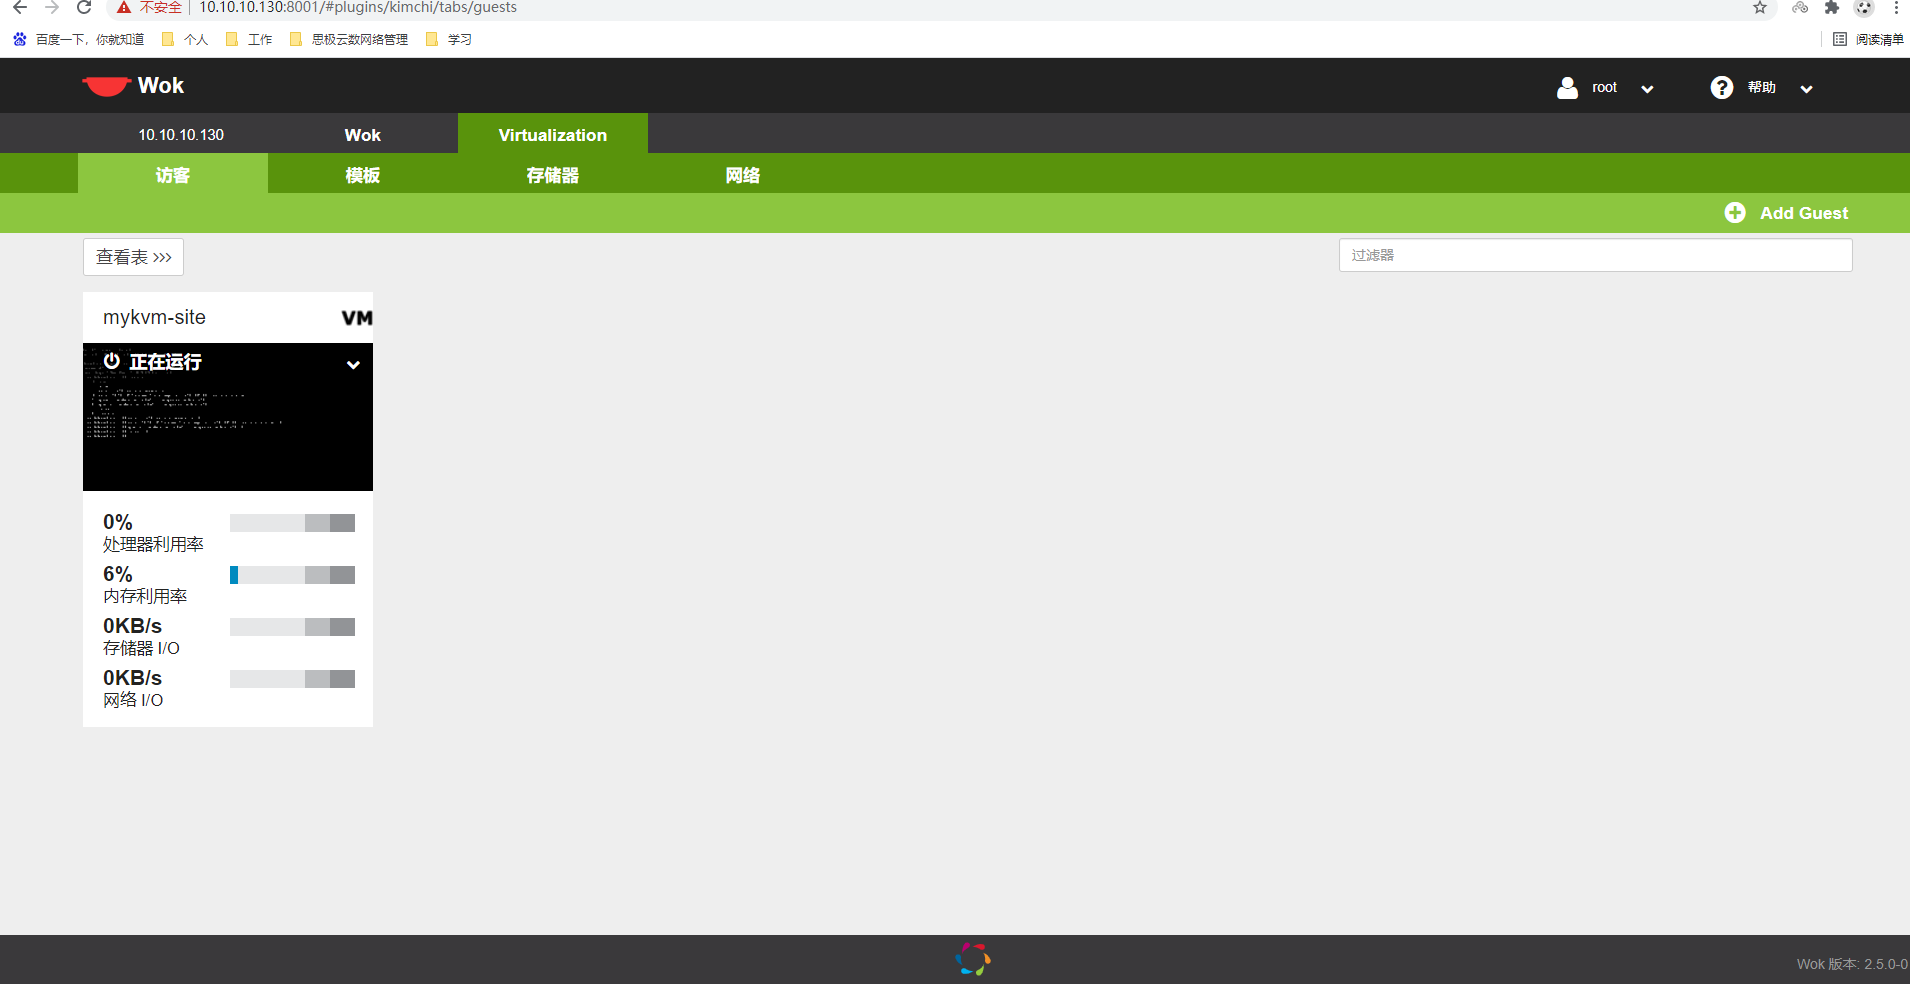
KVM has no web management page. When using KVM virtualization, it generally needs to use other management systems or command-line mode, which brings great inconvenience to the small-scale use of KVM, while wok uses kimchi to manage KVM is very convenient and lightweight. Wok's cherrypy based web framework can be extended through some plug-ins, such as virtualization management, host management and system management. It can run in any web browser that supports HTML5. Kimchi is a KVM management tool based on HTML5. It is a plug-in of wok (wok must be installed before using kimchi). It is more convenient to manage KVM through kimchi.
2. Install and configure cherrypy and wok
[root@kvm-node01 ~]# wget https://github.com/kimchi-project/wok/releases/download/2.5.0/wok-2.5.0-0.el7.centos.noarch.rpm
[root@kvm-node01 ~]# wget https://github.com/kimchi-project/kimchi/releases/download/2.5.0/kimchi-2.5.0-0.el7.centos.noarch.rpm

[root@kvm-node01 ~]# yum -y install epel-release   #epel source. Some dependencies exist in this source
[root@kvm-node01 ~]# yum -y localinstall *.rpm
[root@kvm-node01 ~]# systemctl  daemon-reload
[root@kvm-node01 ~]# systemctl  start wokd
[root@kvm-node01 ~]# systemctl  enable wokd
3.web interface operation
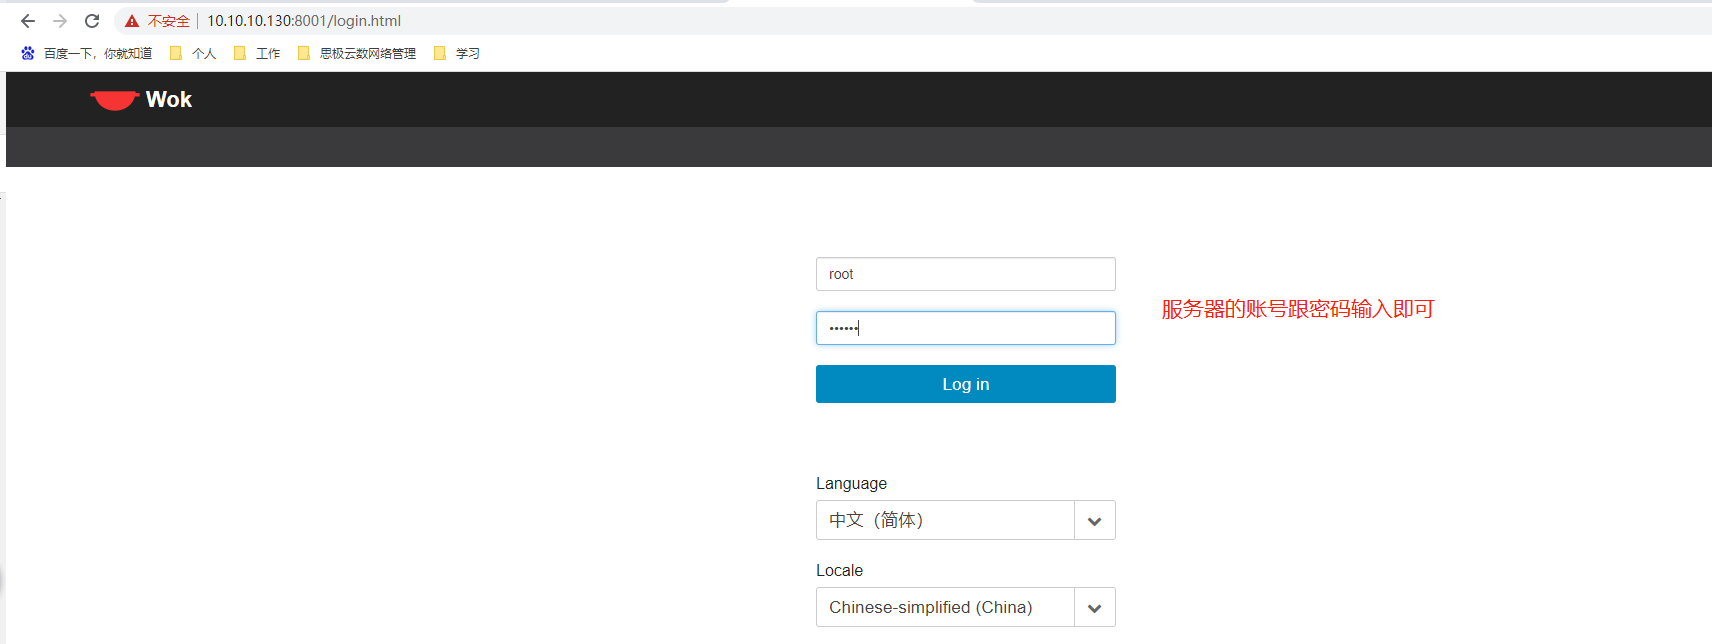
3.1 input in browser https://ip+8001. This interface is very similar to that of ESXI, but it has less functions than that of ESXI
Han: what's up? Do you understand? Younger martial sister: elder martial brother is really good. I'm very clear. Go to bed. I'll take a bath first. Han: right here? (affirming the regular life and rest of younger martial sister) by the way, aren't you looking for me? Younger martial sister: besides, it's late (ps: I'm the clown)