Glide is an open source image loading library for Android, which can help us download, cache and display images in various formats. It is also one of the mainstream image loading frameworks. How to realize the internal source code? Explain the main process and make a brief analysis.
The usage is as follows:
Glide.with(context).load(url).into(imageView);
I split it into three steps:
1, with(context)
Click the source code to see that there are multiple overloaded methods, such as activity, fragment, view, etc., which are shown below with one of them
  @NonNull
  public static RequestManager with(@NonNull Activity activity) {
    return getRetriever(activity).get(activity);
  }
@NonNull
private static RequestManagerRetriever getRetriever(@Nullable Context context) {
// Context could be null for other reasons (ie the user passes in null), but in practice it will
// only occur due to errors with the Fragment lifecycle.
Preconditions.checkNotNull(
context,
"You cannot start a load on a not yet attached View or a Fragment where getActivity() "
+ "returns null (which usually occurs when getActivity() is called before the Fragment "
+ "is attached or after the Fragment is destroyed).");
return Glide.get(context).getRequestManagerRetriever();
}Call the getRetriever method to get the RequestManagerRetriever object. Before creating the object, first pass Glide The get method in Java obtains the configuration of Glide singleton object and AppClideModule.
@NonNull
  public static Glide get(@NonNull Context context) {
    if (glide == null) {
      GeneratedAppGlideModule annotationGeneratedModule =
          getAnnotationGeneratedGlideModules(context.getApplicationContext());
      synchronized (Glide.class) {
        if (glide == null) {
          checkAndInitializeGlide(context, annotationGeneratedModule);
        }
      }
    }

    return glide;
  }
The following get method can know that the life cycle will not be added to the sub thread; The main thread adds a blank fragment to handle the lifecycle. Finally, the RequestManager object is returned
  @NonNull
  public RequestManager get(@NonNull Context context) {
    if (context == null) {
      throw new IllegalArgumentException("You cannot start a load on a null Context");
    } else if (Util.isOnMainThread() && !(context instanceof Application)) {
      if (context instanceof FragmentActivity) {
        return get((FragmentActivity) context);
      } else if (context instanceof Activity) {
        return get((Activity) context);
      } else if (context instanceof ContextWrapper
          // Only unwrap a ContextWrapper if the baseContext has a non-null application context.
          // Context#createPackageContext may return a Context without an Application instance,
          // in which case a ContextWrapper may be used to attach one.
          && ((ContextWrapper) context).getBaseContext().getApplicationContext() != null) {
        return get(((ContextWrapper) context).getBaseContext());
      }
    }

    return getApplicationManager(context);
  }


//Call get judgment thread

@NonNull
  public RequestManager get(@NonNull FragmentActivity activity) {
    if (Util.isOnBackgroundThread()) {
      //Child thread
      return get(activity.getApplicationContext());
    } else {
       //Add lifecycle to main thread
      assertNotDestroyed(activity);
      FragmentManager fm = activity.getSupportFragmentManager();
      return supportFragmentGet(activity, fm, /*parentHint=*/ null, isActivityVisible(activity));
    }
  }
2, load(url)
The execution of the above is done to get the RequestManager object here and then to call load(url). It can be seen from the source code that there are multiple overloaded methods to transfer different types of resources. Finally get the RequestBuilder object
// RequestManager. The code of Java is as follows

public RequestBuilder<Drawable> load(@Nullable Bitmap bitmap) {
    return asDrawable().load(bitmap);
  }

  public RequestBuilder<Drawable> load(@Nullable Drawable drawable) {
    return asDrawable().load(drawable);
  }

  public RequestBuilder<Drawable> load(@Nullable String string) {
    return asDrawable().load(string);
  }

  public RequestBuilder<Drawable> load(@Nullable Uri uri) {
    return asDrawable().load(uri);
  }

  public RequestBuilder<Drawable> load(@Nullable File file) {
    return asDrawable().load(file);
  }

  public RequestBuilder<Drawable> load(@RawRes @DrawableRes @Nullable Integer resourceId) {
    return asDrawable().load(resourceId);
  }

  public RequestBuilder<Drawable> load(@Nullable URL url) {
    return asDrawable().load(url);
  }

  public RequestBuilder<Drawable> load(@Nullable byte[] model) {
    return asDrawable().load(model);
  }

  public RequestBuilder<Drawable> load(@Nullable Object model) {
    return asDrawable().load(model);
  }
3, into(imageView)
In the previous step, we got the RequestBuilder object and called into to know that there are two overloaded methods. The parameter of into is the final displayed control.

The into method has many internal code branches and huge code, so you only need to follow the main process to display the implementation of ImageView. After the execution of the into internal code, return to the buildiimageviewtarget method, which is used for display through executors Mainthreadexector()) to cut off the main thread and finally display the control.
    return into(
        glideContext.buildImageViewTarget(view, transcodeClass),
        /*targetListener=*/ null,
        requestOptions,
        Executors.mainThreadExecutor());
Click into the following internal source code:
  private <Y extends Target<TranscodeType>> Y into(
      @NonNull Y target,
      @Nullable RequestListener<TranscodeType> targetListener,
      BaseRequestOptions<?> options,
      Executor callbackExecutor) {
    Preconditions.checkNotNull(target);
    if (!isModelSet) {
      throw new IllegalArgumentException("You must call #load() before calling #into()");
    }

    Request request = buildRequest(target, targetListener, options, callbackExecutor);

    Request previous = target.getRequest();
    if (request.isEquivalentTo(previous)
        && !isSkipMemoryCacheWithCompletePreviousRequest(options, previous)) {
      // If the request is completed, beginning again will ensure the result is re-delivered,
      // triggering RequestListeners and Targets. If the request is failed, beginning again will
      // restart the request, giving it another chance to complete. If the request is already
      // running, we can let it continue running without interruption.
      if (!Preconditions.checkNotNull(previous).isRunning()) {
        // Use the previous request rather than the new one to allow for optimizations like skipping
        // setting placeholders, tracking and un-tracking Targets, and obtaining View dimensions
        // that are done in the individual Request.
        previous.begin();
      }
      return target;
    }
The request is processed here
Request request = buildRequest(target, targetListener, options, callbackExecutor);
Request previous = target.getRequest();
The request object is loaded into the collection and locked, which is applied to multithreaded concurrent requests.
The url request is as follows:
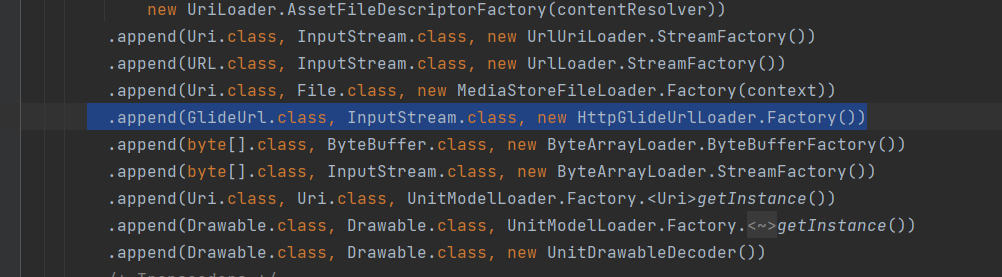
Network request completion callback Ondataready (result), start to return data step by step. In this series of processes, data processing is carried out, such as image compression. Omit step N
//  HttpUrlFetcher. The Java code is as follows

@Override
  public void loadData(
      @NonNull Priority priority, @NonNull DataCallback<? super InputStream> callback) {
    long startTime = LogTime.getLogTime();
    try {
      InputStream result = loadDataWithRedirects(glideUrl.toURL(), 0, null,
    glideUrl.getHeaders());
      callback.onDataReady(result);
    } catch (IOException e) {
      if (Log.isLoggable(TAG, Log.DEBUG)) {
        Log.d(TAG, "Failed to load data for url", e);
      }
      callback.onLoadFailed(e);
    } finally {
      if (Log.isLoggable(TAG, Log.VERBOSE)) {
        Log.v(TAG, "Finished http url fetcher fetch in " + LogTime.getElapsedMillis(startTime));
      }
    }
  }
Finally, we return to the ImageViewTarget class to display the control. This is the overall brief main process.
 @Override
  public void setDrawable(Drawable drawable) {
    view.setImageDrawable(drawable);
  }