Source address: https://github.com/langyastudio/langya-tech/tree/master/spring-cloud
Spring Boot Admin brief introduction
SpringBoot applications can expose various indicators in the running process of the application through the activator. Spring Boot Admin monitors the SpringBoot application through these indicators, and then presents them through the graphical interface. Spring Boot Admin can not only monitor individual applications, but also monitor microservice applications in combination with the registry of Spring Cloud.
Spring Boot Admin can provide the following monitoring information of the application:
- Monitor overview information during application operation
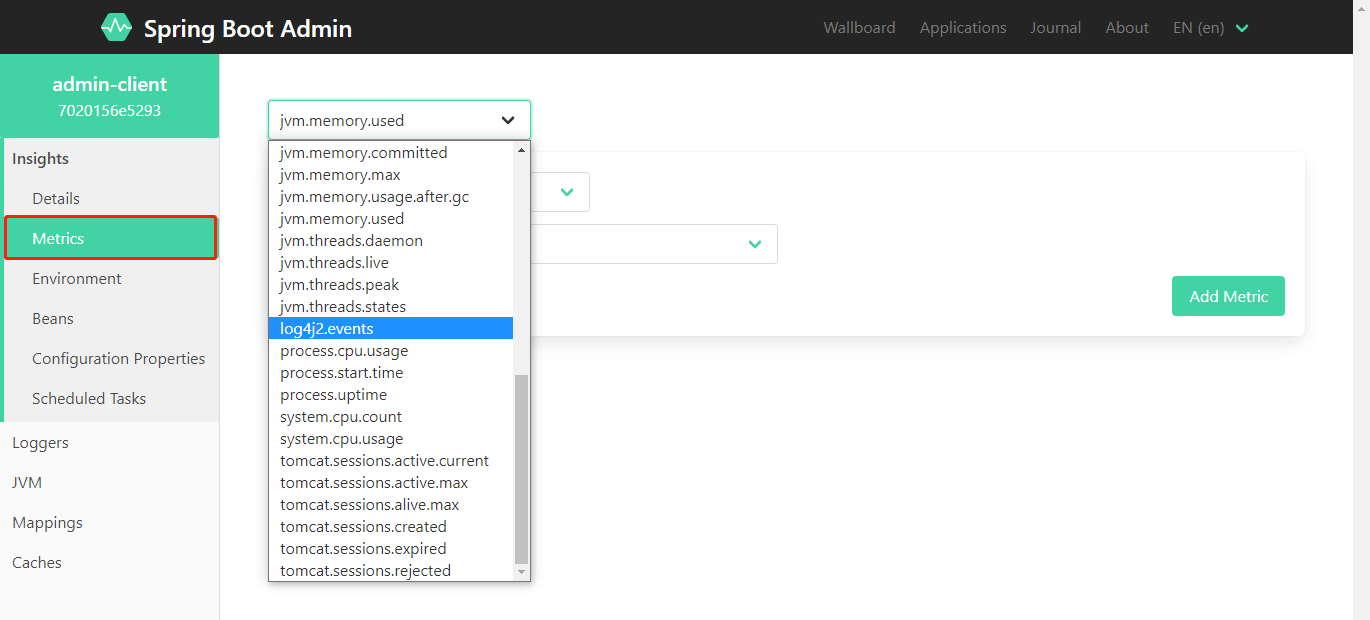
- Metrics information, such as JVM, memory, Tomcat and process information
- Environment variable information, such as system attributes, system environment variables and application configuration information
- View all created Bean information
- View all configuration information in the application
- View application running log information
- View JVM information
- Web accessible endpoints
- View HTTP trace information
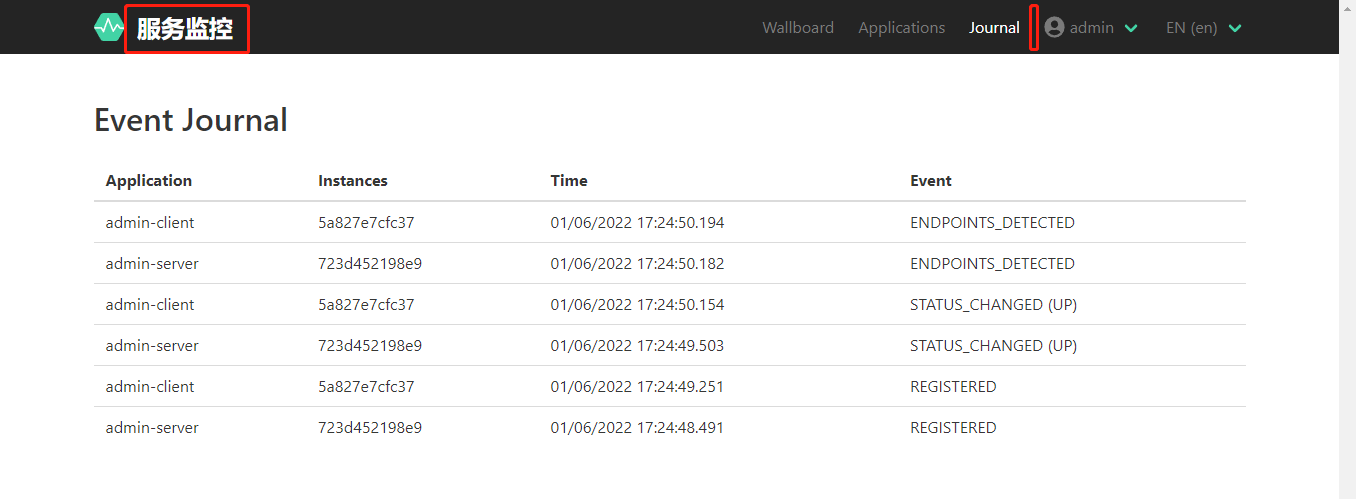
- View audit events
- View scheduled tasks
- Postable / env - & / refresh endpoint supporting Spring Cloud
Basic use
Add admin server module
Here we create an admin server module to demonstrate its functions as a monitoring center
In POM Add related dependencies to XML
<dependency>
    <groupId>org.springframework.boot</groupId>
    <artifactId>spring-boot-starter-web</artifactId>
</dependency>
<dependency>
    <groupId>de.codecentric</groupId>
    <artifactId>spring-boot-admin-starter-server</artifactId>
</dependency>
In application Configure in YML
server:
  port: 19001

spring:
  application:
    name: admin-server

management:
  endpoints:
    health:
      show-details: always
    web:
      exposure:
        include: '*'
Add @ EnableAdminServer on the startup class to enable the admin server function
@EnableAdminServer
@SpringBootApplication
public class AdminServerApplication
{
    public static void main(String[] args)
    {
        SpringApplication.run(AdminServerApplication.class, args);
    }
}
Add admin client module
Here, we create an admin client module to register with admin server as a client
In POM Add related dependencies to XML
<dependency>
    <groupId>org.springframework.boot</groupId>
    <artifactId>spring-boot-starter-web</artifactId>
</dependency>
<dependency>
    <groupId>de.codecentric</groupId>
    <artifactId>spring-boot-admin-starter-client</artifactId>
</dependency>
In application Configure in YML
server:
  port: 19002


spring:
  application:
    name: admin-client
  boot:
    admin:
      client:
        #Configure admin server address
        url: http://localhost:19001


management:
  endpoints:
    web:
      exposure:
        include: '*'
  endpoint:
    health:
      show-details: always
Start the admin server and admin client services
Display of monitoring information
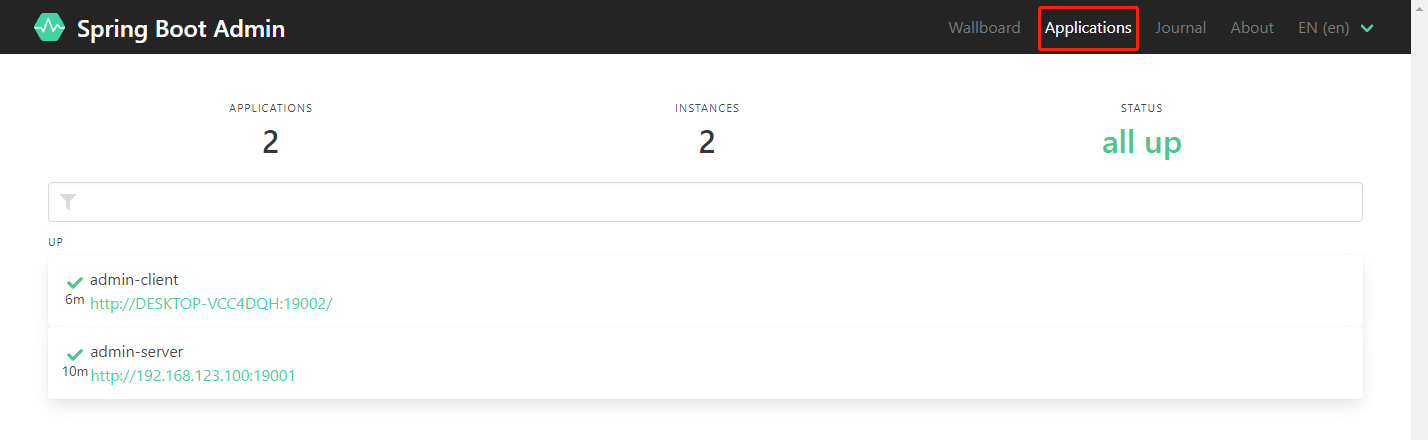
Visit the following address to open the home page of Spring Boot Admin: http://localhost:19001
Click the wallboard button and select admin client to view the monitoring information
Overview of monitoring information
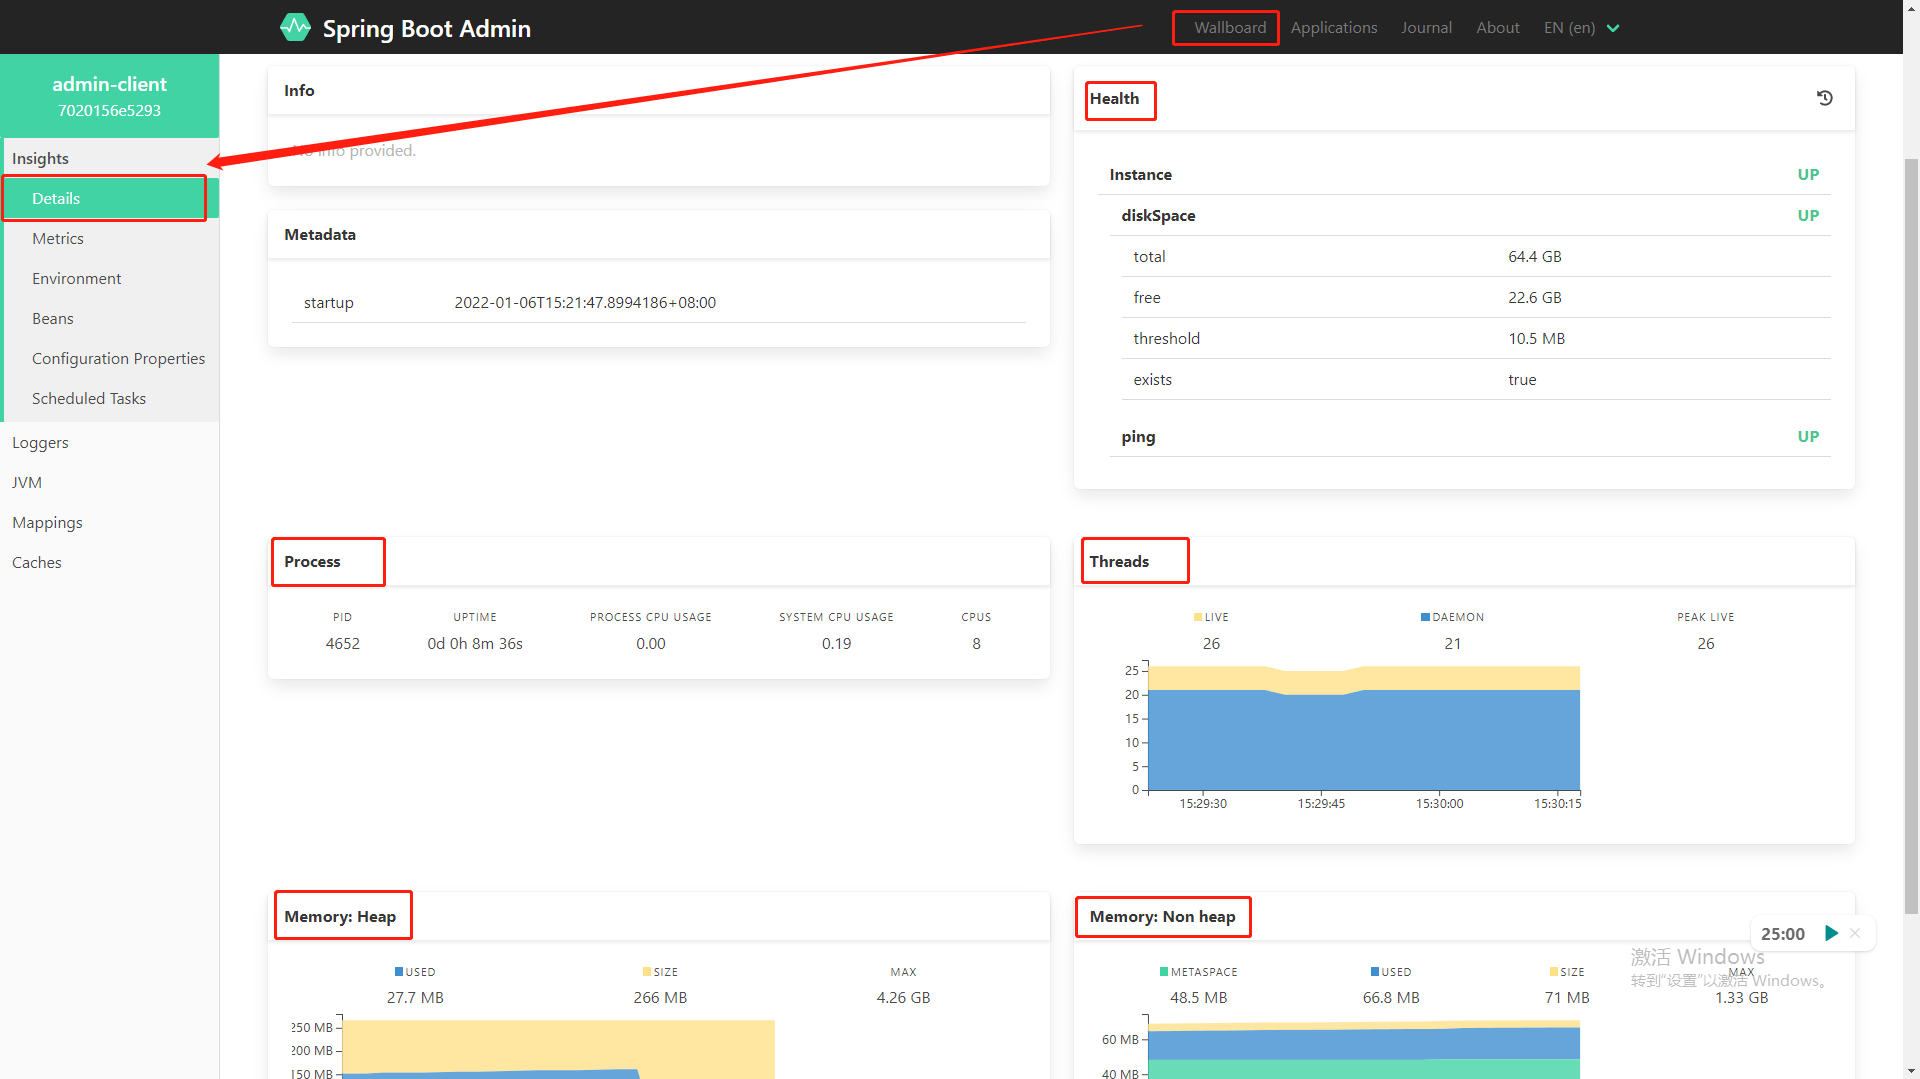
Metrics information, such as JVM, Tomcat and process information;
Environment variable information, such as system attributes, system environment variables and application configuration information;
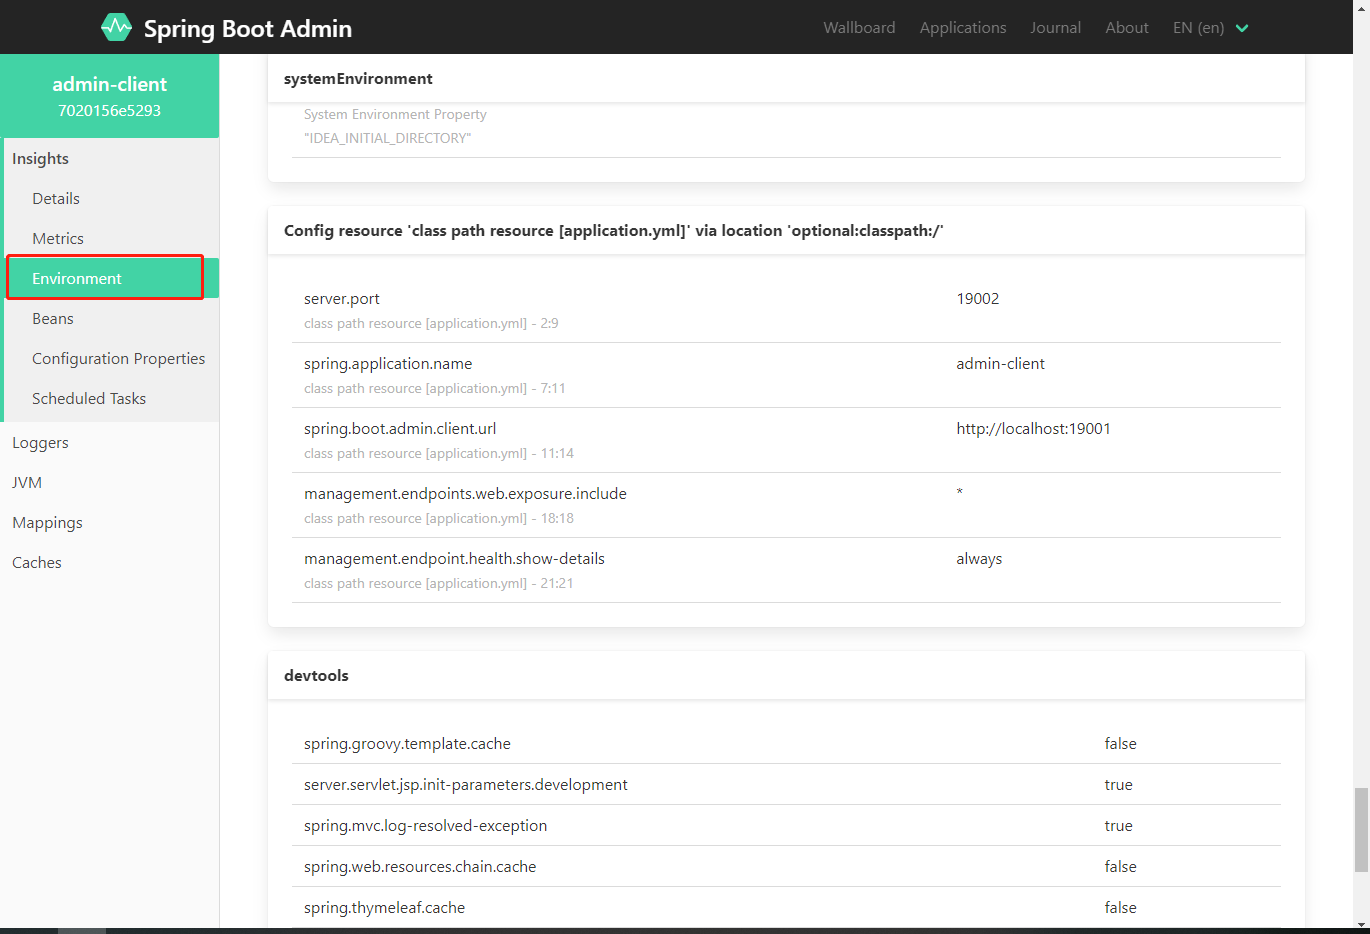
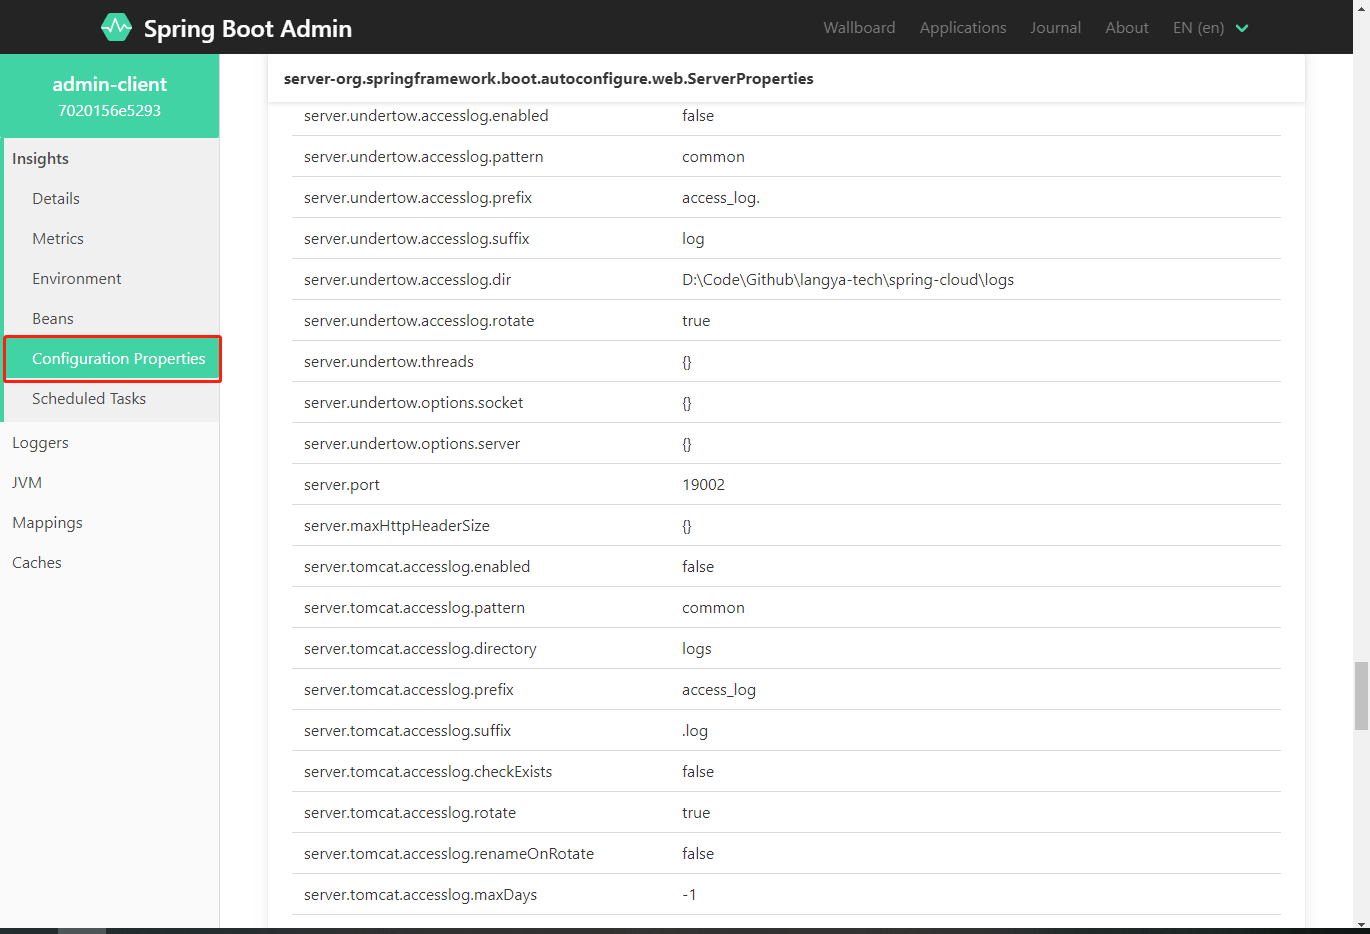
View all configuration information in the application;
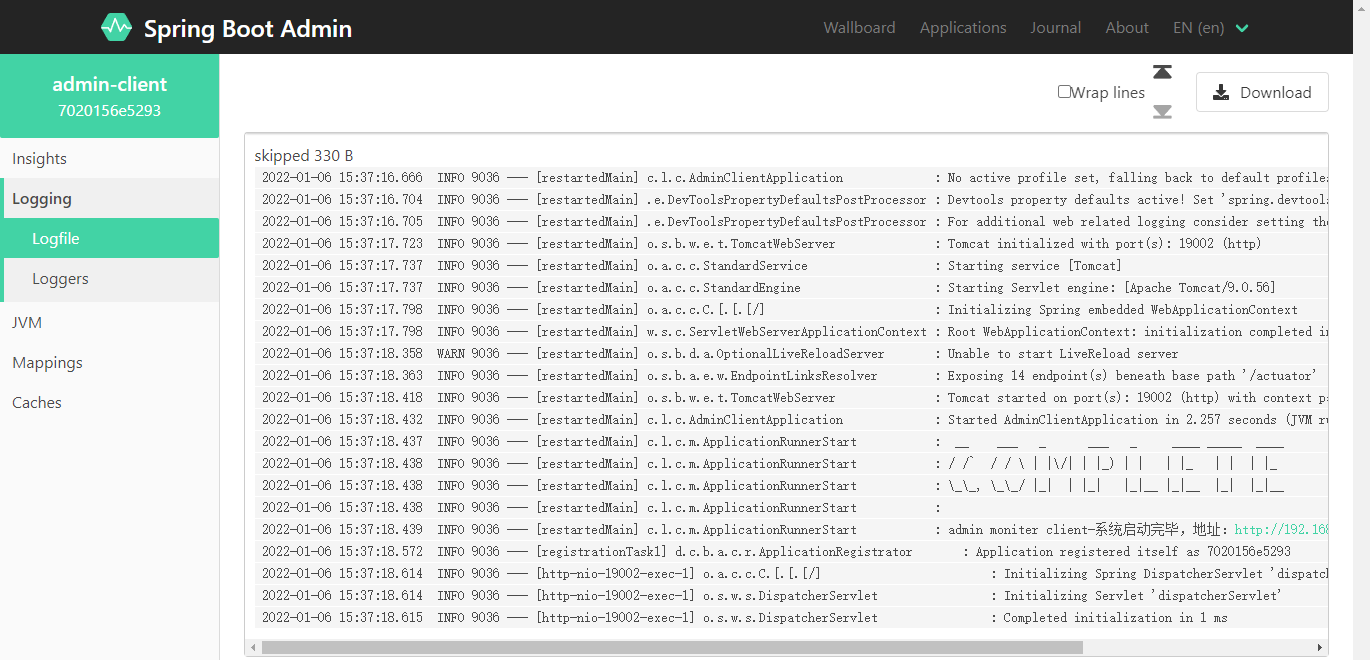
To view log information, you need to add the following configuration to enable it;
logging:
  file:
    name: admin-client.log
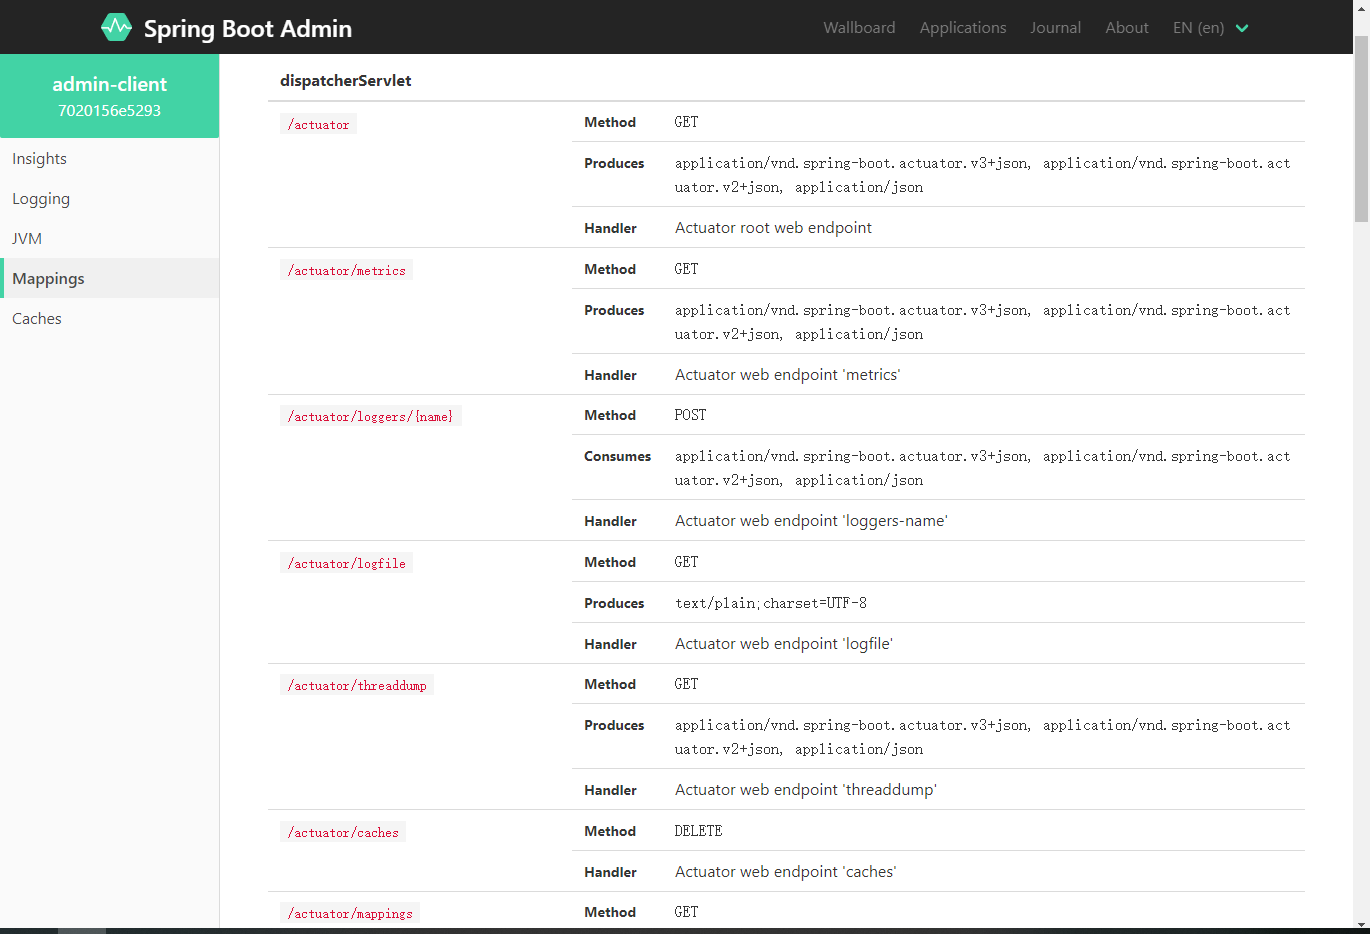
View accessible Web endpoints
Use with registry
Spring Boot Admin is used in combination with the Spring Cloud Alibaba Nacos registry. Just integrate the admin server and the registry. The admin server will automatically obtain the service list from the registry and then obtain the monitoring information one by one. Here, take the Nacos registry as an example to introduce this function
Admin server modification
In POM Add related dependencies to XML
<dependency>
    <groupId>com.alibaba.cloud</groupId>
    <artifactId>spring-cloud-starter-alibaba-nacos-discovery</artifactId>
</dependency>
In application To configure in YML, just add the registry configuration
server:
  port: 19001

spring:
  application:
    name: admin-server

  cloud:
    #Nacos
    nacos:
      username: nacos
      password: nacos
      discovery:
        server-addr: localhost:8848
Add @ EnableDiscoveryClient on the startup class to enable the service registration function
@EnableDiscoveryClient
@EnableAdminServer
@SpringBootApplication
public class AdminServerApplication
{
    public static void main(String[] args)
    {
        SpringApplication.run(AdminServerApplication.class, args);
    }
}
Admin client modification
In POM Add related dependencies to XML
<dependency>
    <groupId>com.alibaba.cloud</groupId>
    <artifactId>spring-cloud-starter-alibaba-nacos-discovery</artifactId>
</dependency>
In application Configure in YML, delete the original admin server address configuration, and add the registry configuration
server:
  port: 19002

spring:
  application:
    name: admin-client
  #Nacos
  nacos:
    username: nacos
    password: nacos
    discovery:
      server-addr: localhost:8848

management:
  endpoints:
    web:
      exposure:
        include: '*'
  endpoint:
    health:
      show-details: always


#Add log monitoring with admin enabled
logging:
  file:
    name: admin-client.log
Add @ EnableDiscoveryClient on the startup class to enable the service registration function
@EnableDiscoveryClient
@SpringBootApplication
public class AdminClientApplication
{
    public static void main(String[] args)
    {
        SpringApplication.run(AdminClientApplication.class, args);
    }
}
Function demonstration
- Start the Nacos server
- Start admin server and admin client
Check the registry and find that all services are registered: http://localhost:8848/
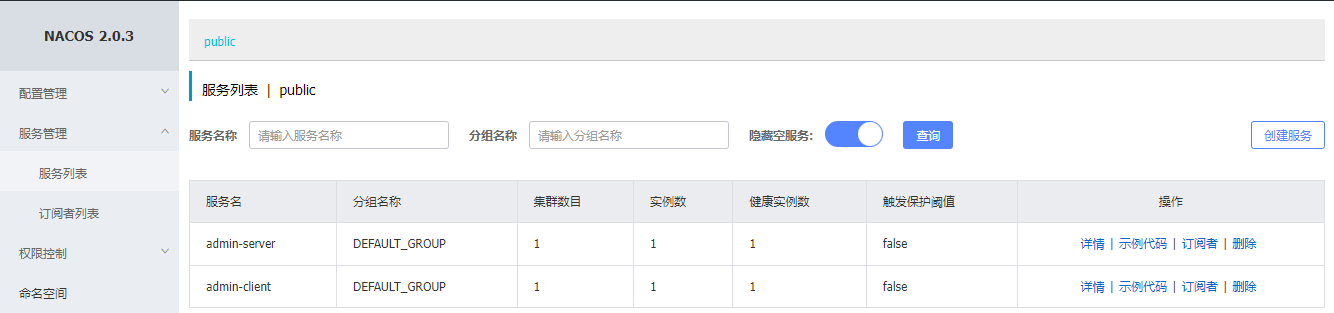
Check the Spring Boot Admin homepage and you can see the service information: http://localhost:19001
Login authentication
We can get the login authentication function by adding Spring Security support to admin server
Add admin server security module
In POM Add related dependencies to XML
<dependency>
    <groupId>com.alibaba.cloud</groupId>
    <artifactId>spring-cloud-starter-alibaba-nacos-discovery</artifactId>
</dependency>
<dependency>
    <groupId>de.codecentric</groupId>
    <artifactId>spring-boot-admin-starter-server</artifactId>
</dependency>
<dependency>
    <groupId>org.springframework.boot</groupId>
    <artifactId>spring-boot-starter-security</artifactId>
</dependency>
In application Configure in YML, configure login user name and password, and ignore the monitoring information of admin server security
server:
  port: 19011

spring:
  application:
    name: admin-security-server

  cloud:
    #Nacos
    nacos:
      username: nacos
      password: nacos
      discovery:
        server-addr: localhost:8848

  # Configure login user name and password
  security:
    user:
      name: admin
      password: 123456
Configure spring security so that admin client can register:
@Configuration
public class SecuritySecureConfig extends WebSecurityConfigurerAdapter
{
    private final String adminContextPath;

    public SecuritySecureConfig(AdminServerProperties adminServerProperties)
    {
        this.adminContextPath = adminServerProperties.getContextPath();
    }

    @Override
    protected void configure(HttpSecurity http) throws Exception
    {
        SavedRequestAwareAuthenticationSuccessHandler successHandler =
                new SavedRequestAwareAuthenticationSuccessHandler();
        successHandler.setTargetUrlParameter("redirectTo");
        successHandler.setDefaultTargetUrl(adminContextPath + "/");

        http.authorizeRequests()
                //1. Grant public access to all static assets and login pages
                .antMatchers(adminContextPath + "/assets/**").permitAll()
                .antMatchers(adminContextPath + "/actuator/info").permitAll()
                .antMatchers(adminContextPath + "/actuator/health").permitAll()
                .antMatchers(adminContextPath + "/login").permitAll()

                //2. Other requests must be authenticated
                .anyRequest().authenticated()
                .and()

                //2. Login
                .formLogin().loginPage(adminContextPath + "/login").successHandler(successHandler)
                .and()

                //3. Logout
                .logout().logoutUrl(adminContextPath + "/logout")
                .and()

                //4. Enable http basic support
                .httpBasic()
                .and()

                //5. Enable cookie based csrf protection
                .csrf()
                .csrfTokenRepository(CookieCsrfTokenRepository.withHttpOnlyFalse())

                //6. Ignore the csrf protection of these paths for admin client registration
                .ignoringRequestMatchers(
                        new AntPathRequestMatcher(adminContextPath + "/instances",
                                                  HttpMethod.POST.toString()),
                        new AntPathRequestMatcher(adminContextPath + "/instances/*",
                                                  HttpMethod.DELETE.toString()),
                        new AntPathRequestMatcher(adminContextPath + "/actuator/**")
                )
                .and()

                .rememberMe(rememberMe -> rememberMe.key(UUID.randomUUID().toString()).tokenValiditySeconds(1209600));
    }
}
Modify the startup class and enable the AdminServer and registration discovery functions:
@EnableDiscoveryClient
@EnableAdminServer
@SpringBootApplication
public class AdminServerSecurityApplication
{
    public static void main(String[] args)
    {
        SpringApplication.run(AdminServerSecurityApplication.class, args);
    }
}
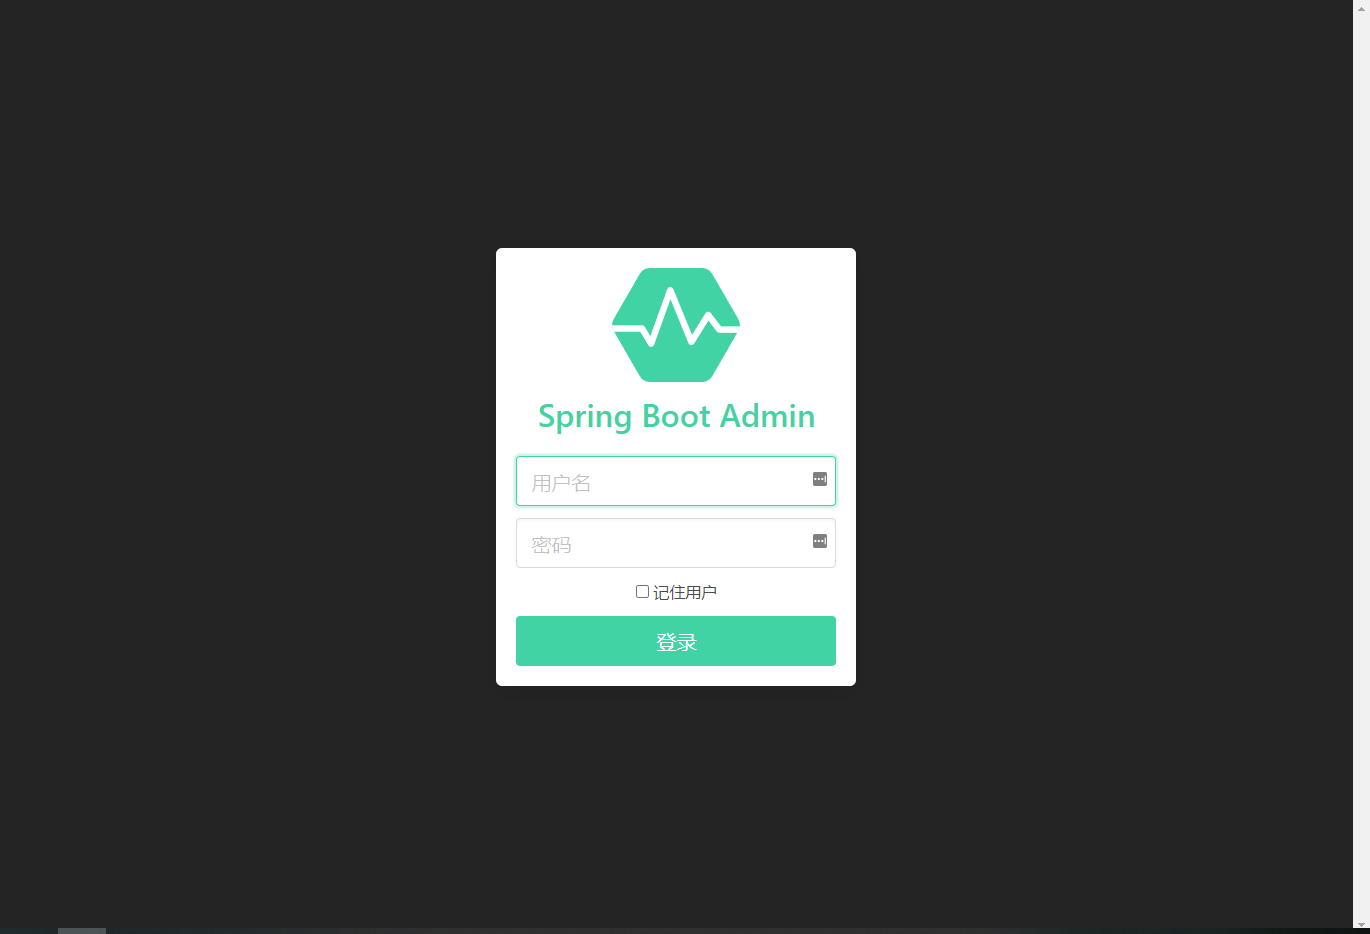
Start Nacos server, admin server security, visit the Spring Boot Admin homepage and find that you need to log in to access: http://localhost:19011
customization
You can customize notification, Logo, title, language, add jump link, remove header menu, etc.
For example, customize the login title, do not display the about menu, and do not display the monitoring information of admin server:
spring:
  application:
    name: admin-security-server

  # Configure admin
  boot:
    admin:
      ui:
        #Left side of header
        brand: <img src="assets/img/icon-spring-boot-admin.svg"><span>Service monitoring</span>
        #Login title
        title: Service monitoring
        #Hide about menu
        view-settings:
          - name: about
            enabled: false
      discovery:
        #The monitoring information of admin server is not displayed
        ignored-services: ${spring.application.name}