Maven series of project management (II)
Create project, POM file, dependency mechanism
Lifecycle, custom libraries, external dependencies
catalogue
-
1. Create Maven project
-
1.1. Command line / terminal creation
-
1.2. Eclipse creation
-
1.3 Java project transferred to Maven project
-
-
2. POM file
-
2.1 dependence
-
2.1.1,JUnit
-
2.1.2,TestNG
-
2.1.3,Selenium
-
2.1.4,Appium
-
2.1.5,OkHttp
-
2.1.6,HttpClient
-
2.1.7,JSON
-
2.1.8,ExtentReports
-
-
2.2 plug in
-
2.2.1,maven-compiler-plugin
-
2.2.2,maven-surefire-plugin
-
-
2.3 remote warehouse
-
-
3. Dependency mechanism
-
4. Build lifecycle
-
5. Custom library to local resource library
-
6. Reference external dependency
1. Create Maven project
1.1. Command line / terminal creation
1. In windows (command line) or Mac (terminal), take windows as an example. Open the command line, enter the folder where you want to create Maven project, and enter the command (group ID is com.test.demo, project ID is My_Maven_Demo):
mvn archetype:generate -DgroupId=com.test.demo -DartifactId=My_Maven_Demo -DarchetypeArtifactId=maven-archetype-quickstart
As shown in the figure: creation is complete.
Note: the installation process may need to be confirmed. Just press enter.
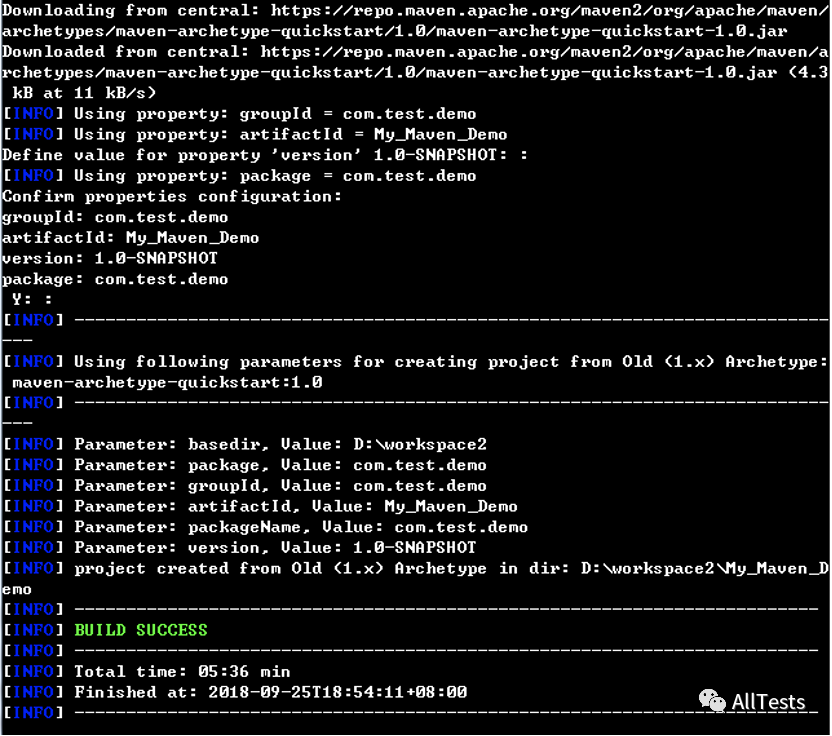
The completed Maven project (My_Maven_Demo) has been created.

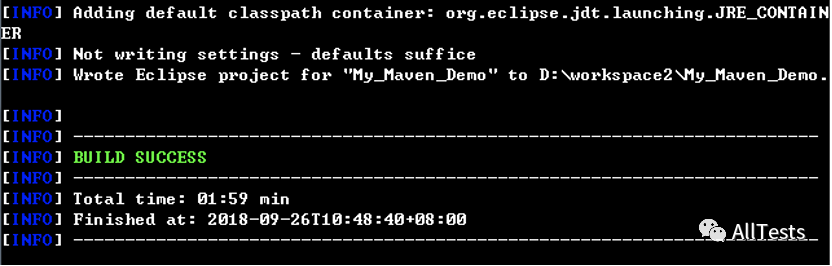
2. In order to be used on Eclipse, the command line goes to my_ Maven_ In the demo project, enter the command:
mvn eclipse:eclipse
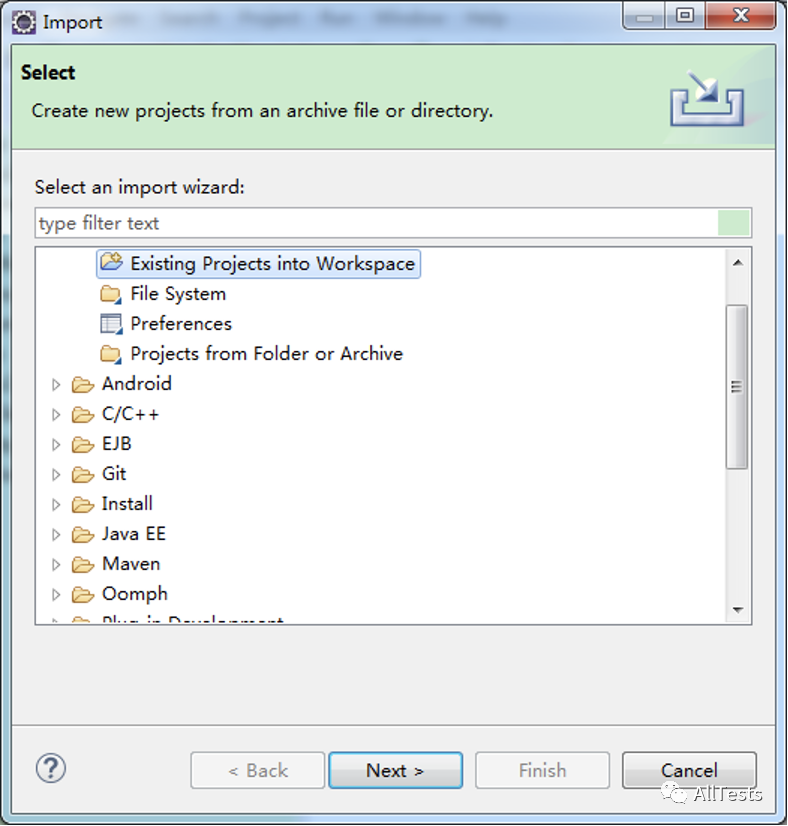
3. Open Eclipse and import the project.
Click file - > Import - > General - > existing projects into workspace.
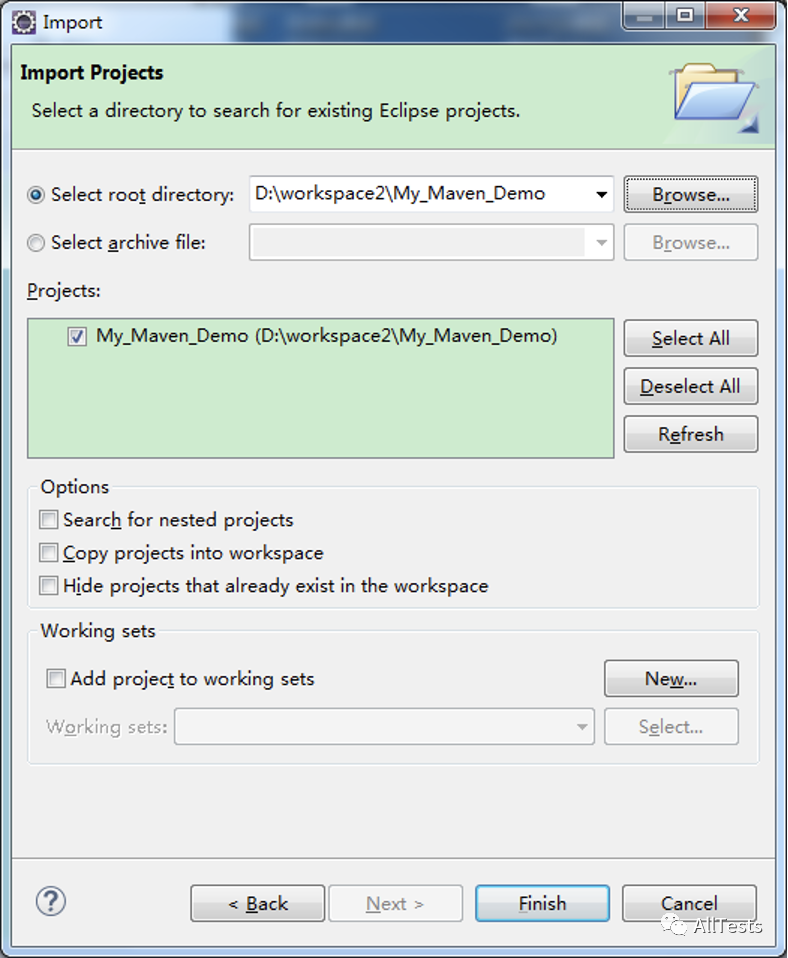
Select the newly created Maven project (My_Maven_Demo) and click Finish.
Select a project and right-click configure - > Convert to Maven project to convert to Maven project.
4. As shown in the figure: project structure.
All the source code is placed in the / src/main/java / file.
All unit test codes are placed in the / src/test/java / file.
POM file (pom.xml) describes the information of the whole project, from directory structure, project plug-ins, project dependencies, how to build the project, etc.
1.2. Eclipse creation
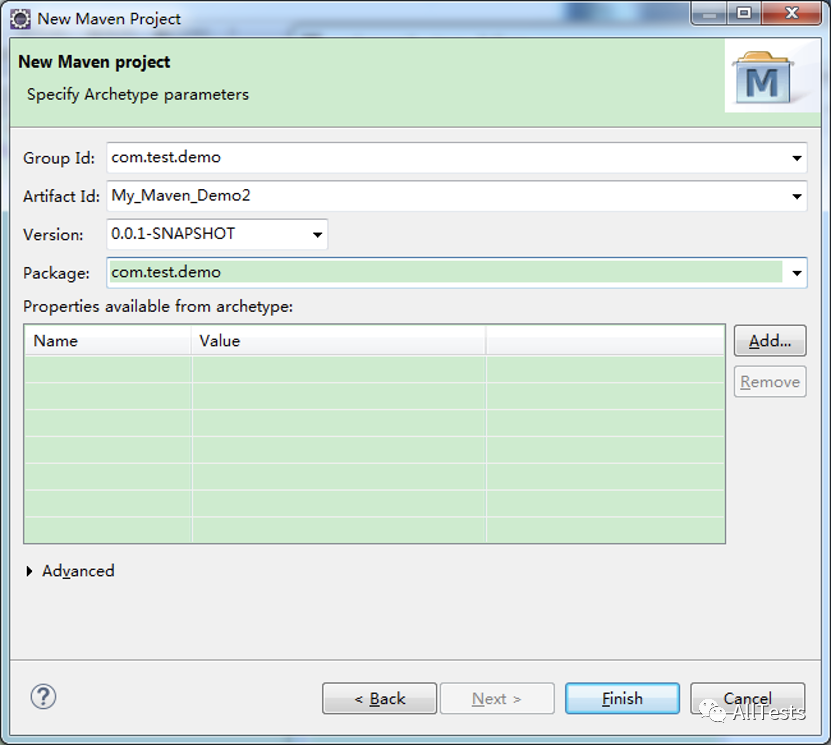
1. This section takes Widnows as an example to open Eclipse and create a project.
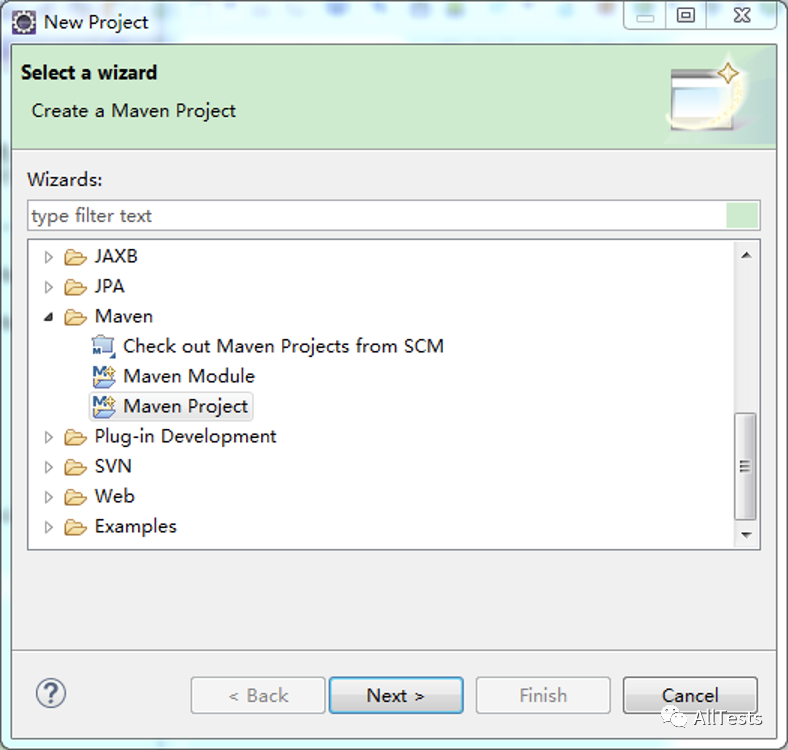
Click file - > New - > Project - > Maven - > Maven project.
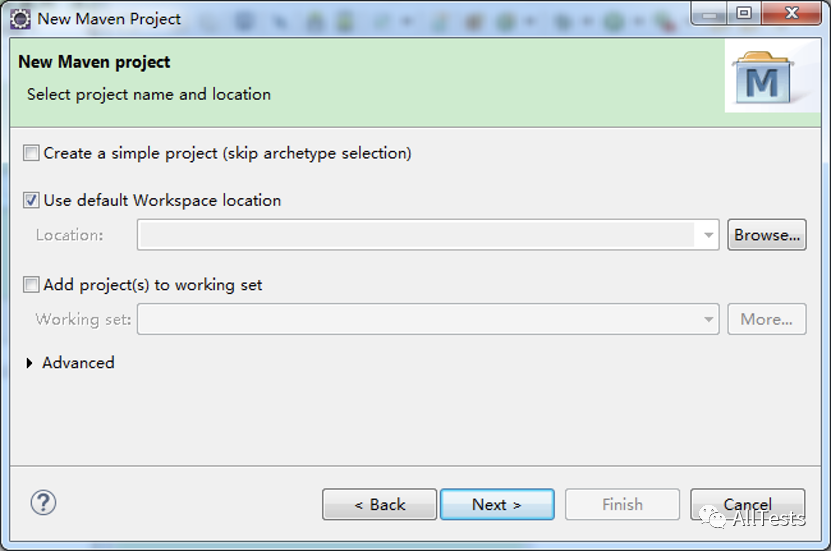
By default, click Next.
Select Artifact Id Maven archetype QuickStart and click Next.

Enter the group ID, project ID, version, package and other information, and click Finish.
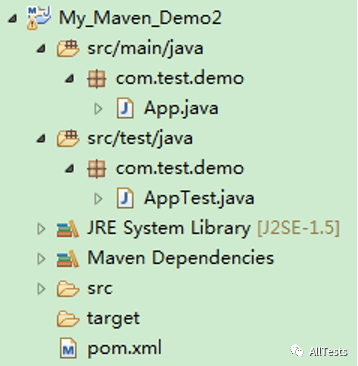
2. As shown in the figure: project structure.
All the source code is placed in the / src/main/java / file.
All unit test codes are placed in the / src/test/java / file.
POM file (pom.xml) describes the information of the whole project, from directory structure, project plug-ins, project dependencies, how to build the project, etc.
1.3 Java project transferred to Maven project
This section takes Widnows as an example to open Eclipse.
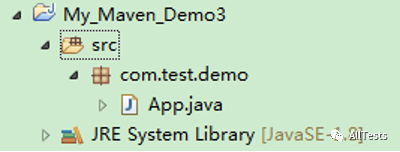
As shown in the figure: My_Maven_Demo3 is a Java project that has been created.
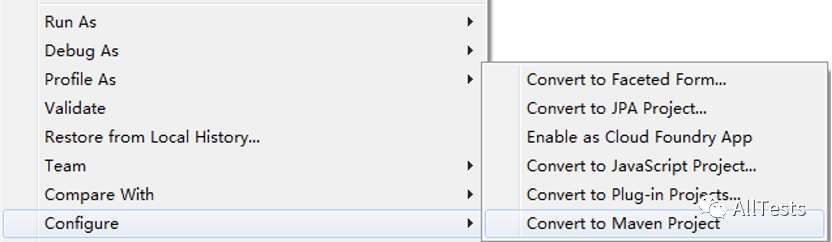
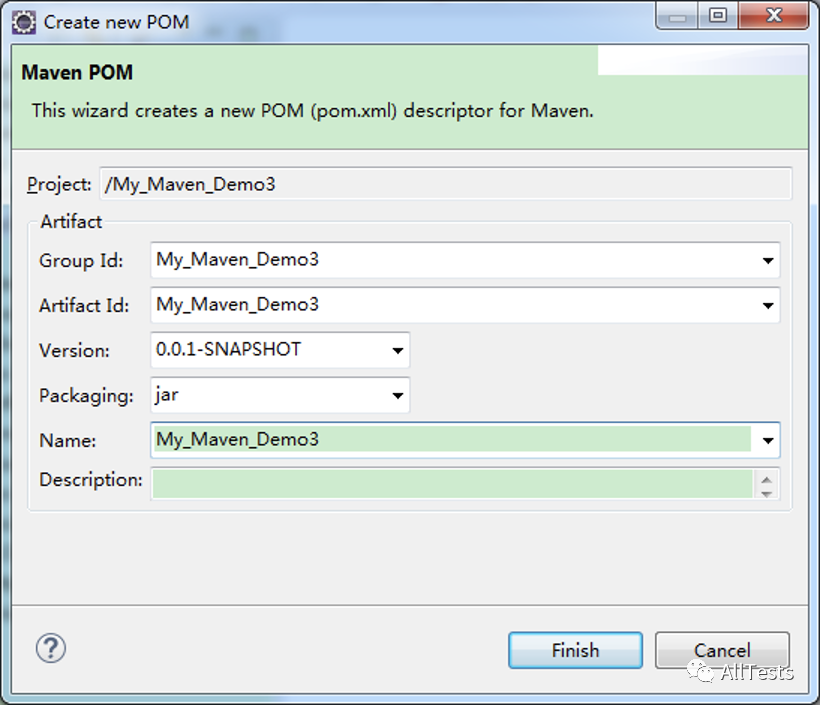
1. Select a project and right-click configure - > Convert to Maven project to convert to Maven project.
Enter group ID, project ID, version and other information, and click Finish.
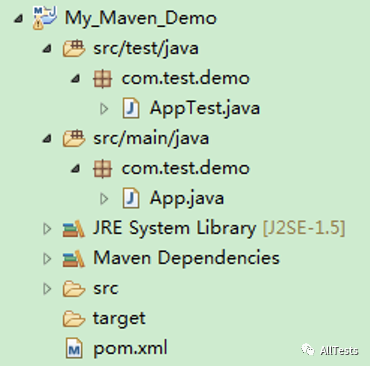
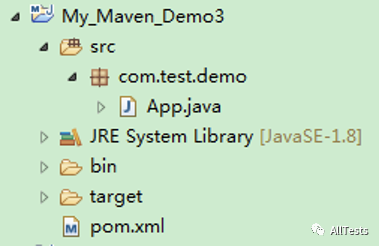
2. As shown in the figure: project structure.
POM file (pom.xml) describes the information of the whole project, from directory structure, project plug-ins, project dependencies, how to build the project, etc.
2. POM file
POM represents the project object model. It is the basic unit of work in Maven and is an XML file (pom.xml).
The items contained in POM are built using Maven to contain various configuration information, targets, plug-ins, etc. when executing tasks or targets, Maven will use the POM file in the current directory to read the required configuration information, and then execute the targets. Note that there is only one POM file (pom.xml) per project.
pom. The root element of XML is project, which has three main child nodes:
(1) groupId this is the number of the project group and is unique. For example: com test. demo
(2) artifactId this is the ID of the project, that is, the name of the project. For example: My_Maven_Demo
(3) Version this is the version of the project. For example: 1.0
The bullet in the library is: groupId:artifactId:version
For example: com test. demo:My_ Maven_ Demo:1.0
2.1 dependence
Dependency is the most critical part of Maven. The reason why Maven is used in the project is because of its dependency management function. If you want to introduce a jar package into the project, you only need to add it in POM Just import the coordinates of its jar package into XML.
How to get the coordinates of the jar package?
Take obtaining Junit jar package coordinates as an example.
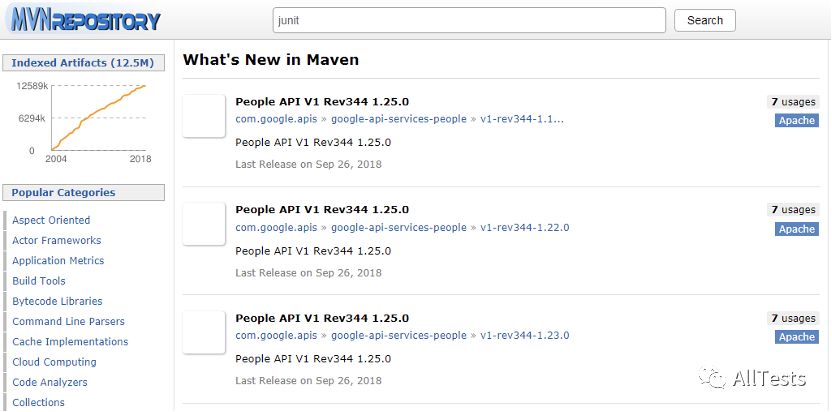
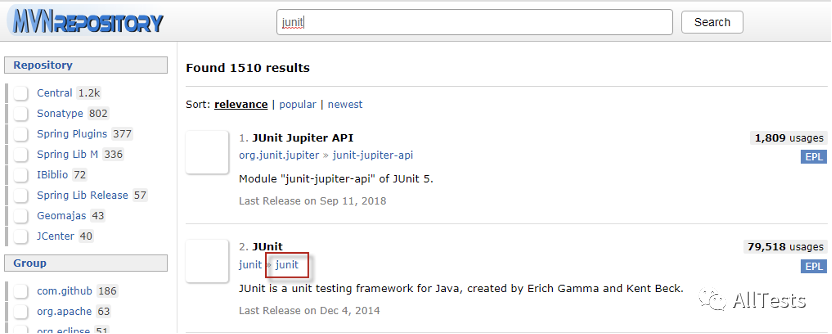
1. Open Maven repository at: http://mvnrepository.com/ , enter junit in the search field and click search.
2. In the search results page, find junit and click to enter.
3. Select the corresponding version number, such as 4.12, and click to enter.

4. As shown in the figure: the JUnit package coordinates are obtained.
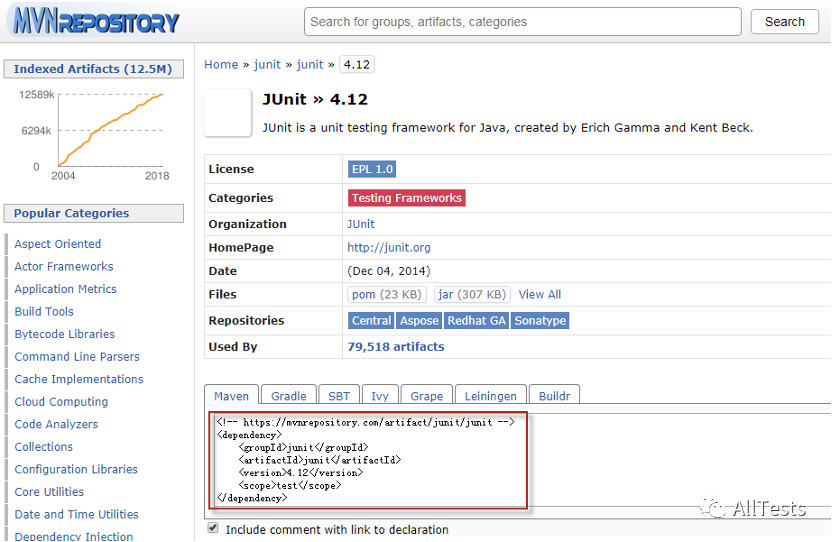
5. Copy the obtained coordinates to POM XML file.
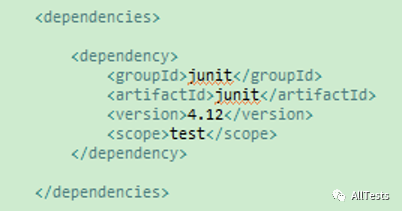
2.1.1,JUnit
<dependency>
    <groupId>junit</groupId>
    <artifactId>junit</artifactId>
    <version>4.12</version>
    <scope>test</scope>
</dependency>
2.1.2,TestNG
<dependency>
    <groupId>org.testng</groupId>
    <artifactId>testng</artifactId>
    <version>6.11</version>
    <scope>test</scope>
</dependency>
2.1.3,Selenium
<dependency>
    <groupId>org.seleniumhq.selenium</groupId>
    <artifactId>selenium-java</artifactId>
    <version>3.12.0</version>
</dependency>
<dependency>
    <groupId>org.seleniumhq.selenium</groupId>
    <artifactId>selenium-server</artifactId>
    <version>3.12.0</version>
</dependency>
2.1.4,Appium
<dependency>
    <groupId>io.appium</groupId>
    <artifactId>java-client</artifactId>
    <version>6.1.0</version>
</dependency>
2.1.5,OkHttp
<dependency>
    <groupId>com.squareup.okhttp3</groupId>
    <artifactId>okhttp</artifactId>
    <version>3.10.0</version>
</dependency>
2.1.6,HttpClient
<dependency>
    <groupId>org.apache.httpcomponents</groupId>
    <artifactId>httpclient</artifactId>
    <version>4.5.6</version>
</dependency>
2.1.7,JSON
<dependency>
    <groupId>org.json</groupId>
    <artifactId>json</artifactId>
    <version>20180813</version>
</dependency>
2.1.8,ExtentReports
<dependency>
    <groupId>com.aventstack</groupId>
    <artifactId>extentreports</artifactId>
    <version>3.1.5</version>
</dependency>
2.2 plug in
Copy the plug-in to POM XML file.
2.2.1,maven-compiler-plugin
Add this compiler plug-in to tell Maven which JDK Version (for example, 1.8) to use to compile the project.
<plugin>
    <groupId>org.apache.maven.plugins</groupId>
    <artifactId>maven-compiler-plugin</artifactId>
    <version>3.8.0</version>
    <configuration>
        <source>1.8</source>
        <target>1.8</target>
    </configuration>
</plugin>
2.2.2,maven-surefire-plugin
Maven performs unit tests through the Maven Surefire Plugin plug-in. (perform integration testing through the Maven Failsafe Plugin).
In POM Configure the dependencies of JUnit and TestNG test framework in XML to automatically identify and run the test cases written using the framework in src/test directory. Maven Surefire Plugin can also identify and execute test methods in common classes that comply with certain naming conventions (POJO test: simple Java object test).
The default binding plug-in target in the test phase of the construction life cycle is the test target in Maven Surefire Plugin. Without additional configuration, you can directly run mvn test.
<plugin>
    <groupId>org.apache.maven.plugins</groupId>
    <artifactId>maven-surefire-plugin</artifactId>
    <version>2.22.0</version>
</plugin>
Combined with TestNG (execute testng.xml):
<plugin>
    <groupId>org.apache.maven.plugins</groupId>
    <artifactId>maven-surefire-plugin</artifactId>
    <version>2.22.0</version>
    <configuration>
        <testFailureIgnore>true</testFailureIgnore>
        <suiteXmlFiles>
            <suiteXmlFile>testng.xml</suiteXmlFile>
        </suiteXmlFiles>
    </configuration>
</plugin>
2.3 remote warehouse
<repositories>
    <repository>
        <id>saucelabs-repository</id>
        <url>https://repository-saucelabs.forge.cloudbees.com/release</url>
        <releases>
            <enabled>true</enabled>
        </releases>
        <snapshots>
            <enabled>true</enabled>
        </snapshots>
    </repository>
</repositories>
3. Dependency mechanism
1. Open the POM file of Maven project (pom.xml) and add the dependency to be used (such as jta).
<dependencies>
    <dependency>
        <groupId>jta</groupId>
        <artifactId>jta</artifactId>
        <version>1.0.1</version>
    </dependency>
</dependencies>
When adding a remote warehouse, Maven will download dependencies from the remote warehouse (dependencies cannot be found in the central repository).
<repositories>
    <repository>
        <id>saucelabs-repository</id>
        <url>https://repository-saucelabs.forge.cloudbees.com/release</url>
        <releases>
            <enabled>true</enabled>
        </releases>
        <snapshots>
            <enabled>true</enabled>
        </snapshots>
    </repository>
</repositories>
2. When Maven compiles or builds, jta's jar will be automatically downloaded and put into Maven's local resource library.
Maven relies on the order in which the search is used:
(1) Search the local resource library. If it is not found, skip to step (2). Otherwise, if it is found, it will be further processed.
(2) Search the central repository. If it is not found, skip to step (3) (4). Otherwise, if it is found, it will download the dependency to the local repository for future reference.
(3) If the remote warehouse is not set, Maven will stop processing and throw an error (the dependent library cannot be found).
(4) Search the remote warehouse. If it is not found, Maven will stop processing and throw an error (the dependent library cannot be found). Otherwise, if found, it will download the dependency to the local resource library for future reference.
4. Build lifecycle
For those who build Maven projects, they can build any Maven project with just a few commands, and the POM file (pom.xml) will ensure that they get the results they want.
Maven has three built-in build lifecycles: default (process project deployment), clean (process project cleanup), and site (process documents generated by the project).
The following lists all the build phases of the default, clean, and site life cycles, which are executed in the specified order:
1,clean Life cycle (handling project cleanup)
(1)pre-clean Perform the required process before the actual project cleanup.
(2)clean Delete all files generated by the previous build.
(3)post-clean Perform the processes required to complete the project clean-up.

2,default Deployment lifecycle (project processing)
(1)validate Verify that the project is correct and that all necessary information is available.
(2)initialize Initializes the build state, such as setting properties or creating directories.
(3)generate-sources Generate any source code included in the compilation.
(4)process-sources Process source code, such as filtering any value.
(5)generate-resources Generate resources included in the package.
(6)process-resources Copy and process the resource to the target directory for packaging.
(7)compile Compile the source code of the project.
(8)process-classes Post process files generated by compilation, such as Java Class for bytecode enhancement.
(9)generate-test-sources Generate any test source code included in the compilation.
(10)process-test-sources Process test source code, such as filtering any value.
(11)generate-test-resources Create a resource for the test.
(12)process-test-resources Copy and process resources into the test target directory.
(13)test-compile Compile the test source code into the test target directory.
(14)process-test-classes Process generated files from test compilation, such as Java Class for bytecode enhancement. about Maven 2.0.5 And above.
(15)test Run tests using an appropriate unit test framework that should not require code to be packaged or deployed.
(16)prepare-package Before the actual packaging, perform some necessary operations to prepare the packaging, which usually produces a processed version of the expansion of the package. ( Maven 2.1 And above)
(17)package Use compiled code and package it into a deployable format, such as JAR.
(18)pre-integration-test Perform the required actions before performing the integration test, which may involve setting up the required environment, etc.
(19)integration-test If necessary, process the package and publish it to the environment where the integration test can run.
(20)post-integration-test Actions required after performing integration testing, which may include cleaning up the environment.
(21)verify Run any checks to verify that the package is valid and meets quality standards.
(22)install Install the package into the local repository as a dependency on other local projects.
(23)deploy Done in an integration or publishing environment, copy the final package to a remote repository for sharing with other developers and projects.

3,site Lifecycle (processing documents generated by the project)
(1)pre-site Execute the process before the actual project site is built.
(2)site Generate site documents for the project.
(3)post-site Perform the process of determining site generation and prepare for site deployment.
(4)site-deploy Deploy the generated site document to the specified web The server.
5. Custom library to local resource library
Create a custom jar (myjar.jar) into Maven's local resource library.
1. Create My_Maven_Jar project, create MyJar class and package the project into jar.
As shown in the figure: My_Maven_Jar project structure.

MyJar class, script code:
package com.test2.demo;

public class MyJar {

       public static void main(String[] args) {
              MyJar myJar = new MyJar();
              myJar.myTest();
       }

       public void myTest() {
              System.out.println("Hello MyJar");
       }

}
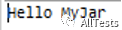
Running result: the console outputs Hello MyJar
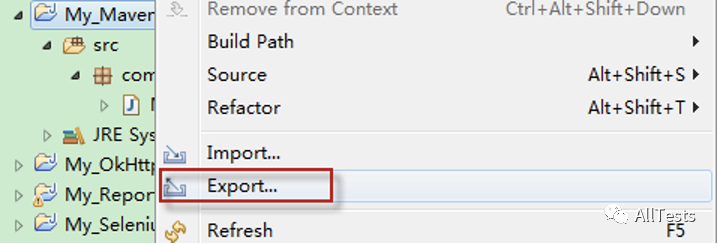
Right click the item and select Export.
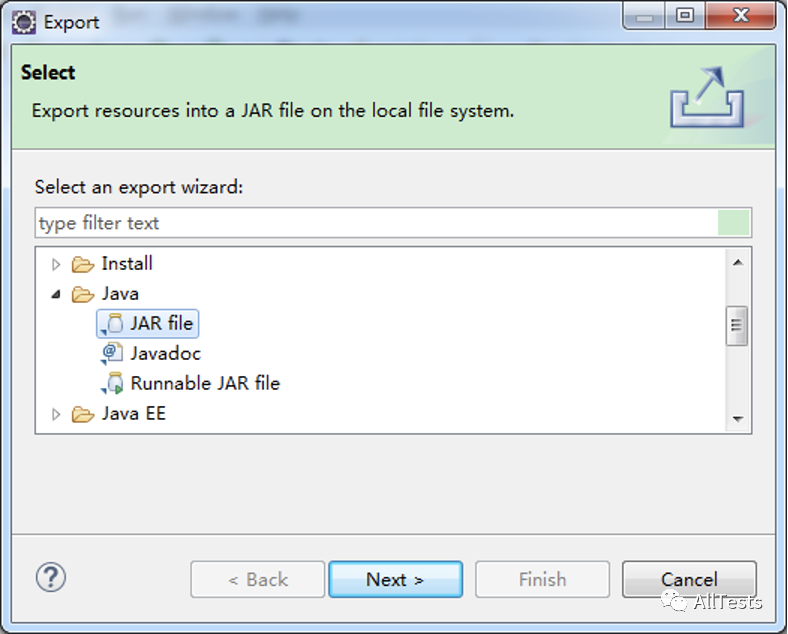
Select Java - > jar file and click Next.
Select the project and file you want to export, specify the file export path, and click Next.
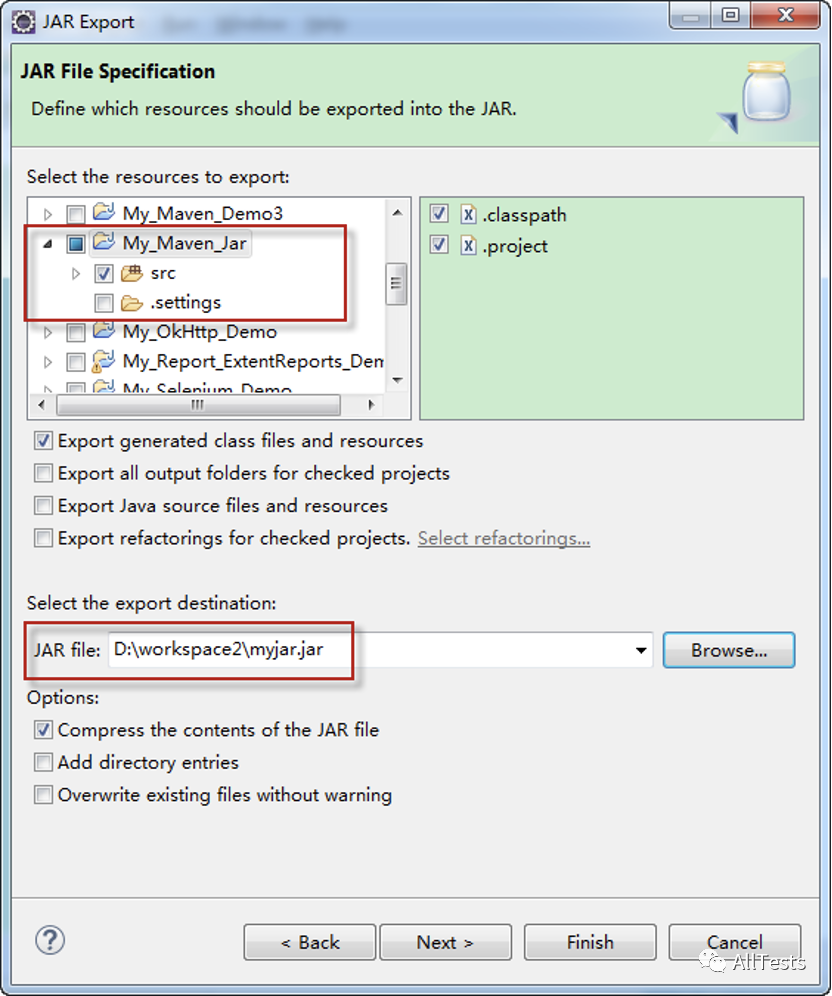
Click Next.

Select the main class and click Finish.
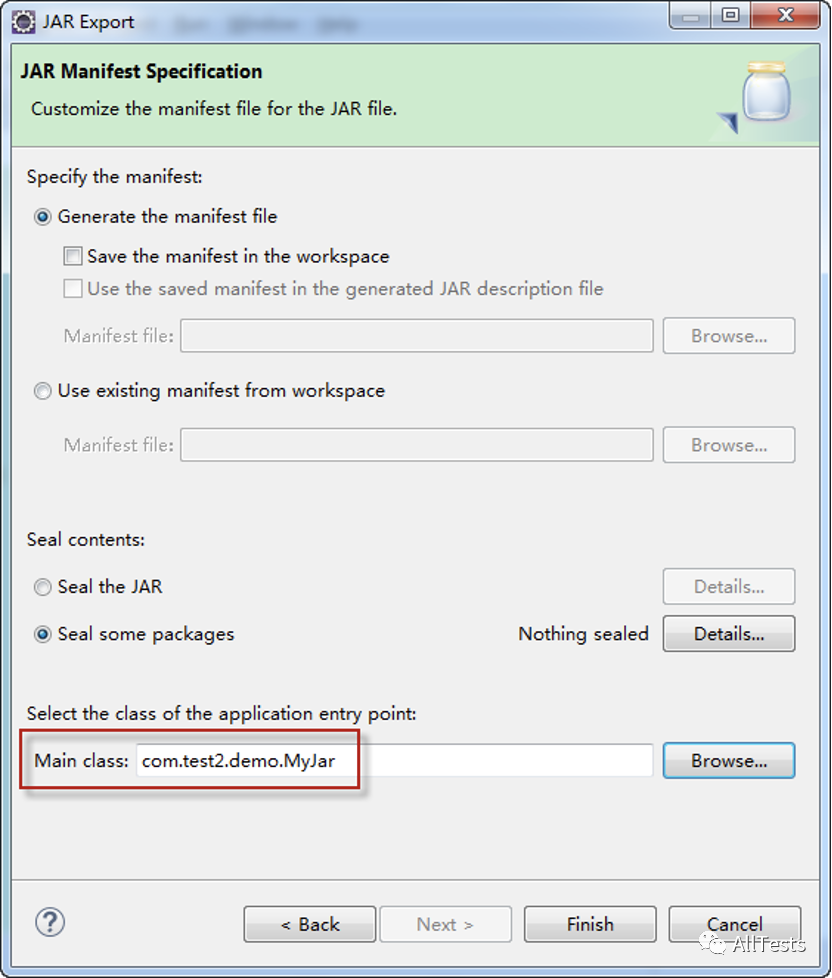
As shown in the figure: package the project into myjar jar.

Open the command line and run myjar Jar, enter Java - jar myjar jar
As shown in the figure: the operation is successful.

2. Add myjar.com Jar is installed in Maven's local resource library.
Open the command line and enter the installation command:
mvn install:install-file -Dfile=D:\workspace2\myjar.jar -DgroupId=com.test2.demo -DartifactId=myjar -Dversion=1.0 -Dpackaging=jar
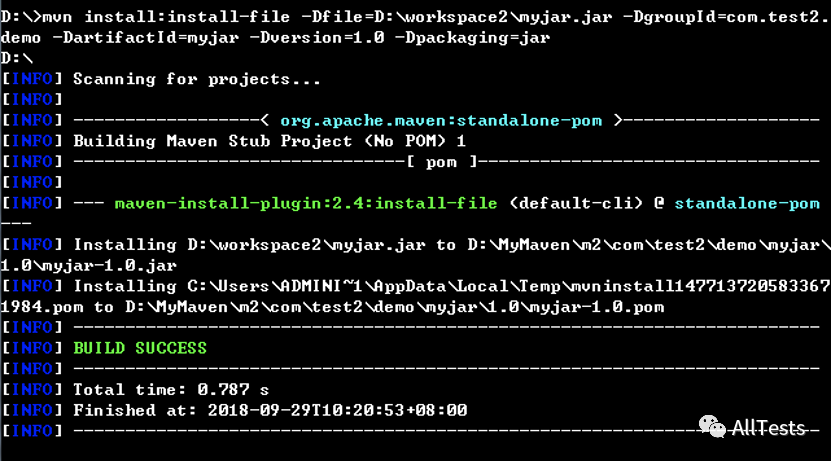
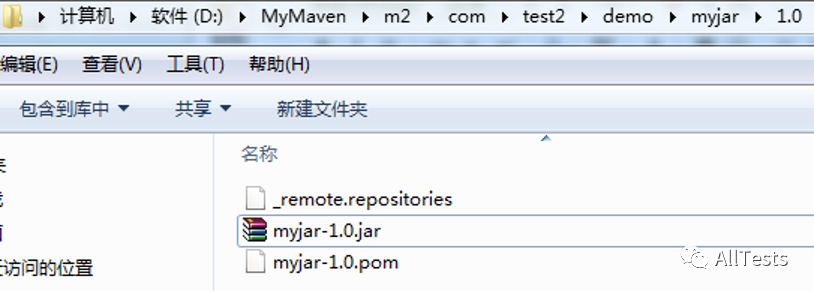
As shown in the figure: the local resource library can search for the newly installed myjar jar.
3. Maven project references custom libraries.
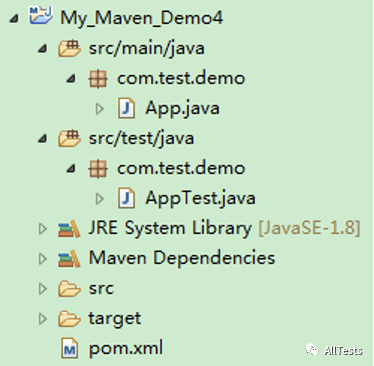
Create Maven project (My_Maven_Demo4), as shown in the figure:
Modify POM file (pom.xml) and add dependency (myjar.jar).
<dependency>
    <groupId>com.test2.demo</groupId>
    <artifactId>myjar</artifactId>
    <version>1.0</version>
</dependency>
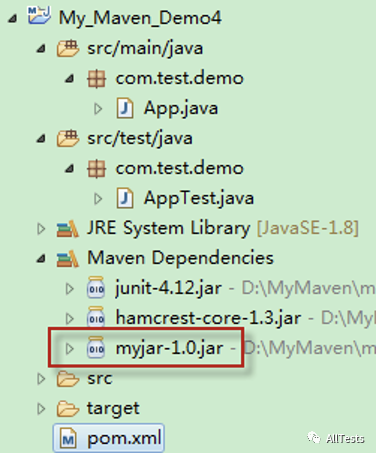
As shown in the figure: Maven dependency has been added to myjar jar.
Create a test class (MyTest) and verify the methods of the custom dependency (myjar.jar).
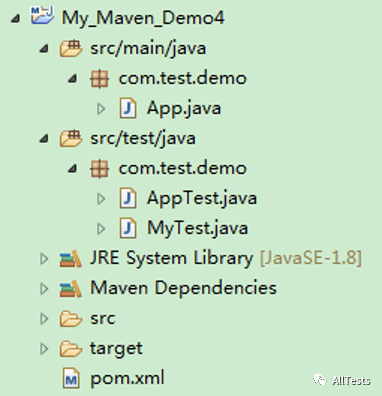
MyTest class, script code:
package com.test.demo;
import org.junit.Test;
import com.test2.demo.MyJar;

public class MyTest {

       @Test
       public void testDemo(){
              MyJar t = new MyJar();
              t.myTest();
       }

}
Execute project, POM XML right click Run as - > Maven test.
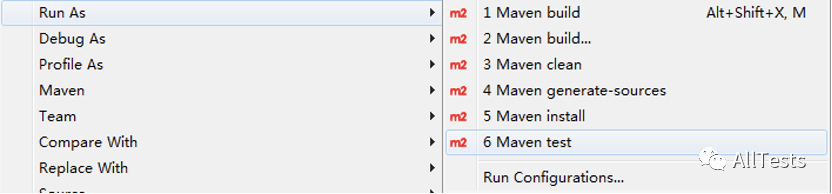
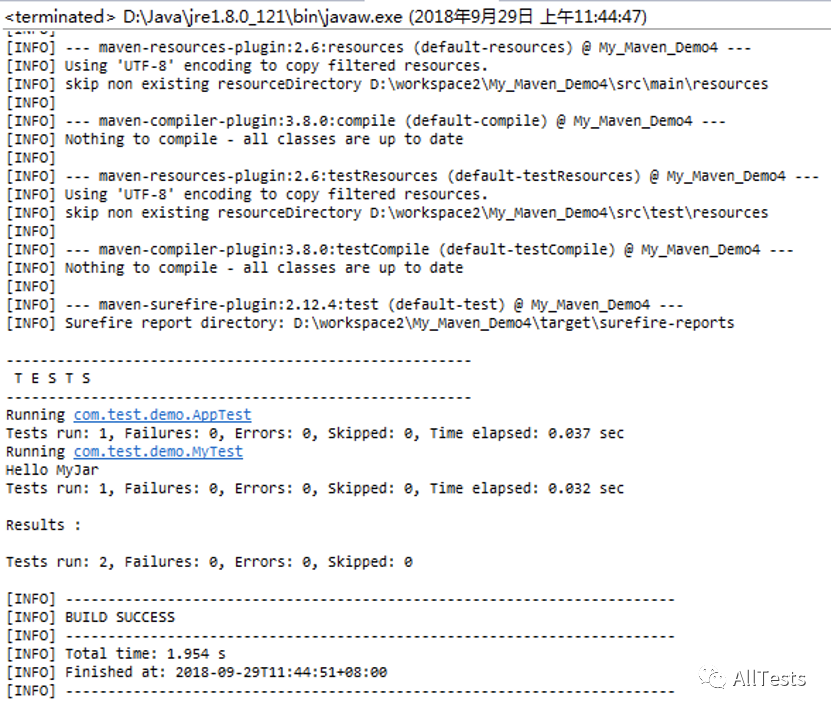
Operation result: execution succeeded.
6. Reference external dependency
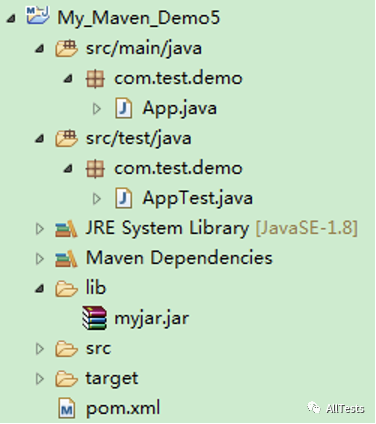
1. Create Maven project (My_Maven_Demo5), create lib folder, and copy the external dependencies to be referenced (for example, custom library myjar.jar).
2. Modify the POM file (pom.xml) and reference the external dependency (myjar.jar).
<dependency>
    <groupId>com.test2.demo</groupId>
    <artifactId>myjar</artifactId>
    <version>1.0</version>
    <systemPath>${basedir}/lib/myjar.jar</systemPath>
    <scope>system</scope>
</dependency>
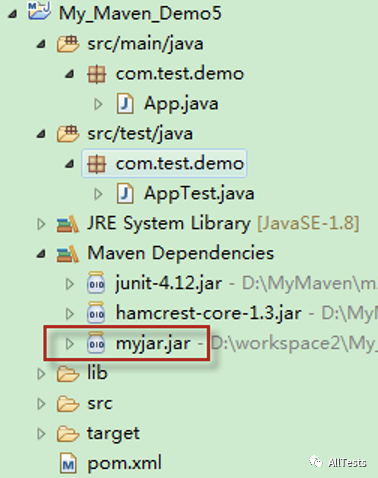
As shown in the figure: Maven has made the external dependency myjar Jar reference comes in.
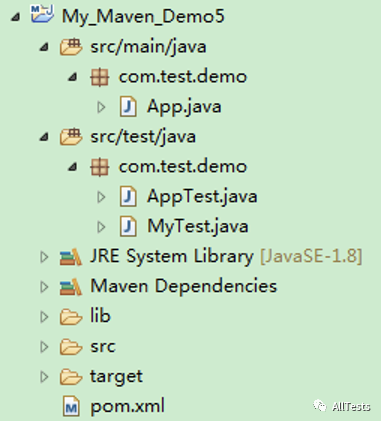
3. Create a test class (MyTest) and verify the methods that reference external dependencies (myjar.jar).
MyTest class, script code:
package com.test.demo;
import org.junit.Test;
import com.test2.demo.MyJar;

public class MyTest {

       @Test
       public void testDemo(){
              MyJar t = new MyJar();
              t.myTest();
       }

}
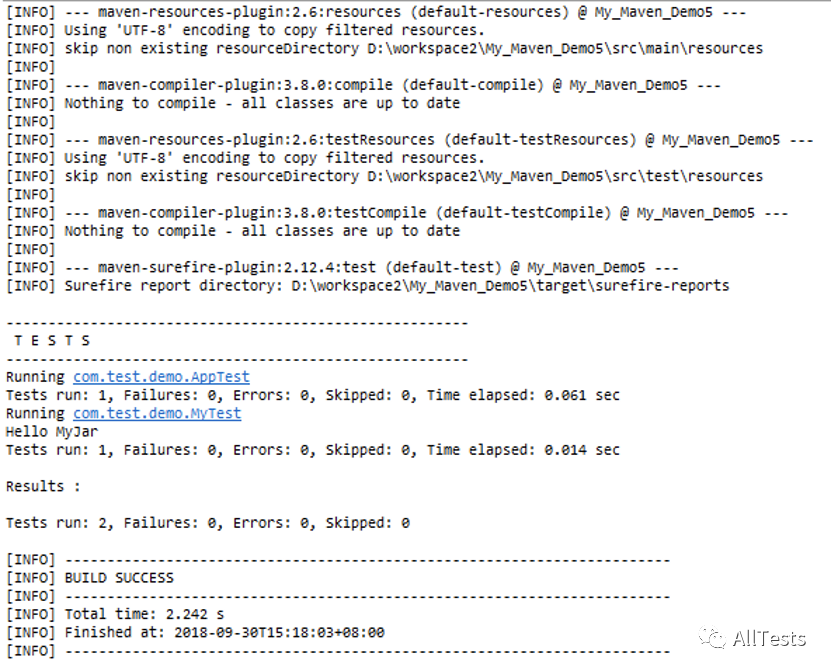
Execute project, POM XML right click Run as - > Maven test.
Operation result: execution succeeded.
If you think the article is good, please , like, share, watch and collect , because this will be the strongest driving force for me to continue to output more high-quality articles!
Here I recommend a software testing exchange group created by myself, QQ: 642830685. The group will share software testing resources, testing interview questions and testing industry information from time to time. You can actively exchange technology in the group, and big guys can answer questions and solve problems for you.