On the idea of login registration business and the realization of some codes
Recently, I started the development of mobile terminal project. As I am in the background, I certainly can't avoid realizing the functions that every app should have: login and registration. At the beginning, I felt very confused. So I write a blog here to share with you how to realize a basic login and registration function. I hope to put forward my opinions actively!
First, let's talk about the functions of the words mentioned in the title:
token
If we need to log in every time we close the client and open it again, or even judge whether to log in every time we access the controller, then if we need to access the persistent database every time, there is a great pressure on the server, so there is a login status based on token. In my opinion, token is based on timestamp, The machine model, the corresponding user id and other available information use the algorithm to generate a string that will not be repeated. We can put such a string in the request header, and then we can use this string for subsequent interaction. We can not check the account and password every time, so as to reduce the pressure on the server.
SMS verification code
We also know that SMS verification code is also an important part of APP applications. How do we realize this function? If it is a self-made simple app project, we must rely on some third-party SDKs, such as Alibaba cloud and Tencent cloud. After opening the service, we need to find the corresponding api document and configure it accordingly, and then we can realize the function of checking the verification code.
Redis
The database running in memory can easily store some key value pairs that need to be used, and the usage is relatively simple. Then the reading and writing speed is much faster than SQL. If we want to operate a project and blindly use the persistent database, it will bring great pressure, so we should also consider what should be put into the memory database, So it is necessary to know Redis.
How do I interact with clients?
In fact, the interaction with the web side is not much different. We pass information through the url, and then get the parameters. After we return a standard json string, the client will do other operations after receiving it. Now the separation between the front and back ends is obvious. Our back-end development only needs to return the data they need
The main ideas and implementation of the two login modules are as follows:
Since all the knowledge in SpringBoot is used here, I won't post the detailed code, so I'll give you an idea about how to use the verification code, Redis and token I mentioned above
Registration:
- The user needs to send verification code before registering
- After successful verification, the corresponding interface will be returned to json
- Then fill in the basic information
- After submitting, the background persistent save returns success
Sign in:
Password login
- The user first sends a login request and passes the account and password
- Background query database for matching
- If the match is successful, a token is generated and hung in the header of the response body
- The token is stored in Redis and the successful data is returned
- If the match is unsuccessful, no token will be generated and the data corresponding to the failure will be returned directly
Verification code login
This is about the same idea as password login, except that you need to request the interface to send the verification code and then match it. It should be noted that you still need to generate a token here
How to use Redis?
First, we need to learn the basic knowledge of Redis, and then we come to the SpringBoot project
First, we need to import the dependency of Redis
 <dependency>
            <groupId>org.springframework.boot</groupId>
            <artifactId>spring-boot-starter-data-redis</artifactId>
        </dependency>
Then come to application yml (note here that I am used to using yml, which is a little better than properties) to configure the basic configuration of Redis
spring:
  redis:
    host: "host ip"
    port: "Redis Port number of"
    password: "Redis Set password" #It should be noted here that Redis in the host must also be running when running
Then we can use the corresponding template class. Here, we need to pay attention to one thing. We need to configure the serialization of Redis, otherwise the key value pairs we pass will be passed to the server in the form of garbled code. How to serialize Redis? You can consult the relevant materials and then customize the configuration of Redis template object
Here we attach a tool class, which is the corresponding method
@Component //Declaration component
public class RedisUtils {
    @Autowired //Automatic injection
    RedisTemplate<String,Object> redisTemplate;
    public String get(String key){
        return (String)redisTemplate.opsForValue().get(key);
    }
    public  void set(String key,Object value){
        redisTemplate.opsForValue().set(key,value);
    }
    public boolean set(String key, Object value, long time) {//Method of adding expiration time
        try {
            if (time > 0) {
                redisTemplate.opsForValue().set(key,value,time,TimeUnit.SECONDS);
            } else {
                set(key, value);
            }
            return true;
        } catch (Exception e) {
            e.printStackTrace();
            return false;
        }
    }

}//Here only a simple getset is implemented. If you want to implement drop and other functions, you can also consult the data
How to use token?
First of all, why mention Redis first? Because we can save the primary key and token string corresponding to the account to Redis in the form of key value pairs
When the token string is generated, it is encrypted according to the algorithm. Similarly, we can decrypt it. We can configure an interceptor to get the token when intercepting the request, decrypt the token, take out the user's uid, and then find the corresponding token from Redis. If it matches, we will release it, As for why not directly use the user's uid for storage, this may involve security issues. Maybe we use the user's independent uid for continuous operation. Maybe it's not a safe practice to carry the user's uid in the request header every time, so we use token for encryption, which I don't know very well.
The general idea is as follows: enter the implementation of the code below:
First, import the corresponding dependencies
   <dependency>
            <groupId>io.jsonwebtoken</groupId>
            <artifactId>jjwt-api</artifactId>
            <version>0.11.2</version>
        </dependency>
        <dependency>
            <groupId>io.jsonwebtoken</groupId>
            <artifactId>jjwt-impl</artifactId>
            <version>0.11.2</version>
            <scope>runtime</scope>
        </dependency>
        <dependency>
            <groupId>io.jsonwebtoken</groupId>
            <artifactId>jjwt-jackson</artifactId> <!-- or jjwt-gson if Gson is preferred -->
            <version>0.11.2</version>
            <scope>runtime</scope>
        </dependency>
Then we need to implement the tool class corresponding to the generated token
public class TokenUtils {
    private final String tokenKey="Custom key, in the form of string";
    byte[] bytes=tokenKey.getBytes();
    private final Key key= Keys.hmacShaKeyFor(Decoders.BASE64.decode(tokenKey));
    private String Token(String userId, Date date) {
        System.out.println(bytes.length);
        SignatureAlgorithm signatureAlgorithm = SignatureAlgorithm.HS256;
        JwtBuilder builder = Jwts.builder()
                .setIssuedAt(date) // Set issuing time
                .setExpiration(new Date(date.getTime() + 1000 * 60 * 60))
                .claim("userId",String.valueOf(userId) ) // Setting content is very important here, because later
                                                          // It needs to be parsed
                .signWith(key);
        String jwt = builder.compact();
        return jwt;
    }
    public String getToken(String userId){
        Date date=new Date();
        int nowTime =(int) (date.getTime()/1000);
        System.out.println(nowTime);
        String TokenStr=Token(userId,date);
        return TokenStr;
    }
}
Then we need to configure the interceptor to use token authentication to log in. Here, we only write a rewrite of the preHandle method. You can refer to the information about the specific configuration class and how to sort it into MVC
    @Autowired
    RedisUtils redisUtils;
    @Override
    public boolean preHandle(HttpServletRequest request, HttpServletResponse response, Object handler) throws Exception {
        if(request.getRequestURI().contains("/login") ||
         request.getRequestURI().contains("/register") ||
         request.getRequestURI().contains("/static"))
            return true;
        final String headerToken=request.getHeader("token");
        log.info("get token:"+headerToken);
        if(null==headerToken || headerToken.trim().equals("")){
            response.sendRedirect("/login403");
            return false;
        }
        System.out.println("========================");
        try{
            Claims claims= Jwts.parser()
            .setSigningKey("Compared with the previously set key Same string") //Note that you should change it yourself
            // **If the key is too short, an error will be reported
            .parseClaimsJws(headerToken).getBody();
            String tokenUserId=(String)claims.get("userId");
            log.info("Resolve to uid:"+tokenUserId);
            String RedisToken=redisUtils.get(tokenUserId); //Redis query operation
            if(RedisToken==null){
             //   request.setAttribute("uid",tokenUserId);
                response.sendRedirect("/login403"); //Redirect to a controller that returns no permission
                return false;
            }
            if(!headerToken.equals(RedisToken)){
                response.sendRedirect("/login403");
                return false;
            }
            return true;
        }catch (Exception e){
            System.out.println(e);
            return false;
        }
    }
The generation of token should be used in the login module. Here, just write it according to logic, and the corresponding tool class has been pasted
How to realize SMS service?
Here I use the third-party SDK corresponding to Tencent cloud
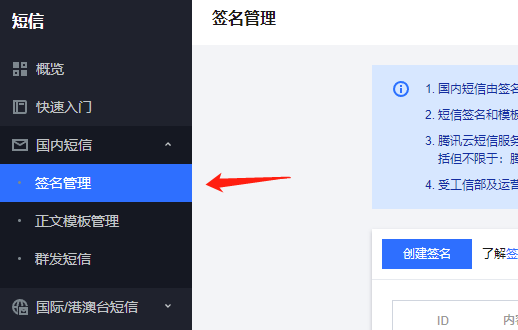
- First, we need to go to the home page of Tencent cloud, and then search the SMS function to open the service
- Then we follow the quick start
Create the corresponding signature and body in this place. Pay attention to strictly follow the requirements here, otherwise it will fail. Then we need to find the corresponding SDK document
import com.tencentcloudapi.common.Credential;
import com.tencentcloudapi.common.exception.TencentCloudSDKException;

//Import optional configuration classes
import com.tencentcloudapi.common.profile.ClientProfile;
import com.tencentcloudapi.common.profile.HttpProfile;

// Import the client of the corresponding SMS module
import com.tencentcloudapi.sms.v20210111.SmsClient;

// Import the request response class corresponding to the request interface
import com.tencentcloudapi.sms.v20210111.models.SendSmsRequest;
import com.tencentcloudapi.sms.v20210111.models.SendSmsResponse;

/**
 * Tencent Cloud Sms Sendsms
 *
 */
public class SendSms
{
    public static void main(String[] args)
    {
        try {
            /* Necessary steps:
             * To instantiate an authentication object, you need to pass in the secret ID and secret key of Tencent cloud account key pair.
             * The method used here is to read from the environment variable. You need to set these two values in the environment variable first.
             * You can also write dead key pairs directly in the code, but be careful not to copy, upload or share the code with others,
             * So as not to compromise the security of your property.
             * SecretId,SecretKey Query: https://console.cloud.tencent.com/cam/capi */
            Credential cred = new Credential("secretId", "secretKey");

            // Instantiate an http option. Optional. No special requirements can be skipped
            HttpProfile httpProfile = new HttpProfile();
            // Set agent
            // httpProfile. Proxhost ("real proxy");
            // httpProfile. Setproxyport (real proxy port);
            /* SDK The POST method is used by default.
             * If you must use the GET method, you can set it here. The GET method cannot handle some large requests */
            httpProfile.setReqMethod("POST");
            /* SDK There is a default timeout. Please do not adjust it if it is not necessary
             * If necessary, check in the code for the latest default values */
            httpProfile.setConnTimeout(60);
            /* SDK The domain name is automatically specified. Usually, you don't need to specify a domain name, but if you visit the services of the financial district
             * You must specify the domain name manually, for example, the domain name of Shanghai Financial District of sms: sms ap-shanghai-fsi. tencentcloudapi. com */
            httpProfile.setEndpoint("sms.tencentcloudapi.com");

            /* Non essential steps:
             * Instantiate a client configuration object. You can specify timeout and other configurations */
            ClientProfile clientProfile = new ClientProfile();
            /* SDK TC3-HMAC-SHA256 is used for signature by default
             * Do not modify this field unless necessary */
            clientProfile.setSignMethod("HmacSHA256");
            clientProfile.setHttpProfile(httpProfile);
            /* Instantiate the client object to request the product (take sms as an example)
             * The second parameter is the region information. You can directly fill in the string AP Guangzhou to support the region list reference https://cloud.tencent.com/document/api/382/52071#.E5.9C.B0.E5.9F.9F.E5.88.97.E8.A1.A8 */
            SmsClient client = new SmsClient(cred, "ap-guangzhou",clientProfile);
            /* Instantiate a request object, and further set the request parameters according to the calling interface and the actual situation
             * You can directly query the SDK source code to determine which attributes of the interface can be set
             * The attribute may be a basic type or it may refer to another data structure
             * It is recommended to use IDE for development. You can easily jump to the document description of each interface and data structure */
            SendSmsRequest req = new SendSmsRequest();

            /* Fill in the request parameters, where the member variable of the request object is the input parameter of the corresponding interface
             * You can view the definition of request parameters through the official website interface document or jump to the definition of request object
             * Basic type settings:
             * Help link:
             * SMS console: https://console.cloud.tencent.com/smsv2
             * sms helper: https://cloud.tencent.com/document/product/382/3773 */

            /* SMS application ID: the actual sdkpappid generated after adding an application in [SMS console], such as 1400006666 */
            String sdkAppId = "1400009099";
            req.setSmsSdkAppId(sdkAppId);

            /* SMS signature content: if UTF-8 code is used, the approved signature must be filled in. The signature information can be viewed by logging in to [SMS console] */
            String signName = "Signature content";
            req.setSignName(signName);

            /* International / Hong Kong, Macao and Taiwan SMS SenderId: fill in the blank for domestic SMS. It is not opened by default. If you need to open it, please contact [sms helper] */
            String senderid = "";
            req.setSenderId(senderid);

            /* User's session content: it can carry context information such as user side ID, and the server will return it as it is */
            String sessionContext = "xxx";
            req.setSessionContext(sessionContext);

            /* SMS number extension number: not opened by default. If you need to open, please contact [sms helper] */
            String extendCode = "";
            req.setExtendCode(extendCode);

            /* Template ID: the approved template ID must be filled in. The template ID can be viewed in [SMS console] */
            String templateId = "400000";
            req.setTemplateId(templateId);

            /* Issue mobile phone number, using E.164 standard, + [country or region code] [mobile phone number]
             * For example: + 8613711112222, in which there is a + number in front, 86 is the country code, 13711112222 is the mobile phone number, and there should be no more than 200 mobile phone numbers at most */
            String[] phoneNumberSet = {"+8621212313123", "+8612345678902", "+8612345678903"};
            req.setPhoneNumberSet(phoneNumberSet);

            /* Template parameter: if there is no template parameter, it is set to null */
            String[] templateParamSet = {"5678"};
            req.setTemplateParamSet(templateParamSet);

            /* The request is initiated by calling the SendSms method through the client object. Note that the request method name corresponds to the request object
             * The returned res is an instance of the SendSmsResponse class, which corresponds to the request object */
            SendSmsResponse res = client.SendSms(req);

            // Output json format string back package
            System.out.println(SendSmsResponse.toJsonString(res));

            // You can also take out a single value. You can view the definition of the returned field through the official website interface document or jump to the definition of the response object
            System.out.println(res.getRequestId());

        } catch (TencentCloudSDKException e) {
            e.printStackTrace();
        }
    }
}
After we configure it according to the document, we can package it into the corresponding tool class and call the corresponding function.
The above is my sorting out of the difficulties in login and registration. It can be regarded as providing you with some ideas, but it doesn't mean to do well. It's just to sort out what you have learned on the blog. If there is a better solution, you can also actively comment and put forward