1, Account security control
(1) System account cleaning
1. Set the Shell of the non login user to / sbin/nologin
usermod -s /sbin/nologin user name
2. Lock accounts that have not been used for a long time
usermod -L user name passwd-l user name ------------ lock account
passwd-S user name ----------------------------View user status
passwd -u user name ------------------------------------Unlock account
3. Delete useless accounts
userdel -r username
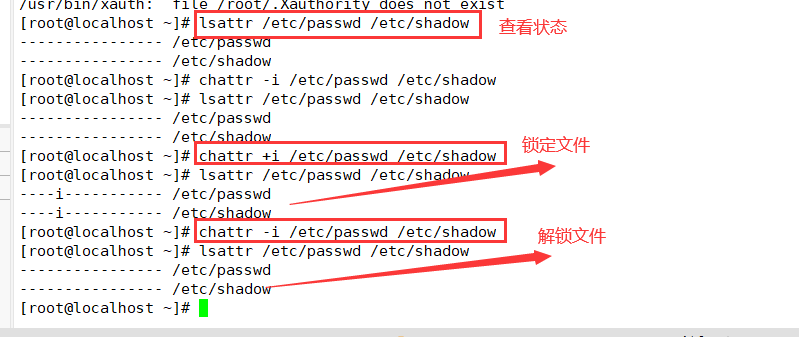
4. Lock account files passwd and shadow
chattr +i /etc/passwd /etc/shadow --------------Lock file
Isattr /etc/passwd /etc/shadow-----------------------View status
chattr -i /etc/passwd /etc/shadow-----------------Unlock file
(2) Password security control
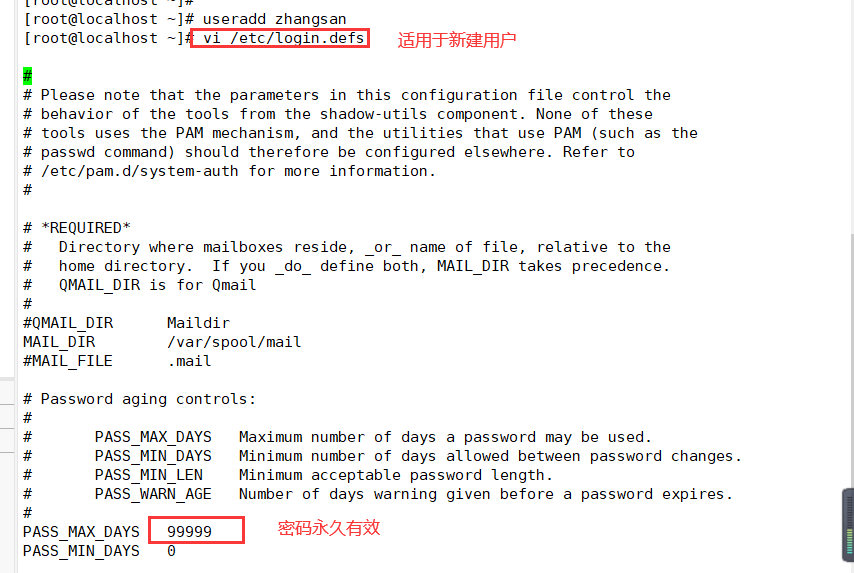
1. Set password validity
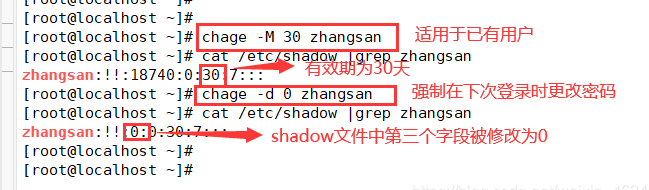
[root@localhost ~]# vi /etc/login.defs ----------------- modify the password configuration file, which is applicable to new users
PASS_ MAX_ DAYS 30

[root@localhost ~]# chage -M 30 zhangsan ----------------- applicable to existing users

2. Require the user to change the password at the next login
[root@localhost ~]# chage -d 0 zhangsan ----------------- force password change at next login
[root@localhost ~]# Cat / etc / shadow | grep Zhangsan ----------------- the third field in the shadow file is modified to
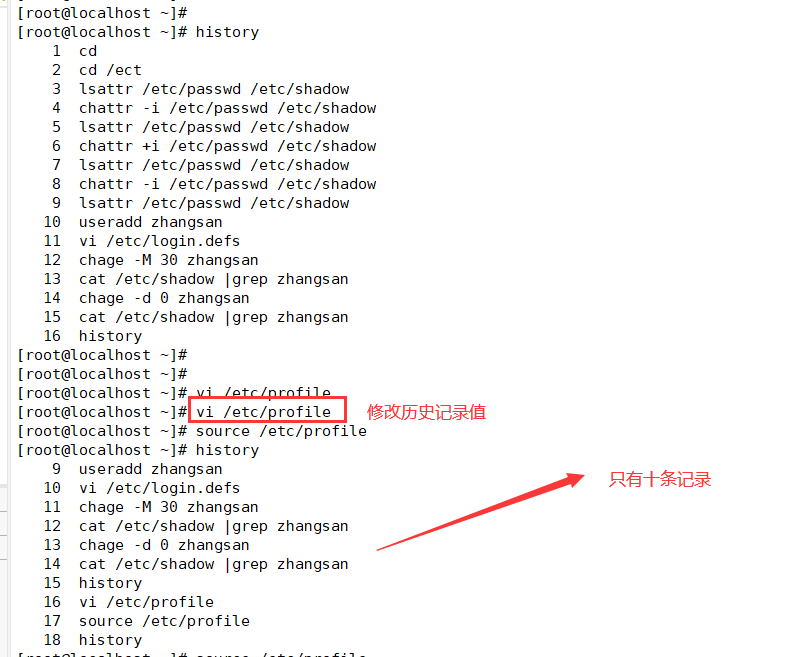
(3) Command history limit
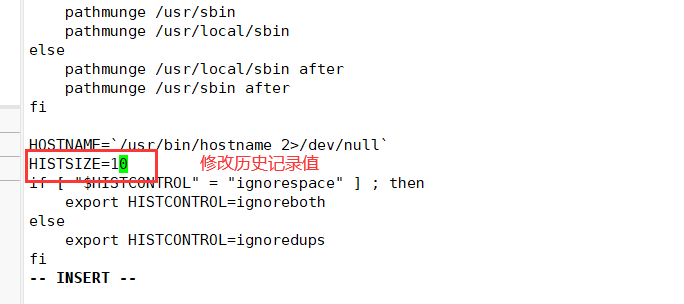
1. Reduce the number of recorded commands
[root@localhost ~]# vi /etc/profile -------------------- system environment variable configuration file (all users will execute it when logging in)
export HISTSIZE=200
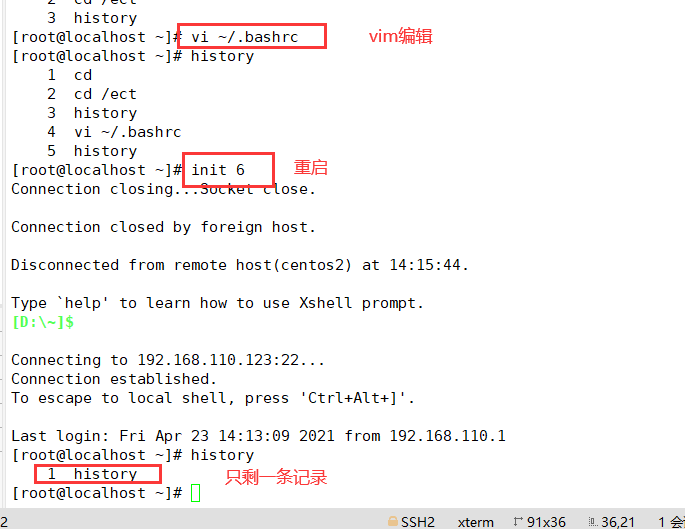
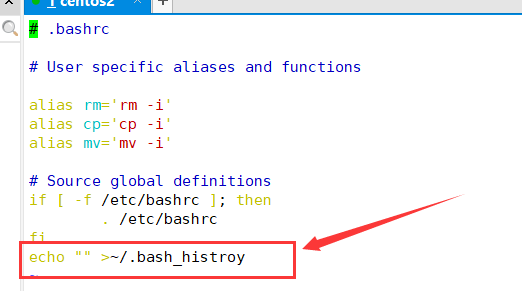
2. Automatically clear command history at login
[root@localhost ~]# vi ~/.bashrc
echo "" > ~/.bash_ history
(4) Automatic logoff of terminal
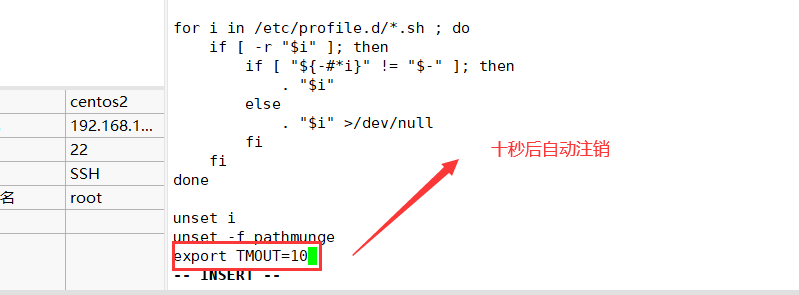
1. Automatically log off after 600 seconds of inactivity
[root@localhost ~]# vi letc/profile
export TMQUT=600
[root@localhost ~]# source /etc/profile

2, Use the su command to switch users
(1) Usage and password verification
▶ Function: switch users
▶ Format: su [-] target user # with "-" indicates that the login shell environment of the target user is used, without adding environment variables.
▶ Users who can log in are generally divided into two types: super user root and ordinary user.
▶ When root switches to any user, no password is required. However, when ordinary users switch to other users, they need to enter the password of the target user for authentication.

(2) Restrict users who use the su command
1. Add users who are allowed to use the su command to the wheel group
gpasswd -a user wheel    #Add user to wheel group
grep wheel /etc/group    #Identify wheel group members

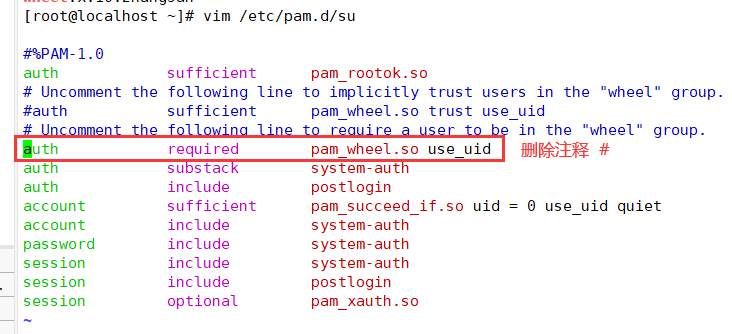
2. Modify / etc / PAM Enable PAM for D / Su authentication configuration_ Wheel certification
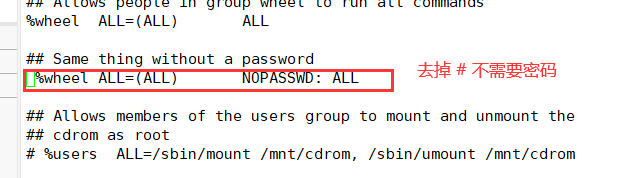
vim /etc/pam.d/su     #Edit / etc / PAM D / Su file
auth sufficient pam_rootok.so
#pam_ rootok. The main function of so module is to enable the user root with uid 0 to directly pass the authentication without entering a password
...      #Omitted part
auth required pam_wheel.so use_uid
 #pam_wheel.so is used to make users in the wheel group use the su command, while others (including root) cannot use the su command

Explanation of each state:
Comment on both lines: available to all users su Command, when switching root And ordinary users need password authentication
 Open the first line and comment the second line: (default state) it is allowed to be used among all users su Command to switch. When switching, root No password is required. Other users need a password.
Note the first line, open the second line: only wheel Only users in the group can use it su Orders, root Users cannot switch.
Both lines are on: only root Users and wheel Only users in the group can use it su Command.

Modify the document, delete the comment "#" in front of the command, and save it with "wq".
(3) View su operation records
1. Security log file - / var/log/secure

3, PAM security authentication in Linux
(1) PAM safety certification process
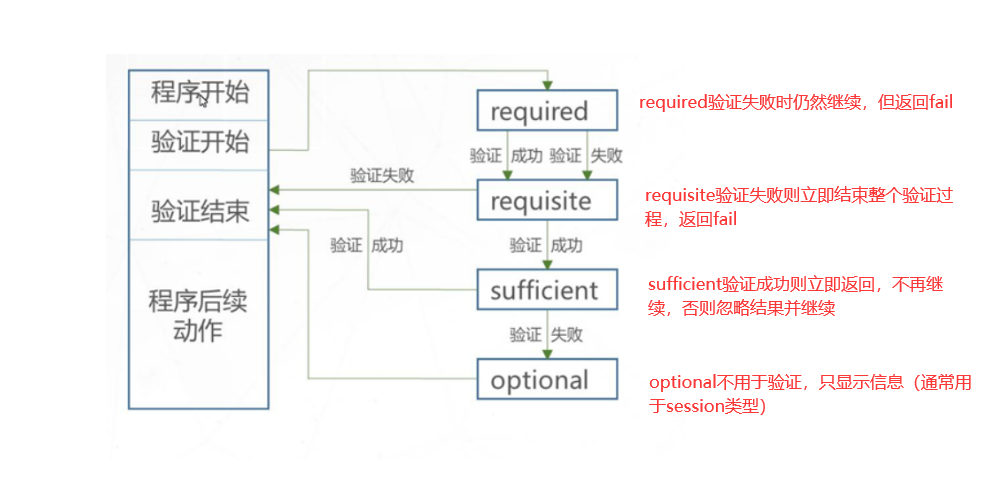
(2) PAM certification principle
▶ PAM authentication sequence: Service - > PAM (configuration file) - > pam_ * so
▶ PAM first determines the service, then loads the corresponding PAM configuration file, and finally calls the PAM authentication module for security authentication.
When a user accesses the server, a service program of the server sends the user's request to the PAM module for authentication. Different applications have different PAM modules.
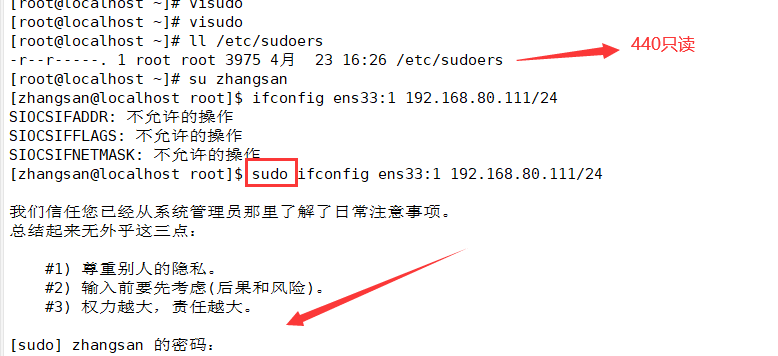
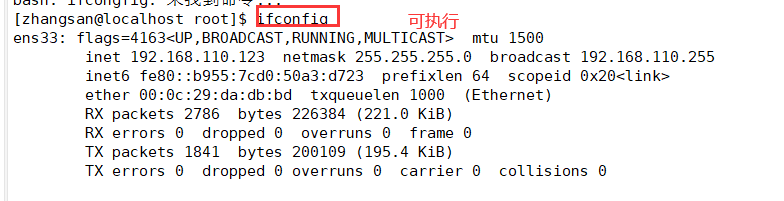
4, Using sudo mechanism to promote permissions
(1) Purpose and usage of sudo command
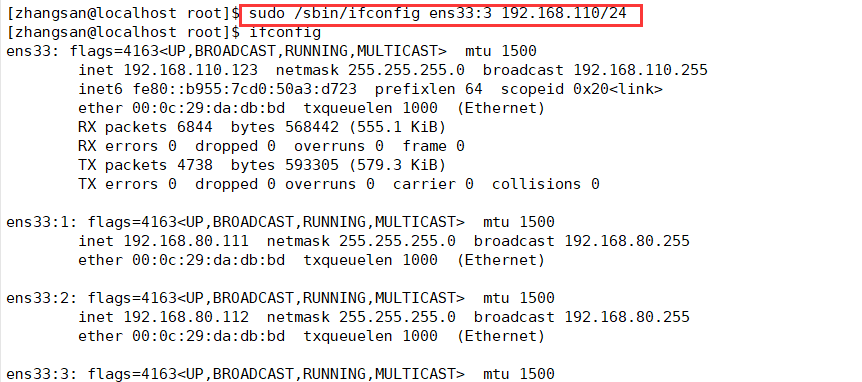
▶ Function: enhance execution permission (execute as other users)
▶ Usage: sudo authorization command
(2) Configure sudo authorization
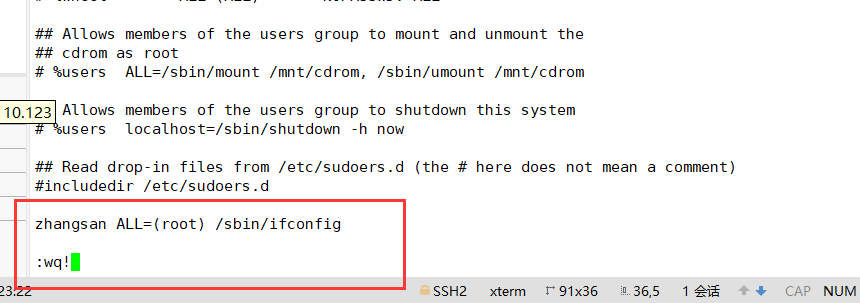
1. VI / etc or / douders
vi /etc/sudoers ---- the default permission of this file is 440. When saving and exiting, you must execute wq! Forced operation
2. Record format
User hostname = command program list
3. Syntax format
User hostname = command program list
User hostname = (user) command program list
User: directly authorize the specified user name, or in the form of "% group name" (authorize all users of a group)
Host name: the host name using this rule. If the host name is not configured, localhost can be used. If the host name is configured, the actual host name can be used. ALL represents ALL hosts
(user): in what capacity can the user execute commands. This item can be omitted. By default, the command is run as root
Command program list: privileged commands that allow authorized users to execute through sudo. The full path of the command program needs to be filled in. Multiple commands are separated by commas and. ALL represents ALL commands of the system
4. Set alias
When inputting, sometimes the characters of some users, host names or commands are long or complex. You can set an alias, which is convenient and labor-saving.
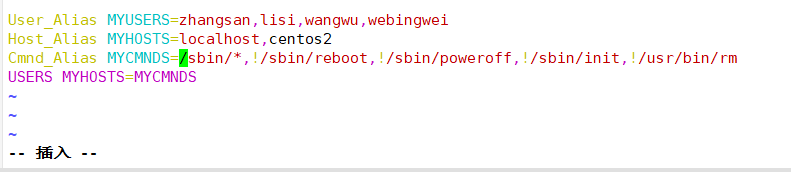
Use keywords User_Alias,Host_Alias,Cmnd_Alias To set the alias (the alias must be uppercase)
Multiple messages need to be separated by ",".
User_Alias USERS=Username 1, username 2, username 3        #User alias. USERS represents the last three USERS
Host_Alias HOSTS=localhost,bogon              #host alias
Cmnd_Alias CMNDS=/sbin/ifconfig,/usr/sbin/useradd,/usr/sbin/userdel  #Command alias
USERS HOSTS=CMNDS   #Write authorization using alias
(3) View sudo operation records
1. The Defaults logfile configuration needs to be started

2. The default log file is "/ var/log/sudo"
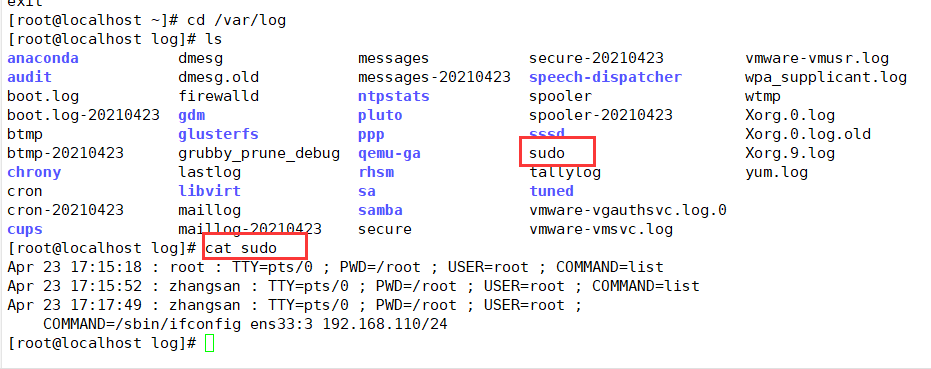
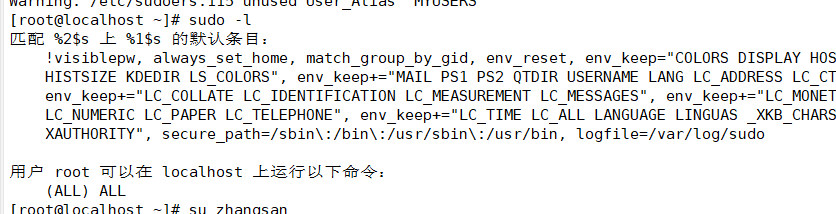
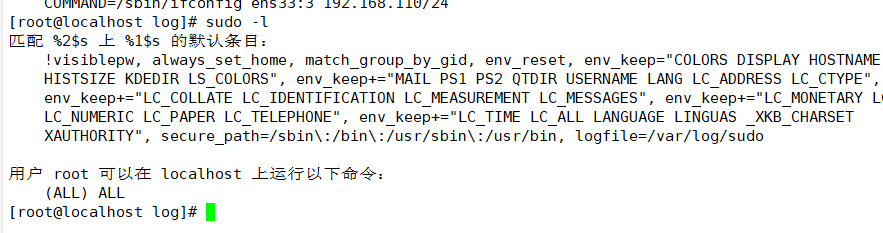
(4) Query authorized sudo operations
5, On off safety control
(1) Adjust BIOS boot settings
▶ Set the first boot device as the hard disk of the current system
▶ It is forbidden to boot the system from other devices (optical disc, U SB flash disk, network)
▶ Set the security level to setup and set the administrator password
(2) GRUB restrictions
▶ Use grub2-mkpasswd-pbkdf2 to generate the key
▶ Modify / etc / grub d/00_ Add a password record in the header file
▶ Generate a new grub CFG configuration file
grub2-mkpasswd-pbkdf2       #Use grub2-mkpasswd-pbkdf2 to generate the key

cp /boot/grub2/grub.cfg /boot/grub2/grub.cfg.bak
cp /etc/grub.d/00_header /etc/grub.d/00_header.bak

vim /etc/grub.d/00_header       #Modify / etc / grub d/00_ Header file, add password record
cat << EOF
set superusers="root"					#Set the user name to root
password_pbkdf2 root grub.pbkdf2......		#Set the password, omitting part of the content as the encrypted password string
EOF

grub2-mkconfig -o /boot/grub2/grub.cfg	#Generate a new grub Cfg file
1. Use grub2-mkpasswd-pbkdf2 to generate the key

2. Modify / etc / grub d/00_ Header file, add password record
Back up the files before modifying them to prevent problems and facilitate recovery. Here will be the grup of step 3 CFG is backed up together


3. Generate a new grub CFG configuration file
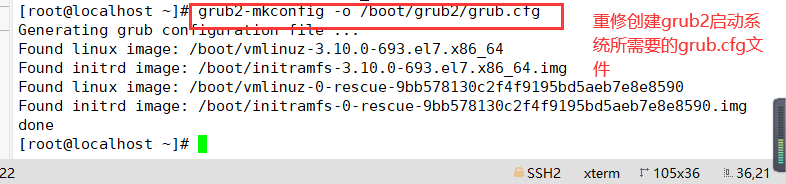
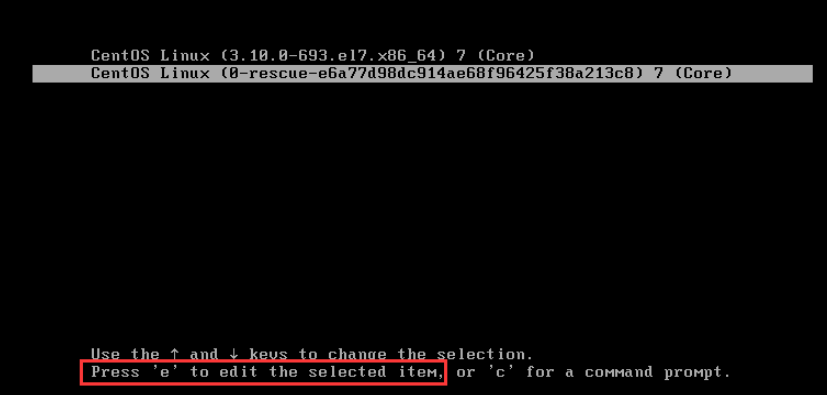
Restart the system init 6, press "e" in the corresponding interface, and the interface shown below will pop up. Enter the user name and password according to the prompt to enter the grub menu.

6, Terminal login security control
(1) Restrict root to login only on the secure side
1. Secure terminal configuration: / etc/securetty
vi /etc/securetty
.....
#tty5
#tty6   #root user is prohibited from logging in from terminals tty5 and tty6
(2) Prohibit ordinary users from logging in
1. Create / etc/nologin file
2. After deleting the nologin file or restarting, it will return to normal
[root@localhost ~]# touch  /etc/nologin     #Prohibit ordinary users from logging in
[root@localhost ~]#  rm  -f  /etc/nologin    #Cancel the above login restrictions

7, System weak password detection
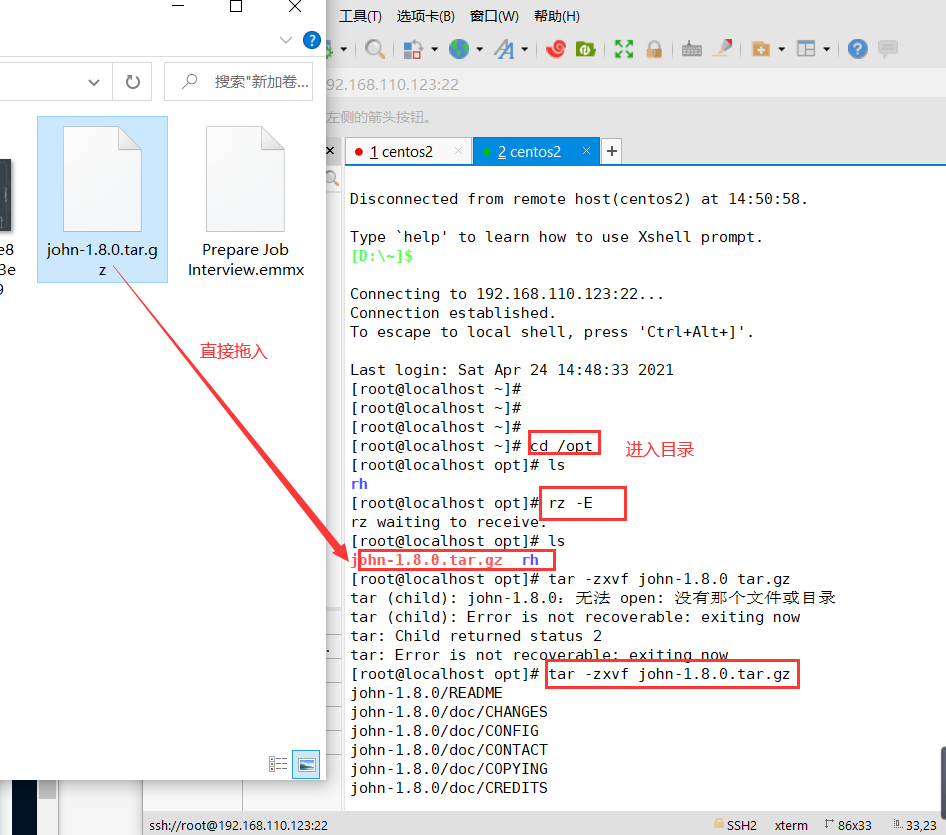
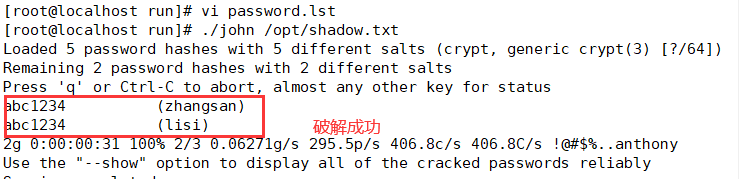
A password analysis tool that supports dictionary style brute force cracking. Through the password analysis of shadow file, the password strength can be detected.
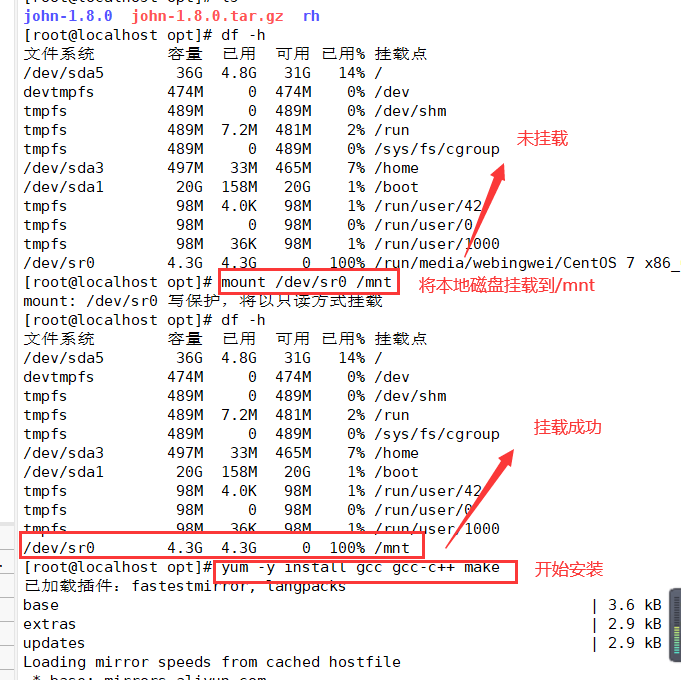
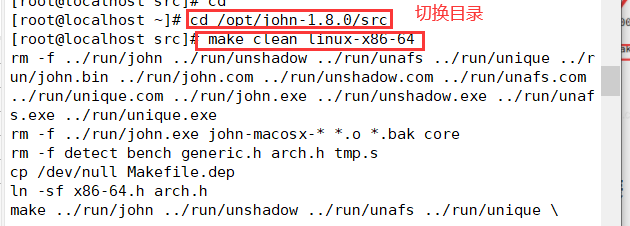
---Decompression Kit----
cd  /opt
tar  zxf  john-1.8.0.tar.gz
---Install software compilation tools---
yum  install  -y  gcc  gcc-c++  make
---Switch to src Subdirectory---
cd  /opt/john-1.8.0/src
---Compile and install---
make  clean  linux-x86-64
---Prepare the password file to be cracked---
cp   /etc/shadow   /opt/shadow. txt
---Perform brute force cracking---
cd  /opt/john-1.8.0/run
./john  /opt/shadow.txt
---View the list of cracked accounts---
./john  --show  /opt/shadow. txt


---Use password dictionary file---
> john.pot         #Clear the cracked account list for re analysis
./john  --wordlist=./password.lst  /opt/shadow.txt       #Use the specified dictionary file to crack
1. Unzip the toolkit to the opt directory
2. Mount the software to the local installation directory of / mnt, and then mount the software to the local installation directory
3. Switch to the scr subdirectory for compilation and installation
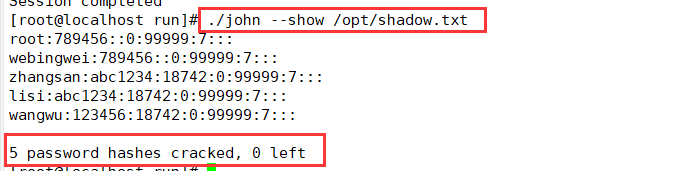
4. Prepare the password file to be cracked, and then go to / opt/john-1.9.0/run subdirectory to perform forced cracking, / John -- show / opt / shadow Txt query the cracked account list

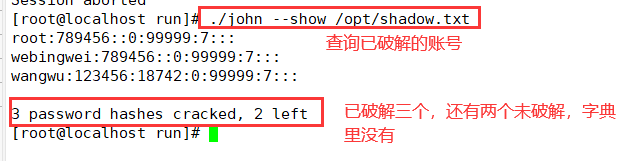
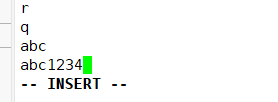
5. If this password is not in the dictionary, add it

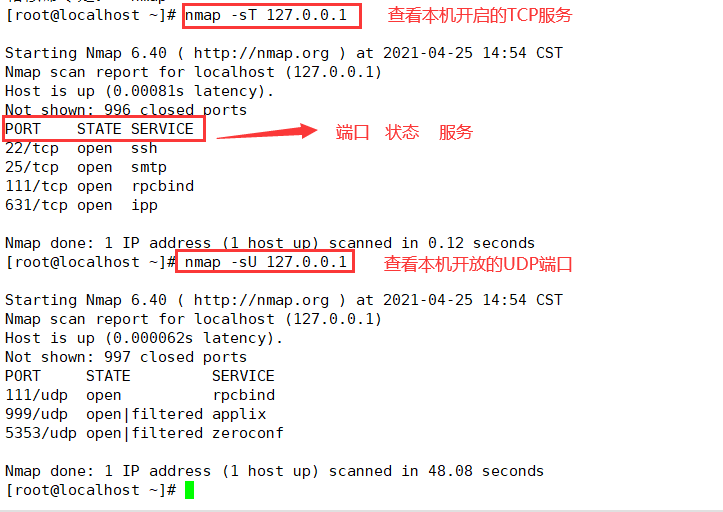
8, Network port scanning ------ NMAP
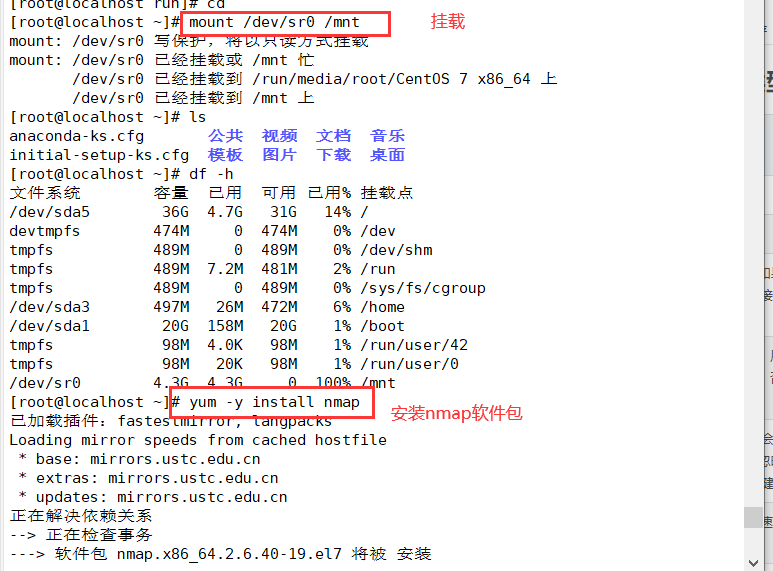
(1) Install the NMAP package
mount /dev/sr0 /mnt       #First, mount the local disk
yum install -y nmap       #Then install the nmap package
(2) nmap command common options and corresponding scan types
| option | explain |
|---|---|
| -p | Specify the port to scan |
| -n | Disable reverse DNS resolution (to speed up scanning) |
| -sS | TCP SYN scanning (half open scanning) only sends SYN data packets to the target. If the SYN/ACK response packet is received, it is considered that the target port is listening, and the connection is disconnected immediately; Otherwise, it is considered that the target port is not open |
| -sT | TCP connection scanning, which is a complete TCP scanning method (default scanning type), is used to establish a TCP connection. If it is successful, it is considered that the target port is listening to the service, otherwise it is considered that the target port is not open |
| -sF | In TCP FIN scanning, open ports will ignore such packets, and closed ports will respond to RST packets. Many firewalls simply filter SYN packets and ignore other forms of TCP attack packets. This type of scanning can indirectly detect the robustness of the firewall |
| -sU | UDP scanning detects which UDP services the target host provides, and the speed of UDP scanning will be relatively slow |
| -s | ICMP scanning is similar to ping detection. It can quickly determine whether the target host is alive without other scanning |
| -P0 | Skip ping detection. This method considers that all target hosts are alive. When the other party does not respond to ICMP requests, this method can avoid giving up scanning due to inability to ping |