Oracle's machine was blown up, so that the little partners could not open the free machine, so they wrote a script and robbed it on the server. When the resources came out, they could basically open it. This script uses Terraform to call API to execute tasks. The following is a brief description.
Oracle ARM has been used by everyone for a while. To sum up, it is the word "Zhenxiang", but the lines in Japan and South Korea have been overwhelmed.
Because it is difficult to find a machine, everyone uses the script, and because there are too many people using the script, many children's shoes brushing the machine have received warning emails, which is very contradictory. If you don't brush, you can't grab the machine, but if you brush, you are afraid of being warned, and then there is the risk of being blocked. The only safe way is to adjust the time a little longer, which may be better.
Oracle provided a new option in the optional real column a few days ago VM.Standard.A1.Flex . According to the user agreement, you can freely allocate 4 ocpus, 24 GB memory, a maximum space capacity of 200GB and 4GB bandwidth. The configuration of the new free model is incredibly high and incredible. It is understood that this model can only be opened in some areas. It does not occupy the quota of two free servers previously issued. However, because of the hot rush purchase, it is difficult to find a machine. If you don't need a script to run, it's hard to grab vps.
1, Installing terrain
Self installation at the official website address:
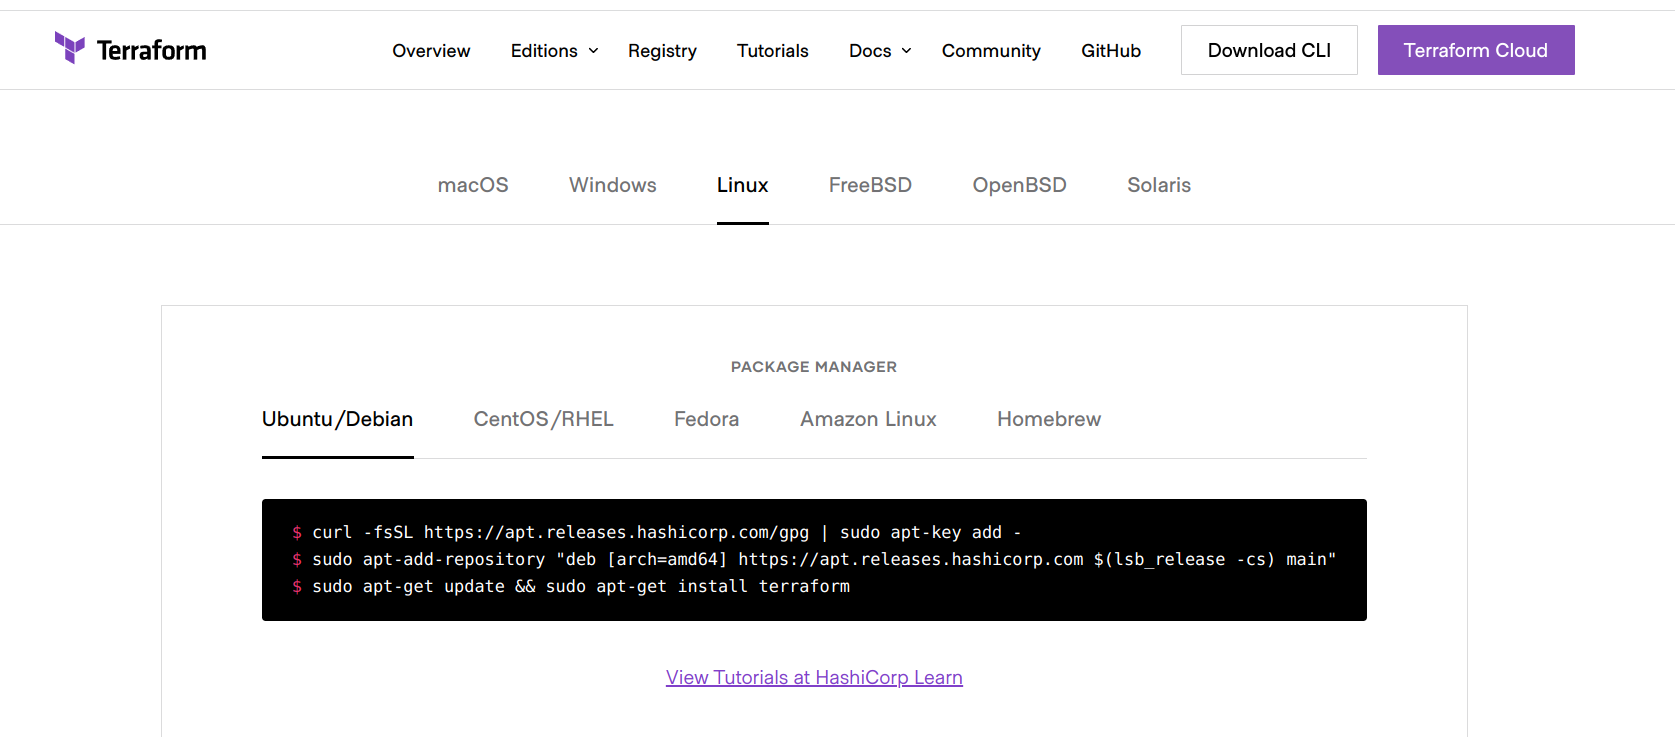
curl -fsSL https://apt.releases.hashicorp.com/gpg | sudo apt-key add -
sudo apt-add-repository "deb [arch=amd64] https://apt.releases.hashicorp.com $(lsb_release -cs) main"
sudo apt-get update && sudo apt-get install terraform
2, Generate main tf
1. When creating an instance, we choose the system: Ubuntu 20 04 (compact version with suffix cannot be selected), VM Standard. A1. Flex: 4C 24G, and paste the key. This process is the same as our normal instance creation.
example:
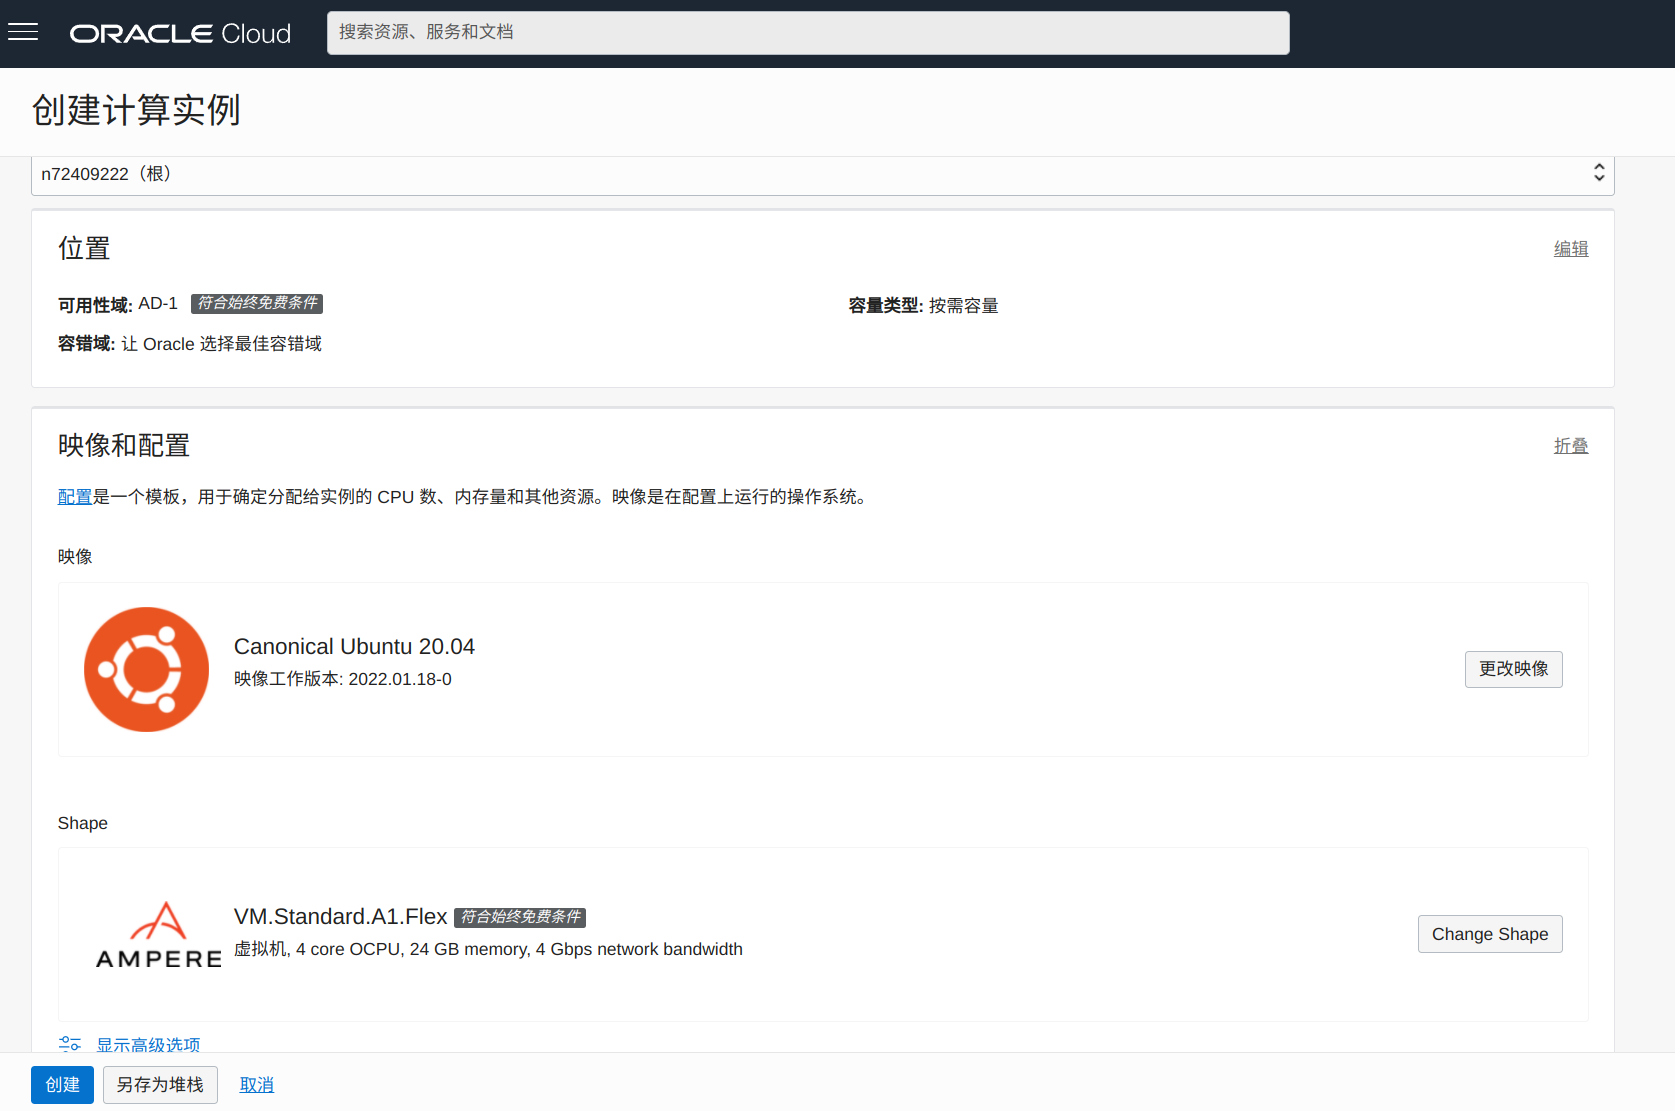
After all the information is filled in, select Save as stack. Stack information and configuration variables, all by default; Review and select "run" below. Finally, click create, and the stack will run automatically once.
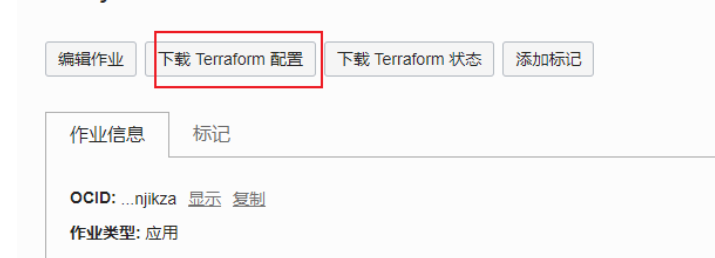
2. Click to download the Terraform configuration and you will get a compressed package. After decompression, there will be main TF, the information inside is what we need to use later.
3, Terrain environment initialization
Create terrain learning folder
cd /opt/
mkdir terraform-learning && cd terraform-learning
Put the downloaded main TF is placed in the terrain learning folder
terraform init
4, Download and install oci tools
Command:
bash -c "$(curl -L https://raw.githubusercontent.com/oracle/oci-cli/master/scripts/install/install.sh)"
Press enter all the way. It is installed in the / root/bin directory by default.
When "= = > Modify profile to update your $path and enable shell / tab completion now? (Y / N):" appears, you are prompted to enter y and enter, which will automatically add environment variables for you. Then enter all the way. The following prompt indicates that the installation is successful.
===> Modify profile to update your $PATH and enable shell/tab completion now? (Y/n): y

===> Enter a path to an rc file to update (file will be created if it does not exist) (leave blank to use '/root/.bashrc'):
-- Backed up '/root/.bashrc' to '/root/.bashrc.backup'
-- Tab completion set up complete.
-- If tab completion is not activated, verify that '/root/.bashrc' is sourced by your shell.
--
-- ** Run `exec -l $SHELL` to restart your shell. **
--
-- Installation successful.
-- Run the CLI with /root/bin/oci --help

Note: if the returned information shows that {oci is not found, it is because the variables will not be reflected immediately after installation, so let's reload it
IV. configuring cli
1. Enter the following code to start configuration. The configured path is in the root directory by default
oci setup config
2. See the following for the specific configuration
Enter a location for your config [/root/.oci/config]:
Enter a user OCID:  #Enter your user ocid
Enter a tenancy OCID:  #Enter the user id of your tenant
Enter a region by index or name(e.g.
1: ap-chiyoda-1, 2: ap-chuncheon-1, 3: ap-hyderabad-1, 4: ap-melbourne-1, 5: ap-mumbai-1,
6: ap-osaka-1, 7: ap-seoul-1, 8: ap-sydney-1, 9: ap-tokyo-1, 10: ca-montreal-1,
11: ca-toronto-1, 12: eu-amsterdam-1, 13: eu-frankfurt-1, 14: eu-zurich-1, 15: me-dubai-1,
16: me-jeddah-1, 17: sa-santiago-1, 18: sa-saopaulo-1, 19: uk-cardiff-1, 20: uk-gov-cardiff-1,
21: uk-gov-london-1, 22: uk-london-1, 23: us-ashburn-1, 24: us-gov-ashburn-1, 25: us-gov-chicago-1,
26: us-gov-phoenix-1, 27: us-langley-1, 28: us-luke-1, 29: us-phoenix-1, 30: us-sanjose-1): #Select area here

Do you want to generate a new API Signing RSA key pair? (If you decline you will be asked to supply the path to an existing key.) [Y/n]: y #Enter y
Enter a directory for your keys to be created [/root/.oci]:
Enter a name for your key [oci_api_key]:
Public key written to: /root/.oci/oci_api_key_public.pem
Enter a passphrase for your private key (empty for no passphrase):
Private key written to: /root/.oci/oci_api_key.pem
Fingerprint:
Config written to /root/.oci/config

If you haven't already uploaded your API Signing public key through the
 console, follow the instructions on the page linked below in the section

 'How to upload the public key':

 https://docs.cloud.oracle.com/Content/API/Concepts/apisigningkey.htm#How2
3. Copy generated public key
cat /root/.oci/oci_api_key_public.pem
4. Copy the displayed content. And add to Oracle background = > User Settings > > Resources > > API secret key > > Add API secret key
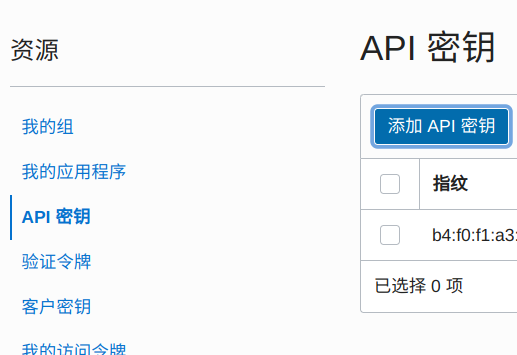
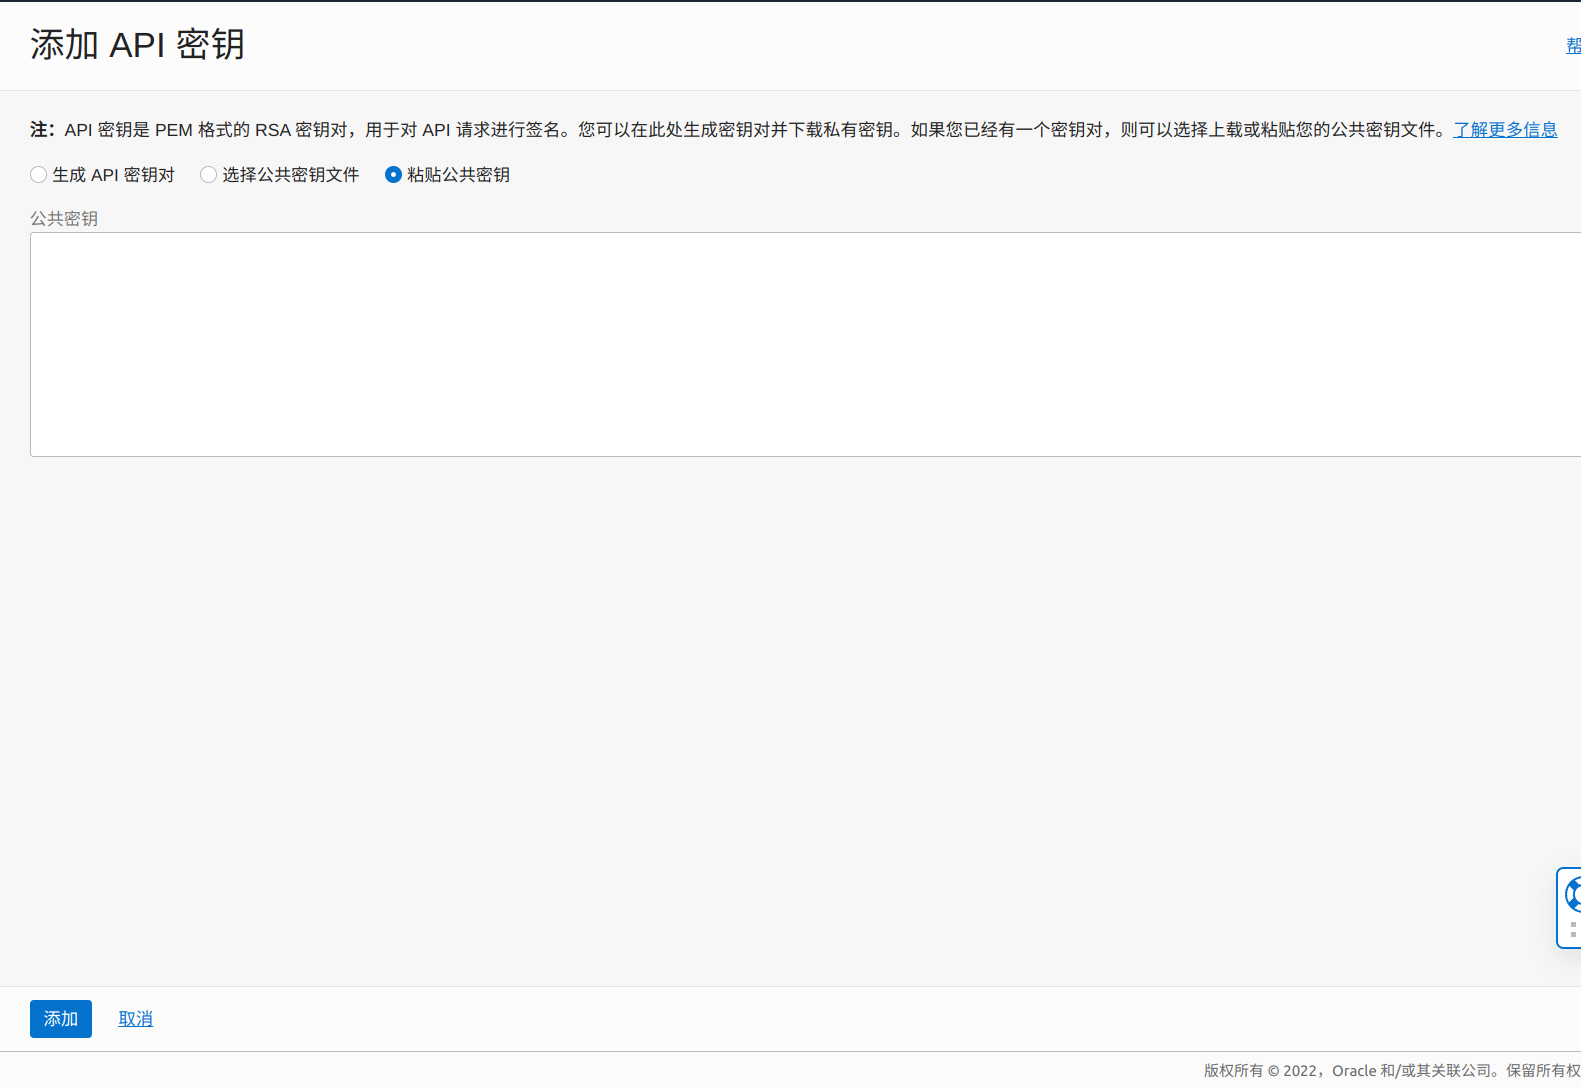
Via cat / root / oci/oci_ api_ key_ public. PEM is dead. Paste the obtained public key and click Add.
5. Verify that the key is valid:
oci iam availability-domain list
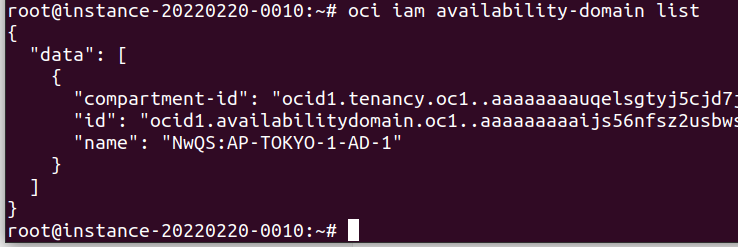
The result returned correctly proves that the added key is valid.
6. Validation script
main. After TF is completed, we will start to create tasks
cd /opt/terraform-learning/

terraform apply
After executing the above command, you will be prompted to enter yes:
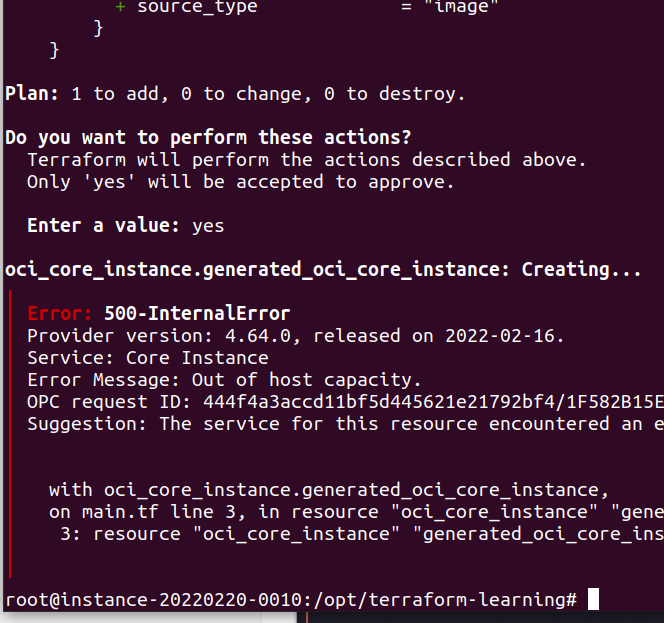
The script and API configuration are finished. You can see that the API returns Error Message: Out of host capacity, indicating that the host capacity is insufficient. Next, we use the shell to constantly request this API interface to create the host.
5, shell script, the server starts up and automatically executes the task
vi terraform.sh
Copy the following code:
#!/bin/bash

path='/opt/terraform-learning/'

cd $path &&
while true
do
    echo 'yes' | terraform apply
    sleep 10s
done
root@instance-20220220-0010:/opt/terraform-learning#
Give Shell script execution permission:
chmod +x terraform.sh
6, Startup script
vi terraform_start.sh
#!/bin/sh
nohup /opt/terraform-learning/terraform.sh >> /opt/terraform-learning/terraform.log 2>&1  &
Use the bootstrap blog I wrote before to open it. I won't say more here!

The ubuntu system server uses the systemctl command to realize the one click script startup of the startup and self startup service https://blog.csdn.net/wto882dim/article/details/123036731

The ending script can only kill the process by killing:
pkill terraform
be careful:
After the script is executed, the API will always be called to create instances. You can limit resources through the restriction policy of Oracle console to avoid creating instances all the time. The method is as follows:
Log in to oracle console

set compute-core quota standard-a1-core-count to 8 in compartment Your account name where request.region = ap-tokyo-1
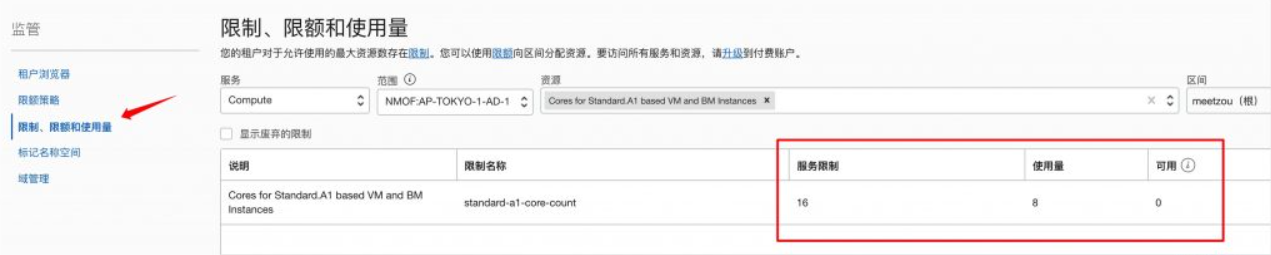
This strategy means to restrict my users to create resources with up to 8 CPUs in Tokyo area, and then enter cores for standard A1 based VM and BM instances query the available quantity, as shown in the figure below, which indicates that the restriction is successful.