1. Main content of the article
This blog is devoted to explaining the skills to encapsulate code in PyCharm and invoke it in JupyterNoteBook. Through the learning of this blog, taking KNN algorithm as an example, it is intended to grasp the skills of functional code in plain language. It takes about 5 minutes to read this blog.
Note: the content of this blog is based on the machine learning course explained by teacher liuyubobo, plus my summary and thinking. For more detailed original videos, please search teacher bobo's machine learning by yourself.
2. Functional encapsulation code
The previous article explained KNN algorithm( KNN algorithm blog address ), the core algorithm logic is implemented by python language in Jupiter notebook. However, in order to call this algorithm logic conveniently later, we create a file with the idea of object-oriented, and then encapsulate the KNN core algorithm code through the methods in the file.
2.1 define classes and functions (also called methods) in pychar
We can find that the suffix of the newly created File in jupyternotebook is ipynb, but the suffix of the File we created should be py. The general idea is that we define the files and functions through pychart, and then upload them to jupyter through the upload function of jupyternotebook to complete the encapsulation of the code.
2.2 specific operation of pychar
Take the core code of KNN Algorithm in the above blog as an example, and create a new one named KNN in PyCharm Py to define a file named KNN_ The function (method) of classify writes the KNN core algorithm code into this method to complete the encapsulation of the code. As shown in the figure below: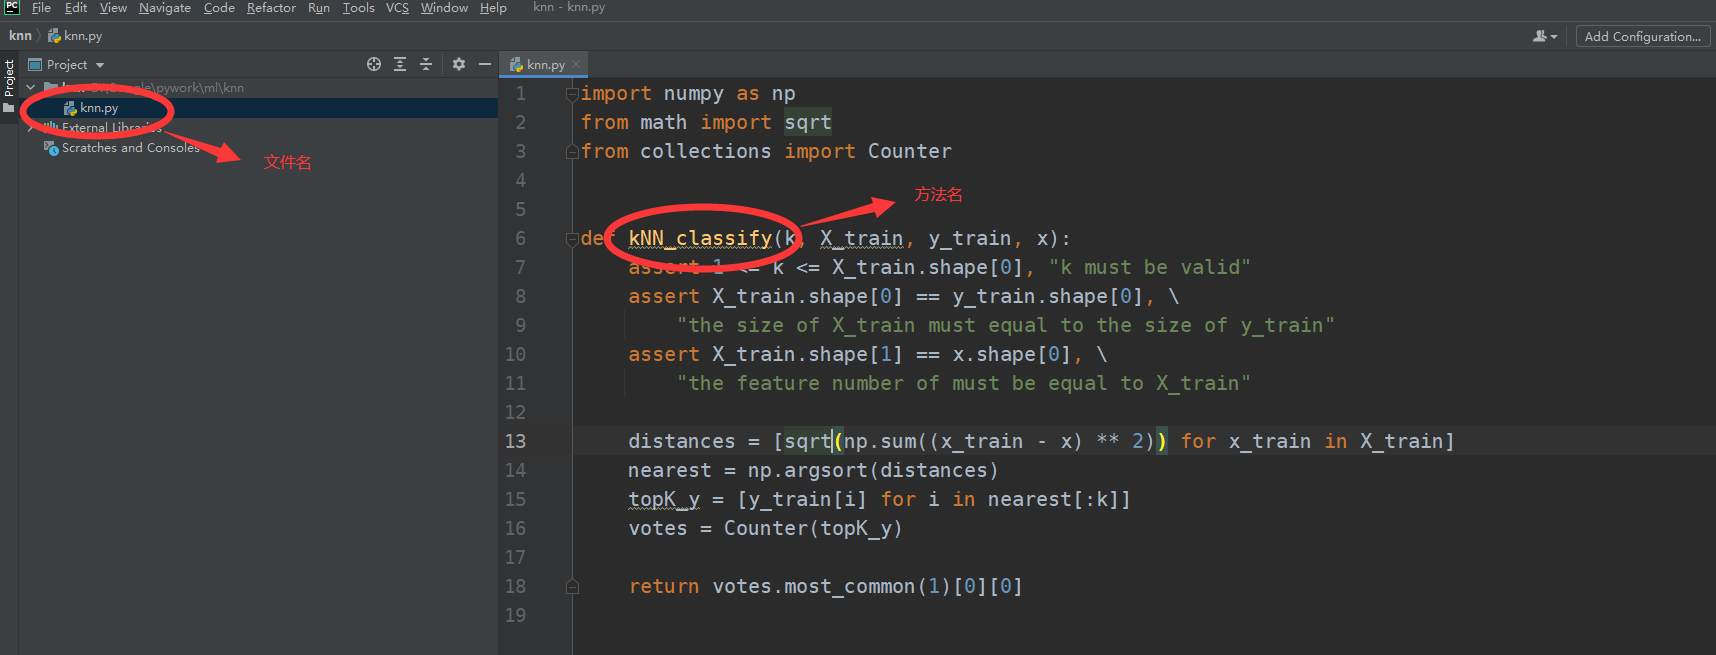
2.3 specific operation of jupyternotebook
In the same level directory of the main file, we create a new one named kNN_function folder, and then enter this folder. Through the upload button, find the KNN we wrote before Py directory and upload it to the jupyter server. The specific operation is shown in the figure below:
Create a new folder as follows: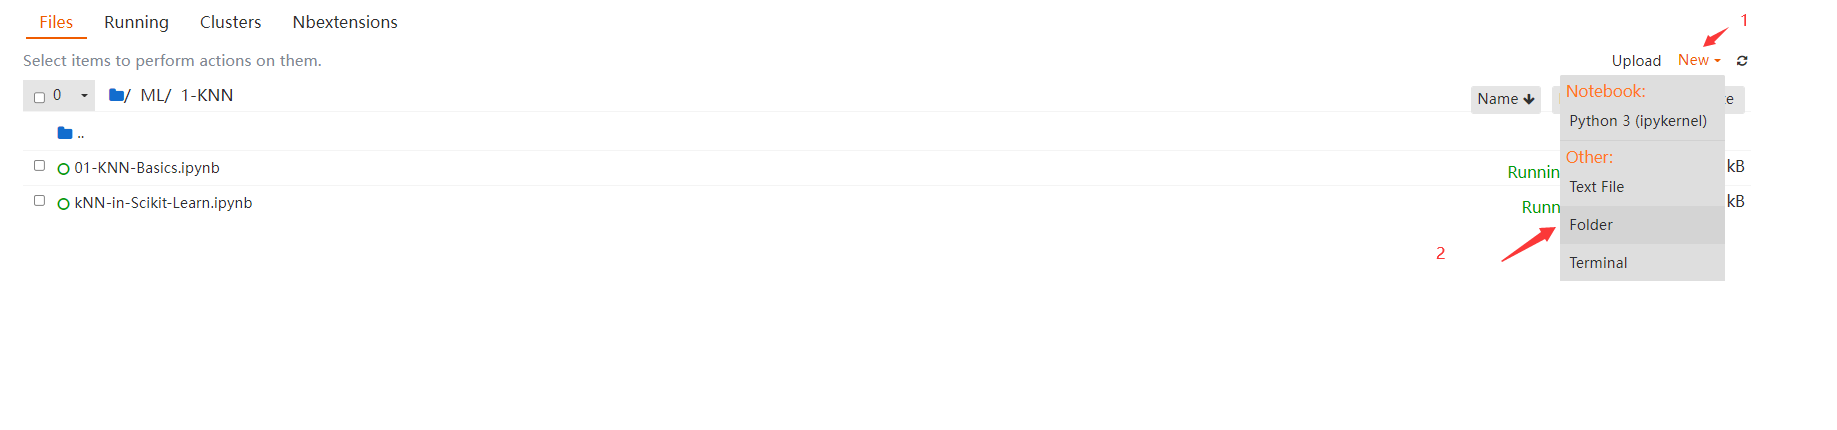
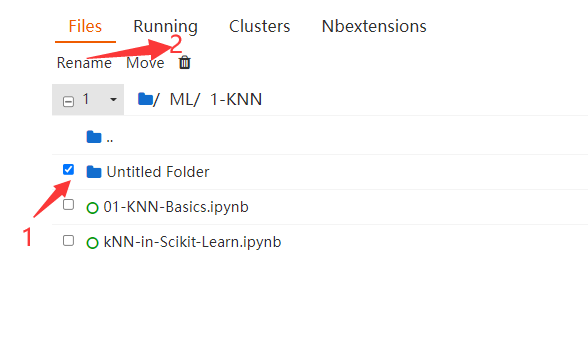
Change the name of the folder to kNN_function, as shown in the following figure:
Enter this folder and find knn.com through upload Py file and upload it to the jupyterNoterbook service, as shown in the following figure:
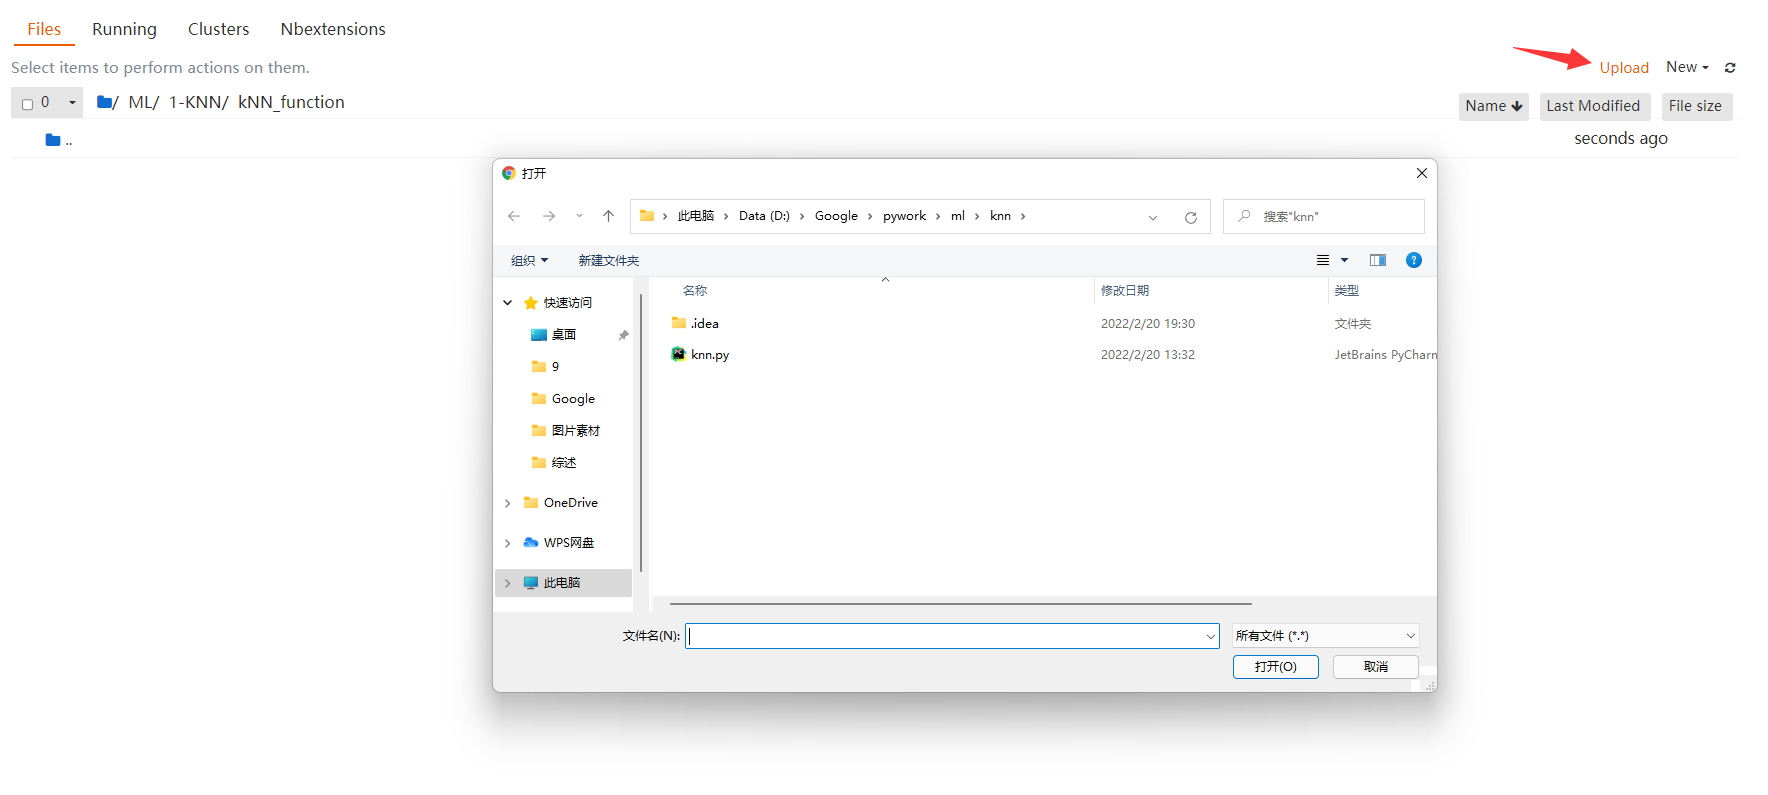

So far, we have put KNN Py is uploaded to the jupyter server.
2.4 knn. is invoked in JupyterNoteBook. Py file
In the main file, we introduce KNN Py, and then its KNN can be called_ The classify method achieves the same effect as the previous blog. The specific whole code is as follows:
import numpy as np
import matplotlib.pyplot as plt

raw_data_X = [[3.393533211, 2.331273381],
              [3.110073483, 1.781539638],
              [1.343808831, 3.368360954],
              [3.582294042, 4.679179110],
              [2.280362439, 2.866990263],
              [7.423436942, 4.696522875],
              [5.745051997, 3.533989803],
              [9.172168622, 2.511101045],
              [7.792783481, 3.424088941],
              [7.939820817, 0.791637231]
             ]
raw_data_y = [0, 0, 0, 0, 0, 1, 1, 1, 1, 1]

X_train = np.array(raw_data_X)
y_train = np.array(raw_data_y)
x = np.array([8.093607318, 3.365731514])

%run kNN_function/knn.py # Introduce KNN Py file
predict_y = kNN_classify(6, X_train, y_train, x) # Call kNN_classify method

predict_y
knn. Code in py file:
import numpy as np
from math import sqrt
from collections import Counter


def kNN_classify(k, X_train, y_train, x):
    assert 1 <= k <= X_train.shape[0], "k must be valid"
    assert X_train.shape[0] == y_train.shape[0], \
        "the size of X_train must equal to the size of y_train"
    assert X_train.shape[1] == x.shape[0], \
        "the feature number of must be equal to X_train"

    distances = [sqrt(np.sum((x_train - x) ** 2)) for x_train in X_train]
    nearest = np.argsort(distances)
    topK_y = [y_train[i] for i in nearest[:k]]
    votes = Counter(topK_y)

    return votes.most_common(1)[0][0]
3. Summary
This blog mainly explains how to encapsulate code by PyCharm function and invoke it in jupyter server. Functional encapsulation is very helpful for managing code. The next blog will introduce the KNN algorithm encapsulated in scikit learn, and realize the simple underlying KNN algorithm of scikit learn in the form of functional encapsulation code. If there are any mistakes, please correct them. Thank you