Vue 3.X using Vue router 4 X for routing configuration, let's study how to use Vue router 4 x. All usage methods in this article are using the Composition API.
This paper introduces Vue router 4 step by step X to build a simple blog system, so that you can understand the new version of Vue router 4 X has a complete understanding, and then can easily drop Vue router 4 X is applied in their own projects.
Project initialization
Project construction
Projects are created using vite.
npm init vite@latest vue-router-blog
npm install
npm run dev
Vue 3.2.25 is currently installed
Configure vite config. js
We configure @ alias, which makes it easier to write the path of the imported file
// Import file
const path = require("path");

export default defineConfig({
  // Add@
  resolve: {
    alias: {
      "@": path.resolve(__dirname, "./src"),
    },
  },
  plugins: [vue()],
});
Configure jsconfig json
jsconfig.json can make VSCode more intelligent
{
  "include": [
    "./src/**/*",
  ],
  "compilerOptions": {
    "baseUrl": ".",
    "paths": {
      "@/*": ["./src/*"]
    }
  }
}
Vue Router 4 initial experience
Installing Vue Router 4
npm i vue-router@4
Vue Router 4.0.12 is currently installed
Create two pages home Vue and about vue
<!-- Home.vue -->
<template>
  <div>
    homepage
  </div>
</template>


<!-- About.vue -->
<template>
  <div>
    About page
  </div>
</template>
These two pages are very simple. Each page just displays one line of text
Create router
We create a router directory under src directory, and create index JS file, in which the routing information is configured.
import { createRouter, createWebHistory } from "vue-router";

// introduce
import Home from "@/views/Home.vue";
import About from "@/views/About.vue";

// Routing information
let routes = [
  {
    path: "/",
    name: 'home',
    component: Home,
  },
  {
    path: "/about",
    name: 'about',
    component: About,
  },
];

// Router
const router = createRouter({
  history: createWebHistory(), // HTML5 mode
  routes,
});

export default router;
Installing router
Install the router on the app.
import { createApp } from 'vue'
import App from './App.vue'

// Introducing plug-ins
import router from "@/store/index";
// Install router plug-in
createApp(App).use(router).mount('#app')
Using router link and router view
Modify app vue
<template>
  <img alt="Vue logo" src="./assets/logo.png" /><br />
  <div>
    <router-link to="/">Home</router-link> |
    <router-link to="/about">About</router-link><br />
  </div>
  <router-view></router-view>
</template>
So far, our has realized the switching function between pages.
Several important concepts
Difference between router link component and a tag
The bottom layer of the router link component is also the rendered a tag, but the page switching of router link only updates part of the page and does not refresh the whole page, while the a tag jump (for example, < a href = "/ about" > to Home tag < / a > < br >) refreshes the whole page.
The underlying principle is that router link hijacks the click event of elements and adds logic to deal with page update.
The difference between Hash mode and HTML5 mode
The URL of Hash mode has a # number, eg: http://localhost:3000/#/about The # number is followed by the Hash address. This mode used to be a common mode of SPA, but the link has a # number, which is ugly.
The HTML5 mode is the same as the normal link address, eg: http://localhost:3000/about , this address is very elegant, but there is a problem. It needs server support. The reason is that it is entered in the browser http://localhost:3000/about Yes, the server thinks that it wants to access the HTML file of the about directory under root Lujin instead of the HTML file under root Lujin.
The servers started by webpack and vite support HTML5 mode, so there is no problem for the development environment to use HTML5 mode.
Why can router link and router view components be used directly?
These two global components are registered when installing the router plug-in, so they can be used directly.
install(app: App) {
    app.component('RouterLink', RouterLink)
    app.component('RouterView', RouterView)
}
Route lazy loading
There is a serious problem with the above method. All components in the router will be loaded at one time. In our example, the Home and About components should be loaded even if the About component is not used sometimes, which will have a great impact on the display of the Home page.
The transformation is as follows:
<!--// Delete import home from "@ / views / home. Vue"; -- >
<!--// Delete import about from "@ / views / about. Vue"; -- >

let routes = [
  {
    path: "/",
    name: 'home',
    <!--// Change to the following way -- >
    component: () => import("@/views/Home.vue"),
  },
  {
    path: "/about",
    name: 'about',
    <!--// Change to the following way -- >
    component: () => import("@/views/About.vue"),
  },
];
In this way, only the components used in the development environment will be loaded. In the production environment, asynchronous components will be packaged separately.
Modify the code (framework for creating blog)
To facilitate the introduction of other contents, let's modify the code:
New simulated blog list data
[
  {
    "id": 1,
    "catId": 1,
    "catName": "iOS",
    "subCatId": 1,
    "subcatName": "recommend",
    "name": "RxSwift realization MVVM framework",
    "image": "https://images.xiaozhuanlan.com/photo/2018/2f5dff865155d756dfe04f2909cd1a36.png",
    "description": "In this article, I will introduce iOS In programming MVVM Design patterns, of course RxSwift Introduction to. This paper is divided into two parts. In part 1, it is briefly introduced RxSwift In part 2, we have a use of design patterns and basics RxSwift of MVVM Sample project for."
  },

  //Omit
]
Named data JSON put it under the src folder
Create routing information
// Routing information
let routes = [
  {
    path: "/",
    name: 'home',
    component: () => import("@/views/All.vue"),
  },
  {
    path: "/iOS",
    name: 'iOS',
    component: () => import("@/views/iOS.vue"),
  },
  {
    path: "/android",
    name: 'android',
    component: () => import("@/views/Android.vue"),
  },
  {
    path: "/flutter",
    name: 'flutter',
    component: () => import("@/views/Flutter.vue"),
  },
  {
    path: "/web",
    name: 'web',
    component: () => import("@/views/Web.vue"),
  },
];
Set 5 routes: all, iOS, Android, fluent, Web.
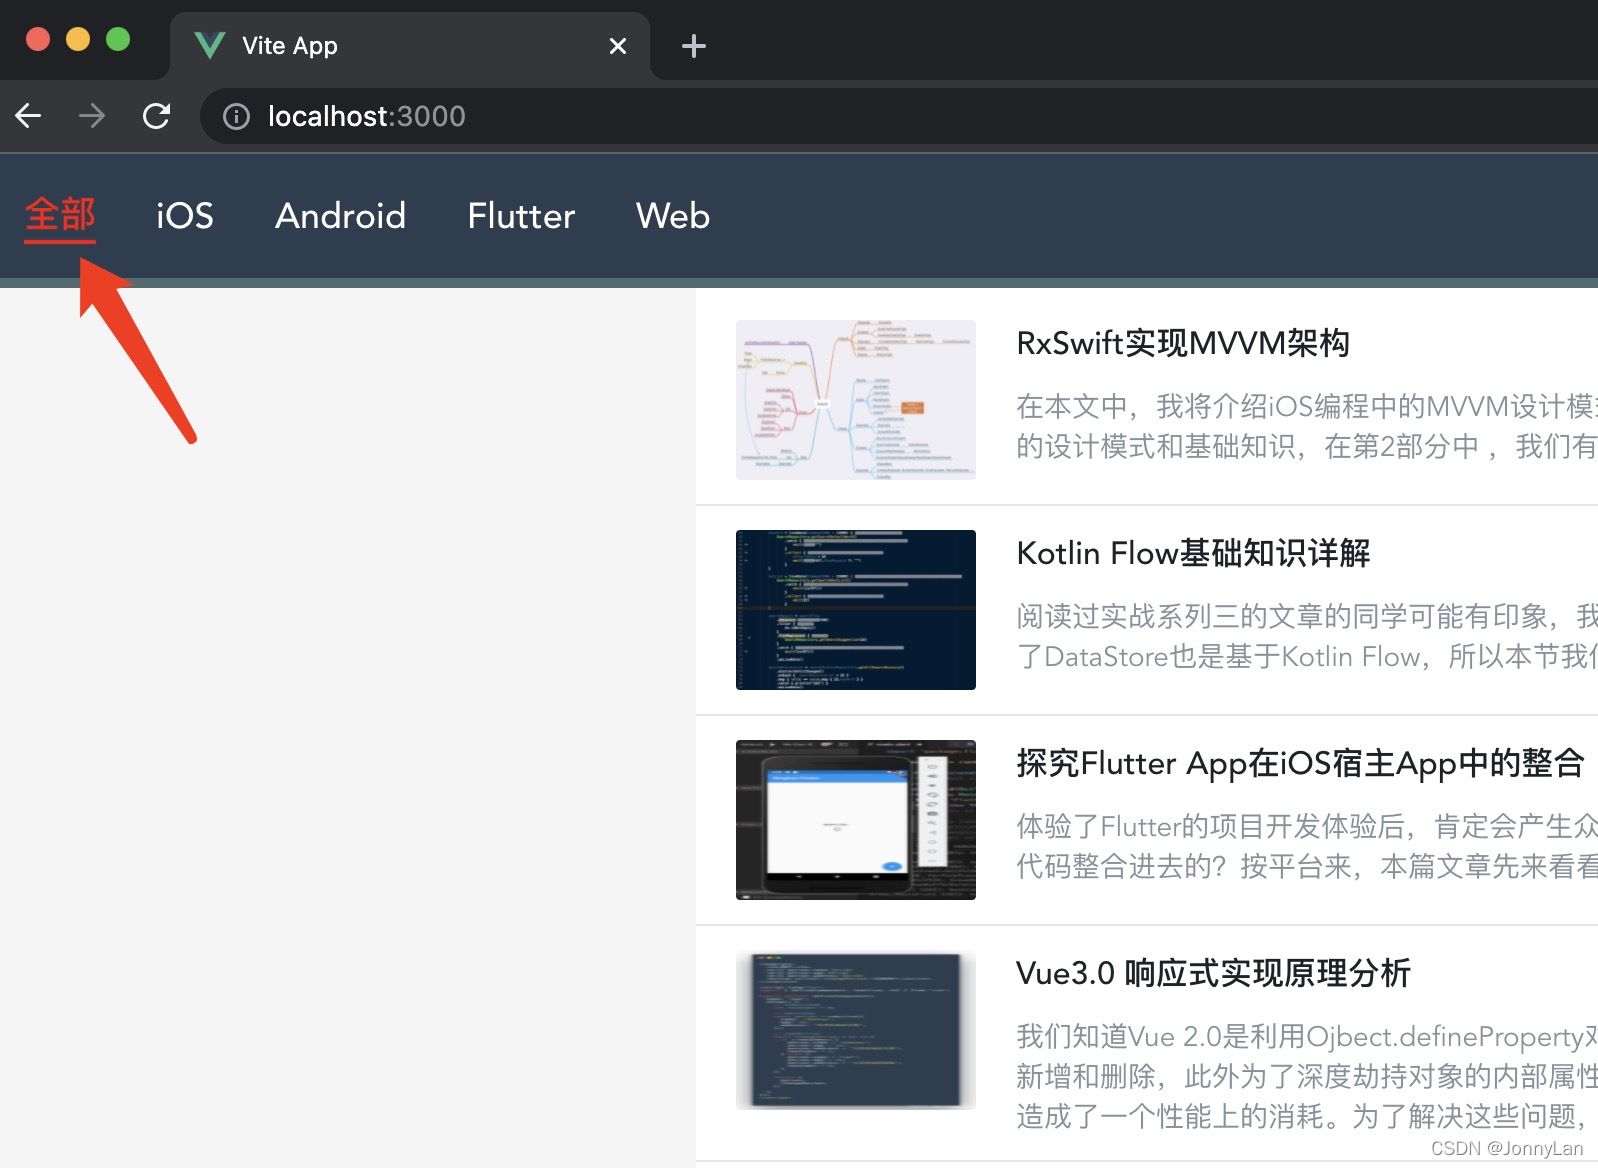
Top navigation assembly
<!-- TheNavigation.vue -->
<template>
  <div id="nav">
    <router-link to="/" class="nav-link">whole</router-link>
    <router-link to="/ios" class="nav-link">iOS</router-link>
    <router-link to="/android" class="nav-link">Android</router-link>
    <router-link to="/flutter" class="nav-link">Flutter</router-link>
    <router-link to="/web" class="nav-link">Web</router-link>
  </div>
</template>
There are five router links in the navigation component, which switch to all, iOS, Android, fluent and Web respectively.
5 page components
<template>
  <div class="container">
    <!-- Blog list -->
    <div v-for="blog in arrs" class="item" :key="blog.id">
      <!-- picture -->
      <img class="thumb" :src="blog.image" />
      <!-- information -->
      <div class="info">
        <div class="title">{{ blog.name }}</div>
        <div class="message"> {{ blog.description }} </div>
      </div>
    </div>
  </div>
</template>

<script setup>

// data
import sourceData from "@/data.json";
let arrs = sourceData;

</script>
APP.vue
<script setup>
import TheNavigation from "@/components/TheNavigation.vue";
</script>

<template>
  <TheNavigation />
  <router-view></router-view>
</template>
So far, the blog framework has been completed and five blog categories have been realized. The effect is as follows:
Set linkActiveClass
The router can set the router link activated class:
const router = createRouter({
  history: createWebHistory(),
  routes,
  <!--// Add active class -- >
  linkActiveClass: "blog-active-link"
});
Then set the style:
#nav .blog-active-link  {
  color: red;
  border-bottom: 2px solid red;
}
Named route
The jumps we use in the top navigation component are path jumps. For example: to = "/", we can set a name for the route, so that we can jump through the name of the route.
<template>
  <div id="nav">
    <router-link to="/" class="nav-link">whole</router-link>
    <!-- modify to Attribute is name -->
    <router-link :to="{name: 'ios'}" class="nav-link">iOS</router-link>
    <router-link :to="{name: 'android'}" class="nav-link">Android</router-link>
    <router-link :to="{name: 'flutter'}" class="nav-link">Flutter</router-link>
    <router-link :to="{name: 'web'}" class="nav-link">Web</router-link>
  </div>
</template>
Routed query
The five blog categories mentioned above are fixed. We click each data in the blog list to enter the blog details. At this time, different blog contents are different, so we can't write them fixedly. The first implementation method is to pass parameters through routing.
Add route for blog details
let routes = [
  //...
  {
    path: '/blogdetail',
    name: "blogdetail",
    component: () => import("@/views/BlogDetail.vue")
  }
];
query parameters
<template>
  <div class="container">
    <!-- Chuan Shen -->
    <router-link v-for="blog in arrs" class="item" :key="blog.id" :to="{ name: 'blogdetail', query: { id: blog.id } }">
      // ellipsis
    </router-link>
  </div>
</template>
Set query: {ID: blog. ID}} to pass parameters to the route
Receive query parameters
<template>
  <div class="container">
    <h2>{{ blog.name }}</h2>
    <p>{{ blog.description }}</p>
  </div>
</template>

<script>
import sourceData from "@/data.json";
import { useRoute } from "vue-router";
export default {
  setup(props) {
    // Get route
    let route = useRoute();
    // Get query parameters
    let blogId = route.query.id;

    return {
      blog: sourceData.find((blog) => blog.id == blogId),
    };
  },
};
</script>
Via route query. id can get the passed blog id, and then the corresponding blog information can be displayed.
Dynamic routing
The page logic of blog details can also be realized by dynamic routing.
Modify the route of blog details
<!-- router.js -->
let routes = [
  //...
  {
    <!-- Dynamic routing path -->
    path: '/blogdetail/:id',
    name: "blogdetail",
    component: () => import("@/views/BlogDetail.vue")
  }
];
: id indicates that the route path is dynamic, and the last path indicates the blog id
Chuan Shen
<template>
  <div class="container">
    <!-- Chuan Shen -->
    <router-link v-for="blog in arrs" class="item" :key="blog.id" :to="{ name: 'blogdetail', params: { id: blog.id } }">
      // ellipsis
    </router-link>
  </div>
</template>
Set params: {ID: blog. ID}} to pass parameters to dynamic routing
Receive parameters
let blogId = route.params.id;
Via route params. id can get the passed blog id, and then the corresponding blog information can be displayed.
Rename route
After knowing the logic of dynamic routing, we can certainly combine the four pages of IOS, Android, fluent and web into one page.
Merge router
<!-- router.js -->
let routes = [
  {
    path: "/",
    name: 'home',
    component: () => import("@/views/All.vue"),
  },
  <!-- take/ios,/android,/flutter,/web Four are merged into/category/:catId -->
  {
    path: "/category/:catId",
    name: 'category',
    component: () => import("@/views/All.vue"),
  },
  {
    path: '/blogdetail/:id',
    name: "blogdetail",
    component: () => import("@/views/BlogDetail.vue")
  }
];
Modify navigation
<template>
  <div id="nav">
    <router-link to="/" class="nav-link">whole</router-link>
    <!-- Dynamic routing -->
    <router-link :to="{name: 'category', params: { catId: 1 }}" class="nav-link">iOS</router-link>
    <router-link :to="{name: 'category', params: { catId: 2 }}" class="nav-link">Android</router-link>
    <router-link :to="{name: 'category', params: { catId: 3 }}" class="nav-link">Flutter</router-link>
    <router-link :to="{name: 'category', params: { catId: 4 }}" class="nav-link">Web</router-link>
  </div>
</template>
list
<script setup>
import { useRoute } from 'vue-router';

// Get route
let route = useRoute();
// Get params parameter
let catId = route.params.catId;

// data
import sourceData from "@/data.json";
let arrs = sourceData.filter((blog) => blog.catId == catId);

</script>
So I can put IOS vue,Android. vue,Flutter. vue,Web. Vue four component files were deleted.
You should have a question. The content of home route is actually the same as that of category route. Can it be merged?
Rename "/"
You can rename "/" to '/ category/0', so that all five routes will access the route of "/ category/:catId".
<!-- router.js -->
let routes = [
  {
    path: "/",
    <!-- rename -->
    redirect: '/category/0'
  },
  {
    path: "/category/:catId",
    name: 'category',
    component: () => import("@/views/All.vue"),
  },
  {
    path: '/blogdetail/:id',
    name: "blogdetail",
    component: () => import("@/views/BlogDetail.vue")
  }
];


import sourceData from "@/data.json";
let arrs = catId != '0' ? sourceData.filter((blog) => blog.catId == catId) : sourceData;
If catid! = ' '0' is a classification filter, otherwise it displays all
Monitor routing changes
There is a problem with the code at this time. Click the navigation at the top to switch to different categories, and the list at the bottom will not change. This is because components are reused. At this time, it is necessary to monitor the change of component routing and switch data.
You can listen to route through the watch function Params: when the route changes, the data can be retrieved.
<!-- All.vue -->
<script setup>
import { ref } from '@vue/reactivity';
import { useRoute } from 'vue-router';
import sourceData from "@/data.json";
import { watch } from '@vue/runtime-core';

let arrs = ref([]);

let route = useRoute();
let params = route.params;

let initData = (catId) => {
  arrs.value = catId != '0' ? sourceData.filter((blog) => blog.catId == catId) : sourceData;
}

// Get data during initialization
initData(params.catId);

// Monitor paramas and update data
watch(() => route.params.catId, (value) => {
  initData(value);
})

</script>
Prohibit route multiplexing
A simpler way to solve the problem in the previous section is to prohibit the reuse of routes.
<template>
  <TheNavigation />
  <!-- Prohibit route multiplexing -->
  <router-view :key="$route.path"></router-view>
</template>
In this way, dynamic components will not be reused, and old components will be unloaded and new components will be mounted directly. Therefore, there is a loss of performance.
Pass props to component
We need to use useRoute in the component to get the route, and then get the corresponding route Params, we can get route in another way params.
Add props attribute to route
<!-- router.js -->
{
    path: "/category/:catId",
    name: 'category',
    component: () => import("@/views/All.vue"),
    <!-- Route addition`props`attribute -->
    props: true,
}
Get props attribute from component
<script setup>
import { ref } from '@vue/reactivity';
import { useRoute } from 'vue-router';
import sourceData from "@/data.json";

// Define props
const props = defineProps({
  catId: {
    type: String,
    required: true,
  }
})

let arrs = props.catId != '0' ? sourceData.filter((blog) => blog.catId == props.catId) : sourceData;

</script>
The catId parameter can be obtained directly from the component. Personally, I think this writing method is more beautiful.
Routing props attribute support function
<!-- router.js -->
{
    path: "/category/:catId",
    name: 'category',
    component: () => import("@/views/All.vue"),
    props: route => ({ catId: parseInt(route.params.catId) }) ,
}
In the function, the parameters can be processed. In our example, the catId is changed from a string to a number
// Define props
const props = defineProps({
  catId: {
    type: Number,
    required: true,
  }
})

let arrs = props.catId !== 0 ? sourceData.filter((blog) => blog.catId === props.catId) : sourceData;
The definition and use of props catId should also be modified accordingly
Programming navigation
In addition to using < router link > to define navigation links, we can also use router's instance method to write code.
For example, you can add a button on the details page and click to return to the previous page
<button @click="$router.back()">return</button>
Transition animation
The implementation of transition animation of Vue Router4 is somewhat inconsistent with previous versions. The transition needs to be included in the router view, as shown below:
  <router-view v-slot="{ Component }">
    <transition name="fade" mode="out-in">
      <component :is="Component" :key="$route.path" />
    </transition>
  </router-view>
Add the corresponding css style
/* fade Mode name = "fade" mode = "out in" */
.fade-enter-active,
.fade-leave-active {
  transition: opacity 0.3s;
}

.fade-enter-from,
.fade-leave-to {
  opacity: 0;
}
In this way, switching has the effect of fading in and out. Custom effect, very convenient.
Route does not match on
Sometimes the user may enter a road force that does not exist at all (for example: http://localhost:3000/categorys )At this time, it is better to display a default 404 page for better user experience.
404 page
Define route
<!-- router.js -->
{
    path: '/:pathMatch(.*)*',
    name: "NotFound",
    component: () => import("@/views/404.vue"),
}
Note that this route must be placed last, otherwise there will be a problem.
404 page
<template>
  <div class="container">
    <h2>Page not found</h2>
  <router-link to="/">Back to the home page</router-link>
  </div>
</template>
The content of this page is arbitrary
Route guard
Route exclusive guard
Imagine the user entering in the browser address bar http://localhost:3000/category/6 In fact, there will be some problems, because there is no such classification. At this time, it needs to be processed. When the classification does not exist, jump to page 404.
<!-- router.js -->
  {
    path: "/category/:catId",
    name: 'category',
    component: () => import("@/views/All.vue"),
    props: route => ({ catId: parseInt(route.params.catId) }),
    <!-- Add routing guard -->
    beforeEnter: (to, from) => {
      // If it is not the correct classification, jump to the not found page
      console.log(to.params.catId);
      if (!["0", "1", "2", "3", "4"].includes(to.params.catId)) {
        return {
          name: "NotFound",
          // This is to keep the input information in the address bar, otherwise the address bar will be very ugly
          params: { pathMatch: to.path.split("/").slice(1) },
          query: to.query,
          hash: to.hash,
        };
      }
    }
  },
If it is not the correct classification, jump to the not found page
Routing global guard
Some specific operations are required in some routes. For example, it must be a login user before accessing. This can be achieved by using meta attribute and global guard.
For example, there is a course column that we set to require users to log in to access. We can set it as follows
<!-- router.js -->
  {
    path: '/course',
    name: "course",
    component: () => import("@/views/Course.vue"),
    <!-- Login required -->
    meta: {needLogin: true}
  },
  {
    path: '/login',
    name: "login",
    component: () => import("@/views/Login.vue"),
  },
Add a global guard. If you need to log in but don't log in, jump to the login page
<!-- router.js -->
// Global guard
router.beforeEach((to, from) => {
  if (to.meta.needLogin && !userLogin) {
    // need to login
    return { name: "login" };
  }
});
Routing guard within component
In fact, there is a third solution to the problem in the previous chapter of handover classification, which is to use the routing guard in the component.
<script setup>
import { ref } from '@vue/reactivity';
import { useRoute, onBeforeRouteUpdate } from 'vue-router';
import sourceData from "@/data.json";

// Define props
const props = defineProps({
  catId: {
    type: Number,
    required: true,
  }
})

let arrs = ref([]);

let fetchData = (id) => {
  return id !== 0 ? sourceData.filter((blog) => blog.catId == id) : sourceData;
}

<!-- Routing guard within component -->
onBeforeRouteUpdate((to, from, next) => {
  arrs.value = fetchData(to.params.catId)
});

arrs.value = fetchData(props.catId);

</script>
For a path with dynamic parameters / category/:catId, when jumping between / category/1 and / category/2, the routing hook function of onBeforeRouteUpdate will be triggered, and the data can be updated in the hook function.
Extend RouterLink
Router link can realize the jump of routing. In addition, it can be extended in order to enrich its functions. For example, we can extend the implementation to jump to external links.
<!--AppLink.vue-->
<template>
  <!-- If it is an external link, jump to(<slot />express router-link In component slot Content)  -->
  <a v-if="isExternal" :href="to"><slot /></a>
  <!-- If it is APP Link, route jump(<slot />express router-link In component slot Content) -->
  <router-link v-else v-bind="$props"><slot /></router-link>
</template>

<script>
import { computed, defineComponent } from "@vue/runtime-core";
import { RouterLink } from "vue-router";

export default {
  props: {
    // Inherits props of RouterLink
    ...RouterLink.props,
  },
  setup(props) {

    // If the 'to' attribute value is a string type and starts with 'http', we think it is an external link
    let isExternal = computed(() => typeof props.to === 'string' && props.to.startsWith('http'));

    return {
      isExternal
    }
  }
};
</script>
use:
<AppLink to="https://www.domain.cn" />
summary
Vue Router 4. The use of X is basically introduced. The most important feature is that it can be used with Composition API. In addition, there are still some changes in the use.