Family, every other day with new knowledge to meet you! Today we are learning how to get and control HTML elements in our JS. If you want to learn JavaScript well, you should persevere in learning it. If you don't understand anything, you can confide in me or comment below and you will reply when you see it.
I How to get HTML elements in JS
1. Through the id attribute in the tag (getElementById)
Get the HTML element through the id attribute in the tag. First, set an id name for our tag. We directly use the id name of the tag to operate the HTML attribute, give you an appetizer, use our JS to make the automatic picture switching effect and code for you.
Get the attribute through id in the following code: A1 style. Backgroundimage this is short for
A1: < div > id name of label setting style: Style: backgroundImage: background image
<!DOCTYPE html>

<html>
	<head>
		<meta charset="utf-8">
		<title></title>
		<style>

		div{
		    width:100px;
			height:200px;
			/* url:position */
			background:url("images/a0.jpg") center/cover;
		}
		</style>
	</head>
	<body>

	<!-- Make picture automatic switching effect-->
	<!-- 1.Want to complete this effect, I hope you put the format of the picture is a1,a2 This format is convenient for us to use -->
	<div id="a1"></div>

	<script>
	 //Define a variable
	 var b=1;
	 //Use the cycle timer to switch our pictures
	 setInterval(function fn1(){
		 a1.style.backgroundImage='url("images/a'+(b%3)+'.jpg")';
		//Add 1 for each execution of b
	  b++;
	 },1000)
	</script>
	</body>
</html>
One of our standard methods is to get the writing method of html elements through id, and change the color when clicking the button
var d=document.getElementById("d1") / / get the id of the div tag to be changed and assign it to D
d.style.background="yellow"
<!DOCTYPE html>
<html>
	<head>
		<meta charset="utf-8">
		<title></title>
		<style>

		div{
			/* Set width*/
			width:100px;
			/* Set high */
			height:100px;
			/* Set background color */
			background:red;
		    display: inline-block;
		}

		</style>
	</head>
	<body>
<!-- How in JS Get in HTML element -->
     <div id="d1"></div>
	 <div></div>
	 <div></div>
	 <!-- br Cross line label -->
	 <br>
	 <button onclick="fn1()" >adopt id change color</button>

	 <script>

	    //I Through the id attribute in the tag
	    function fn1() {
	    //Use id directly
	    // d1.style.background="blue"

	    // Element element (label)
	    var d=document.getElementById("d1")
	    d.style.background="yellow"
	    }

	 </script>
	</body>
</html>
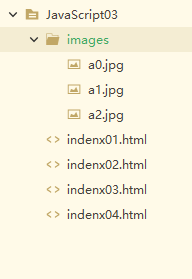
Location of pictures: download the pictures you need, put the pictures in a folder, and then move the folder in

2. By tag name (getElementsByTagName)
When we want to modify more data, we can use to get HTML elements through tag names.
<!DOCTYPE html>
<html>
	<head>
		<meta charset="utf-8">
		<title></title>
		<style>

		div{
			/* Set width*/
			width:100px;
			/* Set high */
			height:100px;
			/* Set background color */
			background:red;
		    display: inline-block;
		}

		</style>
	</head>
	<body>
<!-- How in JS Get in HTML element -->
     <div id="d1"></div>
	 <div></div>
	 <div></div>
	 <!-- br Cross line label -->
	 <br>

	 <button onclick="fn2()" >Change color by tag name</button>

<script>

     // By tag name
	   function fn2(){
		   var dv=document.getElementsByTagName("div");
		   //dv is an array, so we need to traverse the array
		   //var cannot be used whenever a foreach loop is encountered
		   //Use let (define local variables)
		   for( let i of dv){
			   i.style.background="blue";
		   }
	   }
</script>
	</body>
</html>
3.. Through the calss attribute in the tag (getElementsByClassName)
When you only want to modify some things, you can change the color through the class attribute
<!DOCTYPE html>
<html>
	<head>
		<meta charset="utf-8">
		<title></title>
		<style>

		div{
			/* Set width*/
			width:100px;
			/* Set high */
			height:100px;
			/* Set background color */
			background:red;
		    display: inline-block;
		}

		</style>
	</head>
	<body>
<!-- How in JS Get in HTML element -->
     <div class="a"></div>
	 <div class="a"></div>
	 <div></div>
	 <!-- br Cross line label -->
	 <br>

	 <button onclick="fn3()">Through the in the label class Attribute change color</button>

	 <script>


	   //Through the class attribute in the tag
	   function fn3(){
		   var c=document.getElementsByClassName("a");
		   // foreach loop
		   for(let i of c){
			   i.style.background="yellow";
		   }
	   }

	 </script>
	</body>
</html>
II How to control element display (style)
1.display
| none | Don't display (no space on the page) |
| block | Display as block elements |
| inline | Display as inline elements |
| inline-block | Display in line blocks |
Application of none and block:
<!DOCTYPE html>
<html>
	<head>
		<meta charset="utf-8">
		<title></title>
		<style>
		div{
			/* wide */
			width:200px;
			/* high */
			height:150px;
			/* background color  */
			background:red;

		}

		</style>

	</head>
	<body>
		<!-- Control element display(style) -->
		<!-- When the button is clicked div Do not show -->
  <div id="d1"></div>
  <button onclick="fn1()">Point I hide</button>


  <script>
     function fn1(){
		 // If the button calls this function when div is displayed, we will not display it
		 // Block: displayed as a block element
		if(d1.style.display=="block"){
			//none: do not display (there will be no space on the page)
			d1.style.display="none";
		}else{
            d1.style.display="block"
				   }
	 }


  </script>
	</body>
</html>
2.opacity
1. Usage: it is used to control the transparency of elements. If the range is 0-1, 0 is completely transparent and 1 is completely opaque
2. Code shows how to use
<!DOCTYPE html>
<html>
	<head>
		<meta charset="utf-8">
		<title></title>
		<style>
		div{
			/* wide */
			width:200px;
			/* high */
			height:150px;
			/* background color  */
			background:red;

		}

		</style>

	</head>
	<body>
		<!-- Control element display(style) -->
		<!-- When the button is clicked div Do not show -->
  <div id="d1"></div>

  <button onclick="fn2()">Point I hide</button>


  <script>


	 // Controls the transparency of elements
	 function fn2(){
		 // opacity element transparency 0-1
		if(d1.style.opacity==0){
			d1.style.opacity=1;
		}else{
			d1.style.opacity=0;
		}
	 }


  </script>
	</body>
</html>
III Common events on HTML elements
| onclick | Click event |
| ondblclick | Double click event |
| onfocus | Get focus event |
| onblur | Lose focus |
| onmouseover | Mouse in |
| onmouseout | Mouse out |
1.onclick click event
Title: there are thirty input boxes. Set two buttons. When you click two buttons, different values appear in the input box
<!DOCTYPE html>

<html>
	<head>
		<meta charset="utf-8">
		<title></title>
	</head>
	<body>
		<!--subject:There are thirty input boxes and two buttons,
		 When two buttons are clicked, different values appear in the input box-->
	<input type="text"><input type="text"><input type="text"><input type="text"><input type="text"><input type="text"><input
	        type="text"><input type="text"><input type="text"><input type="text"><input type="text"><input
	        type="text"><input type="text"><input type="text"><input type="text"><input type="text"><input
	        type="text"><input type="text"><input type="text"><input type="text"><input type="text"><input
	        type="text"><input type="text"><input type="text"><input type="text"><input type="text"><input
	        type="text"><input type="text"><input type="text"><input type="text">
	<br>
	<!-- When calling a function, pass parameters to the function -->
	<button onclick="fn1('ha-ha')">ha-ha</button>
     <button onclick="fn1('Xi Xi')">Xi Xi</button>
<script>

	function fn1(a){
		//Get all the input boxes through the tag name
		var is=document.getElementsByTagName("input")
		//foreach loop traverses array
		for(let i of is){
			//Change the value in the input box
			i.value=a;
		}
	}

	</script>
	</body>
</html>
2. Use of ondocus and onblur
Title: there are thirty input boxes. When our input box gets focus, the input box is empty. When we lose focus, the input box displays a sentence. (Continued)
<!DOCTYPE html>

<html>
	<head>
		<meta charset="utf-8">
		<title></title>
	</head>
	<body>
		<!--subject:There are thirty input boxes and two buttons,
		 When two buttons are clicked, different values appear in the input box-->
	<input type="text"><input type="text"><input type="text"><input type="text"><input type="text"><input type="text"><input
	        type="text"><input type="text"><input type="text"><input type="text"><input type="text"><input
	        type="text"><input type="text"><input type="text"><input type="text"><input type="text"><input
	        type="text"><input type="text"><input type="text"><input type="text"><input type="text"><input
	        type="text"><input type="text"><input type="text"><input type="text"><input type="text"><input
	        type="text"><input type="text"><input type="text"><input type="text">
	<br>
	<!-- When calling a function, pass parameters to the function -->
	<button onclick="fn1('ha-ha')">ha-ha</button>
     <button onclick="fn1('Xi Xi')">Xi Xi</button>
<script>

	function fn1(a){
		//Get all the input boxes through the tag name
		var is=document.getElementsByTagName("input")
		//foreach loop traverses array
		for(let i of is){
			//Change the value in the input box
			i.value=a;
		}
	}

	// Title: when our input box gets focus, the input box is empty,
	// When we lose focus, the input box displays a sentence
	// Anonymous arrow function
	  (()=>{
		  //Get it in all the input boxes
		  var is=document.getElementsByTagName("input");
		  // foreach loop traversal
		  for(let i of is){
			  // onfocus: get focus
			  i.onfocus=()=>{
				  // When focus is obtained, the value of the input box is empty
				  i.value="";
			  }

			// onblur: lose focus
			i.onblur=()=>{
				i.value="xx";
			}

		  }
	  })();


	</script>
	</body>
</html>
3. OnMouseOver and onmouseout
The code is the first two together. The last section is the use of mouse in and mouse out
<!DOCTYPE html>

<html>
	<head>
		<meta charset="utf-8">
		<title></title>
	</head>
	<body>
		<!--subject:There are thirty input boxes and two buttons,
		 When two buttons are clicked, different values appear in the input box-->
	<input type="text"><input type="text"><input type="text"><input type="text"><input type="text"><input type="text"><input
	        type="text"><input type="text"><input type="text"><input type="text"><input type="text"><input
	        type="text"><input type="text"><input type="text"><input type="text"><input type="text"><input
	        type="text"><input type="text"><input type="text"><input type="text"><input type="text"><input
	        type="text"><input type="text"><input type="text"><input type="text"><input type="text"><input
	        type="text"><input type="text"><input type="text"><input type="text">
	<br>
	<!-- When calling a function, pass parameters to the function -->
	<button onclick="fn1('ha-ha')">ha-ha</button>
     <button onclick="fn1('Xi Xi')">Xi Xi</button>
<script>

	function fn1(a){
		//Get all the input boxes through the tag name
		var is=document.getElementsByTagName("input")
		//foreach loop traverses array
		for(let i of is){
			//Change the value in the input box
			i.value=a;
		}
	}

	// Title: when our input box gets focus, the input box is empty,
	// When we lose focus, the input box displays a sentence
	// Anonymous arrow function
	  (()=>{
		  //Get it in all the input boxes
		  var is=document.getElementsByTagName("input");
		  // foreach loop traversal
		  for(let i of is){
			  // onfocus: get focus
			  i.onfocus=()=>{
				  // When focus is obtained, the value of the input box is empty
				  i.value="";
			  }

			// onblur: lose focus
			i.onblur=()=>{
				i.value="xx";
			}

		  }
	  })();


	</script>
	</body>
</html>
That's all for today's study. You must stick to it. If you don't understand, please comment below, or send me a private letter to leave you a short topic.
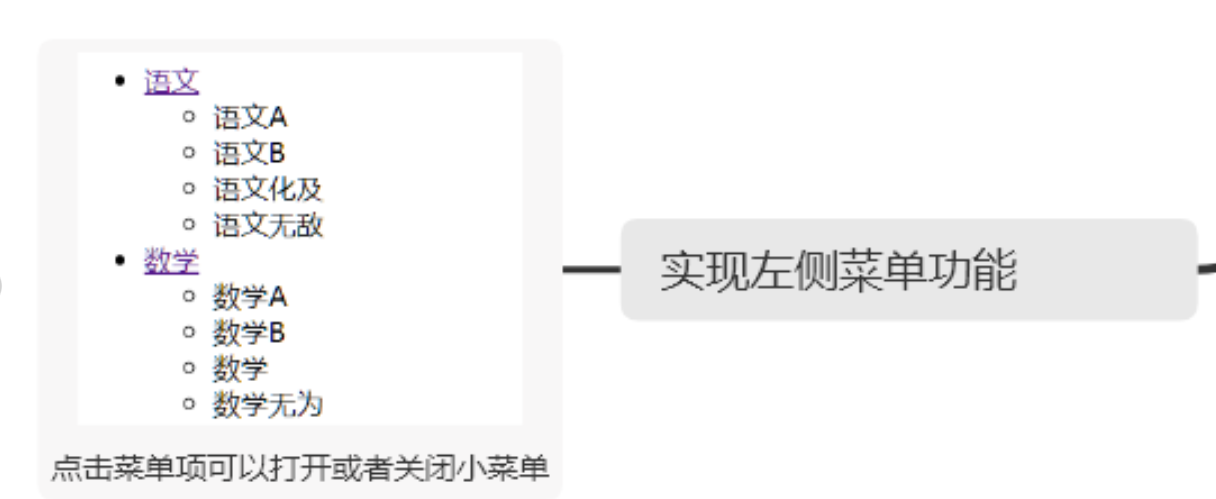
Title: realize a menu function. Click Chinese to close the menu. When you click Chinese again, the menu opens and you can write it down yourself. This topic can use the use of none and block we learned today. Consolidate today's knowledge points. Oh, put the code of the topic at the bottom. You should write it yourself first. If you don't want to read the code, you should read it.
<!DOCTYPE html>
<html>
	<head>
		<meta charset="utf-8">
		<title></title>


	</head>
	<body>

  <!-- Left menu -->
  <ul>
	  <li><i onclick="fn3('u1')">household electrical appliances</i>
	  <ul id="u1">
		  <li>Refrigerator</li>
		  <li>television</li>
          <li>Washing machine</li>
	  </ul>
		</li>
  </ul>

  <ul>
  	  <li><i onclick="fn3('u2')">Fruits</i>
  	  <ul id="u2">
  		  <li>pineapple</li>
  		  <li>jackfruit</li>
  		  <li>honey peach</li>
  	  </ul>
	  </li>
  </ul>


  <script>


      // To realize the menu function on the left, click the menu option to open or close
	  function fn3(id){
		  //Get through id
		  var li=document.getElementById(id)
		  //Set the corresponding element to not display
		    if(li.style.display=="none"){
		        li.style.display="block"
		          }else{
		              li.style.display="none"
		          }
	  }


  </script>
	</body>
</html>