Getting started with Spring MVC
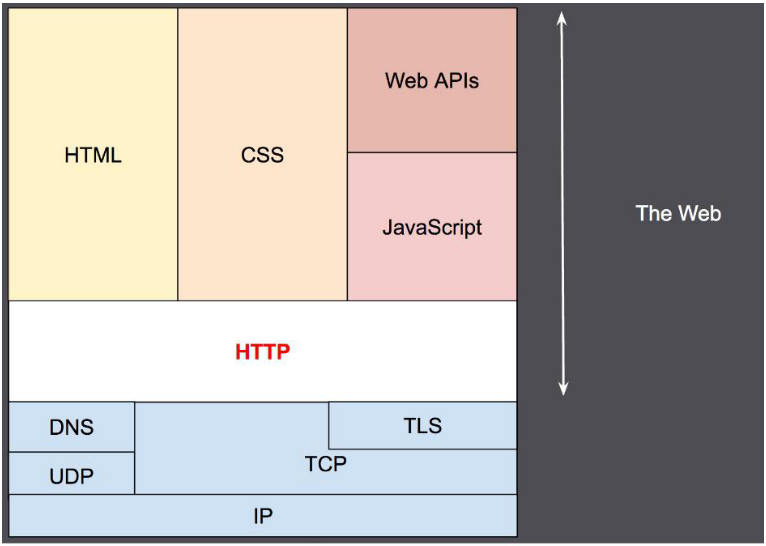
The first layer is the web browser, and the second layer is the web browser, which is used to learn about the various web application transmission protocols. The first layer is the web browser, and the second layer is used to learn about these web application transmission protocols.
HTTP protocol
First, learn about the http protocol. The official documents of Mozilla are provided here for learning
- HyperText Transfer Protocol
- Application layer protocol for transmitting HTML and other content
- It specifies how the browser and server communicate and the data format when communicating.
Take a paragraph here to find out
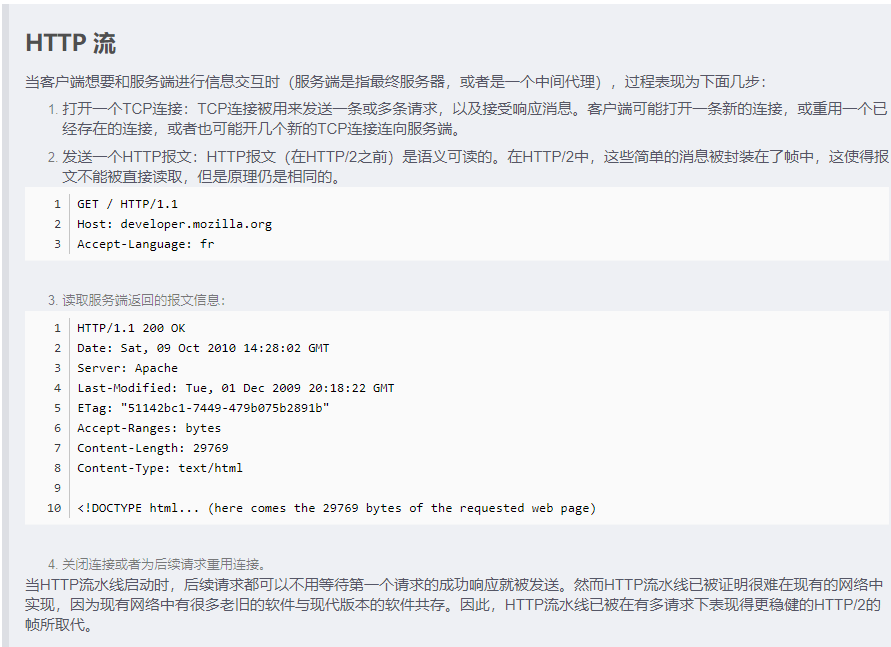
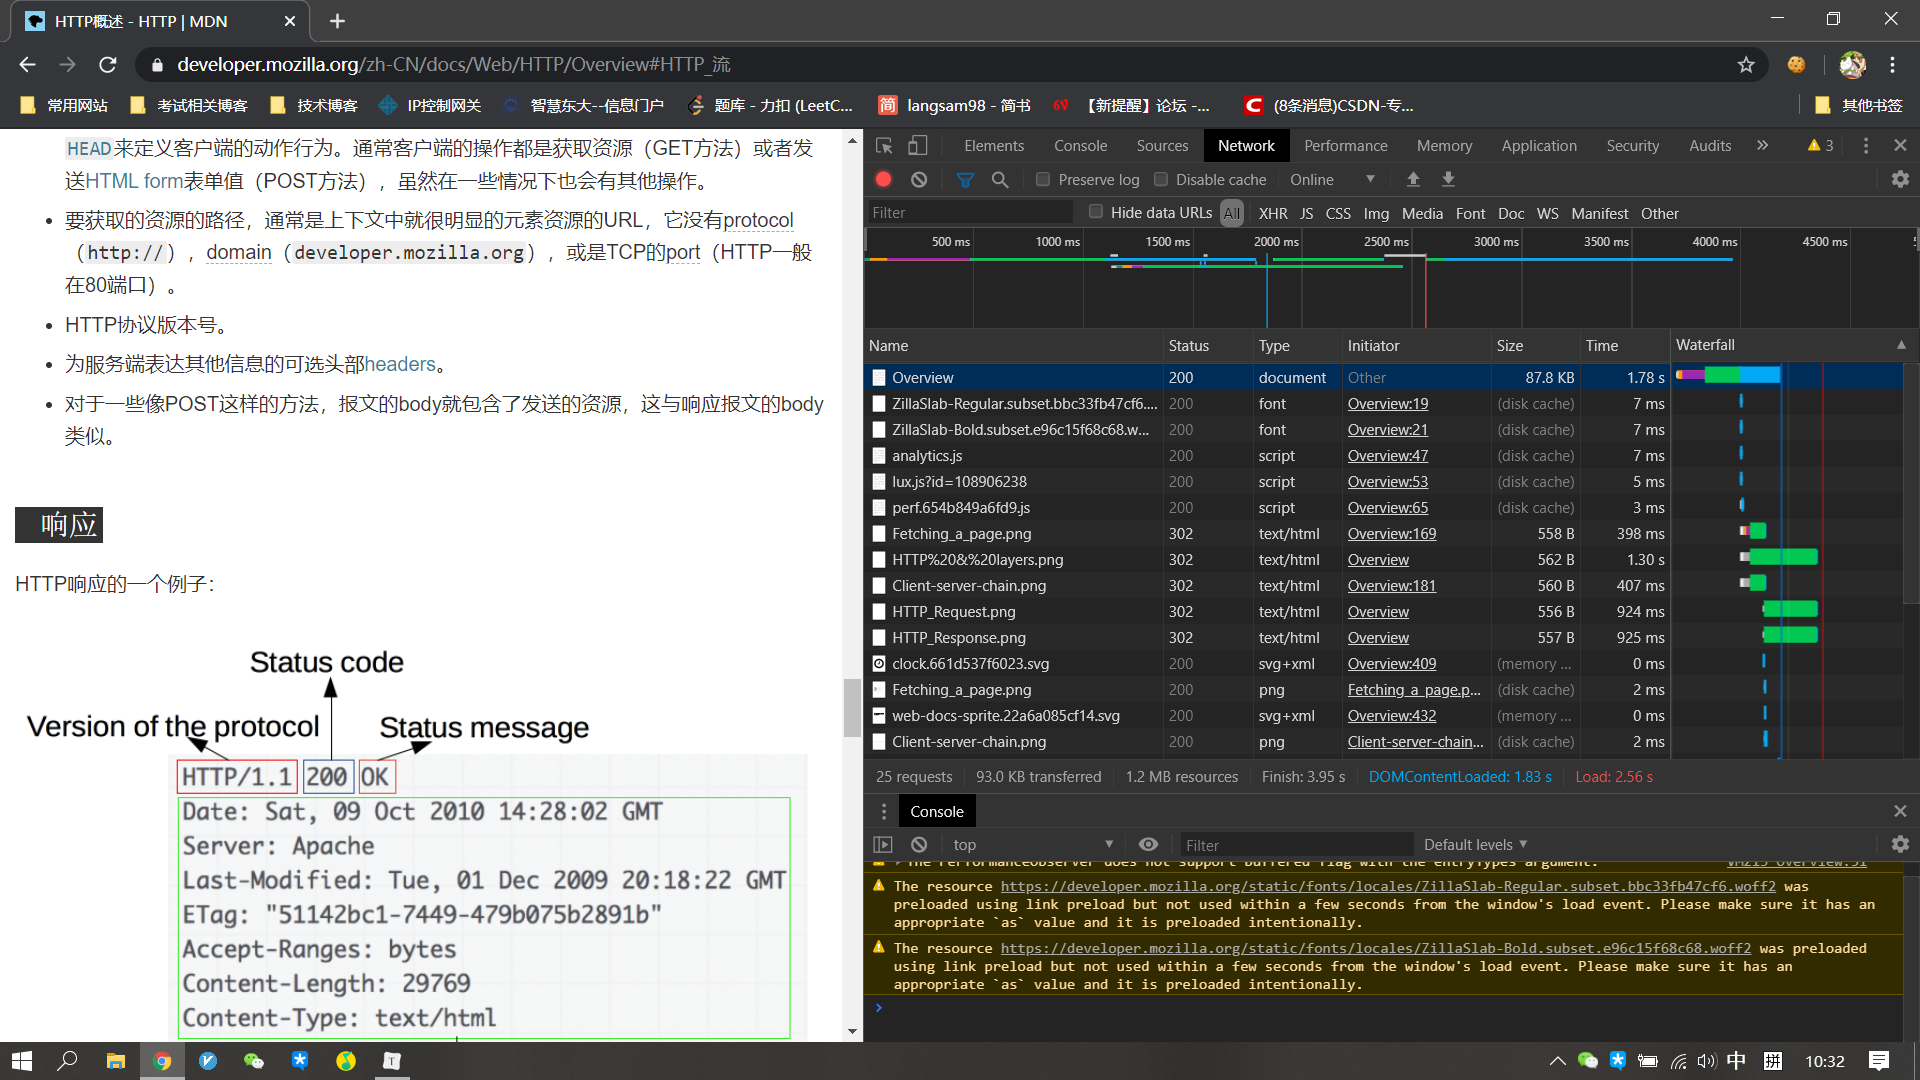
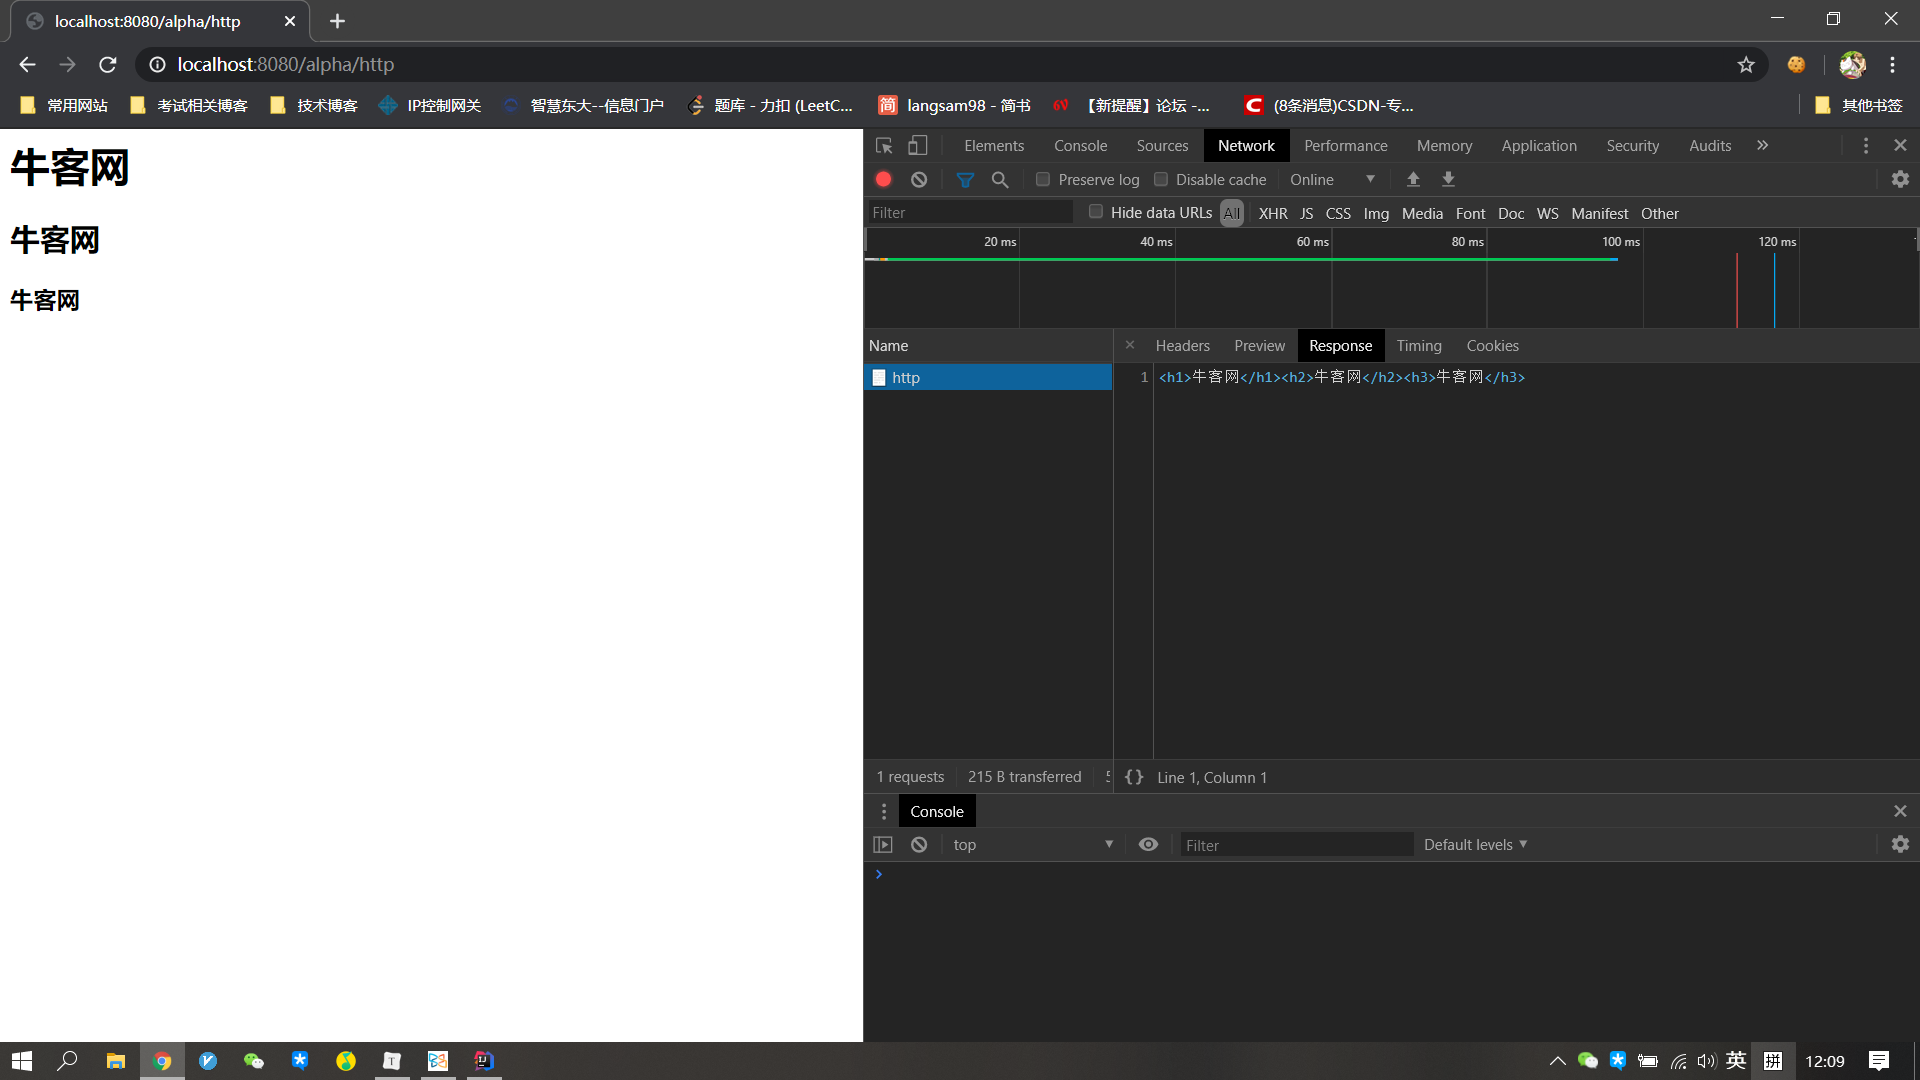
Let's check the actual operation of the browser. Take the website recommended above as an example. Open it with Google browser, right-click - check on the page, and then refresh it. You can see a pile of requests on the right. We can click any one to see its header, cookies and other information. Why are there so many requests? Because in the process of browser parsing, you will find that other resources are referenced in html, so you will request this resource file again.
Spring MVC
- Three tier architecture
- Presentation layer, business layer and data access layer
- MVC
- Model: model layer
- View: view layer
- Controller: control layer
- Core components
- Front end controller: dispatcher Servlet
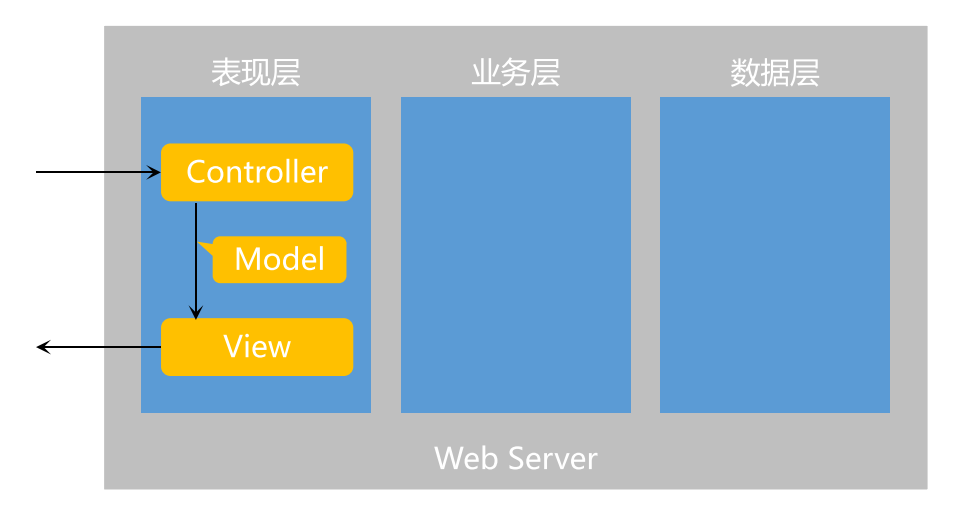
It should be noted that the server-side three-tier architecture and MVC three-tier are not one-to-one correspondence. You can see the general relationship from the figure above. The Controller receives the data in the request and calls the business layer to process it. The obtained data is encapsulated in the model and transmitted to the view layer, and the view layer generates html and returns it to the browser. In this process, there is a core component, the front-end Controller dispatcher servlet. A diagram is found from the latest version of spring documents to explain. The general structure is as follows.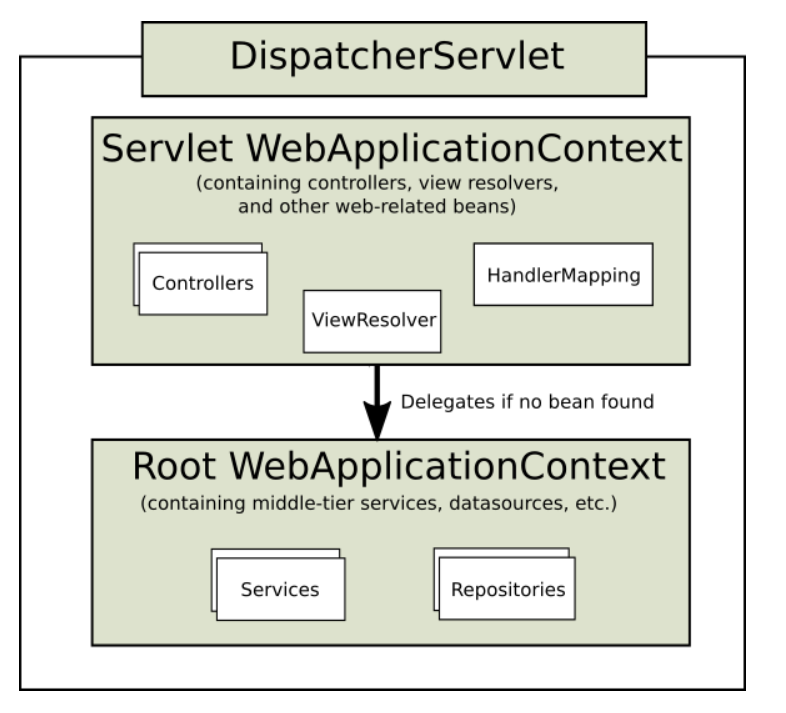
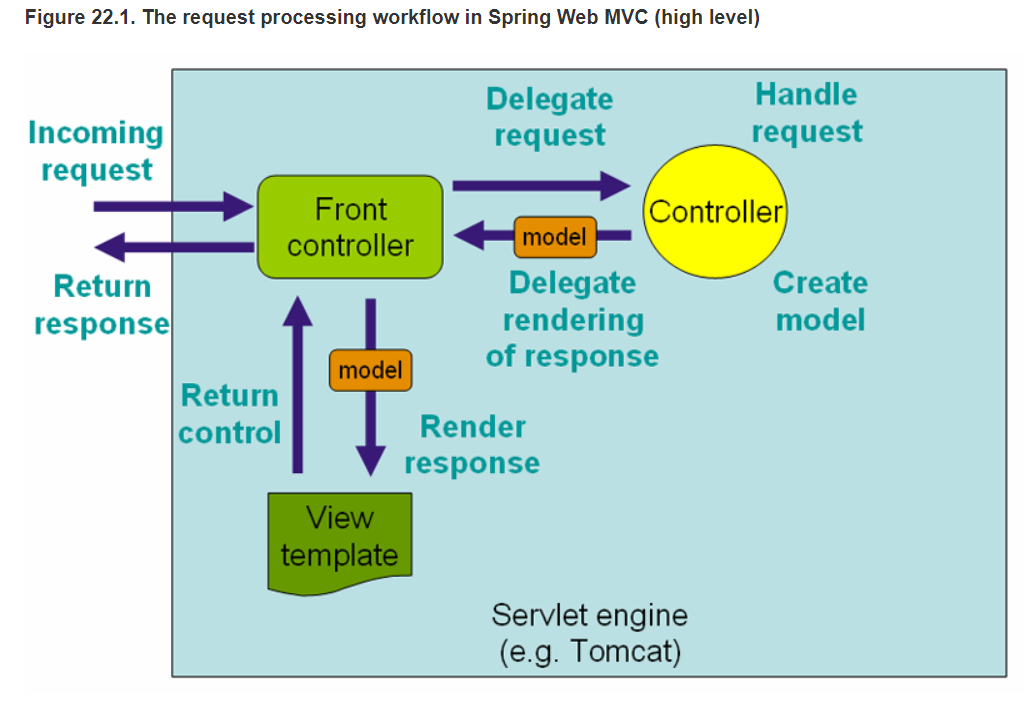
The above figure is not specific enough. If you find this figure in the old version of the document, you can combine it. The general process is that when the request comes, it is parsed by the front-end controller. Handler mapping finds the corresponding controller to process it according to our annotation, returns the model to the front-end controller, and then the front-end controller calls the parser to try to process it, and then it will respond. The explanation is not accurate enough. It is recommended to have an in-depth understanding of the documents on the spring official website
Thymeleaf template engine
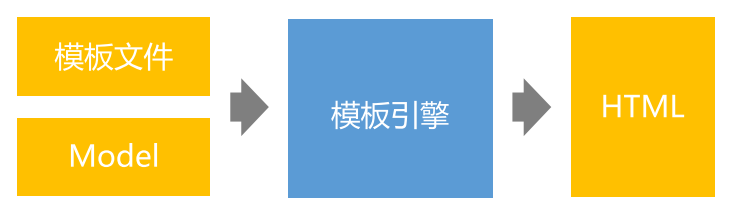
We wrote simple examples in the front, all of which returned strings to the browser, but did not return web pages. We need to borrow a tool - template engine, so the more popular one is thymeleaf.
- template engine
- Generate dynamic HTML
- Thymeleaf
- Advocate natural templates, that is, take HTML files as templates
- Common grammar
- Standard expression, judgment and loop, template layout
Case demonstration
Let's start with application Turn off the cache of thymeleaf in properties.
#ThymeleafProperties
spring.thymeleaf.cache=false
So what does the above sentence mean? ctrl+n let's search the configuration class of thymeleaf, that is, ThymeleafProperties. I intercepted the previous section of code. You can see that this class uses the @ ConfigurationProperties annotation to configure the prefix. We use this prefix plus Cache actually modifies the cache property of ThymeleafProperties, which can be seen in the last line of the code I intercepted.
@ConfigurationProperties(
    prefix = "spring.thymeleaf"
)
public class ThymeleafProperties {
    private static final Charset DEFAULT_ENCODING;
    public static final String DEFAULT_PREFIX = "classpath:/templates/";
    public static final String DEFAULT_SUFFIX = ".html";
    private boolean checkTemplate = true;
    private boolean checkTemplateLocation = true;
    private String prefix = "classpath:/templates/";
    private String suffix = ".html";
    private String mode = "HTML";
    private Charset encoding;
    private boolean cache;
Similarly, we can modify the server startup port, view the corresponding configuration class, and modify other parameters. There is no demonstration here. You can refer to the spring documentation.
# ServerProperties
server.port=8080
Case 1
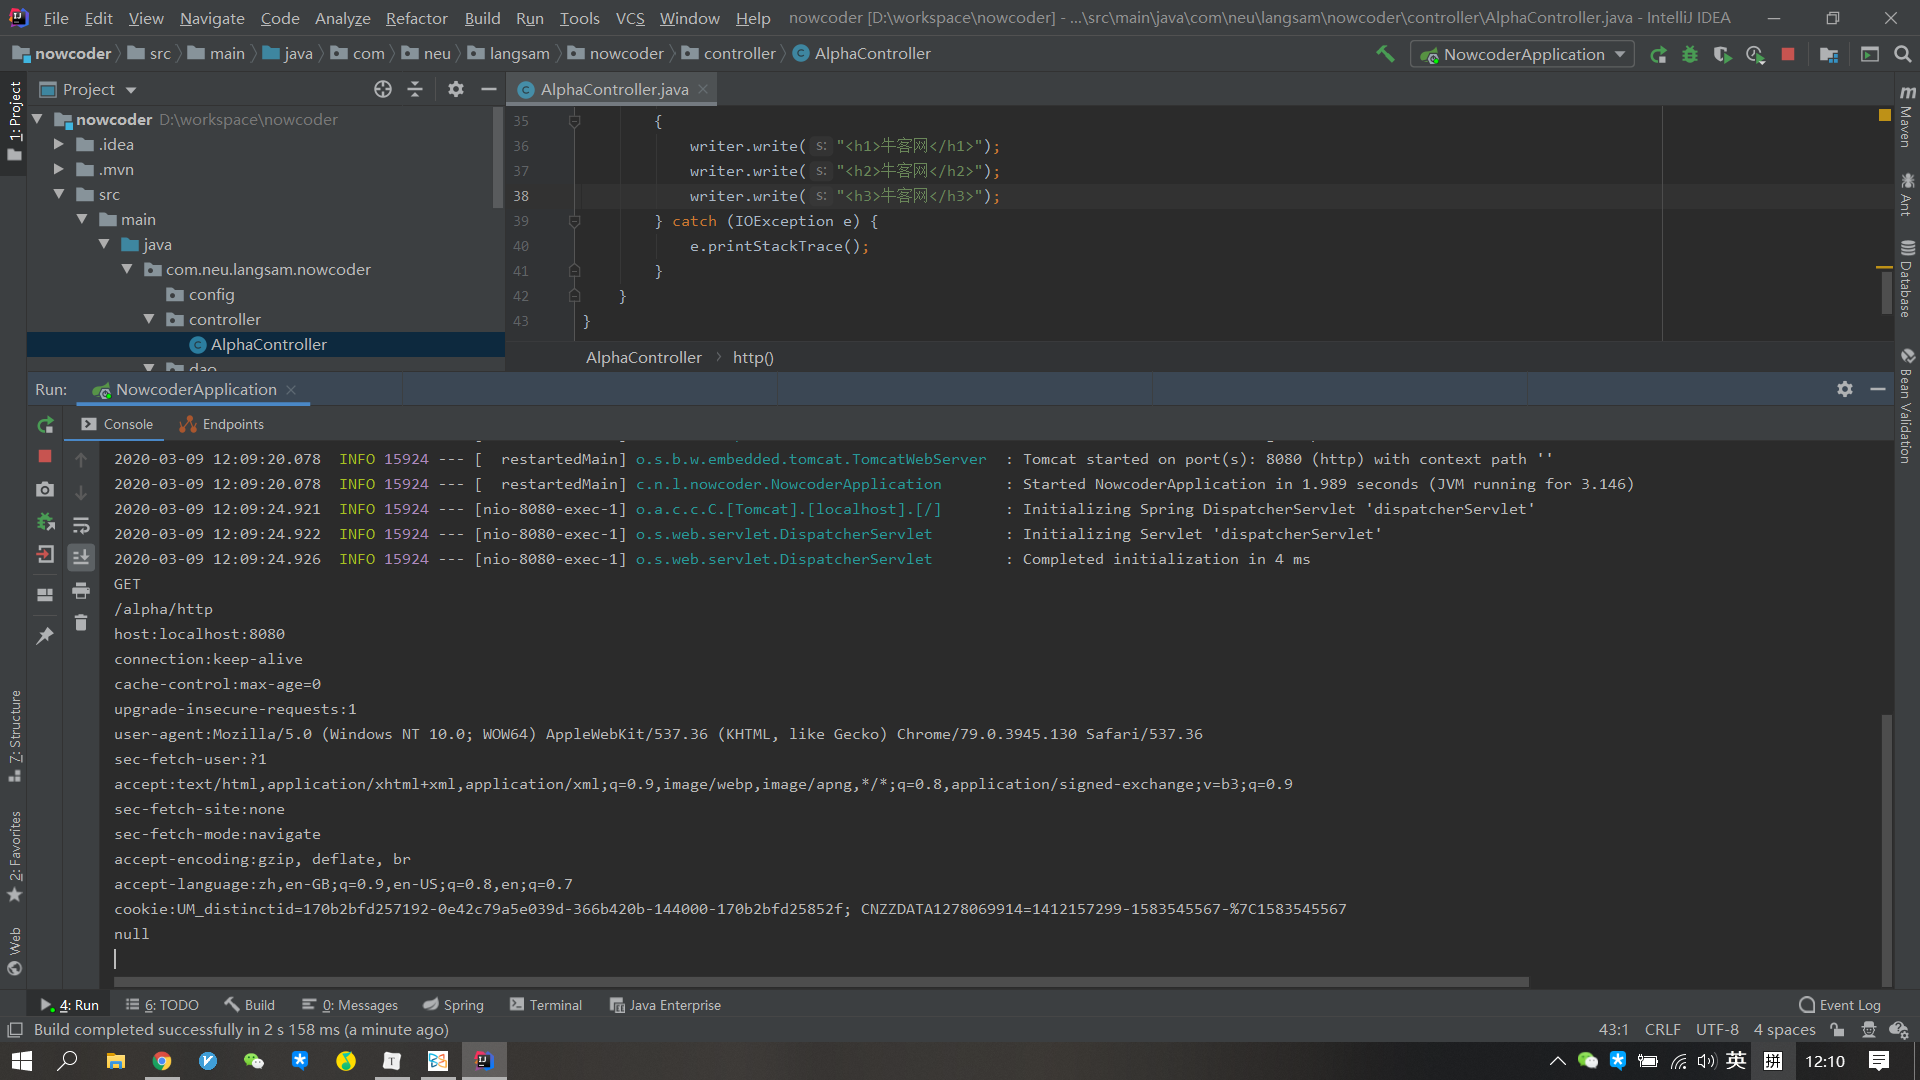
In this case, we demonstrate how to obtain the request and return the response. The specific meaning of each line is written in the comments. In the http method, the request and response of the servlet are passed in. We operate on these two objects.
package com.neu.langsam.nowcoder.controller;

import org.springframework.stereotype.Controller;
import org.springframework.web.bind.annotation.RequestMapping;

import javax.servlet.http.HttpServletRequest;
import javax.servlet.http.HttpServletResponse;
import java.io.IOException;
import java.io.PrintWriter;
import java.util.Enumeration;

@Controller
@RequestMapping("/alpha")
public class AlphaController {

    @RequestMapping("http")
    public void http(HttpServletRequest request, HttpServletResponse response){
        //Get request data
        System.out.println(request.getMethod());//Print request method
        System.out.println(request.getServletPath());//Print request path
        Enumeration<String> enumeration=request.getHeaderNames();//The ancient iterator gets the request header
        while (enumeration.hasMoreElements()){
            String name=enumeration.nextElement();
            String value=request.getHeader(name);
            System.out.println(name+":"+value);
        }

        System.out.println(request.getParameter("code"));//Print request parameters

        //Return response data
        response.setContentType("text/html;charset=utf-8");//Set return data type
        try (
                PrintWriter writer= response.getWriter();
                )
        {
            writer.write("<h1>Niuke network</h1>");//Using writer to write html data
            writer.write("<h2>Niuke network</h2>");
            writer.write("<h3>Niuke network</h3>");
        } catch (IOException e) {
            e.printStackTrace();
        }
    }
}
Start the project and visit it in the browser. You can see that the html we wrote is displayed on the page. You can also open the check to view our request this time. You can see that the data we want to obtain is output by viewing the idea console. You can also connect the question number after the link to pass the parameter, and the parameter will not be demonstrated.
http://localhost:8080/alpha/http?code=test
Case 2
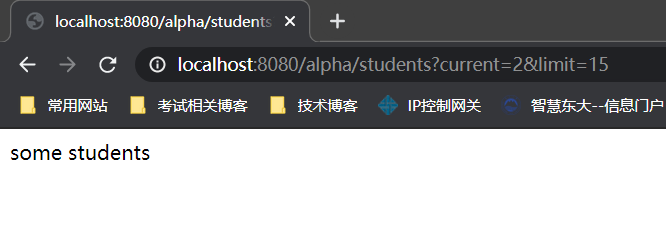
Case 1 demonstrates a more basic method to operate, but in fact, it has encapsulated a simple method. Next, it demonstrates how to handle it more simply. Now let's assume that students' data is queried and displayed in pages, so you need to pass in the current parameter to tell the back end what page is needed now and how many pieces of data are required for each page in the limit parameter. So how to deal with such a request.
GET method
- First, use annotations for configuration
- @RequestMapping configures the access path and access method. Here, we specify that only GET methods are accepted, and POST, DELETE and other methods are available for self understanding. The GET method is usually used to query data, and the POST method is usually used to add or modify data.
- @The ResponseBody annotation means that the java object returned by the method is converted into json or xml format data, which is directly written into the body area of the response without going to the view parser.
- In the first getStudents method, we use the @ RequestParam annotation to specify the request parameters. For the current parameter, we specify that it is not necessary, and the default value is 1. We can pass in the parameters in the address bar, / students? current=2&limit=20
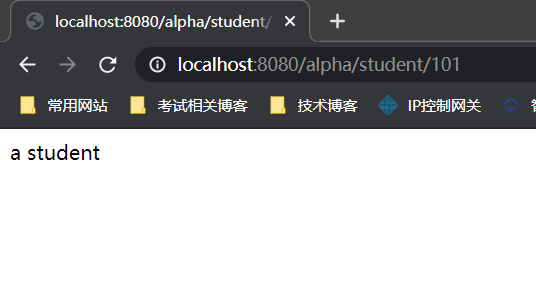
- In the second getStudent method, the @ PathVariable annotation is used, and {id} is used in the path, so you can pass in the id parameter directly from / student/112
These two methods use corresponding methods according to different needs.
//GET request
    // /students?current=1&limit=20
    @RequestMapping(path = "/students",method = RequestMethod.GET)
    @ResponseBody
    public String getStudents(
            @RequestParam(name = "current",required = false,defaultValue = "1") int current,
            @RequestParam(name = "limit",required = false,defaultValue = "10") int limit){
        System.out.println(current+" "+limit);
        return "some students";
    }

    // /student/123
    @RequestMapping(path = "/student/{id}",method = RequestMethod.GET)
    @ResponseBody
    public String getStudent(@PathVariable("id") int id){
        System.out.println(id);
        return "a student";
    }
POST method
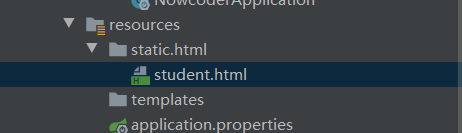
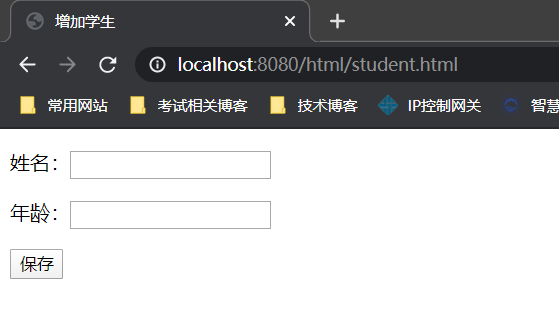
As mentioned above, the post method is usually used to add or modify data, so we need a form to fill in the data. Create a new html directory under the static directory and an html file under the html directory. This is a simple web page with two input boxes and a submit button, which stipulates that the submit path is / alpha/student.
<!DOCTYPE html>
<html lang="en">
<head>
    <meta charset="UTF-8">
    <title>Increase students</title>
</head>
<body>
    <form method="post" action="/alpha/student">
        <p>
            full name:<input type="text" name="name">

        </p>
        <p>
            Age:<input type="text" name="age">
        </p>
        <p>
            <input type="submit" value="preservation">
        </p>
    </form>
</body>
</html>
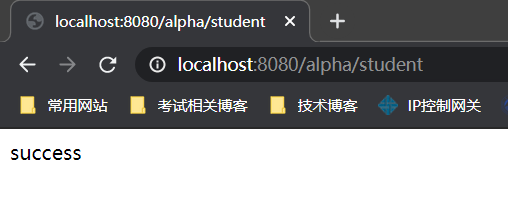
Then we write the method of processing this access path in the controller. Here we need to pay attention to one point. We wrote the / student/{id} path earlier, which is one more layer than the / student we access here, so we need to write another method of processing / student. To get the parameters submitted by the browser, we only need to pass in the parameters with the same name as each item in the browser form, and spring will help us match automatically. For example, the parameter name of input age in html is specified as age, so when processing the request, you can receive it by passing in a parameter named age.
//POST request
@RequestMapping(path = "/student",method = RequestMethod.POST)
@ResponseBody
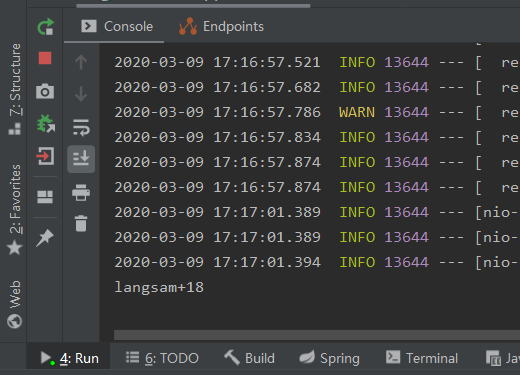
public String saveStudent(String name,int age){
System.out.println(name+"+"+age);
return "success";
}
Case 3
After demonstrating so much, how does the thymeleaf template engine work. First create a template, create the demo directory under templates, and then create a view html, what's the difference between it and the previous static html. Use xmlns in the html tag to specify the source of the template, and use the syntax of thymeleaf in the p tag, which means to make the text of the page equal to the value of then and age we passed in.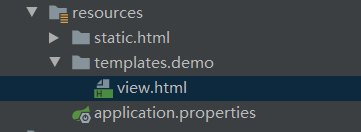
<!DOCTYPE html>
<html lang="en" xmlns:th="http://www.thymeleaf.org">
<head>
    <meta charset="UTF-8">
    <title>Teacher</title>
</head>
<body>
    <p th:text="${name}"></p>
    <p th:text="${age}"></p>
</body>
</html>
Then write the corresponding processing method in the controller. The return data type is set to ModelAndView, that is, the model and view are returned as an object. For simplicity, a fixed data is directly given, and the path of the template, view under the demo path, is set HTML, there is no need to write a suffix here. Just visit the corresponding address in the browser.
    //Response HTML data
    @RequestMapping(path = "/teacher",method = RequestMethod.GET)
    public ModelAndView getTeacher(){
        ModelAndView modelAndView=new ModelAndView();
        modelAndView.addObject("name","Zhang San");//Add model
        modelAndView.addObject("age","18");
        modelAndView.setViewName("/demo/view");//Set view
        return modelAndView;
    }
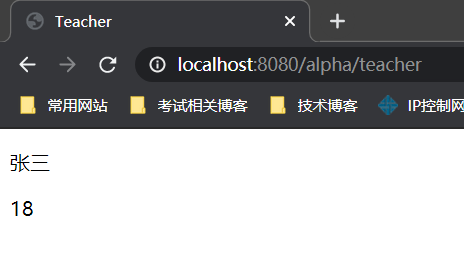
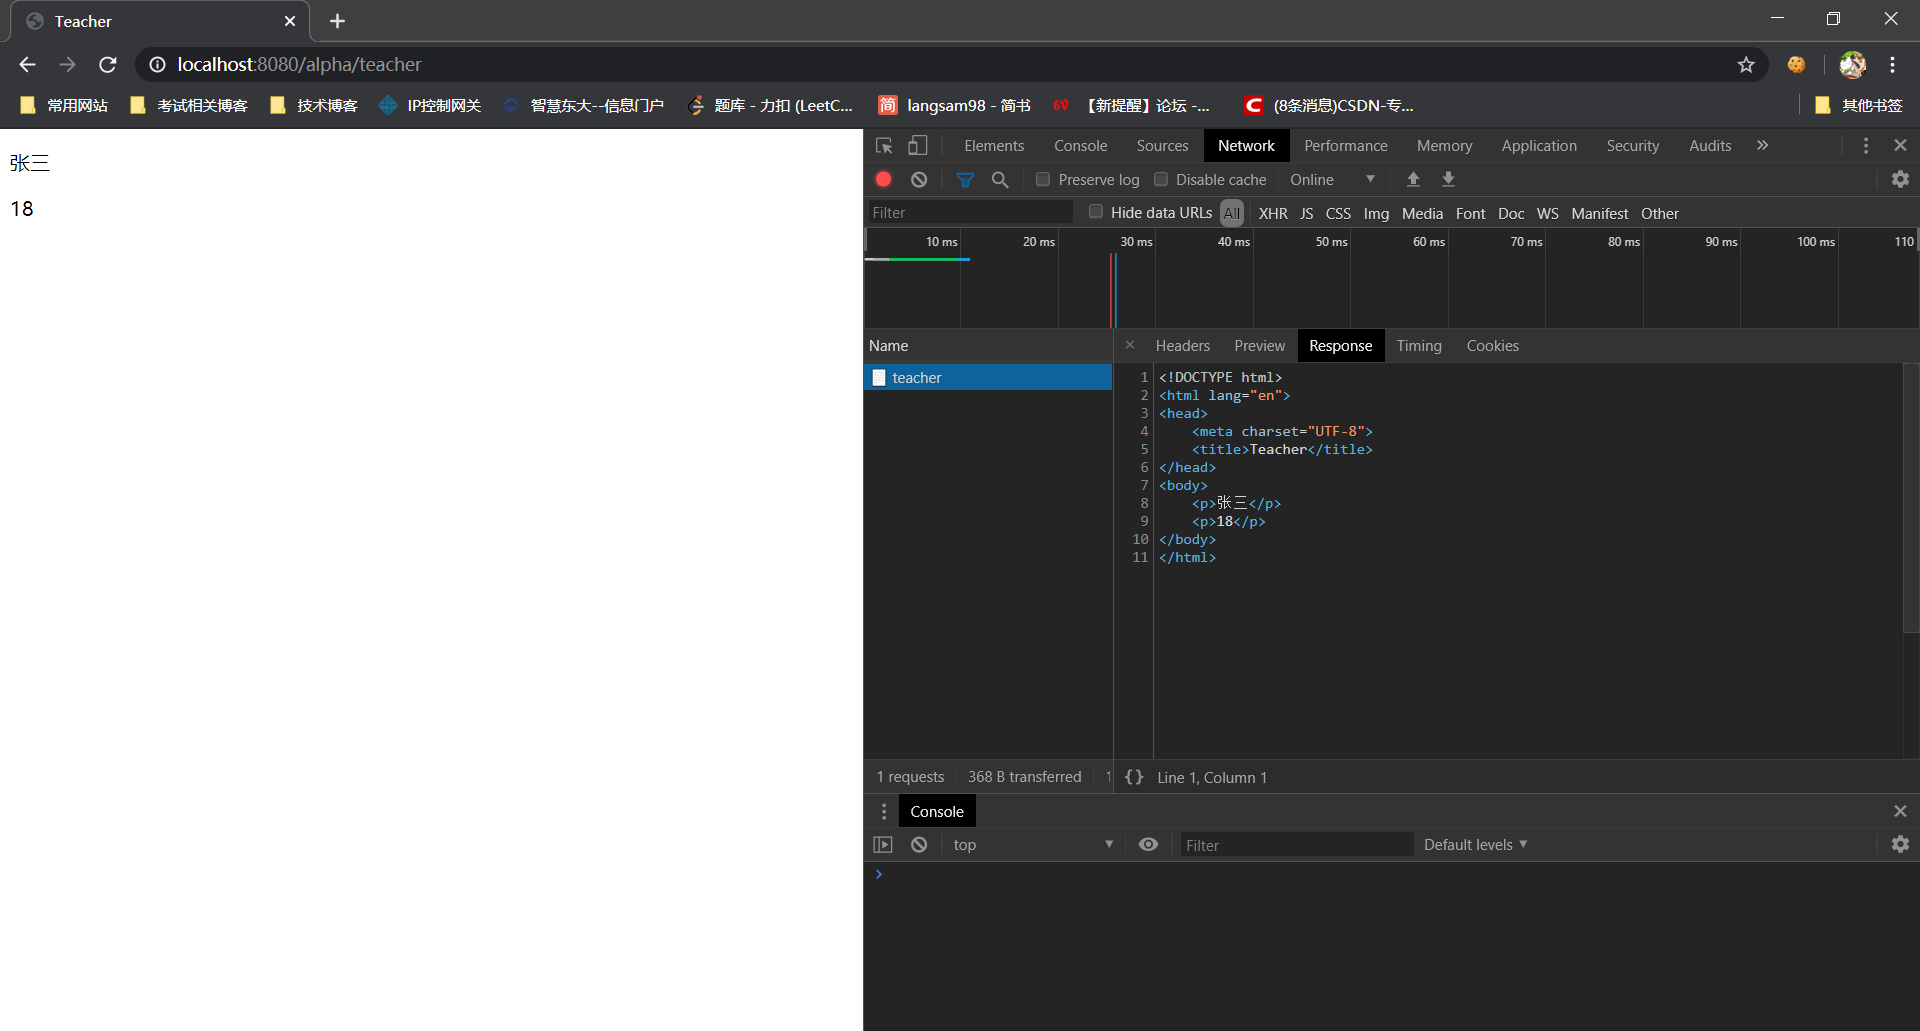
Similarly, when we check the request in the check, we can see that the content of the response is an html file.
There is another way, the effect is the same. This method obtains the reference of the model from the container, modifies the value of the model, and directly returns the path of the view. In contrast, the second way is a little simpler.
Case 4
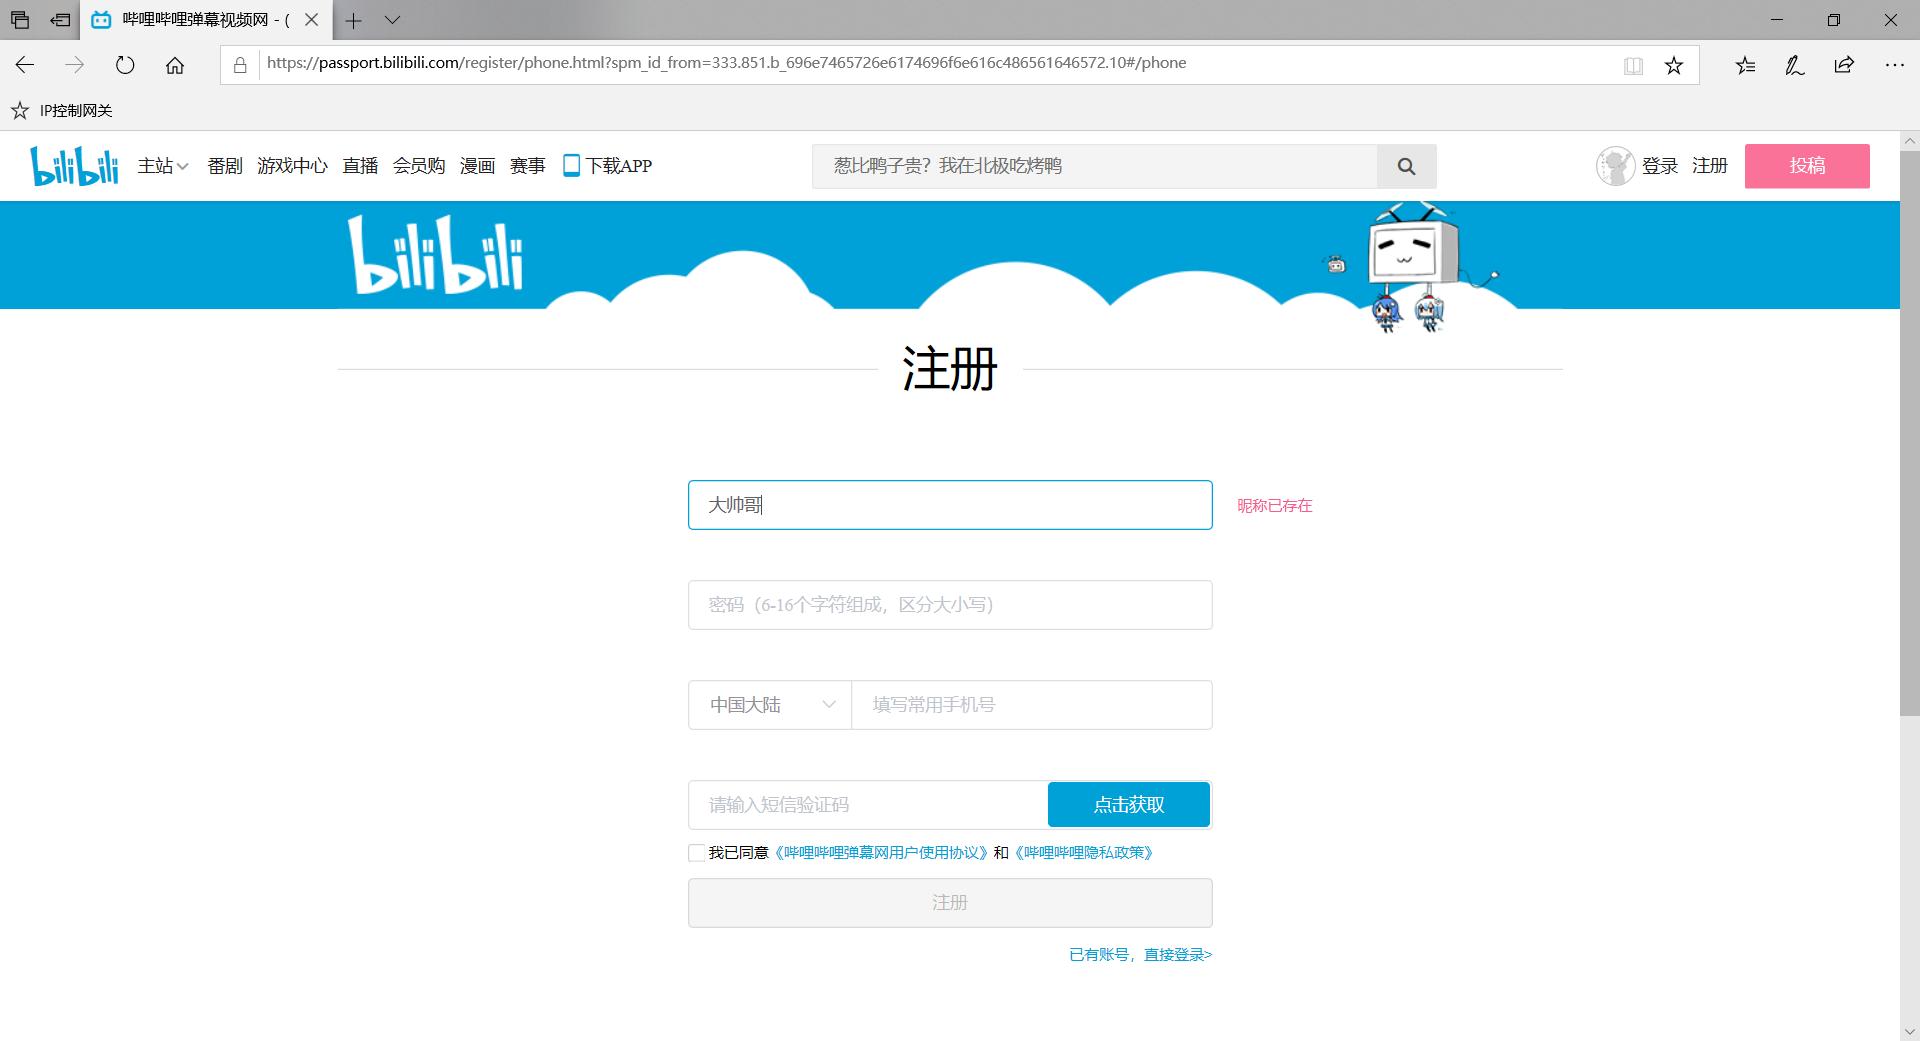
There is also a common case that we need to return JSON data to the browser, usually in an asynchronous request, which we have used earlier. What are asynchronous requests? For example, register bilibili li. When I enter a nickname, the web page will remind me that the nickname is occupied, but there is no refresh change in other parts of the web page.
//Response JSON data (asynchronous request)
//java object - > jspon string - > JS object
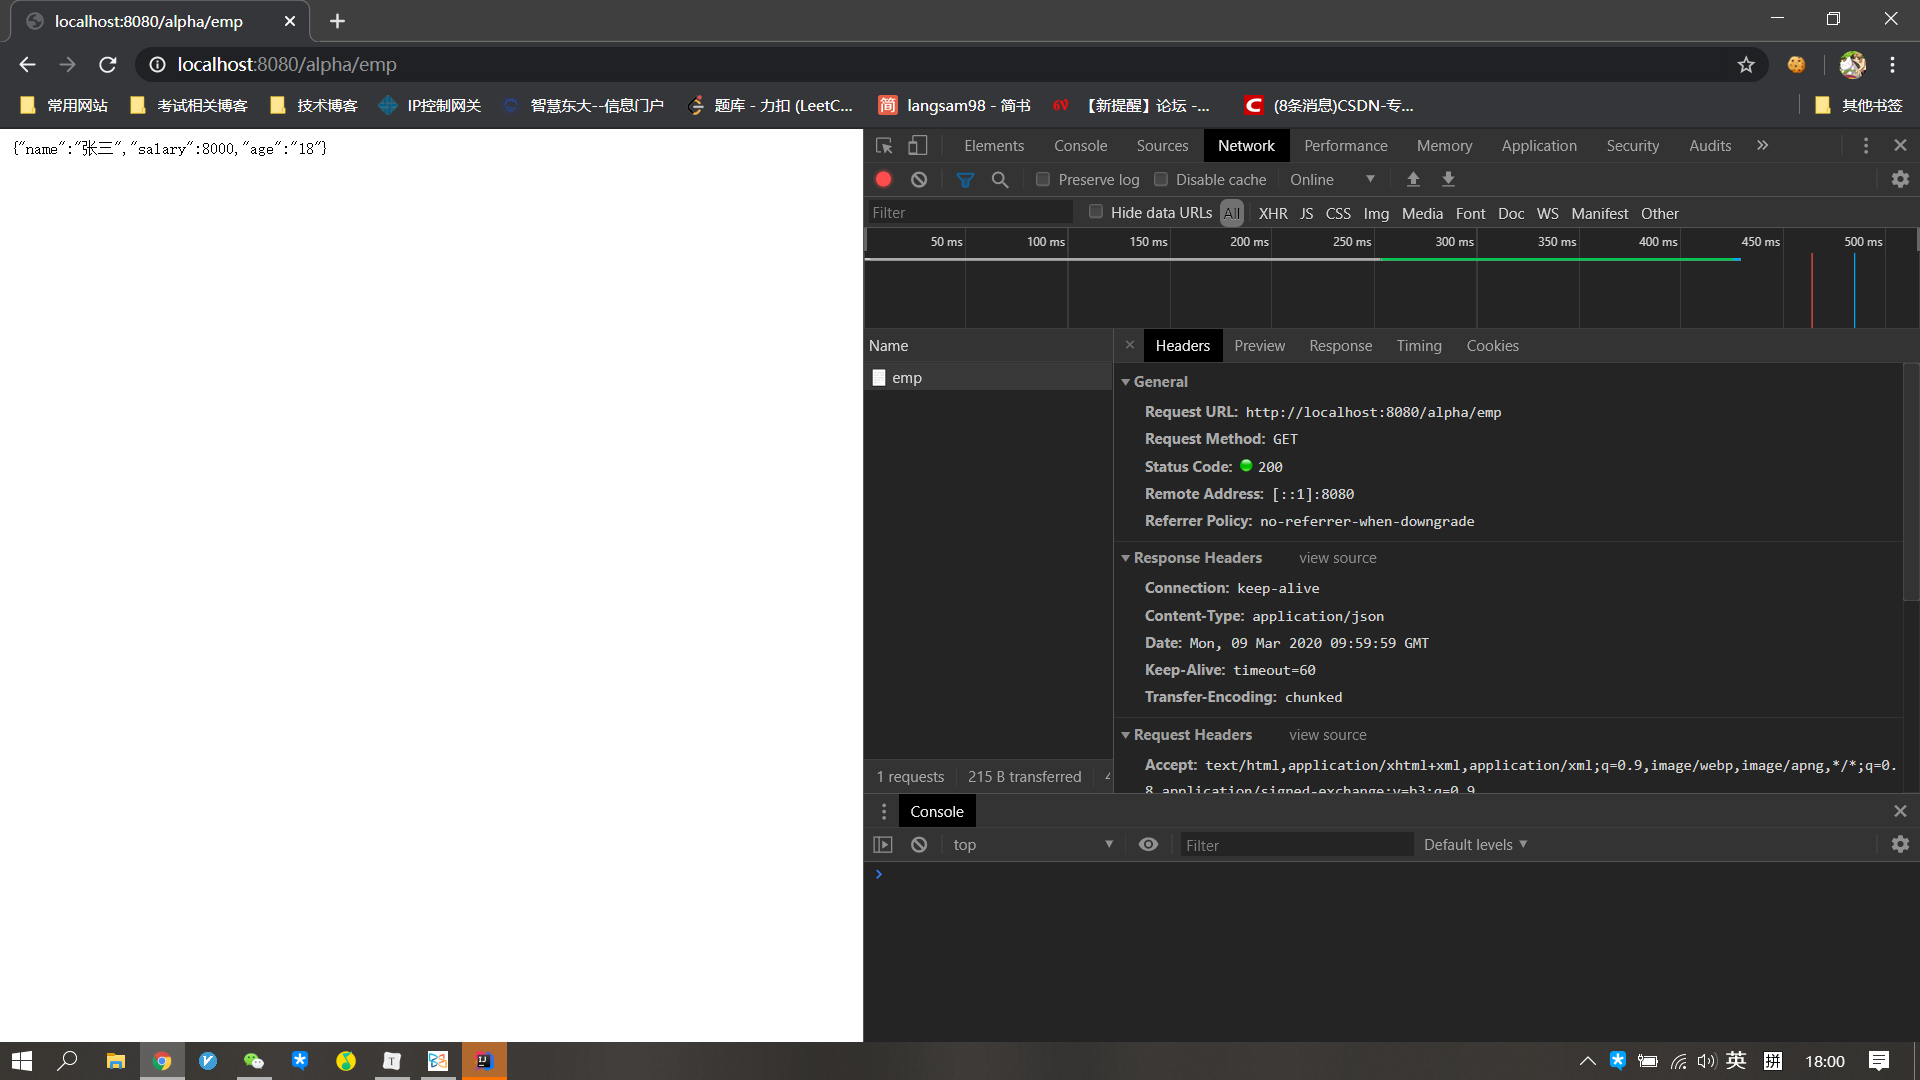
@RequestMapping(path = "/emp",method = RequestMethod.GET)
@ResponseBody
public Map<String,Object> getEmp(){
Map<String,Object> emp=new HashMap<>();
emp.put("name","Zhang San");
emp.put("age","18");
emp.put("salary",8000);
return emp;
}
Returning JSON actually uses the @ ResponseBody annotation mentioned earlier.
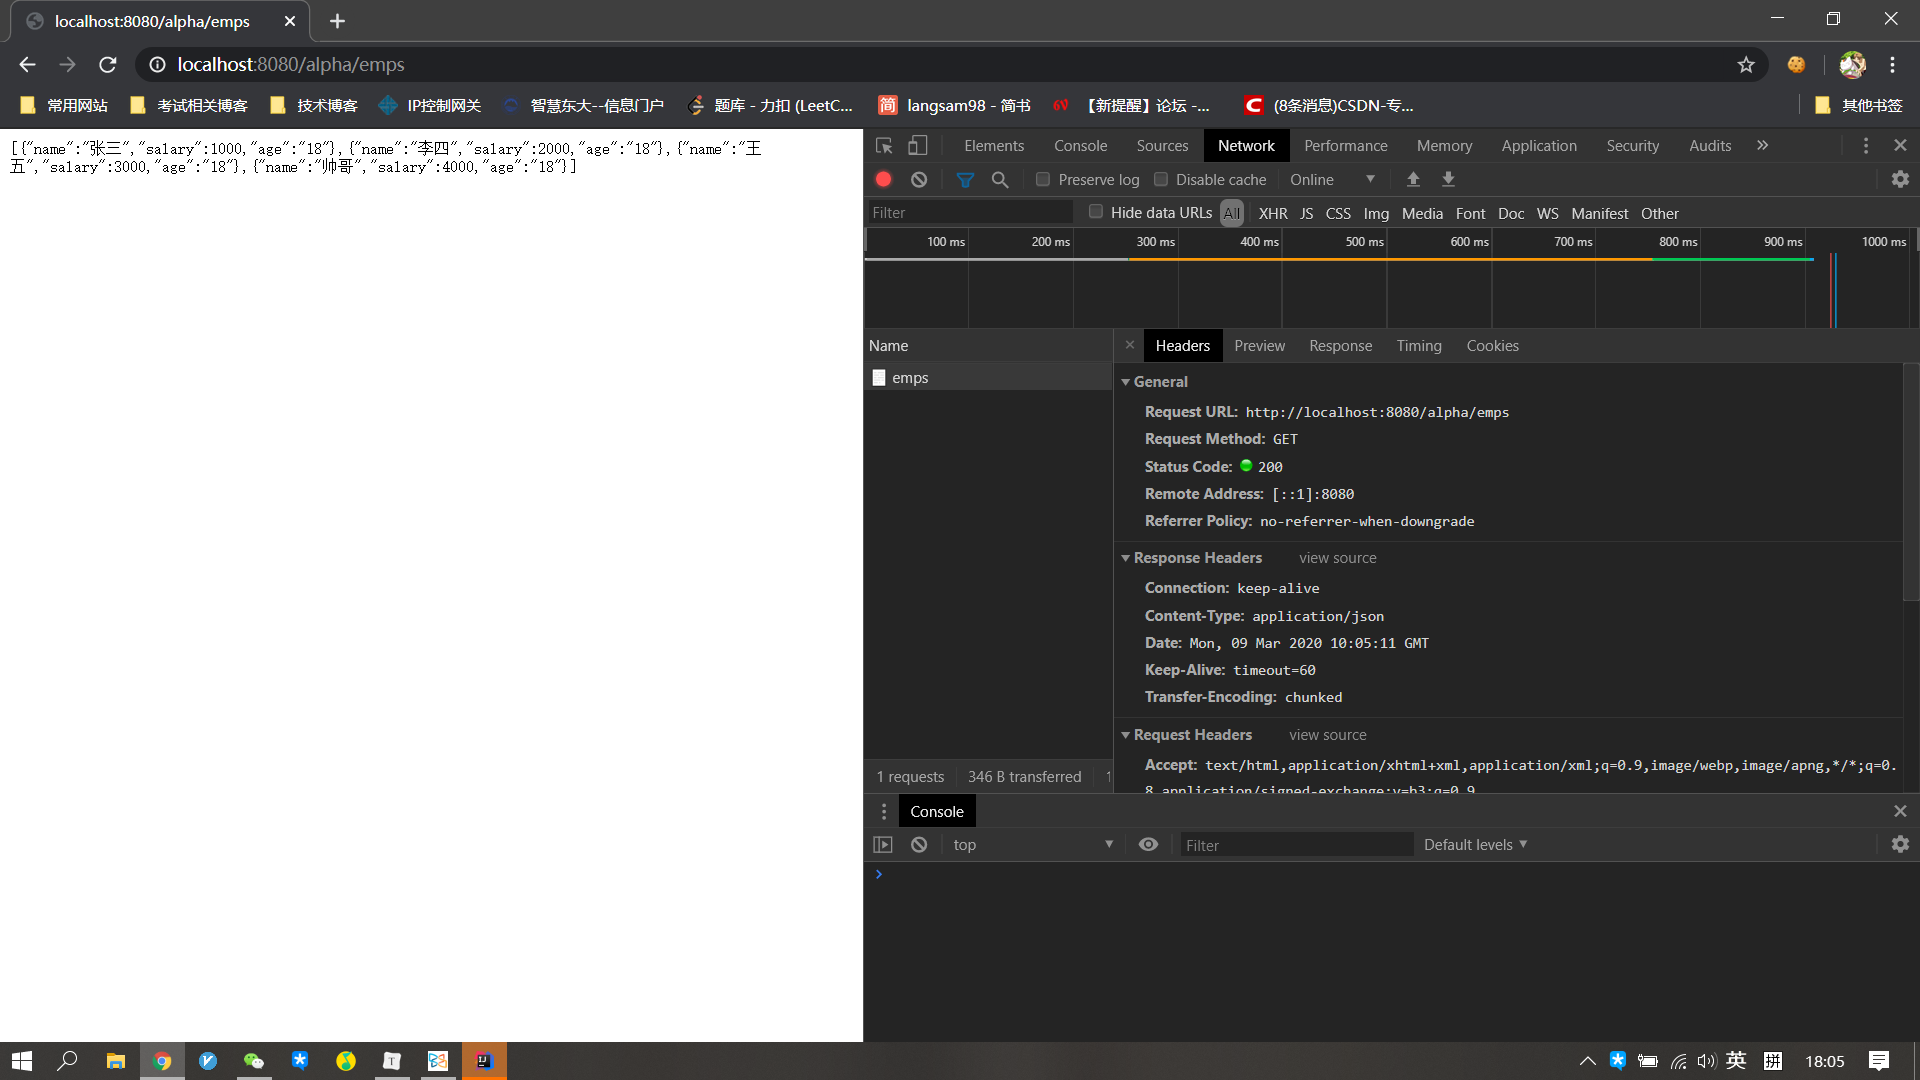
Similarly, you can return a set of data.
@RequestMapping(path = "/emps",method = RequestMethod.GET)
    @ResponseBody
    public List<Map<String,Object>> getEmps(){
        List<Map<String,Object>> list=new ArrayList<>();
        Map<String,Object> emp=new HashMap<>();
        emp.put("name","Zhang San");
        emp.put("age","18");
        emp.put("salary",1000);
        list.add(emp);
        emp=new HashMap<>();
        emp.put("name","Li Si");
        emp.put("age","18");
        emp.put("salary",2000);
        list.add(emp);
        emp=new HashMap<>();
        emp.put("name","Wang Wu");
        emp.put("age","18");
        emp.put("salary",3000);
        list.add(emp);
        emp=new HashMap<>();
        emp.put("name","handsome guy");
        emp.put("age","18");
        emp.put("salary",4000);
        list.add(emp);
        return list;
    }