1, Spring MVC overview
1. MVC design pattern
MVC is the abbreviation of Model, View and Controller, which represent three kinds of responsibilities in Web applications.
Model: business logic used to store data and process user requests.
View: submit data to the controller and display the data in the model.
Controller: judge which model to process the request and data according to the request proposed by the view, and which view to update and display the relevant processed results.
Three tier architecture: Presentation Tier + Application Tier + Data Tier
2,Spring MVC
Spring MVC is a framework design provided by spring to Web applications. Spring MVC is a typical textbook MVC architecture. Unlike Struts, it is a variant or not completely based on MVC system. Spring MVC has clear roles and detailed division of labor, and is seamlessly integrated with the spring framework. As the most mainstream Web development framework in the industry, spring MVC has become the most popular development skill, and is also widely used in the field of desktop development.
In fact, MVC only exists in the presentation layer of the three-tier architecture. M is actually a data Model and an object containing data. In Spring MVC, there is a special class intersection Model for data interaction and value transfer with V; V refers to the view page, including JSP, FreeMarker, Velocity, Thymeleaf, Tile, etc; Of course, C is the Controller (Spring MVC annotation @ Controller class).
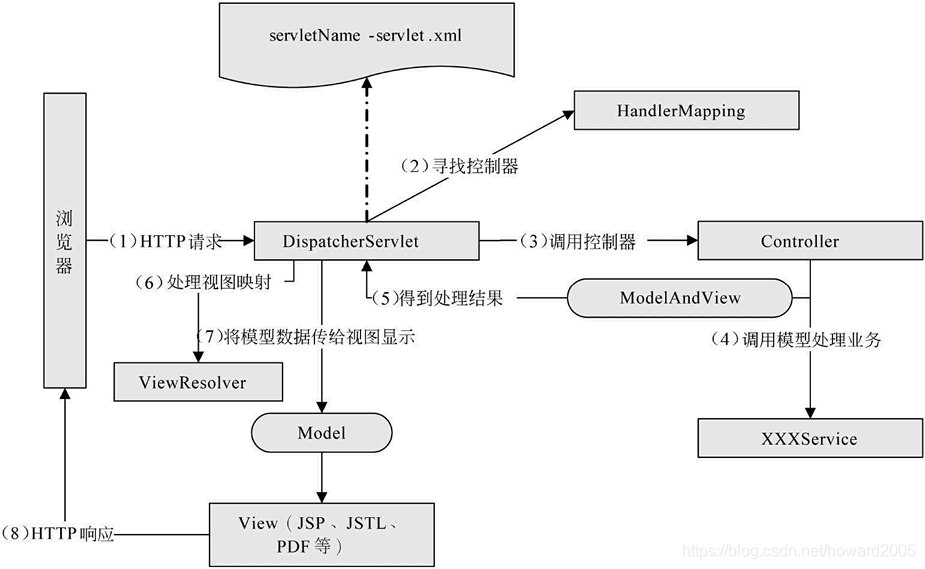
Spring MVC workflow
1. Submit the client request to the dispatcher servlet.
2. The dispatcher servlet Controller looks for one or more HandlerMapping and finds the Controller that handles the request.
3. The dispatcher servlet submits the request to the Controller.
4. After calling the business logic for processing, the controller returns ModelAndView.
5. Dispatcherservlet looks for one or more ViewResolver view parsers and finds the view specified by ModelAndView.
6. The view is responsible for displaying the results to the client.
3. Two ways to use Spring MVC
Using Spring MVC based on XML configuration and annotation
Using Spring MVC based on Java configuration and annotation
2, Using Spring MVC based on XML configuration and annotation
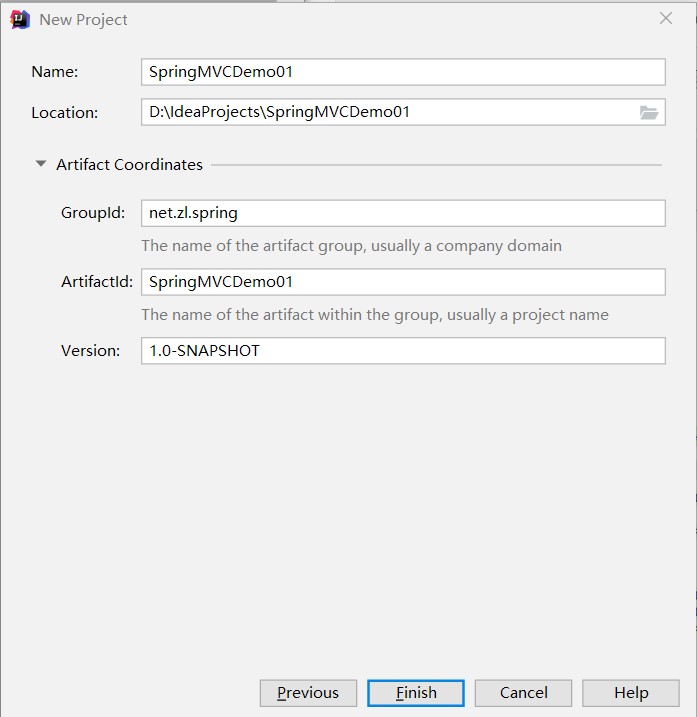
1. New project [SpringMVCDemo01]
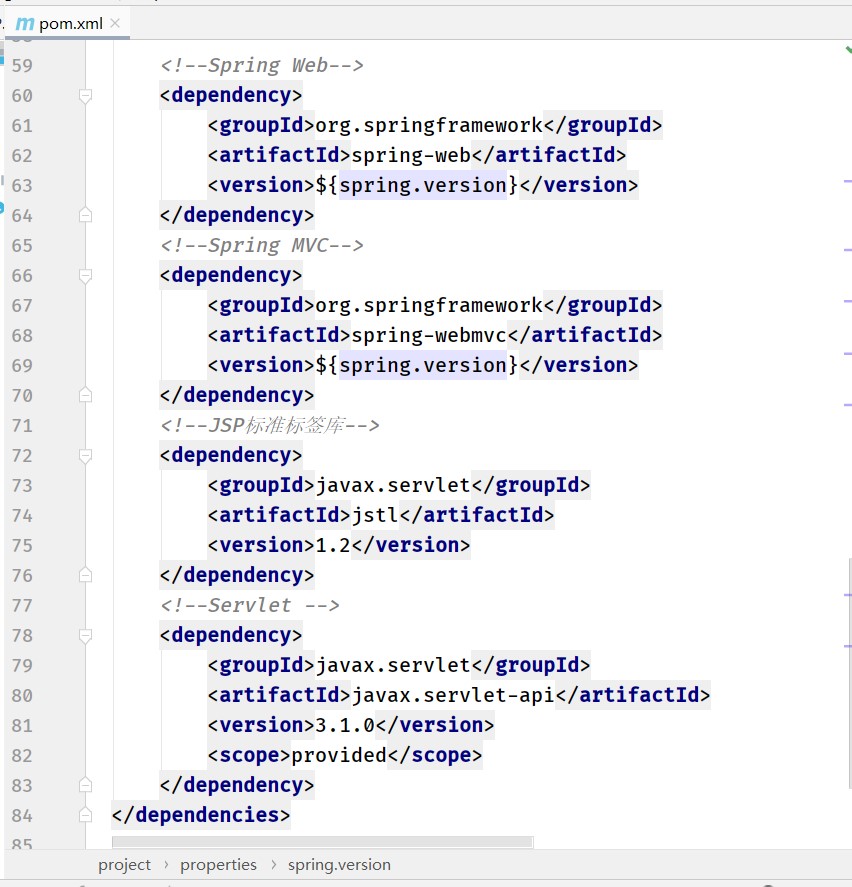
2. In POM Add related dependencies to the XML file
<?xml version="1.0" encoding="UTF-8"?>
<project xmlns="http://maven.apache.org/POM/4.0.0"
         xmlns:xsi="http://www.w3.org/2001/XMLSchema-instance"
         xsi:schemaLocation="http://maven.apache.org/POM/4.0.0 http://maven.apache.org/xsd/maven-4.0.0.xsd">
    <modelVersion>4.0.0</modelVersion>

    <groupId>net.zl.spring</groupId>
    <artifactId>SpringMVCDemo01</artifactId>
    <version>1.0-SNAPSHOT</version>


    <properties>
        <!-- spring.version -->
        <spring.version>5.3.4</spring.version>
    </properties>

    <dependencies>
        <!--Spring core-->
        <dependency>
            <groupId>org.springframework</groupId>
            <artifactId>spring-core</artifactId>
            <version>${spring.version}</version>
        </dependency>
        <!--Spring Bean-->
        <dependency>
            <groupId>org.springframework</groupId>
            <artifactId>spring-beans</artifactId>
            <version>${spring.version}</version>
        </dependency>
        <!--Spring container-->
        <dependency>
            <groupId>org.springframework</groupId>
            <artifactId>spring-context</artifactId>
            <version>${spring.version}</version>
        </dependency>
        <!--Spring test-->
        <dependency>
            <groupId>org.springframework</groupId>
            <artifactId>spring-test</artifactId>
            <version>${spring.version}</version>
        </dependency>

        <!--Log framework-->
        <dependency>
            <groupId>log4j</groupId>
            <artifactId>log4j</artifactId>
            <version>1.2.17</version>
        </dependency>

        <!--unit testing -->
        <dependency>
            <groupId>junit</groupId>
            <artifactId>junit</artifactId>
            <version>4.13</version>
            <scope>test</scope>
        </dependency>

        <!--Spring Web-->
        <dependency>
            <groupId>org.springframework</groupId>
            <artifactId>spring-web</artifactId>
            <version>${spring.version}</version>
        </dependency>
        <!--Spring MVC-->
        <dependency>
            <groupId>org.springframework</groupId>
            <artifactId>spring-webmvc</artifactId>
            <version>${spring.version}</version>
        </dependency>
        <!--JSP Standard label Library-->
        <dependency>
            <groupId>javax.servlet</groupId>
            <artifactId>jstl</artifactId>
            <version>1.2</version>
        </dependency>
        <!--Servlet -->
        <dependency>
            <groupId>javax.servlet</groupId>
            <artifactId>javax.servlet-api</artifactId>
            <version>3.1.0</version>
            <scope>provided</scope>
        </dependency>
    </dependencies>

</project>
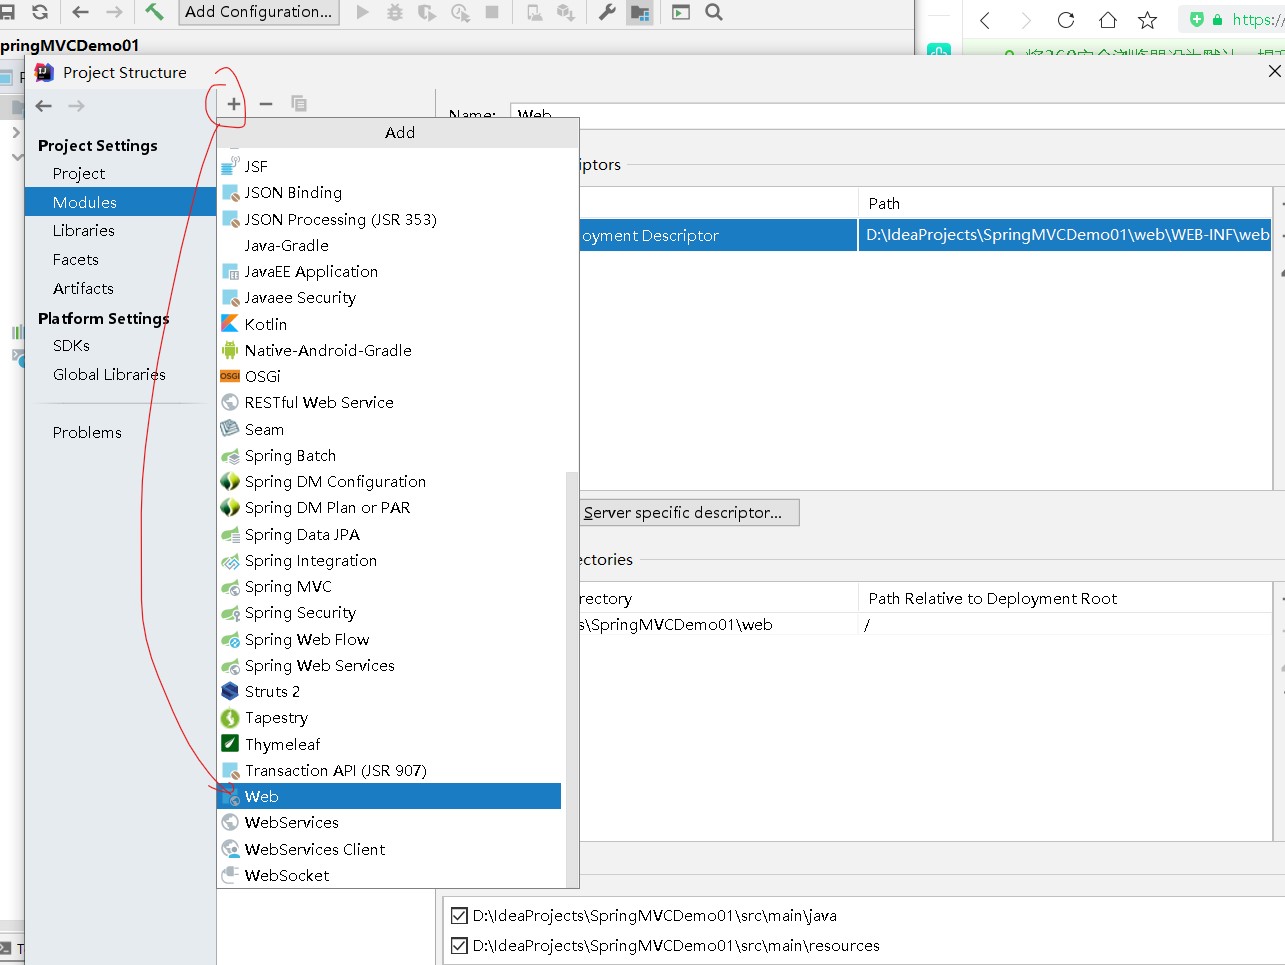
3. Add Web functionality to the project
Open the project structure window and select [Modules] in the list
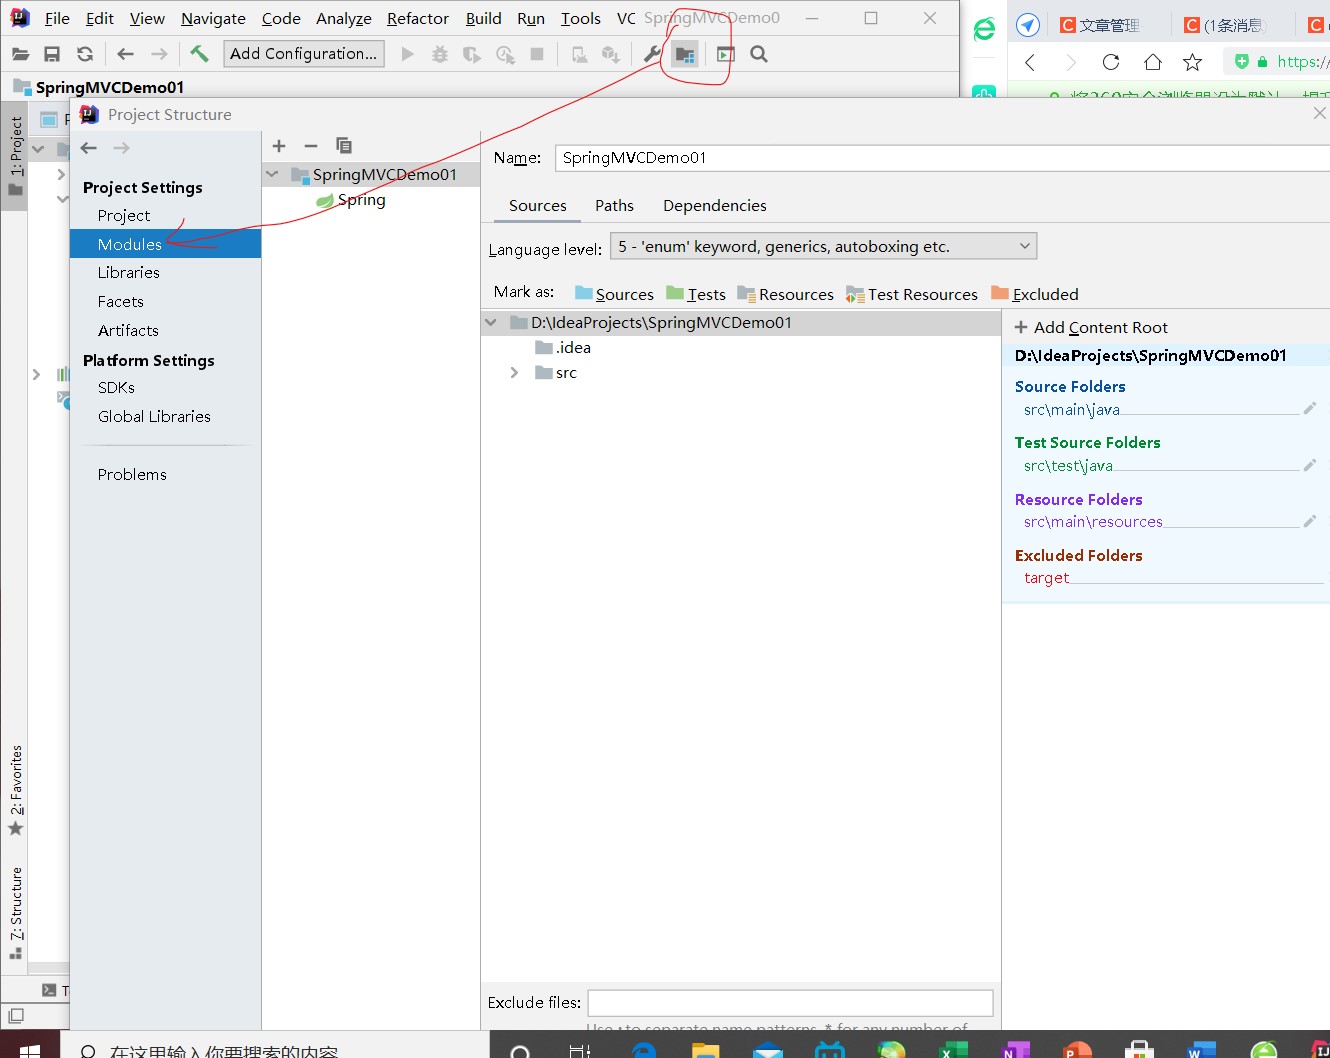
Click the plus sign and select Add Web
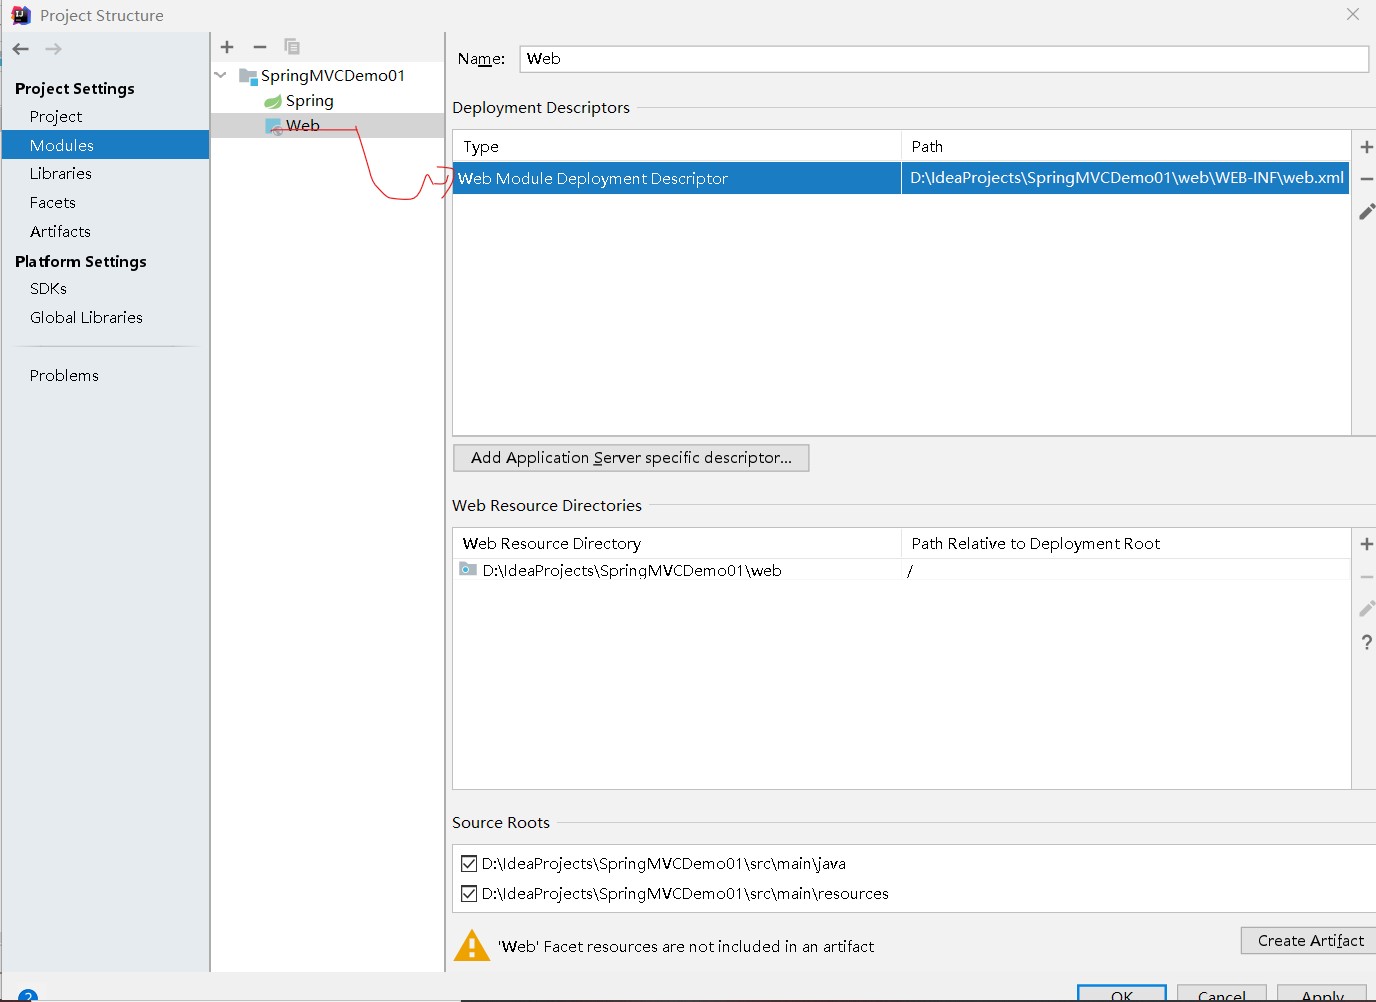
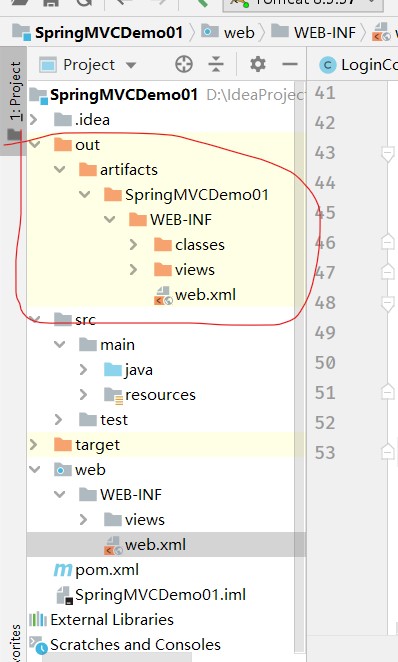
Click Create Artifacts
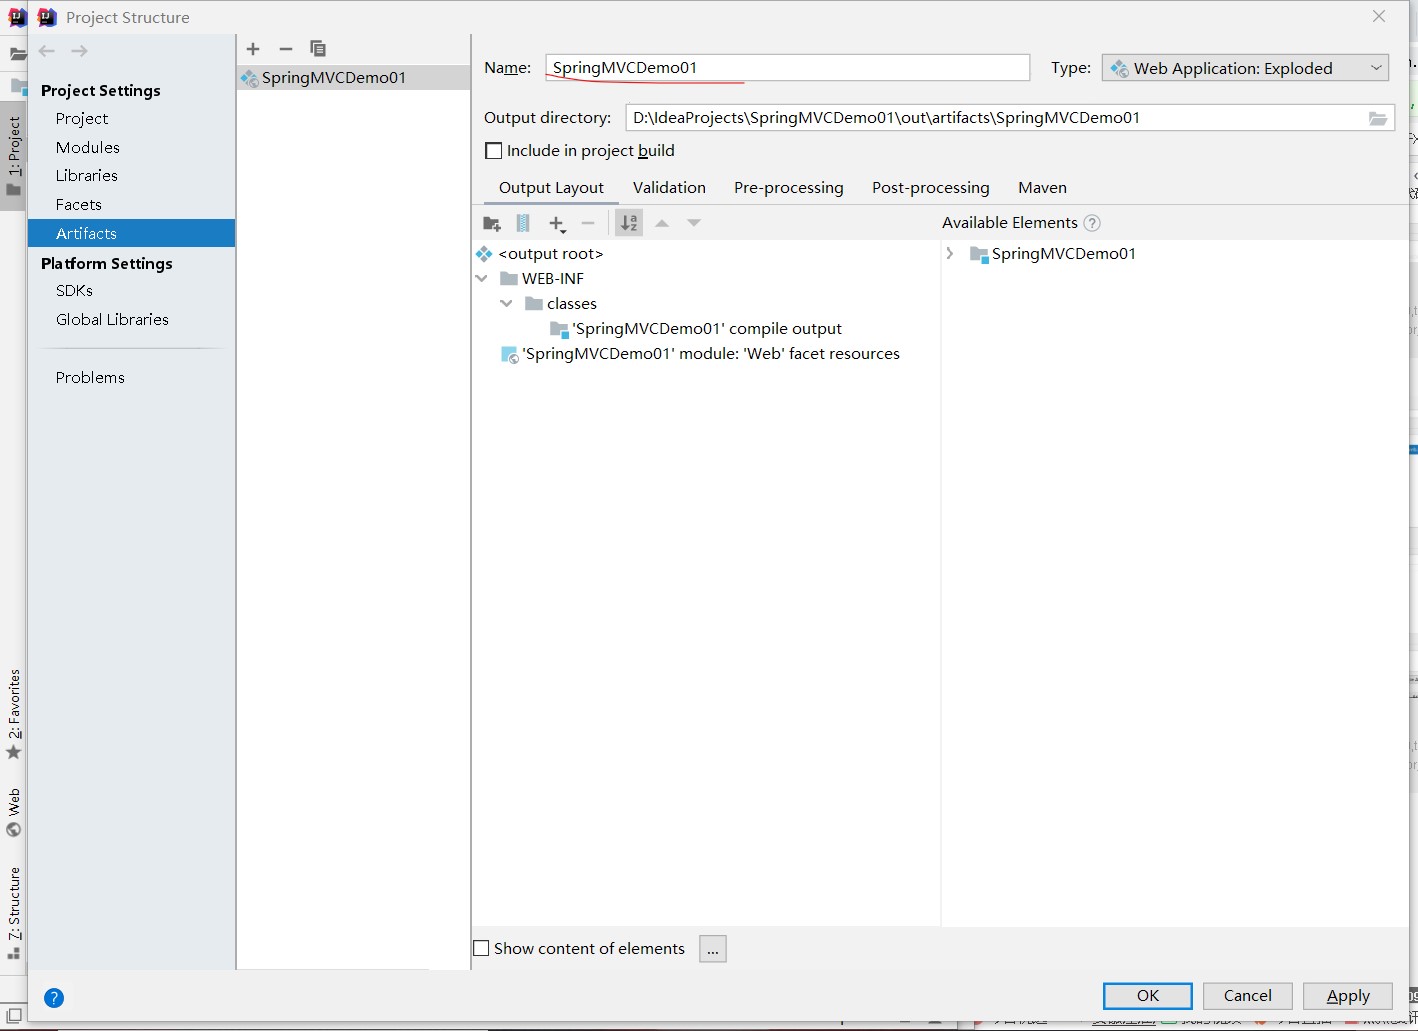
Click OK to see that there is one more web directory for the project
4. Create three pages
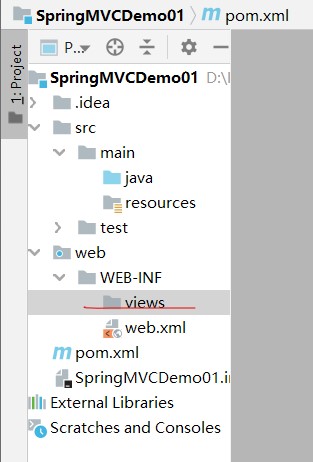
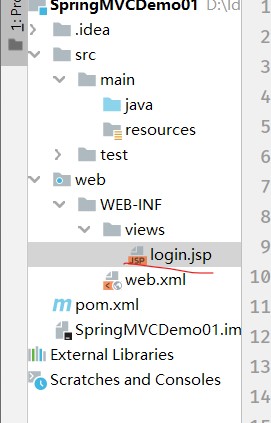
Create views subdirectory in WEB-INF
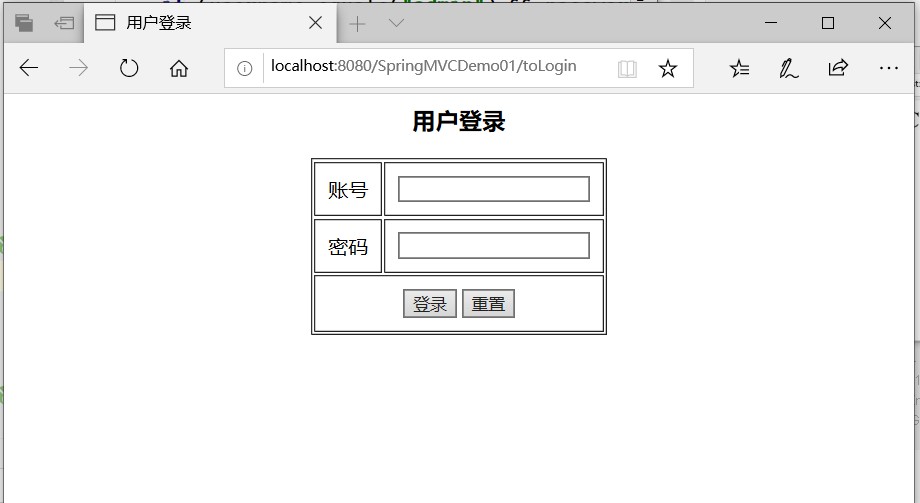
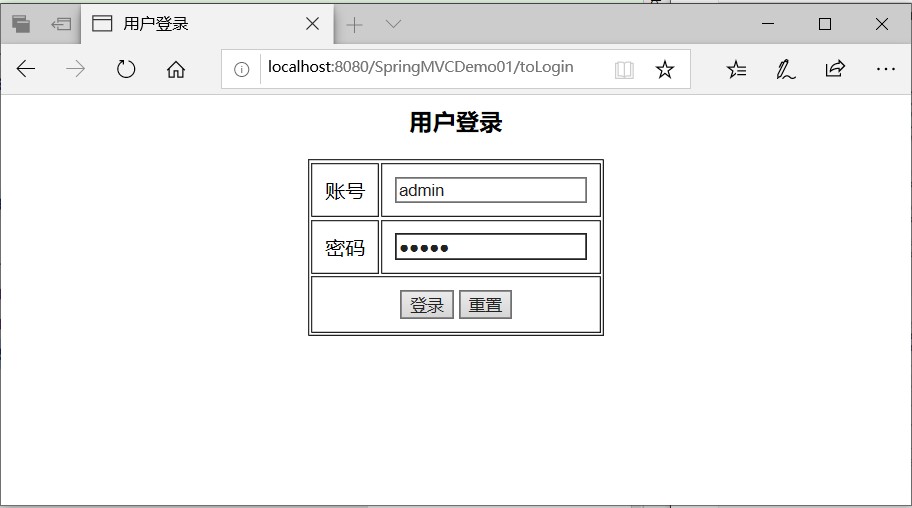
(1) Login page - login jsp
<%--
  Created by IntelliJ IDEA.
  User: 23923
  Date: 2021/4/7
  Time: 15:34
  To change this template use File | Settings | File Templates.
--%>
<%@ page contentType="text/html;charset=UTF-8" language="java" %>
<html>
<head>
    <title>User login</title>
    <meta http-equiv="Content-Type" content="text/html; charset=utf-8" >
</head>
<body>
<h3 style="text-align: center">User login</h3>
<form id="frmLogin" action="login" method="post">
    <table class="tb" border="1" cellpadding="10" style="margin: 0px auto">
        <tr>
            <td align="center">account number</td>
            <td><input id="username" type="text" name="username"/></td>
        </tr>
        <tr>
            <td align="center">password</td>
            <td><input id="password" type="password" name="password"/></td>
        </tr>
        <tr align="center">
            <td colspan="2">
                <input type="submit" value="Sign in"/>
                <input type="reset" value="Reset"/>
            </td>
        </tr>
    </table>
</form>
</body>
</html>
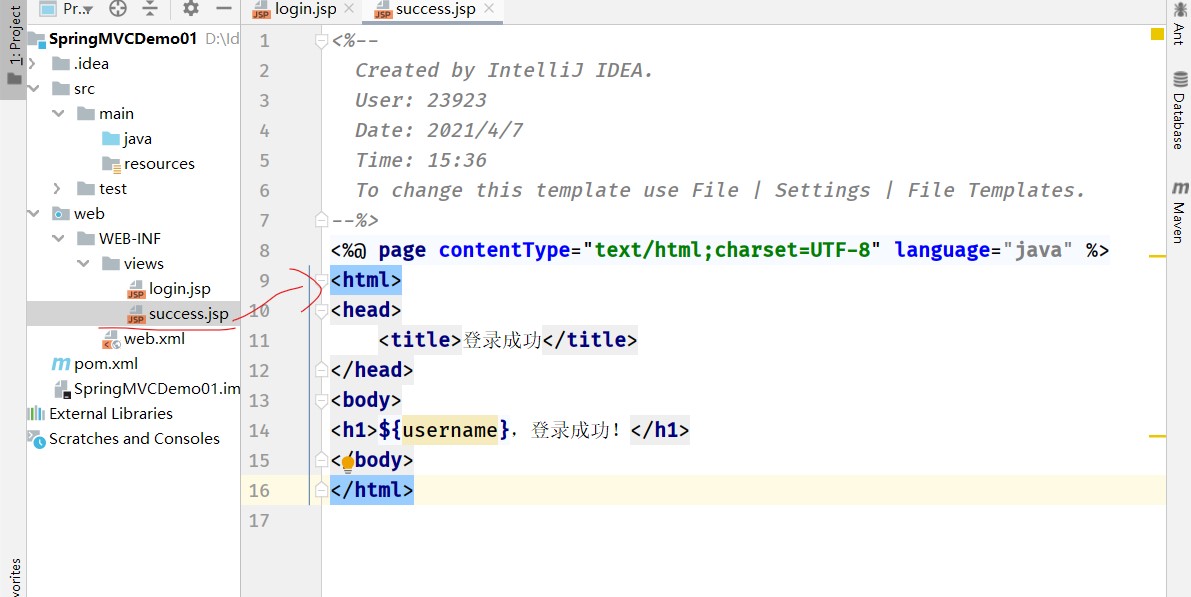
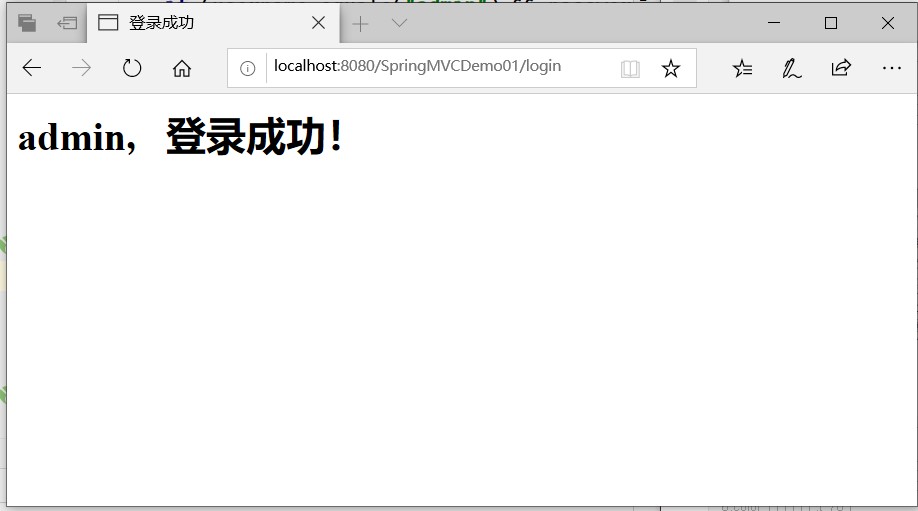
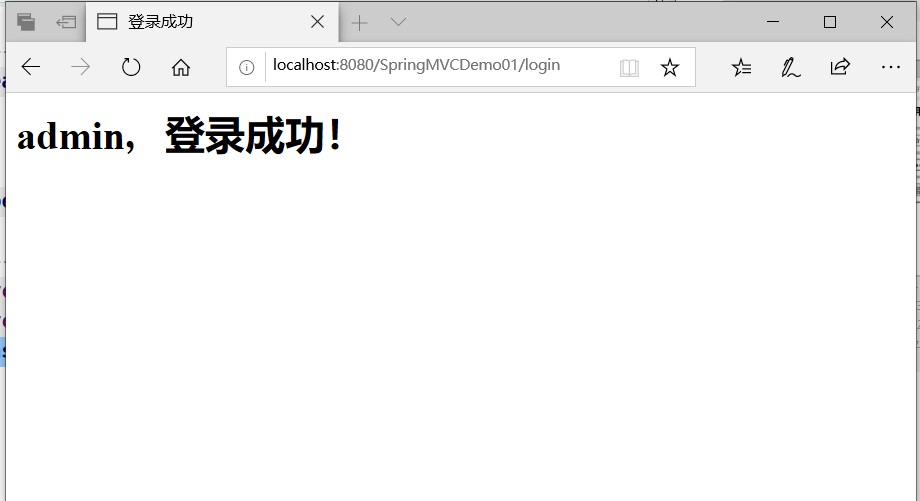
(2) Login success page - success jsp
(3) Login failure page - failure jsp
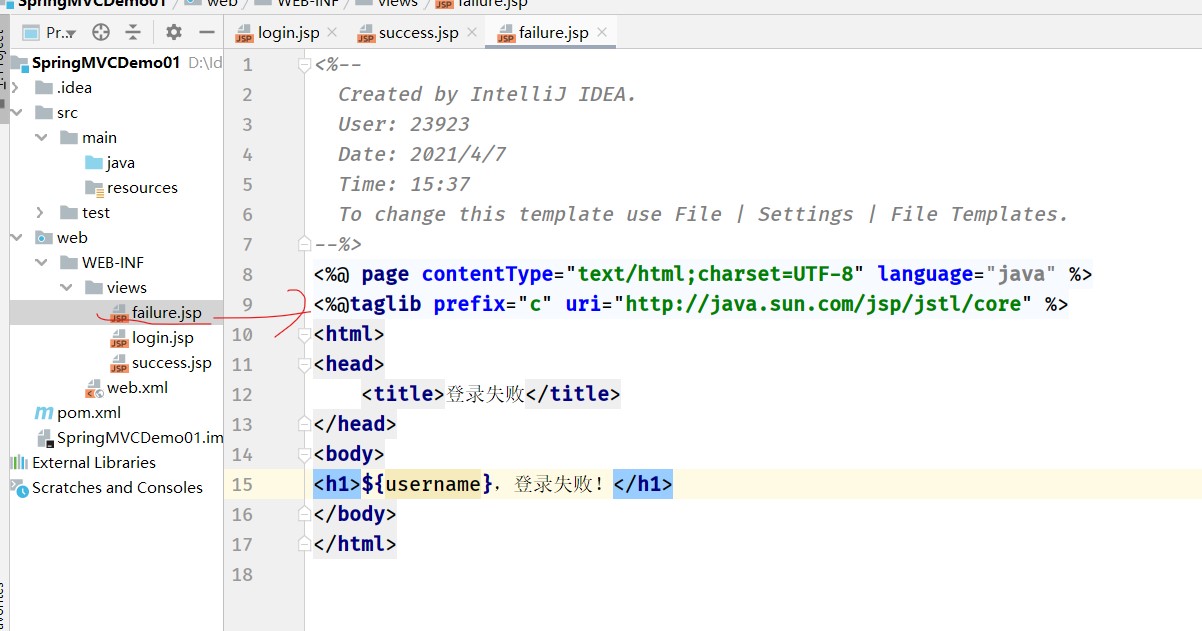
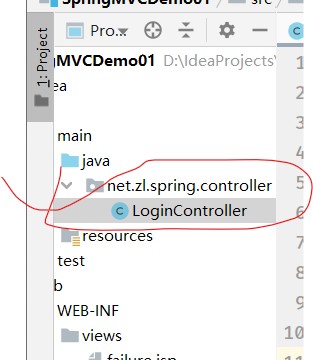
5. Create login controller - LoginController
Create net zl. spring. The controller sub package, and then create the LoginController class in the package
package net.zl.spring.controller;

import org.springframework.stereotype.Controller;
import org.springframework.web.bind.annotation.RequestMapping;
import org.springframework.web.bind.annotation.RequestParam;

import javax.servlet.http.HttpSession;

/**
 * Function: login controller
 * Author: Zhou Lu
 * Date: April 7, 2021
 */
@Controller
public class LoginController {
    @RequestMapping("/login")
    public String login(@RequestParam("username") String username,
                        @RequestParam("password") String password,
                        HttpSession session) {
        session.setAttribute("username", username);
        if (username.equals("admin") && password.equals("12345")) {
            return "success"; // Logical view name
        } else {
            return "failure"; // Logical view name
        }
    }
 }
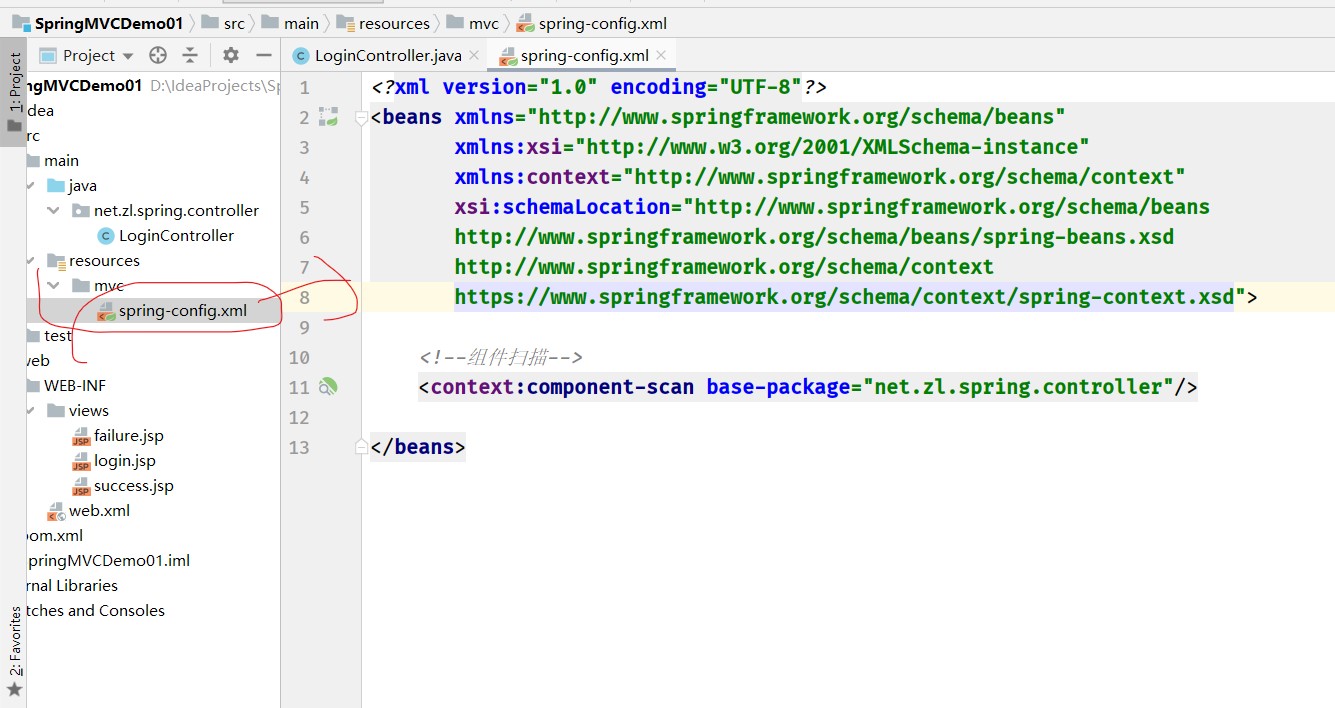
6. Create Spring configuration file - Spring config xml
Create the mvc subdirectory in resources, and then create spring config. Config in the subdirectory xml
<?xml version="1.0" encoding="UTF-8"?>
<beans xmlns="http://www.springframework.org/schema/beans"
       xmlns:xsi="http://www.w3.org/2001/XMLSchema-instance"
       xmlns:context="http://www.springframework.org/schema/context"
       xsi:schemaLocation="http://www.springframework.org/schema/beans
       http://www.springframework.org/schema/beans/spring-beans.xsd
       http://www.springframework.org/schema/context
       https://www.springframework.org/schema/context/spring-context.xsd">

    <!--Component scan-->
    <context:component-scan base-package="net.zl.spring.controller"/>

</beans>
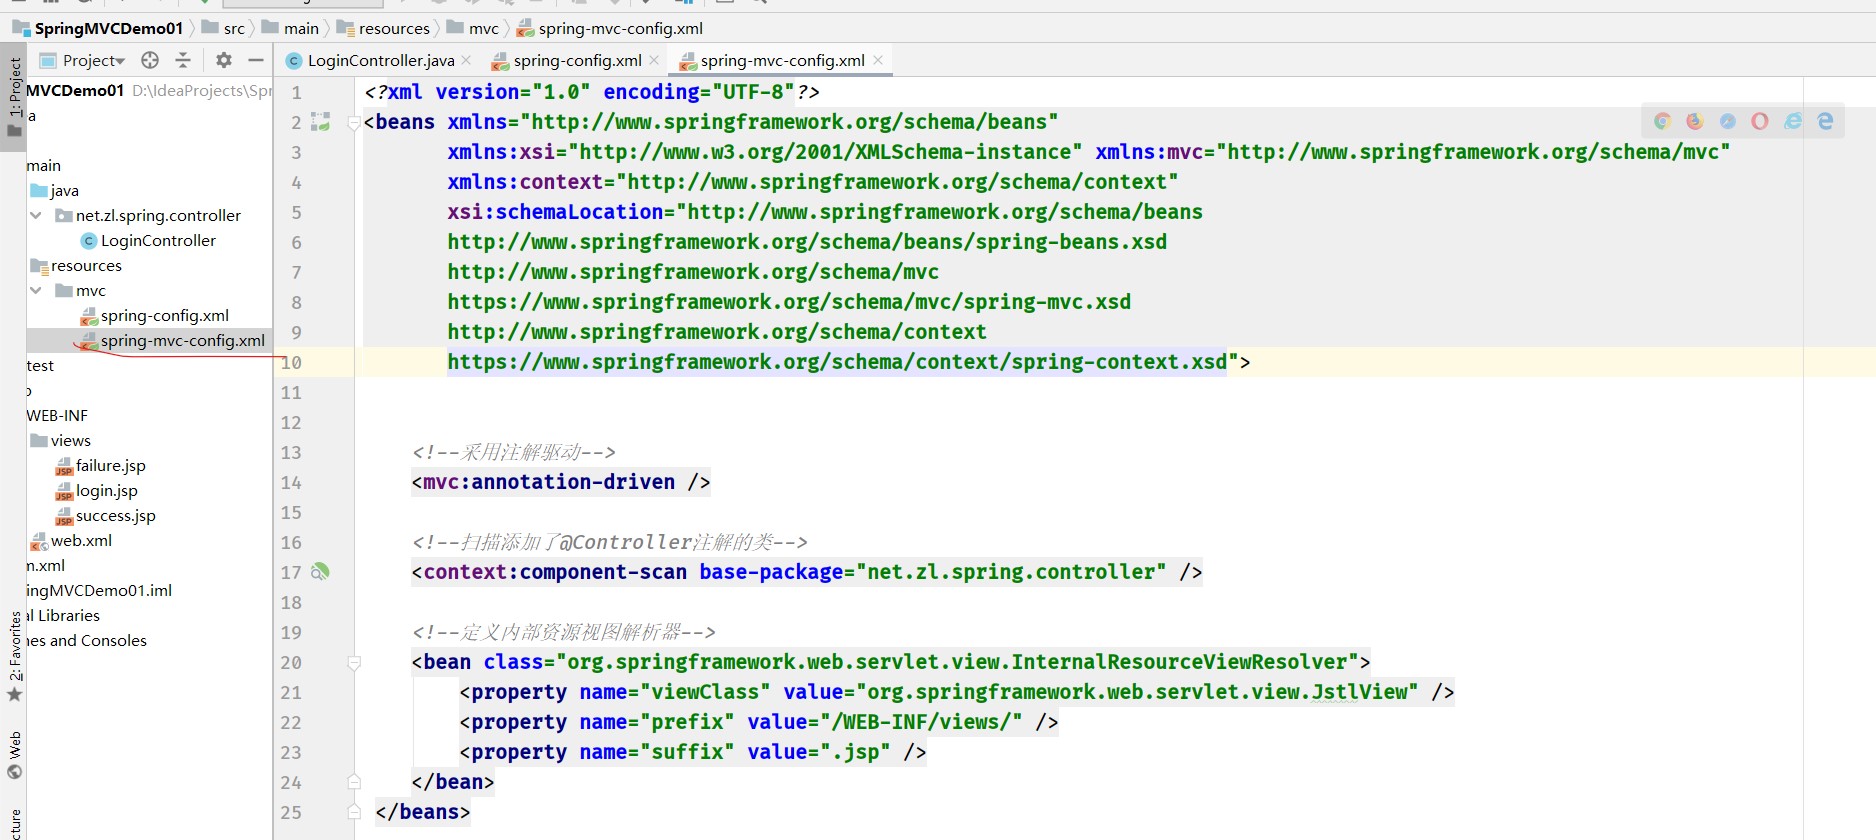
7. Create Spring MVC configuration file - Spring MVC config xml
<?xml version="1.0" encoding="UTF-8"?>
<beans xmlns="http://www.springframework.org/schema/beans"
       xmlns:xsi="http://www.w3.org/2001/XMLSchema-instance" xmlns:mvc="http://www.springframework.org/schema/mvc"
       xmlns:context="http://www.springframework.org/schema/context"
       xsi:schemaLocation="http://www.springframework.org/schema/beans
       http://www.springframework.org/schema/beans/spring-beans.xsd
       http://www.springframework.org/schema/mvc
       https://www.springframework.org/schema/mvc/spring-mvc.xsd
       http://www.springframework.org/schema/context
       https://www.springframework.org/schema/context/spring-context.xsd">


    <!--Annotation driven-->
    <mvc:annotation-driven />

    <!--Scan added@Controller Annotated class-->
    <context:component-scan base-package="net.zl.spring.controller" />

    <!--Define internal resource view parser-->
    <bean class="org.springframework.web.servlet.view.InternalResourceViewResolver">
        <property name="viewClass" value="org.springframework.web.servlet.view.JstlView" />
        <property name="prefix" value="/WEB-INF/views/" />
        <property name="suffix" value=".jsp" />
    </bean>
 </beans>
8. On the web Load Spring configuration file and Spring MVC configuration file in XML
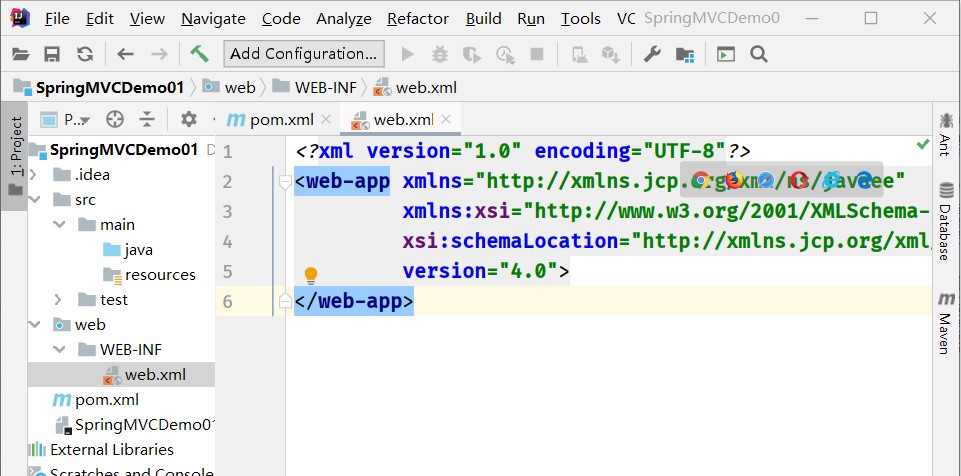
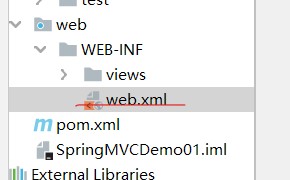
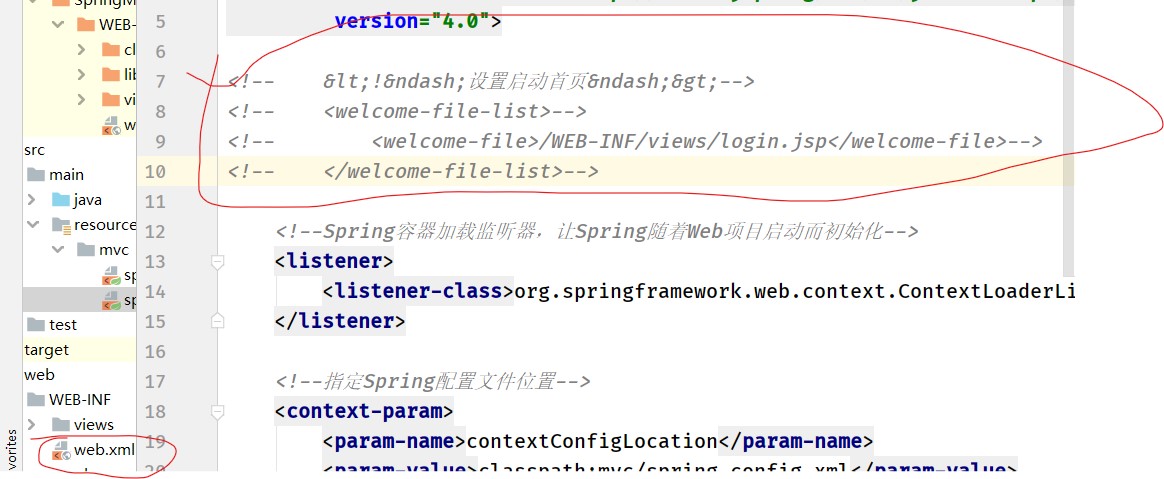
Open the web in the web/WEB-INF directory XML file
<?xml version="1.0" encoding="UTF-8"?>
<web-app xmlns="http://xmlns.jcp.org/xml/ns/javaee"
         xmlns:xsi="http://www.w3.org/2001/XMLSchema-instance"
         xsi:schemaLocation="http://xmlns.jcp.org/xml/ns/javaee http://xmlns.jcp.org/xml/ns/javaee/web-app_4_0.xsd"
         version="4.0">

    <!--Set startup home page-->
    <welcome-file-list>
        <welcome-file>/WEB-INF/views/login.jsp</welcome-file>
    </welcome-file-list>

    <!--Spring The container loads the listener so that Spring along with Web Initialization for project startup-->
    <listener>
        <listener-class>org.springframework.web.context.ContextLoaderListener</listener-class>
    </listener>

    <!--appoint Spring Profile location-->
    <context-param>
        <param-name>contextConfigLocation</param-name>
        <param-value>classpath:mvc/spring-config.xml</param-value>
    </context-param>

    <!--to configure Spring Front controller, loading Spring MVC configuration file-->
    <servlet>
        <servlet-name>DispatcherServlet</servlet-name>
        <servlet-class>org.springframework.web.servlet.DispatcherServlet</servlet-class>
        <init-param>
            <param-name>contextConfigLocation</param-name>
            <param-value>classpath:mvc/spring-mvc-config.xml</param-value>
        </init-param>
        <load-on-startup>1</load-on-startup>
    </servlet>

    <servlet-mapping>
        <servlet-name>DispatcherServlet</servlet-name>
        <url-pattern>/</url-pattern>  <!--"/"Indicates that all requests are blocked-->
    </servlet-mapping>

    <!--Set character encoding filter-->
    <filter>
        <filter-name>Character Encoding</filter-name>
        <filter-class>org.springframework.web.filter.CharacterEncodingFilter</filter-class>
        <init-param>
            <param-name>encoding</param-name>
            <param-value>utf-8</param-value>
        </init-param>
    </filter>
    <filter-mapping>
        <filter-name>Character Encoding</filter-name>
        <url-pattern>/*</url-pattern>
    </filter-mapping>

</web-app>
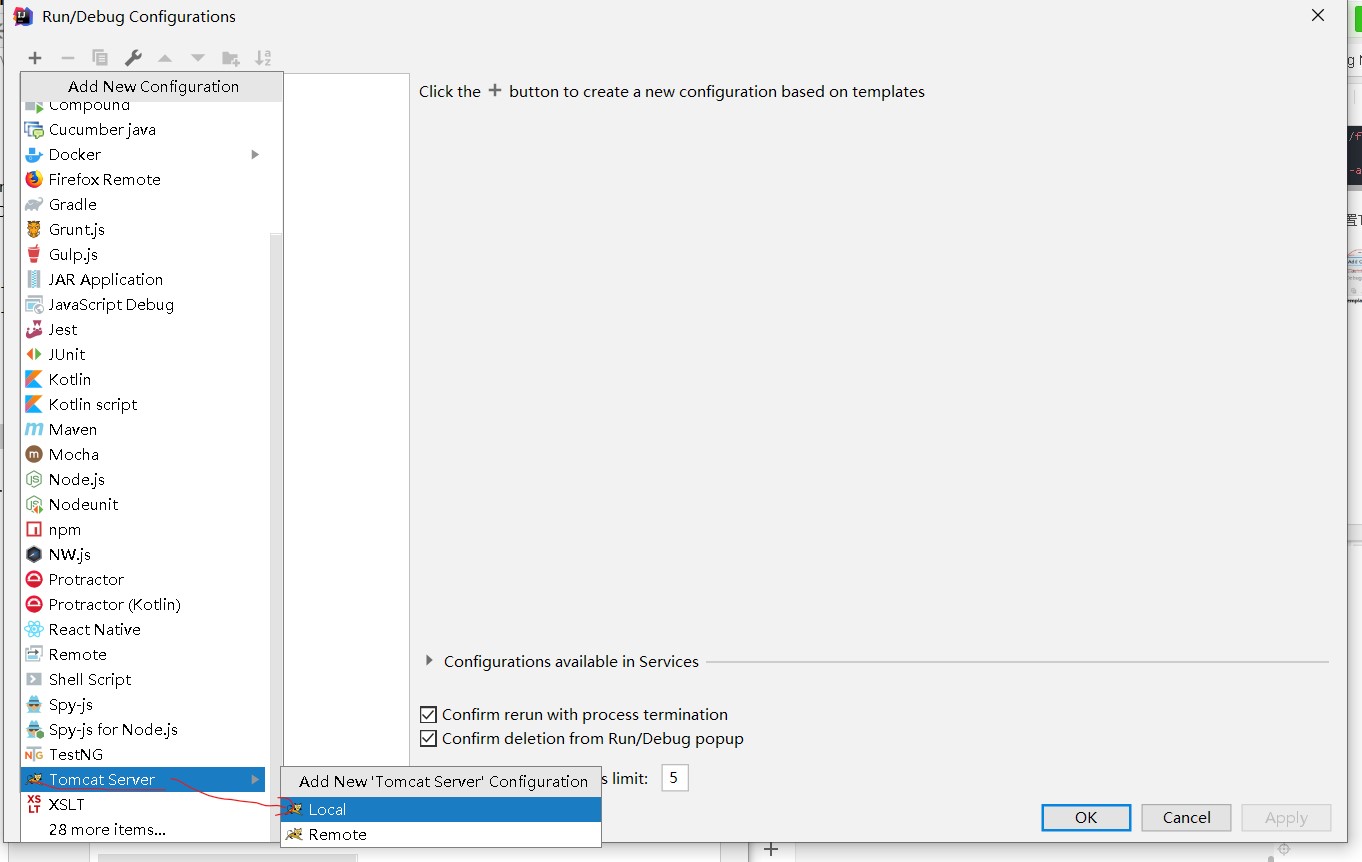
9. Configure Tomcat server
Click Add Configuration on the toolbar to open the Run/Debug Configurations window

Click the plus sign to add the local Tomccat server
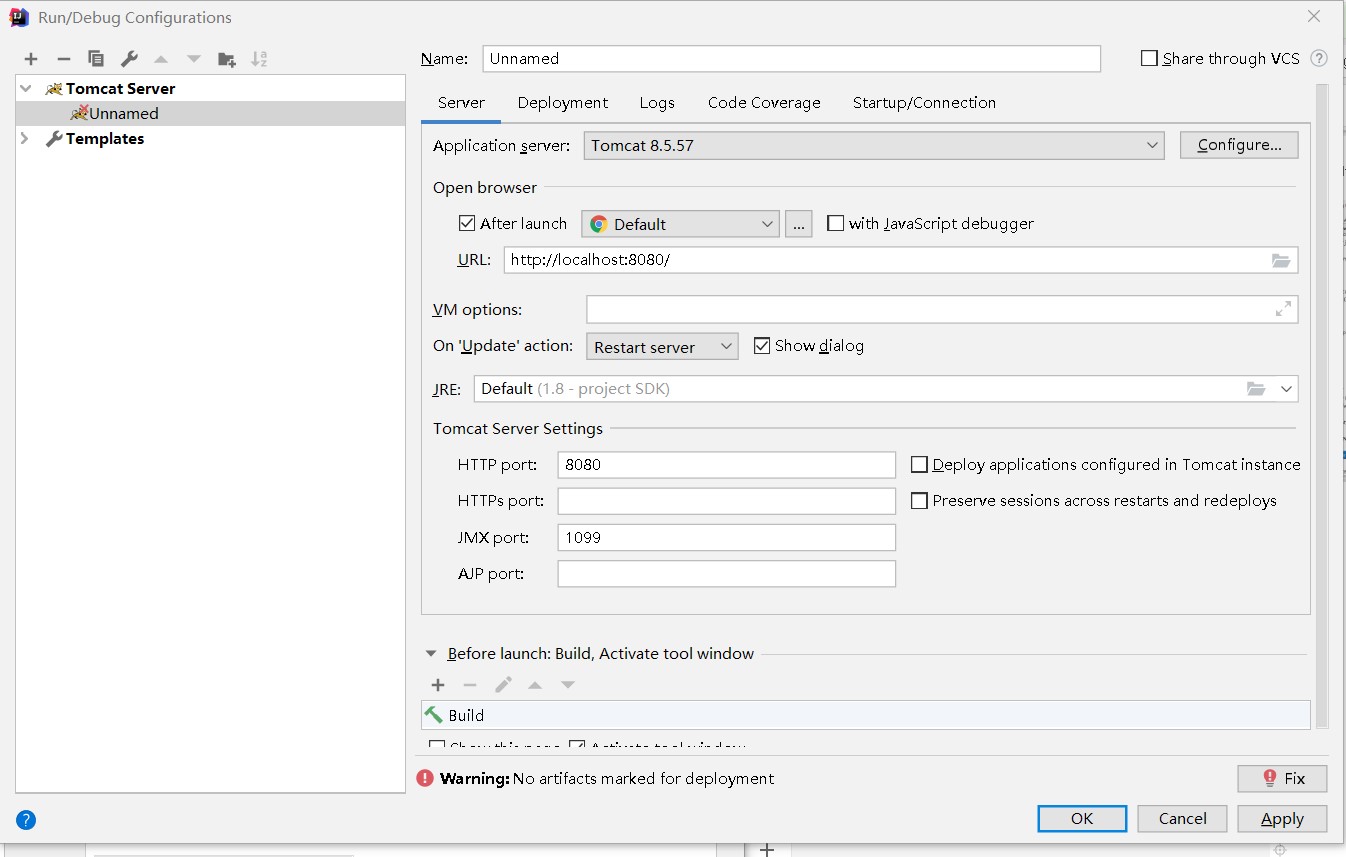
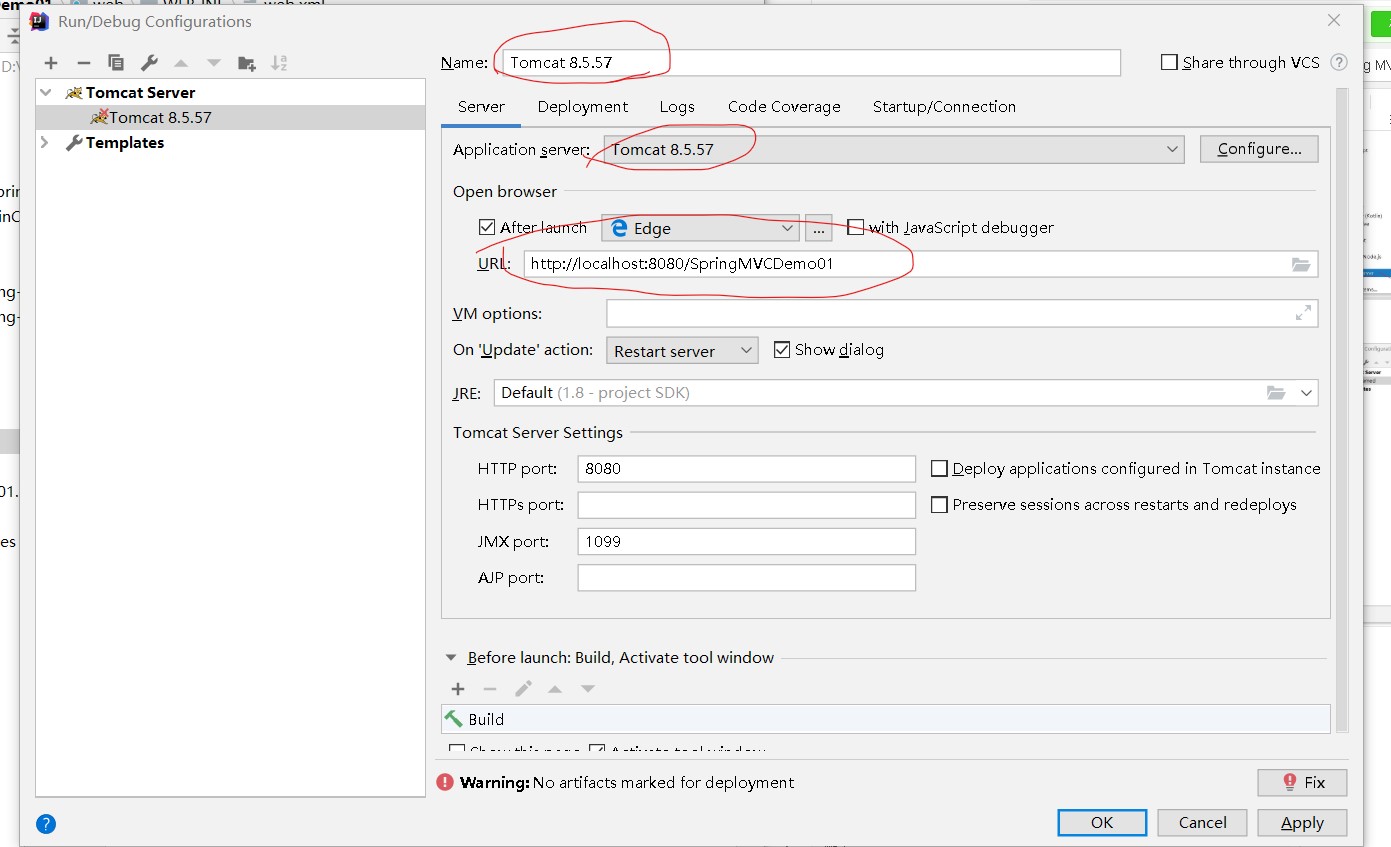
Configure the server (configure the application server)
Click [Fix]
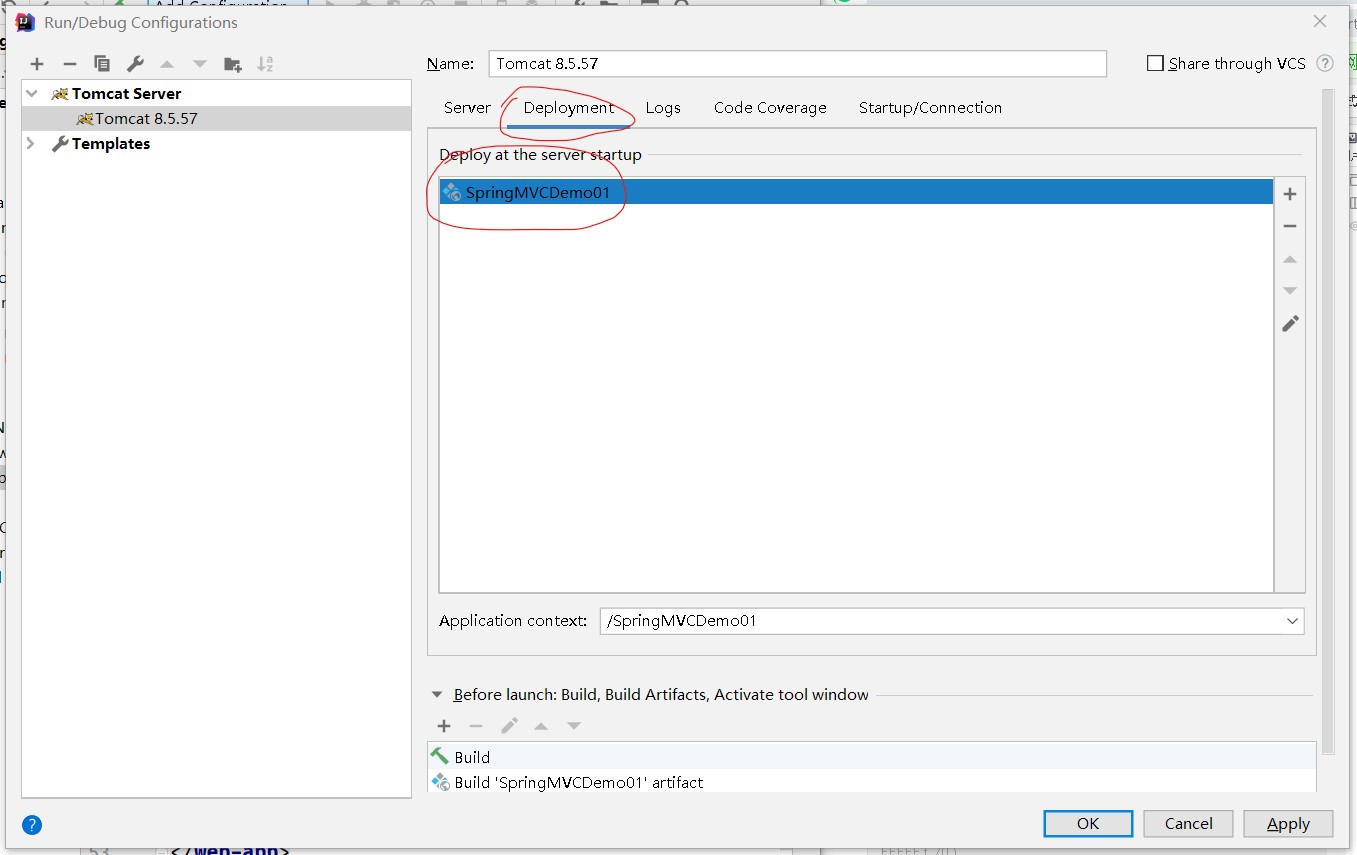
Click OK
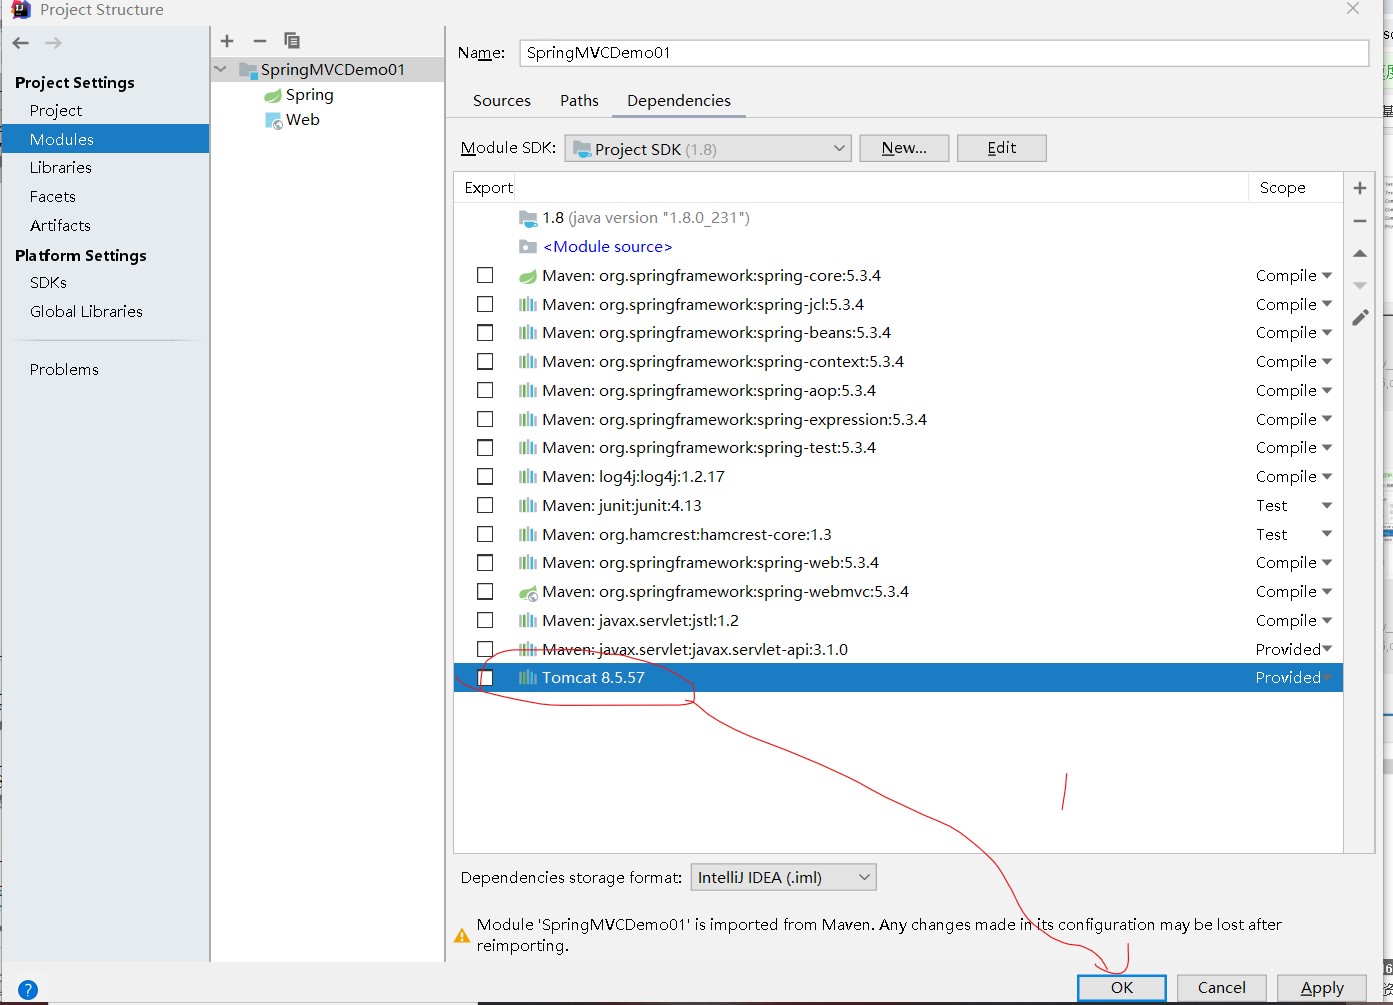
10. Add project dependency on Tomcat
Open the Project Structure window and click the Dependencies tab
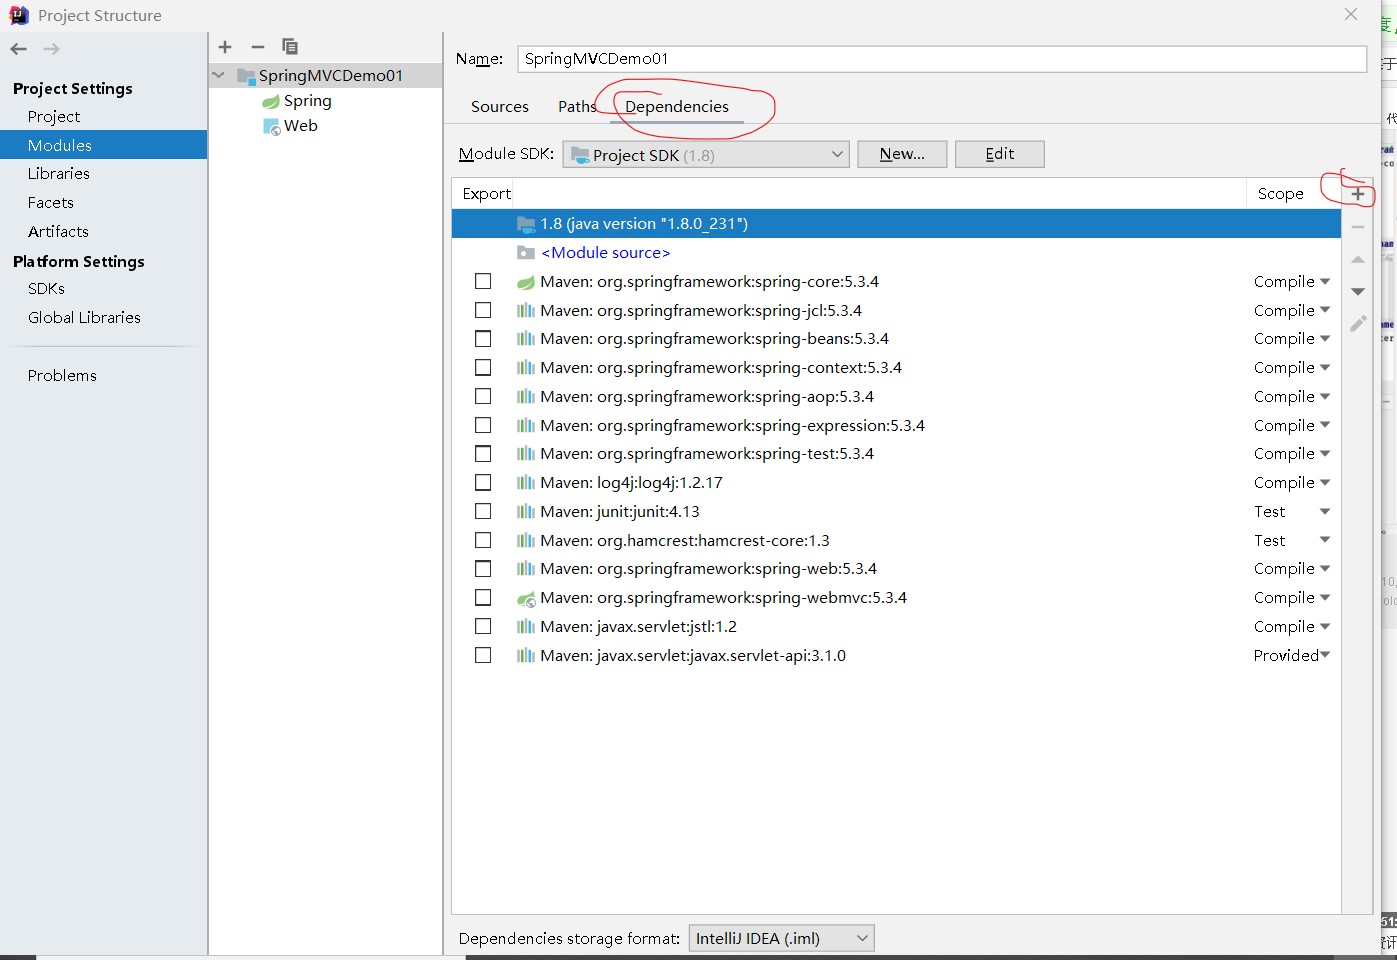
Click [+] and select [Library]
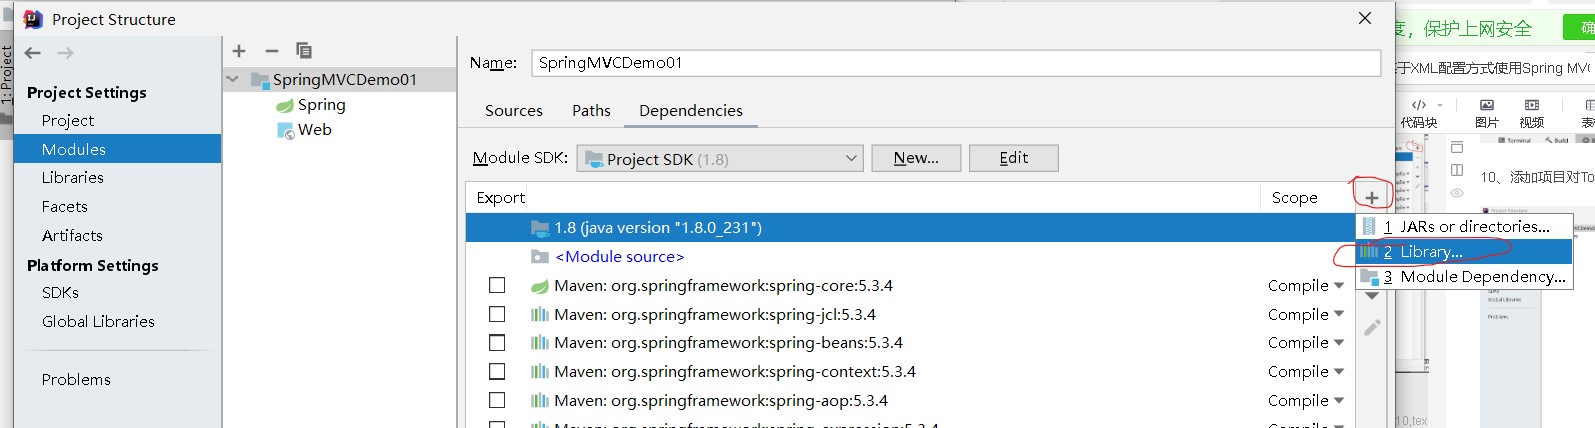
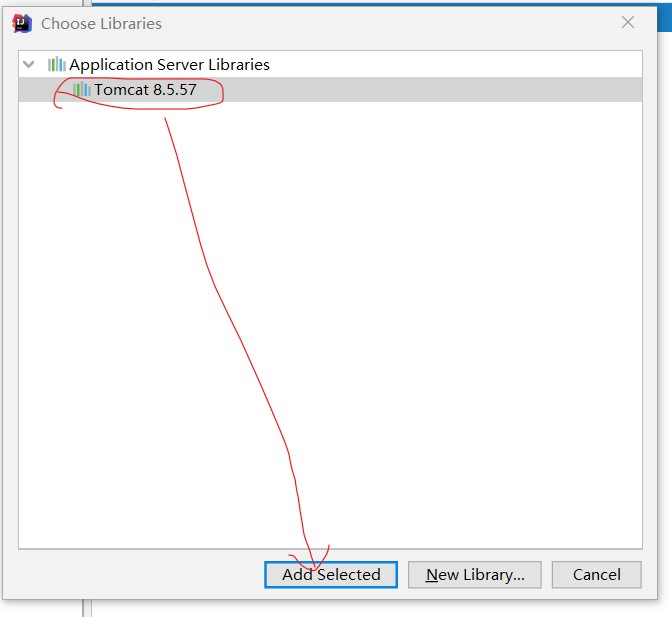
Click Add Selected
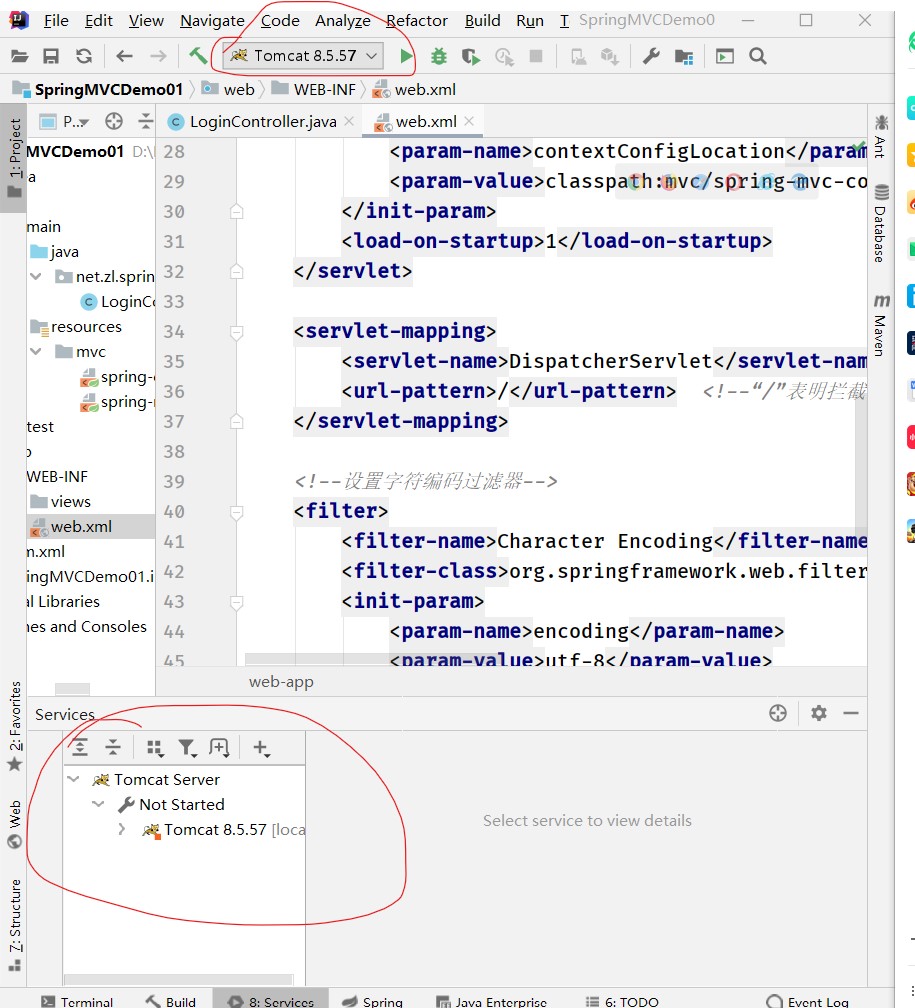
11. Start Tomcat server
Start failed
report errors

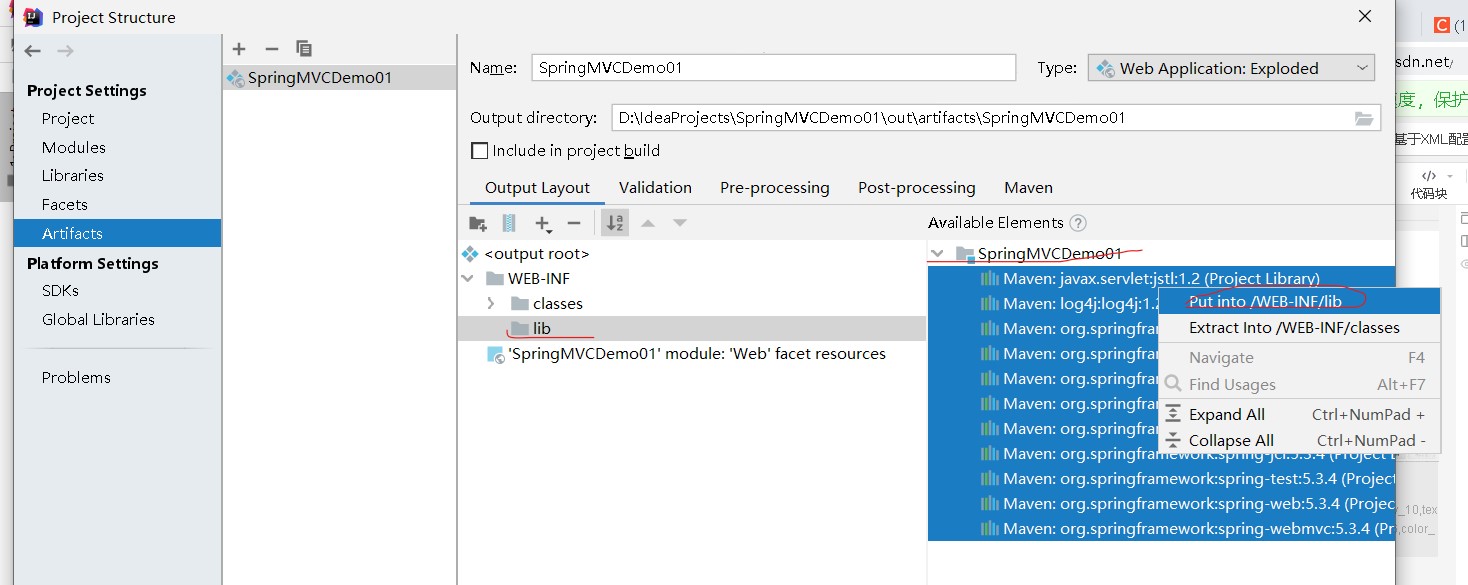
There should be a lib directory in the WEB-INF to store the jar packages required for the project to run, but there is no, so errors will occur
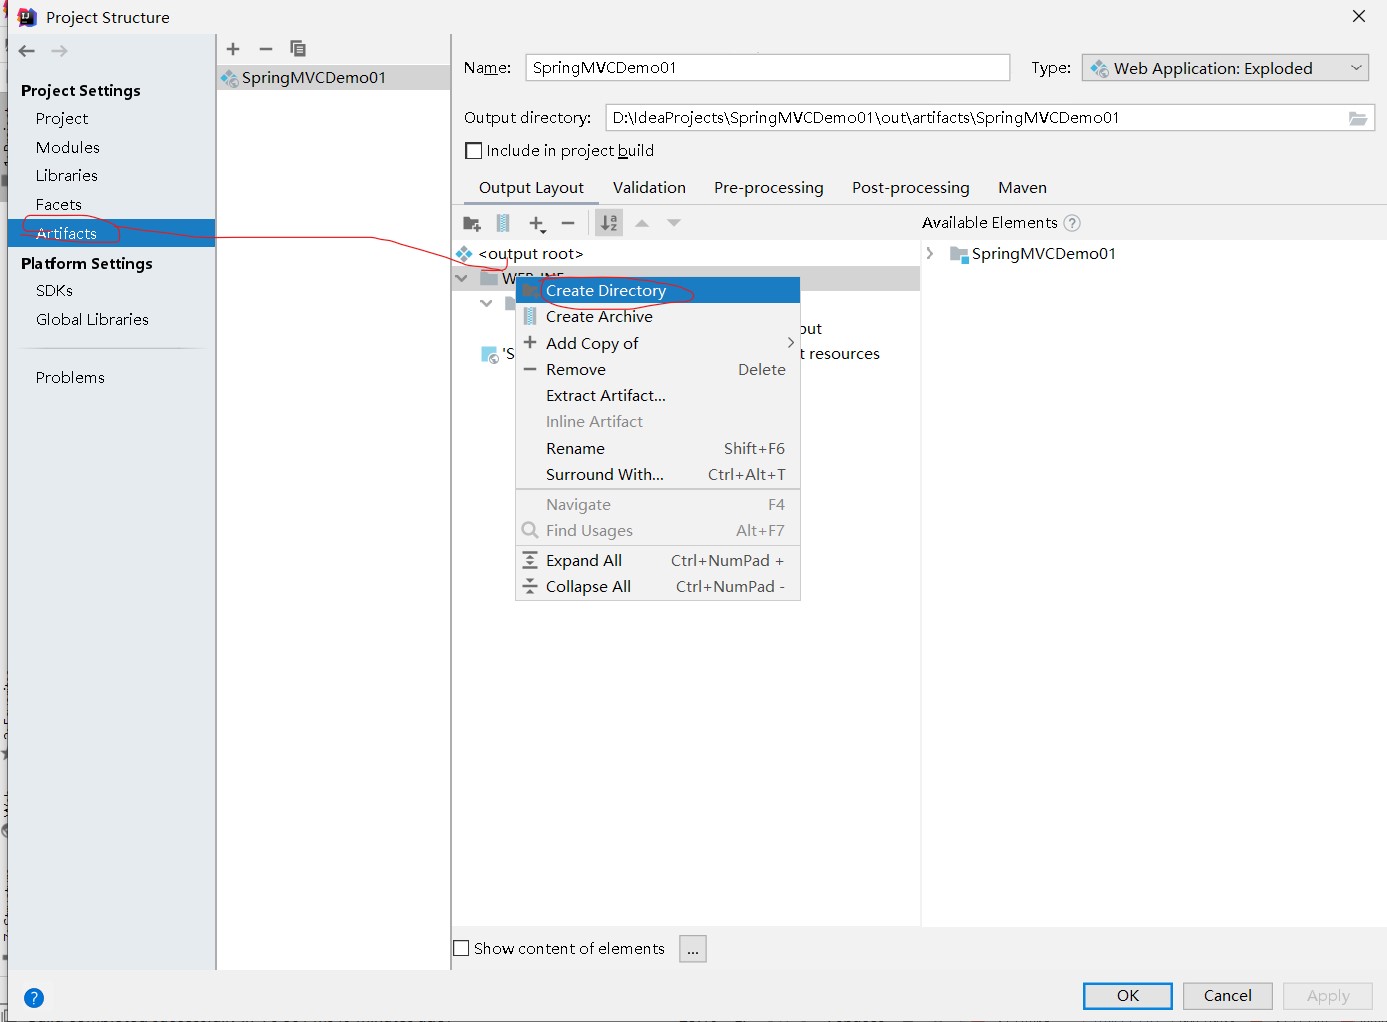
Configure Artifacts and add jar packages required for the normal operation of the project
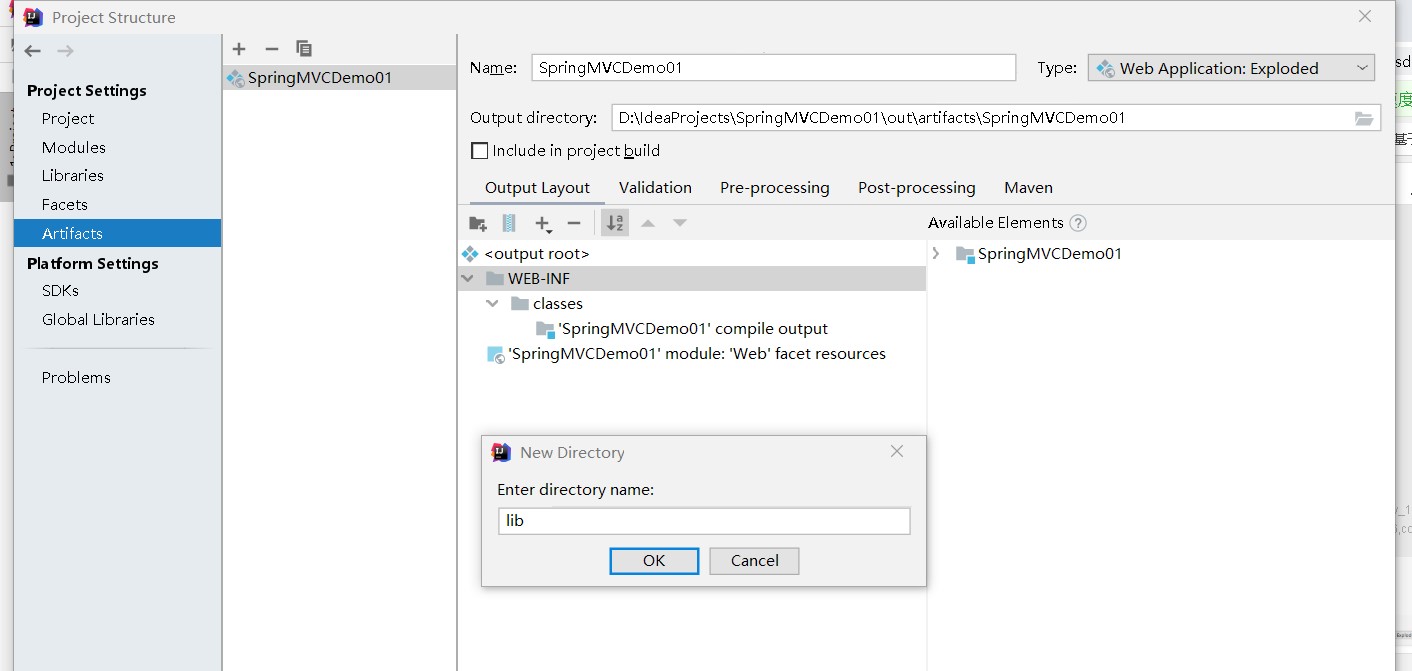
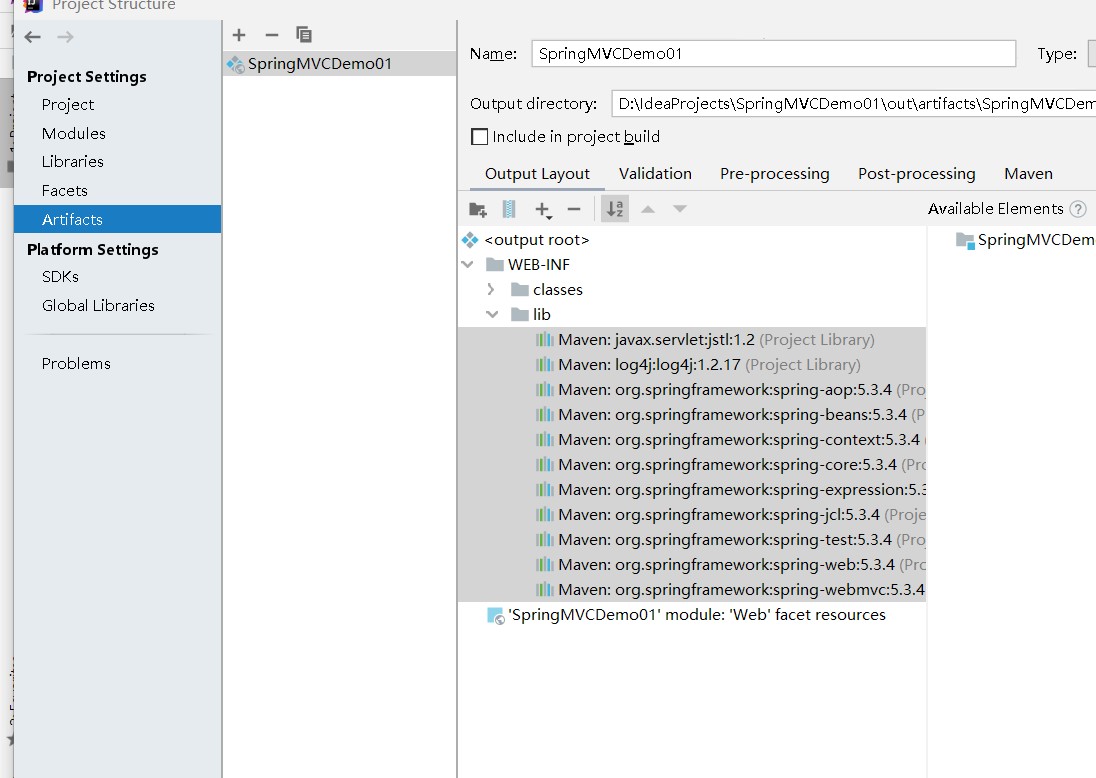
Restart the server
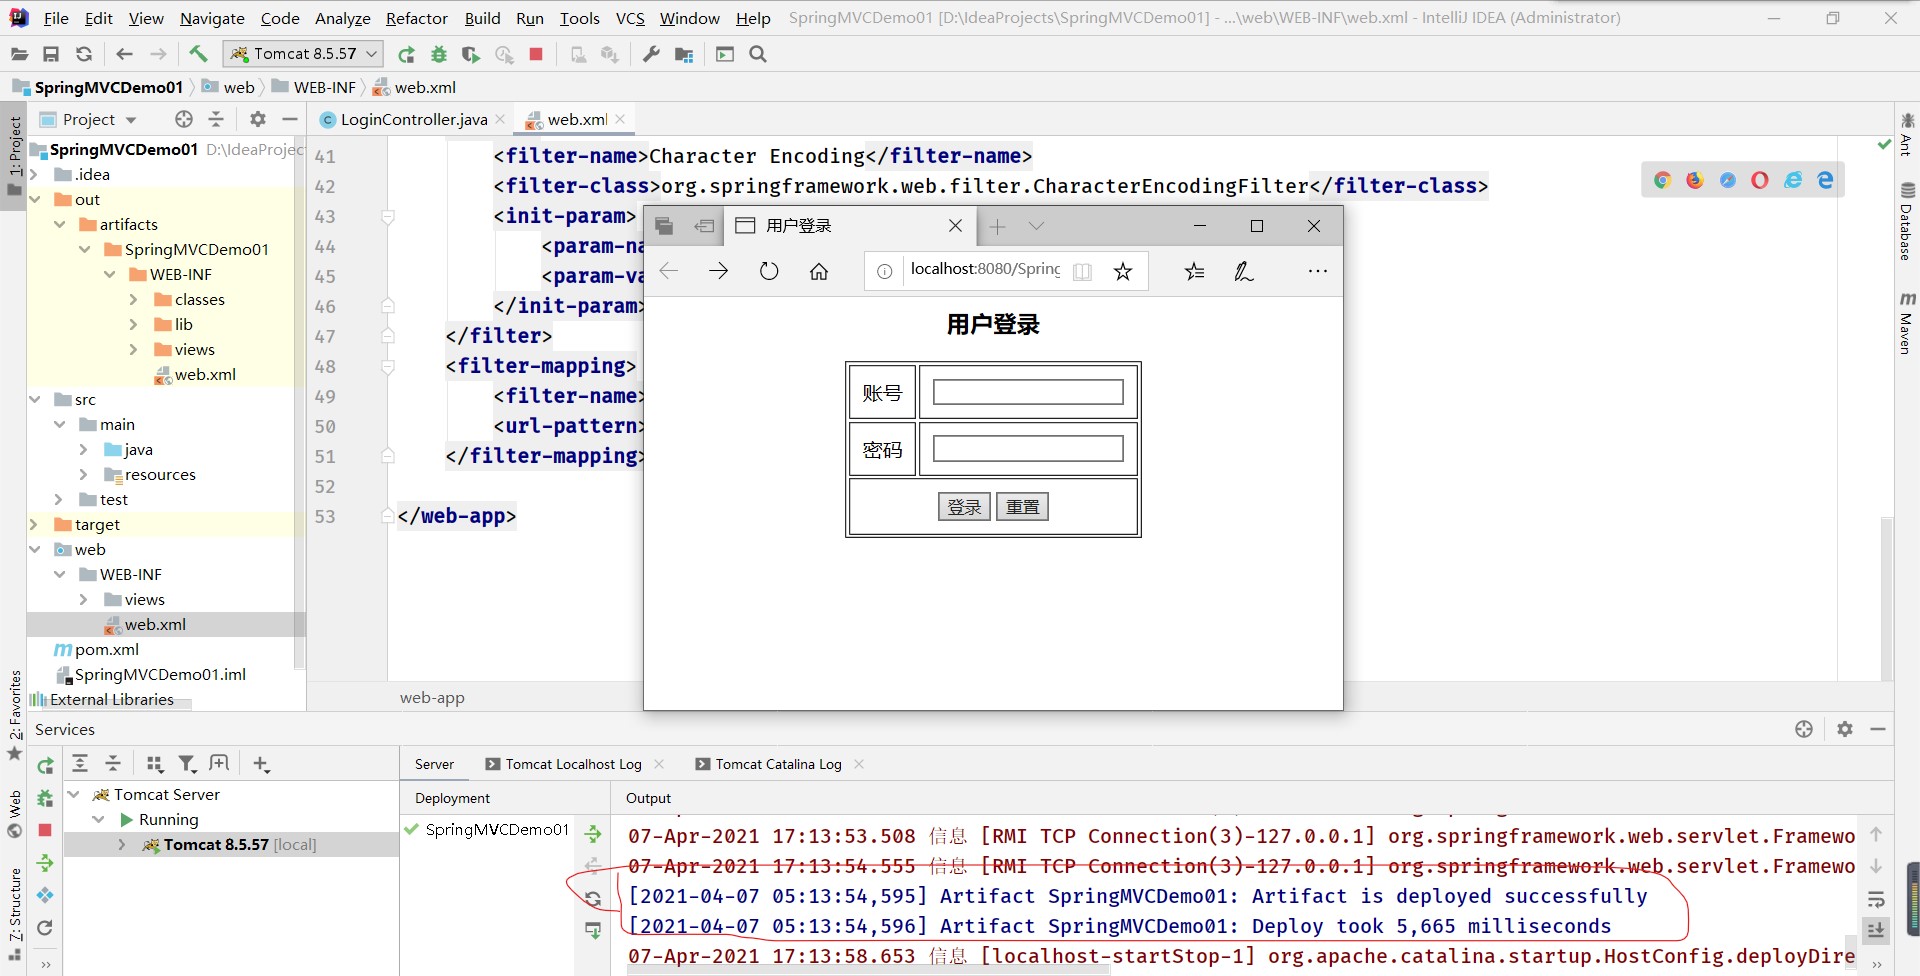
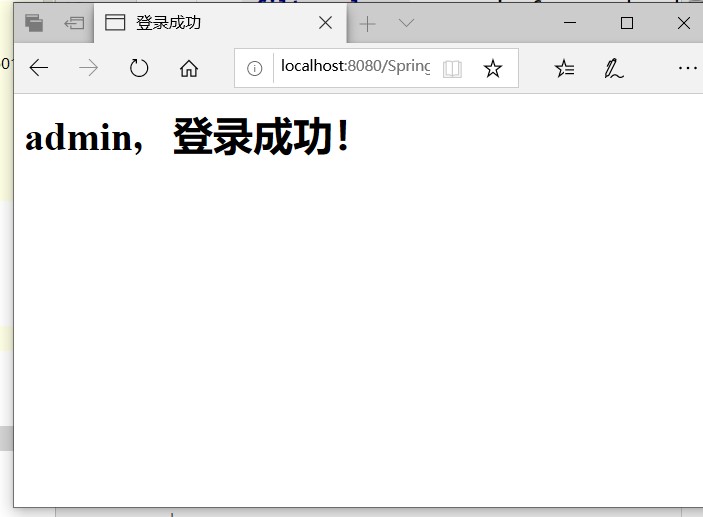
12. Test login function
3, Actual combat practice
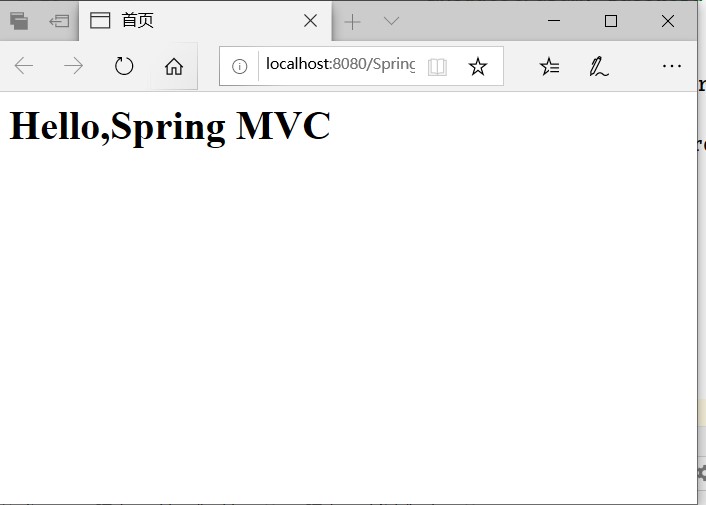
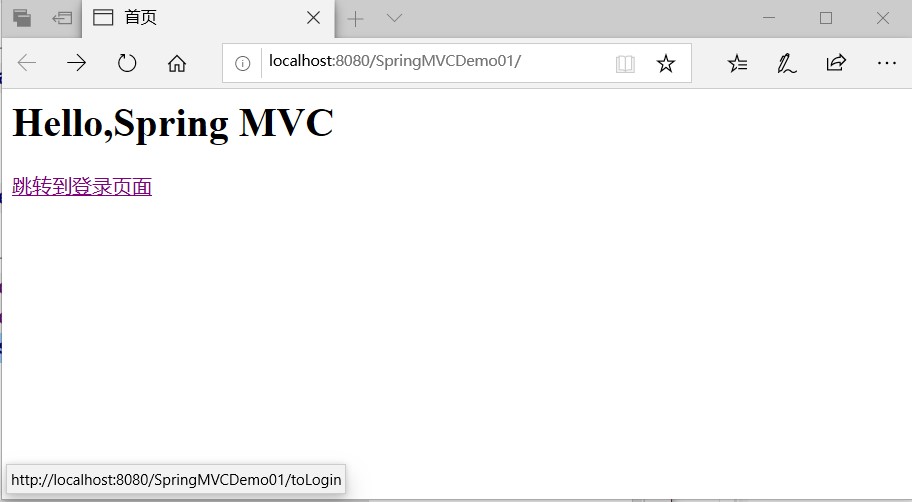
Task 1. Set the project home page - index jsp
Page display content Hello, Spring MVC
1. Modify web XML file
2. Create the home page file index. In the views directory jsp
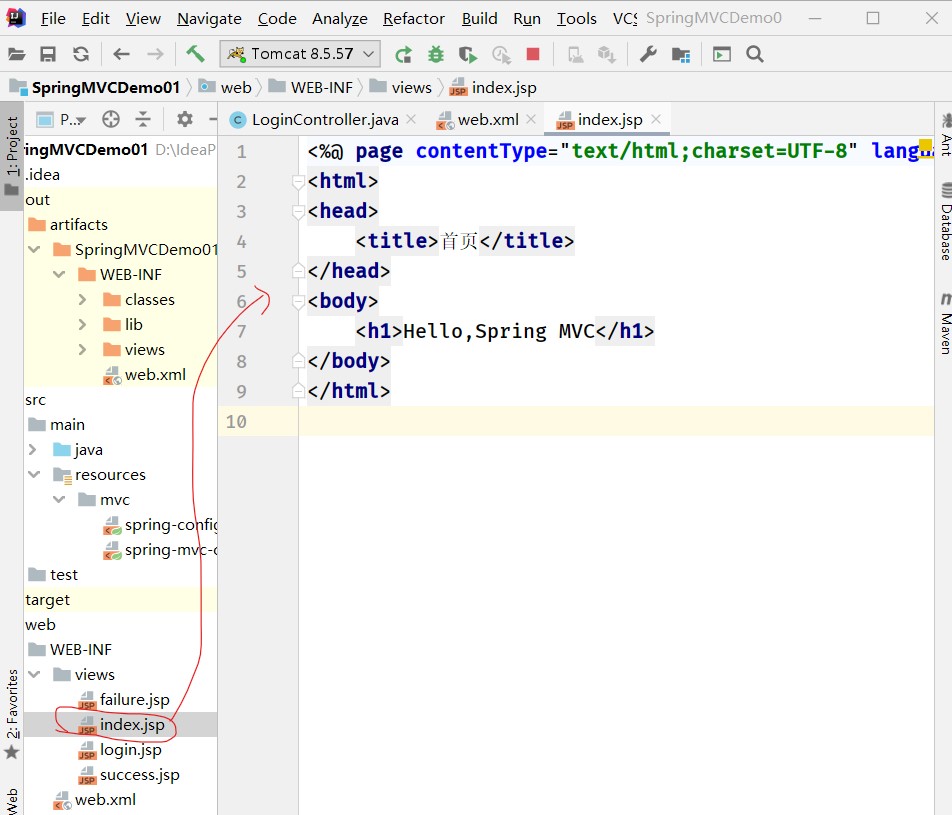
<%@ page contentType="text/html;charset=UTF-8" language="java" %>
<html>
<head>
    <title>home page</title>
</head>
<body>
    <h1>Hello,Spring MVC</h1>
</body>
</html>
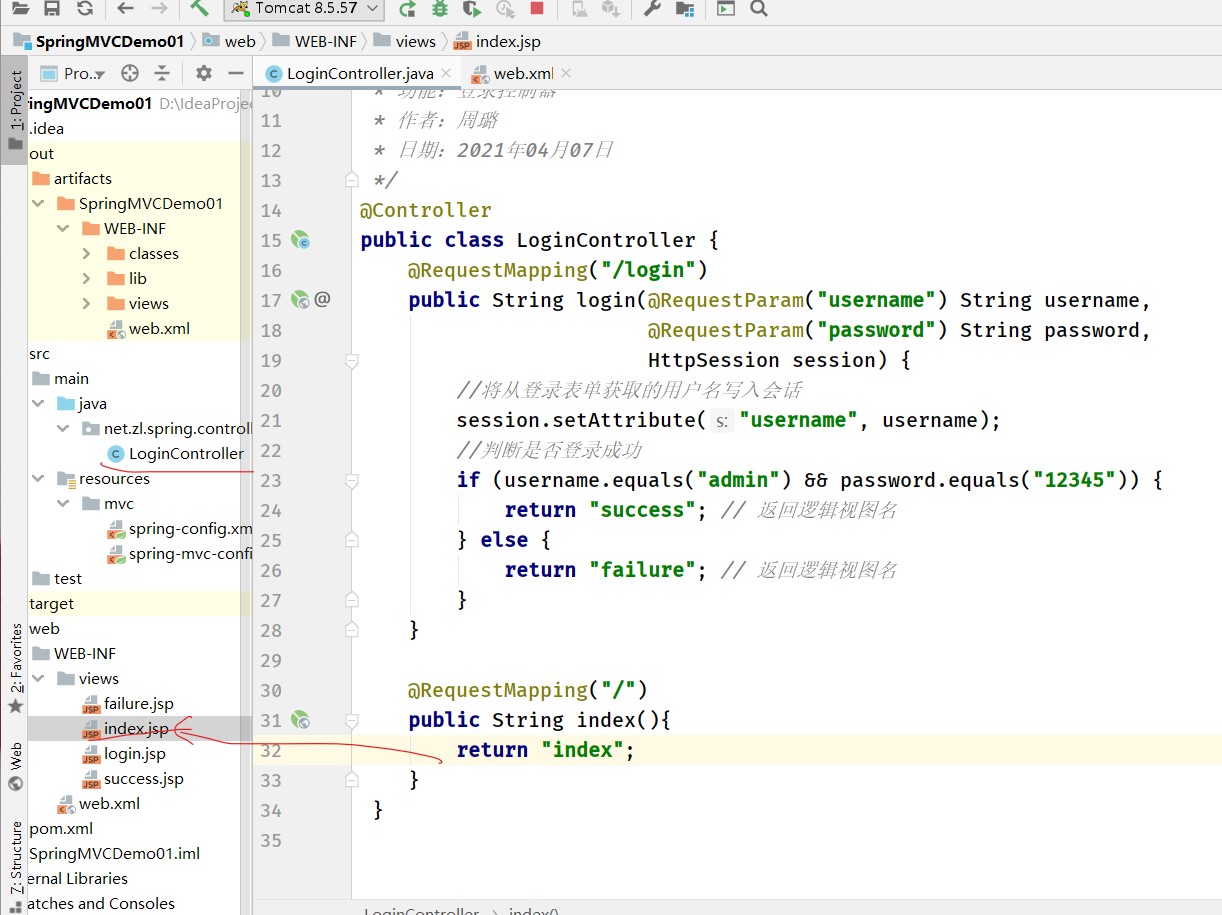
3. Modify login controller - LoginController
4. Start the server and check the effect
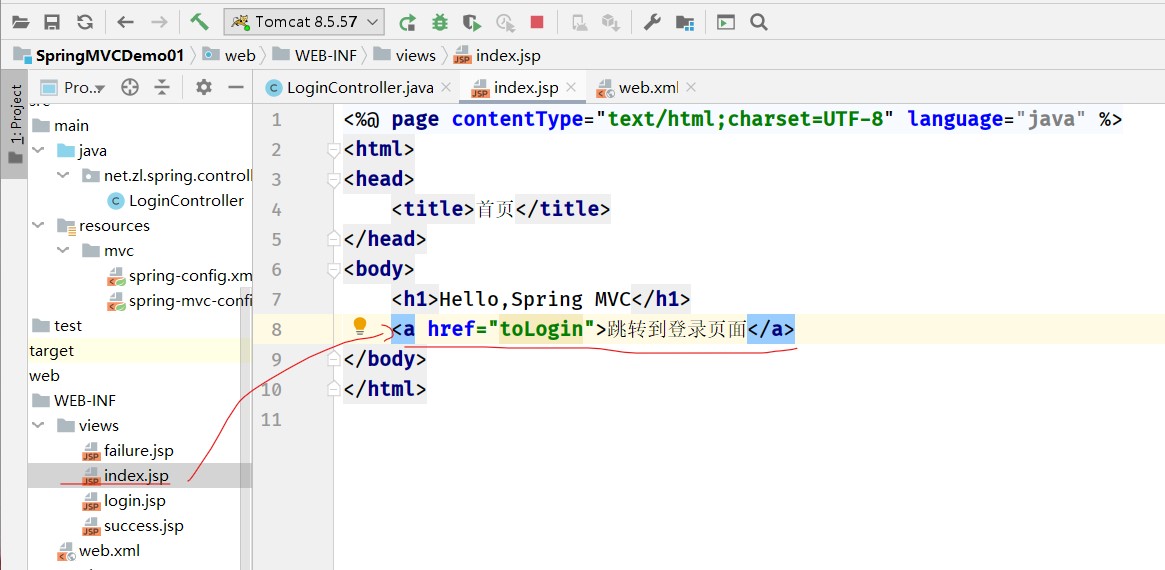
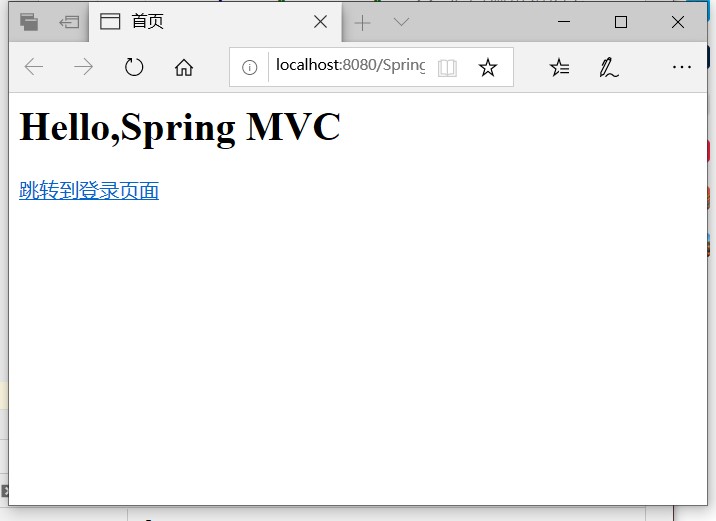
Task 2. Add a login link to the home page. Click to jump to the login page
1. Modify homepage file - index jsp
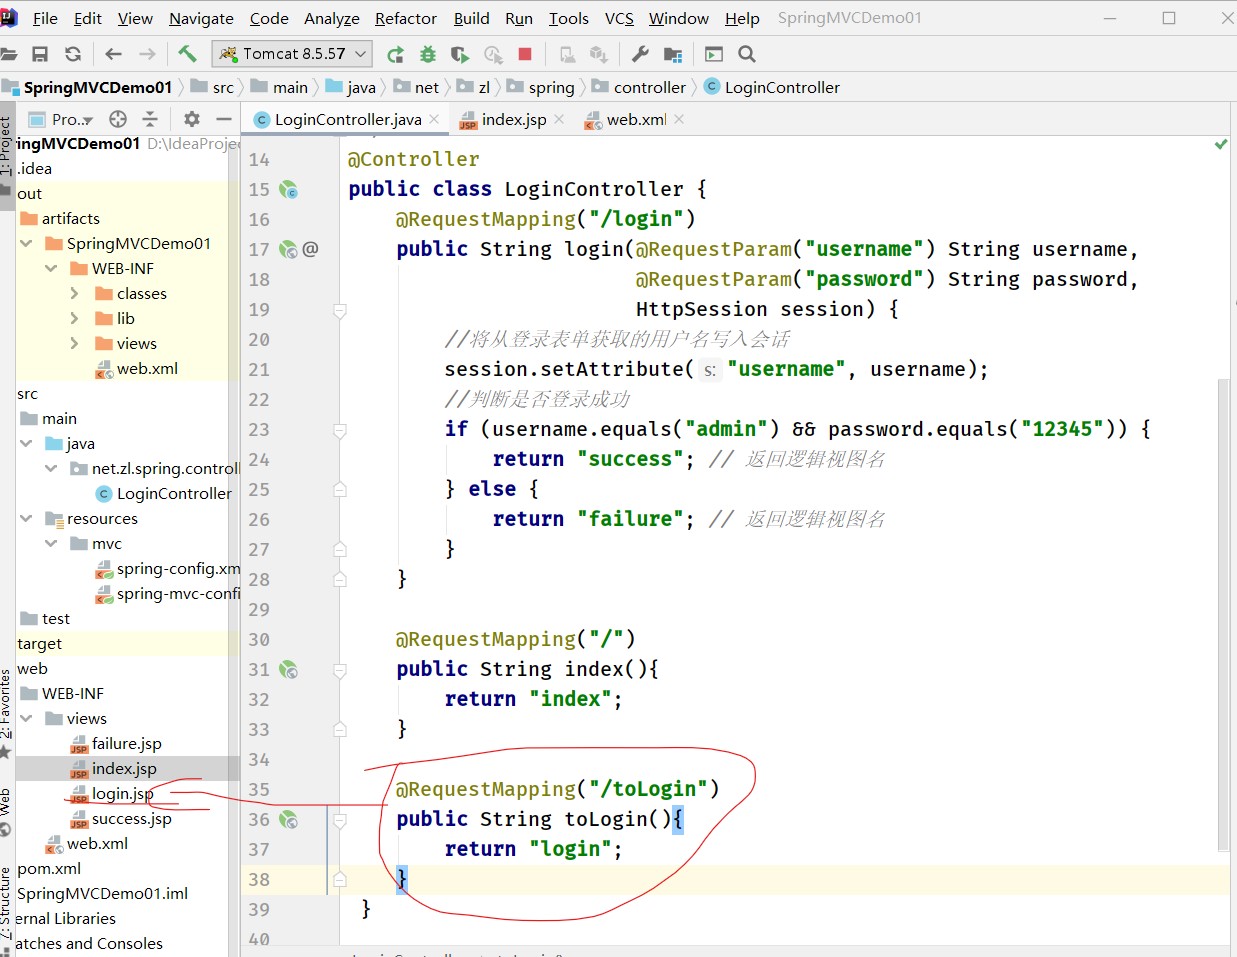
2. Modify login controller - LoginController
3. Start the server and check the effect
Task 3. Use Spring MVC configuration file to realize fast page Jump
1. Modify login controller - LoginController
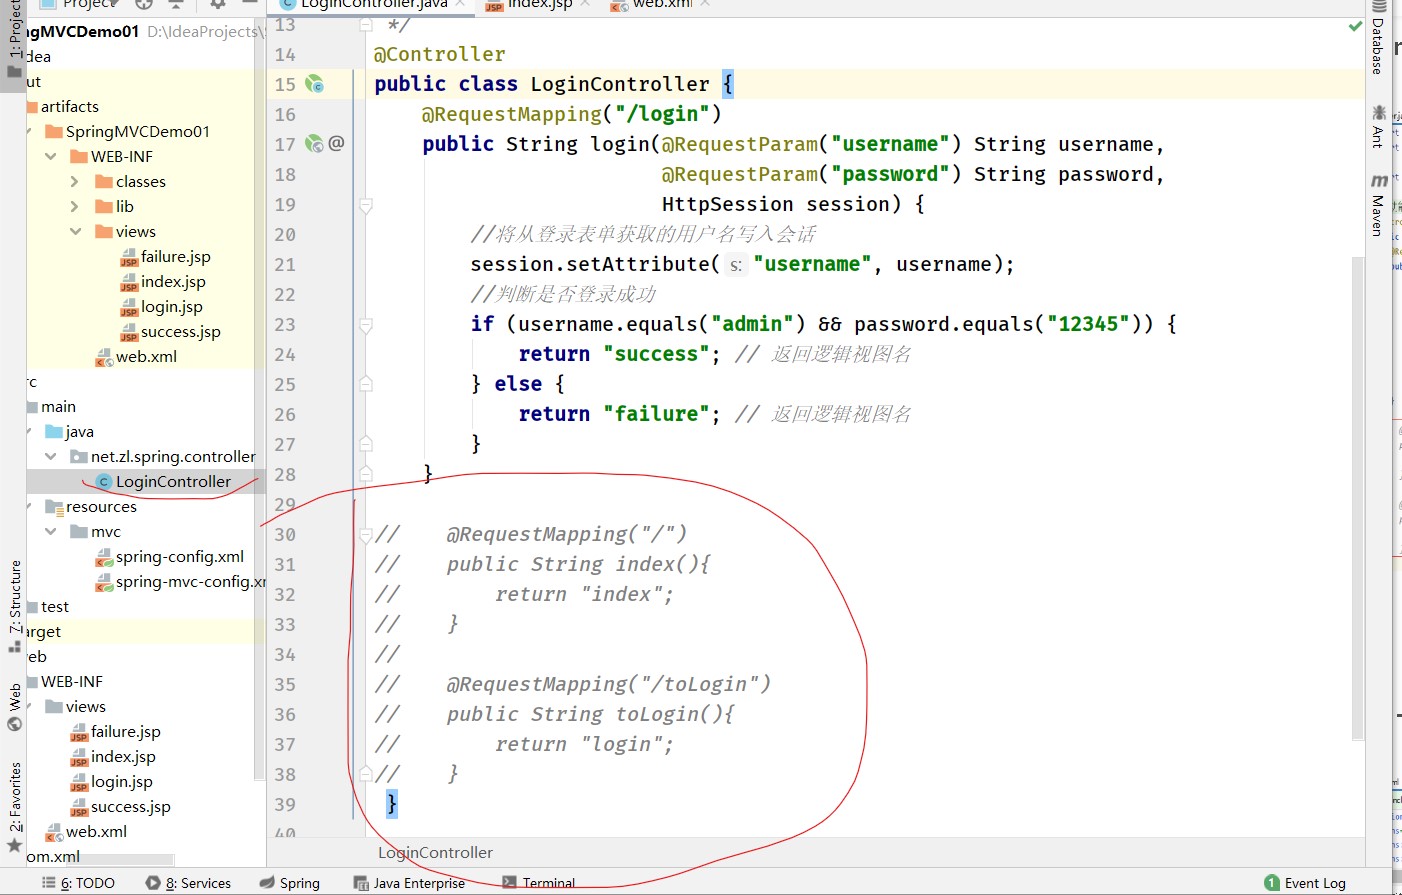
Comment or delete the two methods responsible for page Jump: index() and toLogin()
2. Modify Spring MVC configuration file - Spring MVC config xml

3. Start the server to see the effect
Task 4. Add static resources and let Spring MVC handle them correctly
Static resources include pictures, style sheets, and scripts, which are described below with pictures as an example
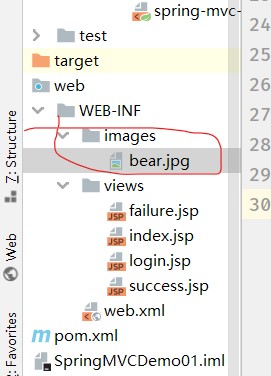
1. Add a picture
Create the images directory in the WEB-INF and add the image bear Jpg copy in
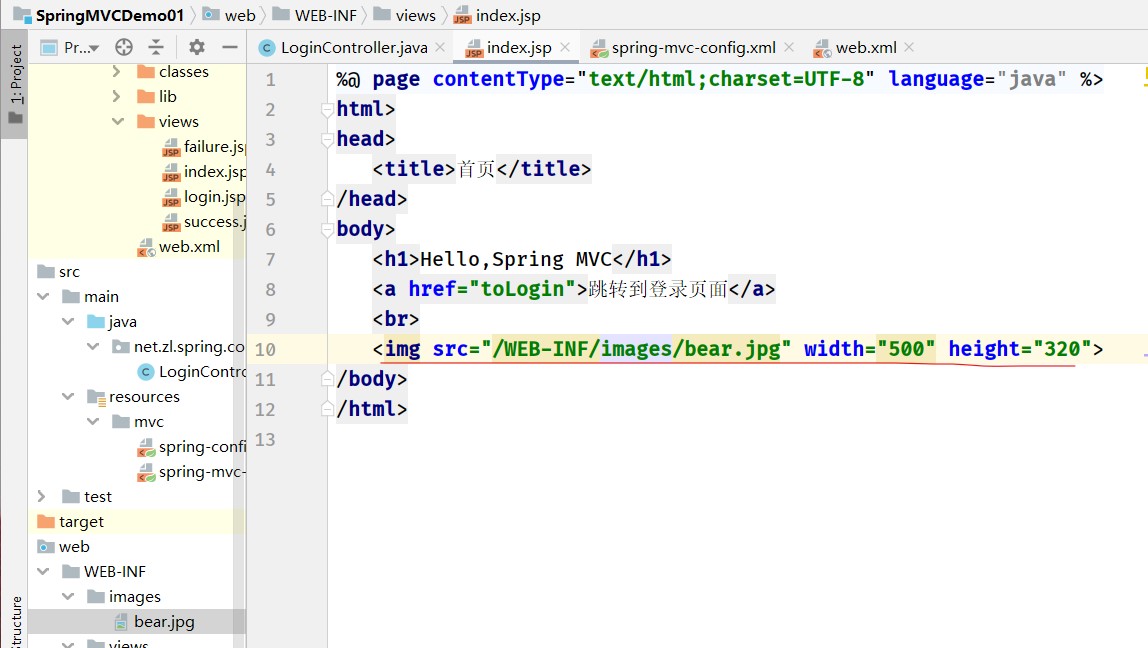
2. Modify the home page file and add the element of displaying the picture
3. Start the server and check the effect
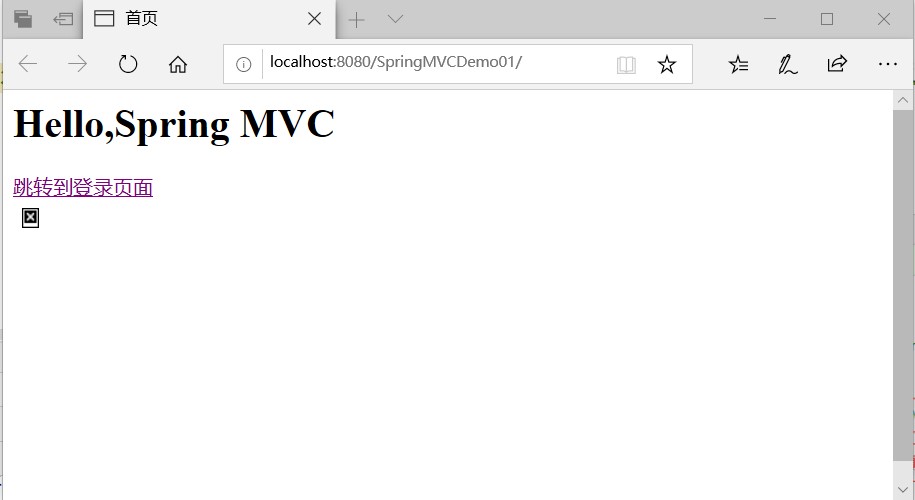
Unable to access picture resources
4. Modify the Spring MVC configuration file to handle static resources separately

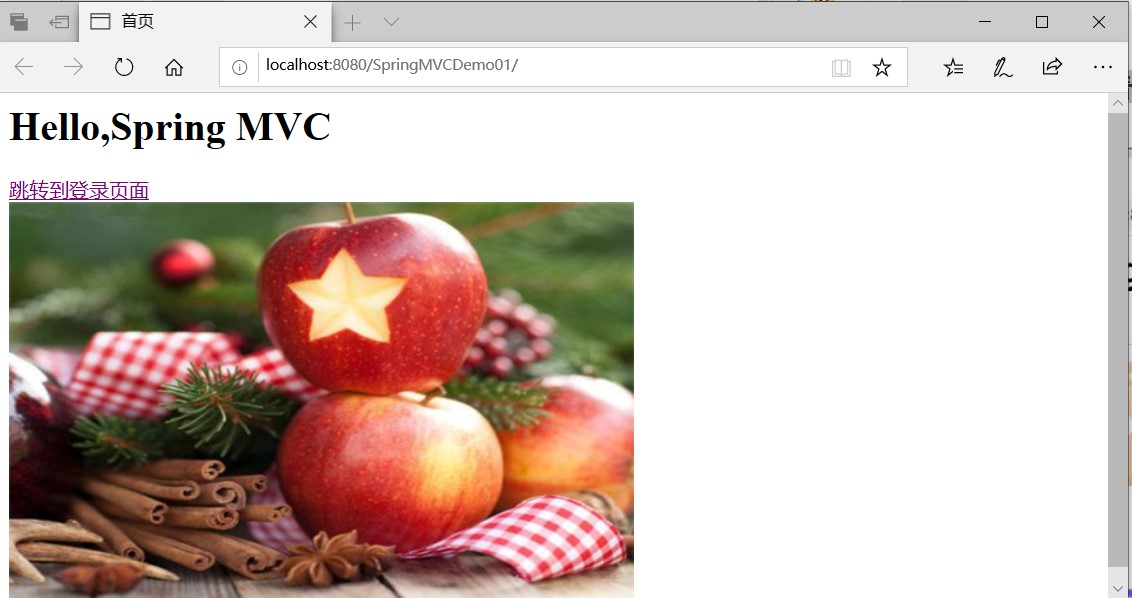
5. Modify the home page file, and the image source adopts the virtual path

6. Restart the server to see the effect
Exercise: adding JavaScript files and CSS
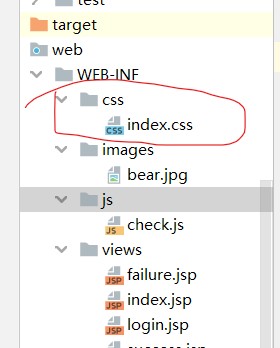
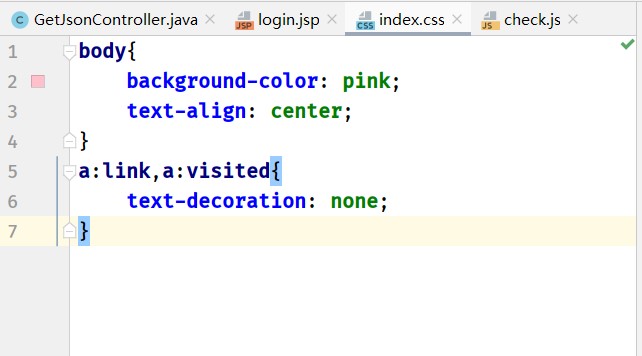
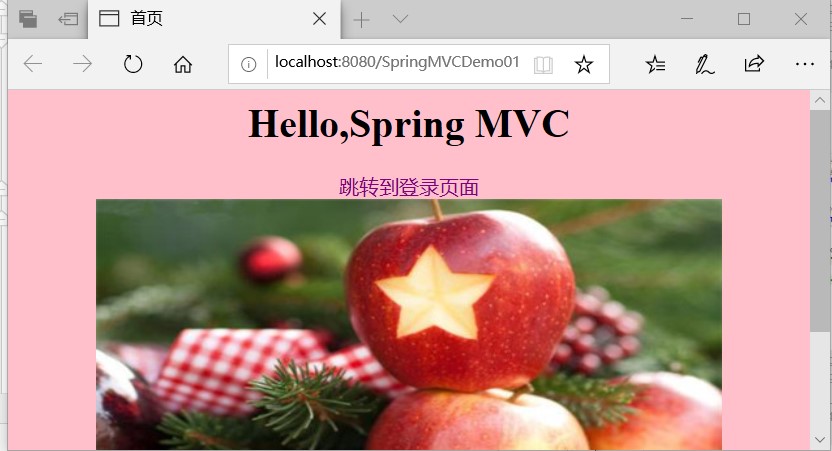
1. Create css directory in WEB-INF and create style file index css, responsible for the style of the home page (all elements are centered, set the background color of the page, remove the underline of hyperlinks...)
In index Importing external css files into JSP
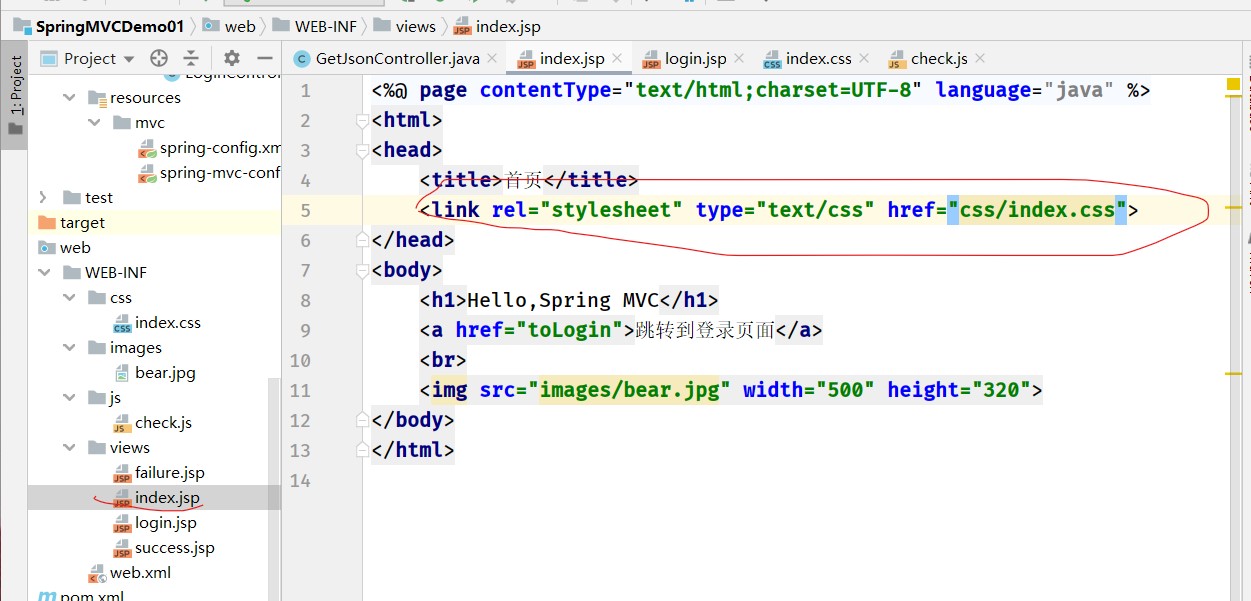
effect
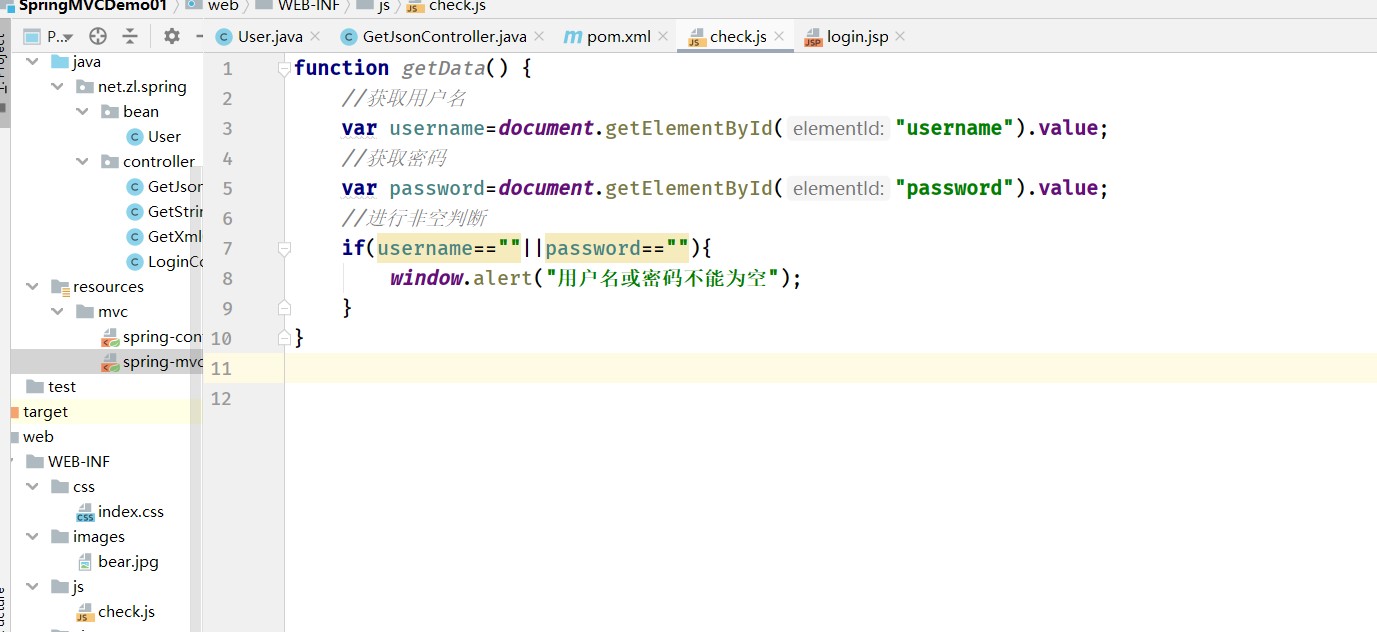
2. Create the js directory in the WEB-INF and create the script file check js, which is responsible for the non empty verification of the login page (first verify the non empty user name, and then verify the non empty password)
Task 5. Request the simple string returned by the server
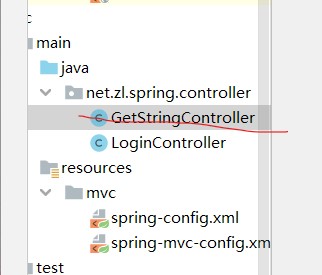
1. Create get string controller - GetStringController
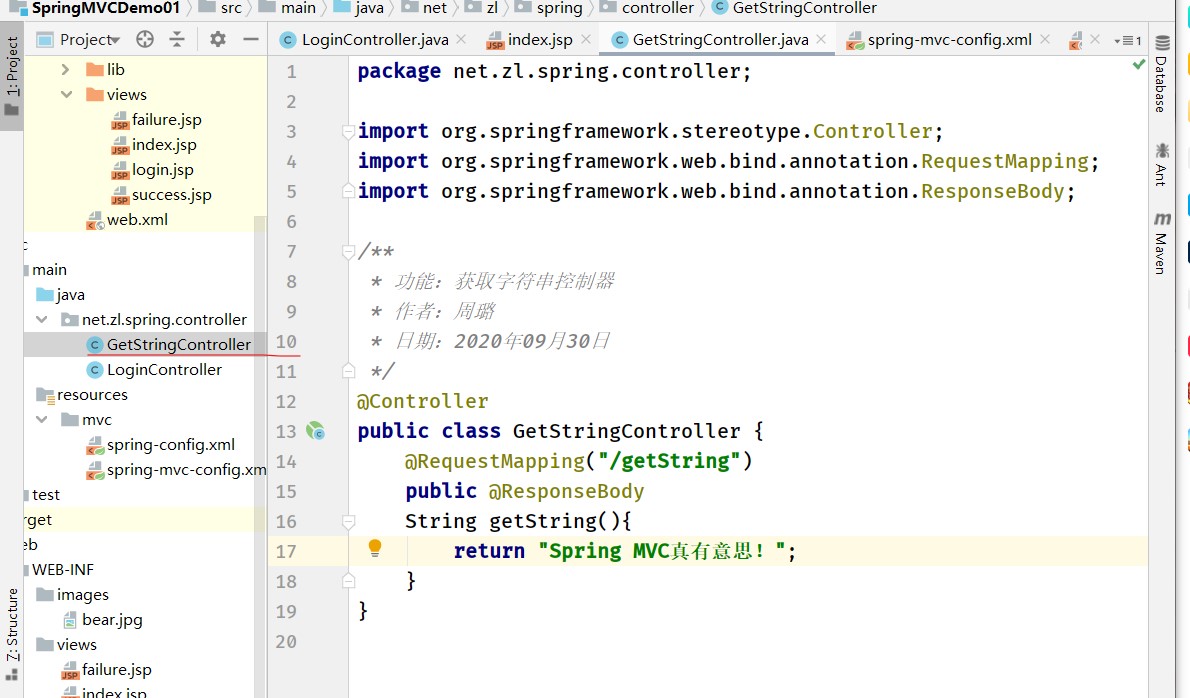
2. Start the server and visit localhost:8080/SpringMVCDemo01/getString

Garbled code
3. Modify get string controller - GetStringController
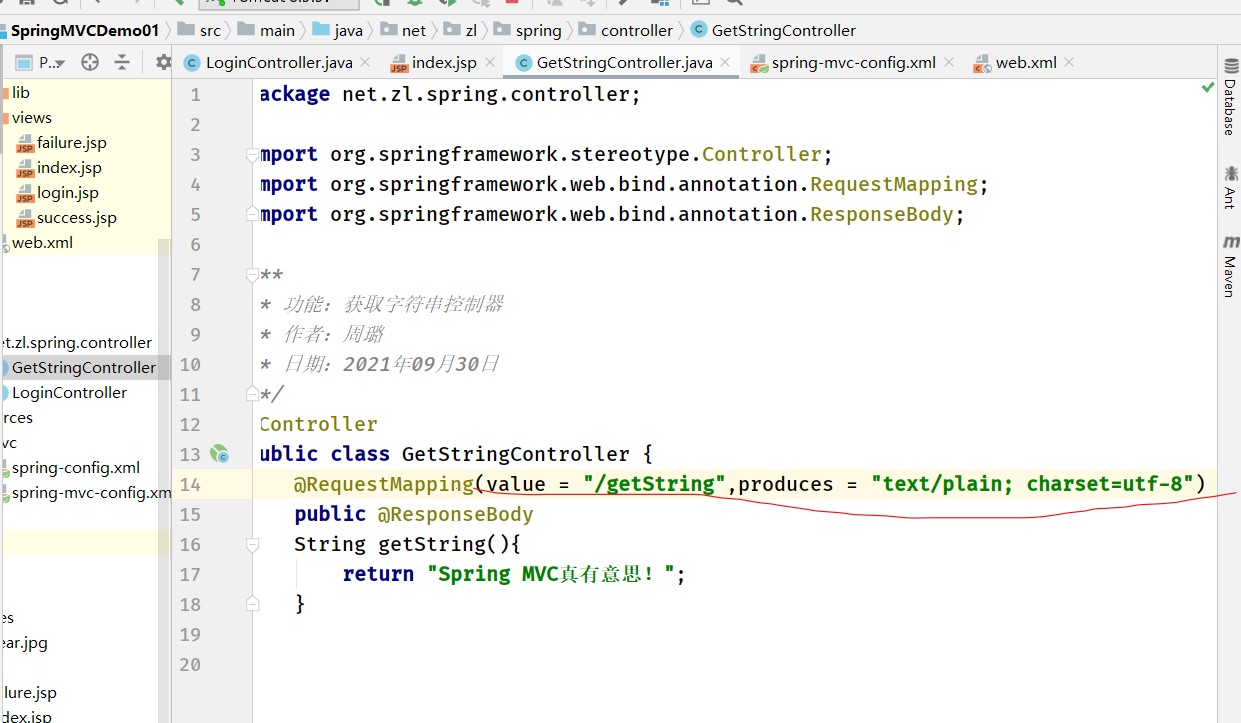
4. Restart the server and visit localhost: 8080 / spring mvcdemo01 / getString

Task 6. Request the JSON data returned by the server
1. Create User entity class - User
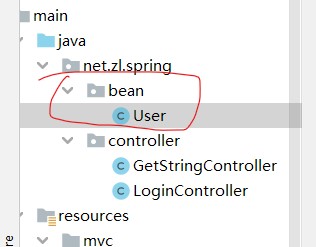
package net.zl.spring.bean;

import java.util.Date;

/**
 * Function: user entity class
 * Author: Zhou Lu
 * Date: April 12, 2021
 */
public class User {
    private int id;
    private String username;
    private String password;
    private String telephone;
    private Date registerTime;
    private int popedom;

    public int getId() {
        return id;
    }

    public void setId(int id) {
        this.id = id;
    }

    public String getUsername() {
        return username;
    }

    public void setUsername(String username) {
        this.username = username;
    }

    public String getPassword() {
        return password;
    }

    public void setPassword(String password) {
        this.password = password;
    }

    public String getTelephone() {
        return telephone;
    }

    public void setTelephone(String telephone) {
        this.telephone = telephone;
    }

    public Date getRegisterTime() {
        return registerTime;
    }

    public void setRegisterTime(Date registerTime) {
        this.registerTime = registerTime;
    }

    public int getPopedom() {
        return popedom;
    }

    public void setPopedom(int popedom) {
        this.popedom = popedom;
    }

    @Override
    public String toString() {
        return "User{" +
                "id=" + id +
                ", username='" + username + '\'' +
                ", password='" + password + '\'' +
                ", telephone='" + telephone + '\'' +
                ", registerTime=" + registerTime +
                ", popedom=" + popedom +
                '}';
    }
}
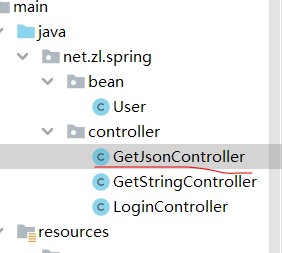
2. Create get JSON controller - GetJsonController
package net.zl.spring.controller;

import net.zl.spring.bean.User;
import org.springframework.stereotype.Controller;
import org.springframework.web.bind.annotation.RequestMapping;
import org.springframework.web.bind.annotation.ResponseBody;

import java.util.ArrayList;
import java.util.Date;
import java.util.List;

/**
 * Function: get JSON controller
 * Author: Zhou Lu
 * Date: April 12, 2021
 */
 @Controller
public class GetJsonController {
    @RequestMapping(value = "/getJson", produces = "application/json; charset=utf-8")
    public @ResponseBody
    User getJson() {
        User user = new User();
        user.setId(1);
        user.setUsername("adorable");
        user.setPassword("12345");
        user.setTelephone("15889895678");
        user.setRegisterTime(new Date());
        user.setPopedom(1);
        return user;
    }

    @RequestMapping(value = "/getJsonArray", produces = "application/json; charset=utf-8")
    public @ResponseBody
    List<User> getJsonArray() {
        List<User> users = new ArrayList<User>();

        User user = new User();
        user.setId(1);
        user.setUsername("adorable");
        user.setPassword("12345");
        user.setTelephone("15889895678");
        user.setRegisterTime(new Date());
        user.setPopedom(1);
        users.add(user);

        user = new User();
        user.setId(2);
        user.setUsername("Li Wenxia");
        user.setPassword("45678");
        user.setTelephone("13978783456");
        user.setRegisterTime(new Date());
        user.setPopedom(1);
        users.add(user);

        user = new User();
        user.setId(3);
        user.setUsername("Zheng Zhihua");
        user.setPassword("88888");
        user.setTelephone("15890903456");
        user.setRegisterTime(new Date());
        user.setPopedom(1);
        users.add(user);

        return users;
    }
 }
3. In POM Add support for json in XML file
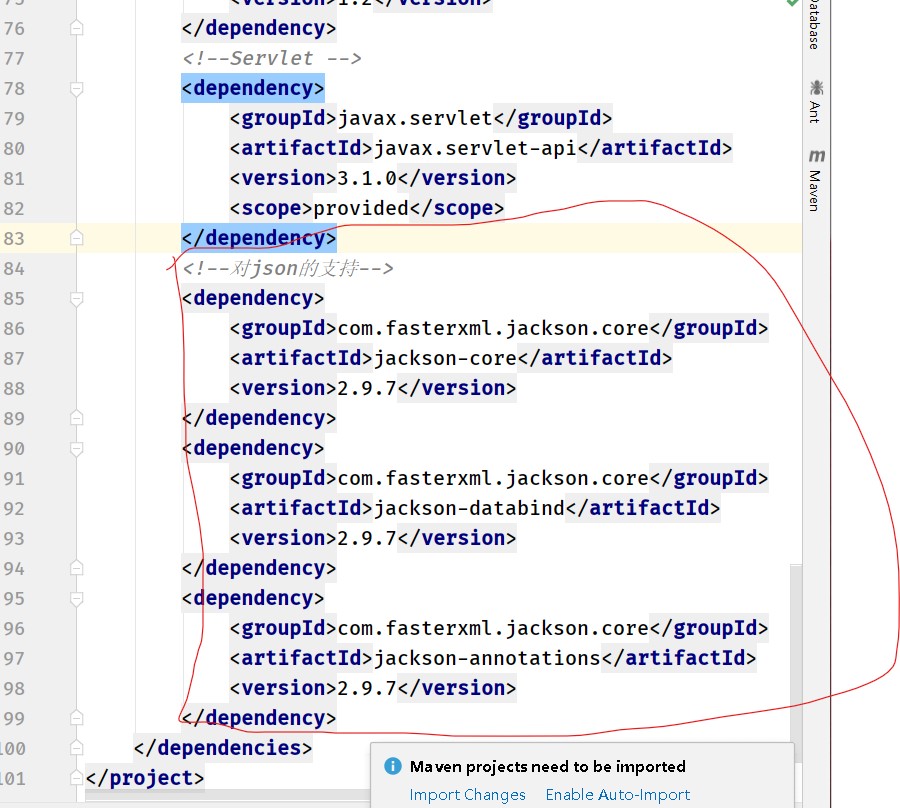
 <!--yes json Support of-->
        <dependency>
            <groupId>com.fasterxml.jackson.core</groupId>
            <artifactId>jackson-core</artifactId>
            <version>2.9.7</version>
        </dependency>
        <dependency>
            <groupId>com.fasterxml.jackson.core</groupId>
            <artifactId>jackson-databind</artifactId>
            <version>2.9.7</version>
        </dependency>
        <dependency>
            <groupId>com.fasterxml.jackson.core</groupId>
            <artifactId>jackson-annotations</artifactId>
            <version>2.9.7</version>
        </dependency>
4. Start the server and view the results
visit http://localhost:8080/SpringMVCDemo01/getJson
visit http://localhost:8080/SpringMVCDemo01/getJsonArray
Task 7. Request the XML data returned by the server
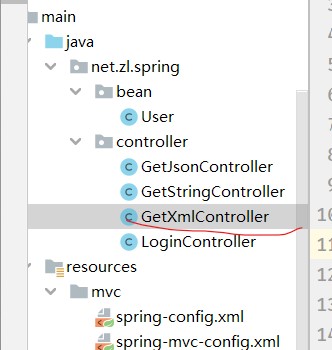
1. Create get XML controller - GetXmlController
package net.zl.spring.controller;

import net.zl.spring.bean.User;
import org.springframework.stereotype.Controller;
import org.springframework.web.bind.annotation.RequestMapping;
import org.springframework.web.bind.annotation.ResponseBody;

import java.util.ArrayList;
import java.util.Date;
import java.util.List;

/**
 * Function: get XML controller
 * Author: Zhou Lu
 * Date: April 12, 2021
 */
@Controller
public class GetXmlController {
    @RequestMapping(value = "/getXml", produces = "application/xml; charset=utf-8")
    public @ResponseBody
    List<User> getXml() {
        List<User> users = new ArrayList<User>();

        User user = new User();
        user.setId(1);
        user.setUsername("adorable");
        user.setPassword("12345");
        user.setTelephone("15889895678");
        user.setRegisterTime(new Date());
        user.setPopedom(1);
        users.add(user);

        user = new User();
        user.setId(2);
        user.setUsername("Li Wenxia");
        user.setPassword("45678");
        user.setTelephone("13978783456");
        user.setRegisterTime(new Date());
        user.setPopedom(1);
        users.add(user);

        user = new User();
        user.setId(3);
        user.setUsername("Zheng Zhihua");
        user.setPassword("88888");
        user.setTelephone("15890903456");
        user.setRegisterTime(new Date());
        user.setPopedom(1);
        users.add(user);

        return users;
    }
}
2. In POM Add support for xml in xml file
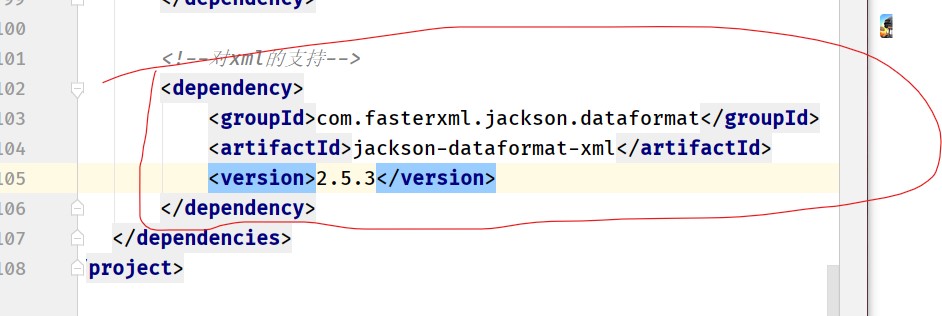
 <!--yes xml Support of-->
        <dependency>
            <groupId>com.fasterxml.jackson.dataformat</groupId>
            <artifactId>jackson-dataformat-xml</artifactId>
            <version>2.5.3</version>
        </dependency>