1, maskRcnn environment configuration (win10)
Let's first look at the configuration I successfully run:
python3.6.13
tensorflow-gpu 1.5.0
scipy1.2.1
Keras2.2.0
cuda9.0
cudnn7.0

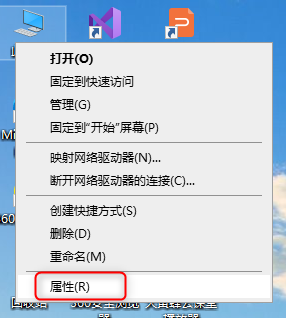
I The default Anaconda is installed
MaskRCNN——01. Environment configuration (based on Anaconda)
II Download the MaskRCNN source code and check the environmental requirements
Download mask RCNN source code
See the following documents for environmental requirements: README (as shown below)

III Build MaskRCNN environment under Anaconda
1. Create and activate the environment:
conda create -n MaskRCNN python=3.6  //MaskRCNN, python version 3.6
source activate MaskRCNN  // Activate environment
pip install --upgrade pip  //Upgrade pip command
2. Install tensorflow GPU
conda install tensorflow-gpu==1.5.0   //The version number can be customized as needed (gpu/cpu). You can verify whether tensorflow is successfully installed. It will not be detailed here
 Or: pip install tensorflow-gpu==1.5.0
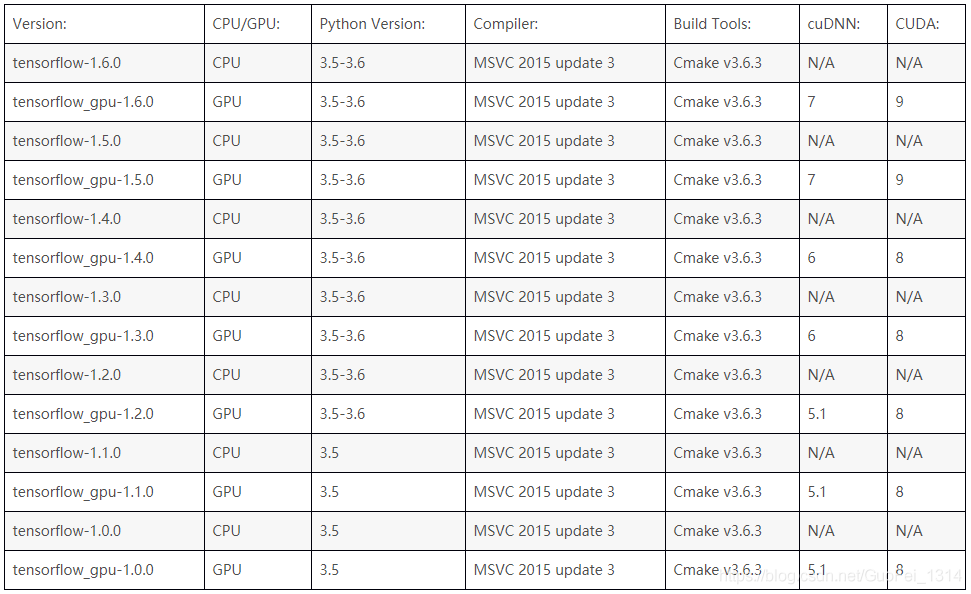
Tensorflow GPU corresponding to cuda, keras version and pytorch version
3. Install the corresponding version of Cuda+cuDnn
tensorflow, Python, cuda and cudnn must be strictly matched, otherwise there will be all kinds of strange problems
Detailed tutorial on building tensorflow GPU environment under Win10 Anaconda (including CUDA+cuDNN installation process)
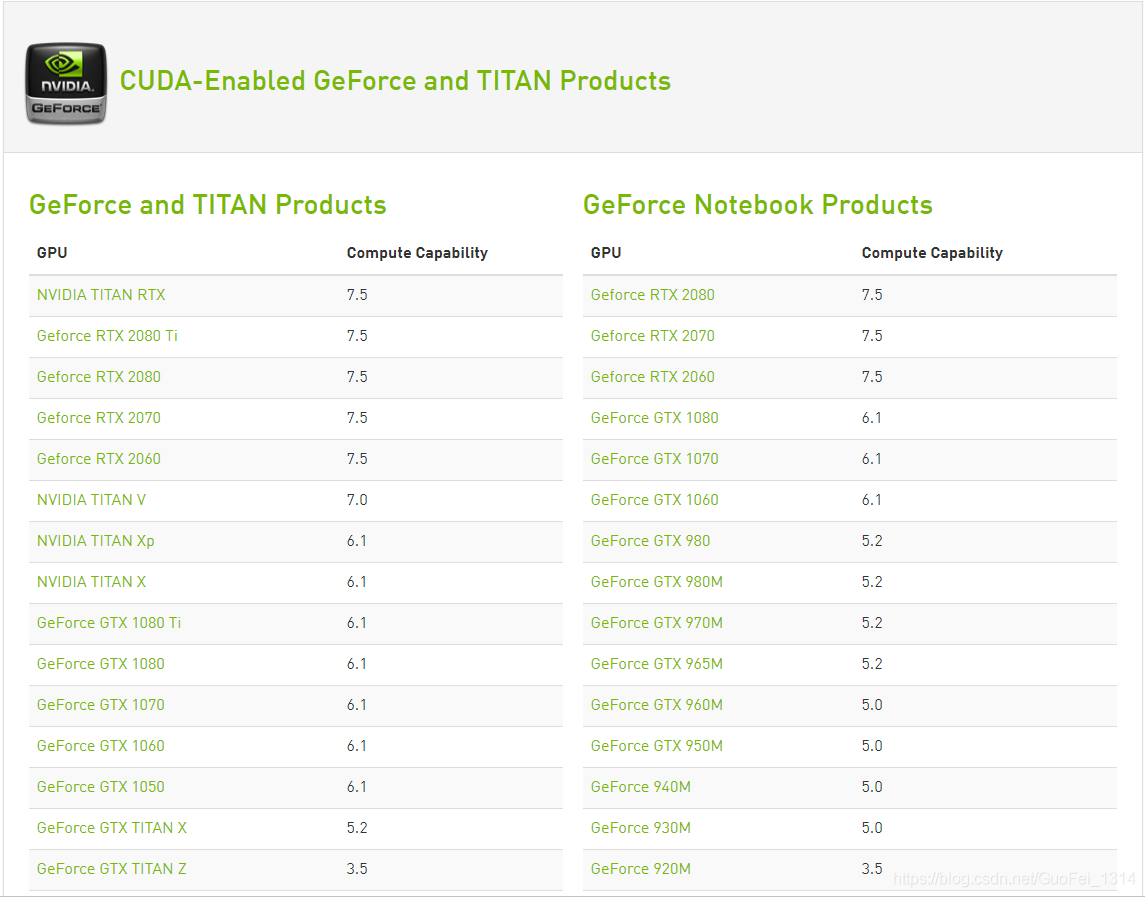
Check whether the computing power of the graphics card matches each version
If you want to use GPU for computing, you need the support of CUDA and cuDNN. You need to check whether your NVIDIA graphics card supports CUDA and the corresponding computing power, preferably above 3.0. The author's graphics card is GTX950M and the computing power is 5.0.
Attached website: https://developer.nvidia.com/cuda-gpus
Download CUDA + cuDNN
Baidu online disk link: Extraction code: 0y0c
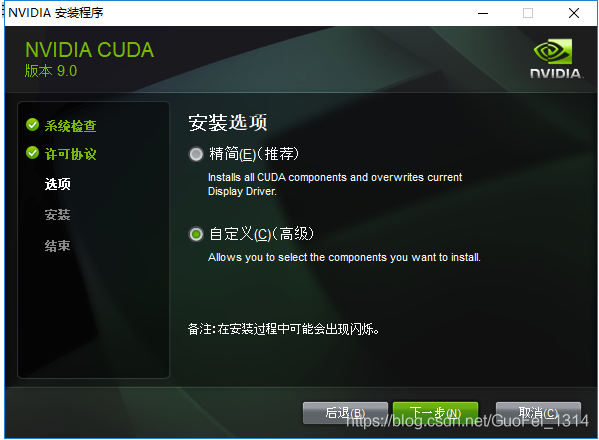
Install CUDA 9.0 and cuDnn 7.0
Select customize (Advanced)
Check all
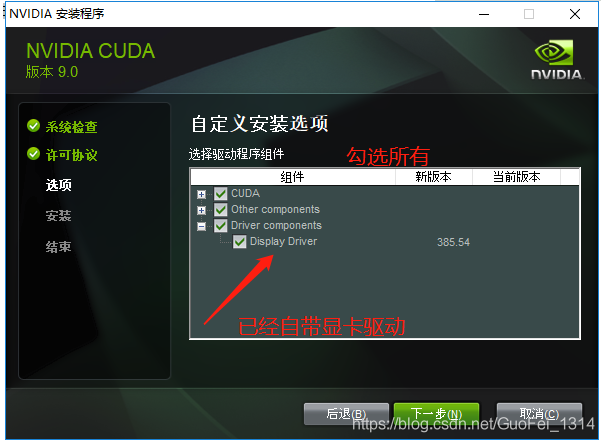
*Note: * do not change the installation path, keep the default, and just go all the way down.
Next, unzip "cudnn-9.0-windows10-x64-v7.zip", open the following three folders, copy the contents of the folders to the files corresponding to the root directory of CUDA installation respectively, and do not copy the folders directly.

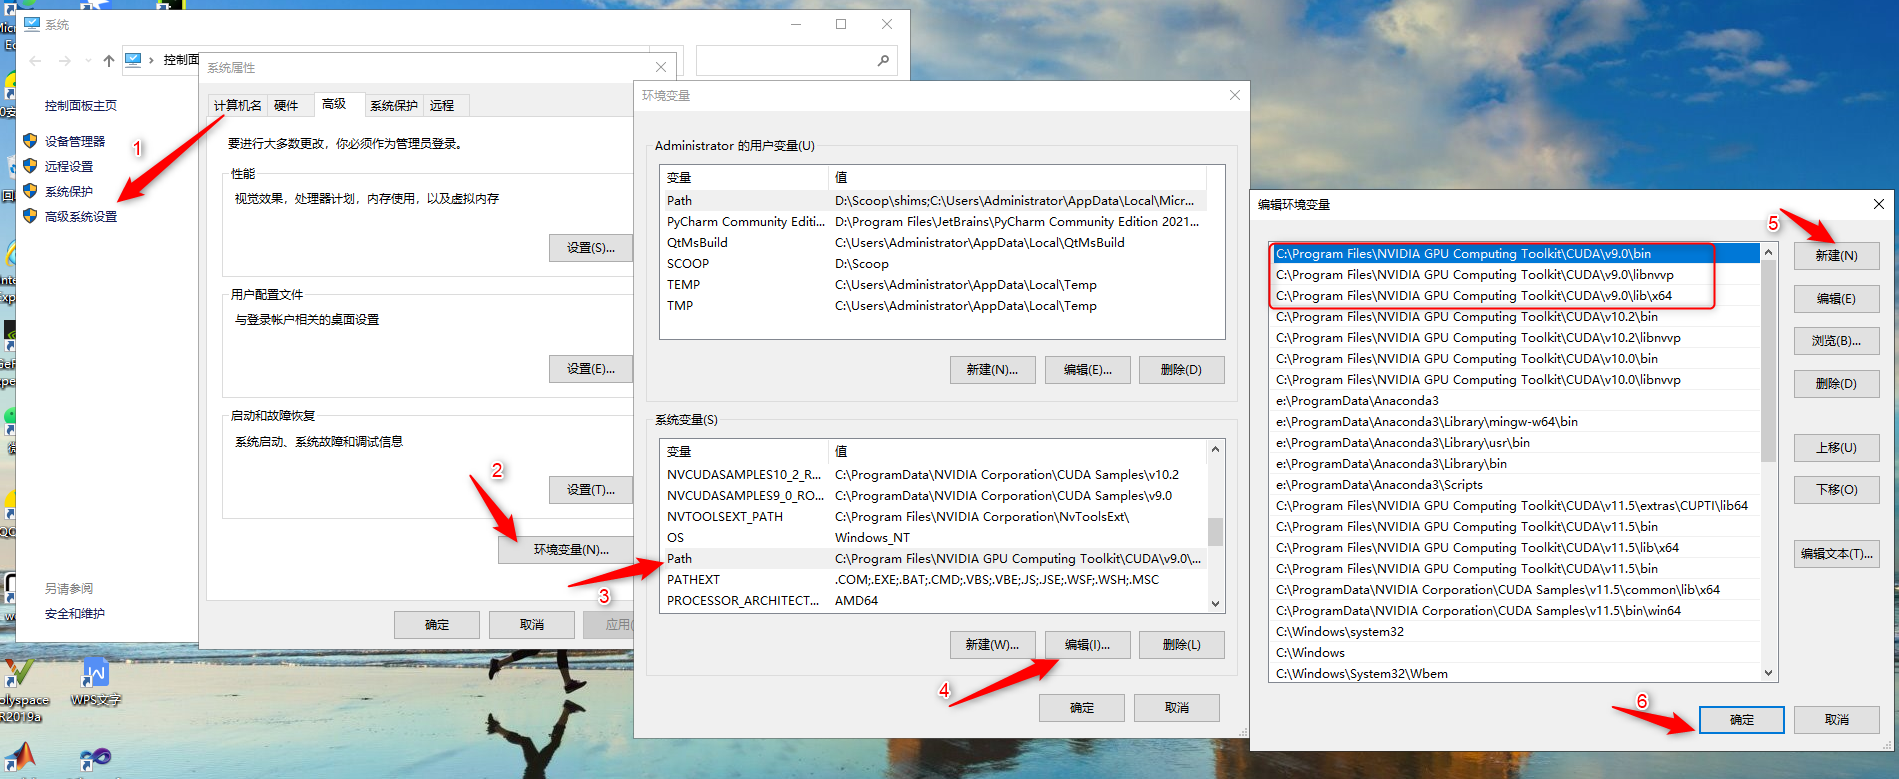
In this way, CUDA Toolkit 9.0 and cuDnn 7.0 have been installed. Configure the environment variables. Add the following four paths to the environment variables. Pay attention to changing to your own installation path.
You'll find an extra cuda9 Path to 0:
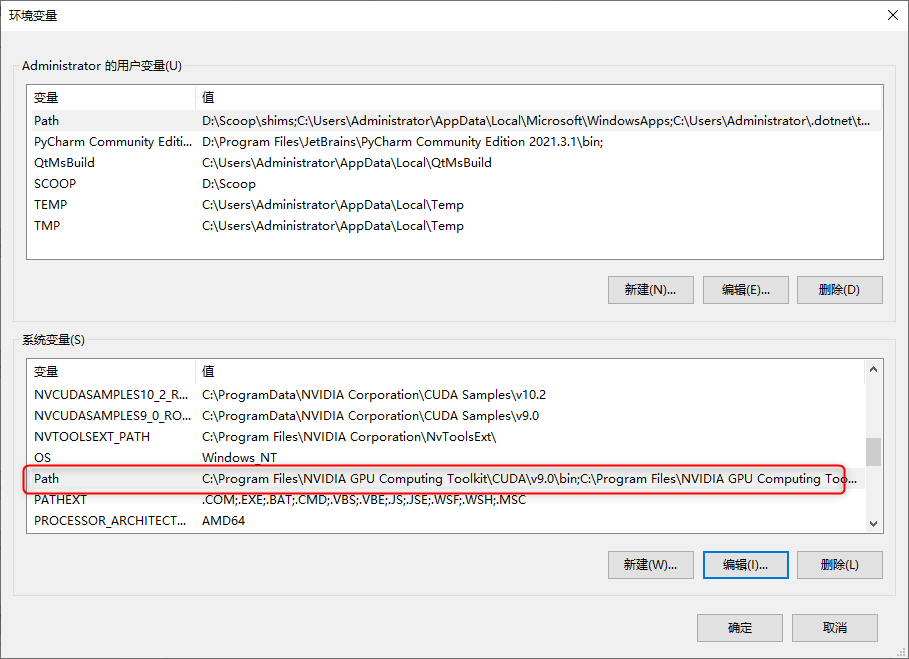
Add a path as follows:
C:\Program Files\NVIDIA GPU Computing Toolkit\CUDA\v9.0\bin
C:\Program Files\NVIDIA GPU Computing Toolkit\CUDA\v9.0\libnvvp
C:\Program Files\NVIDIA GPU Computing Toolkit\CUDA\v9.0\lib\x64
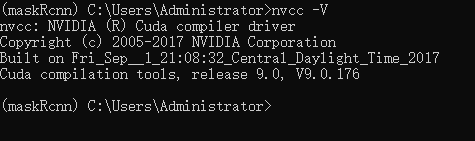
Open cmd and enter nvcc -V to verify whether the installation of CUDA is successful.
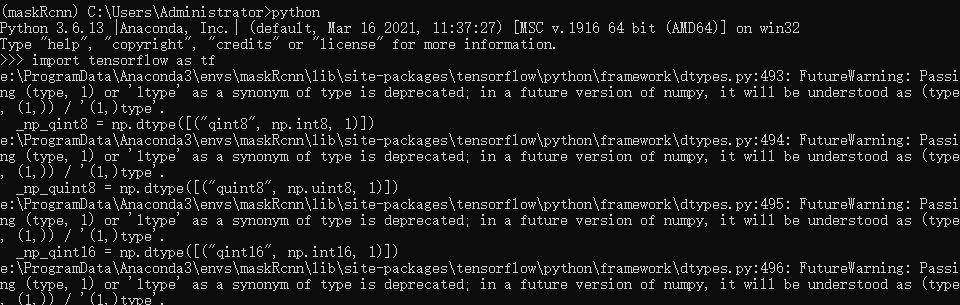
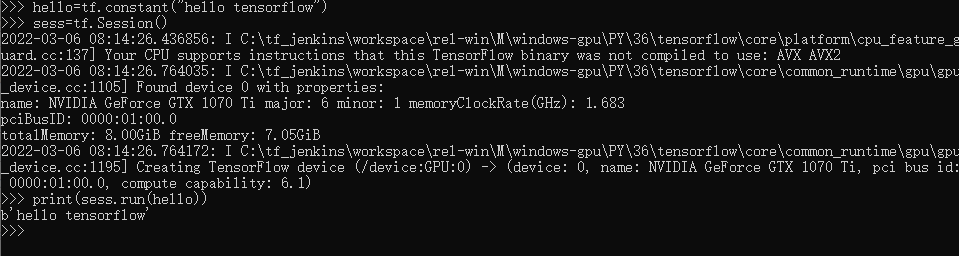
Verify that tensorflow is working properly:
import tensorflow as tf
hello=tf.constant("hello tensorflow")
sess=tf.Session()
print(sess.run(hello))
4. Install requirements in sequence Dependencies in TXT file
pip install numpy
pip install scipy
pip install Pillow
pip install cython
pip install matplotlib
pip install scikit-image
pip install keras>=2.0.8
pip install opencv-python  //PIP install opencv Python is feasible, conda error
                                         // CONDA install opencv Python: CONDA install -- channel https://conda.anaconda.org/menpo  opencv3
pip install h5py
pip install imgaug
pip install ipython
This is all the packages installed in my maskRcnn environment:
absl-py                1.0.0
astor                  0.8.1
backcall               0.2.0
bleach                 4.1.0
cached-property        1.5.2
certifi                2021.5.30
colorama               0.4.4
cycler                 0.11.0
Cython                 0.29.28
dataclasses            0.8
decorator              5.1.1
defusedxml             0.7.1
entrypoints            0.3
enum34                 1.1.10
flake8                 4.0.1
gast                   0.2.2
google-pasta           0.2.0
grpcio                 1.44.0
h5py                   2.10.0
html5lib               0.9999999
imageio                2.15.0
imgaug                 0.4.0
importlib-metadata     4.8.3
ipykernel              5.3.4
ipython                7.16.3
ipython-genutils       0.2.0
ipywidgets             7.6.5
jedi                   0.17.2
Jinja2                 3.0.2
jsonschema             2.6.0
jupyter                1.0.0
jupyter-client         7.1.2
jupyter-console        6.4.0
jupyter-core           4.8.1
jupyterlab-widgets     1.0.0
Keras                  2.2.0
Keras-Applications     1.0.2
Keras-Preprocessing    1.0.1
kiwisolver             1.3.1
Markdown               3.3.6
MarkupSafe             2.0.1
mask-rcnn              2.1
matplotlib             3.3.4
mccabe                 0.6.1
mistune                0.8.4
nb-conda               2.2.1
nb-conda-kernels       2.3.1
nbconvert              5.5.0
nbformat               5.1.3
nest-asyncio           1.5.1
networkx               2.5.1
notebook               5.7.10
numpy                  1.19.5
opencv-python          4.5.5.62
opt-einsum             3.3.0
packaging              21.3
pandocfilters          1.5.0
parso                  0.8.3
pickleshare            0.7.5
Pillow                 8.4.0
pip                    21.2.2
prometheus-client      0.13.1
prompt-toolkit         3.0.28
protobuf               3.19.4
pycocotools            2.0
pycodestyle            2.8.0
pyflakes               2.4.0
Pygments               2.11.2
pyparsing              3.0.7
python-dateutil        2.8.2
PyWavelets             1.1.1
pywin32                228
pywinpty               0.5.7
PyYAML                 6.0
pyzmq                  22.2.1
qtconsole              5.2.2
QtPy                   1.11.2
scikit-image           0.17.2
scipy                  1.2.1
seaborn                0.11.2
Send2Trash             1.8.0
setuptools             58.0.4
Shapely                1.8.1.post1
six                    1.16.0
tensorboard            1.15.0
tensorflow-estimator   1.15.1
tensorflow-gpu         1.5.0
tensorflow-tensorboard 1.5.1
termcolor              1.1.0
terminado              0.9.4
testpath               0.5.0
tifffile               2020.9.3
tornado                6.1
traitlets              4.3.3
typing_extensions      4.1.1
wcwidth                0.2.5
webencodings           0.5.1
Werkzeug               2.0.3
wheel                  0.37.1
widgetsnbextension     3.5.1
wincertstore           0.2
wrapt                  1.13.3
zipp                   3.6.0
Or directly:
pip3 install -r requirements.txt (Suggestions for fear of errors (step-by-step installation above)
#In fact, in Anconda, you should use the conda command to install, but you will encounter situations where various packages cannot be found (as shown in the figure), or choose pip to install:
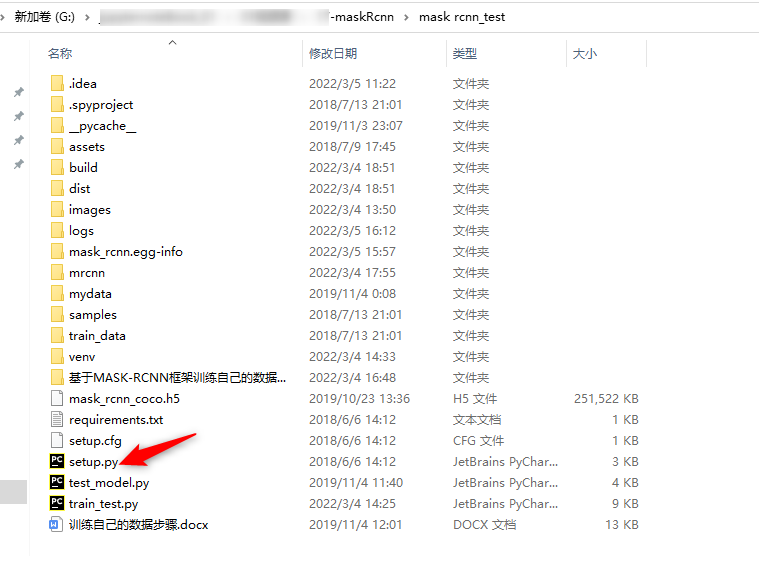
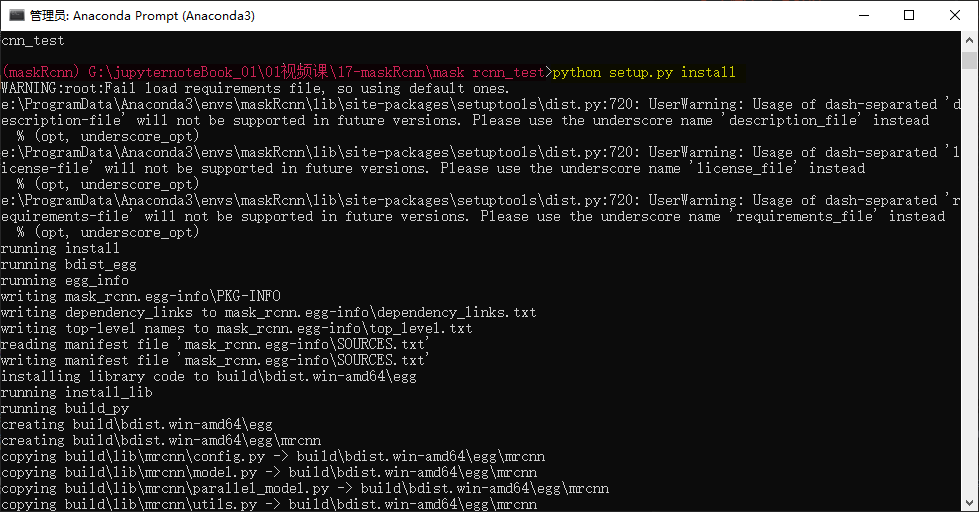
5. Install mask RCNN
There is setup. In the mask RCNN source file Py Directory:
python setup.py install
6. Download the pre trained coco weight file
Download pre training weight mask_ rcnn_ coco. Link H5
Download the mask on the page_ rcnn_ coco. H5, put it on the mask after downloading_ RCNN directory
7. To train or test on MS COCO, install pycocotools Library (important!!!)
If you need to train or test on COCO dataset, you need to install pycocotools (application API of COCO dataset).
Step 1:
git clone https://github.com/pdollar/coco.git
Or directly download the installation package Baidu network disk link: https://pan.baidu.com/s/1OD6J9KZIqDGUUc0TbomNtw
Extraction code: eb2j
Step 2:
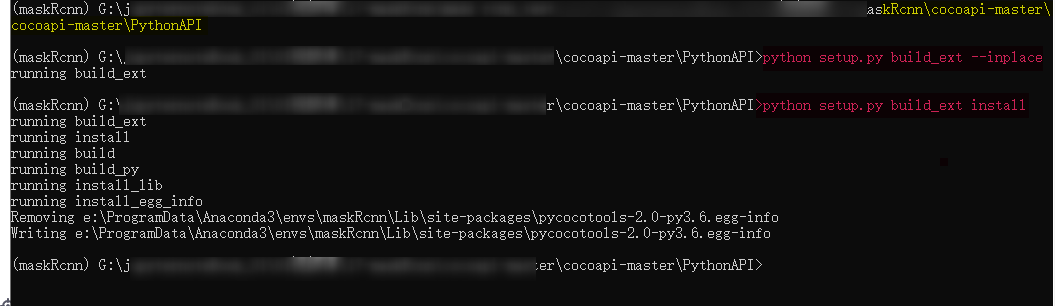
To the \ cocoapi master \ Python API Directory:
Icd coco/PythonAP
implement
python setup.py build_ext --inplace
Step 3:
python setup.py build_ext install
After the above three steps, you have installed pycocotools into the python library. After entering the python 3 command line, you can import directly. If you execute the following command without error, it means that the installation has been successful
(I've installed it again for a demonstration!)
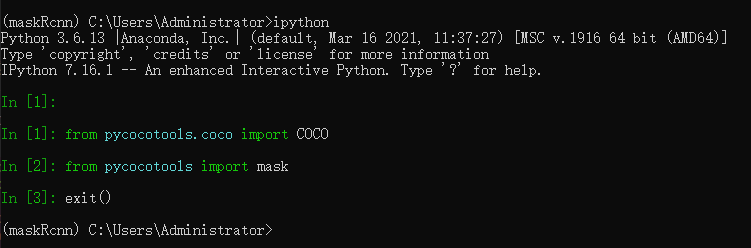
Step 4: verify whether pycocotools is successfully installed
Enter in the environment:
ipython
from pycocotools.coco import COCO
from pycocotools import mask
exit()
4, Run Mask_RCNN case demo ipynb
How to switch the conda virtual environment in Jupyter Notebook: https://blog.csdn.net/Zeek_0114/article/details/105785818
1. Install plug-ins
conda install nb_conda
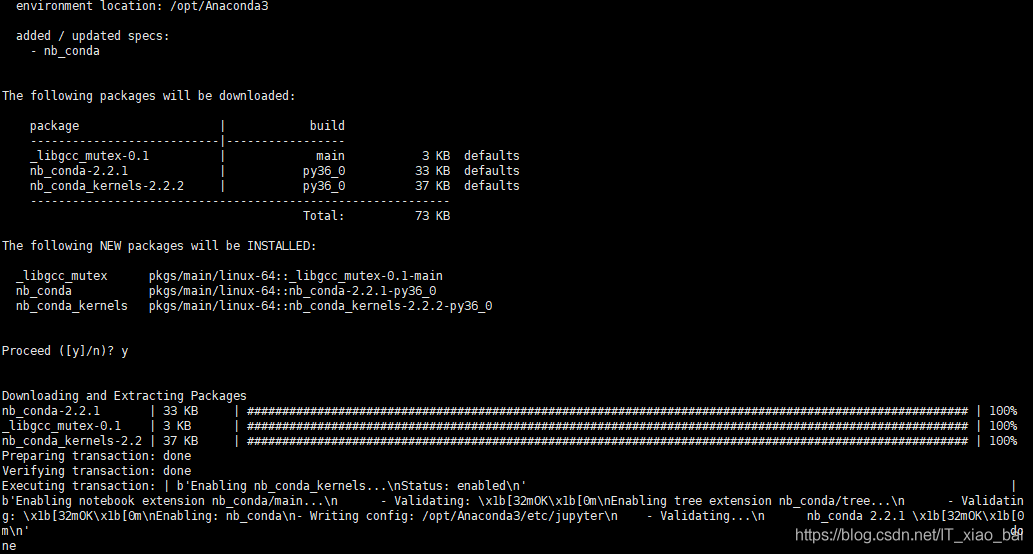
After installing the plug-in, if you open the Jupiter notebook, the Conda tab will appear on the home page, which is not available before pressing the plug-in.

2. Install jupyter in the virtual environment
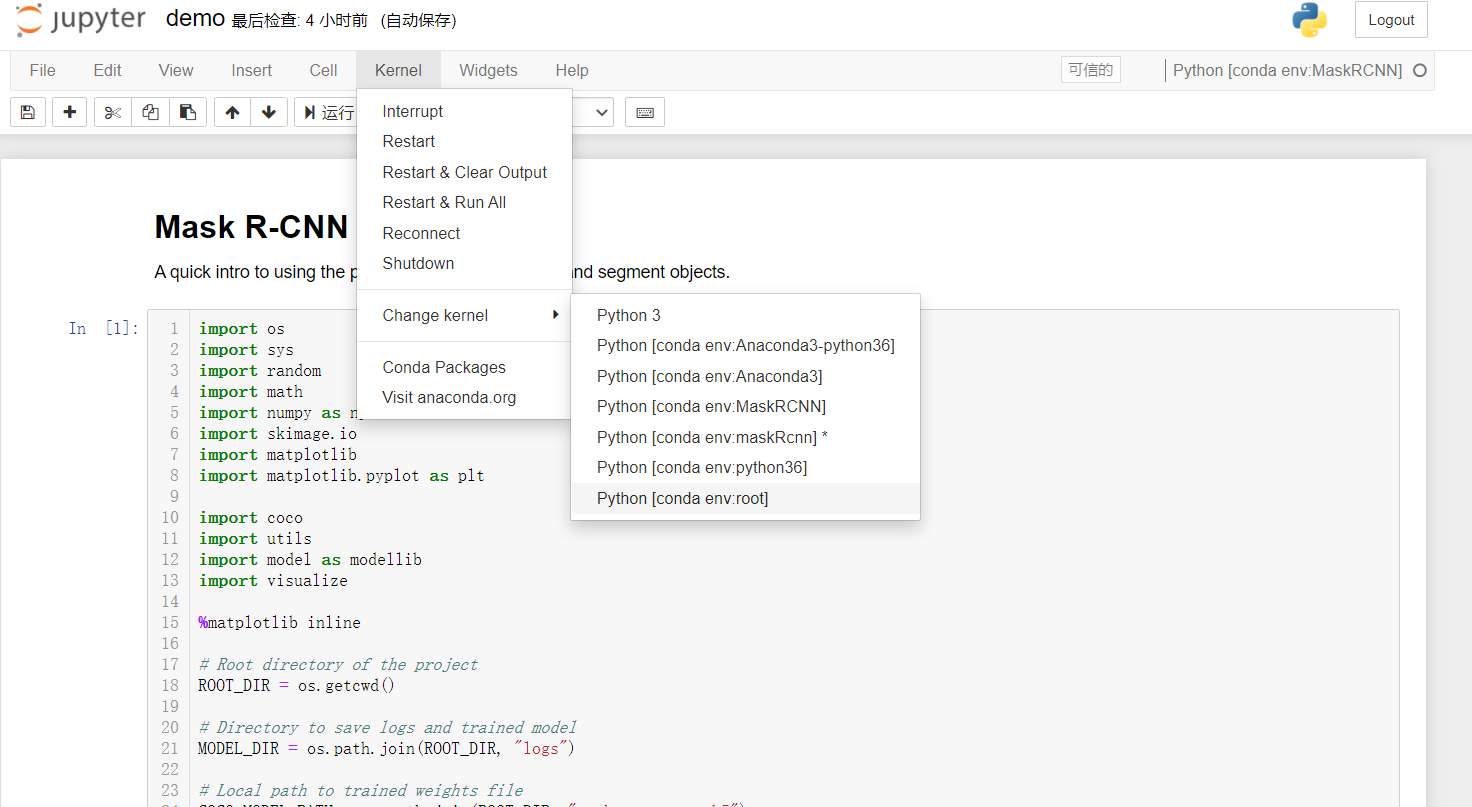
We finished installing NB_ After CONDA plug-in, open jupyter and click "Kernel → Change kernel" in your jupyter notes. You should be able to switch the virtual environment.
But someone must have made a fatal mistake like me. In addition to installing plug-ins, we also need to install jupyter notebook in every virtual environment you build.
Enter the virtual environment first and install jupyter in the virtual environment:
conda install -y jupyter
3. Restart jupyter
At this time, we have installed everything that should be installed. Exit the virtual environment and we need to restart jupyter. After restarting, open the note and click Kernel → Change kernel to switch the virtual environment.
4. Run demo in Jupiter notebook ipynb
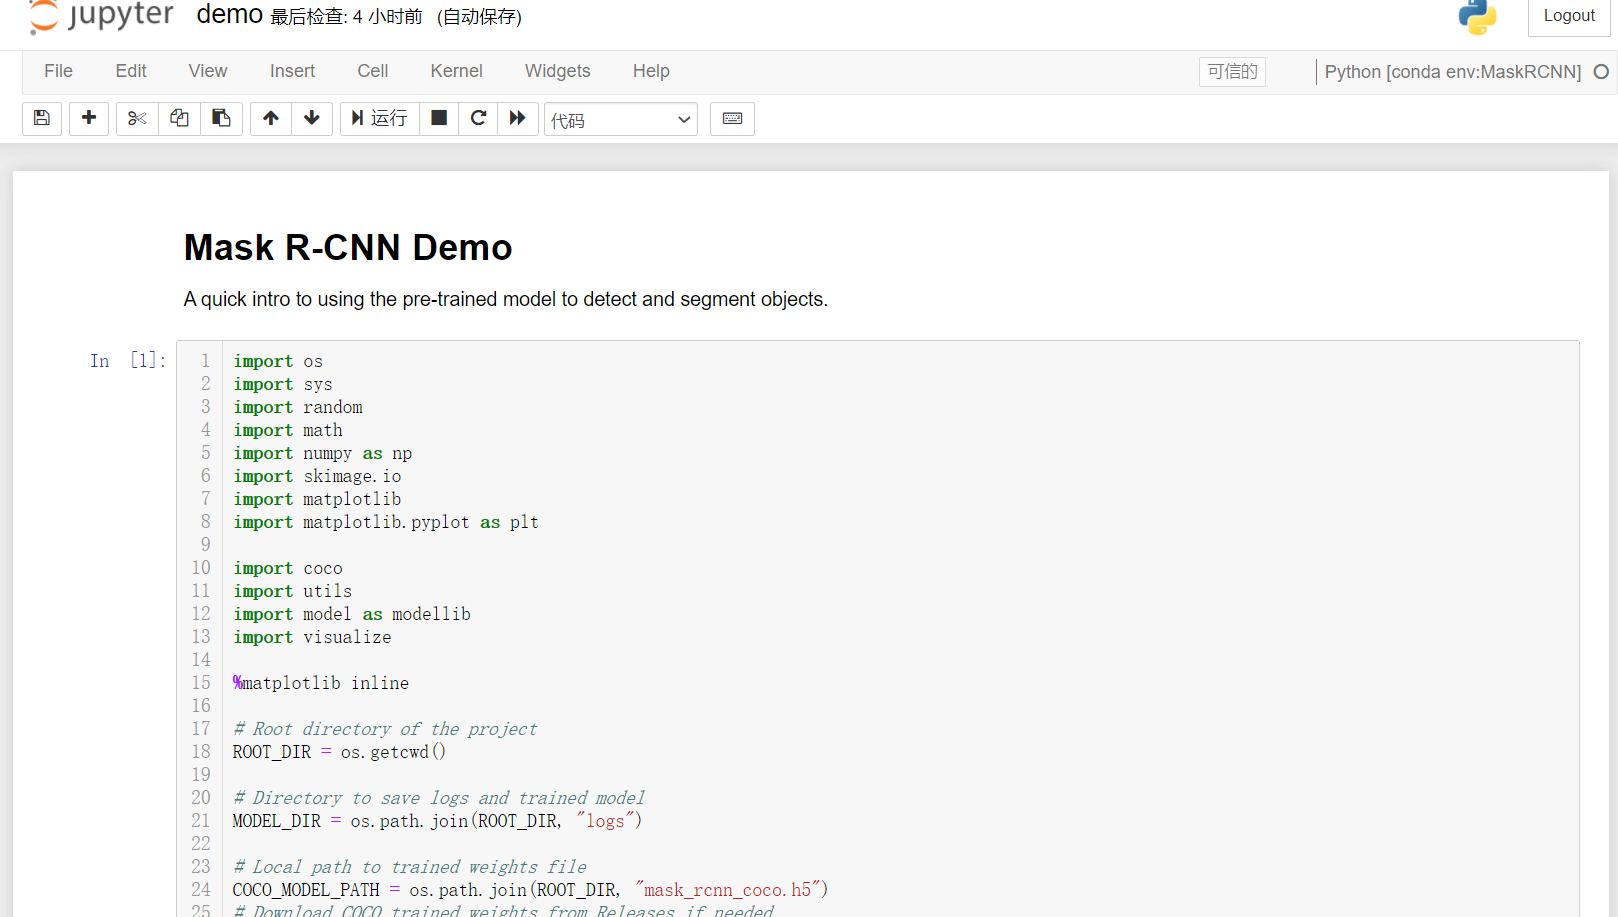
An error may be reported when performing the following step: GPU memory out clean up some video memory garbage first

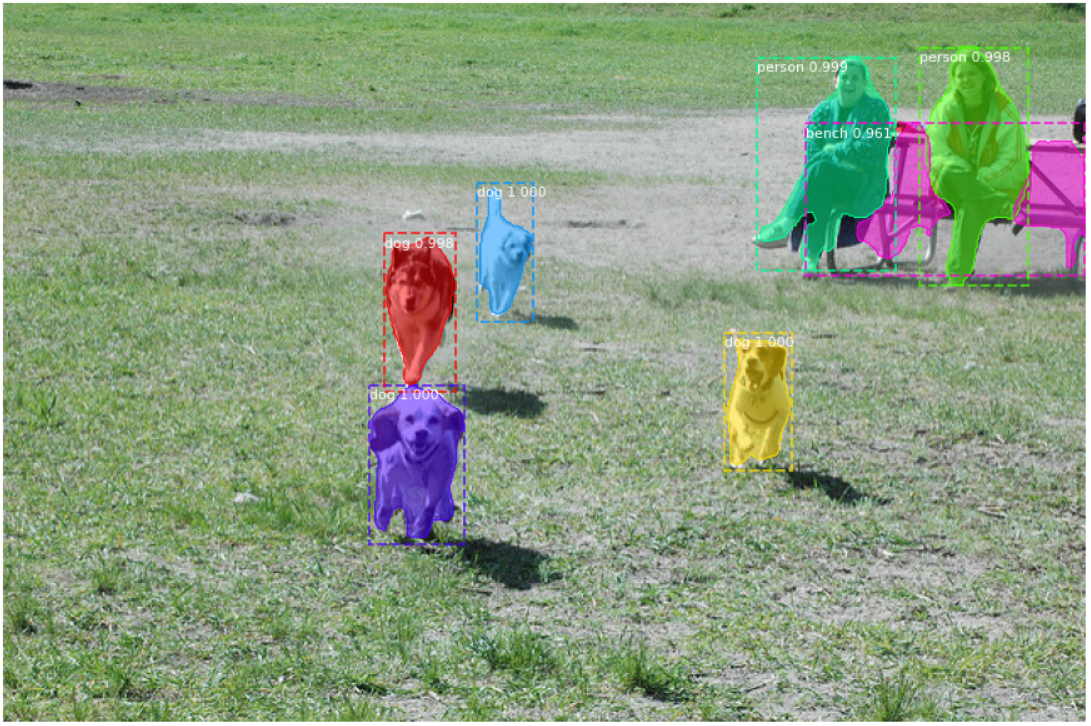
Finally, there is a result:
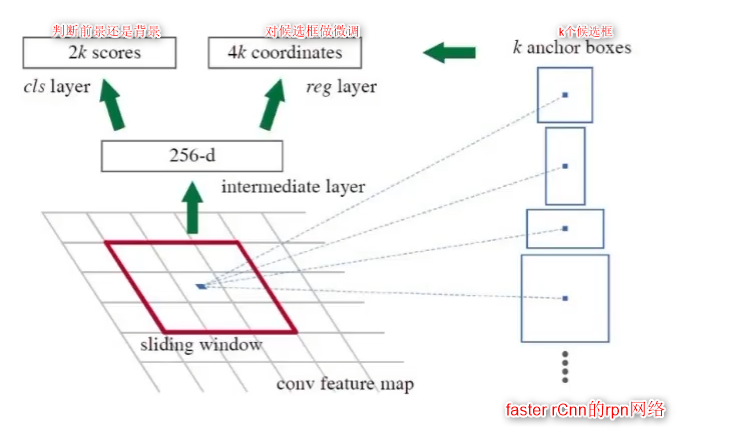
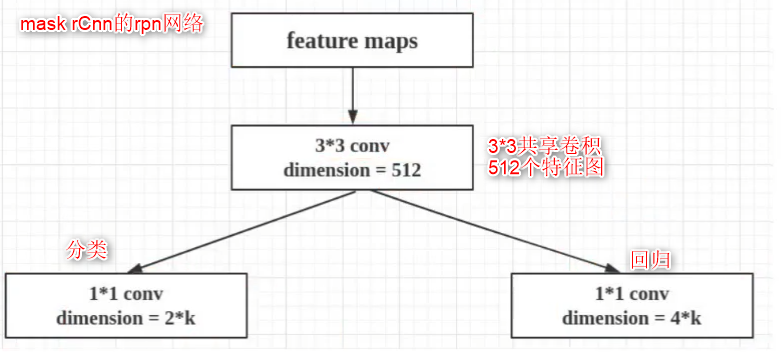
Schematic diagram of fast RCNN and mask Rcnn:
It took me three days to finally get out of the maskRcnn source code. At the beginning, toutie insisted on using tensorflow2 without changing the environment. After spending three days to solve some bugs that Baidu could not solve for half a day, I resolutely embarked on the road of re creating the environment. It was not easy to write today's notes after consulting various blogs, Brothers and sisters, come on!
Thanks for these excellent blog References: