The last article talked about how to use Ubuntu 18 04 install nvidia graphics card driver, then install cuda and cudnn together in the environment where the graphics card driver is installed. The workload is also a lot. I unloaded it several times. The complete collection of deep learning environment and pit avoidance is coming!!!!
preface
This is the video card driver installed in my previous article:
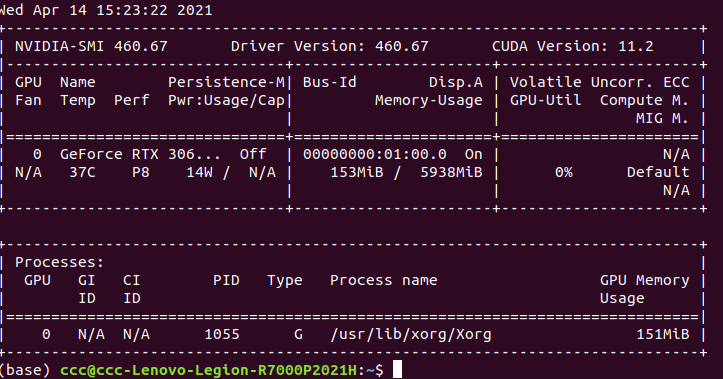 Here is the meaning of each parameter:
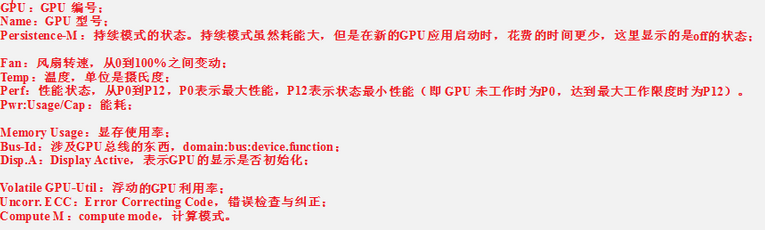 The processes below represent the GPU video memory usage of each process.
You can see that my driver version is 460.67, and the corresponding version of CUDA is 11.2
Don't think CUDA has been installed. This is just to recommend the corresponding downloaded CUDA version for you. You have to do it yourself
1, Install NVIDIA Cuda
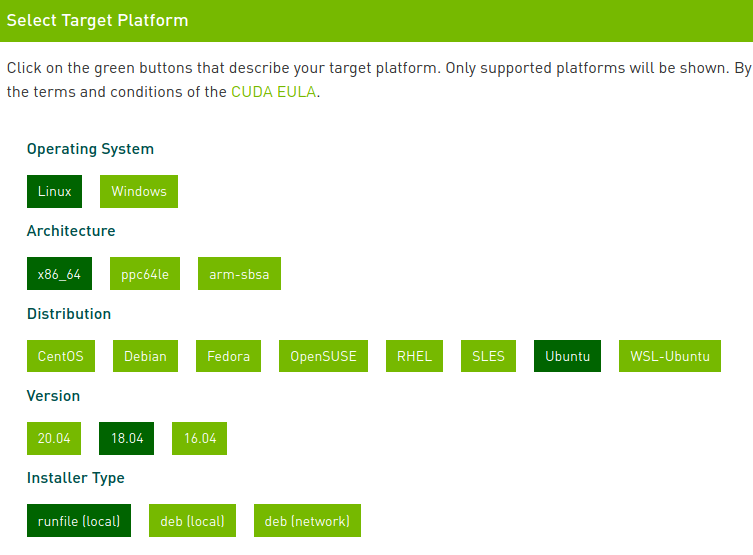
1. Enter the official website
2. Old link
3. Click the block corresponding to your system, and finally select runfile (local) to display the corresponding download connection and copy it to terminal for download.
 This is my screenshot...
Then find the two lines of code and copy them to the terminal for execution.

Check whether cuda version number is correct. Here is my cuda_11.2.0, no problem, next step
2, Installation
1. If there is a wrong version or an old version before, Unloading portal
2. Installation
sudo sh cuda_11.2.0_460.27.04_linux.run //You just downloaded it run file
Then this appears
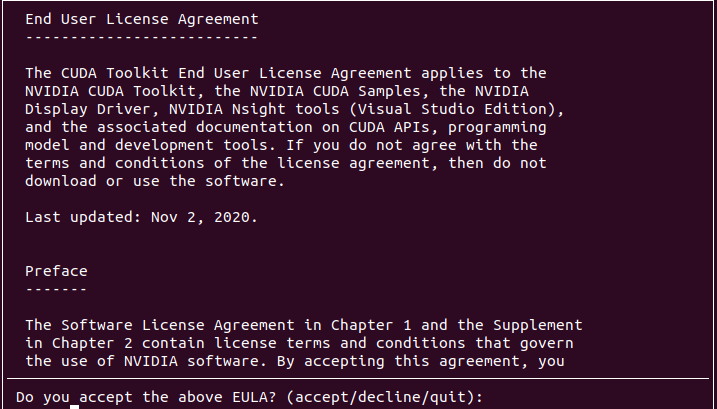
Enter accept
Uncheck the Driver!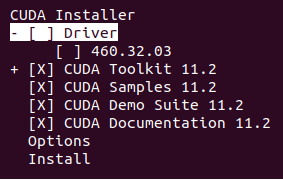
Press the up and down buttons to the install position, and press enter to install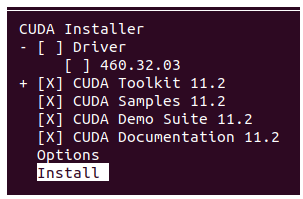 Installation complete!
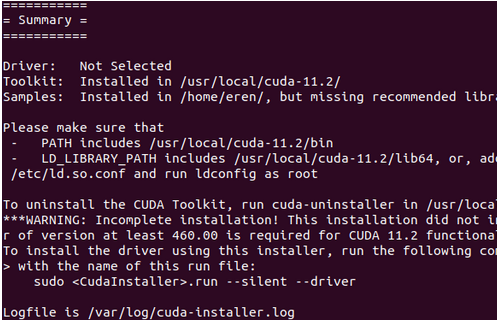
3. Configure environment variables
Open environment variable text
sudo gedit ~/.bashrc //Personally, gedit is easier to use than Vim
Add the following environment variables
Open / usr/local/cuda-11.2. Generally downloaded here
Note: cuda instead of cuda version number is used here to facilitate switching between multiple cuda versions
# CUDA
export LD_LIBRARY_PATH=$LD_LIBRARY_PATH:/usr/local/cuda/lib64
export PATH=$PATH:/usr/local/cuda/bin
export CUDA_HOME=$CUDA_HOME:/usr/local/cuda
Update variables:
source ~/.bashrc
nvcc move to / usr/bin/
sudo cp /usr/local/cuda-11.2/bin/nvcc /usr/bin/
# Note the correspondence of cunda version number
4. Verify whether cuda is successful
nvcc --version
 ok! success!!
Note: Supplement: if the user environment variable (~ /. bashrc) has been changed, but the old cuda version is still displayed, please delete the environment variable of the previous old version. reboot restart.
3, Install cdnn
1. Login Official website , you need to register an account here
Download cuda11 2-Ubuntu18. 3 Deb s corresponding to 04
Be sure to find your corresponding version number. Don't make a mistake! Insert picture description here
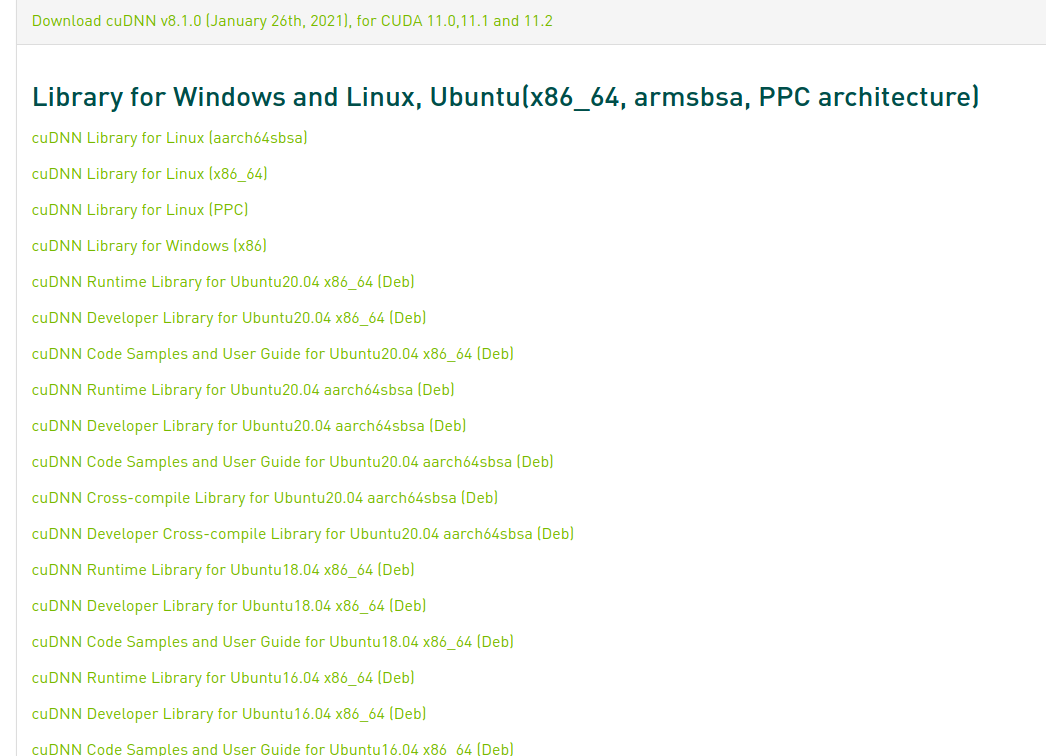
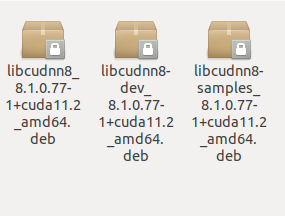
This is what I did. Note that it's all 8.1.0.77
The next step is to run. These three are ok. Note that the order is the order on the picture, so that no dependent packages will be involved
#Note that here -i, replace the names of the three packages you downloaded in turn!!!
sudo dpkg -i libcudnn8_8.1.0.77-1+cuda11.2_amd64.deb
sudo dpkg -i libcudnn8-dev_8.1.0.77-1+cuda11.2_amd64.deb
sudo dpkg -i libcudnn8-samples_8.1.0.77-1+cuda11.2_amd64.deb
Copy the cuDNN samples to HOME
cp -r /usr/src/cudnn_samples_v8/ $HOME
change directory
cd $HOME/cudnn_samples_v8/mnistCUDNN #Here you will find that there are more cudnn in home_ samples_ V8 this folder
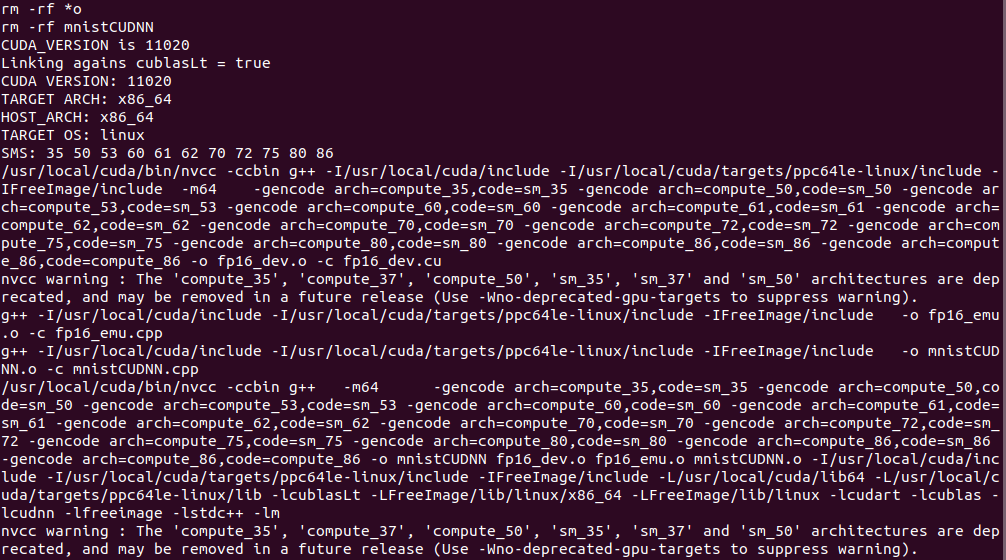
Compile the cuistmn
make clean && make
If there is a problem here:
1.Download FreeImage
2. Unzip the downloaded zip, put it into the download of home (specify yourself) and open readme linux
After reading, install according to Installation:
Open the command line and enter the directory of the extracted file (please refer to your own)
install(make, make install)
clear(make clean)
cd /download/FreeImage/  #Be careful not to forget this slash!!!
make
make install
make clean
This process takes a long time. It's ok if there are warnings and error s in the end.
Recompile the mnistCUDNN sample
cd  $HOME/cudnn_samples_v8/mnistCUDNN
make clean && make
Run the mnistCUDNN sample directly
./mnistCUDNN
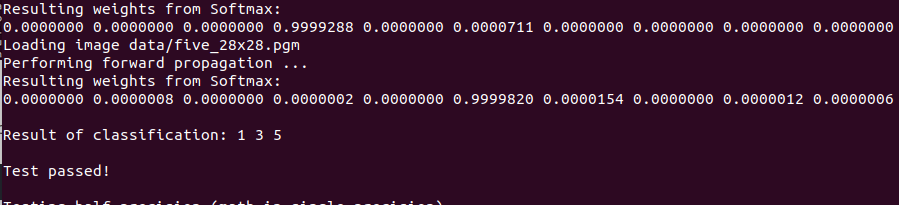
success!!
2. Ultimate verification cudnn
Input to the terminal in sequence:
cd /usr/local/cuda/samples/1_Utilities/deviceQuery
sudo make
./deviceQuery
 Input password
 result=PASS means success!!!
