catalog:
6. Collection of articles on Hongmeng open source third party components
preface
Sideslip menu component of slidingmenu based on Android platform( https://github.com/jfeinstein10/SlidingMenu ), the migration and reconstruction of hongmenghua has been realized, and the code has been opened to the public( https://gitee.com/isrc_ohos/sliding-menu_ohos ), welcome to download and use and put forward your valuable opinions!
background
SlidingMenu_ohos provides a navigation frame of side sliding menu, so that the menu can be hidden on the left, right or left of the mobile phone screen. When the user uses it, it can be called out by sliding left or right, which not only saves the space of the main screen, but also facilitates user operation. It is widely used in many mainstream apps.
Effect display
Since the display effect of the menu from the left and right sides is similar, here we only take the menu from the left side as an example to show the effect.
When the component is not enabled, the application displays the main page. Single finger touch the left side of the screen and slide it to the right gradually, the menu page will be displayed gradually, and the main page will be hidden gradually. When the sliding distance to the right exceeds a certain threshold, all menu pages are displayed, and the effect is shown in Figure 1.
Figure 1 menu display and hiding effect
Sample parsing
The Sample part is relatively simple and mainly consists of two parts. First, create slidingmenu_ The object of ohos component can call the Library interface to set the specific properties of the component according to the actual needs of users. The second is to add the set components to the Ability. The usage of components will be described in detail below.
1. Import SlidingMenu class
import com.jeremyfeinstein.slidingmenu.lib.SlidingMenu;
2. Set the layout of Ability
This layout is used as the layout of the main page and is displayed when the component is hidden.
DirectionalLayout directionalLayout =
(DirectionalLayout)LayoutScatter.getInstance(this).parse(ResourceTable.Layout_activity_main,null,false);setUIContent(directionalLayout);
3. Instantiate the object of the component
SlidingMenu slidingMenu = null;
try {
    //Initializing the SlidingMenu instance
    slidingMenu = new SlidingMenu(this);
} catch (IOException e) {
    e.printStackTrace();
} catch (NotExistException e) {
    e.printStackTrace();
}
4. Set component properties
This step can set the location, trigger range, layout, maximum width and other properties of components according to specific requirements.
//Set menu placement
slidingMenu.setMode(SlidingMenu.LEFT);
//Set the trigger range of the component
slidingMenu.setTouchScale(100);
 //Set the layout of components
slidingMenu.setMenu(ResourceTable.Layout_layout_left_menu);
//Set maximum menu width
slidingMenu.setMenuWidth(800);
5. Ability association
The attachToAbility() method is an important method provided by the Library to associate menu components to Ability. Its parameter sliding_ Windows and SLIDING_CONTENT is the different modes of the menu, sliding_ The menu in Windows mode includes Title / ActionBar, and the menu needs to be displayed on the whole mobile phone page, as shown in Figure 2; SLIDING_ The menu in content mode does not include the part containing Title / ActionBar. The menu can be displayed in the local range of the mobile phone page, as shown in Figure 3.
try {
    //Associate Ability and get the root node of page presentation
    slidingMenu.attachToAbility(directionalLayout,this, SlidingMenu.SLIDING_WINDOW);
} catch (NotExistException e) {
    e.printStackTrace();
} catch (WrongTypeException e) {
    e.printStackTrace();
} catch (IOException e) {
    e.printStackTrace();
}
Figure 2 sliding_ Windows display renderings
Figure 3. SLIDING_CONTENT display renderings
Library parsing
The engineering structure of the Library is shown in the figure below. CustomViewAbove represents the main page, CustomViewBehind represents the menu page, and SlidingMenu is mainly used to control the main page above the menu page. It can also set the width, trigger range, display mode and other attributes of the menu. For the convenience of explanation, the following are explained by taking the example of the finger touching the screen from the left and sliding to the right. The menus are sliding_ Display mode of windows.
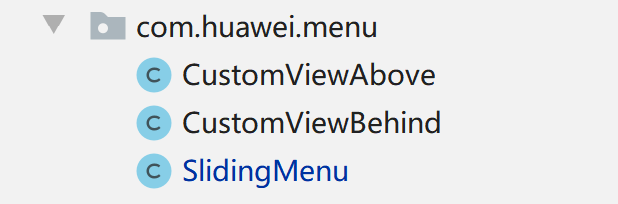
Figure 4 engineering structure of Library
1. CustomViewAbove main page
CustomViewAbove needs to monitor Touch events such as Touch, move, lift and cancel, and record the distance and speed of finger sliding.
(1) handling of Touch events
Touch events determine how menus are displayed, moved, and hidden. For example, within the trigger range of the menu, when the finger slides to the right (POINT_MOVE), the menu will follow and slide to the position of the finger. When the finger is lifted (PRIMARY_POINT_UP) or cancelled sliding (CANCEL), the next status of the menu page will be hidden or displayed according to the distance and speed of the finger sliding.
 switch (action) {
        //Press
        case TouchEvent.PRIMARY_POINT_DOWN:
                 .....
                 mInitialMotionX=mLastMotionX=ev.getPointerPosition(mActivePointerId).getX();
                 break;
        //slide
        case TouchEvent.POINT_MOVE:
                 ......
                //Slide the menu to the finger position (x)
                left_scrollto(x);
                break;
         //lift
         case TouchEvent.PRIMARY_POINT_UP:
                   ......
                   //Get the next status of the menu (full screen display or all hidden)
                  int nextPage = determineTargetPage(pageOffset, initialVelocity,totalDelta);
                  //Set the next state of the menu
                  setCurrentItemInternal(nextPage,initialVelocity);
                   ......
                  endDrag();
                  break;
           //cancel
           case TouchEvent.CANCEL:
                   ......
                  //According to the current state of the menu, mCurItem sets the next state of the menu
                  setCurrentItemInternal(mCurItem);
                 //End drag
                 endDrag();
                 break;
    }
(2) treatment of sliding distance and speed
When the finger is lifted, the sliding speed and distance are greater than the minimum sliding speed and the minimum moving distance respectively. It is determined that the operation at this time is fast drag, and the menu pops up immediately and displays all of them, as shown in Figure 5.
private int determineTargetPage(float pageOffset, int velocity, int deltaX) {
    //Get the current menu status, 0: the left menu is showing, 1: the menu is hidden, 2: the right menu is showing
    int targetPage = getCurrentItem();
    //Judgment for fast drag
    if (Math.abs(deltaX) > mFlingDistance && Math.abs(velocity) > mMinimumVelocity) {
        if (velocity > 0 && deltaX > 0) {
            targetPage -= 1;
        } else if (velocity < 0 && deltaX < 0){
            targetPage += 1;
        }
    }
}
Fig. 5 effect drawing of fast dragging
When the finger is raised and does not meet the fast drag standard, it is necessary to judge the hiding or display of the menu according to the sliding distance. If the expanded part of the menu exceeds 1 / 2 of its width, the menu will pop up immediately, and the effect diagram is shown in Figure 1; If it is less than 1 / 2 of its own width, it will immediately bounce back and hide all. The effect diagram is shown in Figure 6.
//Get the current menu status, 0: the left menu is showing, 1: the menu is hidden, 2: the right menu is showing
switch (mCurItem){
            case 0:
                targetPage=1-Math.round(pageOffset);
                break;
            case 1:
            //When the menu is hidden, first judge whether the menu is placed on the left or right
                if(current_state == SlidingMenu.LEFT){
                    targetPage = Math.round(1-pageOffset);
                }
                if(current_state == SlidingMenu.RIGHT){
                    targetPage = Math.round(1+pageOffset);
                }
                break;
            case 2:
                targetPage = Math.round(1+pageOffset);
                break;
        }
Figure 6 Effect of slow drag
(3) implementation of menu display and hiding
The left side line of the main page is bound to the position of the finger. When the finger slides to the right, the main page will also slide to the right. In this process, the menu page will be displayed gradually to realize the visual effect that the menu page expands slowly with the finger.
void setCurrentItemInternal(int item,int velocity) {
    //Get the target status of the menu
    item = mViewBehind.getMenuPage(item);
    mCurItem = item;
    final int destX = getDestScrollX(mCurItem);
    /*The menu is placed on the left side, and the pop-up display or pop-up hiding of the menu is realized by setting the position of the main page
     1.destX=0,The left side line of the main page is aligned with the left side line of the screen, and the menu is completely obscured to realize menu bounce back and hiding
     2.destX=MenuWidth,The left side line of the main page moves to the right by a distance equal to the total width of the menu to realize the pop-up display of the menu*/
    if (mViewBehind.getMode() == SlidingMenu.LEFT) {
        mContent.setLeft(destX);
        mViewBehind.scrollBehindTo(destX);
    }
    ......
}

// Menu sliding operation when the menu is placed on the left
public void left_scrollto(float x) {
       //When the display width of the menu is greater than the maximum width, only the maximum width is displayed
      if(x>getMenuWidth()){
            x=getMenuWidth();
      }
     //The main page (the left side line of the main page) and the menu (the right side line of the menu) move to the specified position X respectively
    mContent.setLeft((int)x);
    mViewBehind.scrollBehindTo((int)x);
}
2. CustomViewBehind menu page
CustomViewBehind is a menu page, and the logic is much simpler than the main page. It is mainly responsible for changing its own state value according to the Touch event in the main page, and exposing the interface to the outside, which is used to set or obtain the maximum width of the menu page, its own state and other attributes.
// Set maximum menu width
public void setMenuWidth(int menuWidth) {
    this.menuWidth = menuWidth;
}

// Get maximum menu width
public int getMenuWidth() {
    return menuWidth;
}
3. SlidingMenu
Instantiate the objects of CustomViewAbove and CustomViewBehind respectively, and add them to the container of SlidingMenu in the order of the main page in the upper menu page in the lower menu page.
//Add menu sub control
addComponent(mViewBehind, behindParams);
//Add main page sub control
addComponent(mViewAbove, aboveParams);
Project contributors
Xu Zexin, Zheng Senwen, Zhu Wei, Chen Meiru, Wang Jiasi, Zhang Xinxin
Author: Zhu Wei ISRC
For more information, please visit the Hongmeng community jointly built by 51CTO and Huawei: https://harmonyos.51cto.com/