At present, the development environment is managed by the front-end team. There are more and more version distribution projects. I decided to develop a set of jinkens automatic packaging and deployment. After searching online, they are too old or unavailable. After three days of research, I finally completed it and wrote it down and shared it with you.
preface
This article covers the following contents:
- Deploying Jenkins using Docker on Linux
- Jenkins initialization and common plug-in installation
- Building front-end projects using pipeline
- Add gitlab trigger to automatically trigger the build when submitting the code merge request
- The Docker container Node environment where Jenkins is installed
- Front end project installation and construction
- Publish the front-end project to the server through ssh
- ngnix deployment
- Publish completion email notification
Installation system: linux
Docker version: Docker version 19.03.5, build 633a0ea
1, Docker installation Jinkens
Docker is very convenient to install Jinkens. It should be noted that the hardware requirements are high. Docker will not repeat it. If you don't understand, you can see an article written before.
1. System requirements
Minimum recommended configuration:
-
256MB free memory
-
1GB of available disk space (10GB is recommended if jenkins runs as a Docker container)
Recommended hardware configurations for small teams:
-
1GB + free memory
-
50 GB + free disk space
be careful:
Initially, the partition space installed on linux is small, and various errors will be encountered when installing plug-ins. It is troublesome to reinstall the location
2. Installation
Docker image selection:
- jenkinsci/blueocean: all Blue Ocean plug-ins and functions are bundled
- jenkins/jenkins
jenkinsci/blueocean is recommended. Download the jenkinsci/blueocean image here.
2.1 downloading images
Execute docker -v to ensure that docker is installed

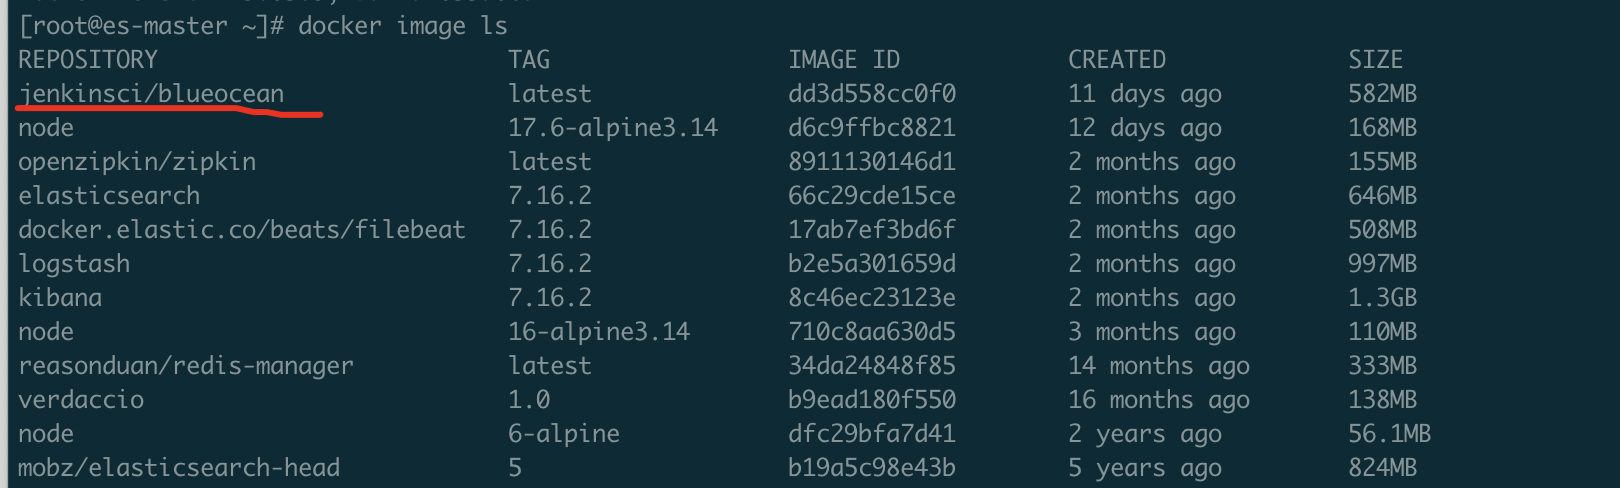
Execute docker pull jenkinsci/blueocean to download the image. After downloading, execute docker image ls to ensure that the image is downloaded successfully.
2.2 running image of docker container
docker run
  # Fill in the first host port (browser access port) and the second container port
  -p 9090:8080 \
  # Map port 50000 of the jenkinsci/blueocean container to port 50000 on the host.
  -p 50000:50000 \
  # Map container directories to local directories.: The front end is the server directory you specify, and the back is fixed
  -v /data/jenkins-data:/var/jenkins_home \
  # Daemons are required
  -v /var/run/docker.sock:/var/run/docker.sock \
  jenkinsci/blueocean
3. Jinkens initialization
Execute docker ps to check whether the container is running

After running, you can access the browser (http: / / server address: 9090 /):
The unlock Jenkins page appears
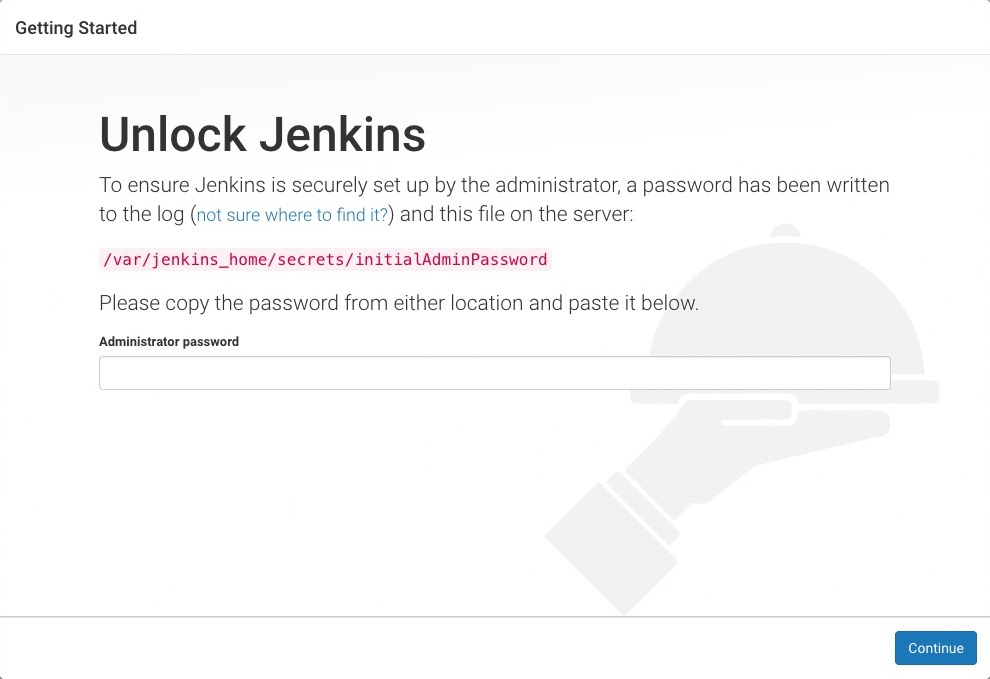
Find the initialAdminbPassword file according to its path and visit vim.
The container jinkens directory has been mapped to the host. Just find it in the host directory. I mapped it to the / data / Jenkins data / folder.
Copy the password, continue to the next step, and then install it step by step as recommended. I won't say more.
2, Build front-end plug-in installation
In addition to the default plug-ins, we also need to install the following list of plug-ins.
You can install as follows:
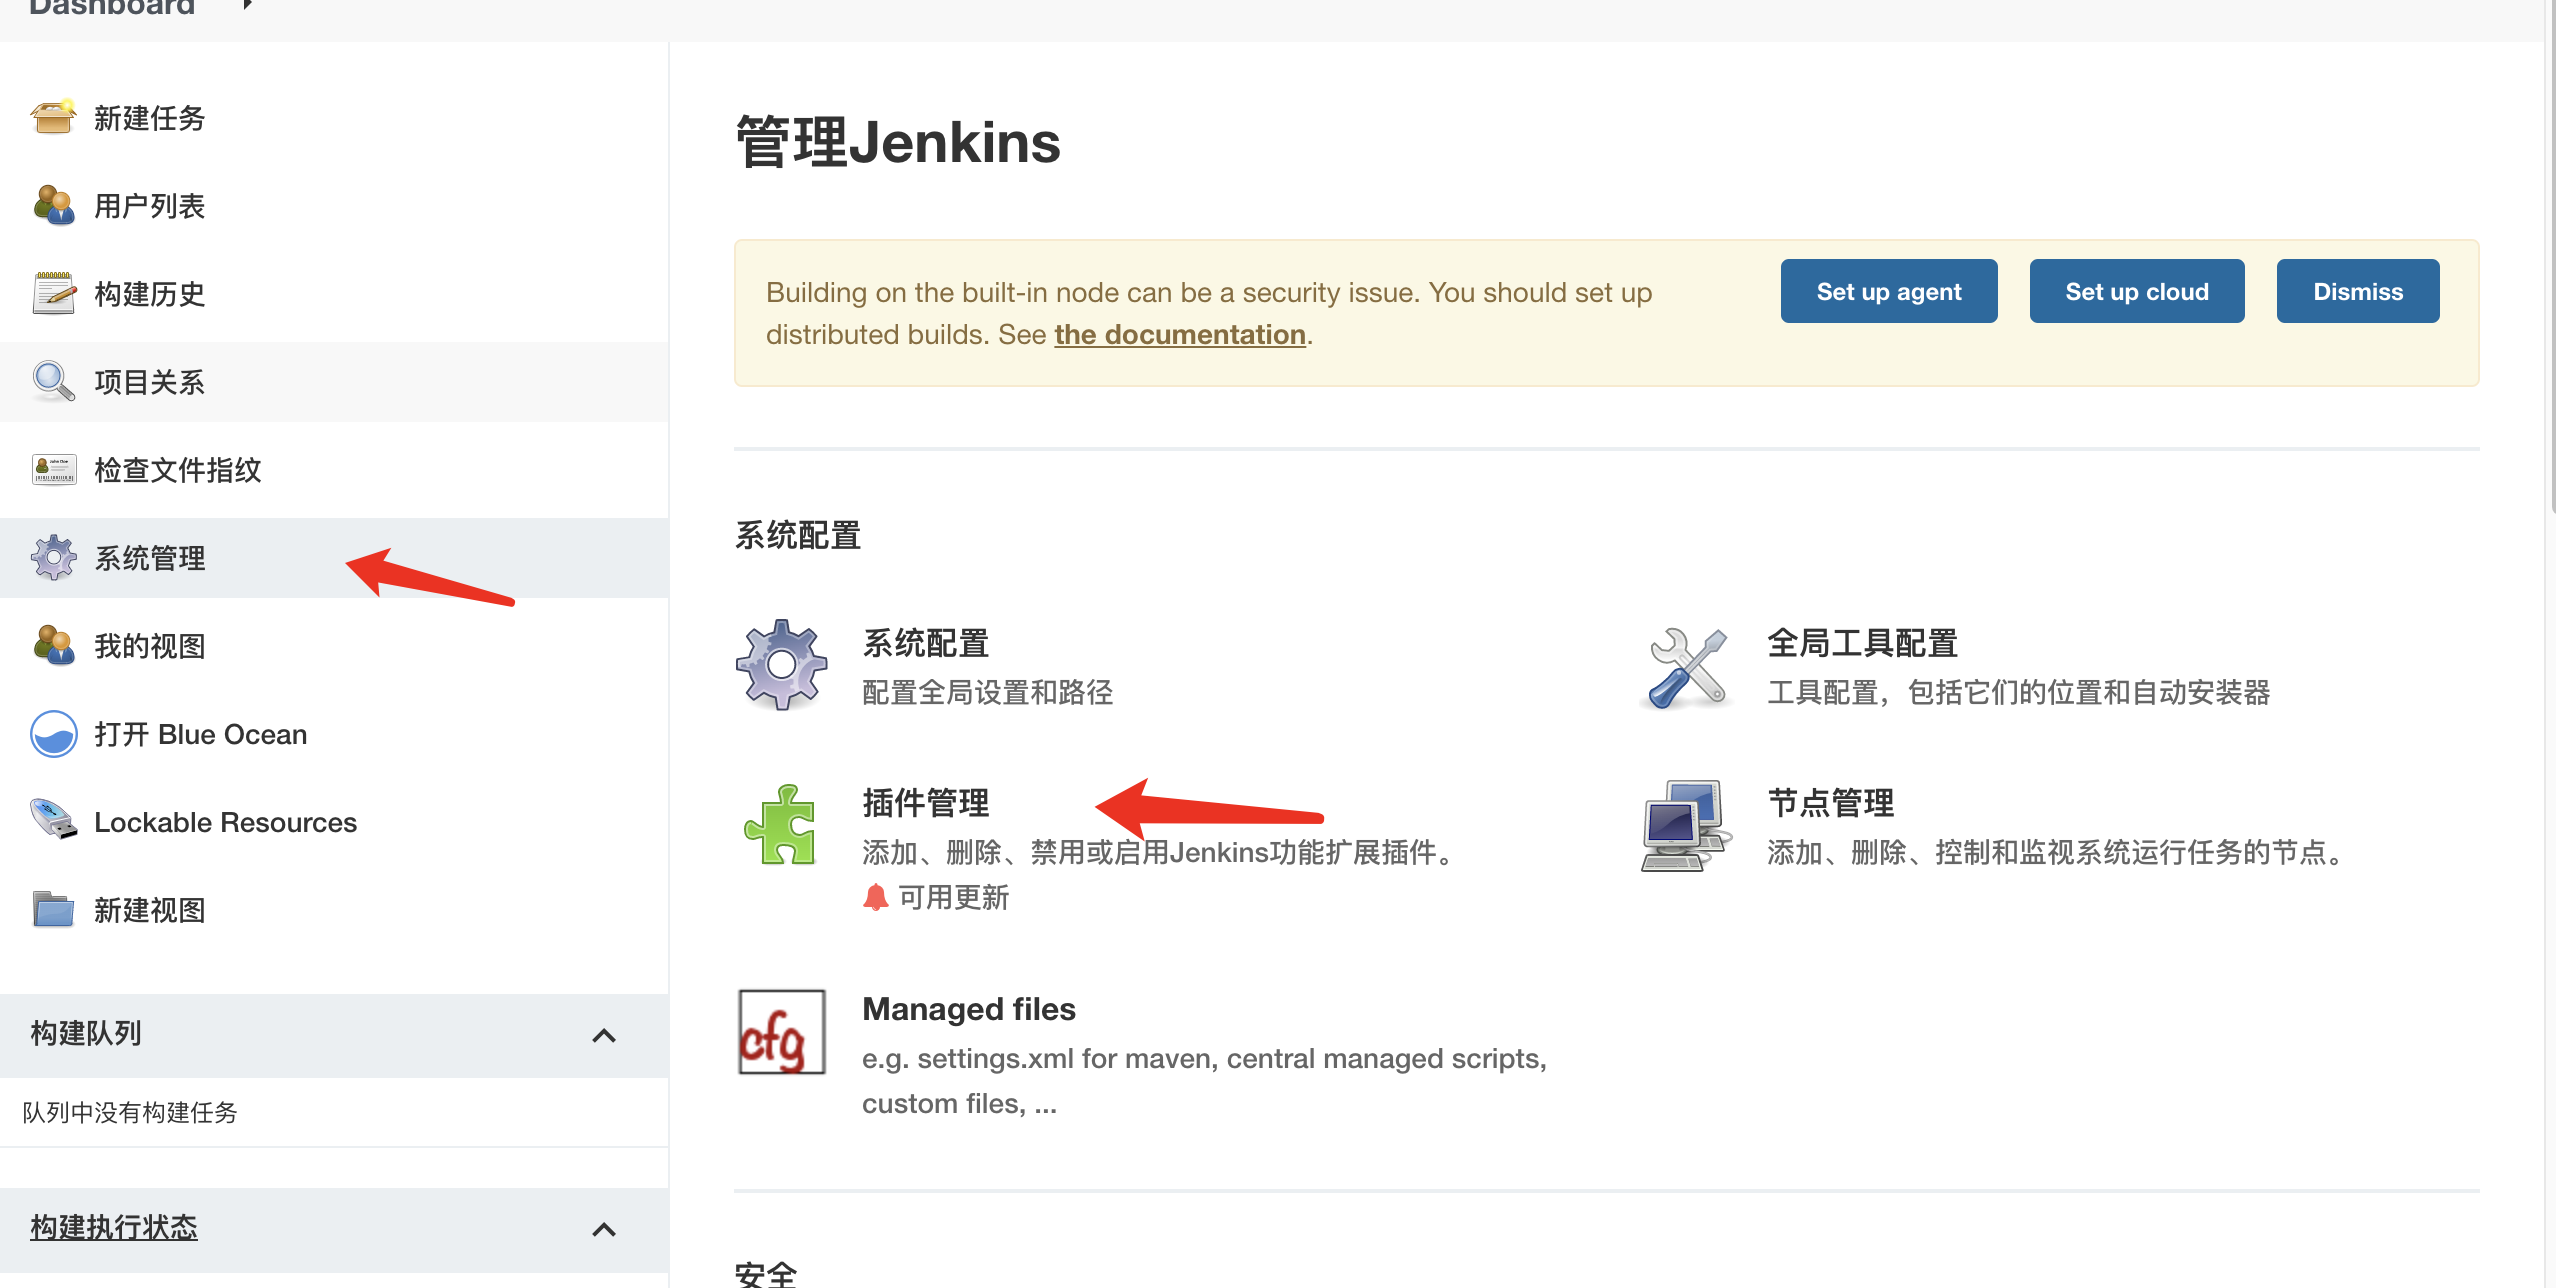
List of installed plug-ins:
- GitLab Plugin : use gitlab to submit the trigger of merging action and automatically build the project.
- SSH Pipeline Steps : Using ssh operation plug-in in pipeline
- Docker plugin
- Docker Pipeline
- NodeJS Plugin
3, Building a project using pipeline
1. New task
Select new task, then enter the name and select pipeline construction.

2. gitlab trigger
First of all, understand the objectives. We expect the project to be built automatically when the dev development environment is push ed or merge requestset.
2.1 configure gitlab plug-in
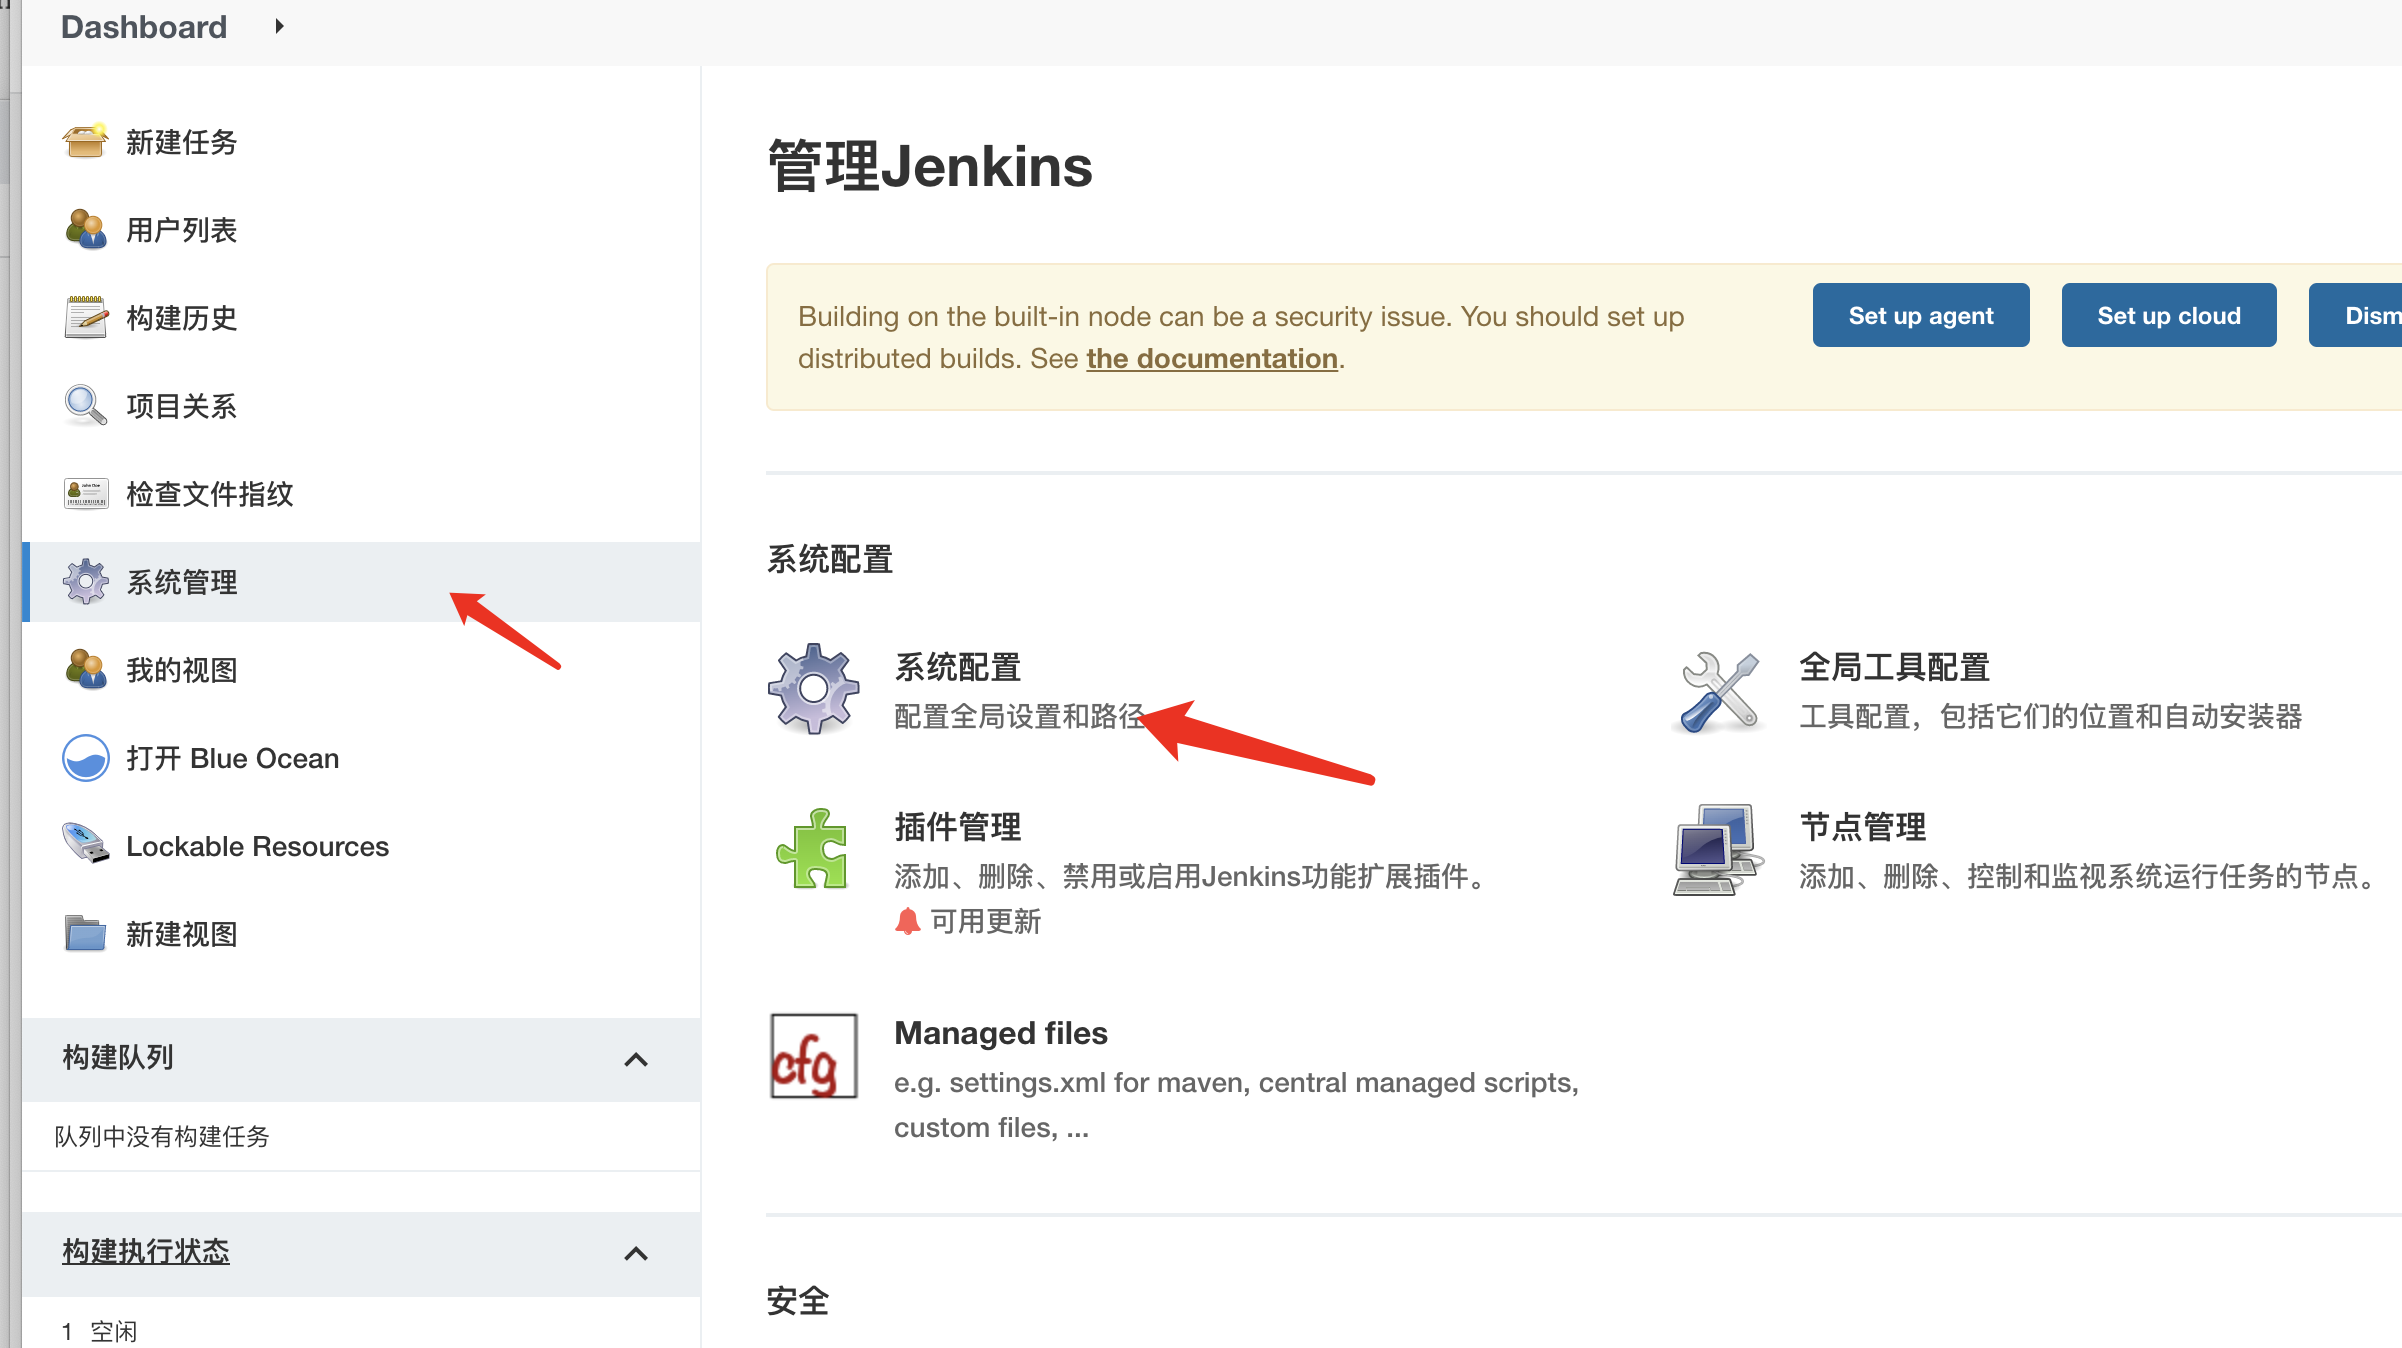
Make sure to configure gitlab under the system tool after downloading gitlab plugin
Set the name, gitlab deployment host and add Gitlab API Token.

Steps to obtain GitLab API token:
Click Avatar - > Settings
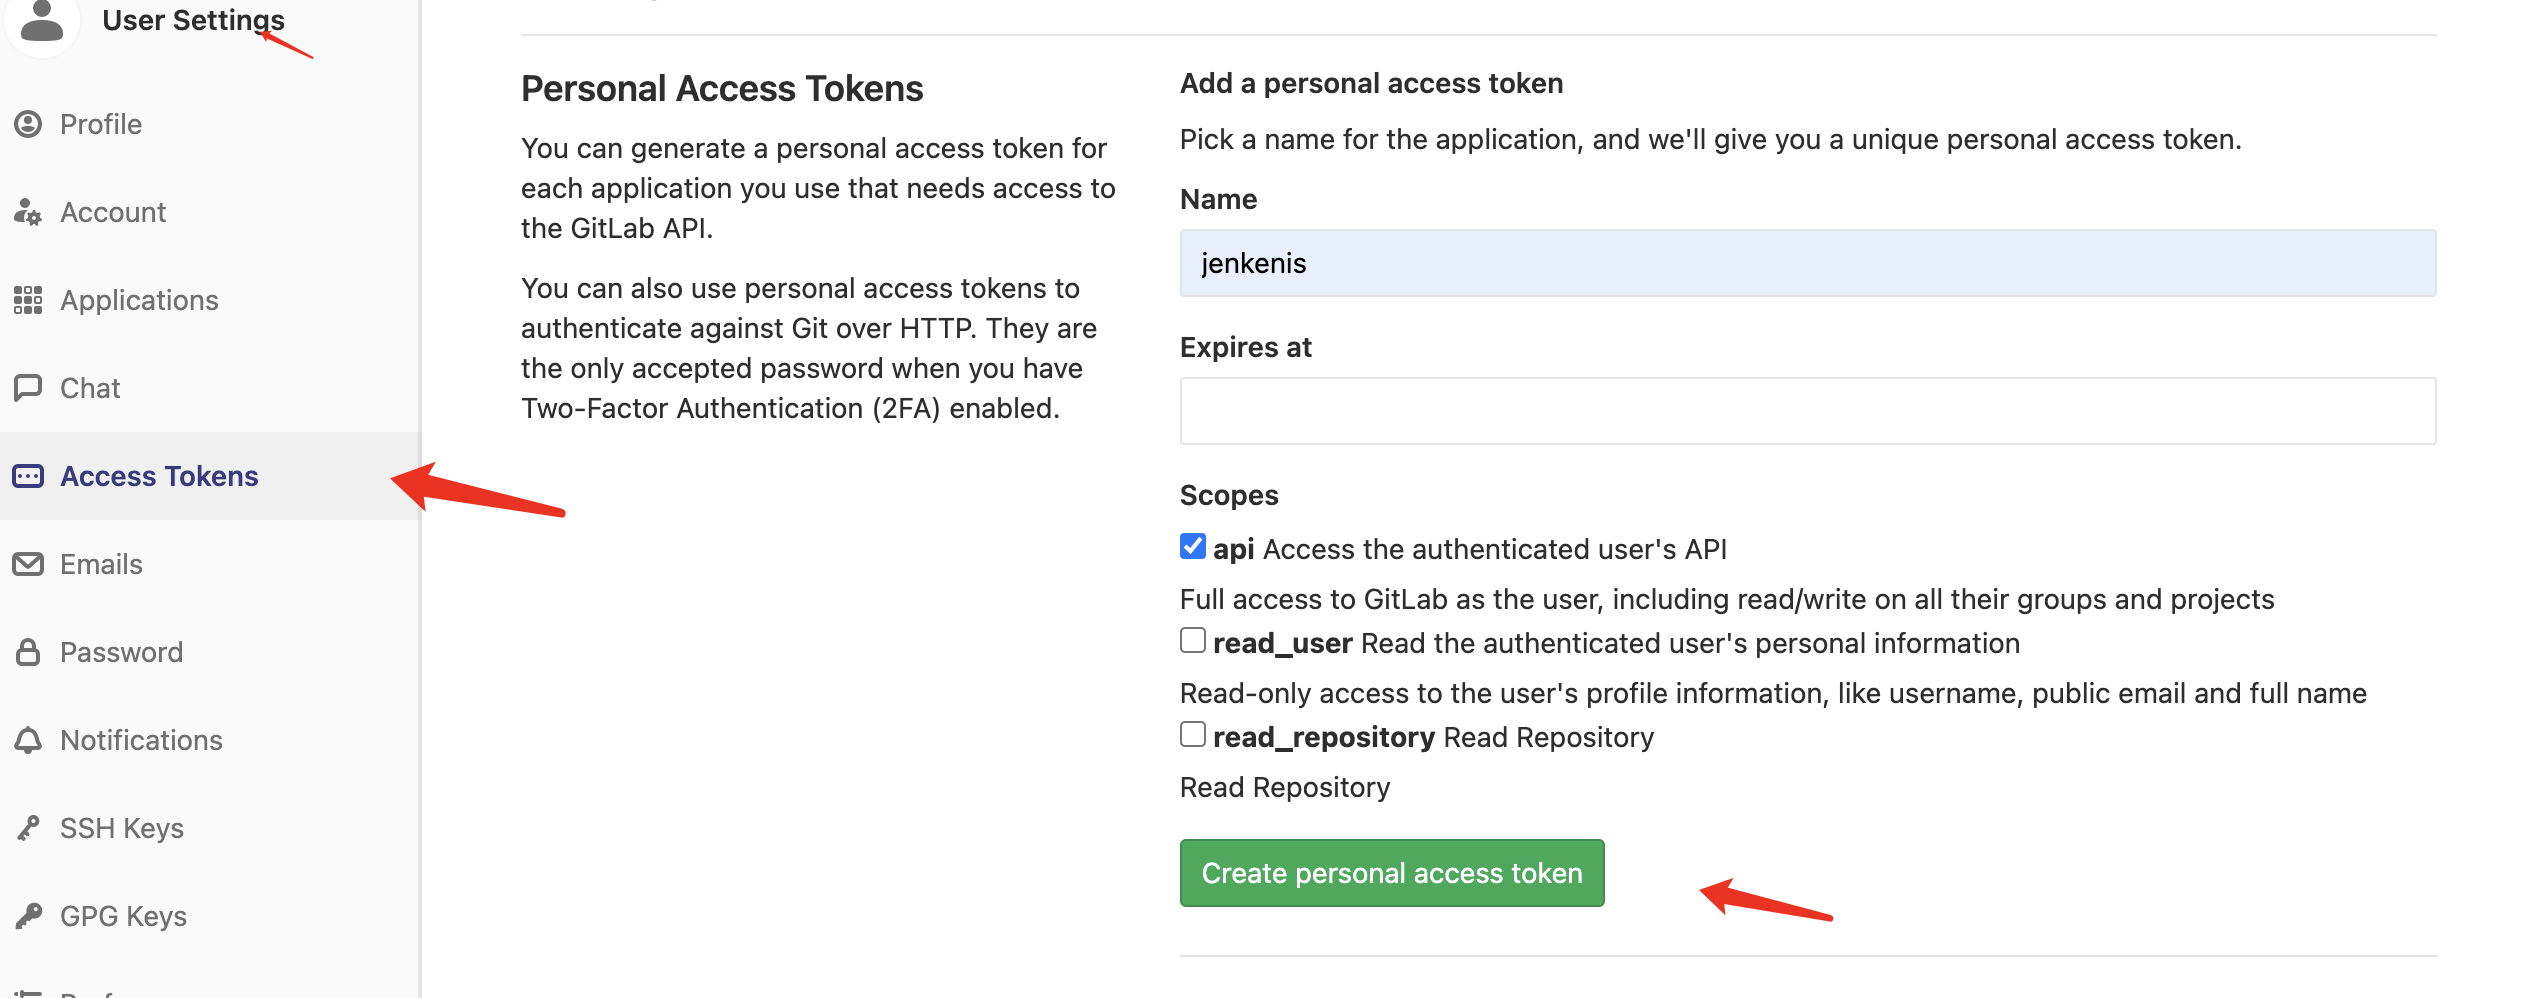
Just write it down.
2.2 select trigger
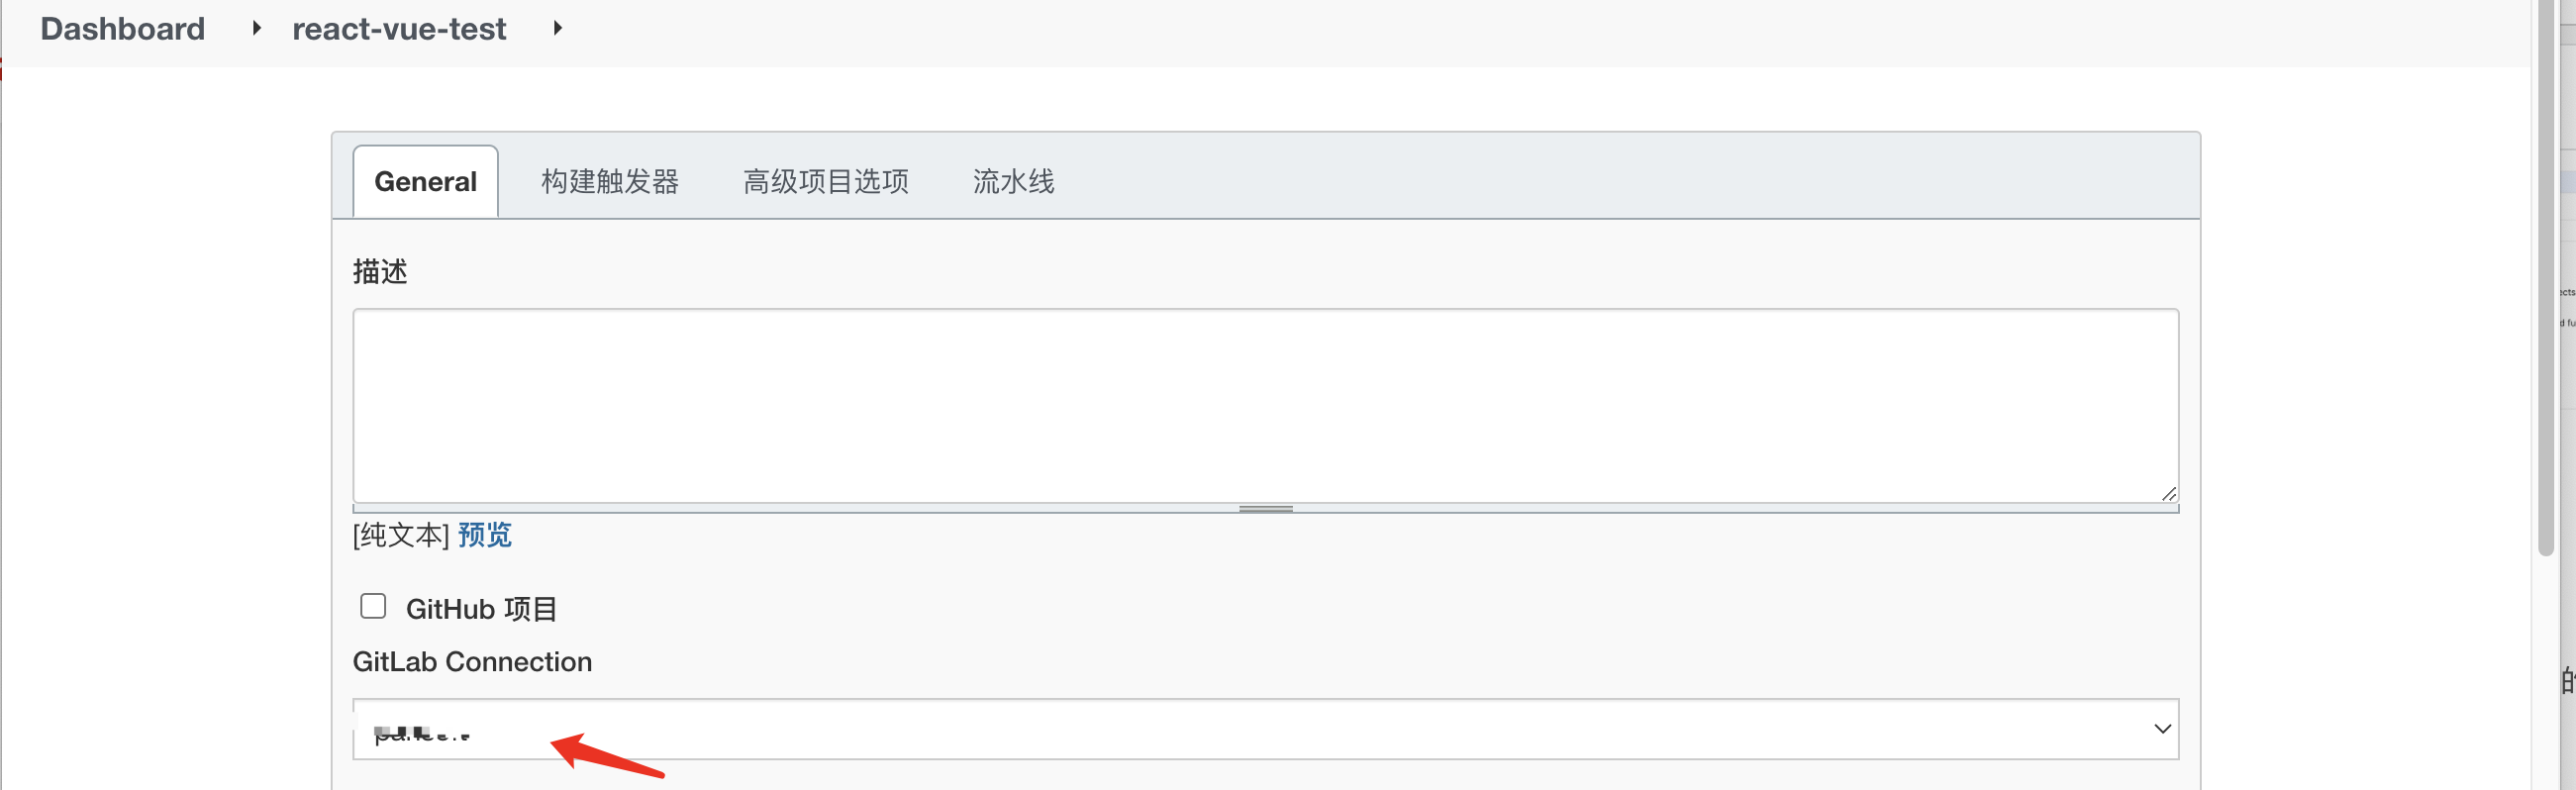
Go back to the job configuration interface, check the gitlab connection and select the name just configured.
2.2.1 switch to build trigger selection:
Check gitlab to build when changing, and select time push and allow merging requests.
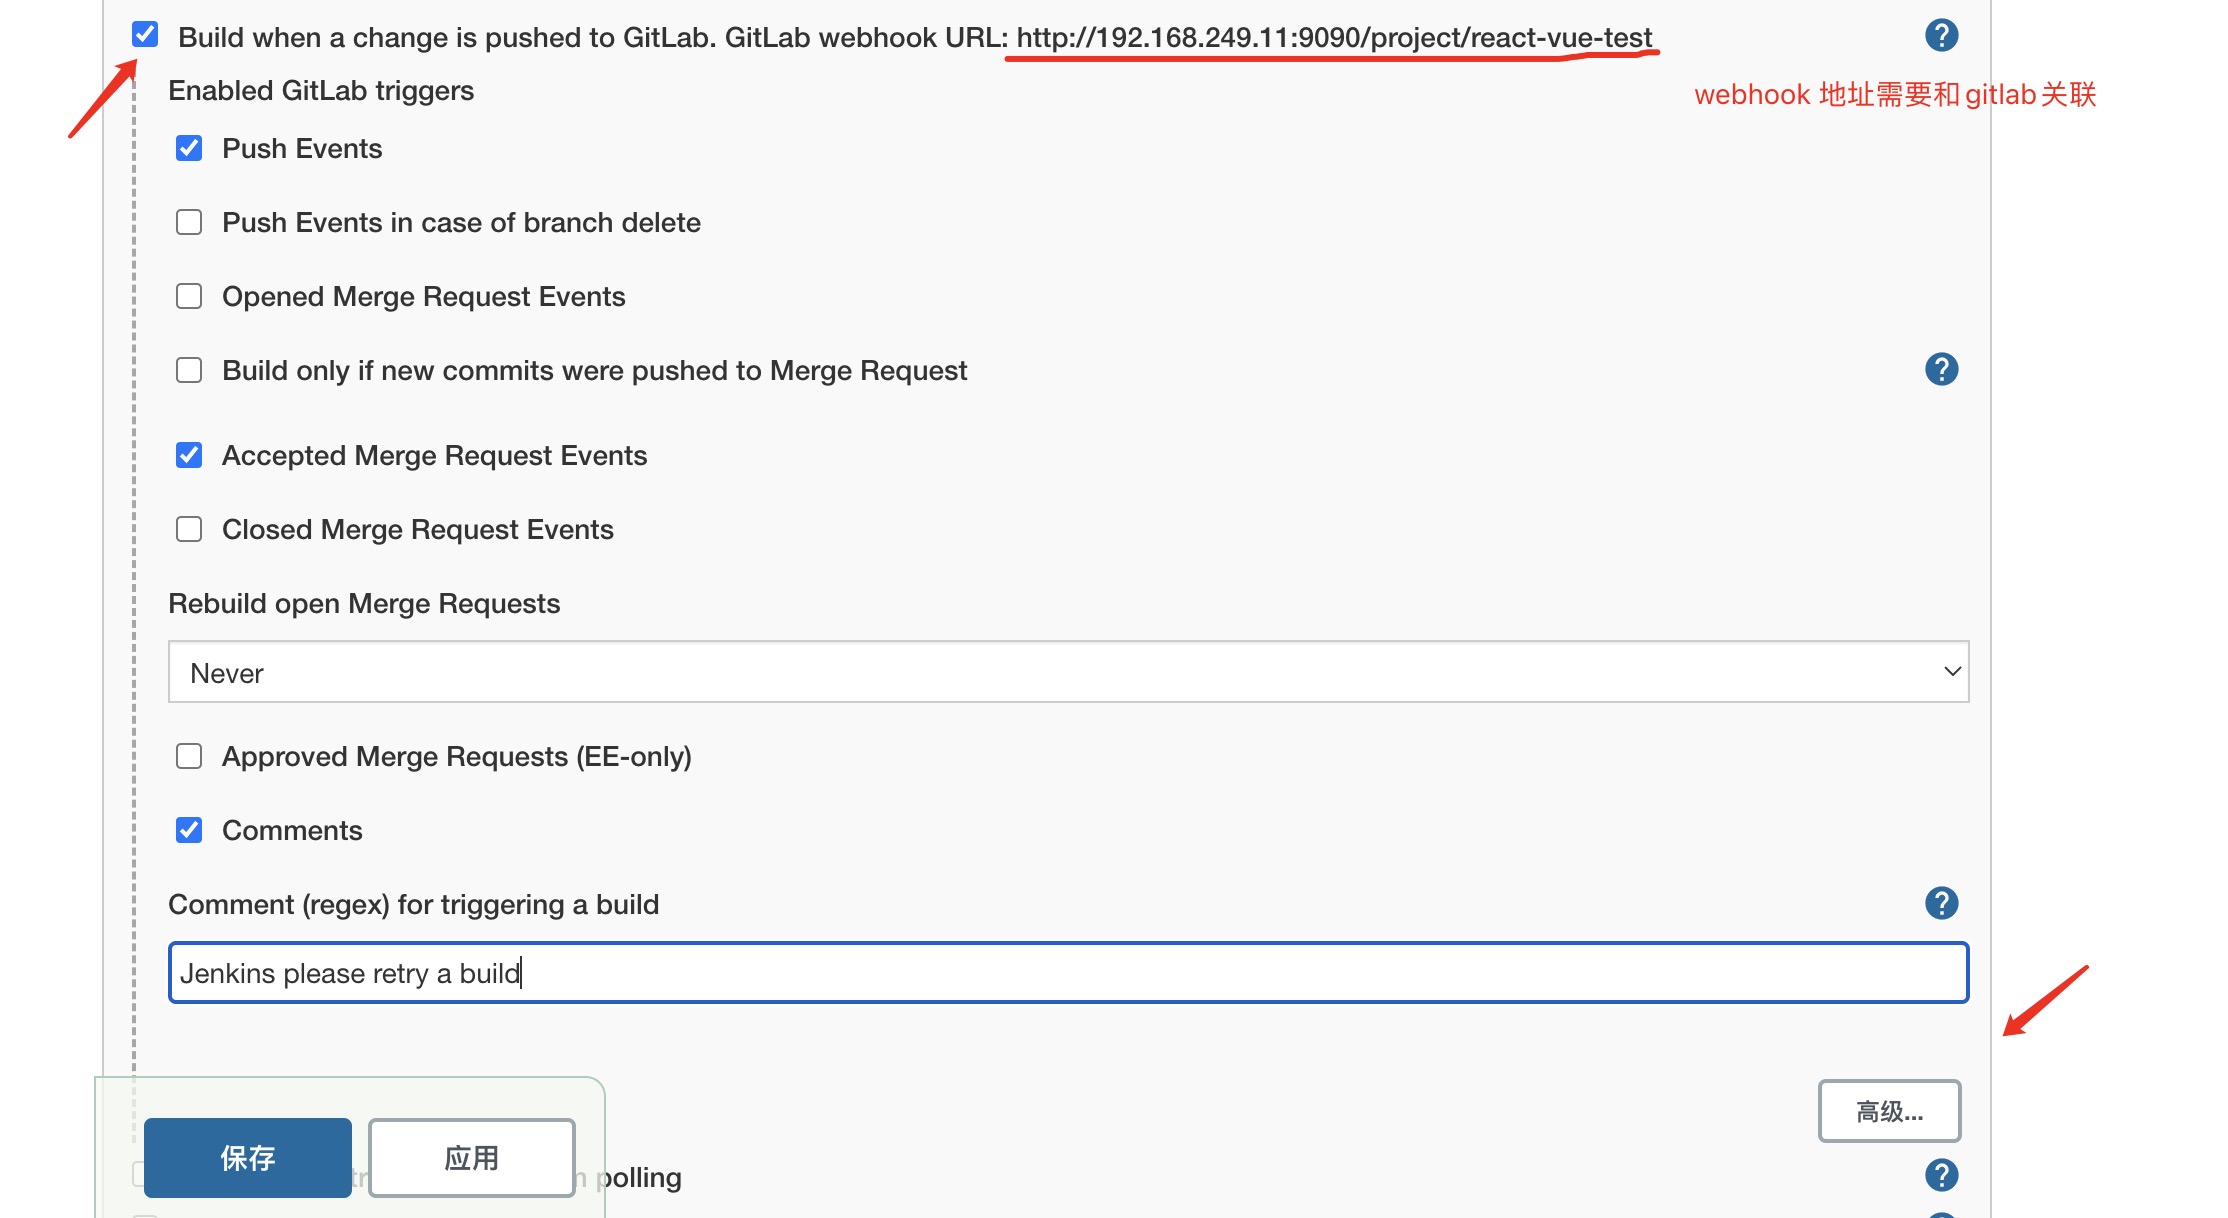
Click Advanced, because I only want to build dev branches in the development environment, so I need branch filtering.

Then click generate token password for gitlab notification.
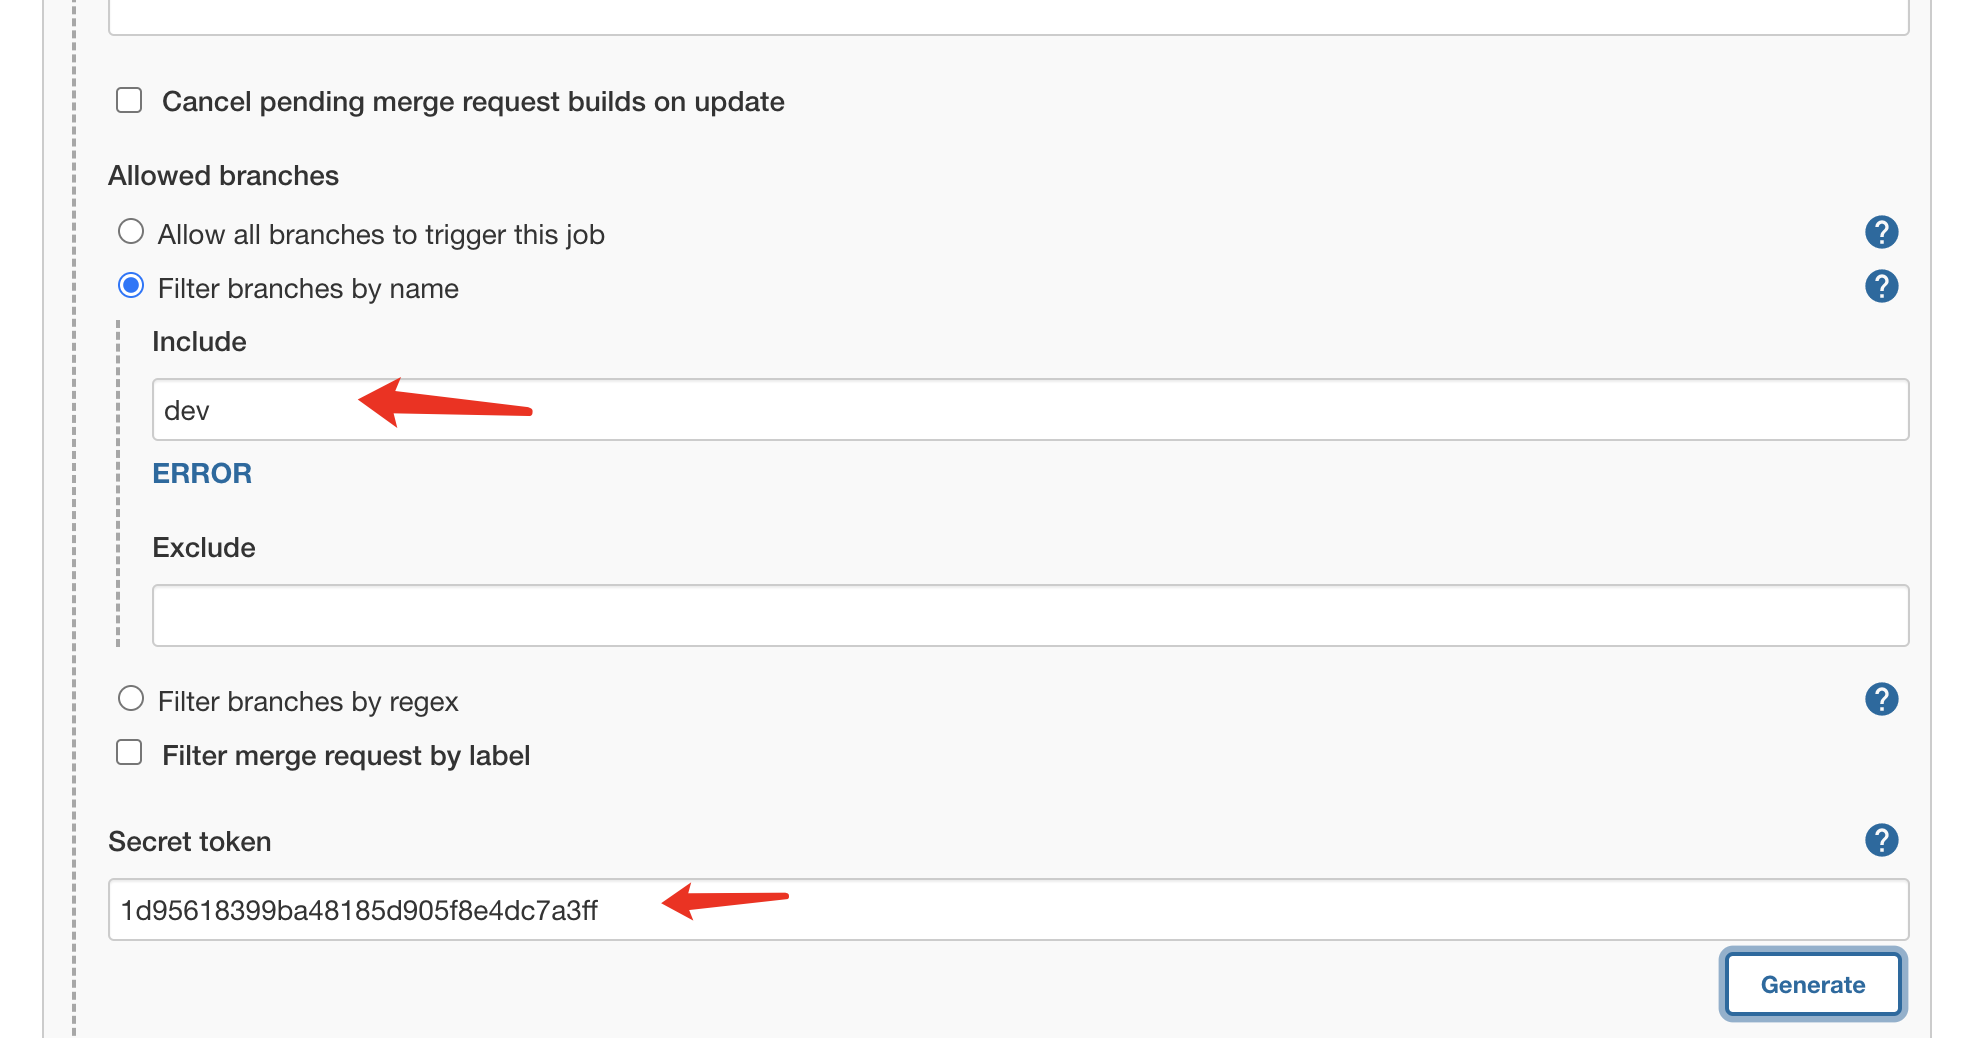
Go back to gitlab, locate the warehouse, select Settings - > integrations, and fill in the configuration with webhook and generated token. Generated by builder step
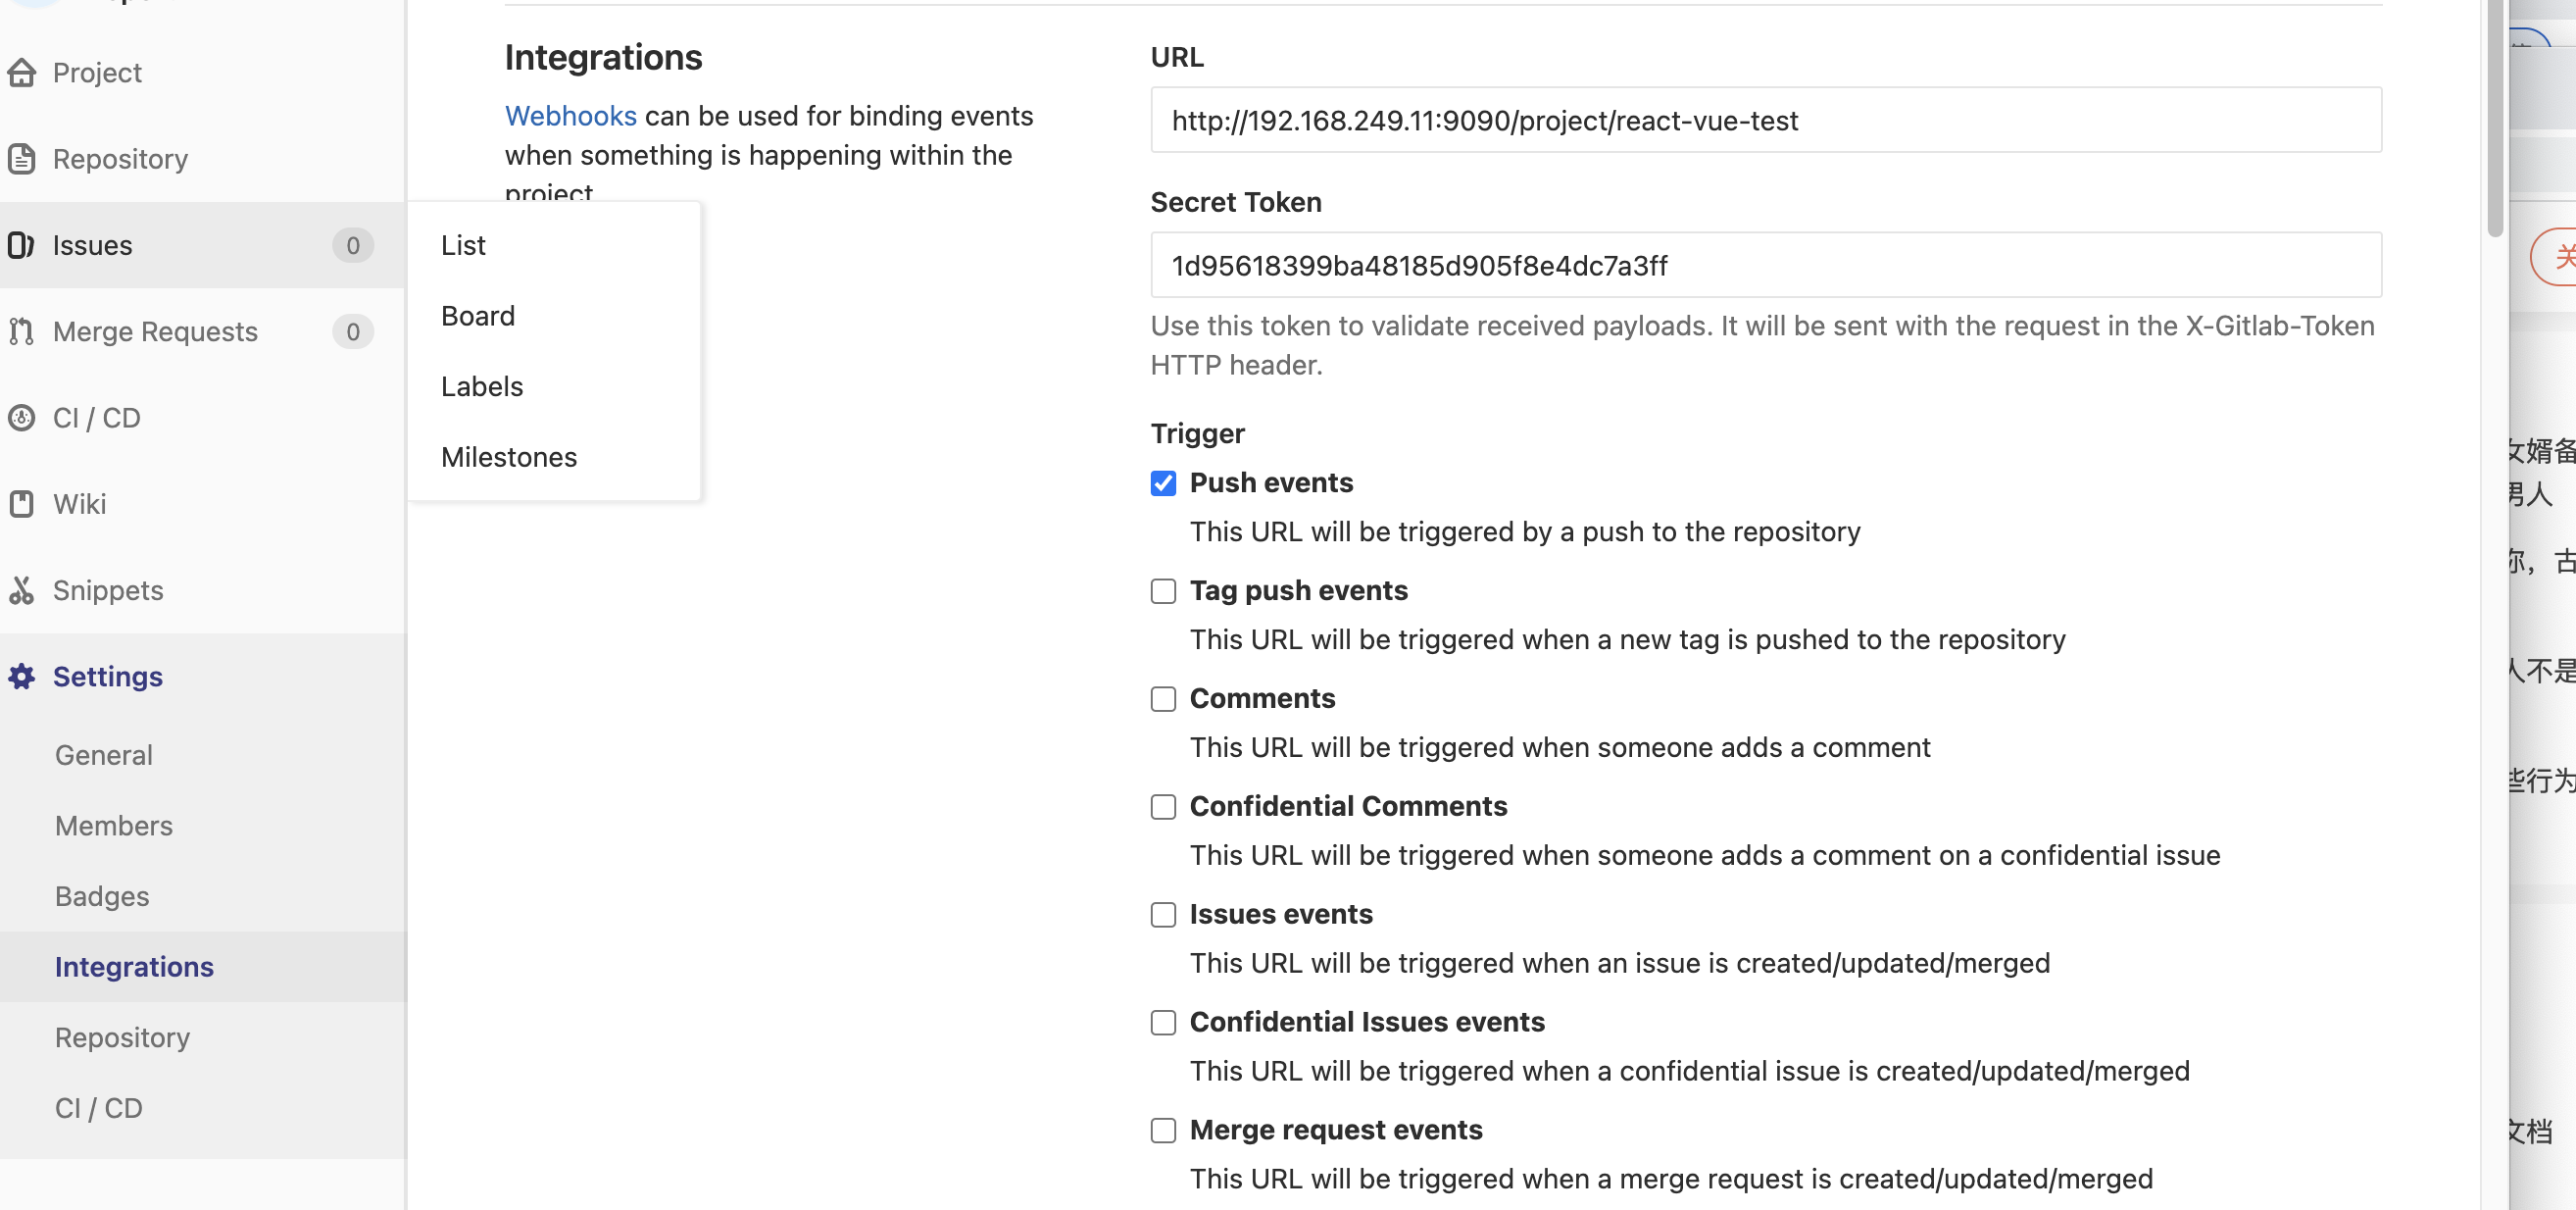
Then add webhooks and notify jenkins when the following Trigger triggers webhooks.
Here, the trigger is completed, and the warehouse will be configured in jenkins for testing.
3. Build project pipeline configuration
Switch to pipeline tab and select Pipeline script from scm
Then enter the warehouse address, gitlab account and password.
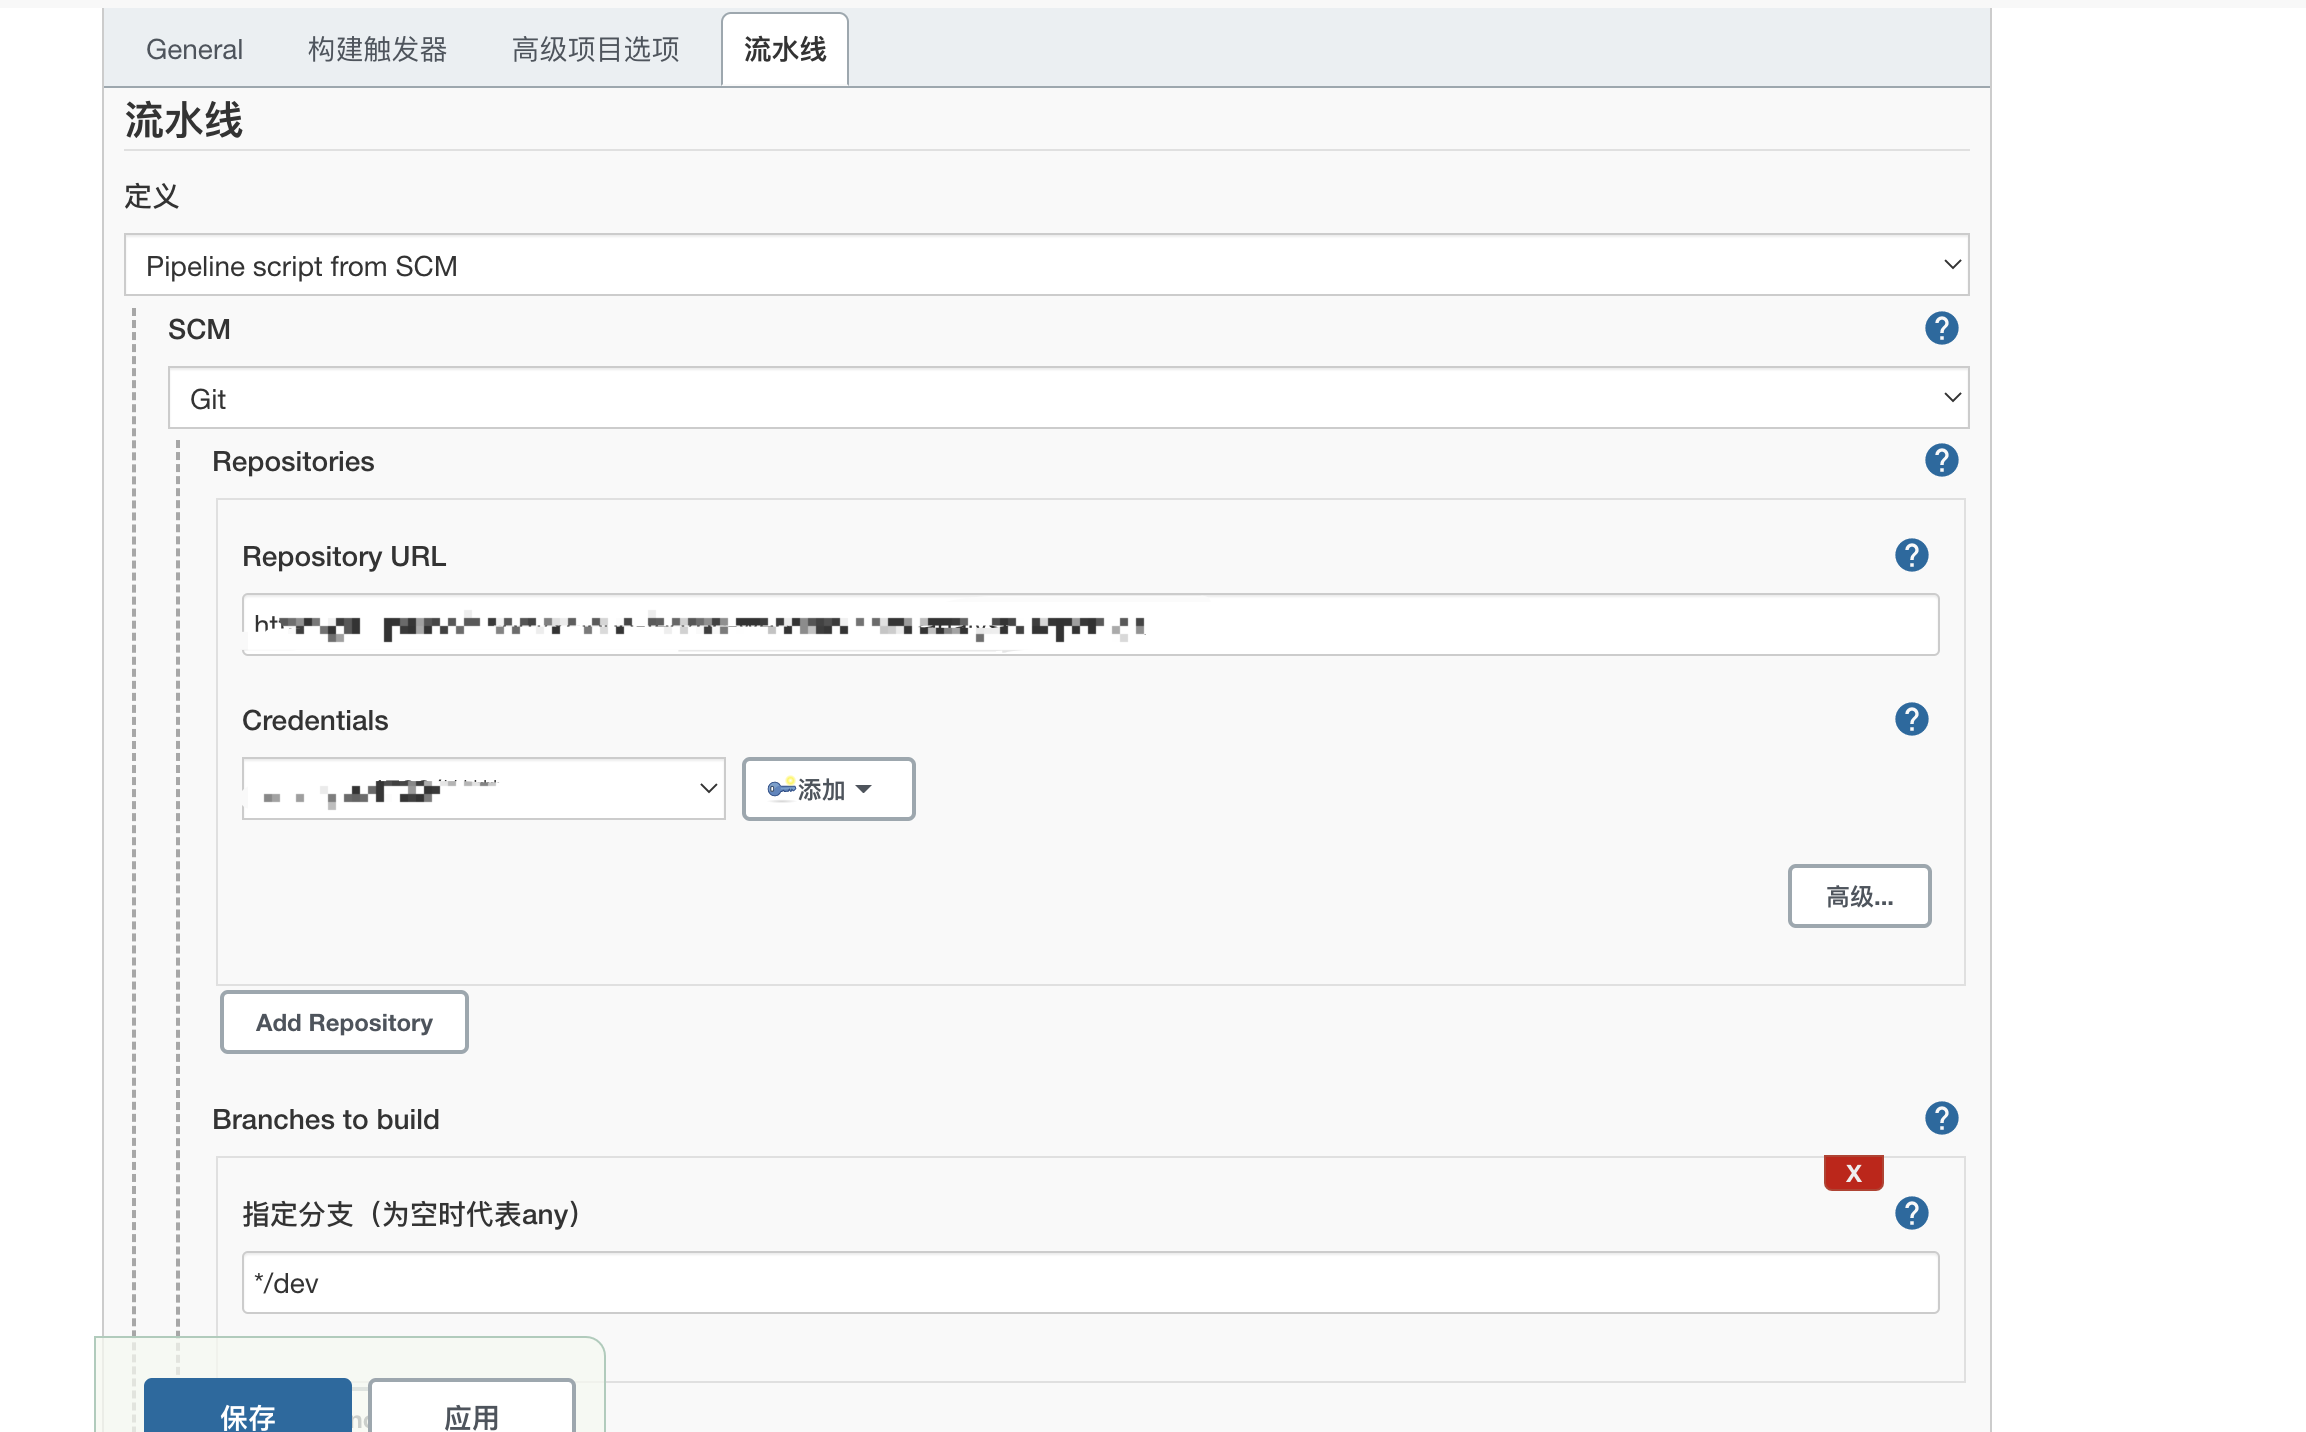
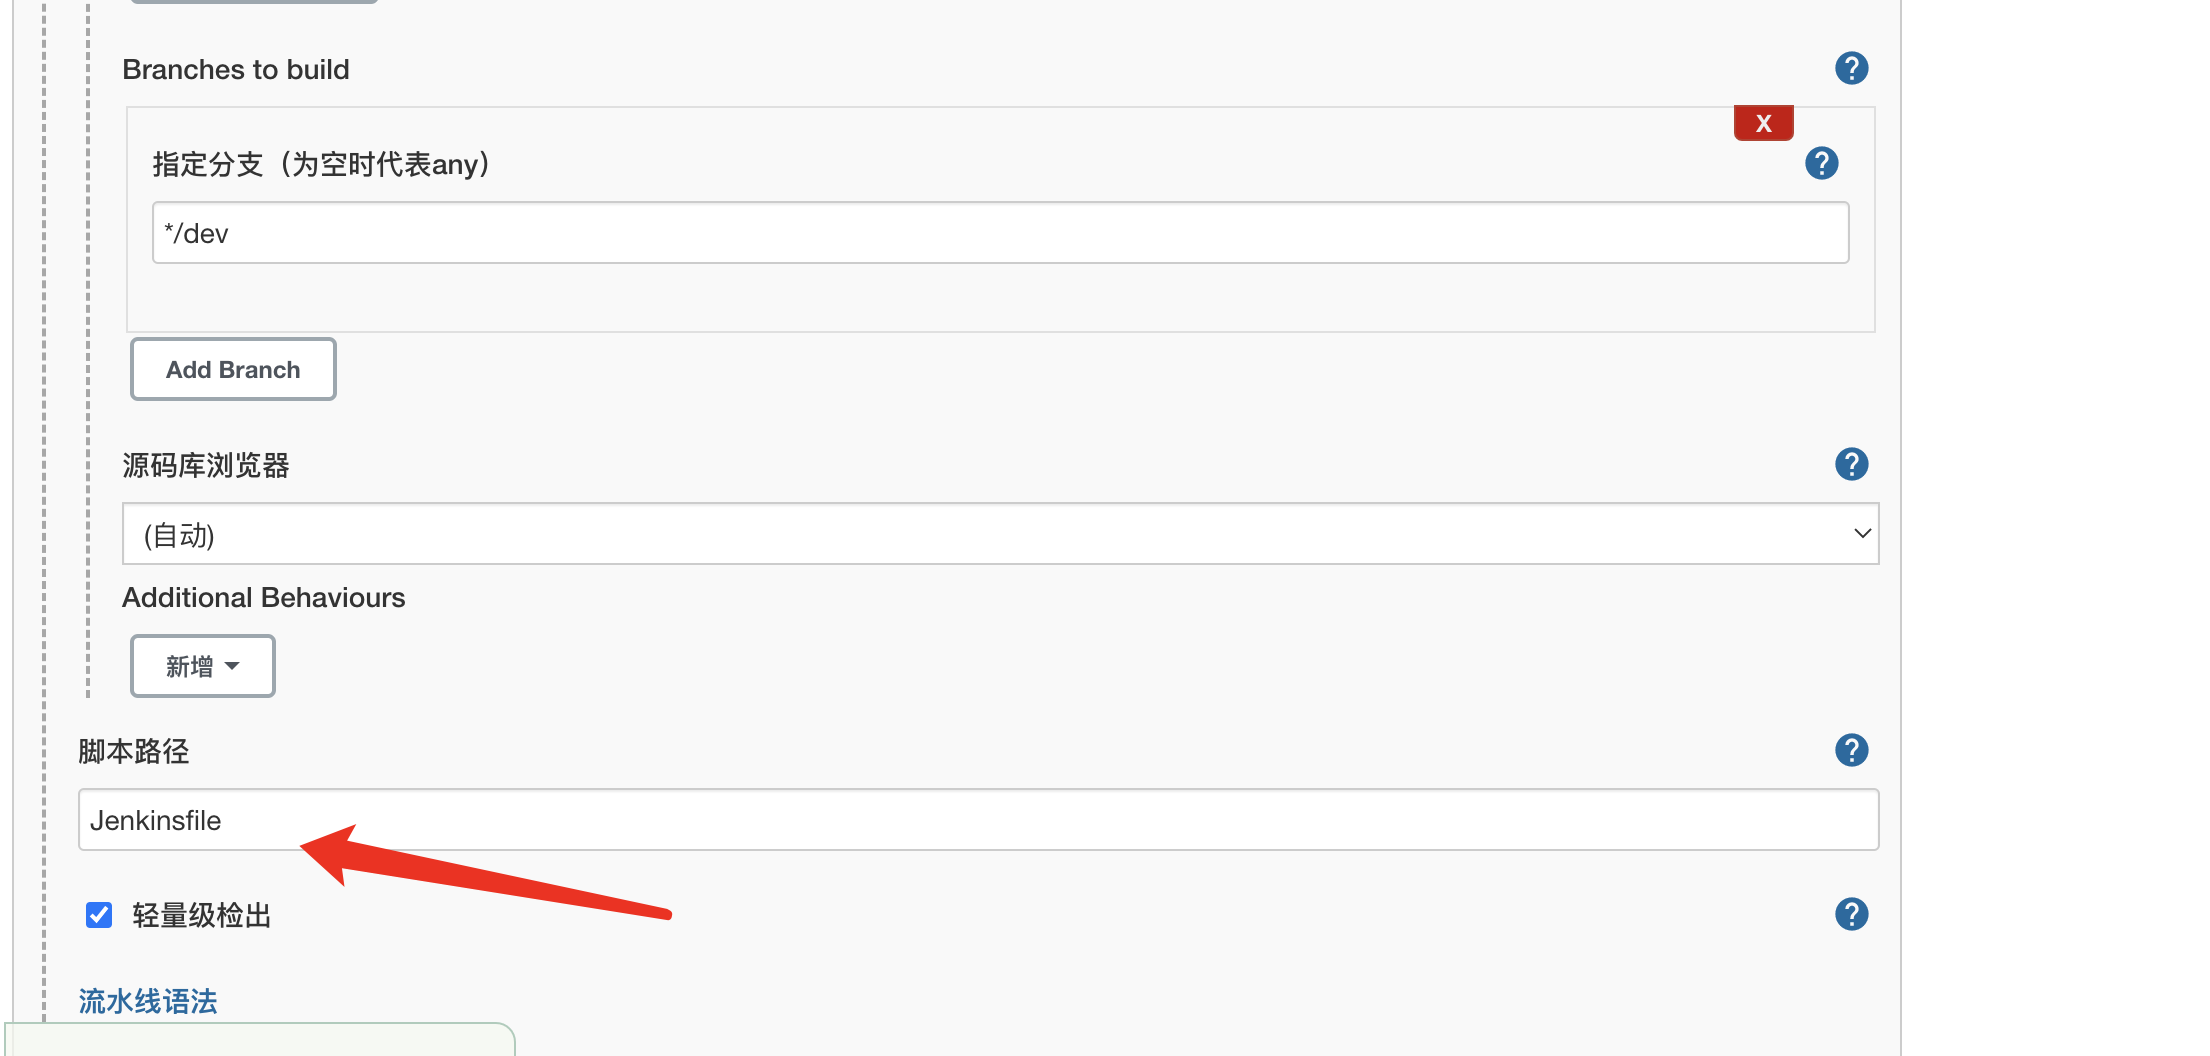
Specify branch and script paths:
Set Jenkinsfile in the figure, that is, read and execute the script in the Jenkinsfile file in the root directory of the project.
4. Front end build Jinkensfile script
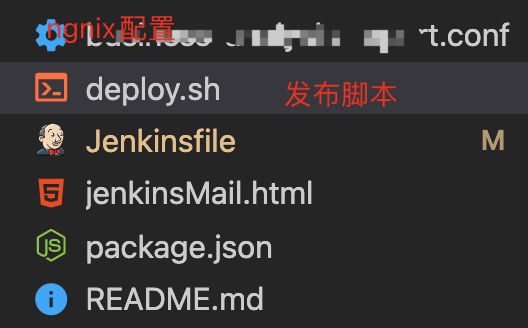
The example project is a React project based on umi. The directory is as follows:
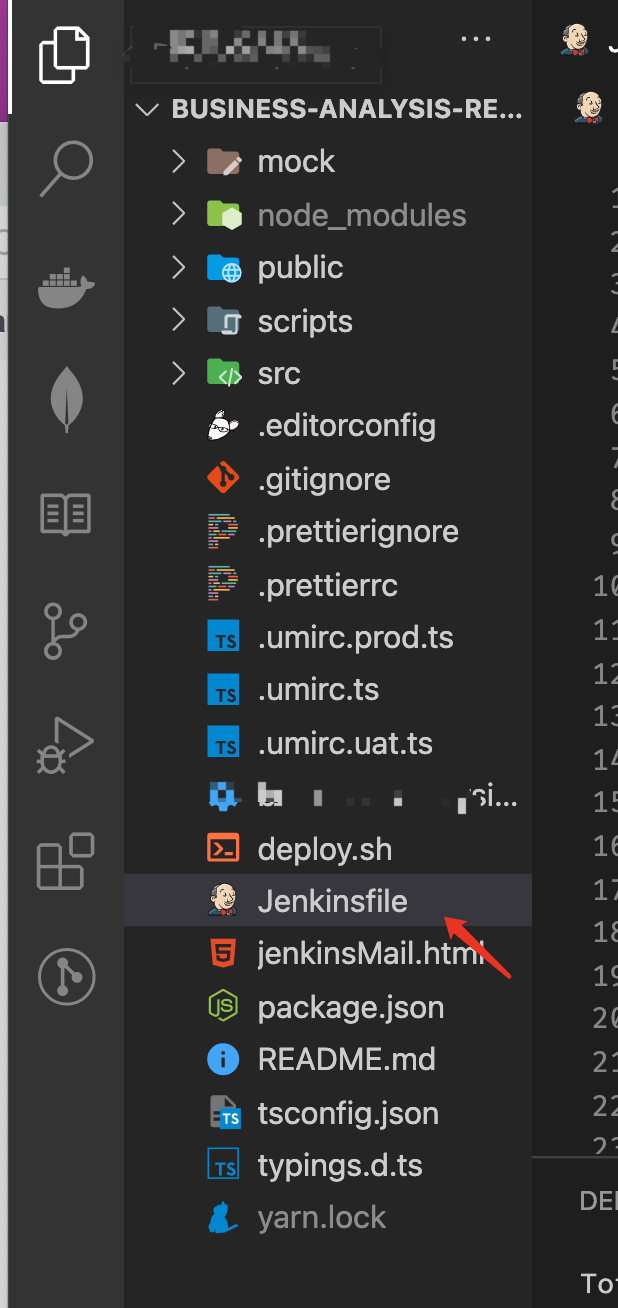
The point is to put the Jenkinsfile location in the root directory. The following describes the configuration of the pipeline script file Jenkinsfile build front end one by one.
4.1 node environment
Building front-end applications requires a node environment, because the host node cannot be directly obtained in the docker container.
Here, the pipeline agent is used to specify the agent environment. The proxy environment is the node image container where docker runs.
pipeline {
    agent {
        docker {
            image 'node:16-alpine3.14'
            args '-p 3000:3000'
        }
    }
    stages {
        stage('Node') {
            steps {
               sh 'node -v'
            }
        }
    }
}
4.2 dependent installation and construction
The stages process is used to execute separately, relying on the installation and packaging commands.
pipeline {
    agent {
        docker {
            image 'node:16-alpine3.14'
            args '-p 3000:3000'
        }
    }
    stages {
        stage('Install') {
            steps {
               sh 'npm install --registry=https://registry.npm.taobao.org'
            }
        }
        stage('Build') {
            steps {
               sh 'npm run build:dev'
            }
        }
    }
}
4.3 deployment
After executing the package command, the project has generated the dist directory in the workspaces folder, but now it is inside the docker container, so it cannot be deployed directly to ngnix.
Then you need to connect to the ngnix server with ssh, assign the folder to ngnix and use the ngnix command.
4.3.1 ssh connection server
First, make sure that the SSH Pipeline Steps plug-in is installed.
Then create a connection script in Jenkinsfile:
stage('Deploy'){
            steps{
                script{
                    def remote = [:]
                    remote.name = 'feService'
                    remote.host = 'The server ip'
                    remote.user = 'root'
                    remote.password = 'Server password'
                    remote.allowAnyHosts = true
                    stage('Remote SSH') {
                        sshScript remote: remote, script: "deploy.sh"
                    }
                }
            }
        }
4.3.2 ngnix release shell script
When connecting to the server, you only need to copy the web app and ngnix configuration to the server deployment.
There are two situations to consider in deployment:
- First release, configuration startup
- Update application
ngnix configuration:
worker_processes  1;

events {
    worker_connections  1024;
}

http {
    include       mime.types;
    default_type  application/octet-stream;

    sendfile        on;
    #tcp_nopush     on;

    #keepalive_timeout  0;
    keepalive_timeout  65;

    server {
        listen       The port number needs to be replaced;
        server_name  localhost;

        location / {
            root   html/entry name;
            index  index.html index.htm;
            try_files $uri $uri/ /index.html;
        }
        #error_page  404              /404.html;

        # redirect server error pages to the static page /50x.html
        #
        error_page   500 502 503 504  /50x.html;
        location = /50x.html {
            root   html;
        }
    }
}
Publish script deploy sh:
PRO_NAME="entry name"
if [! -f "/usr/local/nginx/conf/$PRO_NAME.conf"];then
   echo "You need to create a new configuration file for the first time, nginx release"
   mv /data/jenkins-data/workspace/$PRO_NAME/$PRO_NAME.conf /usr/local/nginx/conf
   mv /data/jenkins-data/workspace/$PRO_NAME/dist /usr/local/nginx/html/$PRO_NAME
   /usr/local/nginx/sbin/nginx -c /usr/local/nginx/conf/$PRO_NAME.conf
else
 echo "Update application"
   mv /data/jenkins-data/workspace/$PRO_NAME/dist /data/jenkins-data/workspace/$PRO_NAME/$PRO_NAME
   cp -rf /data/jenkins-data/workspace/$PRO_NAME/$PRO_NAME /usr/local/nginx/html
   rm -rf /data/jenkins-data/workspace/$PRO_NAME/$PRO_NAME
fi
At this time, the whole process is basically completed, but something is missing.
4, Notice
Notification is required for successful and failed construction. Select email notification here. If the company uses nail, it is recommended to use nail robot to receive it.
Send using Email Extension Plugin
1. Test sending mailbox
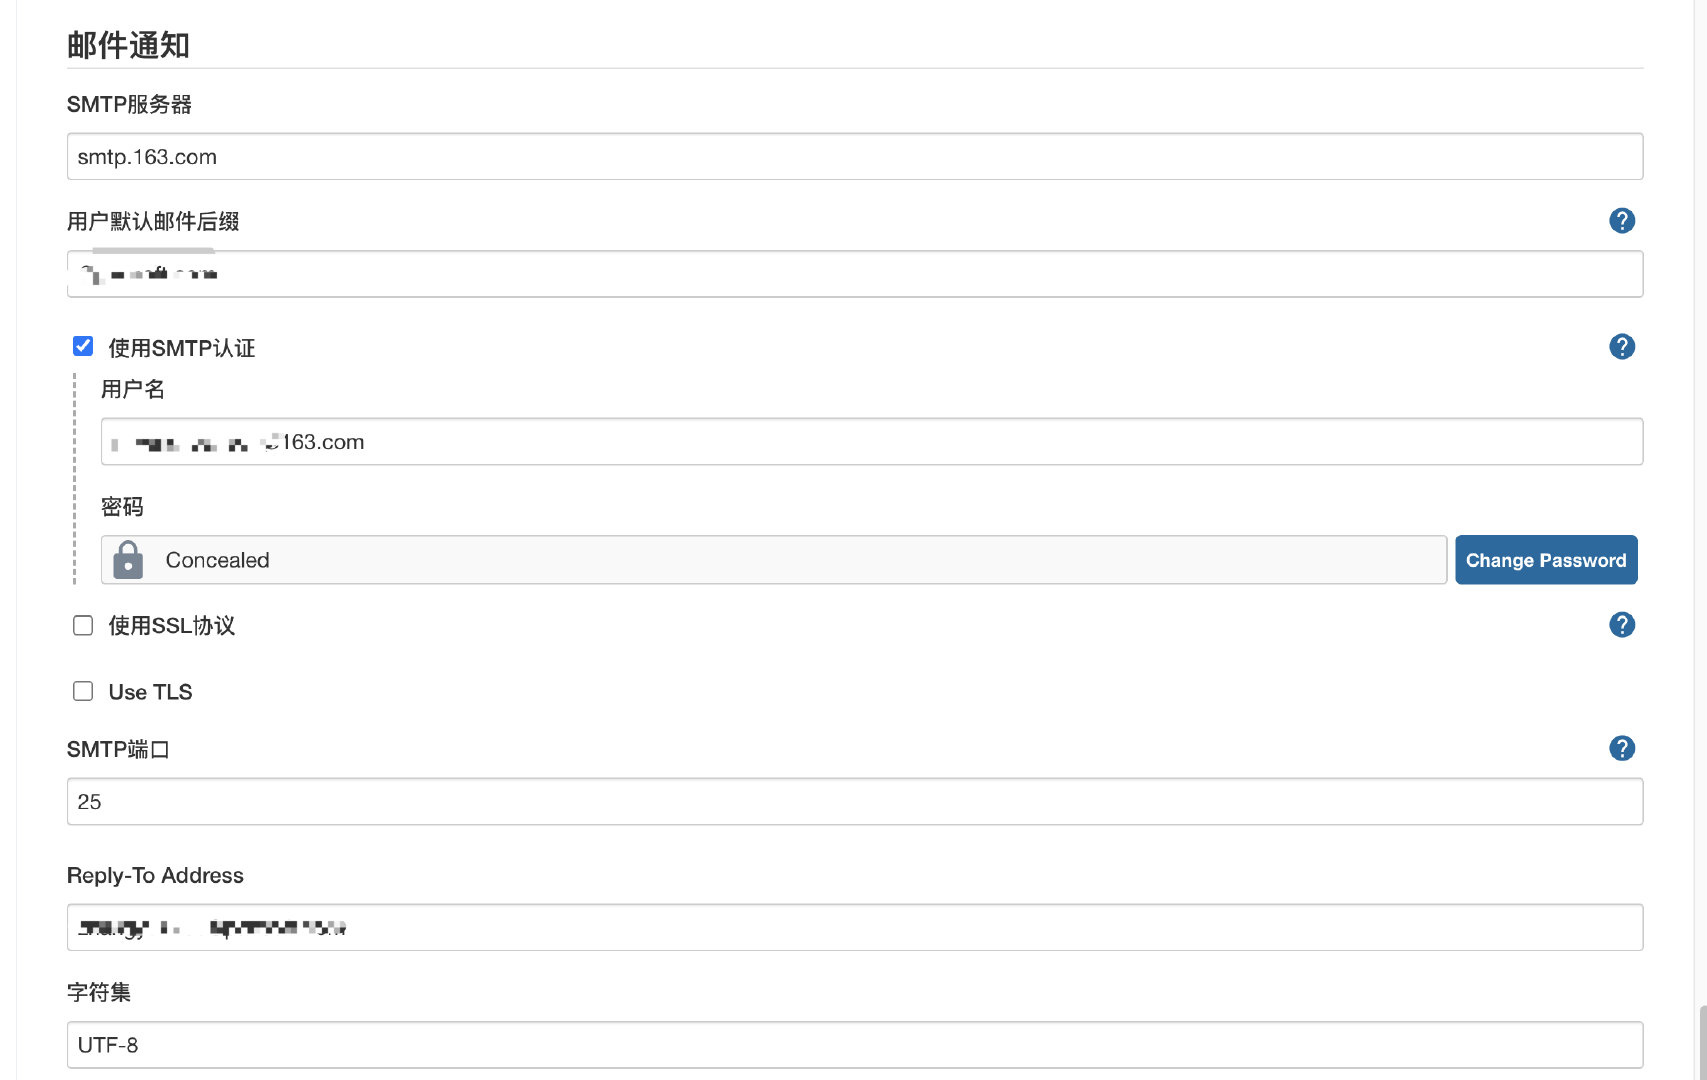
Test the function of jenkins in the system configuration.
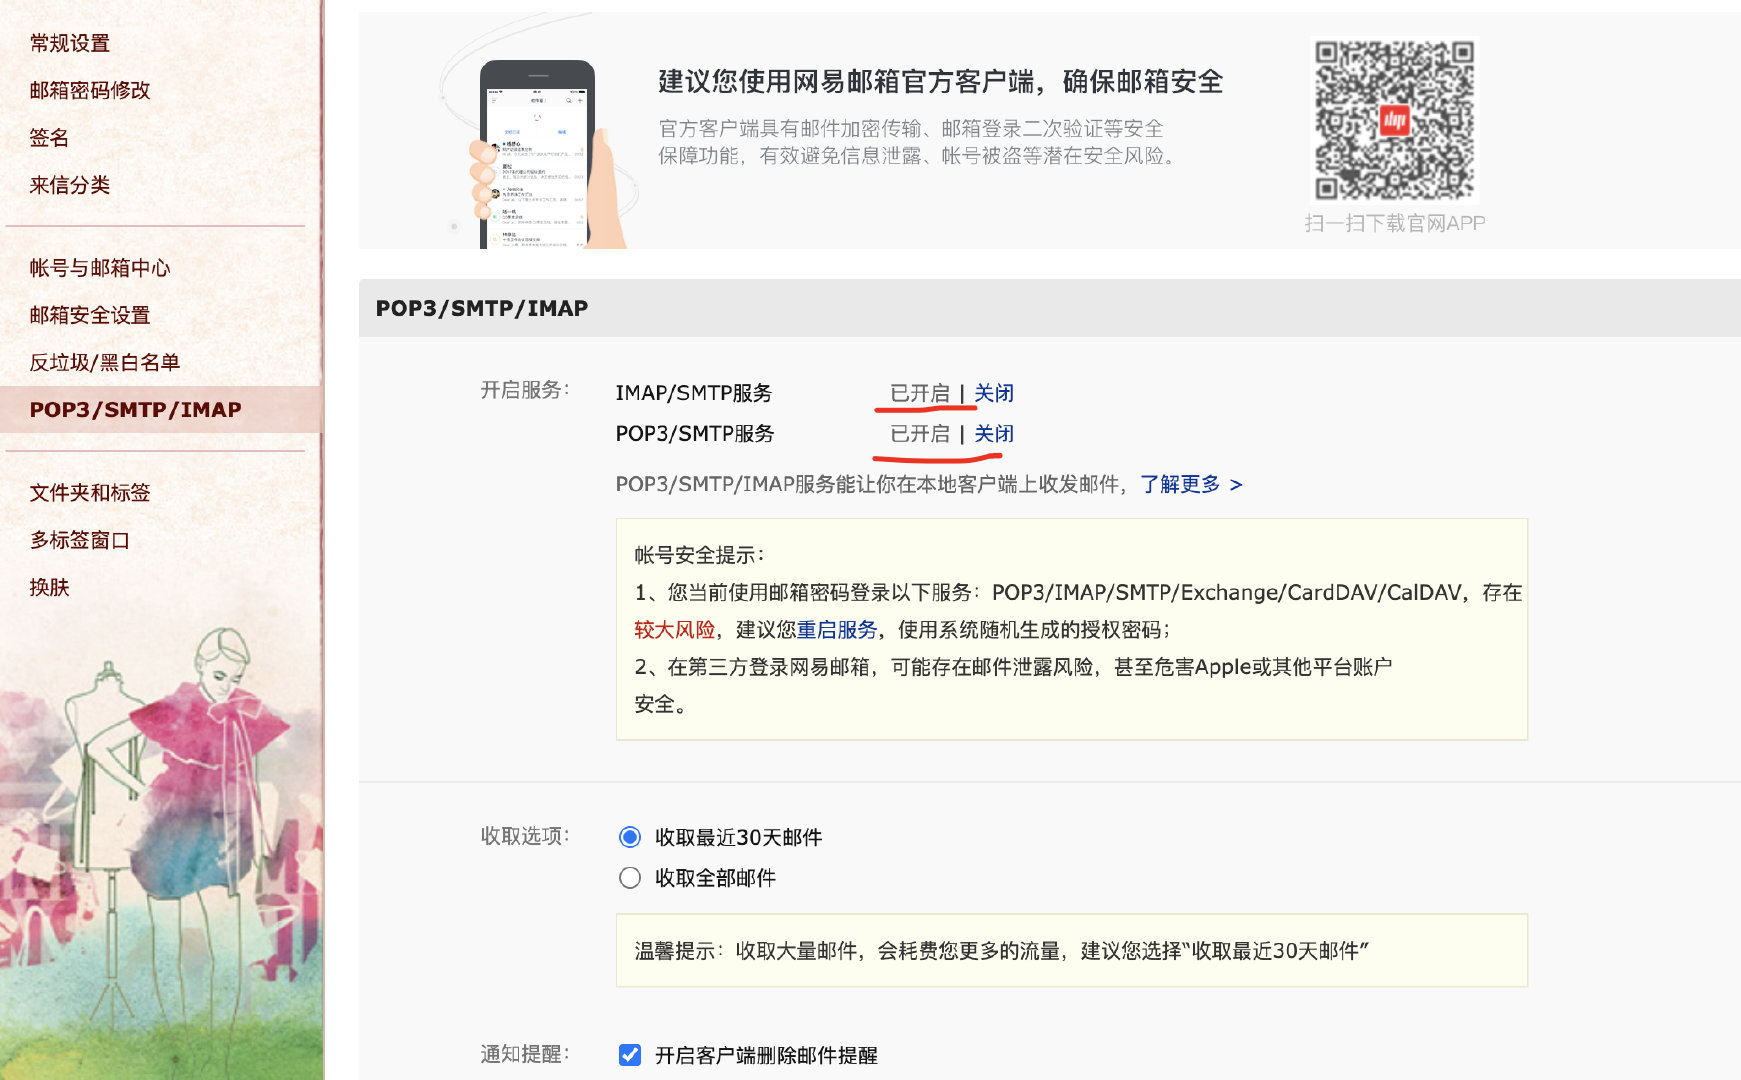
I use 163 email here. I need to open smtp.
jenkins mailbox test configuration
Note: note here that if a new mailbox has just started the smtp service, the password is not the mailbox password, but the token generated by starting smtp
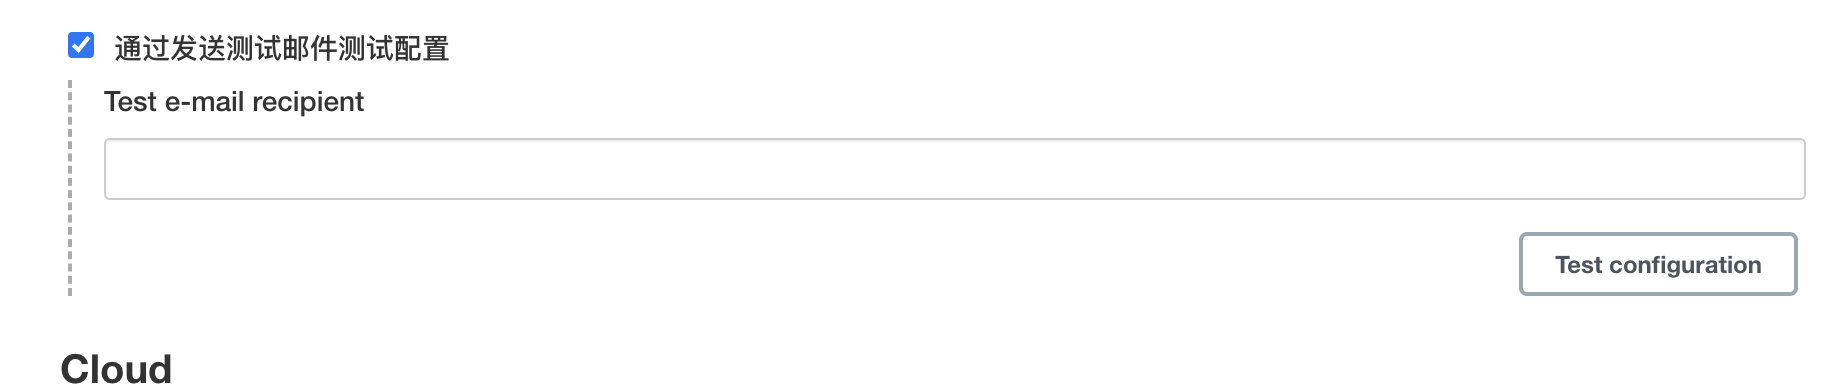
Test send:
Enter the email address and receive it successfully.
2. Configure Extended E-mail Notification
Just write in the same mailbox configuration as the test. Here is a content template. If you want to send it beautifully, choose the html template

3. pipeline sending mailbox script
Send regardless of success or failure, and specify the sending template.
 post {
        always {
        emailext (
            subject: '\'Build notification:${PROJECT_NAME} - Build # ${BUILD_NUMBER} - ${BUILD_STATUS}\'',
            body: '${FILE,path="jenkinsMail.html"}',
            to: 'xxxx@qq.com'
            )
        }
    }
html template:
<!DOCTYPE html>
<html>
<head>
<meta charset="UTF-8">
<title>${ENV,var="JOB_NAME"}-The first ${BUILD_NUMBER}Secondary build log</title>
</head>
<body leftmargin="8" marginwidth="0" topmargin="8" marginheight="4" offset="0">
<table width="95%" cellpadding="0" cellspacing="0"
style="font-size: 11pt; font-family: Tahoma,Arial,Helvetica,sans-serif">
<tr>
<td>(This email is automatically sent by the program. Please do not reply!)</td>
</tr>
<tr>
<td><h2>
<font color="#0000ff "> build result - ${build_status} < / font >
</h2></td>
</tr>
<tr>
<td><br />
<b><font color="#0b610b "> build information < / font ></b>
<ht size="2" width="100%" byte="center" /></td>
</tr>
<tr>
<td>
<ul>
<li>entry name : ${PROJECT_NAME}</li>
<li>Build number : The first ${BUILD_NUMBER}</li>
<li>Trigger mode :${CAUSE}</li>
<li>Build log : <a href="${BUILD_URL}console">${BUILD_URL}console</a></li>
<li>structure Url : <a href="${BUILD_URL}">${BUILD_URL}</a></li>
<li>working directory : <a href="${PROJECT_URL}workflow-stage">${PROJECT_URL}workflow-stage</a></li>
<li>project : Url : <a href="${PROJECT_URL}">${PROJECT_URL}</a></li>
</ul>
</td>
</tr>
<tr>
<td><font color="#0B610B">Changes Since Last
Successful Build:</font></b>
<hr size="2" width="100%" byte="center" /></td>
</tr>
<tr>
<td>
<ul>
<li>Historical change record : <a href="${PROJECT_URL}changes">${PROJECT_URL}changes</a></li>
</ul> ${CHANGES_SINCE_LAST_SUCCESS,reverse=true, format="Changes for Build #%n:<br />%c<br />",showPaths=true,changesFormat="<pre>[%a]<br />%m</pre>",pathFormat="%p"}
</td>
</tr>
<tr>
<td><b><font color="#0B610B">Failed Test Results</font></b>
<hr size="2" width="100%" byte="center" /></td>
</tr>
<tr>
<td><pre
style="font-size: 11pt; font-family: Tahoma,Aarial,Helvetica,sans-serif">$FAILED_TESTS</pre>
<br />
</td>
</tr>
<tr>
<td><font><font color="#0b610b "> build log (last 100 lines): < / font ></b>
<hr size="2" width="100%" byte="center" /></td>
</tr>
<tr>
<td><textarea cols="80" rows="30" readonly="readonly"
style="font-family: Courier New">${BUILD_LOG,maxLines=100}</textarea>
</td>
</tr>
</table>
</body>
</html>
This is all done. Thank you for reading.
All Jenkinsfile configurations
pipeline {
    agent {
        docker {
            image 'node:16-alpine3.14'
            args '-p 3000:3000'
        }
    }
    stages {
        stage('Install') {
            steps {
               sh 'npm install --registry=https://registry.npm.taobao.org'
            }
        }
        stage('Build') {
            steps {
               sh 'npm run build:dev'
            }
        }
        stage('Deploy'){
            steps{
                script{
                    def remote = [:]
                    remote.name = 'feService'
                    remote.host = 'The server'
                    remote.user = 'root'
                    remote.password = 'password'
                    remote.allowAnyHosts = true
                    stage('Remote SSH') {
                        sshScript remote: remote, script: "deploy.sh"
                    }
                }
            }
        }
    }
     post {
        always {
        emailext (
            subject: '\'Build notification:${PROJECT_NAME} - Build # ${BUILD_NUMBER} - ${BUILD_STATUS}\'',
            body: '${FILE,path="jenkinsMail.html"}',
            to: 'xxx@qq.com'
            )
        }
    }
}