Vue basic syntax
[crazy God talking about Java] Vue's latest quick start tutorial is easy to understand Notes: Vue basic syntax, Vue binding events, Vue two-way binding, Vue component explanation.
1.v-bind
v-bind is mainly used for attribute binding. Examples are as follows:
<body>
<div id="app">
    <span v-bind:title="message">
        Hover for a few seconds to view the prompt information of dynamic binding here!
    </span>
</div>


<script src="https://cdn.jsdelivr.net/npm/vue@2/dist/vue.js"></script>
<script>
    var vm = new Vue({
        el:"#app",
        data:{
            message:"Page loaded on" + new Date().toLocaleString()
        }
    })
</script>
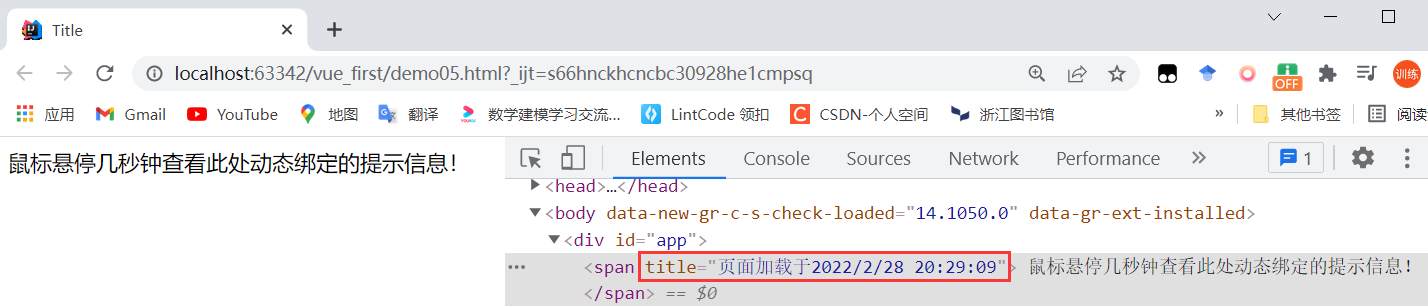
The v-bind seen here is called an instruction. The instructions are prefixed with V - to indicate that they are special features provided by Vue. As you may have guessed, they will apply special responsive behavior on the rendered DOM. Here, the instruction means: "keep the title attribute of this element node consistent with the message of Vue instance."
2. Conditional rendering
The v-if instruction is used to render a piece of content conditionally.
<div id="app">
    <div v-if="happy">I am very happy!</div>
    <div v-else>Oh, no, I'm upset now.</div>
</div>


<script src="https://cdn.jsdelivr.net/npm/vue@2/dist/vue.js"></script>
<script>
    var vm = new Vue({
        el:"#app",
        data:{
            happy: true,
        }
    })
</script>
The v-else element must follow the element with v-if or v-else-if, otherwise it will not be recognized.
v-else-if, as the name suggests, acts as the "else if block" of v-if and can be used continuously:
<div id="app">
    <div v-if="score >= 90">excellent</div>
    <div v-else-if="score >= 80">good</div>
    <div v-else-if="score >= 70">commonly</div>
    <div v-else-if="score >= 60">pass</div>
    <div v-else>fail,</div>
</div>


<script src="https://cdn.jsdelivr.net/npm/vue@2/dist/vue.js"></script>
<script>
    var vm = new Vue({
        el:"#app",
        data:{
            score: 75,
        }
    })
</script>
3. List rendering
The v-for instruction renders a list based on an array. The v-for instruction requires a special syntax in the form of item in items, where items is the original data array and item is the alias of the array element being iterated.
<!DOCTYPE html>
<html lang="en">
<head>
    <meta charset="UTF-8">
    <title>List rendering</title>
</head>
<body>
<div id="app">
    <table>
        <tr>
            <th>full name</th>
            <th>Age</th>
            <th>Gender</th>
        </tr>
        <tr v-for="item in items">
            <td>{{item.user}}</td>
            <td>{{item.age}}</td>
            <td>{{item.gender}}</td>
        </tr>
    </table>
</div>

<script src="https://cdn.jsdelivr.net/npm/vue@2/dist/vue.js"></script>
<script>
    var vm = new Vue({
        el:"#app",
        data:{
            items: [
                {
                    user:'Zhang San',
                    age: 18,
                    gender: 'male'
                },
                {
                    user:'Li Si',
                    age: 24,
                    gender: 'female'
                },
                {
                    user:'Wang Wu',
                    age: 25,
                    gender: 'male'
                },
            ]
        }
    })
</script>
</body>
</html>
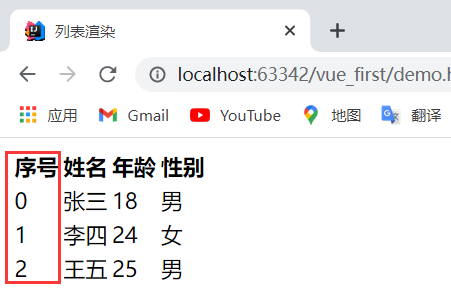
v-for also supports an optional parameter, that is, the index of the current preceding item.
<table>
    <tr>
        <th>Serial number</th>
        <th>full name</th>
        <th>Age</th>
        <th>Gender</th>
    </tr>
    <tr v-for="(item, index) in items">
        <td>{{index}}</td>
        <td>{{item.user}}</td>
        <td>{{item.age}}</td>
        <td>{{item.gender}}</td>
    </tr>
</table>
4. Binding event
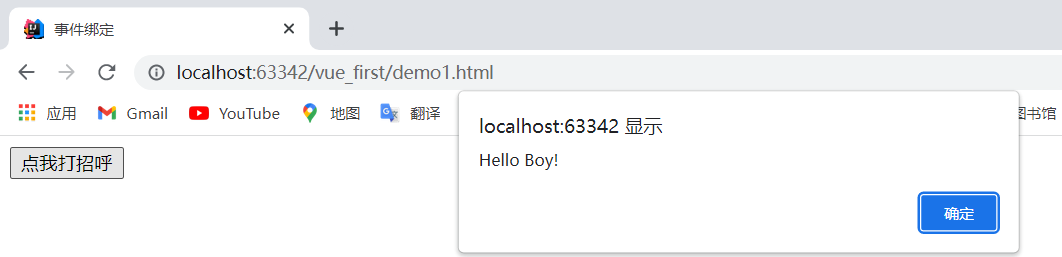
You can use the v-on instruction to listen for DOM events and run some JavaScript code when triggered. Examples are as follows: bind a click event to a button, and click the button to pop up a prompt.
<!DOCTYPE html>
<html lang="en" xmlns:v-on="http://www.w3.org/1999/xhtml">
<head>
    <meta charset="UTF-8">
    <title>Event binding</title>
</head>
<body>
<div id="app">
    <!--v-on binding JS event-->
    <button v-on:click="sayHello">Say hello to me at</button>
</div>

<script src="https://cdn.jsdelivr.net/npm/vue@2/dist/vue.js"></script>
<script>
    var vm = new Vue({
        el:"#app",
        data:{
            message:'Hello Boy!',
        },
        //Methods must be defined in Vue's methods object
        methods: {
            sayHello: function (event) {
                alert(this.message);
            }
        }
    })
</script>
</body>
</html>
-
el attribute: used to indicate where the vue compiler starts parsing the syntax of vue.
-
Data attribute: used to organize the attributes abstracted from the view. It can be said that the data of the view is abstracted and stored in data.
-
Methods attribute: place the business logic in the page. js methods are generally placed in methods.
5. Bidirectional data binding
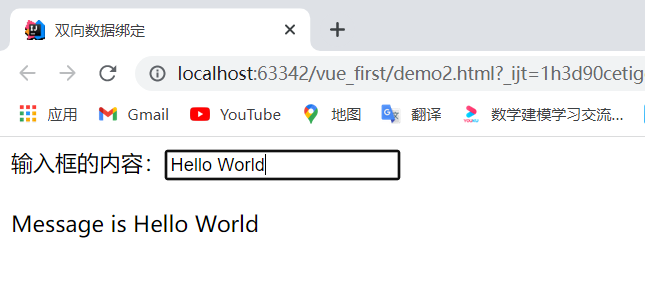
Vue.js is an MVVM framework, that is, two-way data binding, that is, when the data changes, the view will change, and when the view changes, the data will change synchronously. Using two-way data binding in a form, you can use the v-model instruction to create a two-way data binding on the < input >, < textarea > and < Select > elements of the form, which is responsible for listening to the user's input events to update the data.
v-model will ignore the initial values of value, checked and selected attribute s of all form elements, and always take the data of Vue instances as the data source. You should declare the initial value in the data option of the component through JavaScript.
v-model internally uses different attributes for different input elements and throws different events:
- text and textarea elements use value attribute and input event;
- checkbox and radio use checked attribute and change event;
- The select field takes value as a prop and change as an event.
Text input box:
<div id="app">
    Contents of input box:<input type="text" v-model="message"><br><br>
    <span>Message is {{message}}</span>
</div>


<script src="https://cdn.jsdelivr.net/npm/vue@2/dist/vue.js"></script>
<script>
    var vm = new Vue({
        el:"#app",
        data:{
            message: '',
        }
    })
</script>
Multiline text:
<div id="app">
    Information entered:<br><br>
    <textarea v-model="info" placeholder="add multiple lines"></textarea><br><br>
    <span>Multiline Message is {{info}}</span>
</div>

<script src="https://cdn.jsdelivr.net/npm/vue@2/dist/vue.js"></script>
<script>
    var vm = new Vue({
        el:"#app",
        data:{
            info: '',
        }
    })
</script>
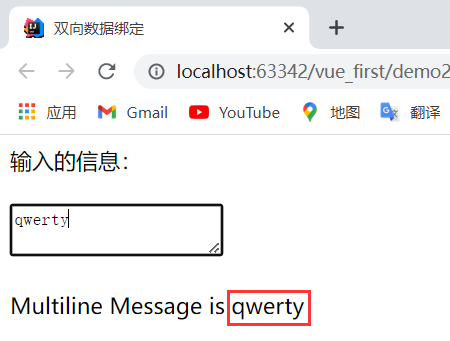
Note: interpolation in the text area (< textarea > {text}} < / textarea >) will not take effect, and v-model should be used instead.
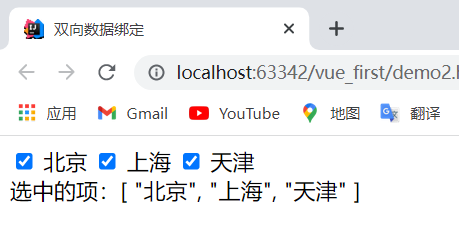
Check box:
<div id="app">
    <input type="checkbox" id="beijing" value="Beijing" v-model="checkedNames">
    <label for="beijing">Beijing</label>
    <input type="checkbox" id="Shanghai" value="Shanghai" v-model="checkedNames">
    <label for="Shanghai">Shanghai</label>
    <input type="checkbox" id="tianjin" value="Tianjin" v-model="checkedNames">
    <label for="tianjin">Tianjin</label>
    <br>
    Selected items:{{checkedNames}}
</div>

<script src="https://cdn.jsdelivr.net/npm/vue@2/dist/vue.js"></script>
<script>
    var vm = new Vue({
        el:"#app",
        data:{
            checkedNames: [],
        }
    })
</script>
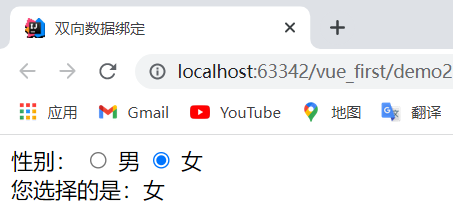
Radio box:
<div id="app">
    Gender:
    <input type="radio" id="one" value="male" v-model="checked">
    <label for="one">male</label>
    <input type="radio" id="two" value="female" v-model="checked">
    <label for="two">female</label><br>
    Your choice is:{{checked}}
</div>

<script src="https://cdn.jsdelivr.net/npm/vue@2/dist/vue.js"></script>
<script>
    var vm = new Vue({
        el:"#app",
        data:{
            checked: 'male', //Give a default value
        }
    })
</script>
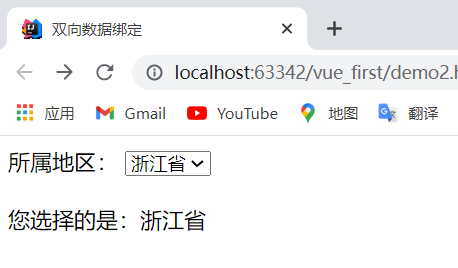
Drop down box:
<div id="app">
    Region:
    <select v-model="selected">
        <option disabled value="">Please select</option>
        <option>Hubei province</option>
        <option>Jiangsu Province</option>
        <option>Zhejiang Province</option>
        <option>Guangdong Province</option>
    </select>
    <br><br>
    <span>Your choice is:{{ selected }}</span>
</div>

<script src="https://cdn.jsdelivr.net/npm/vue@2/dist/vue.js"></script>
<script>
    var vm = new Vue({
        el:"#app",
        data:{
            selected: '', //Give a default value
        }
    })
</script>
If it is multiple choice, it is bound to an array; if it is single choice, it is bound to an empty string.
6. Use of components
A component is a reusable Vue instance. To put it bluntly, it is a set of reusable templates, which is similar to JSTL's custom tags, Thymeleaf's th: fragment and other frameworks. Usually, an application is organized in the form of a nested component tree:
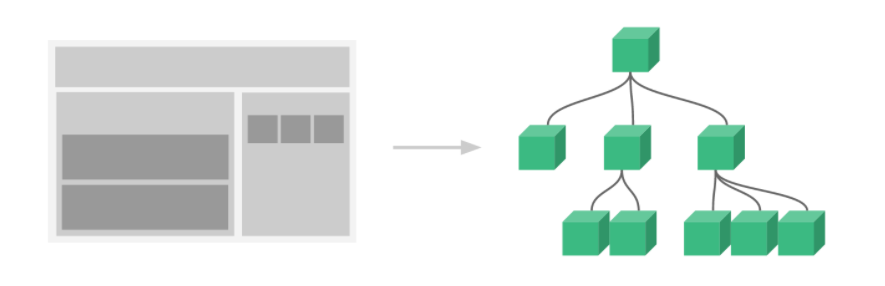
For example, you may have components such as page header, sidebar and content area, and each component contains other components such as navigation links and blog posts. In order to be used in the template, these components must be registered so that Vue can recognize them.
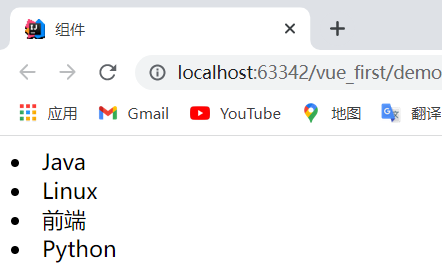
<div id="app">
    <!--Components: values passed to components props-->
    <topbar v-for="item in items" v-bind:data="item"></topbar>
</div>


<script src="https://cdn.jsdelivr.net/npm/vue@2/dist/vue.js"></script>
<script>

    //Define a Vue Component
    Vue.component("topbar",{
       props: ['data'],
       template: '<li>{{data}}</li>'
    });

    var vm = new Vue({
        el:"#app",
        data:{
            items: ["Java", "Linux", "front end", "Python"]
        }
    })
</script>
explain:
- v-for="item in items": an array named items defined in the variable Vue instance, and creates the same number of components;
- v-bind:data="item": bind the traversed item to the attribute named data defined by props in the component= The data on the left of the number is the attribute name defined by props, and the data on the right is the value of the item item item traversed in item in items.