7 - QWidget
QWidget VS QObject
QObject is not a visual control, but the base class of all QT objects.
Qwidget is the base class of all visual controls.
(1) Description
-
The base class of all visual controls (only common to all visual controls, such as a square, resizable, moving position, etc.);
-
Is the simplest blank control;
-
Control is the smallest element of user interface;
Function: receive various events (mouse, keyboard...), draw them on the desktop and show them to users.
-
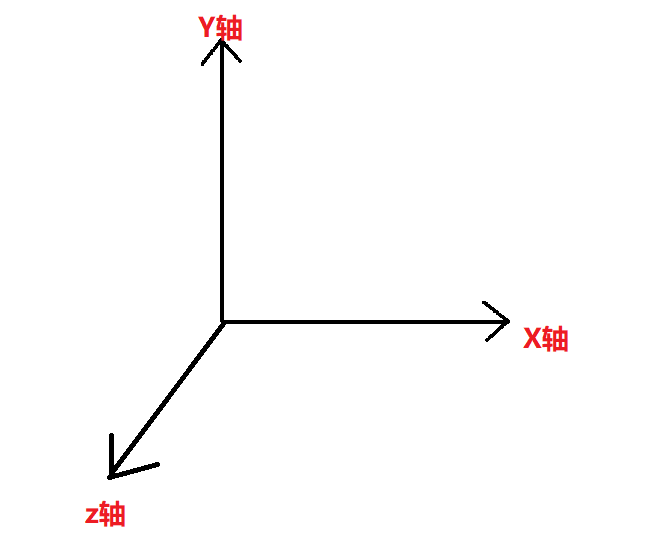
Each control is rectangular, and they are sorted in the order of Z axis (the Z axis faces people, the latter will be obscured by the former, and the latter is the parent control);
-
Control is cut by its parent control and the previous control;
-
A control without a parent control is called a window;
Generally, some methods can be called to automatically display the frame (the frame can be set by show(), and some icons can not be changed by show()).
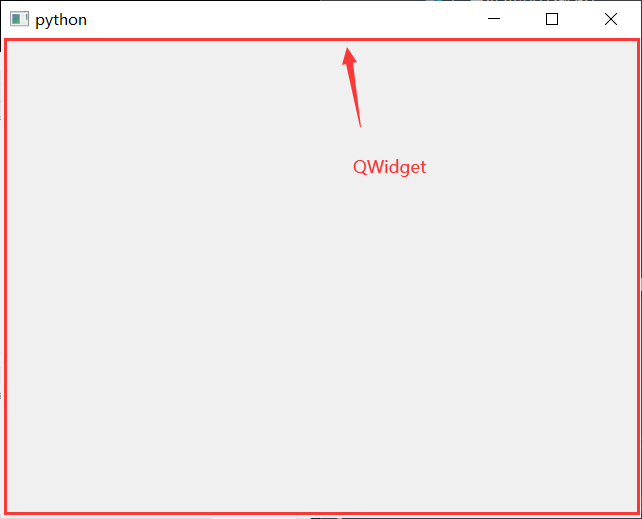
Example 1: take a look at the blank appearance of QWidegt.
# 0. Import packages and modules
from PyQt5.Qt import *
import sys

# 1. Create application object
app = QApplication(sys.argv)

window = QWidget()
window.show()

# 3. Enter message cycle
sys.exit(app.exec_())
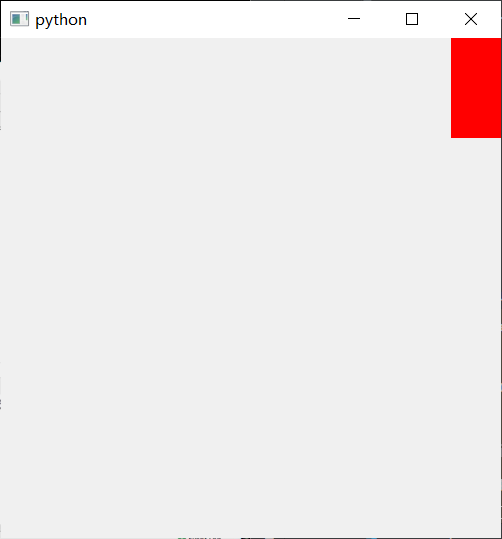
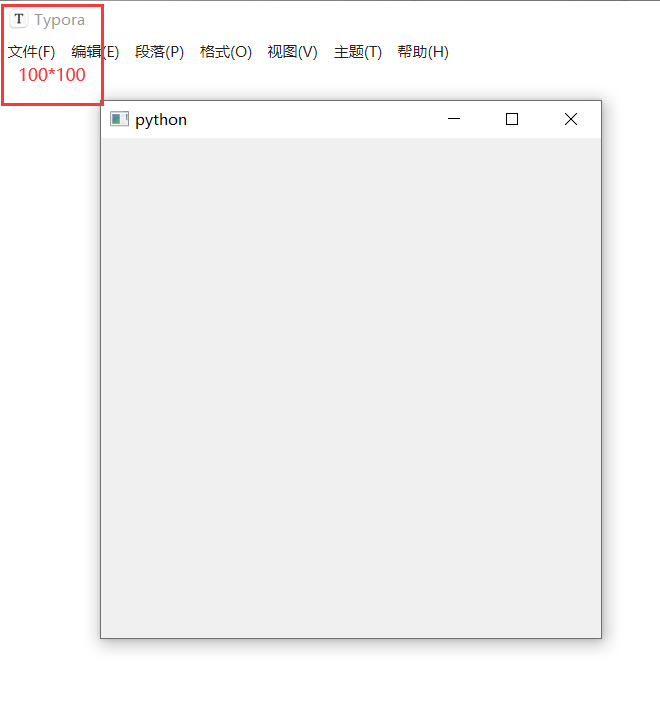
Example 2: nesting of qwidgets
# 0. Import packages and modules
from PyQt5.Qt import *
import sys

app = QApplication(sys.argv)

window = QWidget()
window.resize(500, 500)

red = QWidget(window)
red.resize(100, 100)
red.setStyleSheet("background-color:red;")

window.show()
sys.exit(app.exec_())

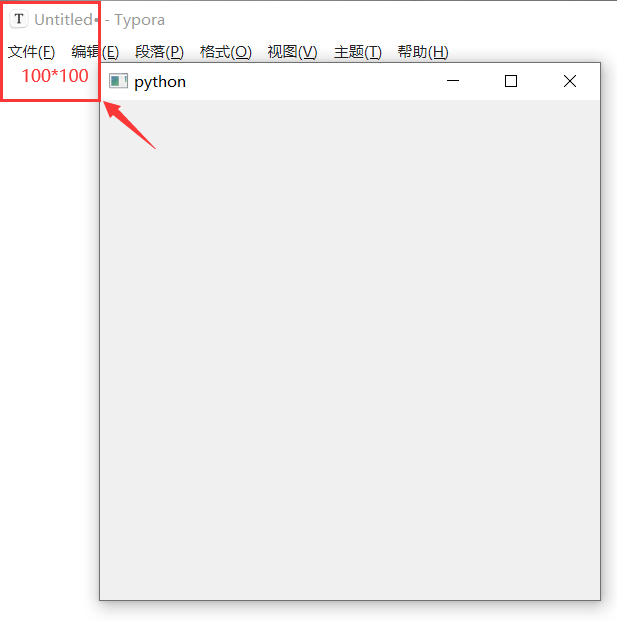
Example 3: when displayed, the child control will not exceed the scope of the parent control.
red.move(450, 0)
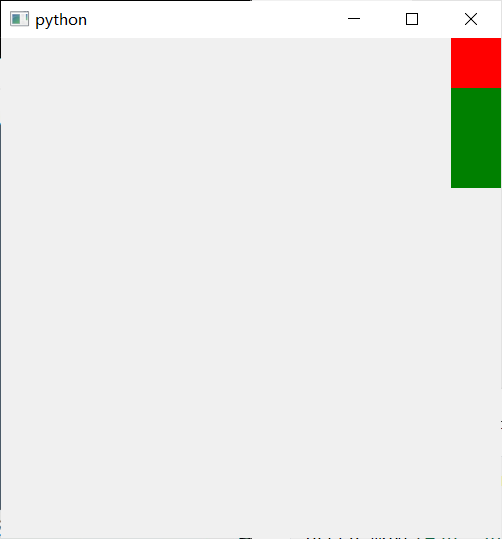
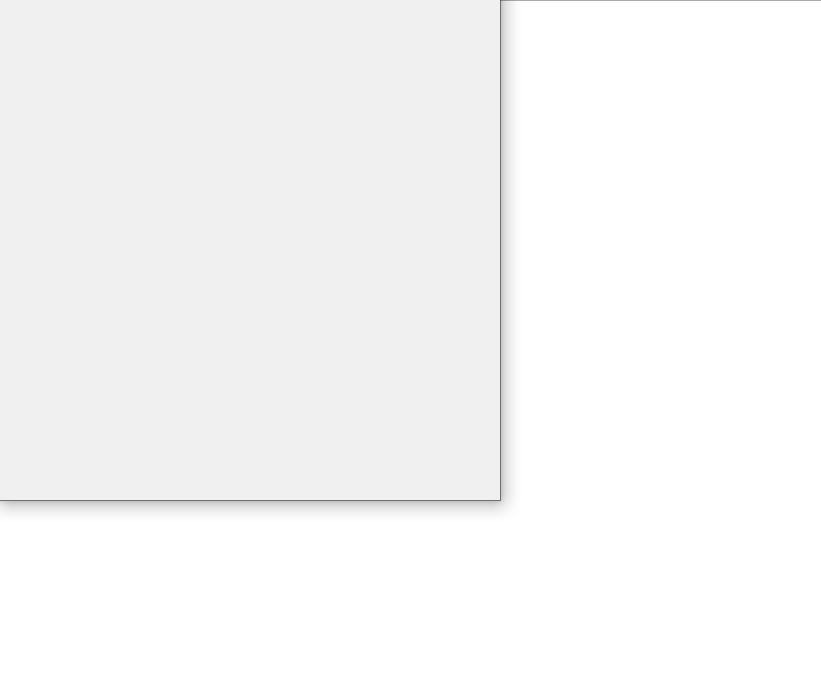
Example 3: two child controls are distributed along the Z axis, and the latter will be cropped by the front.
green = QWidget(window)
green.resize(100, 100)
green.move(450, 50)
green.setStyleSheet("background-color:green;")
(2) Inherit
Method 1: [CTRL] + left mouse button to find the class definition:
class QWidget(_ _PyQt5_QtCore.QObject, _ _PyQt5_QtGui.QPaintDevice):
It inherits from QObject (object) and QPaintDevice (drawing class).
Method 2: attribute__ bases__
print(QWidget.__bases__)
Running result: (< class' PyQt5.QtCore.QObject '>, < class' PyQt5.QtGui.QPaintDevice' >)
PS: parentheses represent tuples, and bases is only the direct parent class.
Method 3: Method mro()
print(QWidget.mro())
Running result: [< class' PyQt5.QtWidgets.QWidget '>, < class' PyQt5.QtCore.QObject' >, < class' sip.wrapper '>, < class' PyQt5.QtGui.QPaintDevice' >, < class' sip.simplewrapper '>, < class' object' >]
PS: mro means to retrieve the whole chain, including not only the direct parent class, but also the parent class of the parent class.
QWidget - > QObject - > wrapper - > qpaintdevice - > simplewrapper - > object (Python object)
(3) Functional function
1. Control creation
API
_ init_(self, parent=None, flags): parent, parent control; Flags, flags.
For example: red = QWidget(window)
Application scenario
When creating a control, set the parent control and flag bit (detailed description of top-level window).
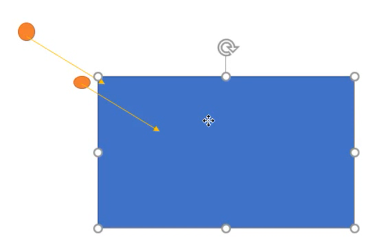
2. Size position
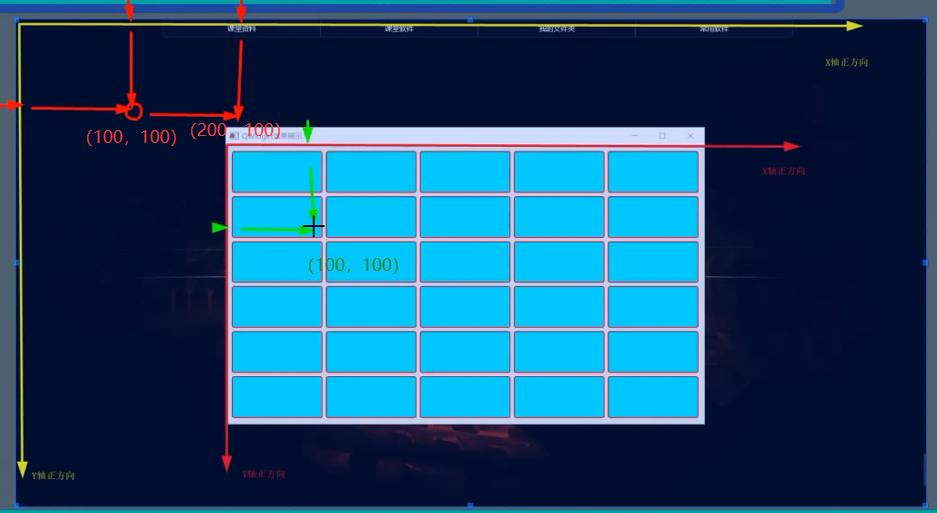
Theoretical support: coordinate system of control
The upper left corner is the coordinate origin, the right is the positive direction of x axis, and the down is the positive direction of y axis.
Control location reference: the child control refers to the parent control, and the top-level control refers to the desktop.
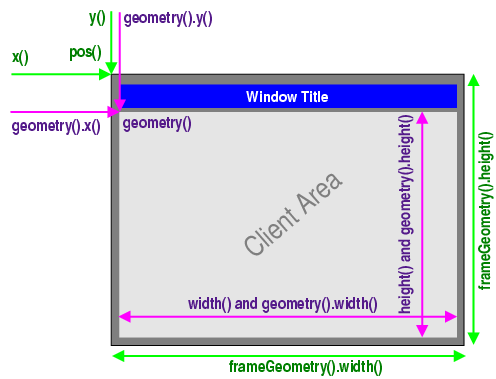
API
(1) Get
Light gray: user area (users can operate here, such as adding a label bar).
Blue: title bar.
Dark grey: exterior frame.
- x(): the x position of the child control relative to the parent control, and the x position of the top-level control window frame relative to the desktop.
- y(): the y position of the window frame relative to the parent control / desktop.
- pos(): combination of window frame X and y, QPoint(x, y).
- width(): the width of the user area control, excluding any window frame.
- height(): the height of the user area control.
- size(): combination of width and height, QSize(width, height), i.e. size combination.
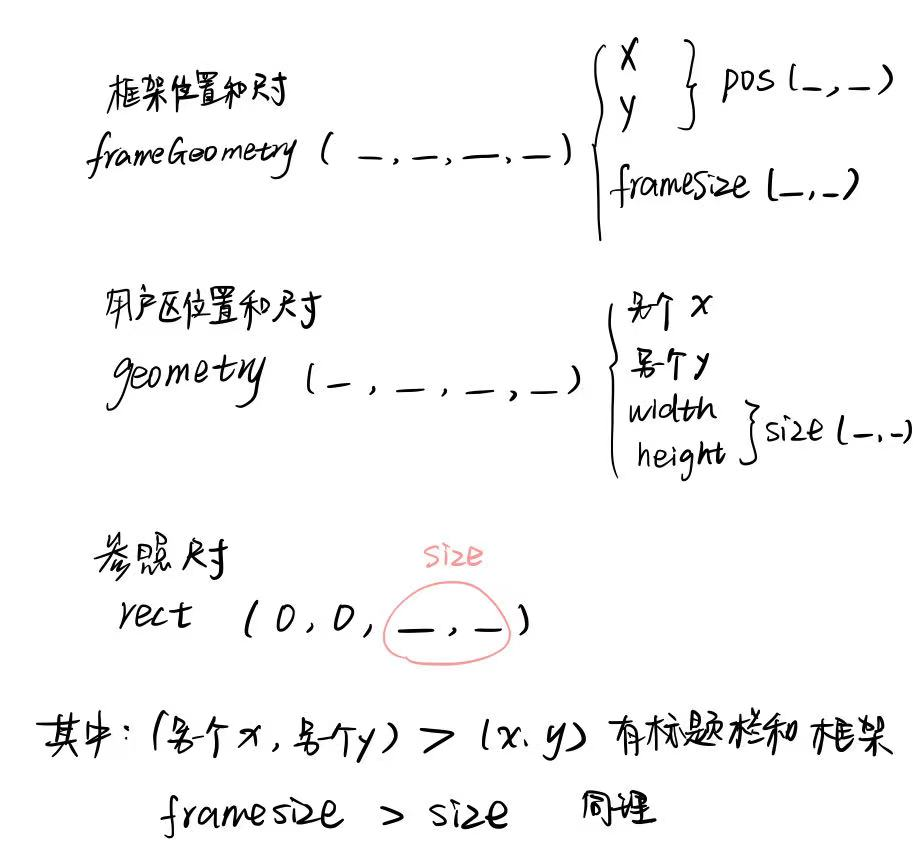
- geometry(): the position and size combination of the user area relative to the parent control, QRect(x, y, width, height).
- rect(): combination of 0, 0, width and height, qrect (0, 0, width and height). That is, the position information is ignored and only the width and height are included. The child control refers to the parent control.
- frameSize(): frame size.
- frameGeometry(): frame size.
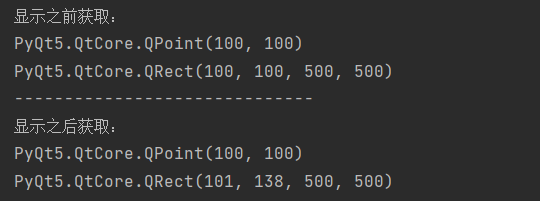
Note: after the control is displayed, the specific position or size data will be correct.
# 0. Import packages and modules
from PyQt5.Qt import *
import sys

# 1. Create application object
app = QApplication(sys.argv)

# 2.1 creating controls
window = QWidget()

# 2.2 setting controls
window.setWindowTitle("")
window.resize(500, 500)
window.move(100, 100)
print("Get before display:")
print(window.pos())
print(window.geometry())


# 2.3 display controls
window.show()
print("-" * 30)
print("Get after display:")
print(window.pos())
print(window.geometry())

# 3. Enter message cycle
sys.exit(app.exec_())
(2) Set
- move(x, y): control x, y; That is pos, for the whole window frame.
- resize(width, height): controls the width and height of the user area.
- setGeometry(x_noFrame, y_noFrame, width, height): refers to the user area.
- adjustSize(): adaptive size based on content.
- setFixedSize(): sets the fixed size.
Note: resize has a minimum value limit because the icon of the lower title bar to be placed.
window.resize(500, 500)
window.move(100, 100)
window.setGeometry(100, 100, 500, 500)
window.show()
window.setGeometry(0, 0, 500, 500)
Note: setGeometry must be set after display. If you are not sure whether to wrap the window frame before display, an error may occur.
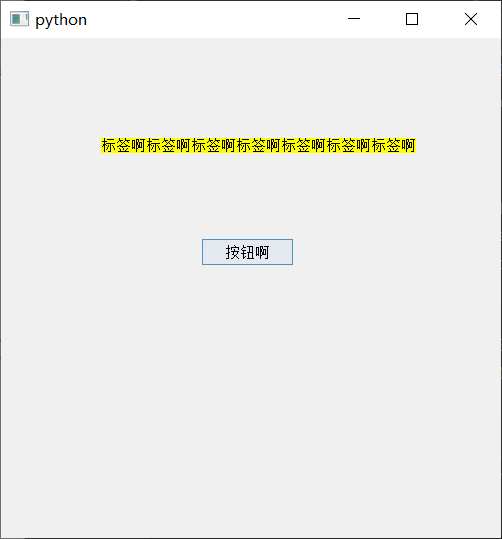
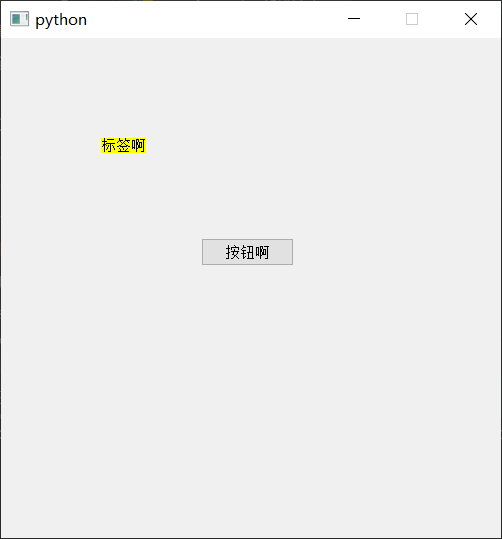
Adaptive size:
label = QLabel(window)
label.setText("Label")
label.move(100, 100)
label.setStyleSheet("background-color:yellow;")


def cao():
    new_content = label.text() + "Label"
    label.setText(new_content)
    label.adjustSize()


btn = QPushButton(window)
btn.setText("Button")
btn.move(200, 200)
btn.clicked.connect(cao)
Fixed size:
window.setWindowTitle("")
# window.resize(500, 500)
window.setFixedSize(500, 500)
window.move(100, 100)
The maximize button has failed!
(3) Auxiliary tools
- xy.exe
Application scenario
Layout control location
Calculate size
case
-
Create a window with a size of 500 x 500 and a position of 300, 300.
window.resize(500, 500)
window.move(300, 300)
-
Through the given number, create the corresponding number of child controls in a window. Requirements: it shall be placed according to the layout of Jiugong grid, with three columns in one row.
# 0. Import packages and modules
from PyQt5.Qt import *
import sys

# 1. Create application object
app = QApplication(sys.argv)

# 2.1 creating controls
window = QWidget()

# 2.2 setting controls
window.setWindowTitle("")
window.resize(500, 500)
window.move(300, 300)

# Total number of controls
widget_count = 20
column_count = 3
row_count = (widget_count-1)//column_count + 1 # Division

# Calculates the width and height of a control
widget_width = window.width()/column_count
widget_height = window.height()/row_count


for i in range(0, widget_count):
    w = QWidget(window)
    x = i % column_count
    y = i // column_count
    w.resize(widget_width, widget_height)
    w.move(x * widget_width, y * widget_height)
    w.setStyleSheet("background-color: yellow;border: 1px solid purple")


# 2.3 display controls
window.show()

# 3. Enter message cycle
sys.exit(app.exec_())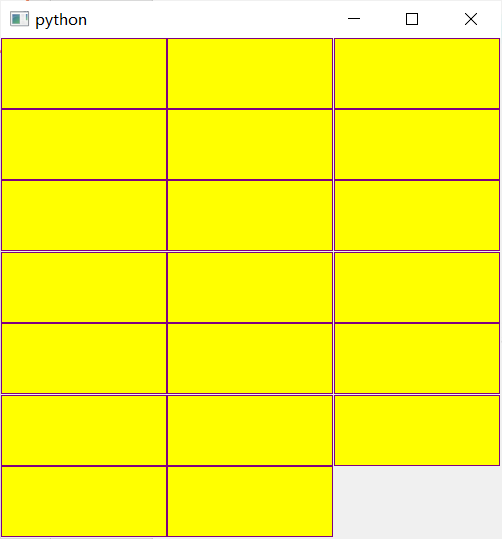
Note: line number is divisor and column number is remainder.
3. Maximum and minimum dimensions
API
(1) Get
- minimumWidth(): the width of the smallest dimension;
- minimumHeight(): the height of the smallest dimension;
- minimumSize(): minimum size;
- maximumWidth(): the width of the maximum size;
- maximumHeight(): the height of the maximum dimension;
- maximumSize(): maximum size (default display);
(2) set
- setMaximumWidth(): sets the maximum width;
- setMaximumHeight(): sets the maximum height;
- setMaximumSize(): sets the maximum size;
- setMinimumWidth(): set the minimum width;
- setMinimumHeight(): set the minimum height;
- setMinimumSize(): sets the minimum size.
Note: there will be differences before and after the control is fully displayed.
Application scenario
Limit control size
case
Create a window and set the minimum and maximum size. Requirements: minimum 200, 200; Max. 400, 400. Test whether it can be changed through resize. (no)
# 0. Import packages and modules
from PyQt5.Qt import *
import sys

# 1. Create application object
app = QApplication(sys.argv)

# 2.1 creating controls
window = QWidget()

# 2.2 setting controls
window.setWindowTitle("Minimum size maximum size")
# window.resize(500, 500)
window.setMinimumSize(200, 200)
window.setMaximumSize(400, 400)


# 2.3 display controls
window.show()

# 3. Enter message cycle
sys.exit(app.exec_())
4. Content margin
API
- Set content margins: setcontentsmargins (left, top, right, bottom), the distance between the edge of the content area and the edge of the control;
- Get content margins: getContentsMargins(), the result is a tuple of (left, top, right, bottom);
- Get content area: contentsRect(), rectangular area of content (x, y, width, height).
Note: the size of the control itself must be enough.
# 0. Import packages and modules
from PyQt5.Qt import *
import sys
# 1. Create application object
app = QApplication(sys.argv)
# 2.1 creating controls
window = QWidget()
# 2.2 setting controls
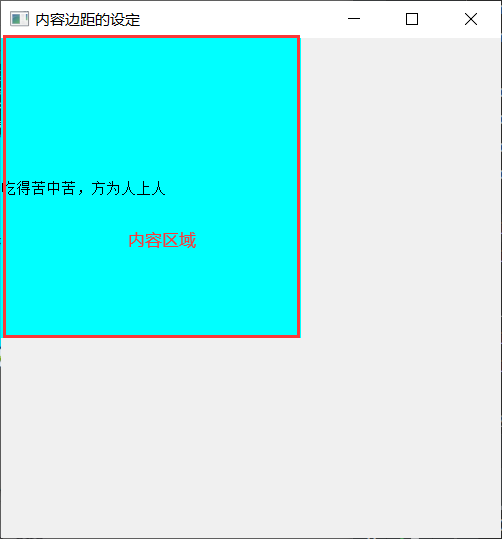
window.setWindowTitle("Setting of content margin")
window.resize(500, 500)
label = QLabel(window)
label.setText("Label here")
label.resize(300, 300)
label.setStyleSheet("background-color: cyan;")
print(label.contentsRect())
print(label.getContentsMargins())
# 2.3 display controls
window.show()
# 3. Enter message cycle
sys.exit(app.exec_())
Result: when nothing is set, the content area is the scope of the whole control, and the content text is displayed in the horizontal left and vertical center of the content area.

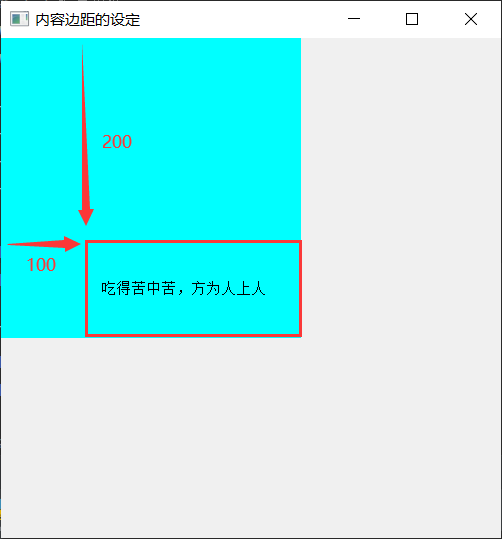
After modifying the content area:
label.setContentsMargins(100, 200, 0, 0)
print(label.contentsRect())
print(label.getContentsMargins())

Application scenario
Adjust the margin of the control content to make the display look better.
case
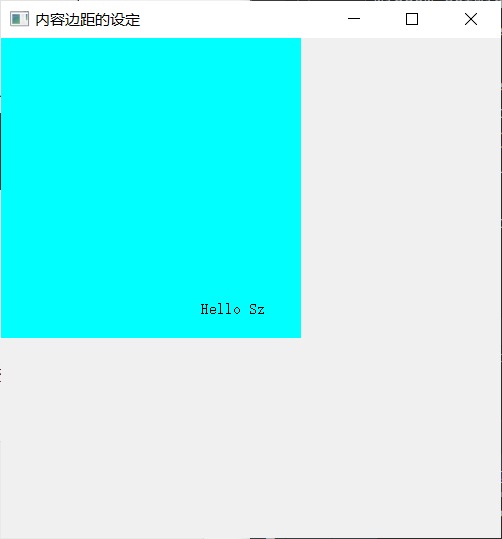
Create a window that contains a label. Requirement: the label content is "Hello Sz"; The size of the content area is 100, 60; Place the content in the lower right corner of the label.
label.setText("Hello Sz")
label.resize(300, 300)
label.setStyleSheet("background-color: cyan;")

label.setContentsMargins(200, 240, 0, 0)
5. Mouse related
API
(1) Set the mouse shape setCursor(), and the values are as follows:
-
Qt.ArrowCursor (arrow arrow)

-
Qt.UpArrowCursor

-
Qt.CrossCursor

-
Qt.IBeamCursor (I-shaped cursor, beam light)

-
Qt.WaitCursor

-
Qt.BusyCursor

-
Qt.ForbiddenCursor

-
Qt.PointingHandCursor

-
Qt.WhatsThisCursor

-
Qt.SizeVerCursor

-
Qt.SizeHorCursor

-
Qt.SizeBDiagCursor

-
Qt.SizeAllCursor

-
Qt. Split vcursor

-
Qt.SplitHCursor

-
Qt.OpenHandCursor

-
Qt.ClosedHandCursor

-
Qt. Blank cursor

-
Custom icon: QCursor object required
Example 1:
label = QLabel(window)
label.setText("Label here")
label.resize(100, 100)
label.setStyleSheet("border:1px solid purple")
label.setCursor(Qt.ForbiddenCursor)
Example 2:
Check the setCursor definition and find that you can pass in unique enumeration type parameters or custom QCursor objects.
def setCursor(self, Union, QCursor=None, Qt_CursorShape=None):
        """ setCursor(self, Union[QCursor, Qt.CursorShape]) """
    pass
View the definition of QCursor object. One construction method is to pass in QPixmap picture object.
class QCursor(__sip.simplewrapper):
    """
    QCursor()
    QCursor(QBitmap, QBitmap, hotX: int = -1, hotY: int = -1)
    QCursor(QPixmap, hotX: int = -1, hotY: int = -1)
    QCursor(Union[QCursor, Qt.CursorShape])
    QCursor(Any)
    """
Then check the definition of QPixmap object. str is the path of the picture. If it is written directly in the same directory, it is OK.
class QPixmap(QPaintDevice):
    """
    QPixmap()
    QPixmap(int, int)
    QPixmap(QSize)
    QPixmap(str, format: str = None, flags: Union[Qt.ImageConversionFlags, Qt.ImageConversionFlag] = Qt.ImageConversionFlag.AutoColor)
    QPixmap(List[str])
    QPixmap(QPixmap)
    QPixmap(Any)
    """
Set custom mouse
pixmap = QPixmap("star.png")
# Zoom the size, and the return value is the modified and adjusted picture
newPixmap = pixmap.scaled(100, 100)
# Modify the hotspot to the lower right corner (default - 1, - 1)
cursor = QCursor(newPixmap, 100, 100)
window.setCursor(cursor)
(2) Reset shape
unsetCursor()
window.unsetCursor()
(3) Get mouse
cursor() -> QCursor
print(window.cursor())
Results: < pyqt5 QtGui. QCursor object at 0x0000020E5EFF5BA8>
(4) Mouse tracking
-
hasMouseTracking(): determines whether mouse tracking is set;
-
setMouseTracking(bool): set whether the mouse tracks;
The so-called mouse tracking is actually setting the conditions for detecting mouse movement events. Do not track: when the mouse moves, it must be pressed to trigger the mouseMoveEvent event event; Tracking: mouseMoveEvent event will also be triggered if the mouse is not pressed when moving.
# 0. Import packages and modules
from PyQt5.Qt import *
import sys


class MyWindow(QWidget):
    def mouseMoveEvent(self, evt):
        print("The mouse moved")

# 1. Create application object
app = QApplication(sys.argv)

# 2.1 creating controls
window = MyWindow()

# 2.2 setting controls
window.setWindowTitle("Mouse operation")
window.resize(500, 500)
window.setMouseTracking(True)

# 2.3 display controls
window.show()

# 3. Enter message cycle
sys.exit(app.exec_())
Result: tracking occurs without pressing the mouse.
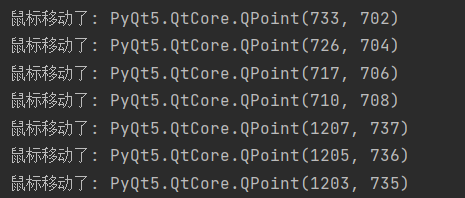
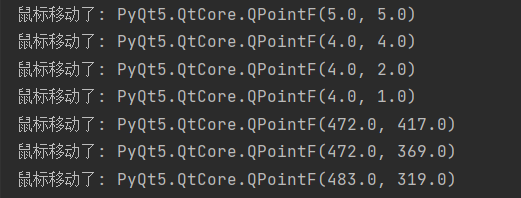
The event object QMouseEvent has global (for the upper left corner of the screen) position, local (for the upper left corner of the control) position and other methods.
overall situation:
Local:
(5) QCursor object
pixmap();pos();setPos(x, y)...
Application scenario
Set the mouse style according to the specific scene; Make user interaction more explicit.
case
Create a window with a label control inside. Requirements: when the mouse moves into the window, let the label position follow the mouse position; Set the mouse to the specified icon and encapsulate it.
import sys
from PyQt5.Qt import *


class Window(QWidget):
    def __init__(self):
        super(Window, self).__init__()
        self.setWindowTitle("Mouse related cases")
        self.resize(500, 500)
        self.move(200, 200)
        self.setMouseTracking(True)

        pixmap = QPixmap("star.png").scaled(60, 60)
        cursor = QCursor(pixmap)
        self.setCursor(cursor)

        label = QLabel(self)
        self.label = label
        label.setText("Label here")
        label.move(100, 100)
        label.setStyleSheet("background-color:cyan;")

    def mouseMoveEvent(self, evt):
        print("Move the mouse to:", evt.localPos())
        # label2 = self.findChild(QLabel) doesn't need to be encapsulated. Label has become an attribute in the class
        self.label.move(evt.localPos().x(), evt.localPos().y())
        # label2.move(evt.localPos()) arguments did not match any overloaded call


app = QApplication(sys.argv)

window = Window()

window.show()

sys.exit(app.exec_())
6. Events
API
-
Show and close events:
showEvent(QShowEvent): called when the control is displayed;
closeEvent(QCloseEvent): called when the control is closed.
-
Move event:
moveEvent(QMoveEvent): called when the control moves. It has moved twice when the window is displayed. Whether x and y change is determined by moving.
-
Resize:
resizeEvent(QResizeEvent): called when the control is resized, and the window has been changed once when it is displayed;
-
Mouse events:
(1) Entry and exit events: enterEvent(QEvent) is triggered when the mouse enters; leaveEvent(QEvent) is triggered when the mouse leaves, which can be used to display the selected shadow effect.
(2) Trigger when the mouse is pressed: mousePressEvent(QMouseEvent);
(3) Triggered when the mouse is released: mouserereleaseevent (qmouseevent). One click plus one release (within the space of the control) is one click.
(4) Triggered when the mouse double clicks: mouseDoubleClickEvent(QMouseEvent);
(5) Triggered when the mouse moves after pressing: mouseMoveEvent(QMouseEvent), which is used to track the mouse.
setMouseTracking(True): after tracking is set, the movement without pressing can also be triggered.
-
Keyboard events:
keyPressEvent(QKeyEvent): called when the keyboard is pressed;
keyReleaseEvent(QKeyEvent): called when the keyboard is released.
If you want to monitor which key is pressed: view the QKeyEvent event event object.
-
Focus event:
focusInEvent(QFocusEvent): called when obtaining focus;
focusOutEvent(QFocusEvent): called when the focus is lost.
-
File upload: (drag event)
dragEnterEvent(QDragEnterEvent): called when dragging into a control;
dragLeaveEvent(QDragLeaveEvent): called when dragging away from the control;
dragMoveEvent(QDragMoveEvent): called when dragging and moving in the control;
dropEvent(QDropEvent): called when dragging and dropping.
-
Draw event: (beautify control)
paintEvent(QPaintEvent): display the control and call it when updating the control;
-
Change event: (switching between Chinese and English)
changeEvent(QEvent): called when the form changes and the font changes.
-
Right click menu:
contextMenuEvent(QContextMenuEvent): called when accessing the right-click menu.
-
typewriting:
inputMethodEvent(QInputMethodEvent): input method call.
Example 1: because it inherits a specific method of a specific object, the object-oriented writing method is adopted.
# 0. Import packages and modules
from PyQt5.Qt import *


# Inherit classes and define your own methods
class Window(QWidget):
    # initialization
    def __init__(self):
        super(Window, self).__init__()
        self.setWindowTitle("Event message learning")
        self.resize(500, 500)
        self.setup_ui()

    # Store all child controls and configuration operations of child controls
    def setup_ui(self):
        label = QLabel(self)
        label.setText("Label label")

    def showEvent(self, a0: QShowEvent) -> None:
        print("The window is displayed")

    def closeEvent(self, a0: QCloseEvent) -> None:
        print("The window is closed")

    def moveEvent(self, a0: QMoveEvent) -> None:
        print("Window moved")

    def resizeEvent(self, a0: QResizeEvent) -> None:
        print("The window has changed size")

    def enterEvent(self, a0: QEvent) -> None:
        print("The mouse came in")
        self.setStyleSheet("background-color: yellow;")

    def leaveEvent(self, a0: QEvent) -> None:
        print("The mouse left")
        self.setStyleSheet("background-color: green;")

    def mousePressEvent(self, a0: QMouseEvent) -> None:
        print("Mouse pressed")

    def mouseReleaseEvent(self, a0: QMouseEvent) -> None:
        print("The mouse is released")

    def mouseDoubleClickEvent(self, a0: QMouseEvent) -> None:
        print("Double click the mouse")

    def mouseMoveEvent(self, a0: QMouseEvent) -> None:
        print("Mouse movement")

    def keyPressEvent(self, a0: QKeyEvent) -> None:
        print("A key on the keyboard is pressed")

    def keyReleaseEvent(self, a0: QKeyEvent) -> None:
        print("A key on the keyboard is released")


if __name__ == '__main__':
    import sys

    app = QApplication(sys.argv)
    window = Window()
    window.show()
    sys.exit(app.exec_())
Application scenario
When a control is triggered by a specific behavior, it will call a specific method to pass the event to the developer for easy processing. By rewriting these event methods, you can listen for relevant information.
Example 2: event transmission of event mechanism
# 0. Import packages and modules
from PyQt5.Qt import *
import sys


class window(QWidget):
    def mousePressEvent(self, a0: QMouseEvent) -> None:
        print("The top window is pressed")


class Midwindow(QWidget):
    def mousePressEvent(self, a0: QMouseEvent) -> None:
        print("The middle control is pressed")
    pass


class Label(QLabel):
    def mousePressEvent(self, evt) -> None:
        print("Label control pressed")
        # evt.accept()
        # Accept the event and will not continue to upload to the parent control
        # print(evt.isAccepted())
        # The output True proof would have been automatically accepted
        # Ignore the event and continue uploading to the parent control
        evt.ignore()
    pass


# 1. Create application object
app = QApplication(sys.argv)

# 2.1 creating controls
window = window()

# 2.2 setting controls
window.setWindowTitle("Event Forwarding")
window.resize(500, 500)

mid_window = Midwindow(window)
mid_window.resize(300, 300)
mid_window.setAttribute(Qt.WA_StyledBackground, True)
mid_window.setStyleSheet("background-color:yellow;")

label = Label(mid_window)
label.setText("Label here")
label.move(100, 100)
label.setStyleSheet("background-color:cyan;")

btn = QPushButton(mid_window)
btn.setText("Button here")
btn.move(50, 50)


# 2.3 display controls
window.show()

# 3. Enter message cycle
sys.exit(app.exec_())
PS:
- If the control does not handle events, it is submitted to the parent control. If the event handling of the tag is annotated, the "middle control is clicked" will be displayed after clicking.
- The main function of the tag is to display. Without the function of mousepressEvent, butten is mainly used to click.
- evt.ignore(): ignore the event and continue uploading to the parent control. It will output "the label is pressed" and "the middle control is pressed".
- evt.accept(): accept the event and will not continue to upload to the parent control. The "tag pressed" will be output.
- print(evt.isAccepted()): check whether the event is accepted. Outputting True means that it will be accepted by default and will not be uploaded.
case
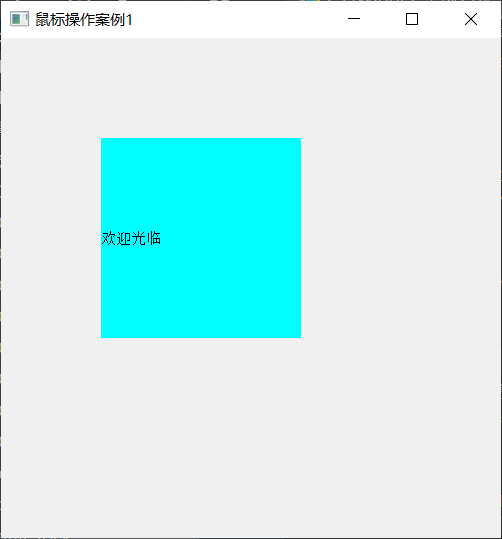
1. Create a window containing a label. It is required to display "welcome" when the mouse enters the label; When the mouse leaves the label, it displays "thank you for your patronage".
# 0. Import packages and modules
from PyQt5.Qt import *
import sys


class newLabel(QLabel):
    def enterEvent(self, a0: QEvent) -> None:
        self.setText("Welcome")

    def leaveEvent(self, a0: QEvent) -> None:
        self.setText("Thank you for your patronage")


# 1. Create application object
app = QApplication(sys.argv)

# 2.1 creating controls
window = QWidget()

# 2.2 setting controls
window.setWindowTitle("Mouse operation case 1")
window.resize(500, 500)

label = newLabel(window)
label.resize(200, 200)
label.move(100, 100)
label.setStyleSheet("background-color:cyan;")

# 2.3 display controls
window.show()

# 3. Enter message cycle
sys.exit(app.exec_())
2. Create a window to listen for user keys. Requirements: monitor the user's input of Tab key; Monitor user input Ctrl+S key combination; Monitor user input Ctrl+Shift+A. Implementation of shortcut keys
(the event of pressing the keyboard is def keyPressEvent(self, QKeyEvent), and the information of which key is pressed is stored in QKeyEvent)
    # Normal key
    def key(self): # real signature unknown; restored from __doc__
        """ key(self) -> int """
        return 0

    # Modifier key
    def modifiers(self): # real signature unknown; restored from __doc__
        """ modifiers(self) -> Qt.KeyboardModifiers """
        pass
# 0. Import packages and modules
from PyQt5.Qt import *
import sys


class newLabel(QLabel):
    def keyPressEvent(self, evt) -> None:
        # print("xxx")
        if evt.key() == Qt.Key_Tab:
            print("The user clicked Tab key")
        if evt.modifiers() == Qt.ControlModifier and evt.key() == Qt.Key_S:
            print("The user clicked CTRL+S key")
        if evt.modifiers() == Qt.ControlModifier | Qt.ShiftModifier and evt.key() == Qt.Key_A:
            print("The user clicked CTRL+Shift+A key")


# 1. Create application object
app = QApplication(sys.argv)

# 2.1 creating controls
window = QWidget()

# 2.2 setting controls
window.setWindowTitle("Mouse operation case 1")
window.resize(500, 500)

label = newLabel(window)
label.resize(200, 200)
label.move(100, 100)
label.setStyleSheet("background-color:cyan;")
# Tag capture keyboard operation
label.grabKeyboard()


# 2.3 display controls
window.show()

# 3. Enter message cycle
sys.exit(app.exec_())
be careful:
-
label.grabKeyboard() can capture keyboard behavior on itself.
-
Modifier key: for example, Tab is not a modifier key, because Tab characters will be entered after clicking.
Qt.NoModifier: no modifier key;
Qt.ShiftModifier: Shift key is pressed;
Qt.ControlModifier: Ctrl key is pressed;
Qt.AltModifier: Alt key pressed
...
Bitwise OR operation is used between combinations of multiple modifier keys (principle: the or operation result of any two modifier keys is unique)
Normal key: QT Key_ xxx
3. When the window is completed, the user area supports dragging. Requirements: click the user area and drag to move the window. (previously, you could only click the title bar to move)
If you dislike the system title bar and want to draw a title bar by yourself, you will use this skill.
# 0. Import packages and modules
from PyQt5.Qt import *


# Inherit classes and define your own methods
class Window(QWidget):
    # initialization
    def __init__(self):
        super(Window, self).__init__()
        self.setWindowTitle("window moving")
        self.resize(500, 500)
        self.setup_ui()

    # Store all child controls and configuration operations of child controls
    def setup_ui(self):
        label = QLabel(self)
        label.setText("Label label")

    def mousePressEvent(self, evt):
        # print("mouse down")
        # Identify two points
        self.mouse_x = evt.globalX()
        self.mouse_y = evt.globalY()
        # print(self.mouse_x, self.mouse_y)
        self.window_x = self.x()
        self.window_y = self.y()

    def mouseMoveEvent(self, evt):
        # print("mouse movement")
        # Moving vector
        move_x = evt.globalX() - self.mouse_x
        move_y = evt.globalY() - self.mouse_y
        # print(move_x, move_y)
        # Target location
        dest_x = self.window_x + move_x
        dest_y = self.window_y + move_y
        self.move(dest_x, dest_y)

    def mouseReleaseEvent(self, evt):
        print("Mouse release")


if __name__ == '__main__':
    import sys

    app = QApplication(sys.argv)
    window = Window()
    window.show()
    sys.exit(app.exec_())
First think: you need to monitor three events "mouse press", "mouse pop-up" and "mouse move".
(1) Determine two points: the point of the left mouse button (determine the movement vector of the mouse (x, y)), and the window coordinate point (locate the window movement)
(2) Let the window coordinate point walk a moving vector.
(3) There are two choices for reference objects - desktop and window control. Select the immovable as the reference object, that is, desktop.
This seems to be done, but if you set mouse tracking (window.setMouseTracking(True), that is, you can track the mouse without clicking the left mouse button), the program will crash. Errors are reported as follows:
Traceback (most recent call last):
  File "C:/Users/16041/PycharmProjects/useQt/7-QWidget-Case 3.py", line 31, in mouseMoveEvent
    move_x = evt.globalX() - self.mouse_x
AttributeError: 'Window' object has no attribute 'mouse_x'
That is, there is no self mouse_ X is a variable, which is because the movement starts before the mouse click operation is performed.
At this time, only one mark is needed to solve this potential safety hazard. The mark runs through the whole process of initialization, pressing, release and movement.
# 0. Import packages and modules
from PyQt5.Qt import *


# Inherit classes and define your own methods
class Window(QWidget):
    # initialization
    def __init__(self):
        super(Window, self).__init__()
        self.setWindowTitle("window moving")
        self.resize(500, 500)
        self.setup_ui()
        self.moveflag = False

    # Store all child controls and configuration operations of child controls
    def setup_ui(self):
        label = QLabel(self)
        label.setText("Label label")

    def mousePressEvent(self, evt):
        self.moveflag = True
        # print("mouse down")
        # Identify two points
        self.mouse_x = evt.globalX()
        self.mouse_y = evt.globalY()
        # print(self.mouse_x, self.mouse_y)
        self.window_x = self.x()
        self.window_y = self.y()

    def mouseMoveEvent(self, evt):
        if self.moveflag:
            # print("mouse movement")
            # Moving vector
            move_x = evt.globalX() - self.mouse_x
            move_y = evt.globalY() - self.mouse_y
            # print(move_x, move_y)
            # Target location
            dest_x = self.window_x + move_x
            dest_y = self.window_y + move_y
            self.move(dest_x, dest_y)

    def mouseReleaseEvent(self, evt):
        self.moveflag = False
        # print("mouse release")


if __name__ == '__main__':
    import sys

    app = QApplication(sys.argv)
    window = Window()
    window.show()
    window.setMouseTracking(True)
    sys.exit(app.exec_())
Another problem now is that pressing any key on the mouse will move, not just the left button.
    def mousePressEvent(self, evt):
        if evt.button() == Qt.LeftButton:
            self.moveflag = True
            # print("mouse down")
            # Identify two points
            self.mouse_x = evt.globalX()
            self.mouse_y = evt.globalY()
            # print(self.mouse_x, self.mouse_y)
            self.window_x = self.x()
            self.window_y = self.y()
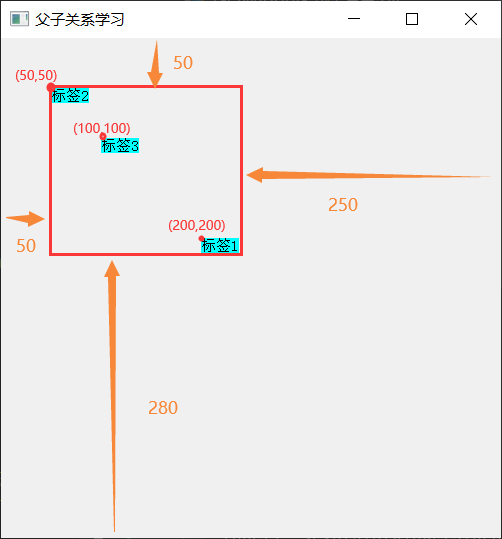
7. Father son relationship
API
- childAt(x, y): get the child control at the specified coordinate;
- parentWidget(): get the parent control of the specified control;
- childrenRect(): a bounding rectangle composed of all child controls.
# 0. Import packages and modules
from PyQt5.Qt import *
import sys

# 1. Create application object
app = QApplication(sys.argv)

# 2.1 creating controls
window = QWidget()

# 2.2 setting controls
window.setWindowTitle("Father son relationship learning")
window.resize(500, 500)

label1 = QLabel(window)
# label1.setParent()
label1.setText("Label 1")
label1.move(200, 200)
label1.setStyleSheet("background-color: cyan;")

label2 = QLabel(window)
# label1.setParent()
label2.setText("Label 2")
label2.move(50, 50)
label2.setStyleSheet("background-color: cyan;")

label3 = QLabel(window)
# label1.setParent()
label3.setText("Label 3")
label3.move(100, 100)
label3.setStyleSheet("background-color: cyan;")

print("window: ", window)
print("label1:", label1)
print("label2:", label2)
print("label3:", label3)
print(window.childAt(210, 210))
print(label2.parentWidget())
print(window.childrenRect())

# 2.3 display controls
window.show()

# 3. Enter message cycle
sys.exit(app.exec_())
case
Create a window that contains several Label controls. Requirements: click on which Label, and the background of which Label will turn red.
Method 1: use the parent control to process
# 0. Import packages and modules
from PyQt5.Qt import *
import sys

class newWidget(QWidget):
    def mousePressEvent(self, evt):
        if evt.button() == Qt.LeftButton:
            local_x = evt.x()
            local_y = evt.y()
            press_widget = self.childAt(local_x, local_y)
            if press_widget:
                press_widget.setStyleSheet("background-color:cyan;")


# 1. Create application object
app = QApplication(sys.argv)

# 2.1 creating controls
window = newWidget()

# 2.2 setting controls
window.setWindowTitle("Self taught father son relationship")
window.resize(500, 500)

for i in range(1, 11):
    label = QLabel(window)
    label.setText("label" + str(i))
    label.move(40 * i, 40 * i)
    label.setStyleSheet("border:1px solid black;")

# 2.3 display controls
window.show()

# 3. Enter message cycle
sys.exit(app.exec_())
It should also be noted that the variable name of label can be the same through the method of creating label through loop.
Method 2: customize QLabel subclass
class newLabel(QLabel):
    def mousePressEvent(self, evt):
        if evt.button() == Qt.LeftButton:
            self.setStyleSheet("background-color:red;")
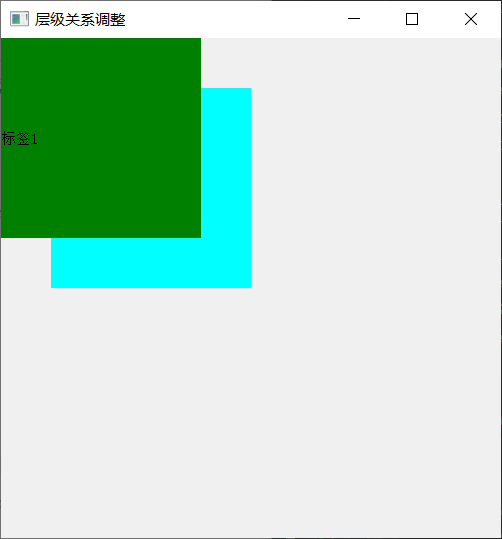
8. Hierarchical control
API
- lower(): lower the control to the lowest level;
- raise_ (): promote the control to the top layer;
- a. Stack under (b): put a under B.
Note: the above operations refer specifically to controls at the same level, which are added by default.
# 0. Import packages and modules
from PyQt5.Qt import *
import sys

# 1. Create application object
app = QApplication(sys.argv)

# 2.1 creating controls
window = QWidget()

# 2.2 setting controls
window.setWindowTitle("Hierarchical relationship adjustment")
window.resize(500, 500)

label = QLabel(window)
label.setText("Label 1")
label.resize(200, 200)
label.setStyleSheet("background-color:green;")

label2 = QLabel(window)
label2.setText("Label 2")
label2.resize(200, 200)
label2.move(50, 50)
label2.setStyleSheet("background-color:cyan;")

# 2.3 display controls
window.show()

# 3. Enter message cycle
sys.exit(app.exec_())

label2.lower()
or label.raise_()
or label2.stackUnder(label)
The effects are as follows:
Improvement: if you point who is on it.
class newLabel(QLabel):
    def mousePressEvent(self, evt):
        self.raise_()
or
class newQWidget(QWidget):
    def mousePressEvent(self, evt):
        sub_widget = self.childAt(evt.x(), evt.y())
        if sub_widget:
            sub_widget.raise_()
Application scenario
You need to adjust the Z-axis order of the controls.
9. Top level window related
API
(1) Icon
- setWindowIcon(QIcon("resource/header_icon.png"))
- windowIcon()
PS: if you don't know what variables are put in the function, first create a variable of prompt type, and then trace it layer by layer.
class QIcon(__sip.wrapper):
    """
    QIcon()
    QIcon(QPixmap)
    QIcon(QIcon)
    QIcon(str)
    QIcon(QIconEngine)
    QIcon(Any)
    """
icon = QIcon("star.png")
window.setWindowIcon(icon)
print(window.windowIcon())
(2) Title
- setWindowTitle("this is often used"), the default is "python".
- windowTitle()
(3) Opacity
- setWindowOpacity(float) 1.0: opaque 0.0: transparent;
- windowOpacity()
(4) Window status
-
setWindowState(state)
Qt.WindowNoState, stateless; (default)
Qt.WindowMinimized, minimized;
Qt.WindowMaximized, maximized;
Qt.WindowFullScreen, full screen; (turn it off in the task manager by CTRL+alt+delete)
Qt.WindowActive, the active window. (when there are multiple windows, you can also set setWindowState to show who is on it after who is on it)
-
windowState()
print(window.windowState() == Qt.WindowNoState)
window.setWindowState(Qt.WindowMinimized)
window.setWindowState(Qt.WindowMaximized)
window.setWindowState(Qt.WindowFullScreen)

window.show()
window2.show()
window.setWindowState(Qt.WindowActive)
Finally, window 1 is on it.
(5) Maximize minimize
Controls the maximization, closing, and so on of custom title blocks
The show() method may not be used.
showFullScreen(): full screen display without window frame.
showMaximized(): maximized, including window frames.
showMinimized(): minimized.
showNormal(): normal.
Example: double click window to maximize
class newWidget(QWidget):
    def mouseDoubleClickEvent(self, evt):
        if evt.button() == Qt.LeftButton:
            self.showMaximized()
Judgment (for example, the maximization function keys of maximization and normal display are different in length)
isMinimized(): whether it is a minimized window;
Ismaxized(): whether it is a maximized window;
isFullScreen(): whether the screen is full.
Example: double click to normalize if it has been maximized, otherwise maximize.
class newWidget(QWidget):
    def mouseDoubleClickEvent(self, evt):
        if evt.button() == Qt.LeftButton:
            if self.isMaximized():
                self.showNormal()
            else:
                self.showMaximized()
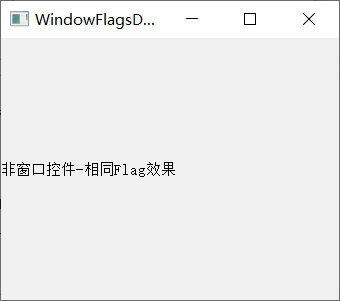
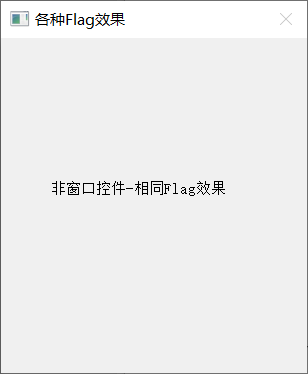
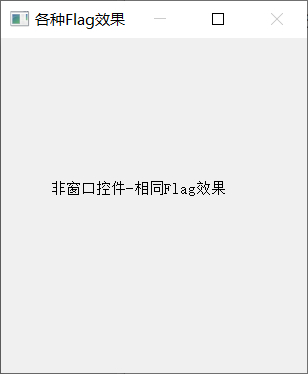
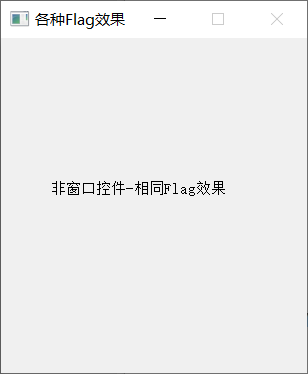
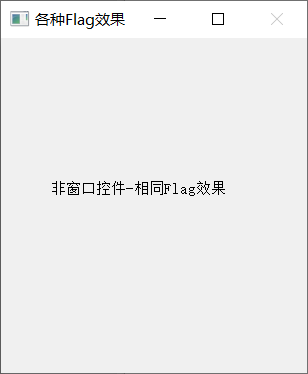
(6) The window flag sets the appearance of the entire window
window.setWindowFlags(Qt.WindowStaysOnTopHint)
windowFlags()
Parameter QT Windowstaysontophint can be:
window style
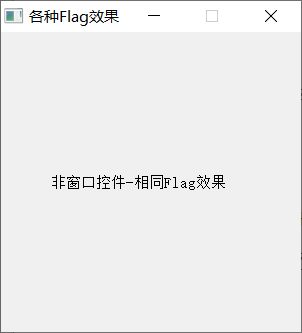
-
Qt.Widget: the default parameter, which is a window or control. The parent control is a general control; If there is no parent control, it is a window.
Windows include window borders and title bars (icons, titles, minimize, maximize, close).
-
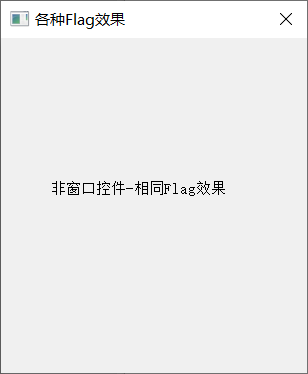
Qt.Window: it is a window with window border and title.
Title bar (icon, title, minimize, maximize, close)
-
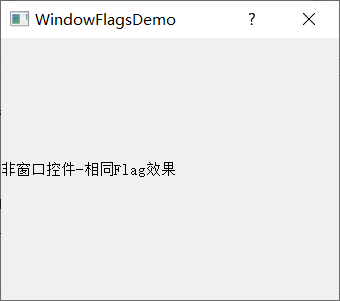
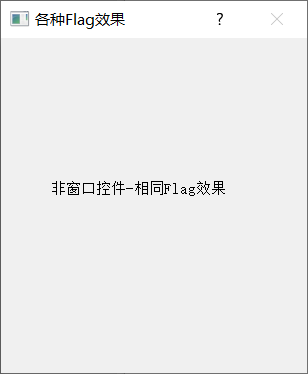
Qt.Dialog: a dialog window with a window border and a title bar.
Title bar (icon, title, question mark, close)

-
Qt.Sheet: a Macintosh form that is a window or widget. (what's the difference from the above???)
-
Qt.Drawer: is a window or part of a Macintosh drawer.
-
Qt.Popup: is a pop-up top-level window.
-
Qt.Tool: is a tool window.

-
Qt.ToolTip: it is a prompt window without title bar and window border.
-
Qt.SplashScreen: it is a welcome window and the default value of qsplayscreen constructor. (different from the above?)

-
Qt.SubWindow: is a child window.

Appearance mark of top-level window
-
Qt.MSWindowsFixedSizeDialogHint: the window cannot be resized.
-
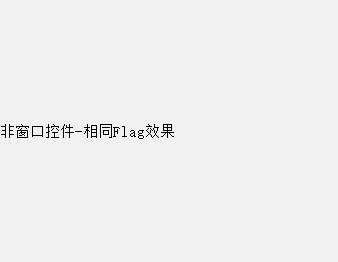
Qt. Frameleswindowhint: the window has no border.
-
Qt. Customize window hint: it has a border but no title bar and button. It cannot be moved or dragged.
-
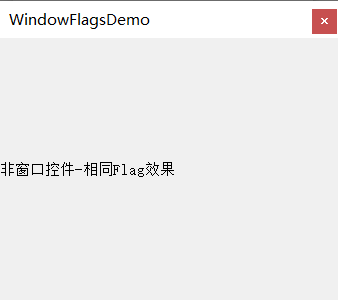
Qt.WindowTitleHint: add a title bar and a close button.
-
Qt.WindowSystemMenuHint: add a system directory and a close button.

-
Qt.WindowMaximizeButtonHint: activate the maximize and close buttons and prohibit the minimize button.
-
Qt. Windowminizebuttonhint: activate the minimize and close buttons, and prohibit the maximize button.
-
Qt.WindowMinMaxButtonsHint: activates the minimize, maximize, and close buttons.
-
Qt.WindowCloseButtonHint: add a close button.
-
Qt.WindowContextHelpButtonHint: add question mark and close button, the same as dialog box.
-
Qt.WindowStaysOnTopHint: the window is always at the top level (QQ login interface).
-
Qt.WindowStaysOnBottomHint: the window is always in the bottom position.
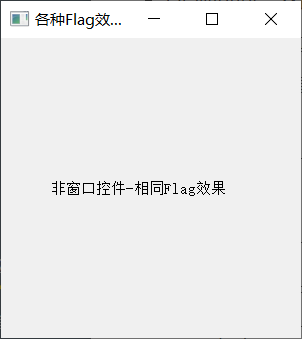
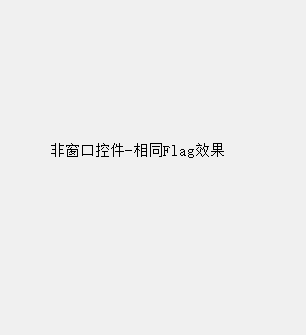
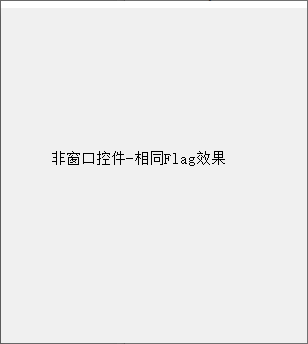
Note: a window is a control without a parent control, that is, a top-level control. Controls generally refer to non window controls.
Application scenario
Adjust the appearance of the entire application window.
case
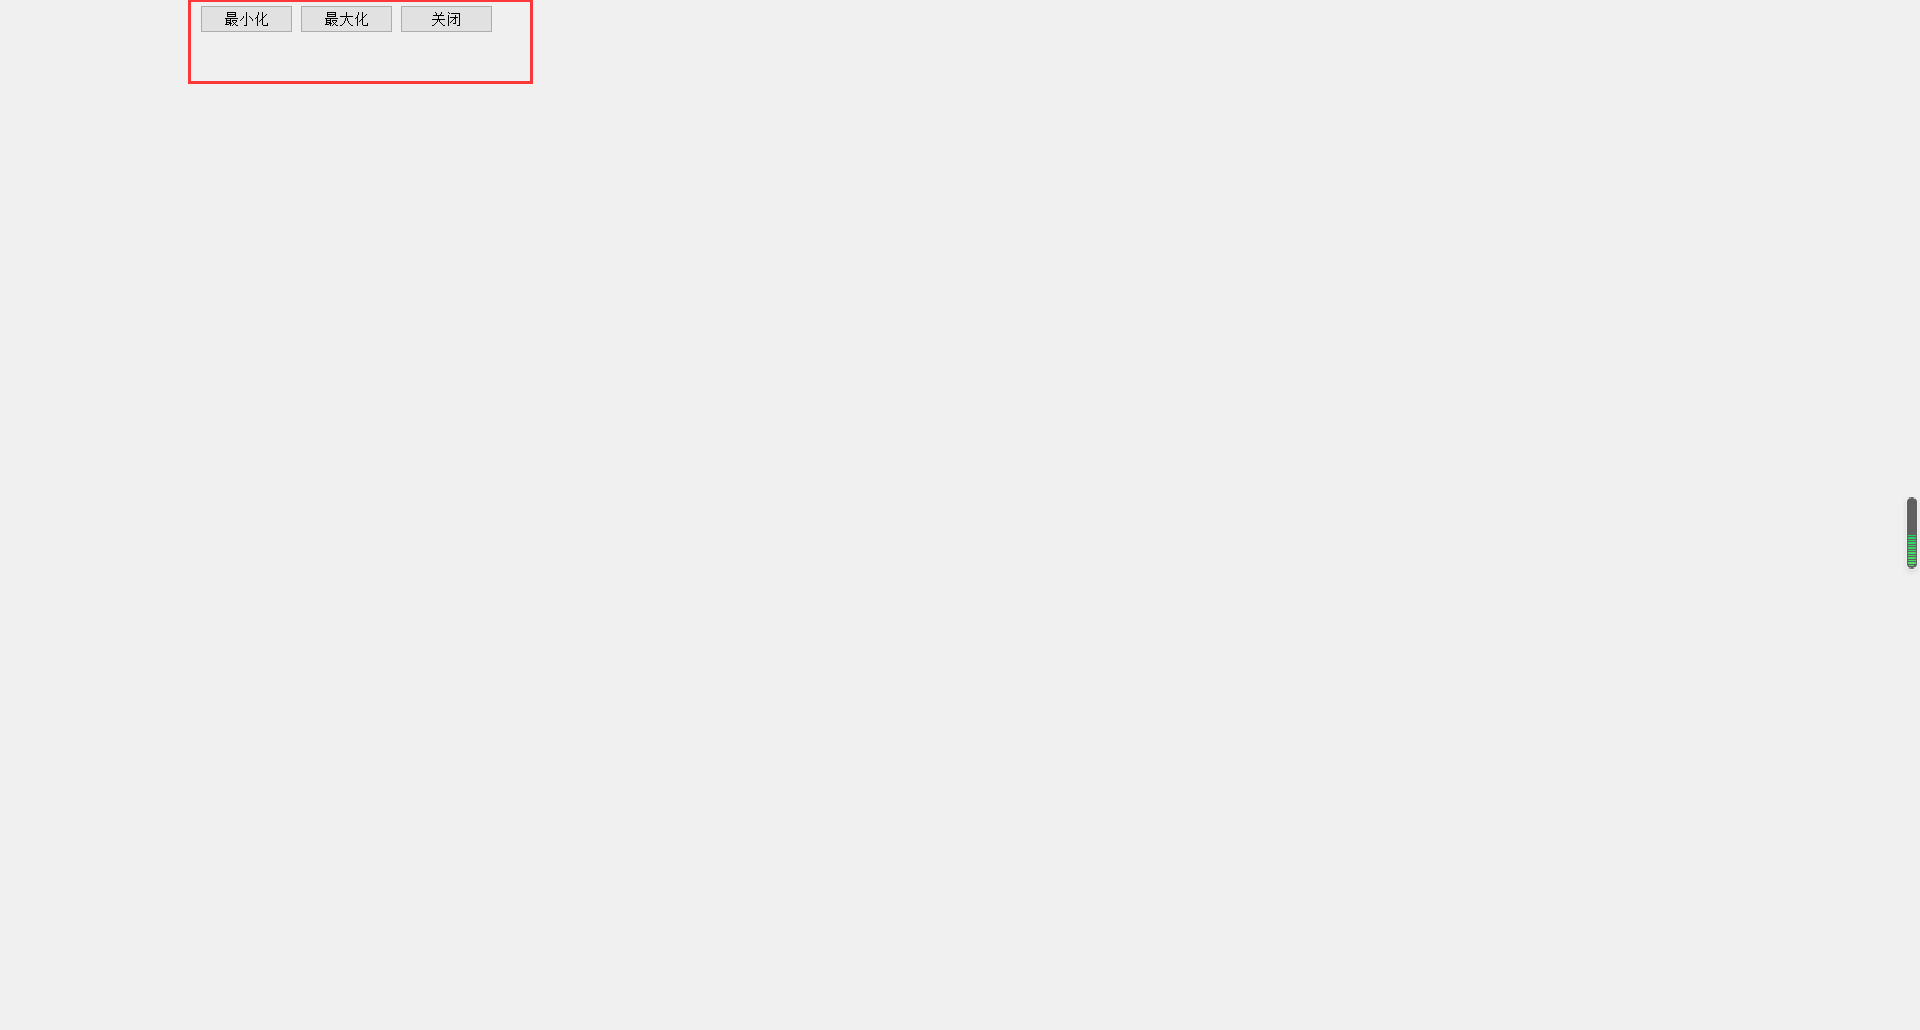
To create a window, requirements: no border, no title bar, translucent window, user-defined minimize, maximize and close buttons, and support dragging user area to move.
Borderless setting
Method 1: call method
window.setWindowFlags(Qt.FramelessWindowHint)
Method 2: set when creating the control
window = QWidget(flags=Qt.FramelessWindowHint)
Customize the function of minimize, maximize and close buttons:
- Monitor the signal. 2. Modify the event method.
Method 1 is selected here because the listening signal is a high-level encapsulation of events, which is closer to developers.
Maximization issues:
The maximize button should switch to restore—— The write slot function determines the current state.
# 0. Import packages and modules
from PyQt5.Qt import *
import sys

# 1. Create application object
app = QApplication(sys.argv)

# 2.1 creating controls
window = QWidget()
# flags=Qt.FramelessWindowHint
window.setWindowFlags(Qt.FramelessWindowHint)
window.setWindowOpacity(0.5)

# Add three child controls - upper right corner of window


# 2.2 setting controls
window.setWindowTitle("Top level window case")
window.resize(500, 500)

top_margin = 5
# Add three child controls - upper right corner of window
close_btn = QPushButton(window)
close_btn.setText("close")
close_btn_w = close_btn.width()
window_w = window.width()
close_btn_x = window_w - close_btn_w
close_btn_y = top_margin
close_btn.move(close_btn_x, close_btn_y)

max_btn = QPushButton(window)
max_btn.setText("Maximize")
max_btn_w = max_btn.width()
max_btn_x = close_btn_x - max_btn_w
max_btn_y = top_margin
max_btn.move(max_btn_x, max_btn_y)

min_btn = QPushButton(window)
min_btn.setText("minimize")
min_btn_w = min_btn.width()
min_btn_x = max_btn_x - min_btn_w
min_btn_y = top_margin
min_btn.move(min_btn_x, min_btn_y)


def max_normal():
    if window.isMaximized():
        window.showNormal()
        max_btn.setText("Maximize")
    else:
        window.showMaximized()
        max_btn.setText("recovery")


close_btn.pressed.connect(window.close)
max_btn.pressed.connect(max_normal)
min_btn.pressed.connect(window.showMinimized)


# 2.3 display controls
window.show()

# 3. Enter message cycle
sys.exit(app.exec_())
Too messy code: encapsulation and refactoring (encapsulation as a class)
PS: why is there width between buttons? Because the automatically adjusted width and the obtained width may be different. If you want no gap, you need to set your own width.
# 0. Import packages and modules
from PyQt5.Qt import *
import sys


class Window(QWidget):
    def __init__(self, *args, **kwargs):
        super().__init__(*args, **kwargs)
        self.setWindowFlags(Qt.FramelessWindowHint)
        self.setWindowOpacity(1)
        # 2.2 setting controls
        self.setWindowTitle("Top level window case")
        self.resize(500, 500)
        self.setup_ui()

    # Add child controls
    def setup_ui(self):
        # Public data
        top_margin = 5
        btn_w = 80
        btn_h = 40
        # Add three child controls - upper right corner of window
        close_btn = QPushButton(self)
        close_btn.setText("close")
        close_btn.resize(btn_w, btn_h)
        close_btn_w = btn_w
        window_w = self.width()
        close_btn_x = window_w - close_btn_w
        close_btn_y = top_margin
        close_btn.move(close_btn_x, close_btn_y)

        max_btn = QPushButton(self)
        max_btn.setText("Maximize")
        max_btn.resize(btn_w, btn_h)
        max_btn_w = btn_w
        max_btn_x = close_btn_x - max_btn_w
        max_btn_y = top_margin
        max_btn.move(max_btn_x, max_btn_y)

        min_btn = QPushButton(self)
        min_btn.setText("minimize")
        min_btn.resize(btn_w, btn_h)
        min_btn_w = btn_w
        min_btn_x = max_btn_x - min_btn_w
        min_btn_y = top_margin
        min_btn.move(min_btn_x, min_btn_y)

        def max_normal():
            if self.isMaximized():
                self.showNormal()
                max_btn.setText("Maximize")
            else:
                self.showMaximized()
                max_btn.setText("recovery")

        max_btn.pressed.connect(max_normal)
        min_btn.pressed.connect(self.showMinimized)
        close_btn.pressed.connect(self.close)


# 1. Create application object
app = QApplication(sys.argv)
# 2.1 creating controls
window = Window()

# 2.3 display controls
window.show()

# 3. Enter message cycle
sys.exit(app.exec_())
close_ btn. pressed. There is a warning in the sentence "connect (self. Close)". I don't know why?? It's right to put it outside
Error: Expected type 'Union [(...) - > none, pyqtboundsignal]', got '() - > bool' instead
The title position is incorrect after maximization—— Monitor the change of window size.
# 0. Import packages and modules
from PyQt5.Qt import *
import sys


class Window(QWidget):
    def __init__(self, *args, **kwargs):
        super().__init__(*args, **kwargs)
        self.setWindowFlags(Qt.FramelessWindowHint)
        self.setWindowOpacity(1)

        # Save public data as attributes
        self.top_margin = 5
        self.btn_w = 80
        self.btn_h = 40

        # 2.2 setting controls
        self.setWindowTitle("Top level window case")
        self.resize(500, 500)
        self.setup_ui()

    # Add child controls
    def setup_ui(self):
        # Add three child controls - upper right corner of window
        close_btn = QPushButton(self)
        self.close_btn = close_btn
        close_btn.setText("close")
        close_btn.resize(self.btn_w, self.btn_h)

        max_btn = QPushButton(self)
        self.max_btn = max_btn
        max_btn.setText("Maximize")
        max_btn.resize(self.btn_w, self.btn_h)

        min_btn = QPushButton(self)
        self.min_btn = min_btn
        min_btn.setText("minimize")
        min_btn.resize(self.btn_w, self.btn_h)

        def max_normal():
            if self.isMaximized():
                self.showNormal()
                max_btn.setText("Maximize")
            else:
                self.showMaximized()
                max_btn.setText("recovery")

        max_btn.pressed.connect(max_normal)
        min_btn.pressed.connect(self.showMinimized)
        close_btn.pressed.connect(self.close)

    def resizeEvent(self, QResizeEvent):
        close_btn_w = self.btn_w
        window_w = self.width()
        close_btn_x = window_w - close_btn_w
        close_btn_y = self.top_margin
        self.close_btn.move(close_btn_x, close_btn_y)

        max_btn_w = self.btn_w
        max_btn_x = close_btn_x - max_btn_w
        max_btn_y = self.top_margin
        self.max_btn.move(max_btn_x, max_btn_y)

        min_btn_w = self.btn_w
        min_btn_x = max_btn_x - min_btn_w
        min_btn_y = self.top_margin
        self.min_btn.move(min_btn_x, min_btn_y)


# 1. Create application object
app = QApplication(sys.argv)
# 2.1 creating controls
window = Window()

# 2.3 display controls
window.show()

# 3. Enter message cycle
sys.exit(app.exec_())
Cross method reference: define variables as self attributes
Drag user area to move
    def mousePressEvent(self, evt):
        # Record the initial two coordinate points
        if evt.button() == Qt.LeftButton:
            self.move_flag = True
            self.window_x = self.x()
            self.window_y = self.y()
            self.mouse_x = evt.globalX()
            self.mouse_y = evt.globalY()

    def mouseMoveEvent(self, evt):
        # Calculate movement vector
        if self.move_flag:
            current_x = evt.globalX()
            current_y = evt.globalY()
            window_cx = current_x - self.mouse_x + self.window_x
            window_cy = current_y - self.mouse_y + self.window_y
            self.move(window_cx, window_cy)

    def mouseReleaseEvent(self, evt):
        self.move_flag = False
Note: to determine whether to move, press first and then move, and the mark will be reset when released.
if evt.button() == Qt.LeftButton:
This sentence with or without parentheses is wrong several times.
10. Interaction state
API
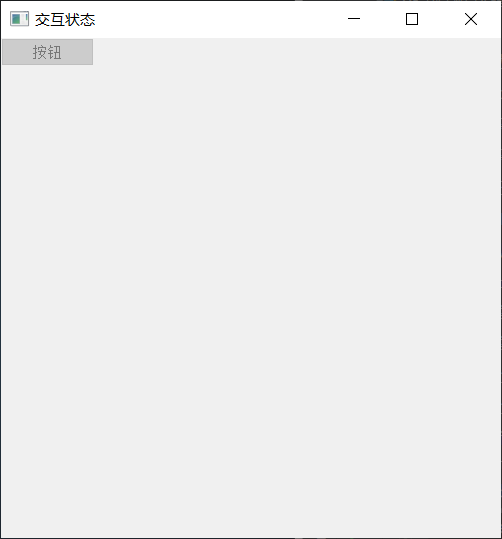
(1) Available (gray)
For example, the login button cannot be clicked without entering an account or password.
- setEnabled(bool): set whether the control is disabled;
- isEnabled(): gets whether the control is available.
btn = QPushButton(window)
btn.setText("Button")
btn.pressed.connect(lambda: print("Button clicked"))
print(btn.isEnabled())
btn.setEnabled(False)
Result: the button is gray.
(2) Show / hide (drawn)
-
setVisible(bool): set whether the control is visible. If the passed parameter value is True, it may not be visible.
Vest (essentially calling setVisible):
- setHidden(bool): use False instead.
- show(): display control;
- hide(): hide the control.
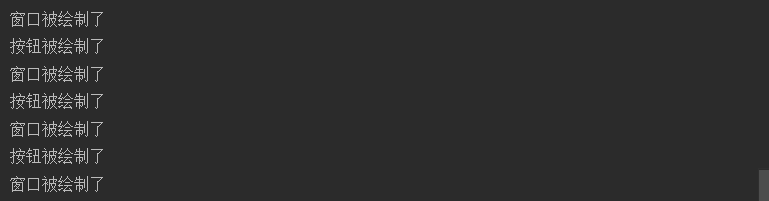
In order to monitor whether the drawing event is executed, rewrite the function first:
class Window(QWidget):
    def paintEvent(self, evt):
        super().paintEvent(evt)
        print("The window is drawn")
After commenting out show, the window will not be printed and drawn. Similarly, the window will not be displayed. If setVisibleha function is called, the above two behaviors will be restored.
# window.show()
window.setVisible(True)
When drawing, the parent control is drawn first, and then the child control is drawn. If the parent control is hidden, the child control cannot be drawn.
class Window(QWidget):
    def paintEvent(self, evt):
        super().paintEvent(evt)
        print("Drawn window")


class Btn(QPushButton):
    def paintEvent(self, evt):
        super().paintEvent(evt)
        print("The button is drawn")

If you want to draw a window but hide the button:
btn.hide()
window.setHidden(False)
Note: neither hide() nor show() need to pass bool parameters.
Hiding is not deleting, but redrawing. For example, click to hide the button:
btn.pressed.connect(lambda: btn.setVisible(False))
First, keep redrawing windows and buttons. After clicking the button, draw the window only once, and then stop.
- isHidden(): determines whether the control is hidden, usually based on the visibility of the parent control.
- isVisible(): gets whether the final state of the control is visible.
- isVisibleTo(widget): if it can change synchronously with the display and hiding of the widget control, it returns True, which has nothing to do with the actual display.
Note: visible represents the final state of the control, relative to the user's naked eye (it is also visible if it is blocked by other controls).
hide can be understood as whether the parameter is True or False relative to whether the parent control is visible. What is hidden must be invisible, otherwise.
For example:
print(btn.isHidden())
print(btn.isVisible())
1. If window is displayed first, btn is displayed by the way. False,True.
2. If window is not displayed, btn cannot be displayed. False,False.
print(btn.isVisibleTo(window))
True.
That is, if the parent control is displayed, whether the child control can be displayed.
btn.setVisible(False)
print(btn.isVisibleTo(window))
False.
(3) Edit or not, i.e. set the window title xxx [*]
- setWindowModified(bool): in the edited state, it is automatically displayed *; Not edited, not displayed *.
- isWindowModified(): whether the window is in the edited state.
window.setWindowTitle("Interaction state[*]")
window.resize(500, 500)
window.setWindowModified(True)
print(window.isWindowModified())
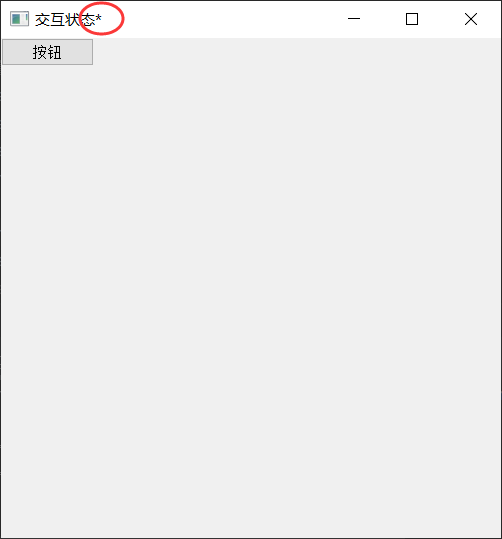
PS: after setting the window title, * will appear automatically when modifying, [] will not be displayed. [*] can be placed in the back or in the front, but the symbol can only be * and cannot be anything else.
Application: this will appear in the upper left corner after Notepad editing, and prompt whether to save when closing.
(4) Is it an active window
isActiveWindow(): the return value of the window with which the user is interacting is True, regardless of the upper and lower layers of the screen.
(5) Shut down
close(): by default, it also functions as a hidden control and will not be released.
btn = Btn(window)
btn.setText("Button")
btn.close()
btn.destroyed.connect(lambda: print("The button was released"))
Output: blank.
setAttribute(Qt.WA_DeleteOnClose, True): if the attribute is modified and deleted when it is closed, it will be released, but it will not be released when it is hidden.
btn.setAttribute(Qt.WA_DeleteOnClose, True)
btn.close()
btn.destroyed.connect(lambda: print("The button was released"))
Output: "button released"
Application scenario
When appropriate, set the unused state to control the interaction logic.
case
Create a window that contains a text box, a button, and a label. Requirements: in the default state, the label is hidden, the text box and button are displayed, and the button is set to unavailable state; When there is content in the text box, make the button available, otherwise it is not available = = (for example, click login is not allowed when no account is entered) =; If you click the button, the content box will be displayed as SZ, otherwise, the content box will be displayed as Sz.
Knowledge points involved:
Creation of text box, QLineEdit class; Text box monitoring content change, textChanged signal; text() method for obtaining the content of text box; Button status settings.
The definition parameter of texthanged has a p_str, used to pass the modified string.
def textChanged(self, p_str): # real signature unknown; restored from __doc__
    """ textChanged(self, str) [signal] """
	pass
Therefore, the content of the text box can be judged by the length of the string.
# 0. Import packages and modules
from PyQt5.Qt import *


# Inherit classes and define your own methods
class Window(QWidget):
    # initialization
    def __init__(self):
        super(Window, self).__init__()
        self.setWindowTitle("Interaction status case")
        self.resize(500, 500)
        self.setup_ui()

    # Store all child controls and configuration operations of child controls
    def setup_ui(self):
        label = QLabel(self)
        label.setText("label")
        label.move(100, 50)
        label.hide()

        le = QLineEdit(self)
        # le.setText("text box default input")
        le.move(100, 100)

        def text_cao(text):
            # if len(text) > 0:
            #     btn.setEnabled(True)
            # else:
            #     btn.setEnabled(False)
            btn.setEnabled(len(text))

        le.textChanged.connect(text_cao)

        btn = QPushButton(self)
        btn.setText("Sign in")
        btn.move(100, 150)
        btn.setEnabled(False)

        def check():
            if le.text() == "Sz":
                label.setText("Login successful")
            else:
                label.setText("Login failed")
            label.adjustSize()
            label.show()

        btn.pressed.connect(check)


if __name__ == '__main__':
    import sys

    app = QApplication(sys.argv)
    window = Window()
    window.show()
    sys.exit(app.exec_())
Note: BTN setEnabled (len (text)), the parameter of setEnabled can be passed to text. And label If adjustsize() is not set, it will only maintain the width of the original label, so that the new content cannot be fully displayed.
11. Information tips
API
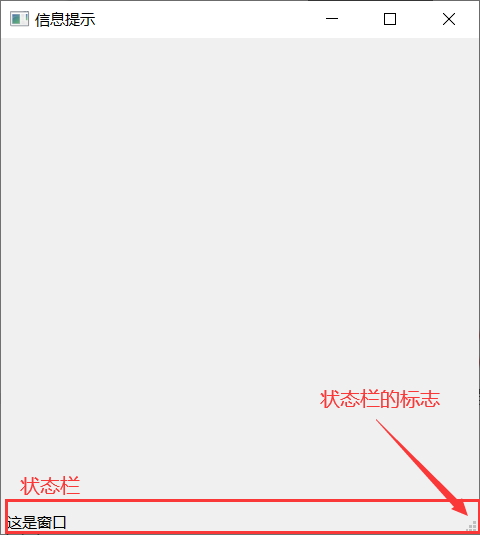
(1) Status prompt
- statusTip()
- setStatusTip(str)
Effect: a piece of text displayed on the status bar when the mouse stops on the control (status bar: the lowest bar of the main window, which shows the user's operation status).
window = QMainWindow()
window.setWindowTitle("Information tips")
window.resize(500, 500)

window.statusBar()
window.setStatusTip("This is the window")
print(window.statusTip())
# Print the contents of the status prompt
PS: QMainWindow() composite window, some of which are lazy loaded (created only when used).
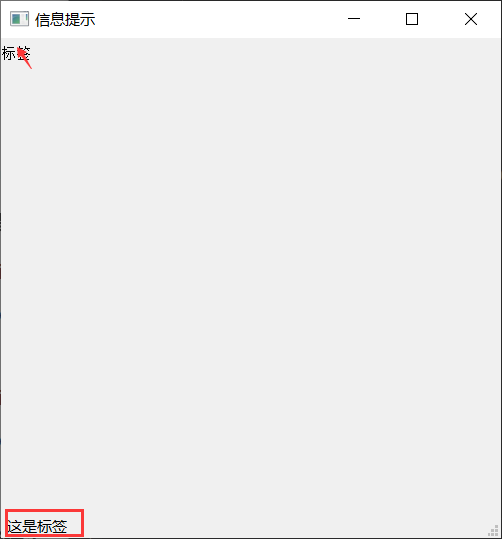
It can also be set for child controls. Whoever calls this method will be displayed in the status bar.
label.setStatusTip("This is the label")
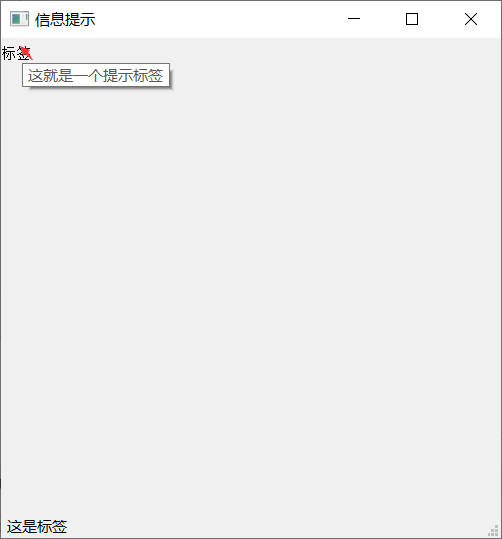
(2) Tooltips
-
toolTip()
-
setToolTip(str)
-
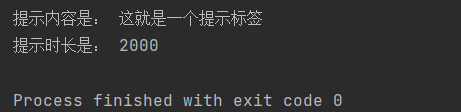
Display duration control:
toolTipDuration()
setToolTipDuration(msec), in milliseconds.
-
Effect: hover the mouse over the control for a while and display it next to it.
label = QLabel(window)
label.setText("label")
label.setStatusTip("This is the label")
label.setToolTip("This is a prompt label")
label.setToolTipDuration(2000)
print("The tips are:", label.toolTip())
print("The prompt duration is:", label.toolTipDuration())
(3) What's the hint? "
- whatsThis()
- setWhatsThis(str)
Effect: switch to "see what this is" mode and display it when clicking the control.
# Set whasthis mode
window.setWindowFlags(Qt.WindowContextHelpButtonHint)
label.setWhatsThis("What is this? Isn't it just a label")
print(label.whatsThis())
First click the question mark to trigger the "what is this" mode, and then click the label label to display the prompt.
12. Focus control
API
(1) Single control angle
-
setFocus(): Specifies that the control gets the focus.
-
setFocusPolicy(Policy): sets the focus acquisition policy.
Policy:
- Qt.TabFocus: get the focus through the Tab key;
- Qt.ClickFocus: get focus by being clicked;
- Qt.StrongFocus: focus can be obtained through the above two methods * * (default) * *;
- Qt.NoFocus: you can only use setFocus to get focus, but you can't operate it.
-
clearFocus(): cancel focus.
le1 = QLineEdit(window)
le1.move(50, 50)

le2 = QLineEdit(window)
le2.move(50, 100)

le3 = QLineEdit(window)
le3.move(50, 150)
By default, the first control gets focus:
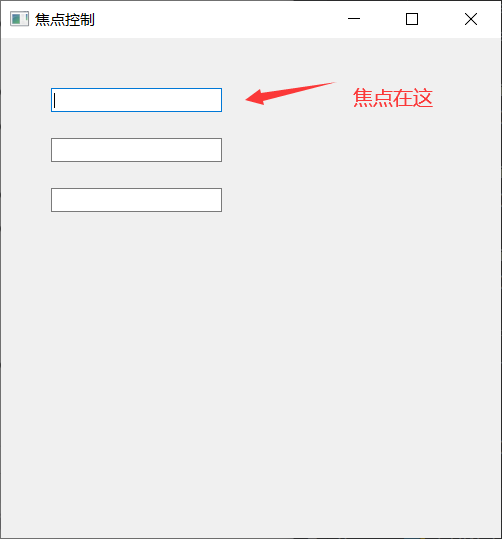
# le2 get focus by default
le2.setFocus()
# The only way to get focus is to click (le1 and le3 are still normal)
le2.setFocusPolicy(Qt.ClickFocus)
# The only way to get focus is Tab
le2.setFocusPolicy(Qt.TabFocus)
# There are two ways to get focus (default)
le2.setFocusPolicy(Qt.StrongFocus)
# Do not use the above two methods to get focus
le2.setFocusPolicy(Qt.NoFocus)
# By default, le2 is not used to set the focus, which is useless for le1
le2.clearFocus()
(2) Parent control angle
- focusWidget(): get the currently focused control in the child control;
- focusNextChild(): focus on the next child control;
- focusPreviousChild(): focus on the previous child control;
- focusNextPrevChild(bool): True, next (the first word Next); False, previous; (prototype of the previous two methods)
- setTabOrder(pre_widget, next_widget): a static method (called by class name) that sets the order in which the child controls get the focus.
If you enter directly:
# Gets the control that gets the focus among all child controls in the current window
print(window.focusWidget())
It will output None.
This is because the acquisition of focus is realized during execution, not when displaying the window, so you should find which control obtains focus when clicking the window.
class Window(QWidget):
    def mousePressEvent(self, evt):
        print(self.focusWidget())

class Window(QWidget):
    def mousePressEvent(self, evt):
        print("Current focus:", self.focusWidget())
        self.focusNextChild()
        self.focusPreviousChild()
        self.focusNextPrevChild(True)
        self.focusNextPrevChild(False)
# 1-3-2
QWidget.setTabOrder(le1, le3)
QWidget.setTabOrder(le3, le2)
When le2 is finished, it will automatically switch back to le1.
Application scenario
Combine the business logic of the program to adjust the focus operation.
For example, when inputting the user name and password, the focus is in different text boxes, which can be switched by clicking the mouse or Tab. After selection, there will be a blue halo around. Only the control that obtains the focus can interact with the user.
13. Not very important
(1) Attributes
setAttribute (QT:: widgettattribute attribute, bool on = true)
(2) Mask
QWidget :: mask()const
Returns the mask currently set on the widget. If no mask is set, the return value will be a blank area.
See also setMask(), clearMask(), qregion:: isempty() and shape clock examples.
(3) Content drag
setAcceptDrops()
acceptDrops()
(4) Interactive control
scroll(int dx,int dy)
repaint()
(5) Action behavior
addAction(QAction * action)
removeAction(),insertAction(),actions()
(6) Status control
keyboardGrabber()
mouseGrabber()
grabMouse()
nextInFocusChain()
previousInFocusChain()
releaseKeyboard()
(7) Shortcut
setShortcutAutoRepeat(int id,bool enable = true)
setShortcutEnabled(int id,bool enable = true)
grabShortcut() and releaseShortcut()
(8) Coordinate conversion
mapFrom(const QWidget * parent,const QPoint& pos)
mapFromGlobal(const QPoint& pos)const
Convert the global screen coordinates pos to widget coordinates.
See also mapToGlobal(), mapFrom(), and mapFromParent(). mapTo(const QWidget * parent,const QPoint& pos)constConverts the widget coordinates pos to the coordinate system of the parent. The parent cannot be 0, and the parent of the control must be called.
See also mapFrom(), mapToParent(), mapToGlobal(), and underMouse().
QPoint QWidget :: mapToGlobal(const QPoint& pos)const
14. Very important. Follow up
(1) Layout
API
- setLayout(QLayout)
- layout()
- setLayoutDirection(Qt.LayoutDirection)
- layoutDirection()
- unsetLayoutDirection()
Application scenario
Layout controls make it more beautiful and convenient to place.
case
Create a window with two labels. Requirements: two labels shall be placed vertically.
(2) Control size related settings when layout exists
obtain
- sizeHint(): recommended size
- minimumSizeHint(): minimum recommended size
- sizePolicy(): size policy
set up
- setFixedSize(width, height): equivalent to setMinimumSize(width, height) + setMaximumSize(width, height): fixed size (not changed by external factors)
- setFixedWidth(width): fixed width (not changed by external factors)
- setFixedHeight(height): fixed height (not changed by external factors)
(3) Style
API
palette
- palette(): gets the palette object of the control
- setPalette(QPalette): sets the palette object of the control
effect:
In practical applications, it is often necessary to set the color appearance of a control, such as background, foreground, etc. The palette QPalette class provided in Qt is specially used to manage the appearance and display of controls.
QPalette class is equivalent to the palette of dialog boxes or controls, which manages all colors of controls and forms.
Each form and control contains a QPalette object, which can be set accordingly when displayed.
How to set the color:
- setBrush ( ColorRole, QBrush )
- setBrush (ColorGroup, ColorRole, QBrush )
- setColor ( ColorRole, QColor )
- setColor ( ColorGroup, ColorRole, QColor )
Note:
ColorGroup:
- Active: active state (get focus state)
- Disabled: disabled state (no focus state)
- Inactive: inactive state (unavailable state)
ColorRole:
- QPalette.Window: window color
- QPalette.WindowText: window text color
- QPalette.Base: background color of text input control
- QPalette.Text: font color of text input control
- QPalette.Button: the background color of the button control
- QPalette.ButtonText: the font color of the button control
- QPalette.Hightlight: highlight background color
- QPalette.HightlightText: highlight font color
- QPalette.Link: link color
- QPalette.LinkVisited: visited link color
style sheet
- setStyleSheet(stylesheet): sets the style sheet string;
- styleSheet(): get the stylesheet string.
Application scenario
Set the style of the control to make the control more beautiful.
case
- Create a window that contains a label. Requirements: the text color of the label is red and the background color is gray, which can be realized by using the palette.
- Create a window with two labels and two buttons. Requirements: set all labels, and the background color is cyan; The border is 1px solid red.
(4) Signal
Windowtitle changed (qstring): window title change signal;
Windowicon changed (qicon): window icon change signal;
Customcontext menu requested (qpoint): custom context menu request signal.
Reference blog:
- Process finished with exit code -1073740791 (0xC0000409) solution: 99% of the problem can be solved by adjusting the error report https://www.cnblogs.com/ranzhong/p/13875853.html
- pyqt taskbar icon problem: https://blog.csdn.net/jieCooner/article/details/42238903