Complete Handbook of C Language Self-study (33 articles)
Android Multiresolution Adaptation Framework
HTML5 Front-end Development Practical Course Series
MySQL Database Practical Tutorial (35 Graphics Edition)
Overthrow Yourself and Past - Custom View Series (10)
A series of front-end tutorials for Android programmers (40 free video tutorials + source code)
Copyright Statement
- The original author of this article: Gu Ge's younger brother
- Author's blog address: http://blog.csdn.net/lfdfhl
In previous blogs, I introduced the selectors commonly used in CSS: label selector, class selector, id selector, wildcard selector. In this blog, we will learn about composite selectors. As the name implies, a composite selector is composed of two or more basic selectors, which are combined in different ways to achieve a more powerful and convenient selection function.
Union selector
The union selector is composed of various selectors connected by commas, which sets the same CSS style for different tags. The grammatical format is as follows:
selector1,selector2,selector3... {
   property1 : value1;
   property2 : value2;
   property3 : value3;
   property4 : value4;
   ..................
}
See the following example:
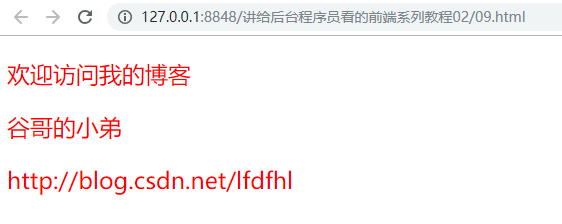
<!DOCTYPE html>
<html lang="en">

<head>
    <meta charset="UTF-8">
    <title>Union selector</title>
    <style type="text/css">
    .welcome,#title,div {
        font-size: 23px;
        color: red;
    }
    </style>
</head>

<body>
    <p class="welcome">Welcome to my blog</p>
    <p id="title">Guge's younger brother</p>
    <div>http://blog.csdn.net/lfdfhl</div>
</body>

</html>
In this example, the union selector is unified as a div tag, the class attribute is a welcom tag, and the id attribute is a style for the title tag. The effect diagram is as follows:
Label Designated Selector
The label specifier selector is used to set CSS styles for the specified label; it represents a "both" And... The relationship emphasizes the selection condition of "satisfying at the same time, indispensable at the same time". Its most common usage is the combination of label name and class selector or the combination of label name and id selector, so more specifically, label specifying selector has two ways of writing:
- The first is:
Label name. Class selector name{
   property1 : value1;
   property2 : value2;
   property3 : value3;
   property4 : value4;
   ..................
}
- The second is:
Label name#id selector name{
   property1 : value1;
   property2 : value2;
   property3 : value3;
   property4 : value4;
   ..................
}
See the following example:
<!DOCTYPE html>
<html lang="en">
<head>
	<meta charset="UTF-8">
	<title>Label Designated Selector</title>
	<style type="text/css">
	p.welcome{
        font-size: 23px;
        color: red;
    }
	</style>
</head>
<body>
	<p class="welcome">Welcome to my blog</p>
    <p id="title">Guge's younger brother</p>
    <div>http://blog.csdn.net/lfdfhl</div>
</body>
</html>
In this example, the label designator is used to style the label with class attribute equal to welcome in the p label. The effect diagram is as follows:

Descendant Selectors
The descendant selector is also called the inclusion selector; and the tag specifier selector emphasizes "both..." And... "Different, the descendant selector emphasizes nesting, and the grammatical format is as follows:
selector1 selector2 selector3... {
   property1 : value1;
   property2 : value2;
   property3 : value3;
   property4 : value4;
   ..................
}
See the following example:
<!DOCTYPE html>
<html lang="en">

<head>
    <meta charset="UTF-8">
    <title>Descendant Selectors</title>
    <style type="text/css">
    div .welcome {
        font-size: 23px;
        color: red;
    }
    </style>
</head>

<body>
    <div>
    	<div>
            <section>
                 <p class="welcome">hello everyone</p>
            </section>
        </div>
        <p class="welcome">Welcome to my blog</p>
        <p class="welcome">Looking forward to technical exchanges with you</p>
    </div>
    <p id="title">Guge's younger brother</p>
    <div>http://blog.csdn.net/lfdfhl</div>

</body>

</html>
In this example, all class attributes in div tag equal to welcome tag are styled by descendant selector, and the effect diagram is as follows: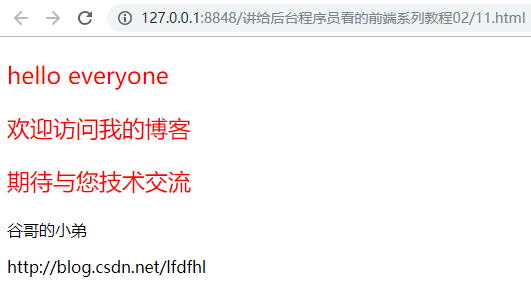
Uh huh, see no: div tag, whether it's a child element or a grandchild element, as long as its class attribute is equal to welcome, will add a specific style.
Child selectors
The sub-selector is used to style the first generation of sub-elements of the specified tag. The grammatical format is as follows:
selector1 > selector2{
   property1 : value1;
   property2 : value2;
   property3 : value3;
   property4 : value4;
   ..................
}
See the following example:
<!DOCTYPE html>
<html lang="en">

<head>
    <meta charset="UTF-8">
    <title>Child selectors</title>
    <style type="text/css">
    div>.welcome {
        font-size: 23px;
        color: red;
    }
    </style>
</head>

<body>
    <div>
    	<div>
            <section>
                 <p class="welcome">hello everyone</p>
            </section>
        </div>
        <p class="welcome">Welcome to my blog</p>
        <p class="welcome">Looking forward to technical exchanges with you</p>
    </div>
    <p id="title">Guge's younger brother</p>
    <div>http://blog.csdn.net/lfdfhl</div>

</body>

</html>
Here, the sub-selector sets the style for the direct sub-label whose class attribute in the div tag is equal to welcome. The effect diagram is as follows: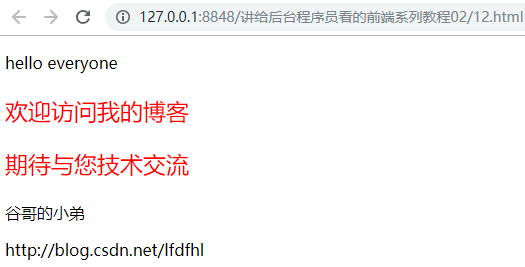
Note: The difference between descendant selector and descendant selector:
The child selector only acts on the immediate descendants of the label (the first generation descendants); the descendant selector acts on all descendant elements of the label.
attribute selectors
I've talked about id selectors and class selectors before. Both selectors are implemented based on id or class attributes of tags. Now let's move on to the property selector, which can style tags with specified properties (not just class and id attributes).
Example 1
Set styles for all elements with title Attributes
The code is as follows:
<!DOCTYPE html>
<html>
	<head>
		<style type="text/css">
			[title] {
				color: red;
			}
		</style>
	</head>

	<body>
		<h2 title="Hello world">Hello world</h2>
		<a title="hi" href="http://www.ifeng.com">Welcome</a>
	</body>
</html>
The results are as follows:
Example 2
Style all elements of title= "hi"
The code is as follows:
<!DOCTYPE html>
<html>
	<head>
		<style type="text/css">
			[title=hi] {
				color: red;
			}
		</style>
	</head>

	<body>
		<h2 title="Hello world">Hello world</h2>
		<a title="hi" href="http://www.ifeng.com">Welcome</a>
	</body>
</html>
The results are as follows:
Example 3
Set styles for all tags that contain hi for the value of title attributes; apply to attribute values separated by spaces.
The code is as follows:
<!DOCTYPE html>
<html>
	<head>
		<style type="text/css">
			[title~=hi] {
				color: red;
			}
		</style>
	</head>

	<body>
		<h2 title="Hello hi">Hello world</h2>
		<h2 title="Hellohi">welcome</h2>
		<a title="hi" href="http://www.ifeng.com">Welcome</a>
	</body>
</html>
The results are as follows: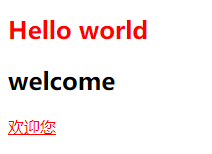
Example 4
Set the style for all labels of en that contain the value of the lang attribute; for hyphen-separated attribute values:
The code is as follows:
<!DOCTYPE html>
<html>
	<head>
		<style type="text/css">
			[lang|=en] {
				color: red;
			}
		</style>
	</head>

	<body>
		<p lang="en">Hello</p>
		<p lang="en-us">Hi</p>
		<p lang="us">Welcome</p>
		<p lang="zh">welcome</p>
	</body>
</html>
The results are as follows: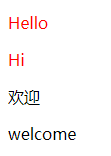
Example 5
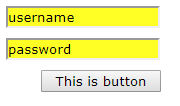
The application of attribute selector in form.
Grammatical Format:
Label name [attribute="attribute value"]
The code is as follows:
<!DOCTYPE html>
<html>
	<head>
		<style>
		 input[type="text"]
		 {
			width:150px;
			display:block;
			margin-bottom:10px;
			background-color:yellow;
			font-family: Verdana, Arial;
    }
     input[type="button"]
		 {
			width:120px;
			margin-left:35px;
			display:block;
			font-family: Verdana, Arial;
		 }
   </style>
	</head>
	<body>
		<form name="input" action="" method="get">
			<input type="text" name="username" value="username" size="20">
			<input type="text" name="password" value="password" size="20">
			<input type="button" value="This is button">
		</form>
	</body>
</html>
The results are as follows: