Please indicate: https://mp.csdn.net/mdeditor/82504849
Bottom navigation bar radiogroup + fragemt
1. First, create a new selector file in drawable, right-click new - > drawable resource file in drawable, and create a text color selector [u text] and four other picture selectors [u home] drawable, selector [u phone] drawable, selector [u find] drawable, selector [personal] drawable. As the name implies, the selector will change the color or picture after clicking
selector_text
<?xml version="1.0" encoding="utf-8"?>
<selector xmlns:android="http://schemas.android.com/apk/res/android">
    <item android:state_checked="false" android:color="#cdcdcd"/>
    <item android:state_checked="true" android:color="#d4237a"/>
</selector>
selector_home_drawable
<?xml version="1.0" encoding="utf-8"?>
<selector xmlns:android="http://schemas.android.com/apk/res/android">
    <item android:state_checked="false" android:drawable="@drawable/home"/>
    <item android:state_checked="true" android:drawable="@drawable/home_selected"/>
</selector>
selector_phone_drawable
<?xml version="1.0" encoding="utf-8"?>
<selector xmlns:android="http://schemas.android.com/apk/res/android">
    <item android:state_checked="false" android:drawable="@drawable/phone"/>
    <item android:state_checked="true" android:drawable="@drawable/phone_selected"/>

</selector>
selector_find_drawable
<?xml version="1.0" encoding="utf-8"?>
<selector xmlns:android="http://schemas.android.com/apk/res/android">
    <item android:state_checked="false" android:drawable="@drawable/find"/>
    <item android:state_checked="true" android:drawable="@drawable/find_selected"/>

</selector>
selector_personal_drawable
<?xml version="1.0" encoding="utf-8"?>
<selector xmlns:android="http://schemas.android.com/apk/res/android">
    <item android:state_checked="false" android:drawable="@drawable/personal"/>
    <item android:state_checked="true" android:drawable="@drawable/personal_selected"/>

</selector>
2. Then create the activity main.xml layout file, which is mainly composed of ViewPager and fragment. Fragment is the main part of layout navigation, and RadioGroup is the bottom navigation.
<?xml version="1.0" encoding="utf-8"?>
<RelativeLayout xmlns:android="http://schemas.android.com/apk/res/android"
android:layout_width="match_parent"
android:layout_height="match_parent"
android:orientation="vertical"
>
<RadioGroup
android:id="@+id/radio_group"
android:layout_width="match_parent"
android:layout_height="60dp"
android:layout_alignParentBottom="true"
android:background="#fff"
android:orientation="horizontal">
<RadioButton
android:id="@+id/rd_home"
style="@style/tab_menu_item"
android:drawableTop="@drawable/selector_home_drawable"
android:text="home page"
android:textColor="@drawable/selector_text"/>
<RadioButton
android:id="@+id/rd_phone"
style="@style/tab_menu_item"
android:drawableTop="@drawable/selector_phone_drawable"
android:text="Mail list"
android:textColor="@drawable/selector_text"/>
<RadioButton
android:id="@+id/rd_find"
style="@style/tab_menu_item"
android:drawableTop="@drawable/selector_find_drawable"
android:text="find"
android:textColor="@drawable/selector_text"/>
<RadioButton
android:id="@+id/rd_personal"
style="@style/tab_menu_item"
android:drawableTop="@drawable/selector_personal_drawable"
android:text="personal"
android:textColor="@drawable/selector_text"/>
</RadioGroup>
<FrameLayout
android:id="@+id/fragment_container"
android:layout_width="match_parent"
android:layout_height="match_parent"
android:layout_above="@id/radio_group"
/>
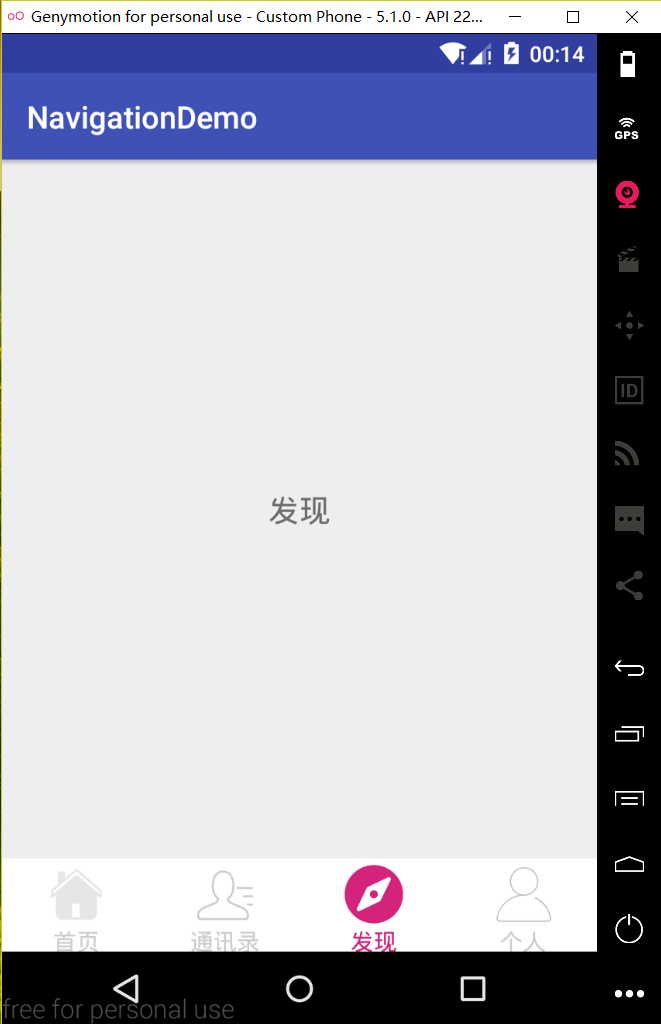
</RelativeLayout>2. Then create four more fragment layout files. Here I post only one of them, and the other three just change the text to see which fragment it is
<?xml version="1.0" encoding="utf-8"?>
<LinearLayout xmlns:android="http://schemas.android.com/apk/res/android"
    android:layout_width="match_parent"
    android:layout_height="match_parent">

    <TextView
        android:layout_width="match_parent"
        android:layout_height="wrap_content"
        android:layout_gravity="center"
        android:gravity="center"
        android:text="find"
        android:textSize="20sp" />

</LinearLayout>
4. After the four fragment layout files are created, four fragment classes are created. HomeFragment and HomeFragment, phonefragment and personalfragment inherit android.support.v4.app.Fragment. Here, I only post one fragment code. The other three are similar to this one, just change r.layout.fragment [find] to the corresponding layout name;
public class FindFragment  extends Fragment{
    @Override
    public View onCreateView(LayoutInflater inflater, @Nullable ViewGroup container, @Nullable Bundle savedInstanceState){
        View view=inflater.inflate(R.layout.fragment_find,container,false);
        return view;
    }
}
#Please note that it is better to inherit android.support.v4.app.Fragment, otherwise other problems will occur.
5. At last, we started layout rendering in MainActivity. It should be noted that the proportion of pictures and text is a little strange due to the large pictures, so we optimized the pictures in the code.
public class MainActivity extends AppCompatActivity implements RadioGroup.OnCheckedChangeListener {

    private RadioButton homeRb, phoneRb, findRb, personalRb;
    private RadioGroup mRadioGroup;
    private HomeFragment mHomeFragment;
    private PhoneFragment mPhoneFragment;
    private PersonalFragment mPersonalFragment;
    private FindFragment mFindFragment;

    @Override
    protected void onCreate(Bundle savedInstanceState) {
        super.onCreate(savedInstanceState);
        setContentView(R.layout.activity_main);
        initView();
    }

    private void initView() {
        mRadioGroup = findViewById(R.id.radio_group);
        mRadioGroup.setOnCheckedChangeListener(this);
        homeRb = findViewById(R.id.rd_home);
        phoneRb = findViewById(R.id.rd_phone);
        findRb = findViewById(R.id.rd_find);
        personalRb = findViewById(R.id.rd_personal);
        homeRb.setChecked(true);

        /**Optimize the pictures, and do similar processing for the other three pictures
         * The bottom navigation will change the color of the picture, so the picture in radiobutton is not a picture, but refers to a custom selector picture
         * Originally, getResources.getDrawable was used, but it is out of date, so ContextCompat is used
         */
        Drawable home = ContextCompat.getDrawable(this, R.drawable.selector_home_drawable);
        /**
         *  When the picture is drawn, bind a rectangle to it and specify the rectangle
         *  Parameter the new position of the first two corresponding pictures relative to the upper left corner, and the last two are the length and width of the pictures
         */
        home.setBounds(0, 0, 80, 80);
        /**
         *   Set the direction of the picture in the text, corresponding to left, top, right and bottom respectively
         */

        homeRb.setCompoundDrawables(null, home, null, null);

        Drawable phone = ContextCompat.getDrawable(this, R.drawable.selector_phone_drawable);
        phone.setBounds(0, 0, 80, 80);
        phoneRb.setCompoundDrawables(null, phone, null, null);

        Drawable find = ContextCompat.getDrawable(this, R.drawable.selector_find_drawable);
        find.setBounds(0, 0, 80, 80);
        findRb.setCompoundDrawables(null, find, null, null);

        Drawable personal = ContextCompat.getDrawable(this, R.drawable.selector_personal_drawable);
        personal.setBounds(0, 0, 80, 80);
        personalRb.setCompoundDrawables(null, personal, null, null);
    }

    @Override
    public void onCheckedChanged(RadioGroup group, int checkedId) {
        FragmentTransaction transaction = getSupportFragmentManager().beginTransaction();
        hideAllFragment(transaction);
        switch (checkedId) {
            case R.id.rd_home:
                if (mHomeFragment == null) {
                    mHomeFragment = new HomeFragment();
                    transaction.add(R.id.fragment_container, mHomeFragment);
                } else {
                    transaction.show(mHomeFragment);
                }
                break;
            case R.id.rd_phone:
                if (mPhoneFragment == null) {
                    mPhoneFragment = new PhoneFragment();
                    transaction.add(R.id.fragment_container, mPhoneFragment);
                } else {
                    transaction.show(mPhoneFragment);
                }
                break;
            case R.id.rd_find:
                if (mFindFragment == null) {
                    mFindFragment = new FindFragment();
                    transaction.add(R.id.fragment_container, mFindFragment);
                } else {
                    transaction.show(mFindFragment);
                }
                break;
            case R.id.rd_personal:
                if (mPersonalFragment == null) {
                    mPersonalFragment = new PersonalFragment();
                    transaction.add(R.id.fragment_container,  mPersonalFragment);
                } else {
                    transaction.show( mPersonalFragment);
                }
                break;
        }
        transaction.commit();
    }

    public void hideAllFragment(FragmentTransaction transaction){
        if(mHomeFragment!=null){
            transaction.hide(mHomeFragment);
        }
        if(mPhoneFragment!=null){
            transaction.hide(mPhoneFragment);
        }
        if(mFindFragment!=null){
            transaction.hide(mFindFragment);
        }
        if(mPersonalFragment!=null){
            transaction.hide(mPersonalFragment);
        }
    }


}
Design sketch: