Actual combat: k8s localdns-2021.12 twenty-nine
catalogue
Experimental environment
Experimental environment:
1,win10,vmwrokstation Virtual machine;
2,k8s Cluster: 3 sets centos7.6 1810 Virtual machine, 1 master node,2 individual node node
   k8s version: v1.22.2
   containerd://1.5.5
Experimental software
2021.12. 28 - experimental software - nodelocaldns
Link: https://pan.baidu.com/s/1cl474vfrXvz0hPya1EDIlQ
Extraction code: lpz1

1. DNS optimization
We explained earlier that in Kubernetes, we can use CoreDNS to resolve the domain name of the cluster. However, if the cluster is large and has high concurrency, we still need to optimize DNS. A typical example is that * * CoreDNS, which we are familiar with, will timeout for 5s * *.
2. Timeout reason
⚠️ The teacher said that the timeout 5s fault here is not easy to reproduce. Here, explain the reason for the timeout.
In iptables mode (by default, but in ipve, this timeout problem cannot be solved!), the Kube proxy of each service creates some iptables rules in the nat table of the host network namespace.
For example, for the Kube DNS service with two DNS server instances in the cluster, the relevant rules are roughly as follows:
Well, I'm not very familiar with iptables... 😥😥, Take a hard look..
(1) -A PREROUTING -m comment --comment "kubernetes service portals" -j KUBE-SERVICES
<...>
(2) -A KUBE-SERVICES -d 10.96.0.10/32 -p udp -m comment --comment "kube-system/kube-dns:dns cluster IP" -m udp --dport 53 -j KUBE-SVC-TCOU7JCQXEZGVUNU
<...>
(3) -A KUBE-SVC-TCOU7JCQXEZGVUNU -m comment --comment "kube-system/kube-dns:dns" -m statistic --mode random --probability 0.50000000000 -j KUBE-SEP-LLLB6FGXBLX6PZF7
(4) -A KUBE-SVC-TCOU7JCQXEZGVUNU -m comment --comment "kube-system/kube-dns:dns" -j KUBE-SEP-LRVEW52VMYCOUSMZ
<...>
(5) -A KUBE-SEP-LLLB6FGXBLX6PZF7 -p udp -m comment --comment "kube-system/kube-dns:dns" -m udp -j DNAT --to-destination 10.32.0.6:53
<...>
(6) -A KUBE-SEP-LRVEW52VMYCOUSMZ -p udp -m comment --comment "kube-system/kube-dns:dns" -m udp -j DNAT --to-destination 10.32.0.7:53

#explain:
-j Representative jump
We know / etc / resolv. For each Pod Nameserver 10.96 is populated in the conf file 0.10 this entry. Therefore, the DNS lookup request from Pod will be sent to 10.96 0.10, which is the cluster IP address of Kube DNS service.
Since (1) the request enters the KUBE-SERVICE chain, then matches the rule (2), and finally jumps to the entry (5) or (6) according to the random pattern of (3), the target IP address of the requested UDP packet is modified to the actual IP address of the DNS server, which is completed through DNAT. Including 10.32 0.6 and 10.32 0.7 is the IP address of the two Pod replicas of CoreDNS in our cluster.
2.1 DNAT in core
DNAT's main responsibility is to change the destination of outgoing packets at the same time, respond to the source of packets, and ensure that all subsequent packets are modified the same. The latter relies heavily on the connection tracking mechanism, also known as conntrack, which is implemented as a kernel module. Conntrack tracks ongoing network connections in the system.
Each connection in conntrack (equivalent to a table) is represented by two tuples, One tuple is used for the original request (IP_CT_DIR_ORIGINAL) and the other tuple is used for the reply (IP_CT_DIR_REPLY). For UDP, each tuple consists of source IP address, source port, destination IP address and destination port, and the reply tuple contains the real address of the destination stored in the src field.
For example, if the IP address is 10.40 The Pod of 0.17 sends a request to the cluster IP of Kube DNS, which is converted to 10.32 0.6, the following tuples will be created:
original: src = 10.40.0.17 dst = 10.96.0.10 sport = 53378 dport = 53
 reply: src = 10.32.0.6 dst = 10.40.0.17 sport = 53 dport = 53378
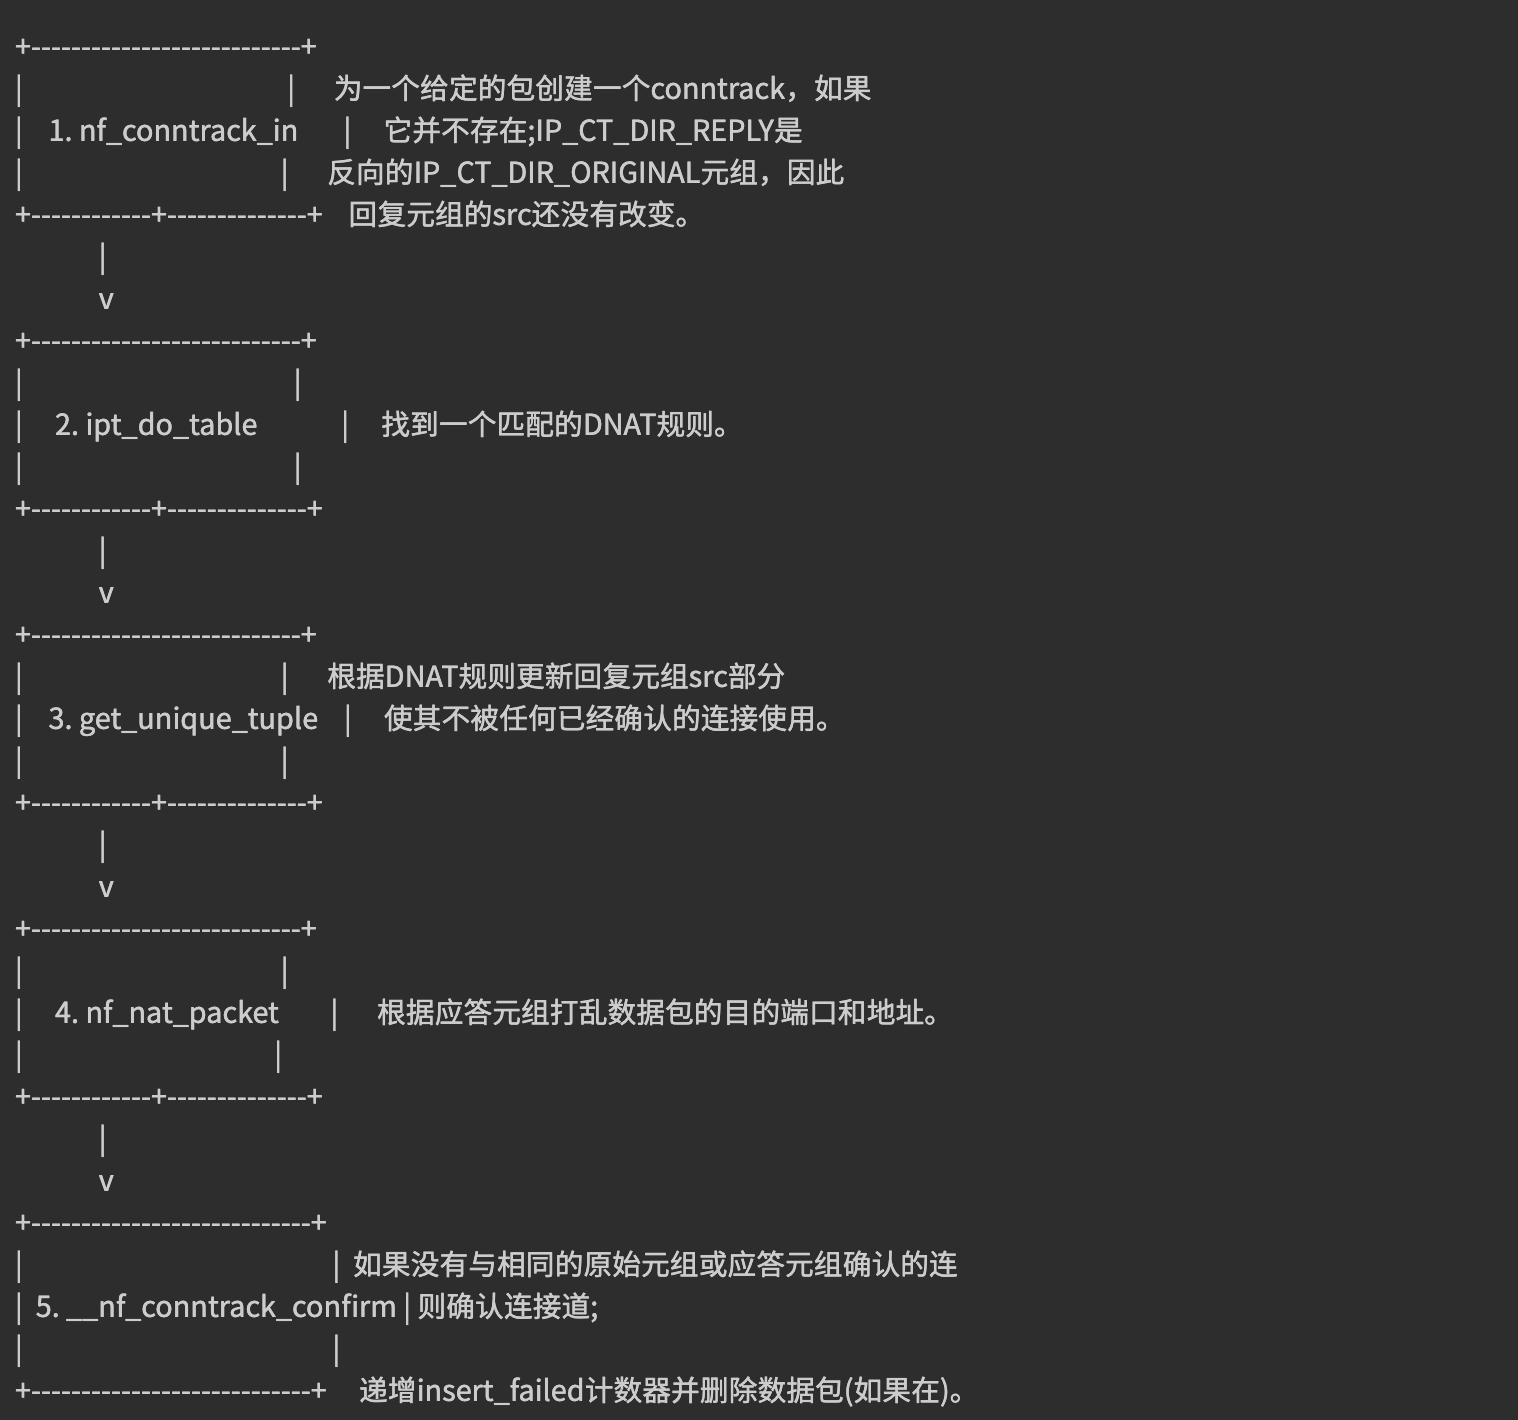
With these entries, the kernel can modify the destination and source addresses of any related packets accordingly without traversing the DNAT rules again. In addition, it will know how to modify the reply and to whom it should be sent. After a conntrack entry is created, it is first confirmed, and then if no confirmed conntrack entry has the same original tuple or reply tuple, the kernel attempts to confirm the entry. The simplified process of conntrack creation and DNAT is as follows:
The following one is a little vague 😥😥
2.2 problems
😥😥 o. Shift, my knowledge is also a blind spot.
DNS client (glibc or musl libc) will request a and AAAA records concurrently. Naturally, when communicating with DNS Server, it will connect (establish fd) first, and then the request message will be sent using this fd. Because UDP is a stateless protocol, the conntrack table entry will not be created when connecting, and the A and AAAA records of concurrent requests will use the same fd contract by default. At this time, their source ports are the same, In case of concurrent contracting, the two packets have not been inserted into the conntrack table entry, so netfilter will create conntrack table entries for them respectively, and the request CoreDNS in the cluster is the CLUSTER-IP accessed, and the message will eventually be transformed into a specific Pod IP by DNAT. When the two packets are transformed into the same IP by DNAT, their quintuples will be the same, At the time of final insertion, the following packet will be lost. If there is only one instance of the Pod copy of DNS, it is easy to happen. The phenomenon is that the DNS request times out. The default policy of the client is to wait for 5s automatic retry. If the retry is successful, we see that the DNS request has a 5s delay.
For specific reasons, please refer to the article summarized by weave works Racy conntrack and DNS lookup timeouts.
- Only when multiple threads or processes send the same five tuple UDP message from the same socket concurrently, there is a certain probability
- glibc and musl (libc Library of alpine linux) both use parallel query, which is to send multiple query requests concurrently. Therefore, it is easy to encounter such conflicts and cause query requests to be discarded
- Because ipvs also uses conntrack, using Kube proxy ipvs mode can not avoid this problem
3. Solution
To completely solve this problem, of course, the best way is to FIX the BUG in the kernel. In addition to this method, we can also use other methods to avoid the concurrency of the same five tuple DNS requests.
In resolv There are two related parameters in conf that can be configured:
- Single request request open: different source ports are used for sending A-type requests and AAAA type requests, so that the two requests do not occupy the same table entry in the conntrack table, so as to avoid conflict.
- Single request: avoid concurrency. Instead, send A-type and AAAA type requests serially. There is no concurrency, thus avoiding conflicts.
Resolv. To the container There are several ways to add the options parameter to conf:
-
In the container's entry point or CMD script, execute / bin / echo 'options single request open' > > / etc / resolv Conf (not recommended)
-
Add in the postStart hook of Pod: (not recommended)
lifecycle: postStart: exec: command: - /bin/sh - -c - "/bin/echo 'options single-request-reopen' >> /etc/resolv.conf -
Use template Spec.dnsconfig configuration:
template: spec: dnsConfig: options: - name: single-request-reopen -
Use ConfigMap to overwrite / etc / resolv. In Pod conf:
# configmap
apiVersion: v1
data:
  resolv.conf: |
    nameserver 1.2.3.4
    search default.svc.cluster.local svc.cluster.local cluster.local
    options ndots:5 single-request-reopen timeout:1
kind: ConfigMap
metadata:
  name: resolvconf
---
# Pod Spec
spec:
    volumeMounts:
    - name: resolv-conf
      mountPath: /etc/resolv.conf
      subPath: resolv.conf  # To mount a file under a directory (ensure that the current directory is not overwritten), you need to use subpath - > Hot update is not supported
...
  volumes:
  - name: resolv-conf
    configMap:
      name: resolvconf
      items:
      - key: resolv.conf
        path: resolv.conf
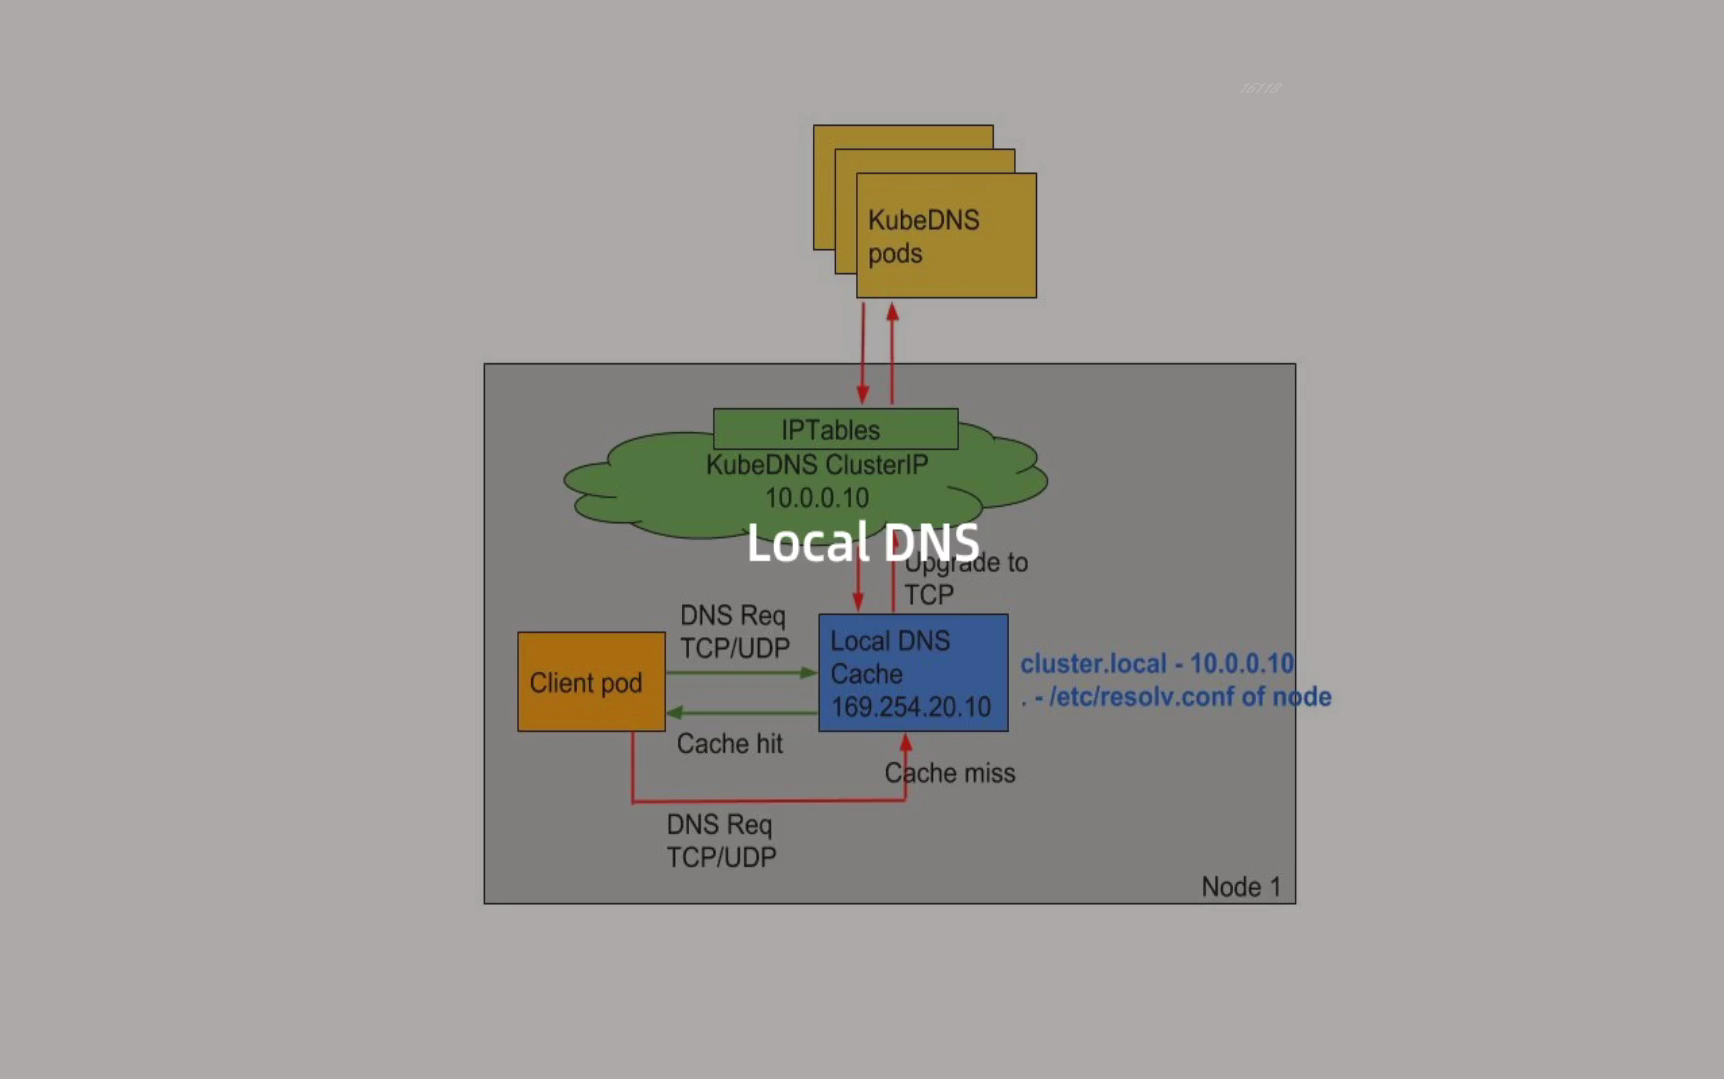
The above method can solve the DNS timeout problem to some extent, but a better way is to use the local DNS cache. The DNS requests of the container are sent to the local DNS cache service, so there is no need to go through DNAT. Of course, there will be no conntrack conflict, and it can effectively improve the performance bottleneck of CoreDNS.
4. Performance test
💖 The actual battle begins
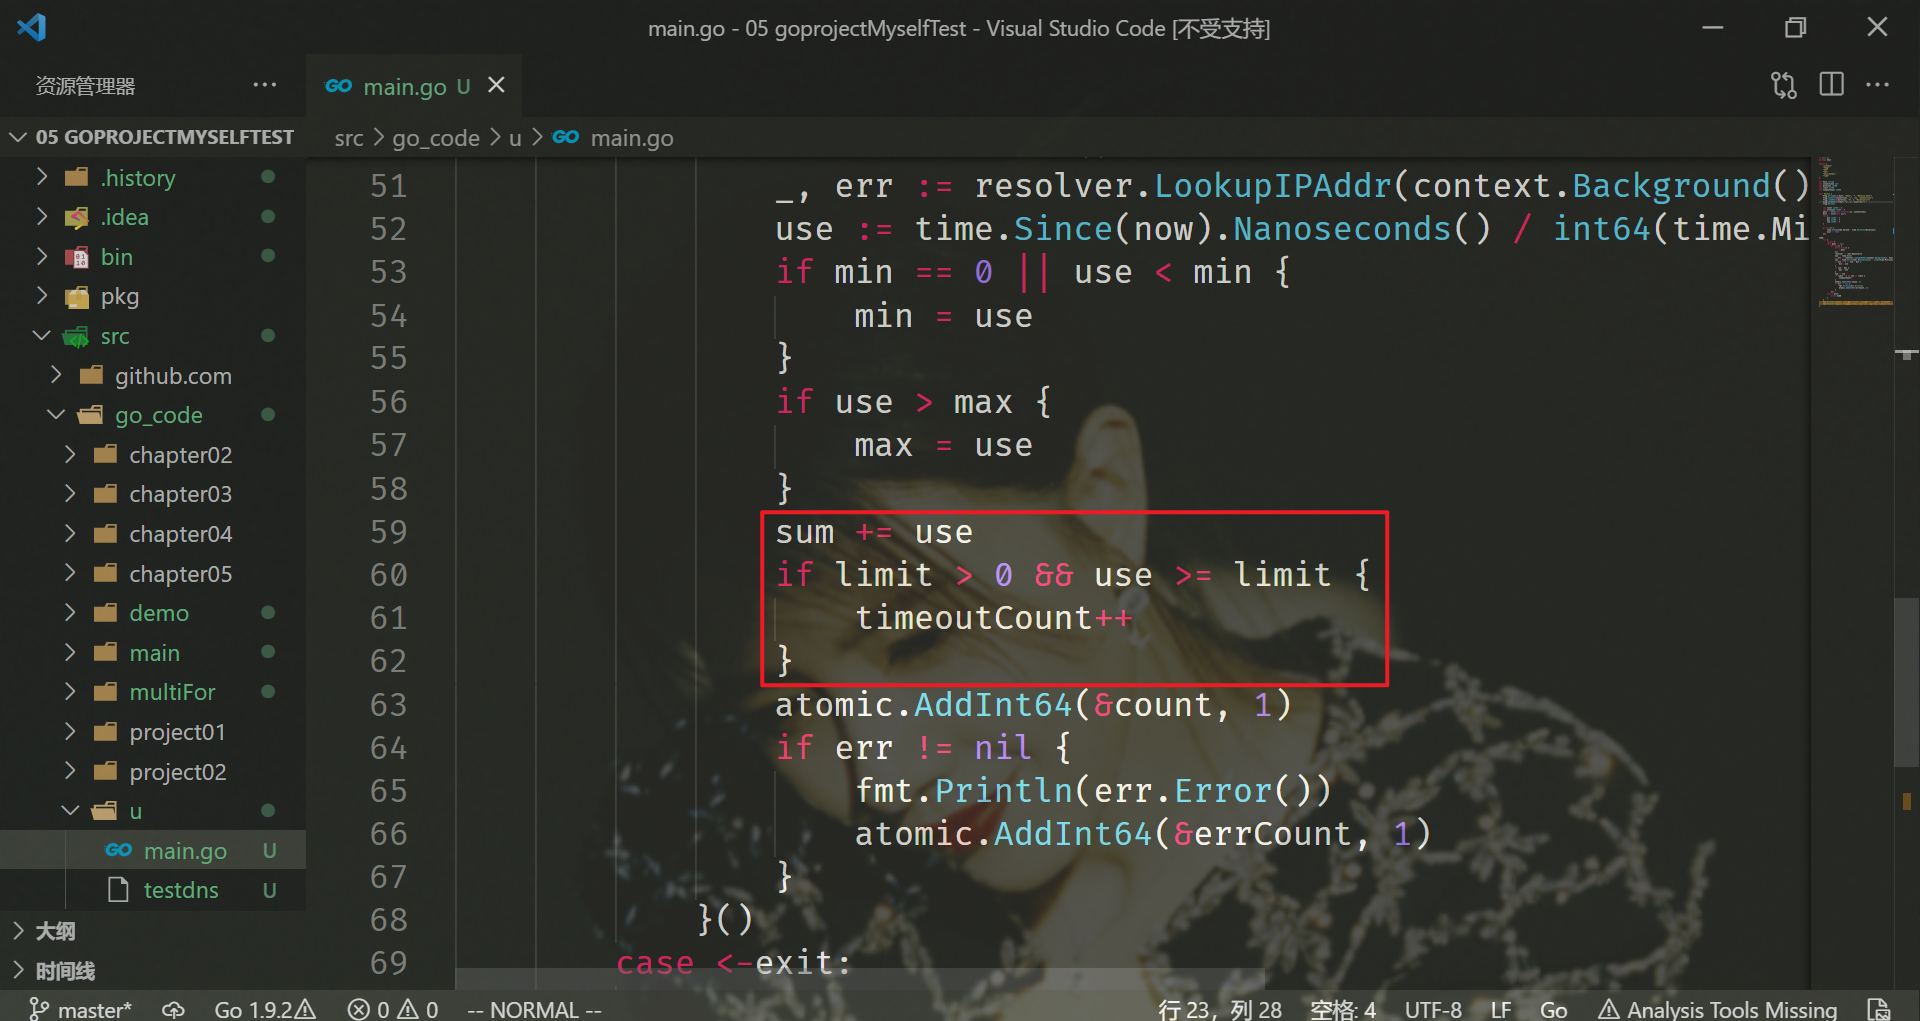
Here we use a simple golang program to test the performance before and after using the local DNS cache. The code is as follows:
// main.go
package main

import (
    "context"
    "flag"
    "fmt"
    "net"
    "sync/atomic"
    "time"
)

var host string
var connections int
var duration int64
var limit int64
var timeoutCount int64

func main() {
    flag.StringVar(&host, "host", "", "Resolve host")
    flag.IntVar(&connections, "c", 100, "Connections")
    flag.Int64Var(&duration, "d", 0, "Duration(s)")
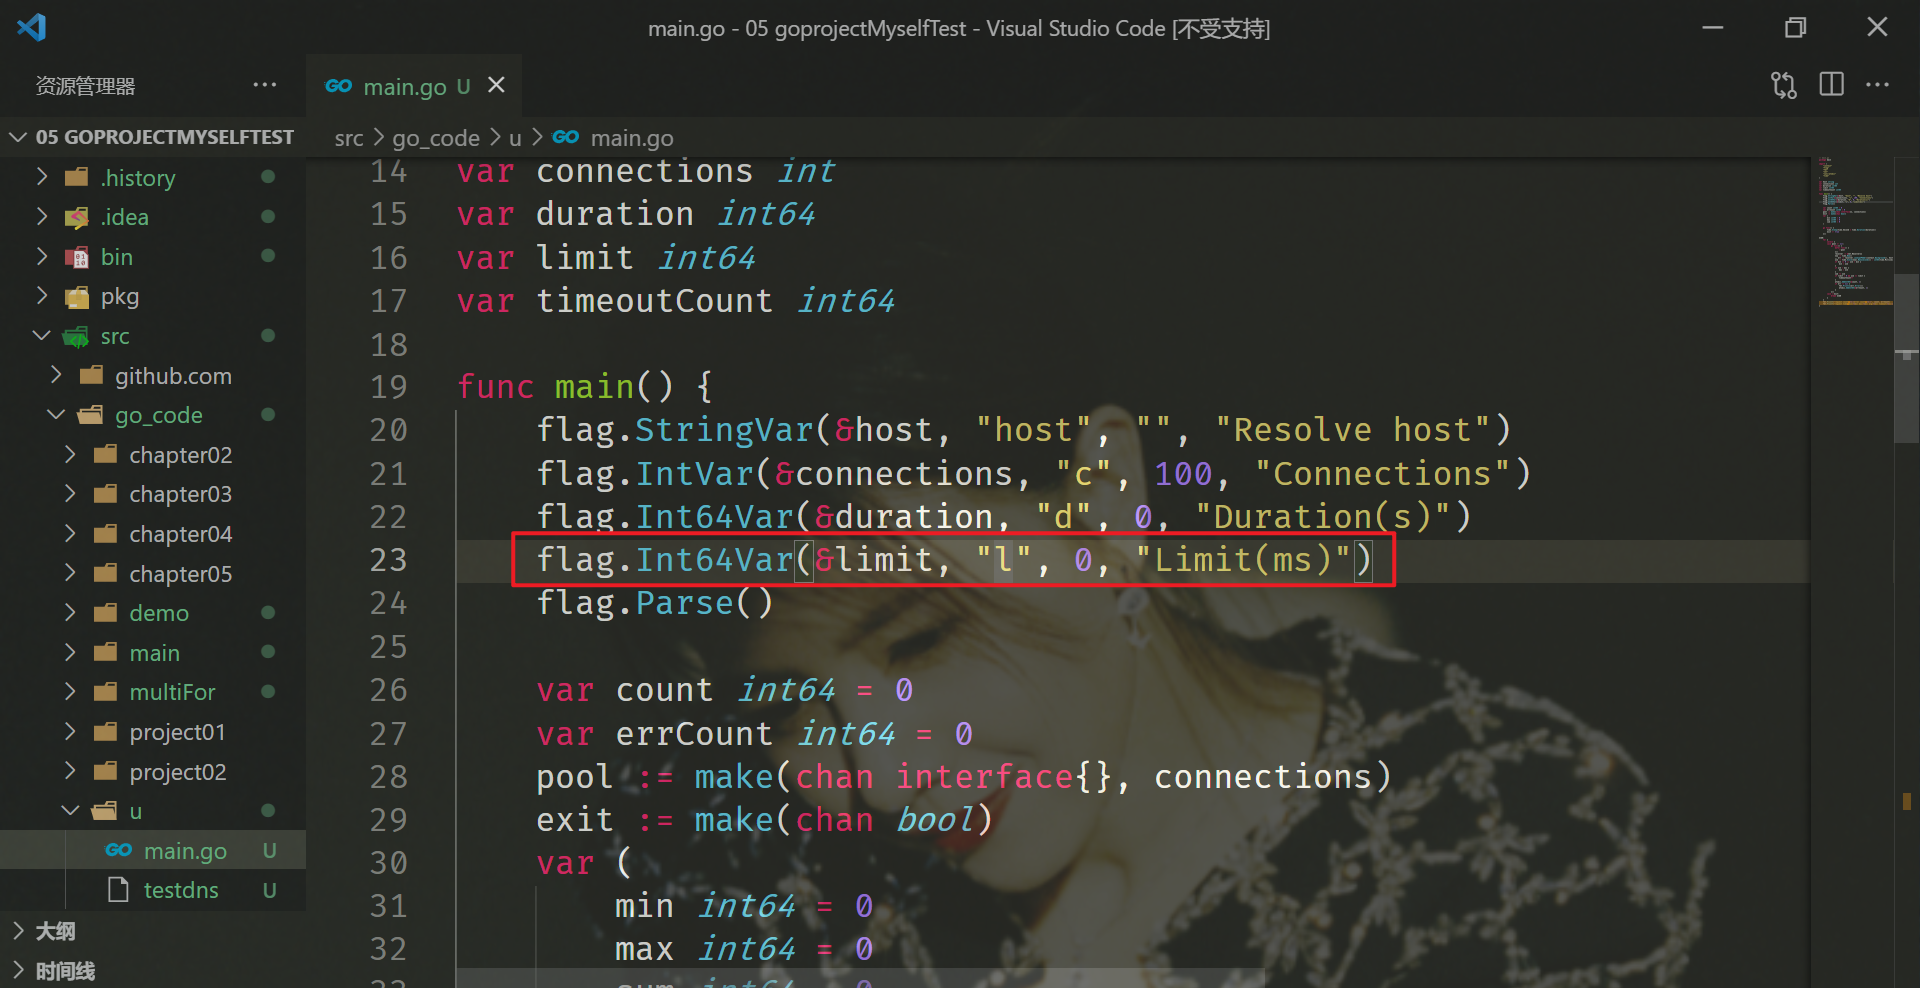
    flag.Int64Var(&limit, "l", 0, "Limit(ms)")
    flag.Parse()

    var count int64 = 0
    var errCount int64 = 0
    pool := make(chan interface{}, connections)
    exit := make(chan bool)
    var (
        min int64 = 0
        max int64 = 0
        sum int64 = 0
    )

    go func() {
        time.Sleep(time.Second * time.Duration(duration))
        exit <- true
    }()

endD:
    for {
        select {
        case pool <- nil:
            go func() {
                defer func() {
                    <-pool
                }()
                resolver := &net.Resolver{}
                now := time.Now()
                _, err := resolver.LookupIPAddr(context.Background(), host)
                use := time.Since(now).Nanoseconds() / int64(time.Millisecond)
                if min == 0 || use < min {
                    min = use
                }
                if use > max {
                    max = use
                }
                sum += use
                if limit > 0 && use >= limit {
                    timeoutCount++
                }
                atomic.AddInt64(&count, 1)
                if err != nil {
                    fmt.Println(err.Error())
                    atomic.AddInt64(&errCount, 1)
                }
            }()
        case <-exit:
            break endD
        }
    }
    fmt.Printf("request count: %d\nerror count: %d\n", count, errCount)
    fmt.Printf("request time: min(%dms) max(%dms) avg(%dms) timeout(%dn)\n", min, max, sum/count, timeoutCount)
}
First configure the golang environment, and then directly build the above test application:
go build -o testdns .
As for how to build your own go environment, please see another article: Go software installation - successfully tested - 20210413,Vscade builds Go programming environment - successfully tested - 20210413
Please refer to note 1 below for the problems needing attention.
After the construction, a binary file of testdns is generated, and then we copy the binary file to any Pod for testing:
First, here I deploy an nginx yaml:
[root@master1 ~]#vim nginx.yaml
apiVersion: apps/v1
kind: Deployment
metadata:
  name: nginx
spec:
  selector:
    matchLabels:
      app: nginx
  replicas: 2
  template:
    metadata:
      labels:
        app: nginx
    spec:
      containers:
      - name: nginx
        image: nginx:1.7.9
        ports:
        - containerPort: 80
[root@master1 ~]#kubectl apply -f nginx.yaml
deployment.apps/nginx created
[root@master1 ~]#kubectl get po
NAME                     READY   STATUS    RESTARTS   AGE
nginx-5d59d67564-k9m2k   1/1     Running   0          14s
nginx-5d59d67564-lbkwx   1/1     Running   0          14s
After copying, enter the Pod of this test:
[root@master1 go]#kubectl cp testdns nginx-5d59d67564-k9m2k:/root/
[root@master1 go]#kubectl exec -it nginx-5d59d67564-k9m2k -- bash
root@nginx-5d59d67564-k9m2k:/# ls -l  /root/testdns
-rwxr-xr-x 1 root root 2903854 Dec 28 07:18 /root/testdns
root@nginx-5d59d67564-k9m2k:/#
Let's deploy another svc:
[root@master1 ~]#cat service.yaml
apiVersion: v1
kind: Service
metadata:
  name: nginx-service
spec:
  ports:
  - name: http
    port: 5000
    protocol: TCP
    targetPort: 80 #It's equivalent to exposing the service to the nginx above
  selector:
    app: nginx
  type: ClusterIP #The default is ClusterIP mode

[root@master1 ~]#kubectl apply -f service.yaml
service-service/nginx created
[root@master1 ~]#kubectl get svc nginx-service
NAME            TYPE        CLUSTER-IP     EXTERNAL-IP   PORT(S)    AGE
nginx-service   ClusterIP   10.106.35.68   <none>        5000/TCP   58s

[root@master1 ~]#curl 10.106.35.68:5000 #You can simply test it
<!DOCTYPE html>
<html>
<head>
<title>Welcome to nginx!</title>
<style>
    body {
        width: 35em;
        margin: 0 auto;
        font-family: Tahoma, Verdana, Arial, sans-serif;
    }
</style>
</head>
<body>
<h1>Welcome to nginx!</h1>
<p>If you see this page, the nginx web server is successfully installed and
working. Further configuration is required.</p>

<p>For online documentation and support please refer to
<a href="http://nginx.org/">nginx.org</a>.<br/>
Commercial support is available at
<a href="http://nginx.com/">nginx.com</a>.</p>

<p><em>Thank you for using nginx.</em></p>
</body>
</html>
[root@master1 ~]#
Then we execute the testdns program for stress testing, such as 200 concurrent tests for 30 seconds:
⚠️ Of course, there should be many programs online for dns stress testing. 😋, This time, the code written by the teacher go is used for pressure test.
The following is the data in the notes provided for the teacher:
# For nginx service default 	  Resolve this address
root@svc-demo-546b7bcdcf-6xsnr:~# ./testdns -host nginx-service.default -c 200 -d 30 -l 5000
lookup nginx-service.default on 10.96.0.10:53: no such host
lookup nginx-service.default on 10.96.0.10:53: no such host
lookup nginx-service.default on 10.96.0.10:53: no such host
lookup nginx-service.default on 10.96.0.10:53: no such host
lookup nginx-service.default on 10.96.0.10:53: no such host
request count: 12533
error count: 5
request time: min(5ms) max(16871ms) avg(425ms) timeout(475n)
root@svc-demo-546b7bcdcf-6xsnr:~# ./testdns -host nginx-service.default -c 200 -d 30 -l 5000
lookup nginx-service.default on 10.96.0.10:53: no such host
lookup nginx-service.default on 10.96.0.10:53: no such host
lookup nginx-service.default on 10.96.0.10:53: no such host
request count: 10058
error count: 3
request time: min(4ms) max(12347ms) avg(540ms) timeout(487n)
root@svc-demo-546b7bcdcf-6xsnr:~# ./testdns -host nginx-service.default -c 200 -d 30 -l 5000
lookup nginx-service.default on 10.96.0.10:53: no such host
lookup nginx-service.default on 10.96.0.10:53: no such host
request count: 12242
error count: 2
request time: min(3ms) max(12206ms) avg(478ms) timeout(644n)
root@svc-demo-546b7bcdcf-6xsnr:~# ./testdns -host nginx-service.default -c 200 -d 30 -l 5000
request count: 11008
error count: 0
request time: min(3ms) max(11110ms) avg(496ms) timeout(478n)
root@svc-demo-546b7bcdcf-6xsnr:~# ./testdns -host nginx-service.default -c 200 -d 30 -l 5000
request count: 9141
error count: 0
request time: min(4ms) max(11198ms) avg(607ms) timeout(332n)
root@svc-demo-546b7bcdcf-6xsnr:~# ./testdns -host nginx-service.default -c 200 -d 30 -l 5000
request count: 9126
error count: 0
request time: min(4ms) max(11554ms) avg(613ms) timeout(197n)
We can see that most of the average time-consuming is about 500ms. This performance is very poor, and there are some items that fail to parse. Next, let's try to use nodelocal dnschache to improve the performance and reliability of DNS.
😂 Note: the phenomenon data of this test
root@nginx-5d59d67564-k9m2k:~# ./testdns -host nginx-service.default.svc.cluster.local -c 200 -d 30 -l 5000
request count: 34609
error count: 0
request time: min(4ms) max(5191ms) avg(166ms) timeout(2n)
root@nginx-5d59d67564-k9m2k:~# ./testdns -host nginx-service.default.svc.cluster.local -c 200 -d 30 -l 5000
request count: 31942
error count: 0
request time: min(3ms) max(1252ms) avg(183ms) timeout(0n)
root@nginx-5d59d67564-k9m2k:~# ./testdns -host nginx-service.default.svc.cluster.local -c 200 -d 30 -l 5000
request count: 31311
error count: 0
request time: min(4ms) max(1321ms) avg(187ms) timeout(0n)
root@nginx-5d59d67564-k9m2k:~#
#We can see that most of the average time is about 160ms, but we don't see any items that fail to parse


#Change the concurrent number to 1000 and test again:
root@nginx-5d59d67564-k9m2k:~# ./testdns -host nginx-service.default.svc.cluster.local -c 1000 -d 30 -l 5000
request count: 24746
error count: 0
request time: min(7ms) max(7273ms) avg(1138ms) timeout(52n)
root@nginx-5d59d67564-k9m2k:~#
😘 Note: the teacher the phenomenon data of this test

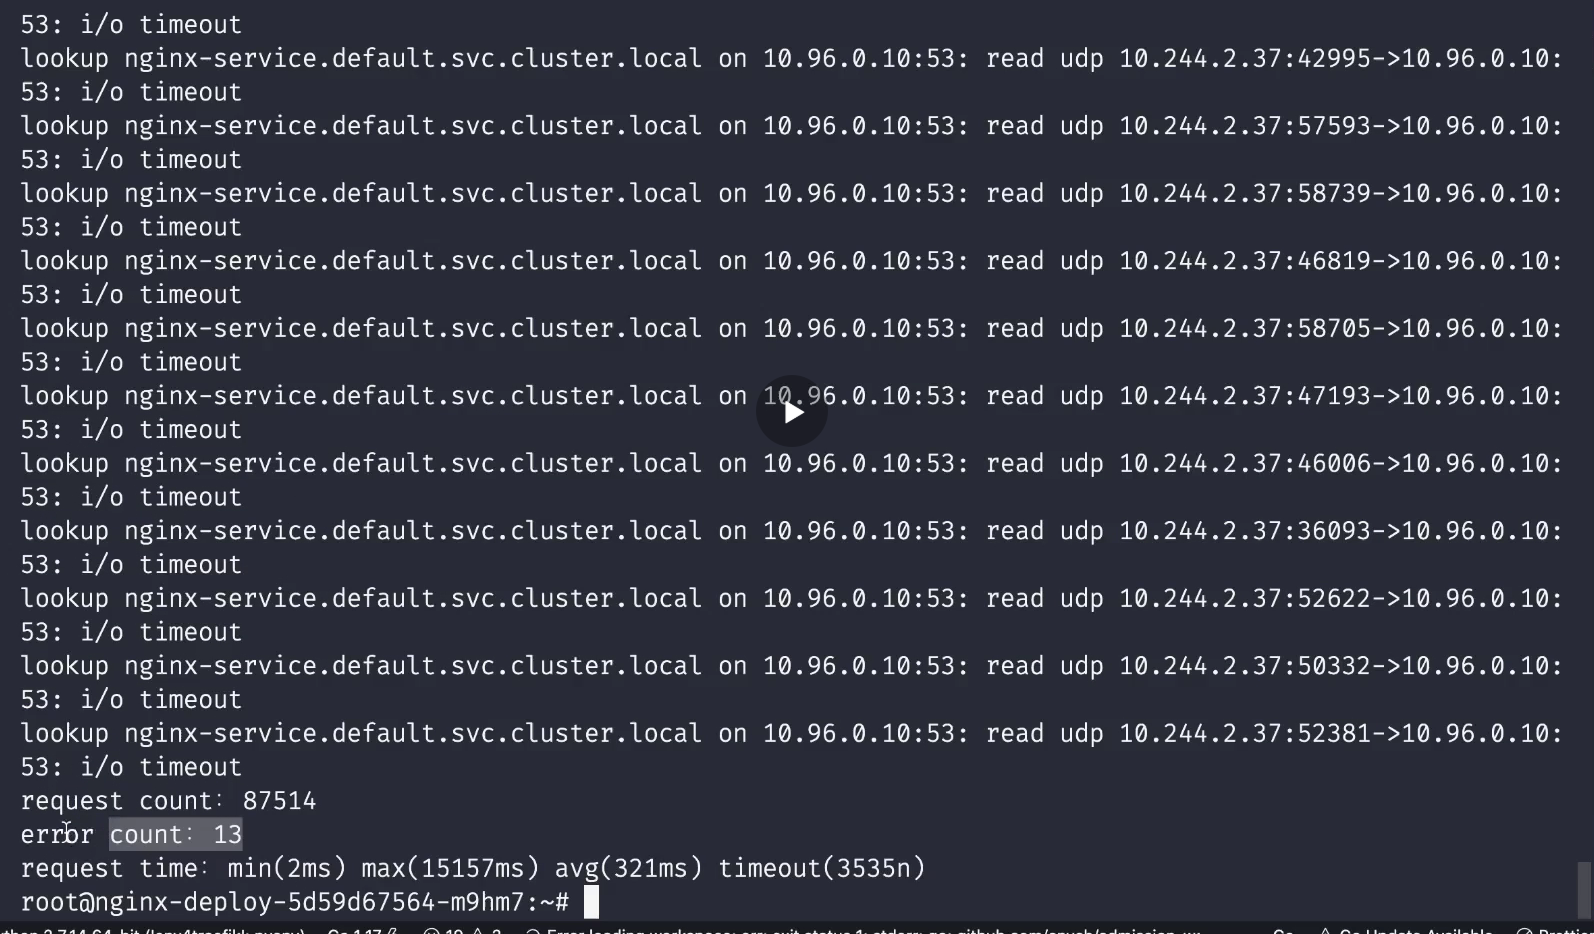
This i/o timeout may appear in your online environment because your online business concurrency may be very high.
-
Note: dns stress testing may not be successful, but it is mainly related to your environment.
-
Note: the meaning of the: - l parameter is a little vague if it exceeds 5s...
5,NodeLocal DNSCache
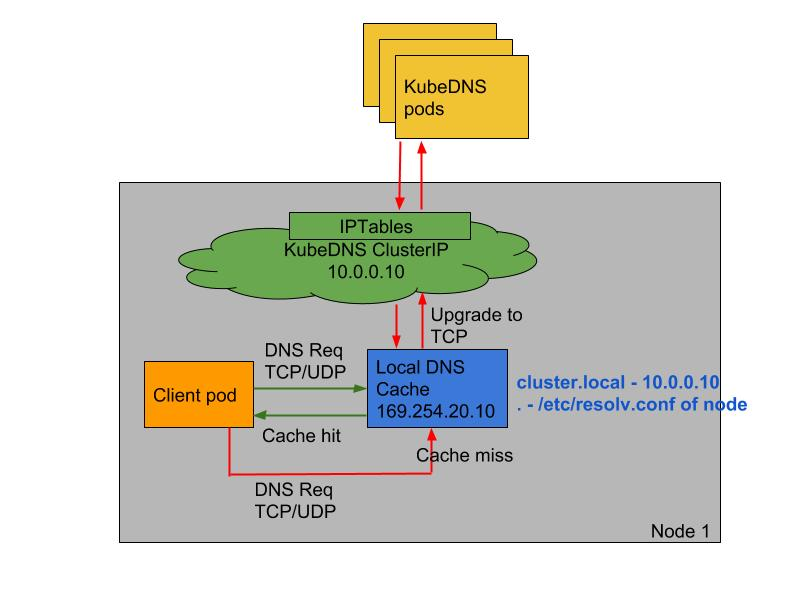
**Nodelocal dnschache improves the performance and reliability of cluster DNS by running a DaemonSet on cluster nodes** The Pod in the DNS mode of ClusterFirst can connect to the service IP of Kube DNS for DNS query, and convert it to a CoreDNS endpoint through the iptables rule added by the Kube proxy component. By running DNS cache on each cluster node, nodelocal dnschache can shorten the delay time of DNS lookup, make DNS lookup time more consistent, and reduce the number of DNS queries sent to Kube DNS.
Running nodelocal dnschache in a cluster has the following advantages:
- If there is no CoreDNS instance locally, the Pod with the highest DNS QPS may have to be resolved to another node. After using nodelocal dnschache, having a local cache will help to improve latency.
- Skipping iptables DNAT and connection tracking will help to reduce conntrack contention and prevent UDP DNS entries from filling the conntrack table (this is the reason for the 5s timeout problem mentioned above). Note: if it is changed to TCP, it can also be effective
- The connection from the local cache proxy to the Kube DNS service can be upgraded to TCP. The TCP conntrack entry will be deleted when the connection is closed, and the UDP entry must time out (the default nfconntrack kudp_timeout is 30 seconds)
- Upgrading DNS queries from UDP to TCP will reduce the tail latency due to discarded UDP packets and DNS timeout, usually up to 30 seconds (3 retries + 10 second timeout)
It is also very simple to install nodelocal dnschache. You can directly obtain the official resource list:
wget https://github.com/kubernetes/kubernetes/raw/master/cluster/addons/dns/nodelocaldns/nodelocaldns.yaml
[root@master1 ~]#wget https://github.com/kubernetes/kubernetes/raw/master/cluster/addons/dns/nodelocaldns/nodelocaldns.yaml
--2021-12-28 16:38:36--  https://github.com/kubernetes/kubernetes/raw/master/cluster/addons/dns/nodelocaldns/nodelocaldns.yaml
Resolving github.com (github.com)... 20.205.243.166
Connecting to github.com (github.com)|20.205.243.166|:443... connected.
HTTP request sent, awaiting response... 302 Found
Location: https://raw.githubusercontent.com/kubernetes/kubernetes/master/cluster/addons/dns/nodelocaldns/nodelocaldns.yaml [following]
--2021-12-28 16:38:36--  https://raw.githubusercontent.com/kubernetes/kubernetes/master/cluster/addons/dns/nodelocaldns/nodelocaldns.yaml
Resolving raw.githubusercontent.com (raw.githubusercontent.com)... 185.199.108.133, 185.199.111.133, 185.199.109.133, ...
Connecting to raw.githubusercontent.com (raw.githubusercontent.com)|185.199.108.133|:443... connected.
HTTP request sent, awaiting response... 200 OK
Length: 5334 (5.2K) [text/plain]
Saving to: 'nodelocaldns.yaml'

100%[===================================================================>] 5,334       --.-K/s   in 0.1s

2021-12-28 16:38:37 (51.4 KB/s) - 'nodelocaldns.yaml' saved [5334/5334]

[root@master1 ~]#ll nodelocaldns.yaml
-rw-r--r-- 1 root root 5334 Dec 28 16:38 nodelocaldns.yaml
[root@master1 ~]#
The download may fail due to network problems. Here you can wait a little and try again.
The resource manifest file contains several variables worth noting, including:
- __ PILLAR__DNS__SERVER__ : The ClusterIP representing the Kube DNS Service can be obtained by the command kubectl get SVC - n Kube system | grep Kube DNS | awk '{print $3}' (here is 10.96.0.10)
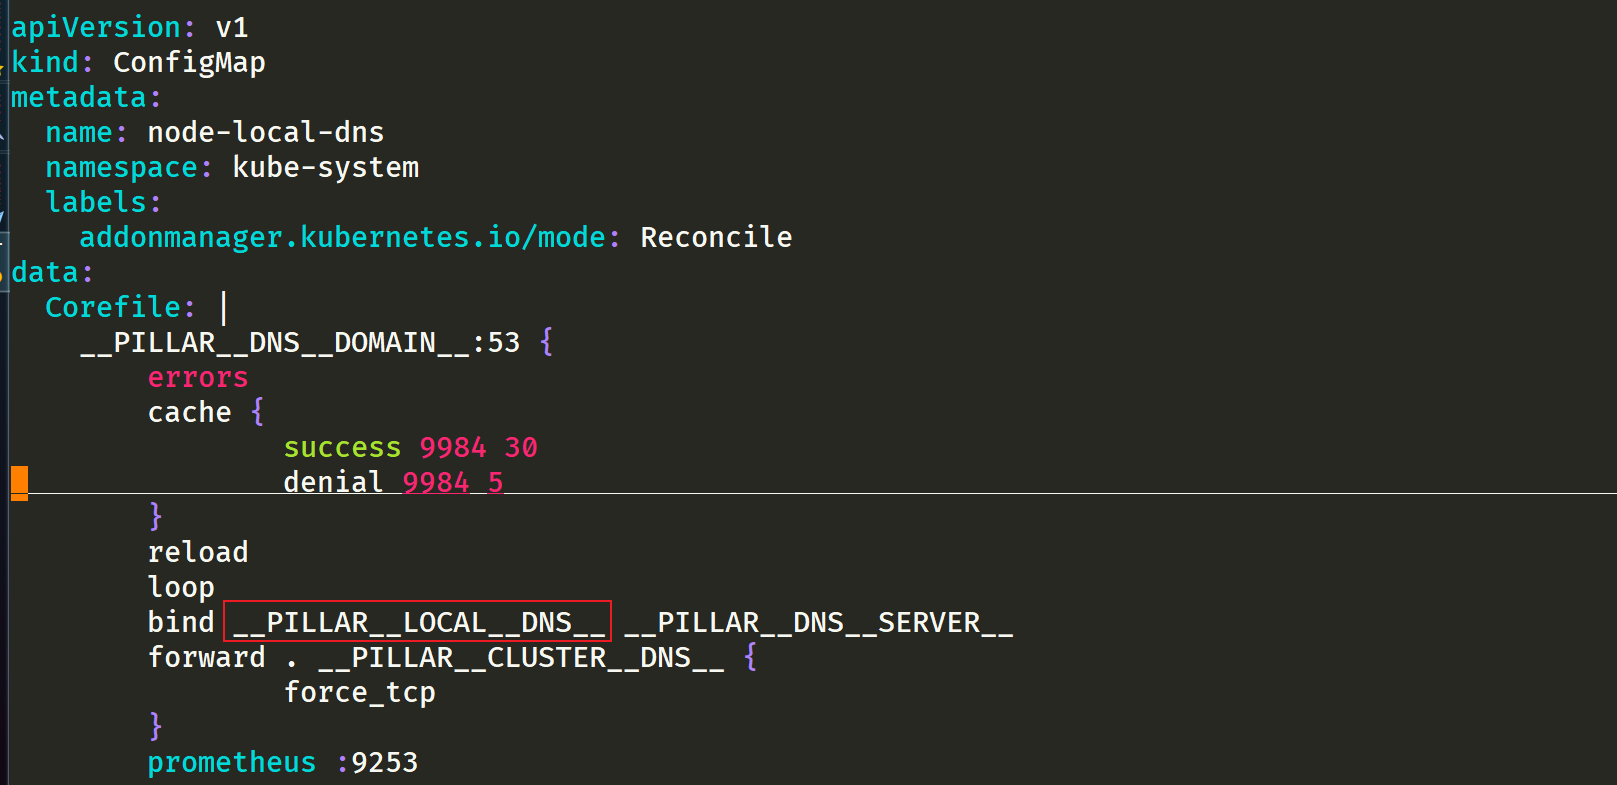
- __ PILLAR__LOCAL__DNS__: Indicates the local IP of dnschache. The default is 169.254 twenty point one zero
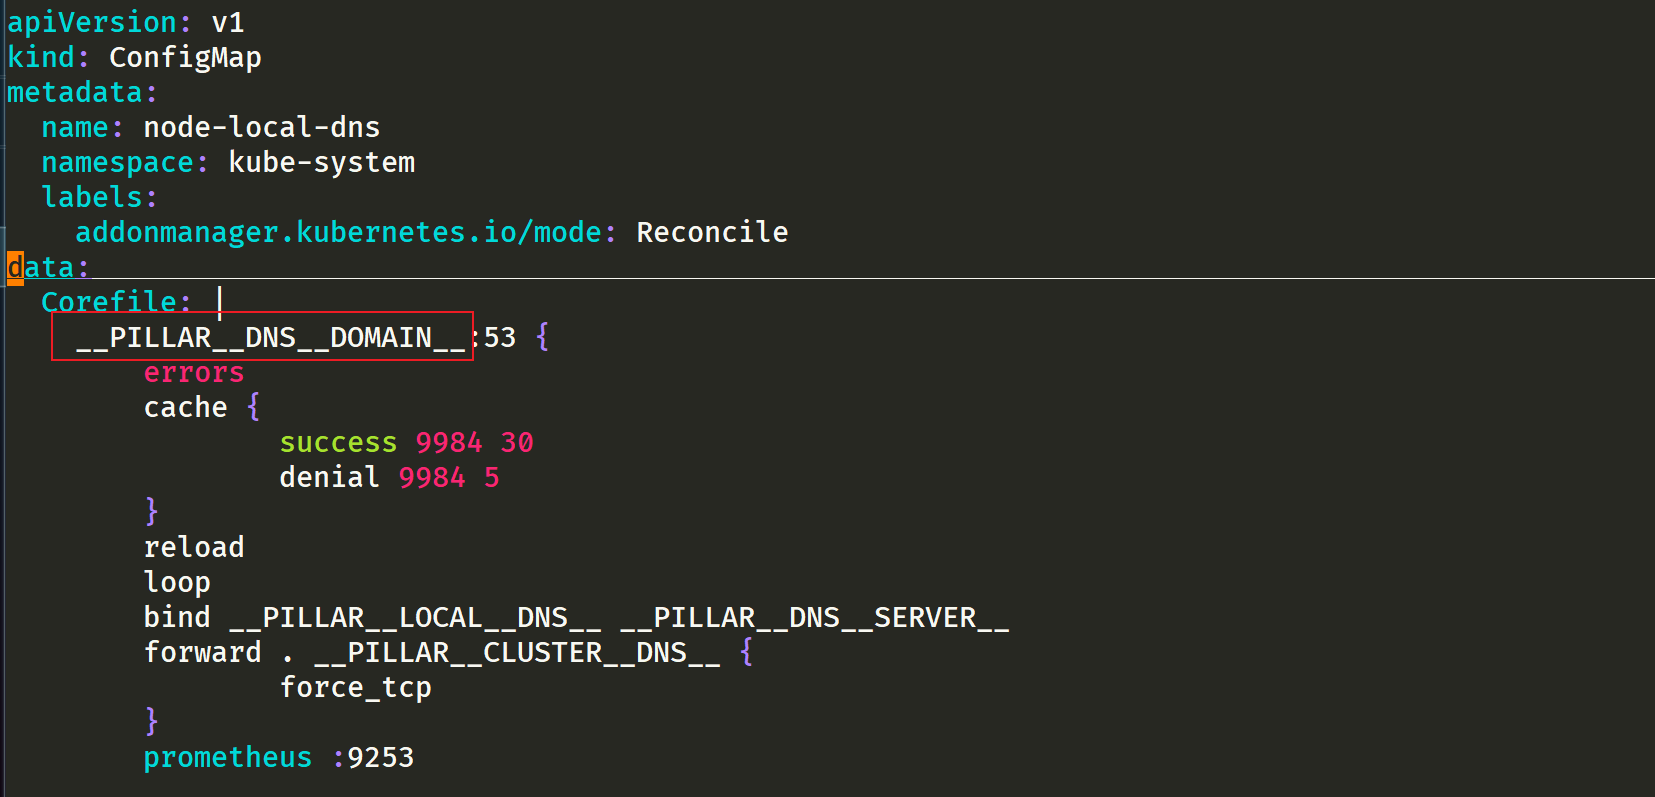
- __ PILLAR__DNS__DOMAIN__: Indicates the cluster domain. The default is cluster local
There are two other parameters__ PILLAR__CLUSTER__DNS__ And__ PILLAR__UPSTREAM__SERVERS__, These two parameters will be mirrored through 1.21 Version 1 is used for automatic configuration, and the corresponding values are from the ConfigMap of Kube DNS and the customized Upstream Server configuration. Directly execute the following commands to install:
$ sed 's/k8s.gcr.io\/dns/cnych/g
s/__PILLAR__DNS__SERVER__/10.96.0.10/g
s/__PILLAR__LOCAL__DNS__/169.254.20.10/g
s/__PILLAR__DNS__DOMAIN__/cluster.local/g' nodelocaldns.yaml |
kubectl apply -f -

#Note: this uses the teacher's image transfer address cnych.
You can check whether the corresponding Pod has been started successfully through the following commands:
[root@master1 ~]#kubectl get po -nkube-system -l k8s-app=node-local-dns -owide
NAME                   READY   STATUS    RESTARTS   AGE    IP            NODE      NOMINATED NODE   READINESS GATES
node-local-dns-2tbfz   1/1     Running   0          100s   172.29.9.51   master1   <none>           <none>
node-local-dns-7xv6x   1/1     Running   0          100s   172.29.9.53   node2     <none>           <none>
node-local-dns-rxhww   1/1     Running   0          100s   172.29.9.52   node1     <none>           <none>
Let's export a pod to see the following:
[root@master1 ~]#kubectl get po node-local-dns-2tbfz -nkube-system -oyaml
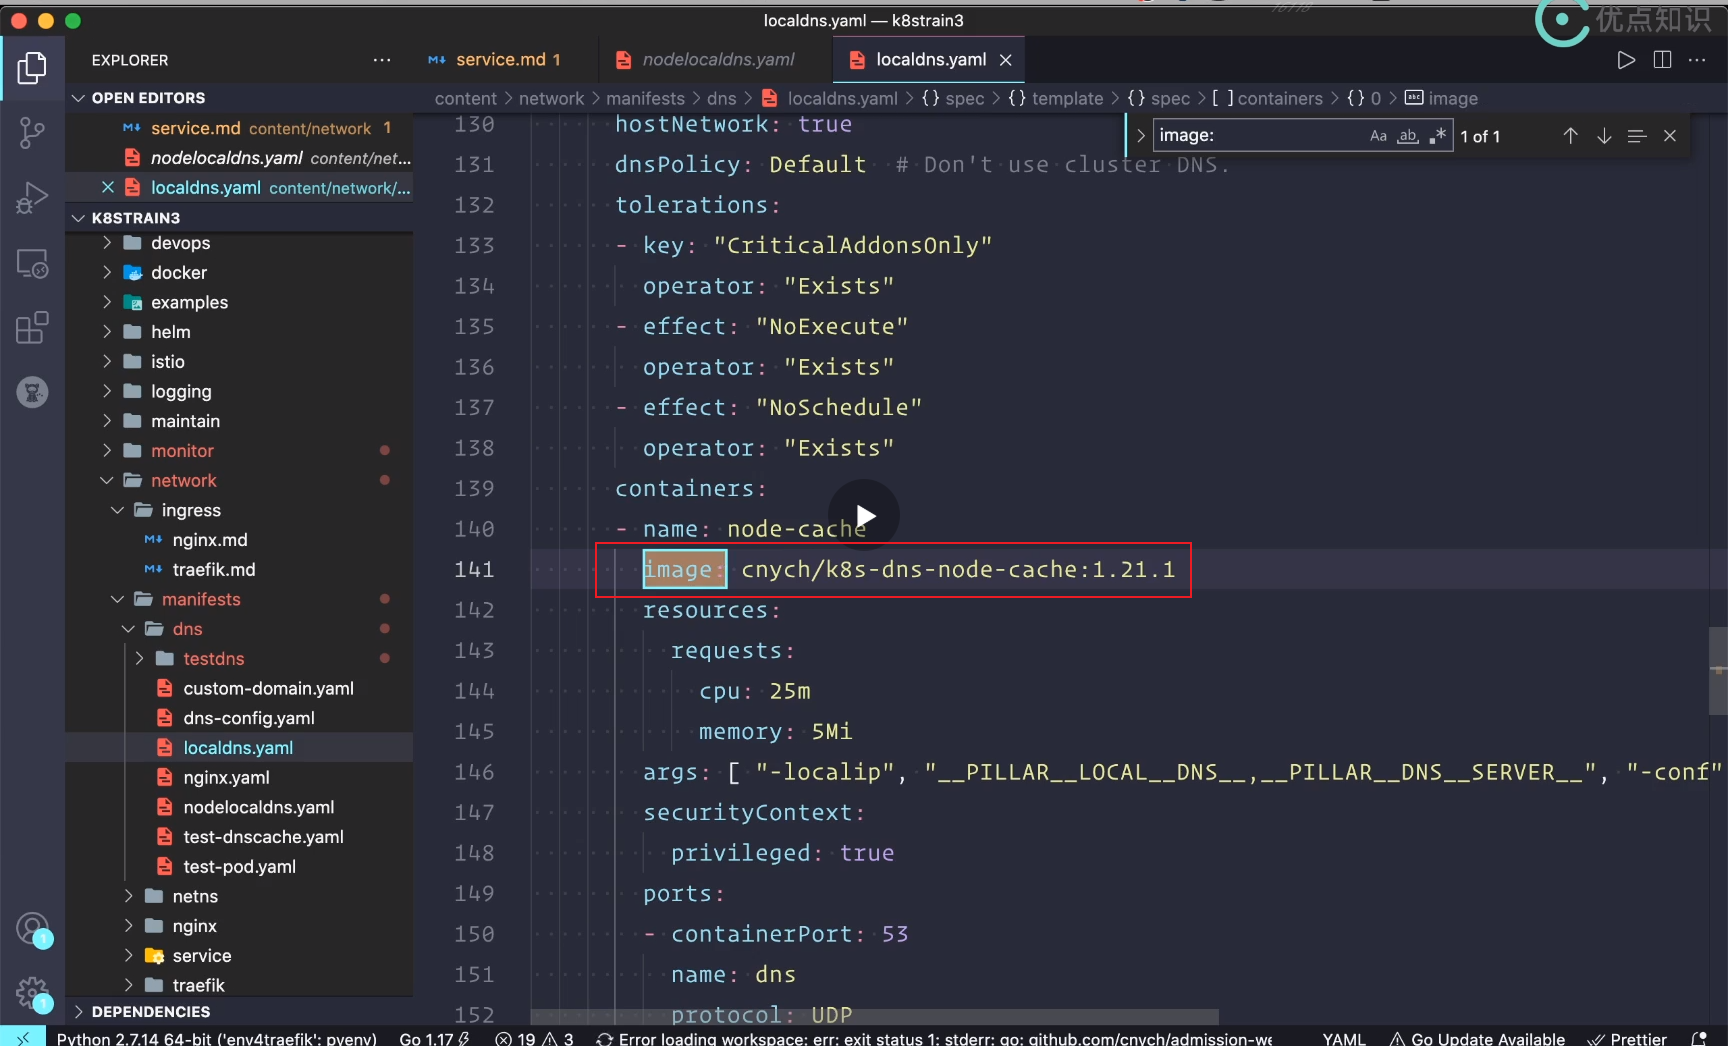
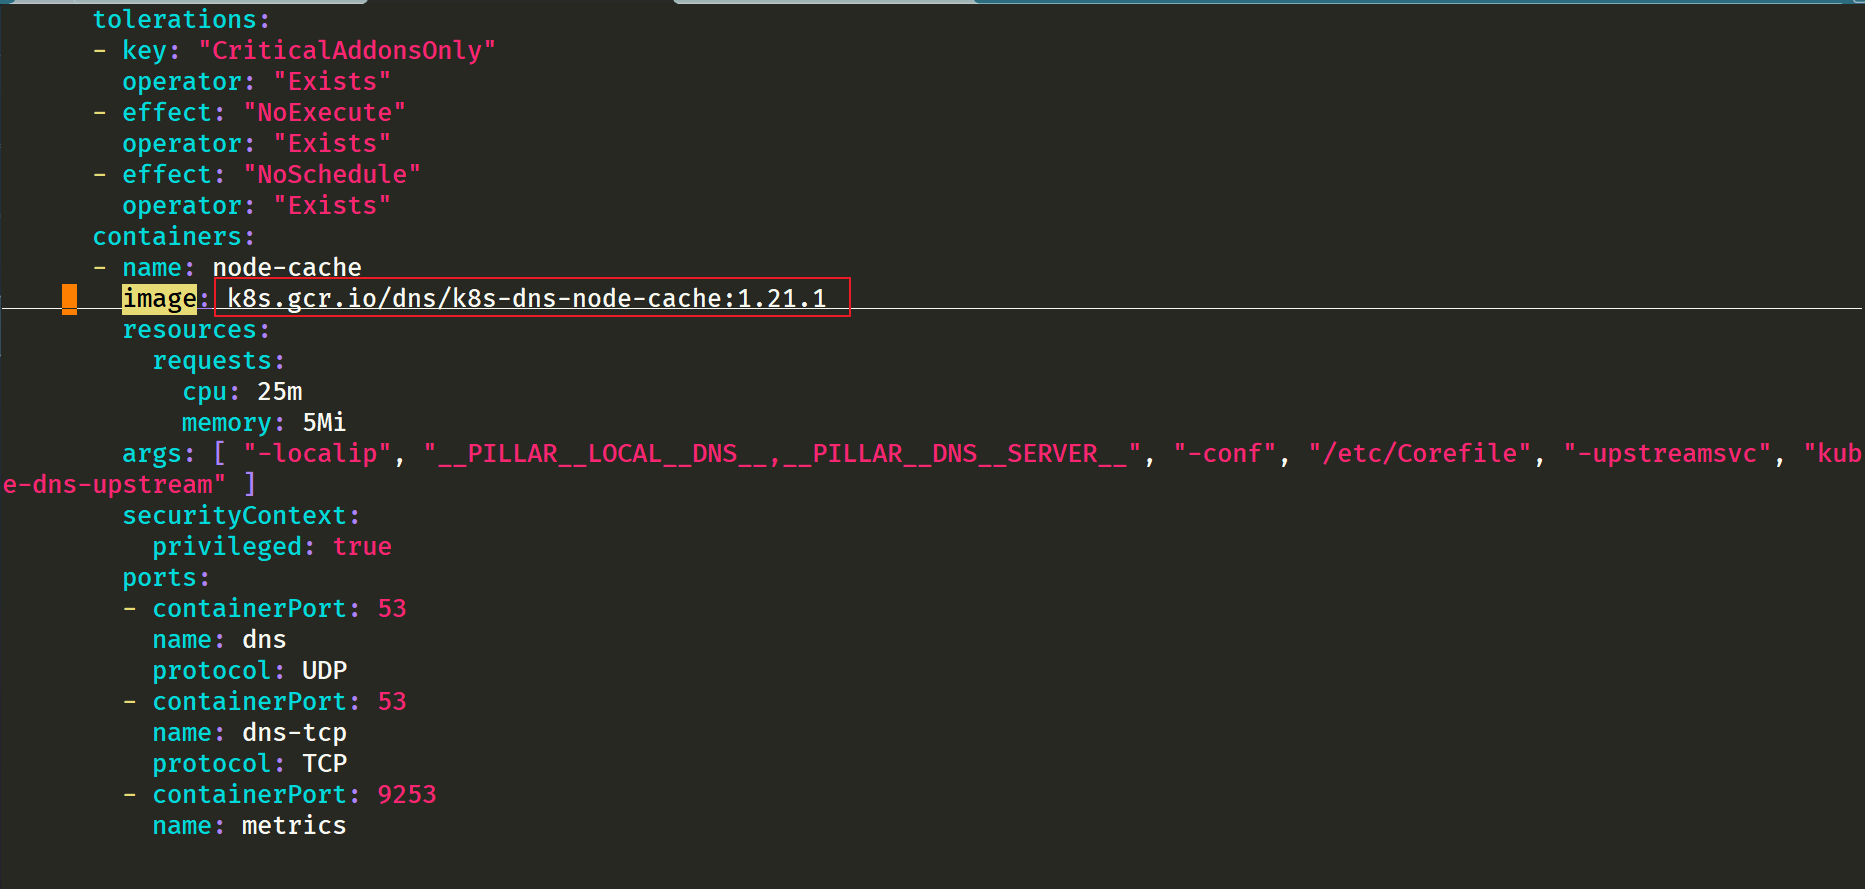
You can see that the image address has been modified:

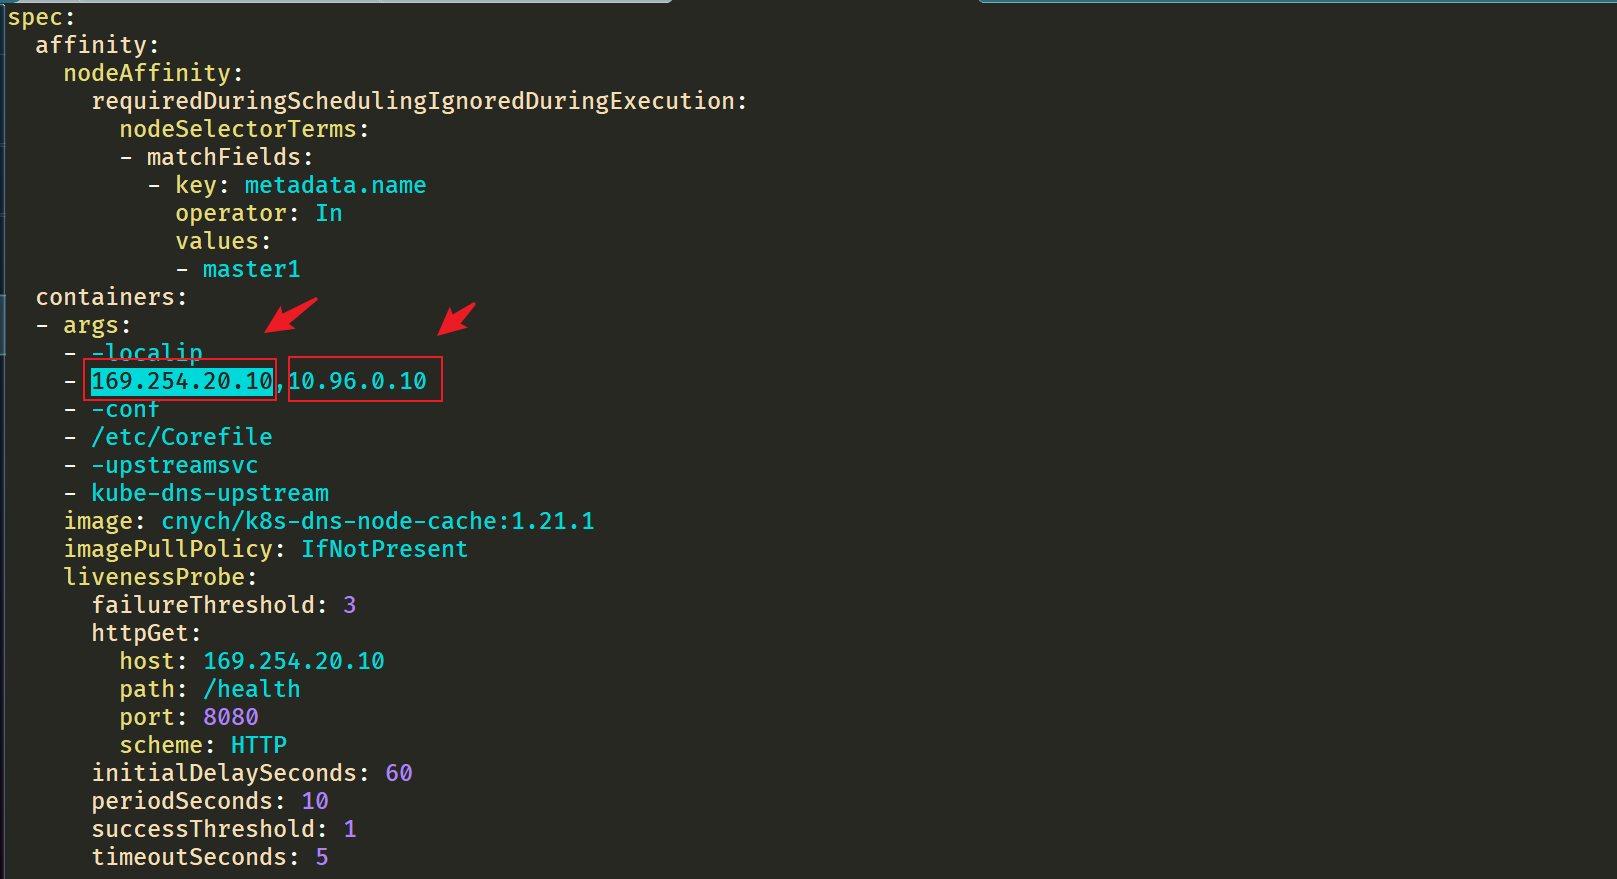
Here you can see the display from 169.254 20.10 resolve the address. If not, go to 10.96 0.10.
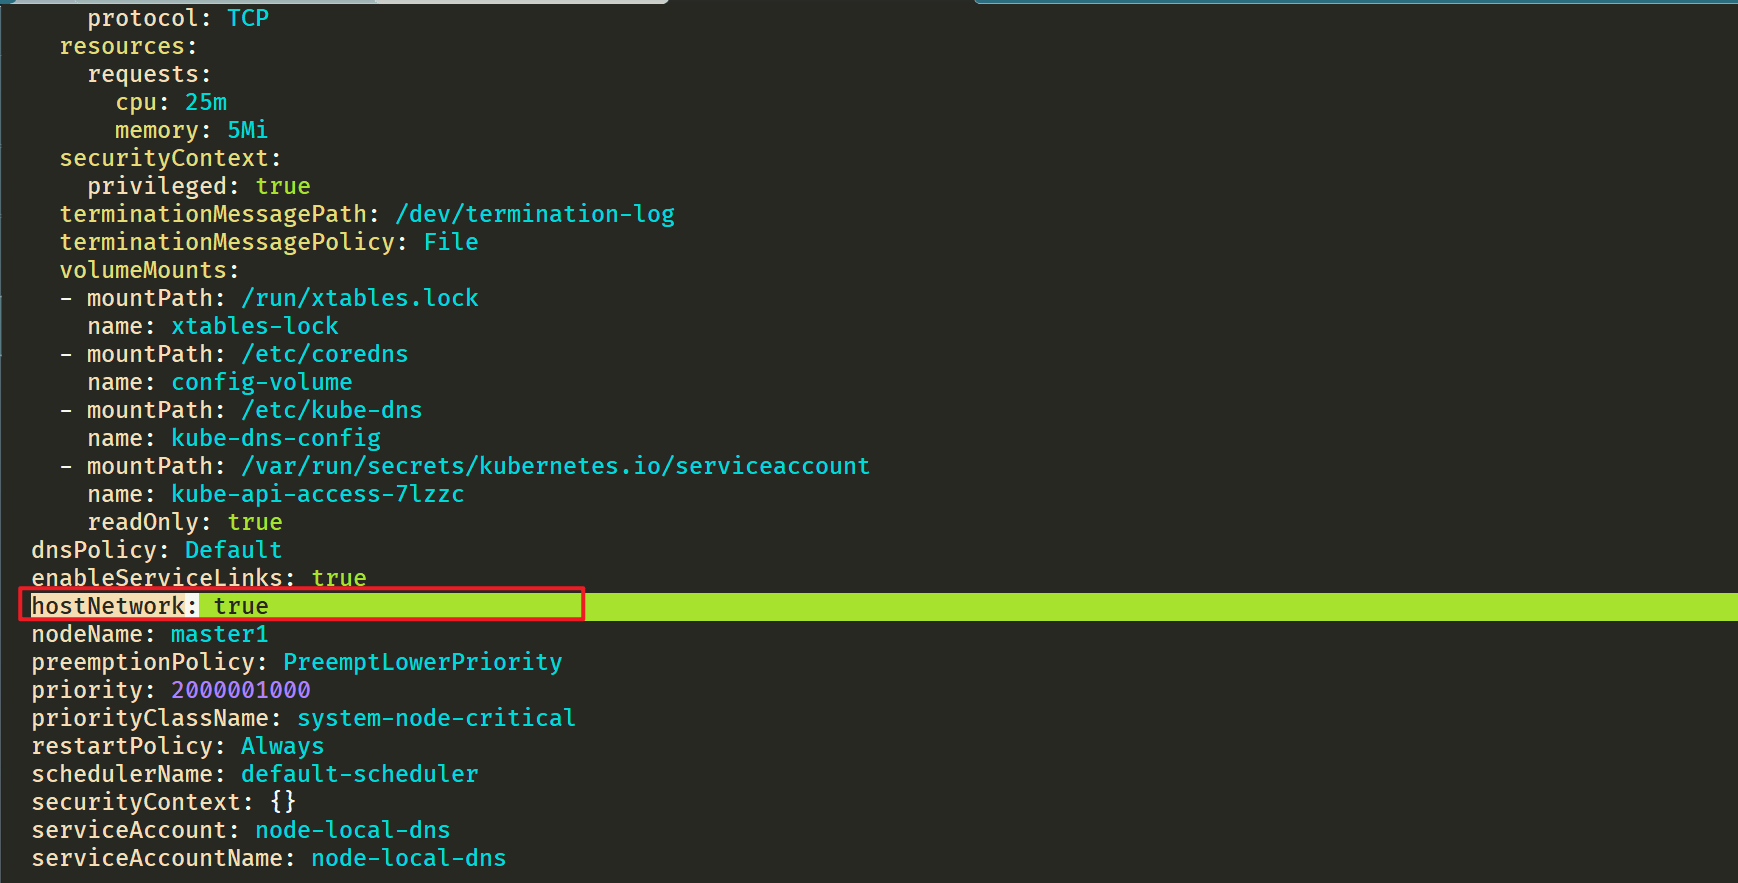


⚠️ It should be noted that node local DNS is deployed using DaemonSet here, and hostNetwork=true is used, which will occupy port 8080 of the host machine. Therefore, it is necessary to ensure that this port is not occupied.
But that's not all. If the Kube proxy component uses ipvs mode, we also need to modify the -- cluster DNS parameter of kubelet to point to 169.254 In 20.10, the daemon will create a network card to bind the IP at each node, and the Pod will send a DNS request to the IP of the node. When the cache fails, it will proxy to the upstream cluster DNS for query. In iptables mode, Pod still requests from the original cluster DNS. If the node has this IP listening, it will be intercepted by the local machine, and then requests the upstream DNS of the cluster. Therefore, it is not necessary to change the -- cluster DNS parameter.
⚠️ If we are worried about the impact of modifying the cluster DNS parameter in the online environment, we can also directly use the address of the new localdns in the newly deployed Pod through dnsConfig configuration.
Since I am using the 1.22 cluster installed by kubedm, we only need to replace / var / lib / kubelet / config. On the node The parameter value of clusterDNS in yaml file, and then restart:
sed -i 's/10.96.0.10/169.254.20.10/g' /var/lib/kubelet/config.yaml
systemctl daemon-reload && systemctl restart kubelet
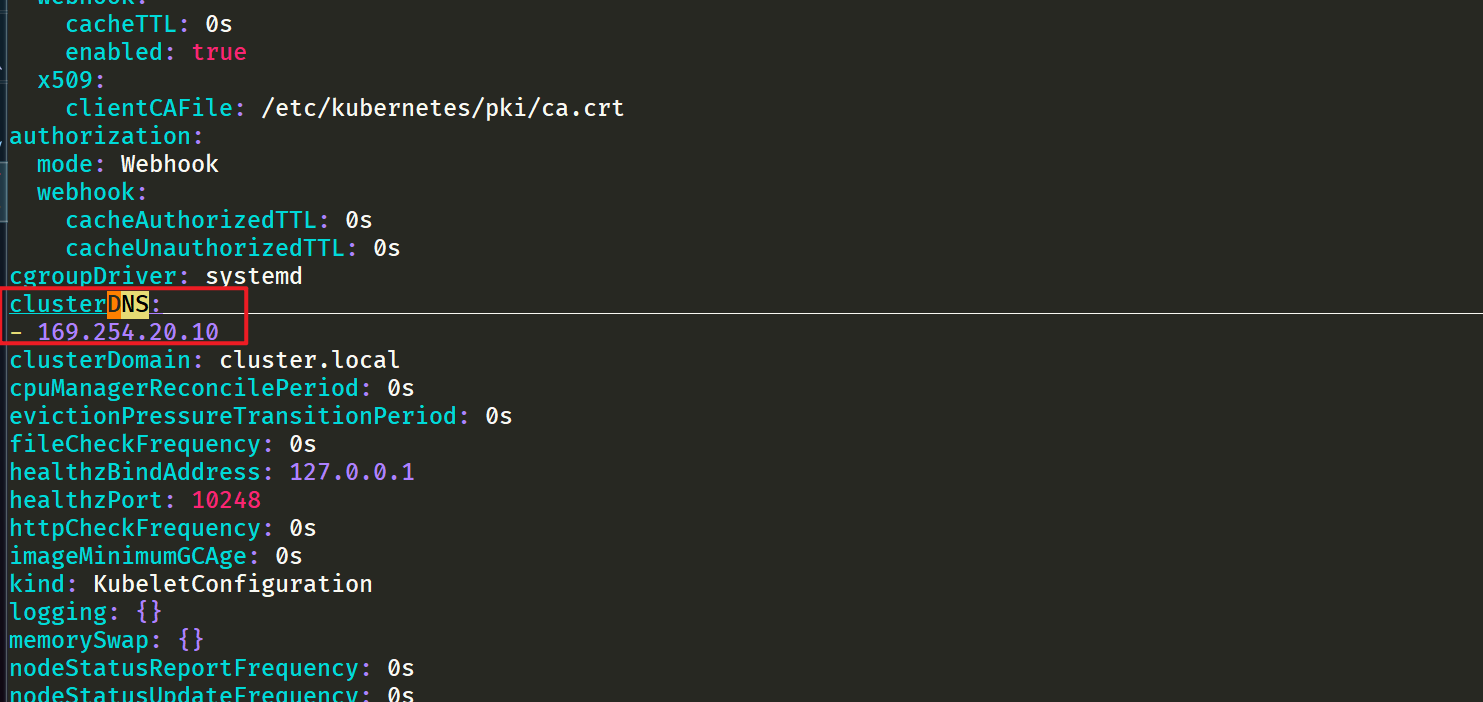
Note: all nodes should be configured: 💖
After node local DNS is installed and configured, we can deploy a new Pod to verify the following:
[root@master1 ~]#vim test-node-local-dns.yaml
# test-node-local-dns.yaml
apiVersion: v1
kind: Pod
metadata:
  name: test-node-local-dns
spec:
  containers:
  - name: local-dns
    image: busybox
    command: ["/bin/sh", "-c", "sleep 60m"]
Direct deployment:
[root@master1 ~]#vim test-node-local-dns.yaml
[root@master1 ~]#kubectl apply -f test-node-local-dns.yaml
pod/test-node-local-dns created
[root@master1 ~]#kubectl exec -it test-node-local-dns -- sh
/ # cat /etc/resolv.conf
search default.svc.cluster.local svc.cluster.local cluster.local
nameserver 169.254.20.10
options ndots:5
/ #
We can see that the nameserver has become 169.254 20.10. Of course, for the previous history, Pod needs to be rebuilt if it wants to use node local DNS.
Next, we rebuild the Pod of the previous stress test DNS and copy the testdns binary file to the Pod again:
[root@master1 ~]#kubectl delete -f nginx.yaml
deployment.apps "nginx" deleted
[root@master1 ~]#kubectl apply -f nginx.yaml
deployment.apps/nginx created
[root@master1 ~]#kubectl get po
NAME                     READY   STATUS    RESTARTS   AGE
nginx-5d59d67564-kgd4q   1/1     Running   0          22s
nginx-5d59d67564-lxnt2   1/1     Running   0          22s
test-node-local-dns      1/1     Running   0          5m50s

[root@master1 ~]#kubectl cp go/testdns nginx-5d59d67564-kgd4q:/root
[root@master1 ~]#kubectl exec -it nginx-5d59d67564-kgd4q -- bash
root@nginx-5d59d67564-kgd4q:/# cd /root/
root@nginx-5d59d67564-kgd4q:~# ls
testdns
root@nginx-5d59d67564-kgd4q:~# cat /etc/resolv.conf
search default.svc.cluster.local svc.cluster.local cluster.local
nameserver 169.254.20.10
options ndots:5
root@nginx-5d59d67564-kgd4q:~#

#Own test data this time
#Pressure measurement again
#Let's start with 200 concurrent tests and test them three times
root@nginx-5d59d67564-kgd4q:~# ./testdns -host nginx-service.default -c 200 -d 30 -l 5000
request count: 47344
error count: 0
request time: min(1ms) max(976ms) avg(125ms) timeout(0n)
root@nginx-5d59d67564-kgd4q:~# ./testdns -host nginx-service.default -c 200 -d 30 -l 5000
request count: 49744
error count: 0
request time: min(1ms) max(540ms) avg(118ms) timeout(0n)
root@nginx-5d59d67564-kgd4q:~# ./testdns -host nginx-service.default -c 200 -d 30 -l 5000
request count: 55929
error count: 0
request time: min(2ms) max(463ms) avg(105ms) timeout(0n)
root@nginx-5d59d67564-kgd4q:~#
root@nginx-5d59d67564-kgd4q:~#


#Another 1000 concurrent tests, three times
root@nginx-5d59d67564-kgd4q:~# ./testdns -host nginx-service.default -c 1000 -d 30 -l 5000
request count: 42177
error count: 0
request time: min(16ms) max(2627ms) avg(690ms) timeout(0n)
root@nginx-5d59d67564-kgd4q:~# ./testdns -host nginx-service.default -c 1000 -d 30 -l 5000
request count: 45456
error count: 0
request time: min(29ms) max(2484ms) avg(650ms) timeout(0n)
root@nginx-5d59d67564-kgd4q:~# ./testdns -host nginx-service.default -c 1000 -d 30 -l 5000
request count: 45713
error count: 0
request time: min(3ms) max(1698ms) avg(647ms) timeout(0n)
root@nginx-5d59d67564-kgd4q:~#
#Note: the effect of this 1000 concurrent test is obvious
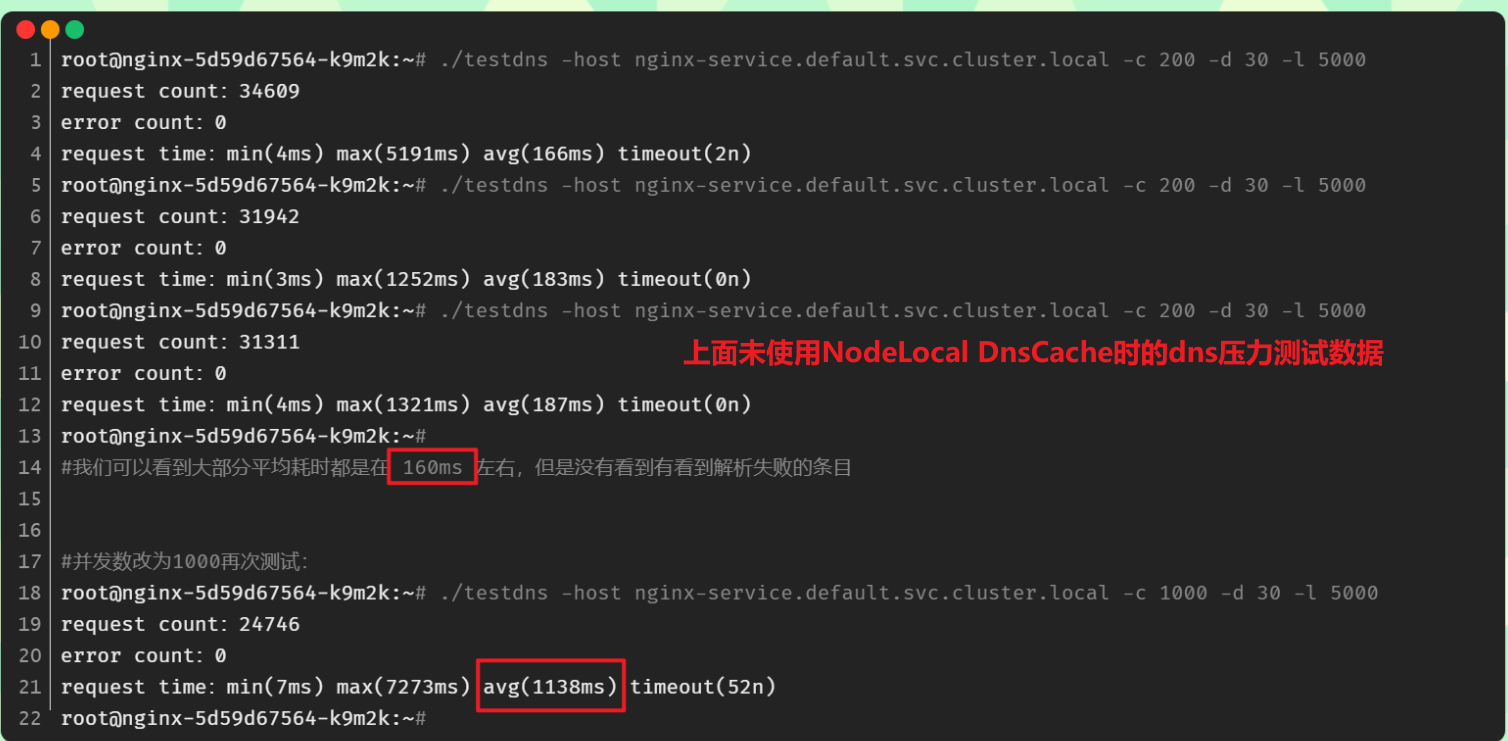
😘 Test data of teacher's notes:
# Copy to reconstructed Pod
$ kubectl cp testdns svc-demo-546b7bcdcf-b5mkt:/root
$ kubectl exec -it svc-demo-546b7bcdcf-b5mkt -- /bin/bash
root@svc-demo-546b7bcdcf-b5mkt:/# cat /etc/resolv.conf
nameserver 169.254.20.10  # You can see that the nameserver has changed
search default.svc.cluster.local svc.cluster.local cluster.local
options ndots:5
root@svc-demo-546b7bcdcf-b5mkt:/# cd /root
root@svc-demo-546b7bcdcf-b5mkt:~# ls
testdns
# Re perform the pressure test
root@svc-demo-546b7bcdcf-b5mkt:~# ./testdns -host nginx-service.default -c 200 -d 30 -l 5000
request count: 16297
error count: 0
request time: min(2ms) max(5270ms) avg(357ms) timeout(8n)
root@svc-demo-546b7bcdcf-b5mkt:~# ./testdns -host nginx-service.default -c 200 -d 30 -l 5000
request count: 15982
error count: 0
request time: min(2ms) max(5360ms) avg(373ms) timeout(54n)
root@svc-demo-546b7bcdcf-b5mkt:~# ./testdns -host nginx-service.default -c 200 -d 30 -l 5000
request count: 25631
error count: 0
request time: min(3ms) max(958ms) avg(232ms) timeout(0n)
root@svc-demo-546b7bcdcf-b5mkt:~# ./testdns -host nginx-service.default -c 200 -d 30 -l 5000
request count: 23388
error count: 0
request time: min(6ms) max(1130ms) avg(253ms) timeout(0n)
From the above results, we can see that both the maximum resolution time and the average resolution time are much more efficient than the previous default CoreDNS. Therefore, we highly recommend deploying nodelocal dnschache in the online environment to improve the performance and reliability of DNS. The only disadvantage is that because LocalDNS uses the DaemonSet deployment mode, the service may be interrupted if the image needs to be updated (however, some third-party enhanced components can be used to realize in-situ upgrade to solve this problem, such as openkruise -Alibaba cloud is an open source enhancement suite.).
Alibaba cloud also recommends online deployment.
What the teacher did (just understand)
Modify local 1: image
Modify image address:
Default mirror address:
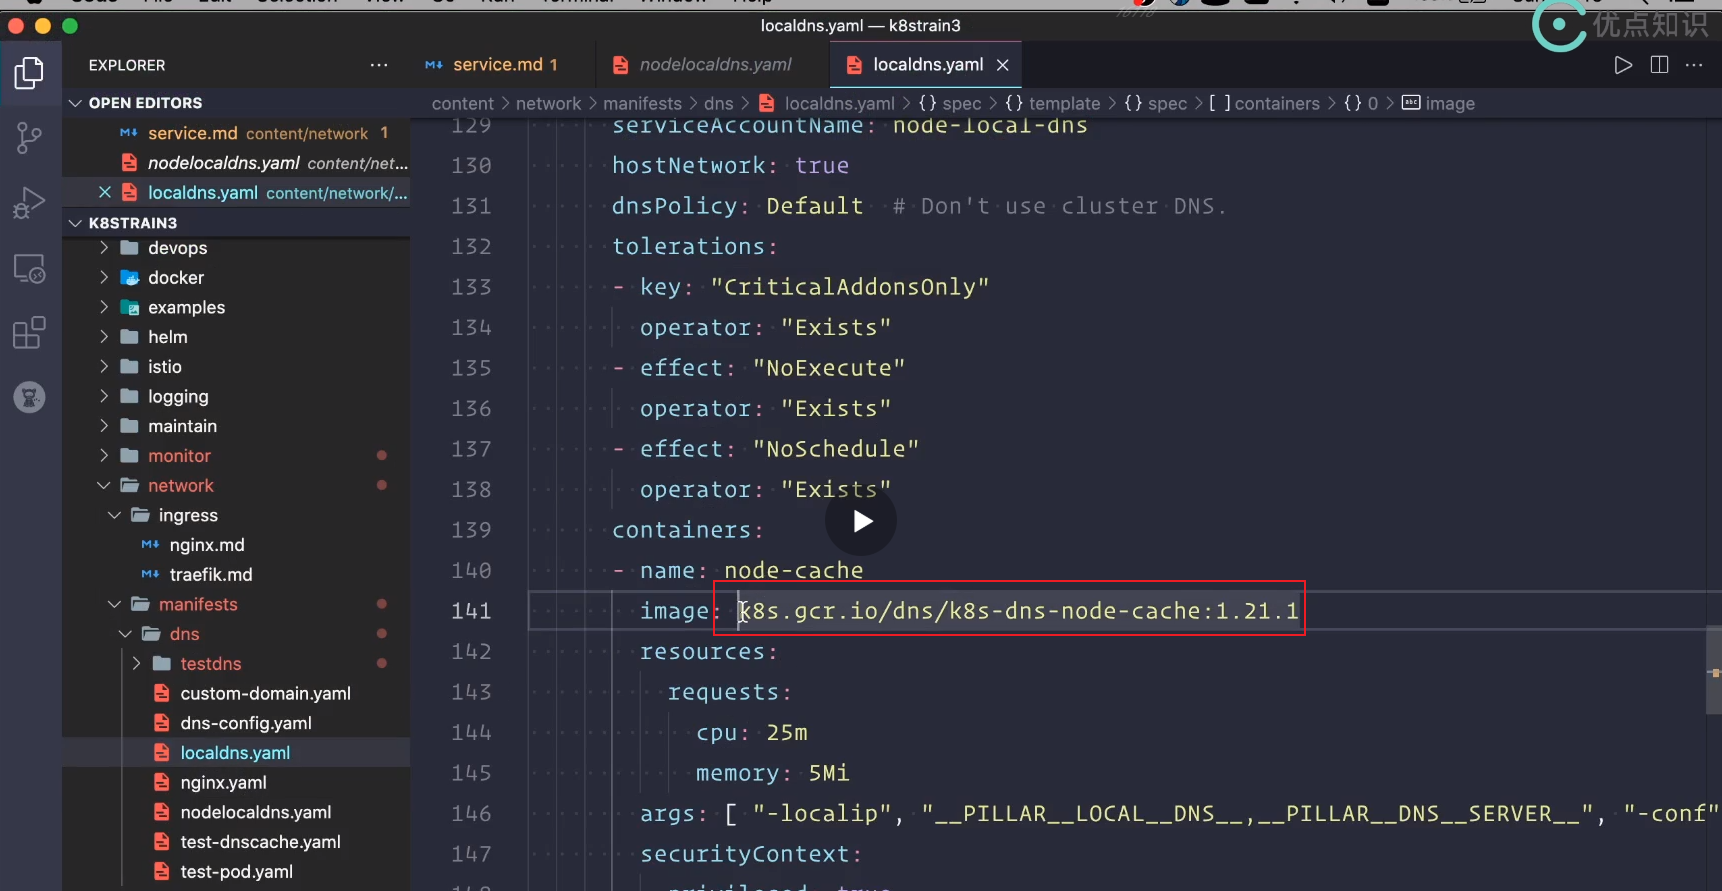
The teacher's address after image transfer:
Modify place 2: pay attention to these parameters
- __PILLAR__DNS__DOMAIN__
__ PILLAR__DNS__SERVER__ : The ClusterIP representing the Kube DNS Service can be obtained by the command kubectl get SVC - n Kube system | grep Kube DNS | awk '{print $3}' (here is 10.96.0.10)
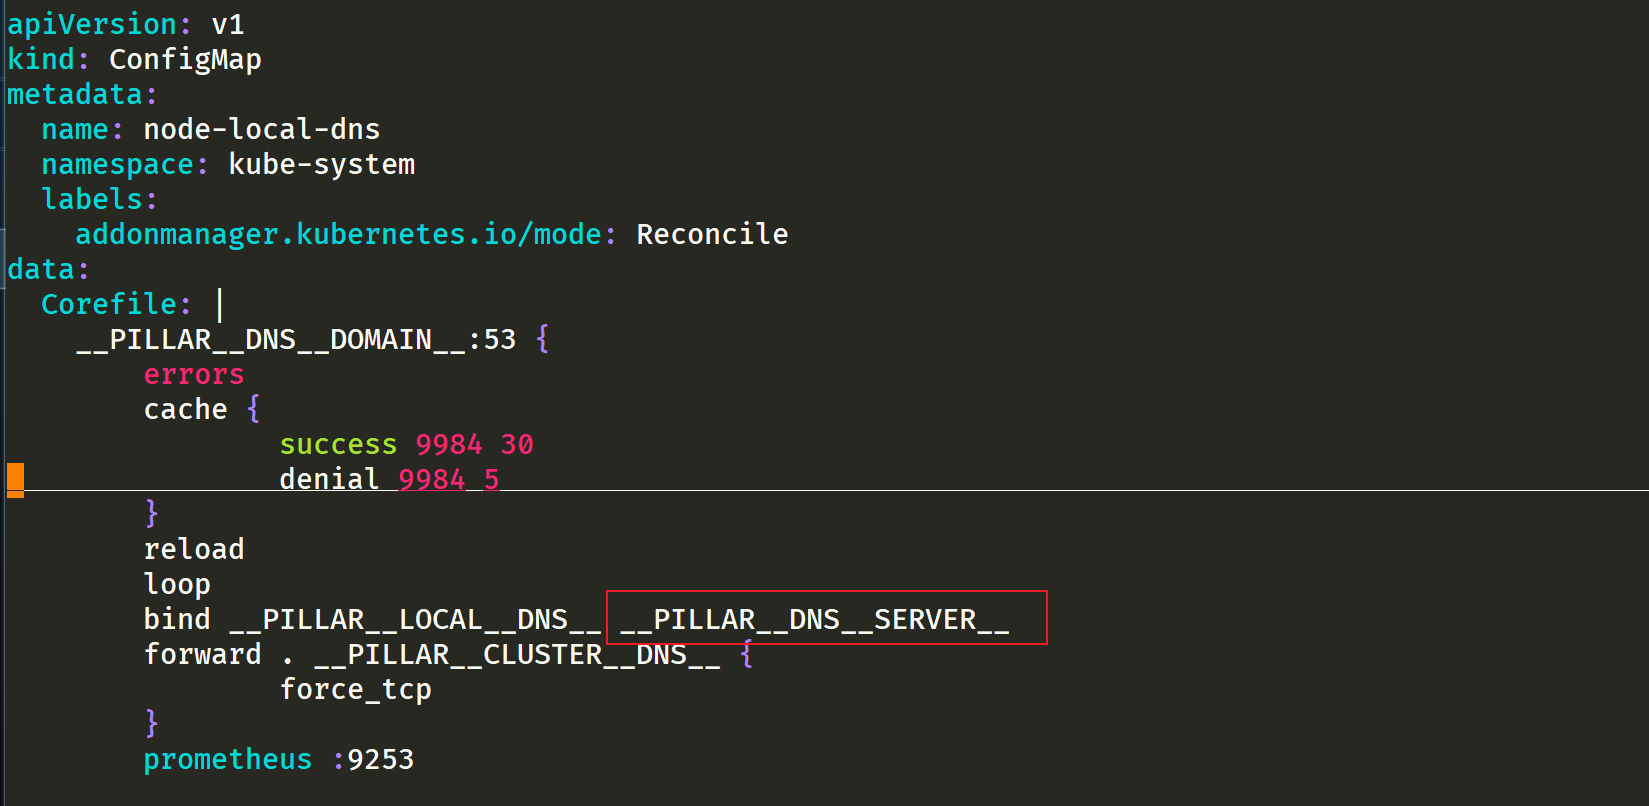
[root@master1 ~]#kubectl get svc -nkube-system |grep kube-dns
kube-dns         ClusterIP   10.96.0.10       <none>        53/UDP,53/TCP,9153/TCP   58d
[root@master1 ~]#kubectl get svc -nkube-system |grep kube-dns |awk '{print $3}'
10.96.0.10
[root@master1 ~]#
- __ PILLAR__LOCAL__DNS__: Indicates the local IP of dnschache. The default is 169.254 twenty point one zero
__ PILLAR__LOCAL__DNS__: Indicates the local IP of dnschache. The default is 169.254 twenty point one zero
This is equivalent to a virtual ip, and a relay will be made later.
- __ PILLAR__DNS__DOMAIN__: Indicates the cluster domain. The default is cluster local
- be careful
There are two other parameters__ PILLAR__CLUSTER__DNS__ And__ PILLAR__UPSTREAM__SERVERS__, These two parameters are mirrored through 1.15 Version 16 is used for automatic configuration, and the corresponding values are from the ConfigMap of Kube DNS and the customized Upstream Server configuration.
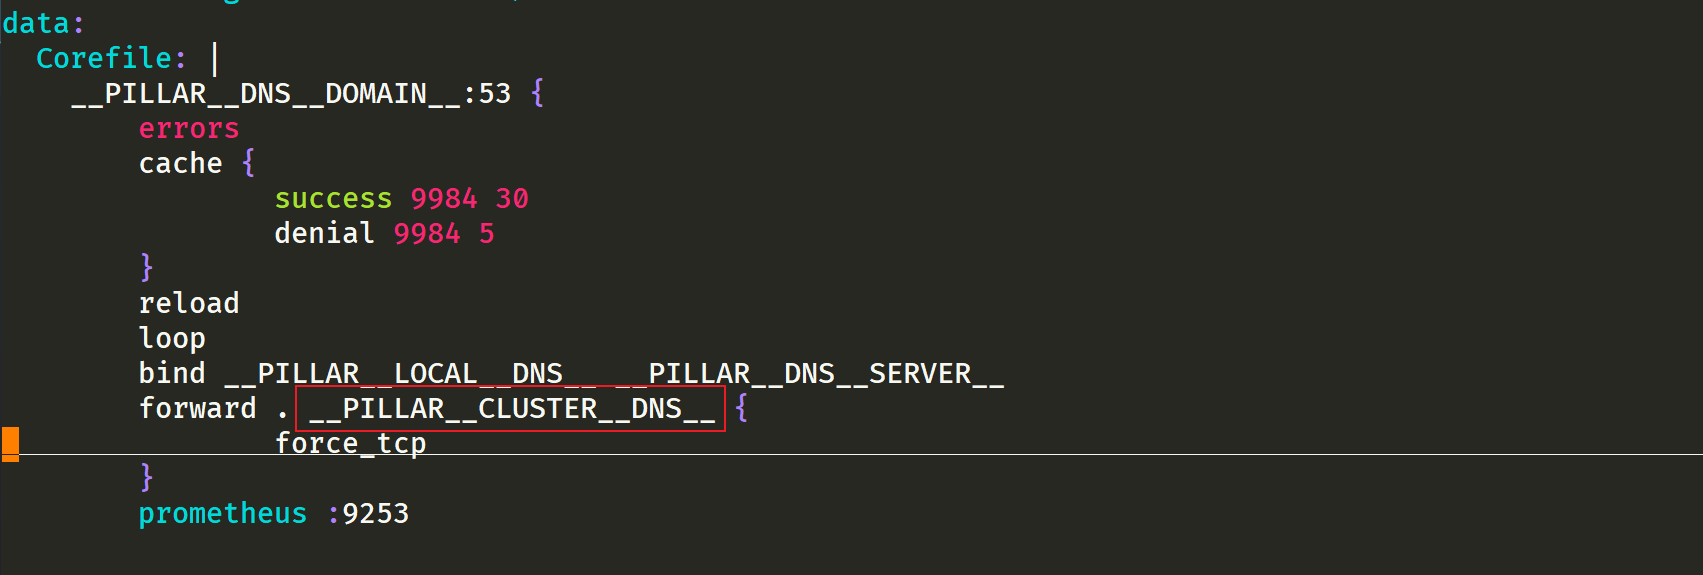


be careful
📍 Note 1: go environment installation and program compilation
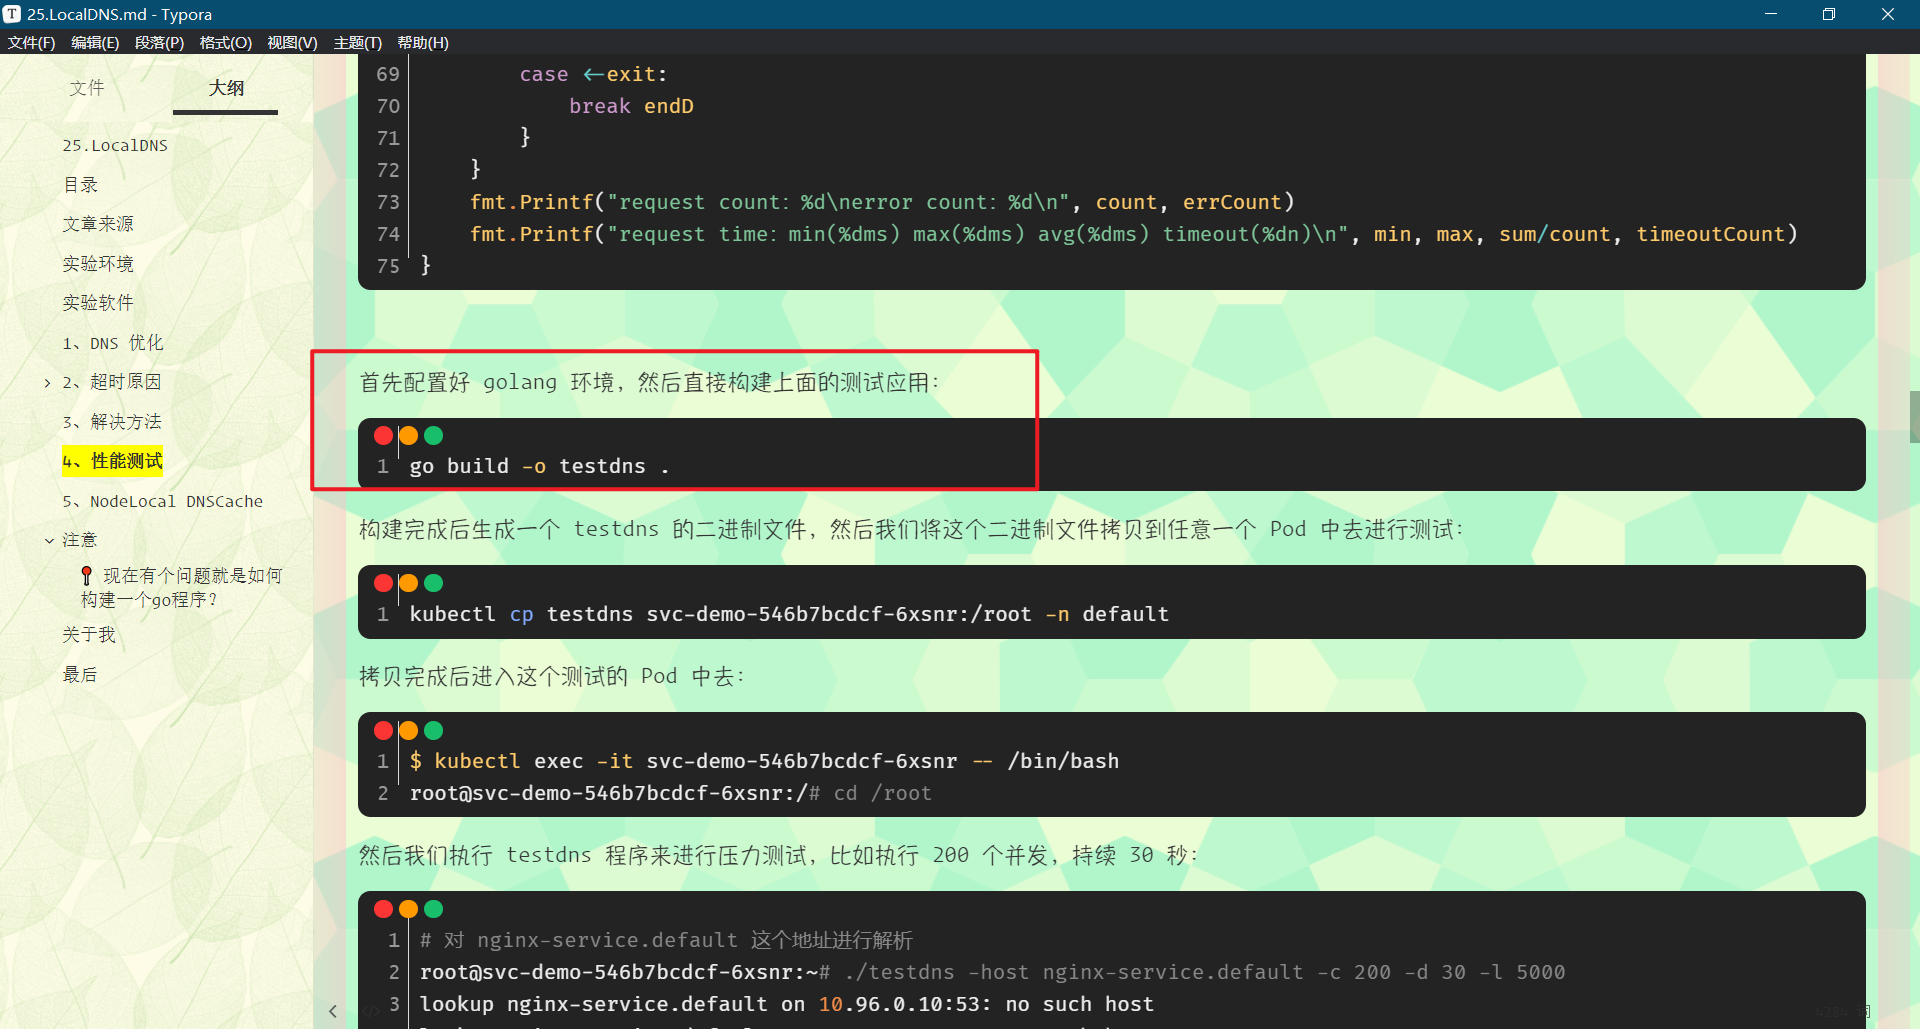
I learned some go basics myself. After installing the go environment on master01, copy the code and run it. It is found that an error is reported, as follows:
Missing go Mod file. I am now using the new version: go version go1 16.2 linux/amd64

Solution: perfect solution.
Create go. In the parent directory of the code Mod file
[root@master1 go]#pwd
/root/go
[root@master1 go]#ls
main.go
[root@master1 go]#cd /root
[root@master1 ~]#go mod init module #Create go. In the parent directory of the code Mod file
go: creating new go.mod: module module
go: to add module requirements and sums:
        go mod tidy
[root@master1 ~]#ll go.mod
-rw-r--r-- 1 root root 23 Dec 28 13:17 go.mod
[root@master1 ~]#cd go/
[root@master1 go]#go build -o testdns .
[root@master1 go]#ll -h testdns
-rwxr-xr-x 1 root root 2.8M Dec 28 13:17 testdns
[root@master1 go]#
This code is built under linux. Of course, it can be built under windows.
Or it can be compiled in the windows go environment:
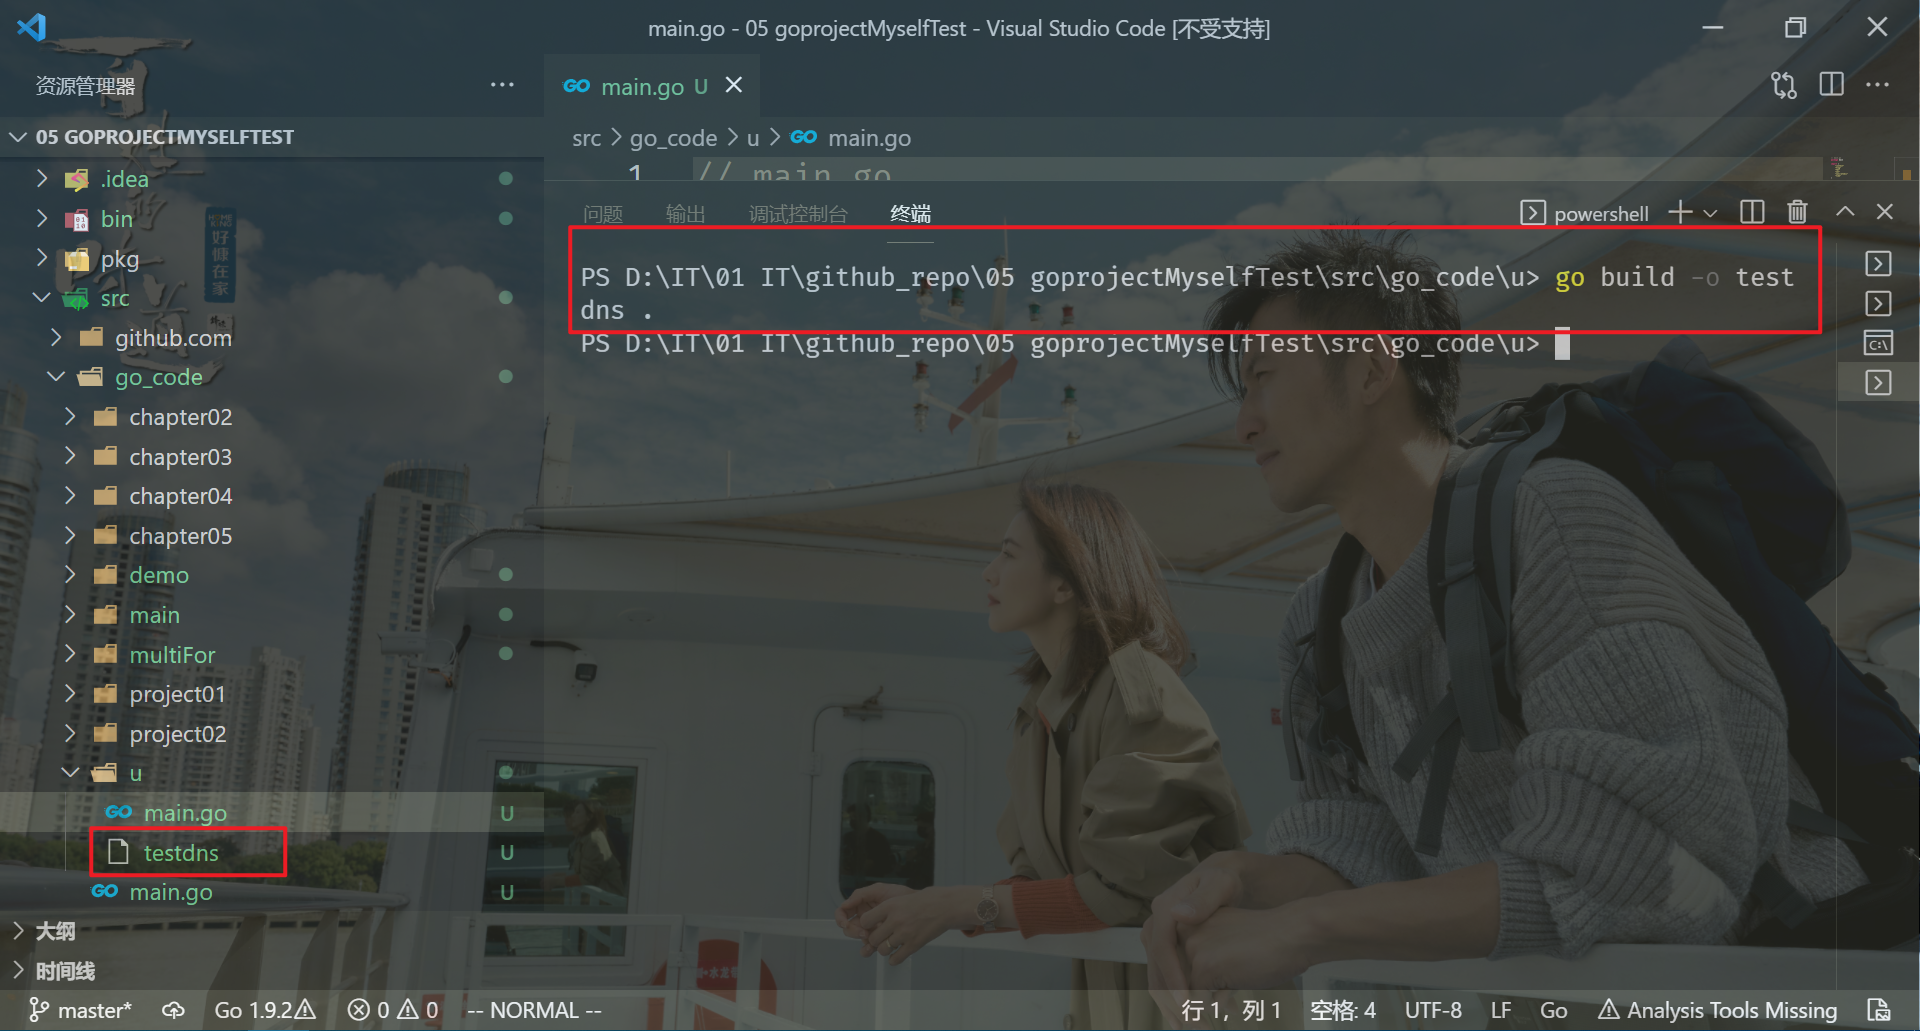
No matter in linux environment, windows environment, old version or new version go environment, you only need to write one copy of the code.
⚠️ Note: did the teacher say that if he compiled the code directly under the mac, the generated binary file was only suitable for the mac.
Because our pod runs under linux, we need to specify the recompilation code under linux.

So the question is, should I also specify this parameter for the code I build under windows?? 🤣
This time, you can directly use the teacher's command to compile under linux:
[root@master1 go]#pwd
/root/go
[root@master1 go]#ls
main.go
[root@master1 go]#GOOS=linux GOARCH=amd64 go build -o testdns .
[root@master1 go]#ll
total 2840
-rw-r--r-- 1 root root    1904 Dec 27 15:58 main.go
-rwxr-xr-x 1 root root 2903854 Dec 28 15:13 testdns
[root@master1 go]#
Here, the pressure measurement software testdns is ready for you and can be used directly.

⚠️ There is another problem: the go environment under linux does not work. You need to go to source again. Remember that there was no problem before. There was a problem with the configuration this time. It's strange... Check it later.
📍 Note 2: about image transfer
[root@master1 ~]#vim nodelocaldns.yaml
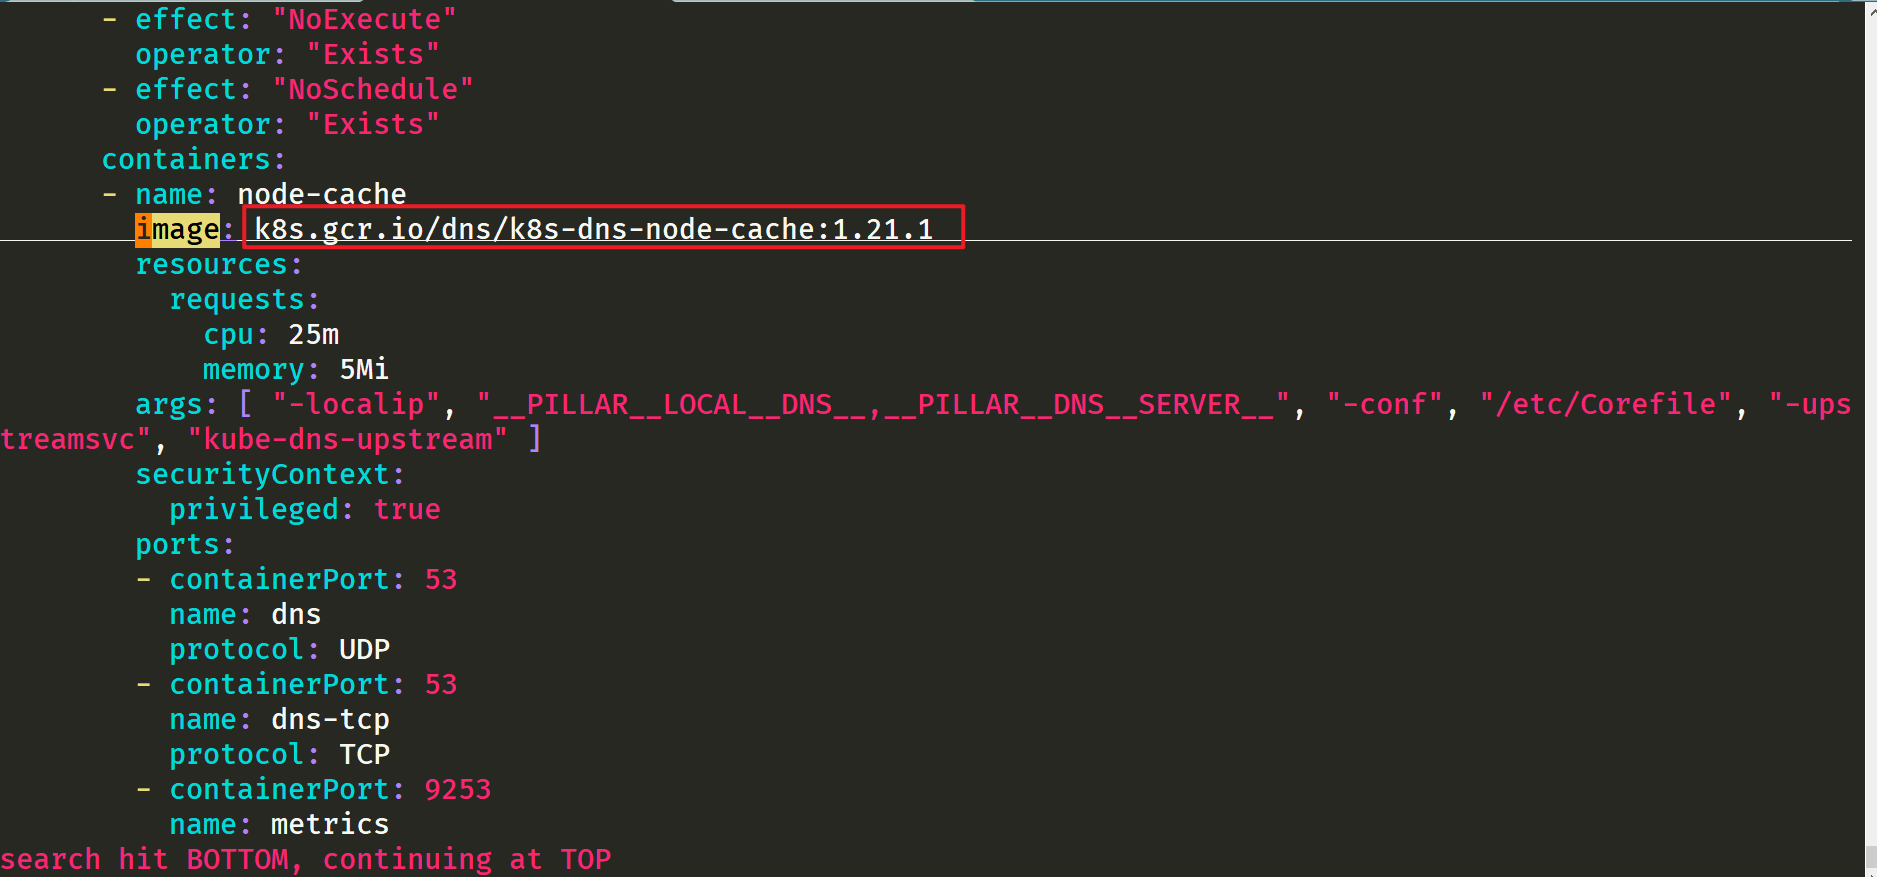
We need to replace this address. We need to make an image transfer.
Go to the following website:
https://katacoda.com/
katacoda.com is also a good learning website.
Log in to the website with github account:
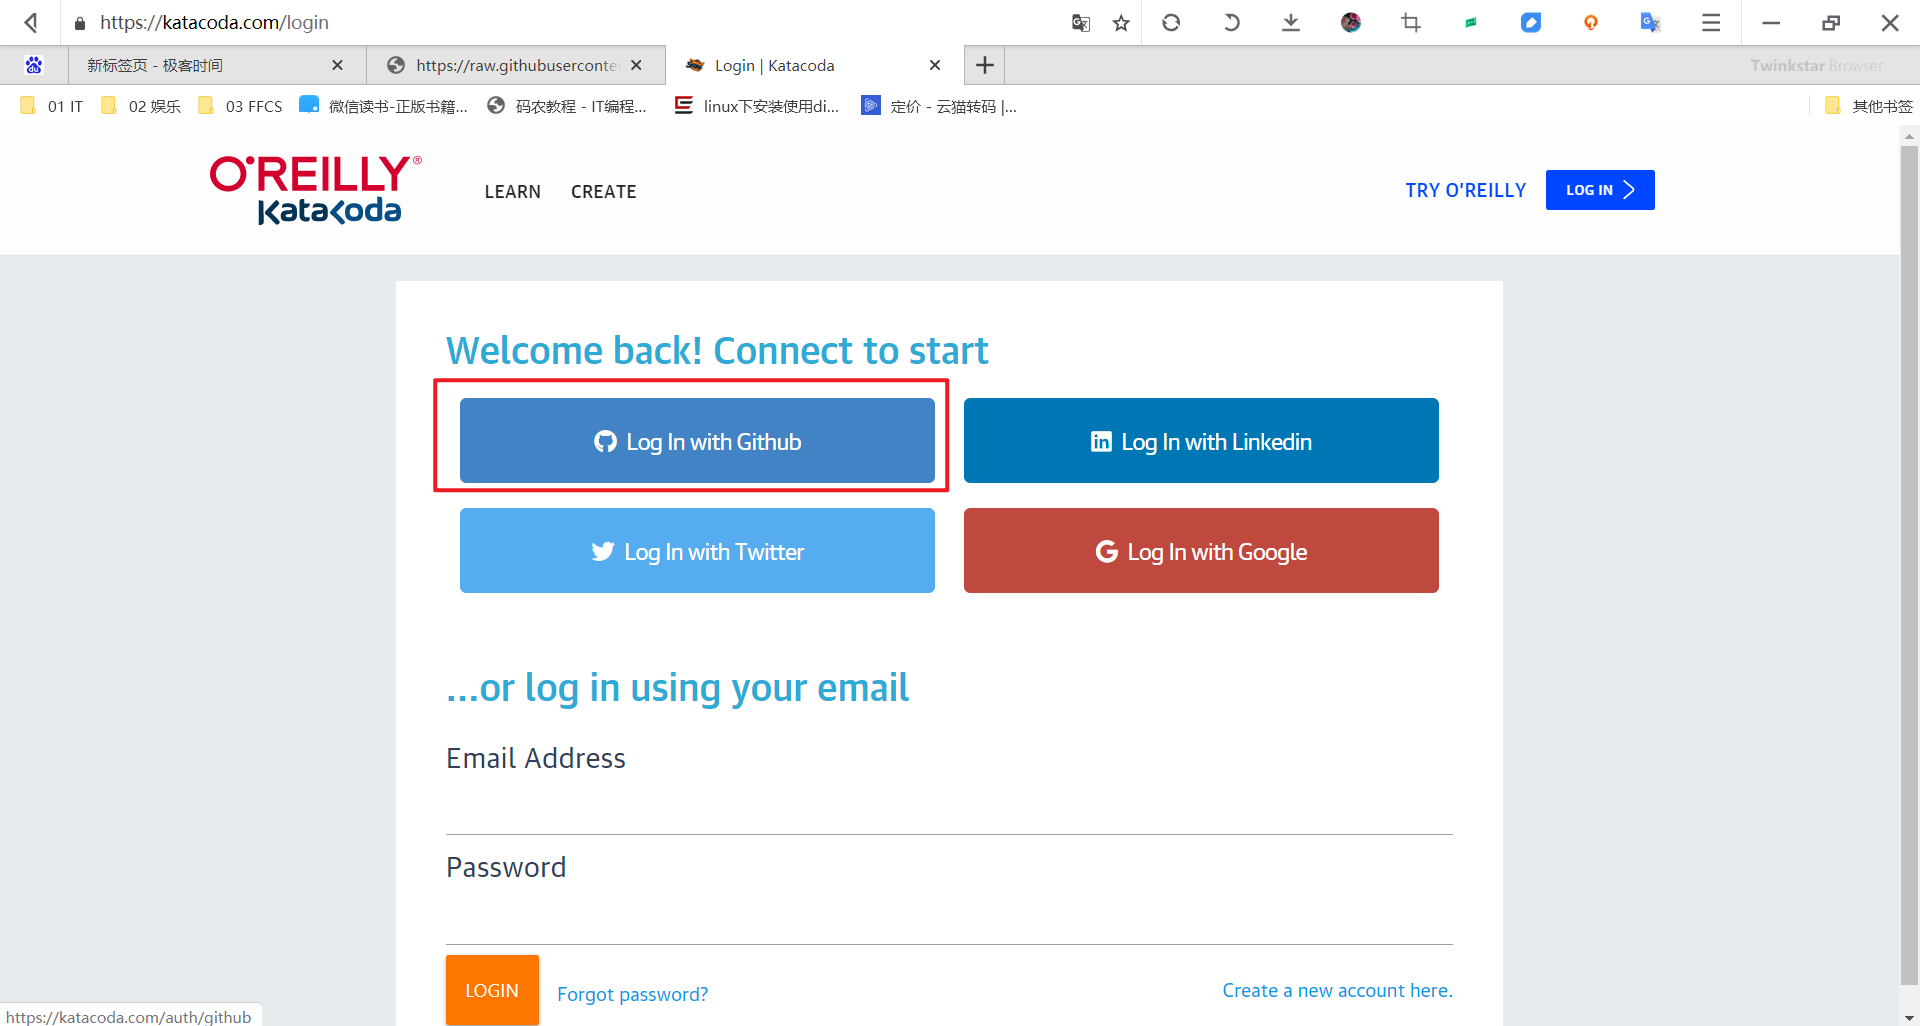


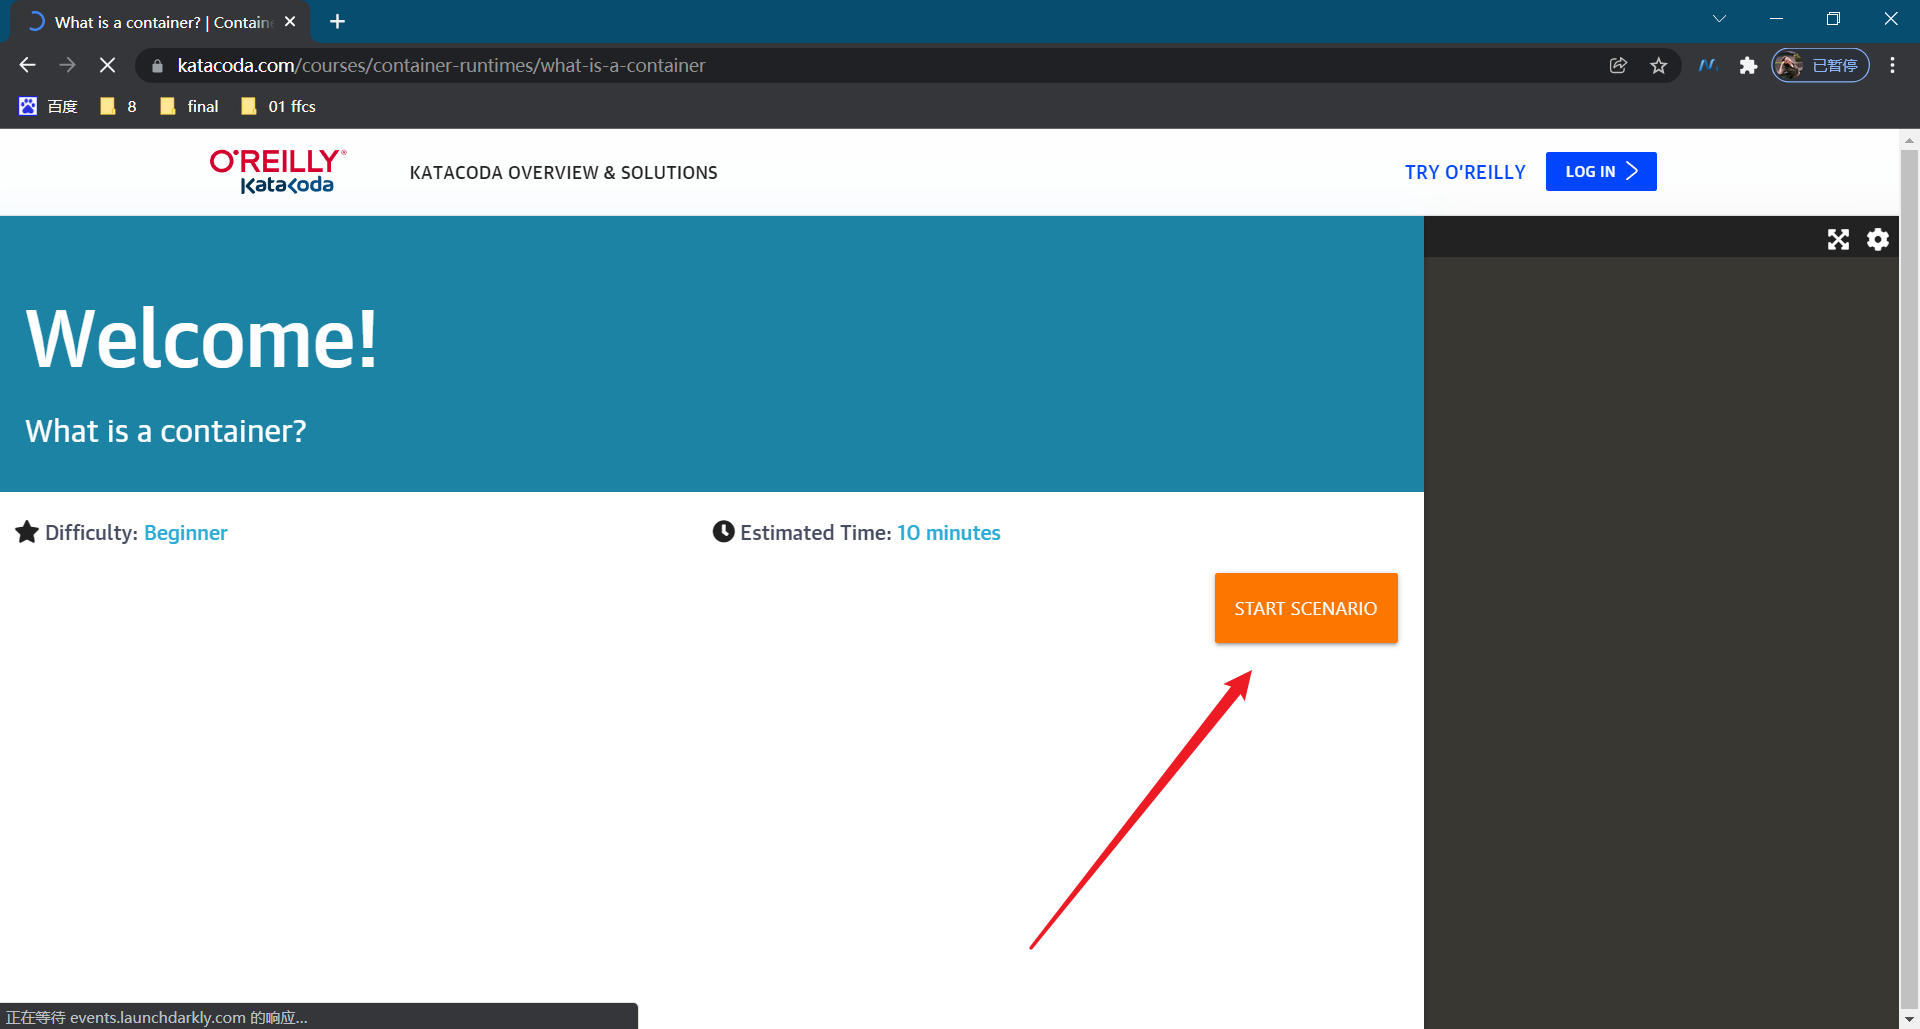
Is this a foreign website or a slow one
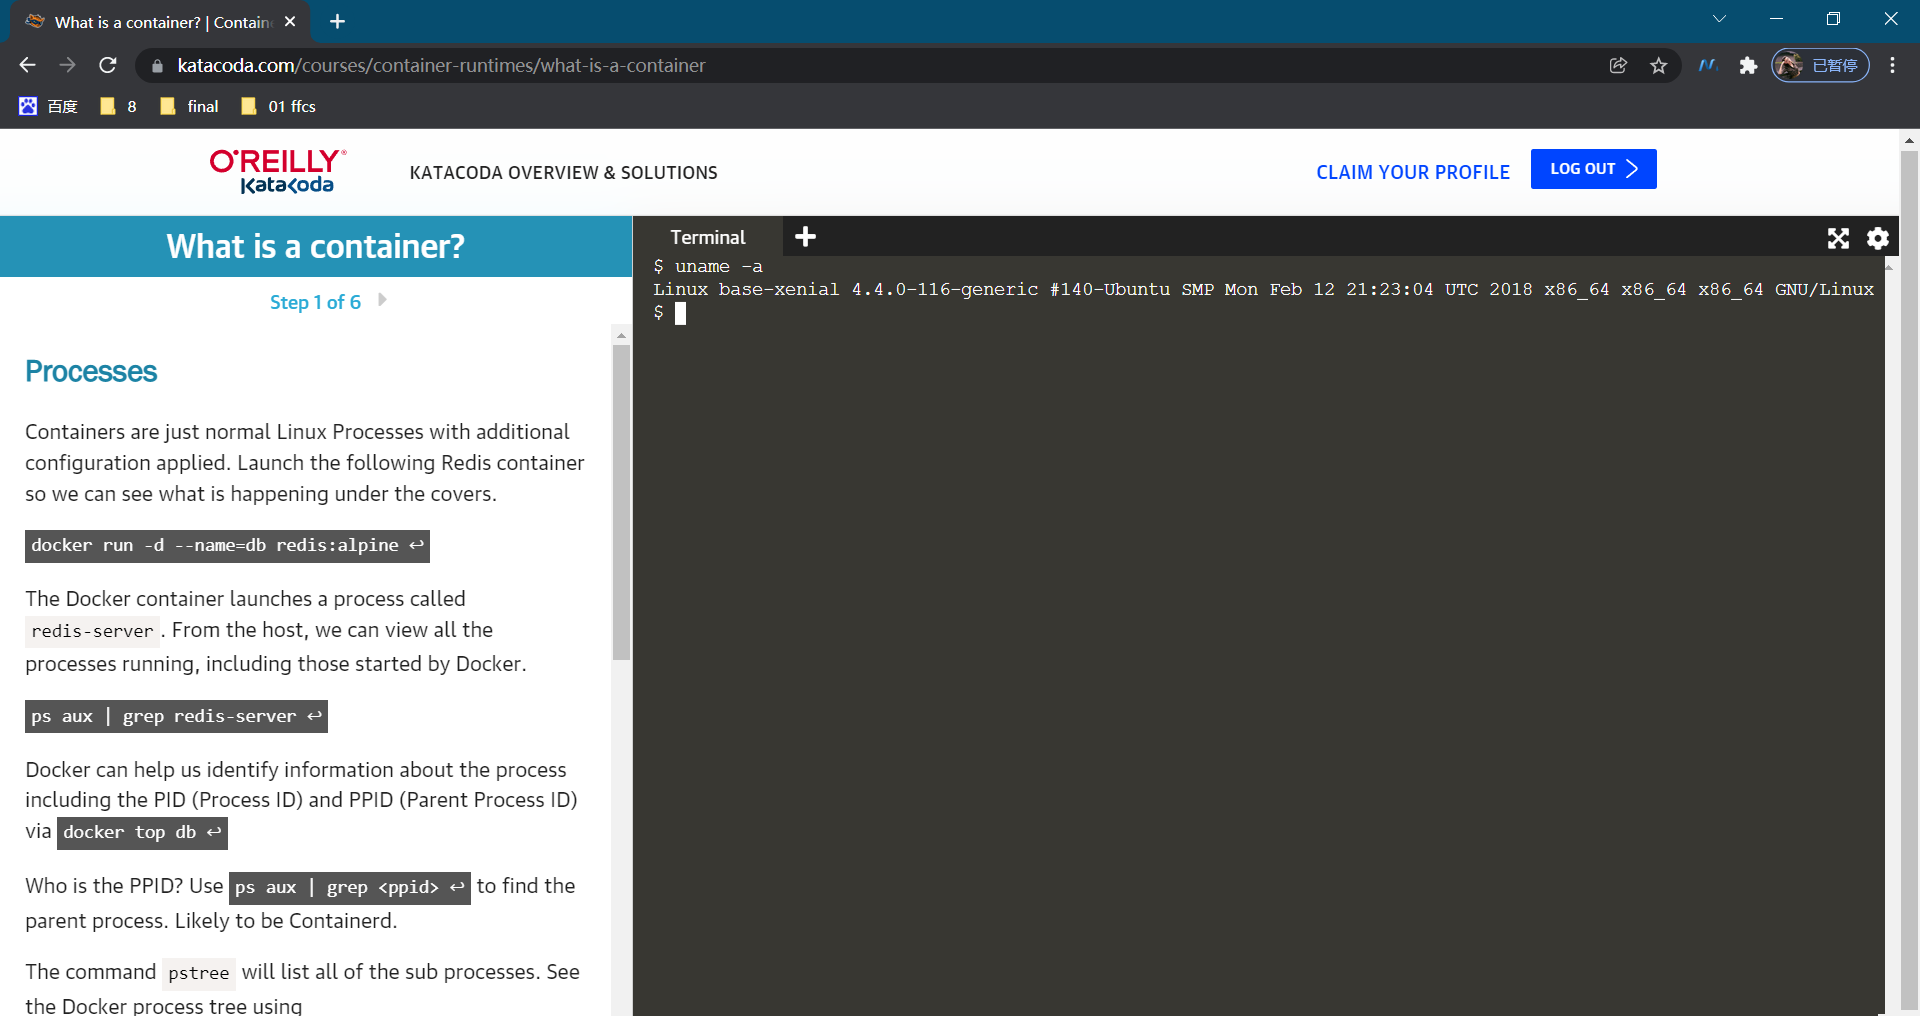
Use scientific Internet here:
Here it may also serve as a pod or container.
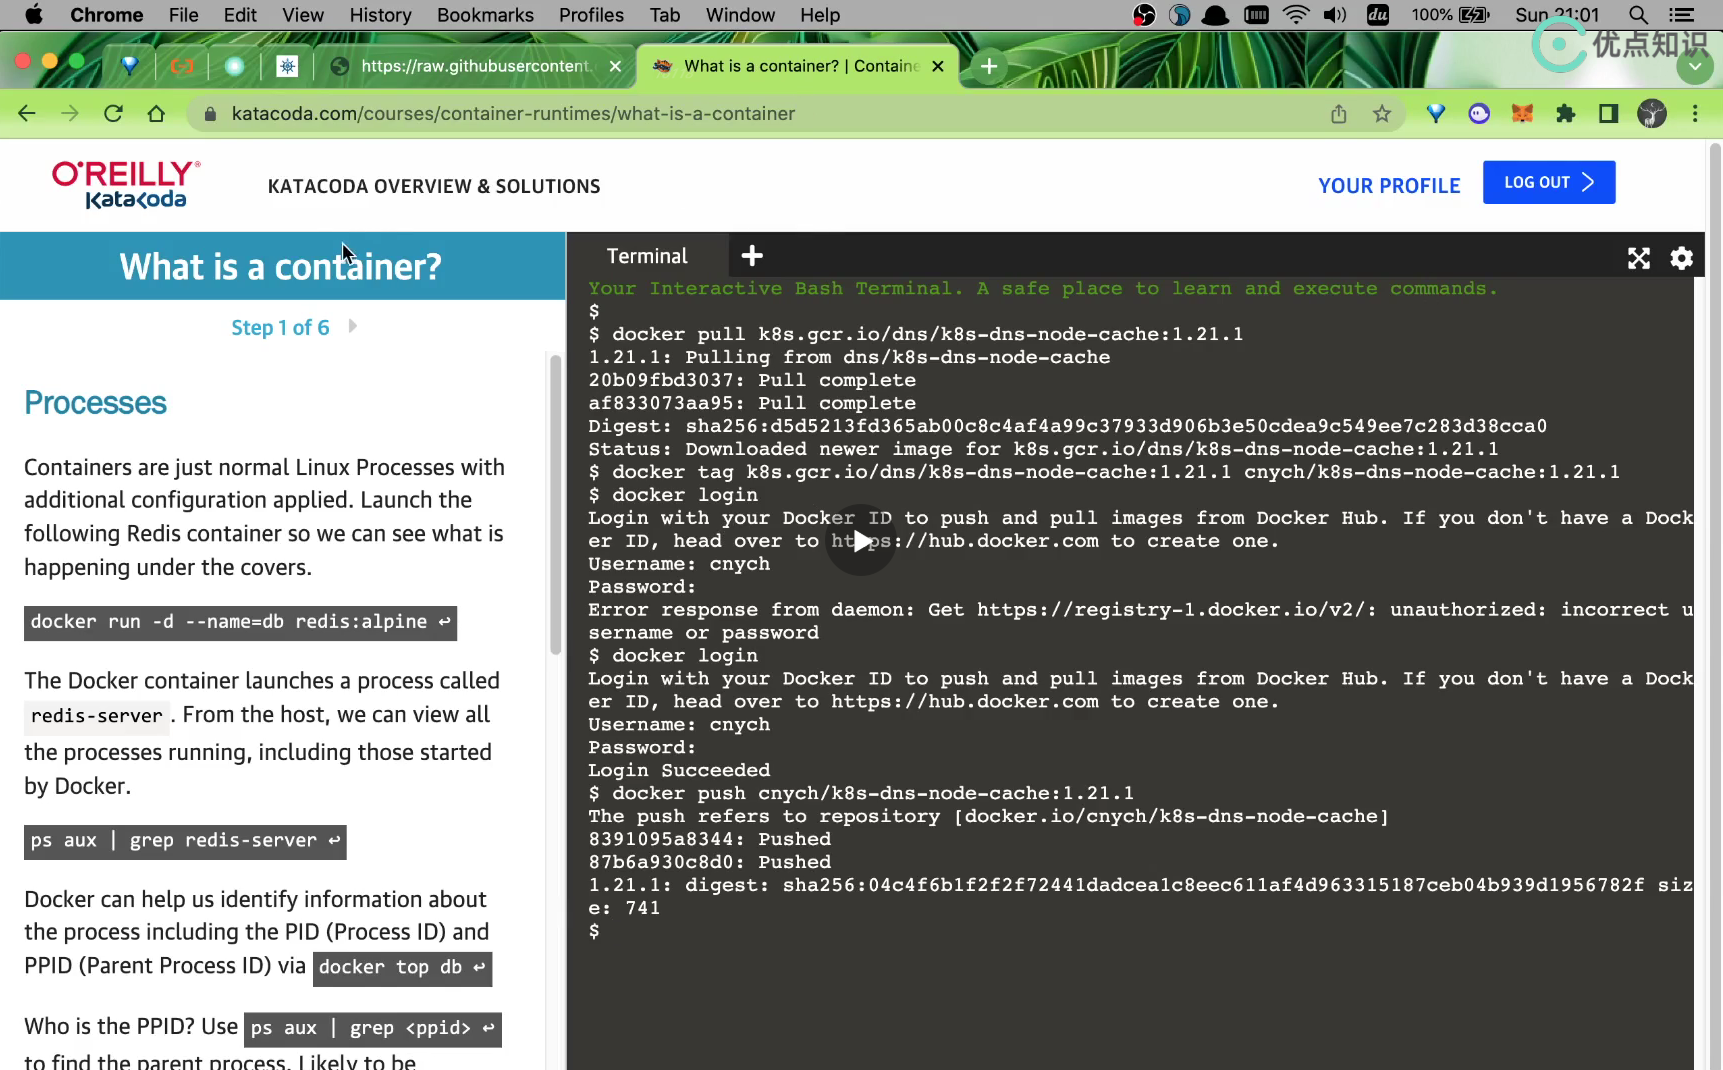
We put k8s gcr. io/dns/k8s-dns-node-cache:1.21. 1. Pull down the mirror image:
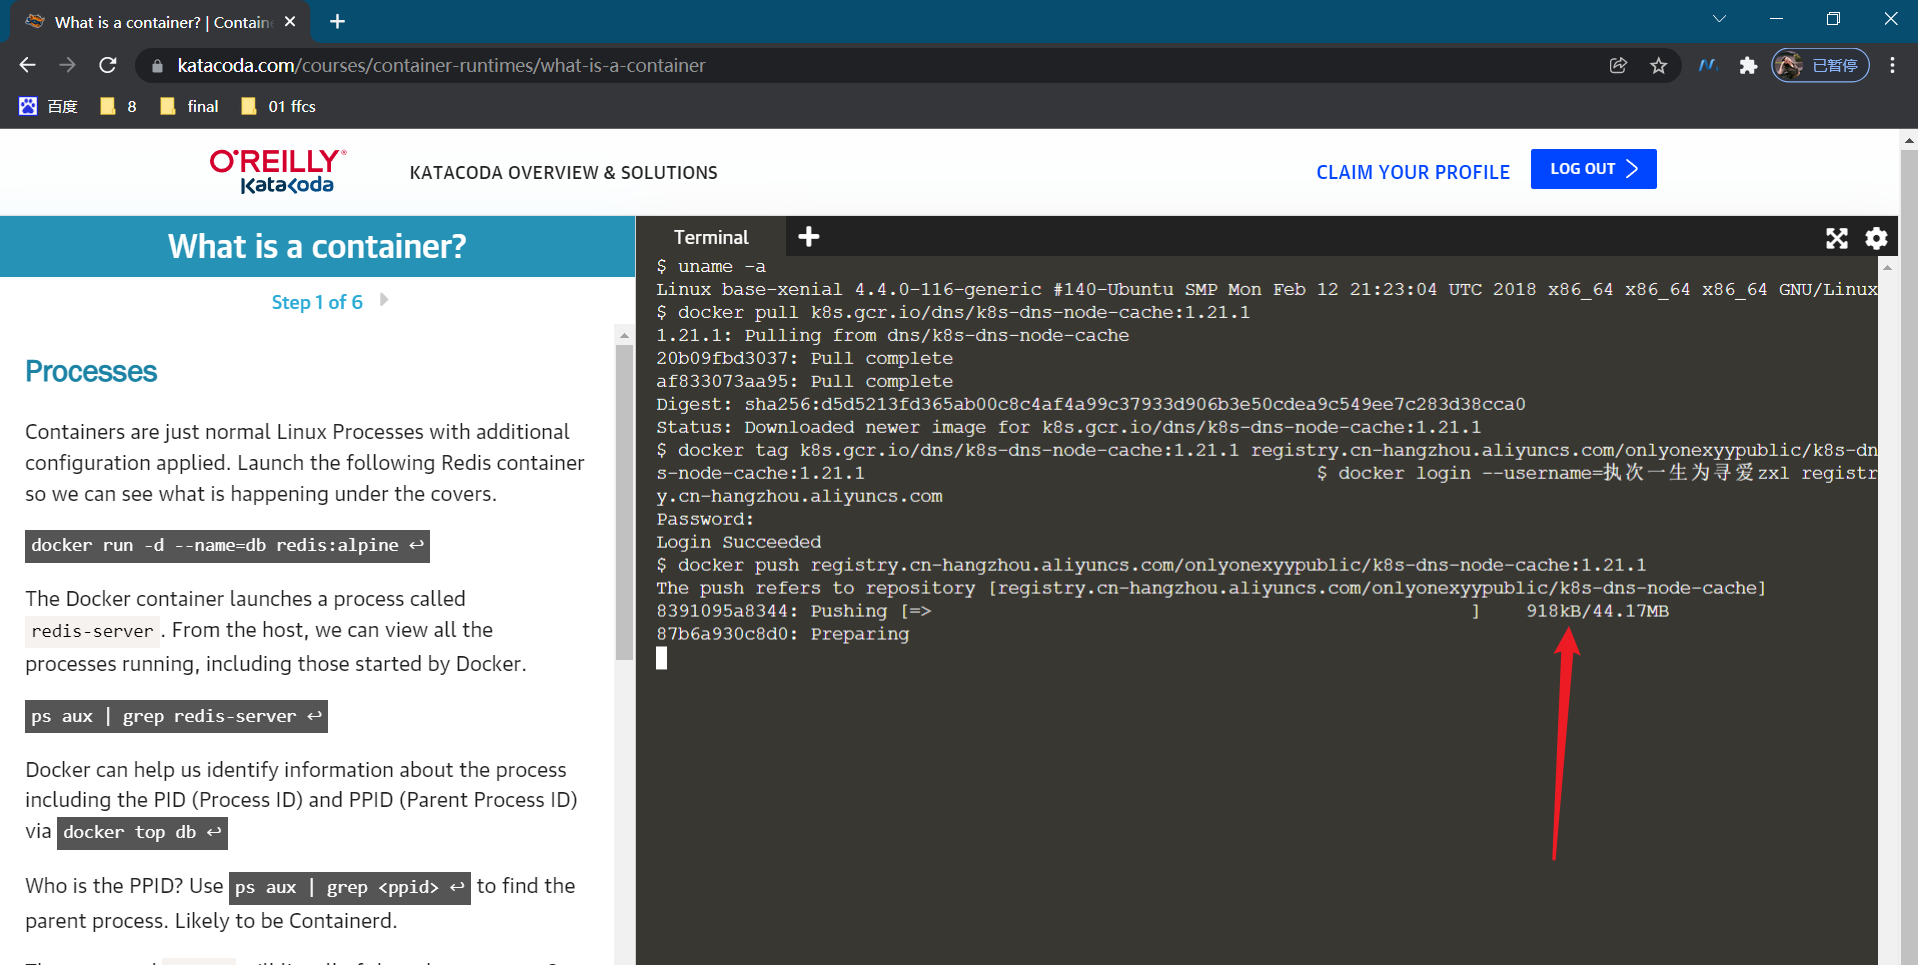
This push is too slow.... 😥😥 But why is the teacher so fast? Is it because the teacher's image warehouse address is globally accessible and has done domain name conversion (cdn accelerated)?
- How to transfer an image?
[root@xyy admin]#docker pull k8s.gcr.io/dns/k8s-dns-node-cache:1.21.1
Error response from daemon: Get "https://k8s.gcr.io/v2/": net/http: request canceled while waiting for connection (Client.Timeout exceeded while awaiting headers)
[root@xyy admin]#
Note that the image address k8s DNS node cache: 1.21 1. There is no source in dockerhub warehouse, nor in Alibaba's image warehouse.
- I think the speed of push is so slow...
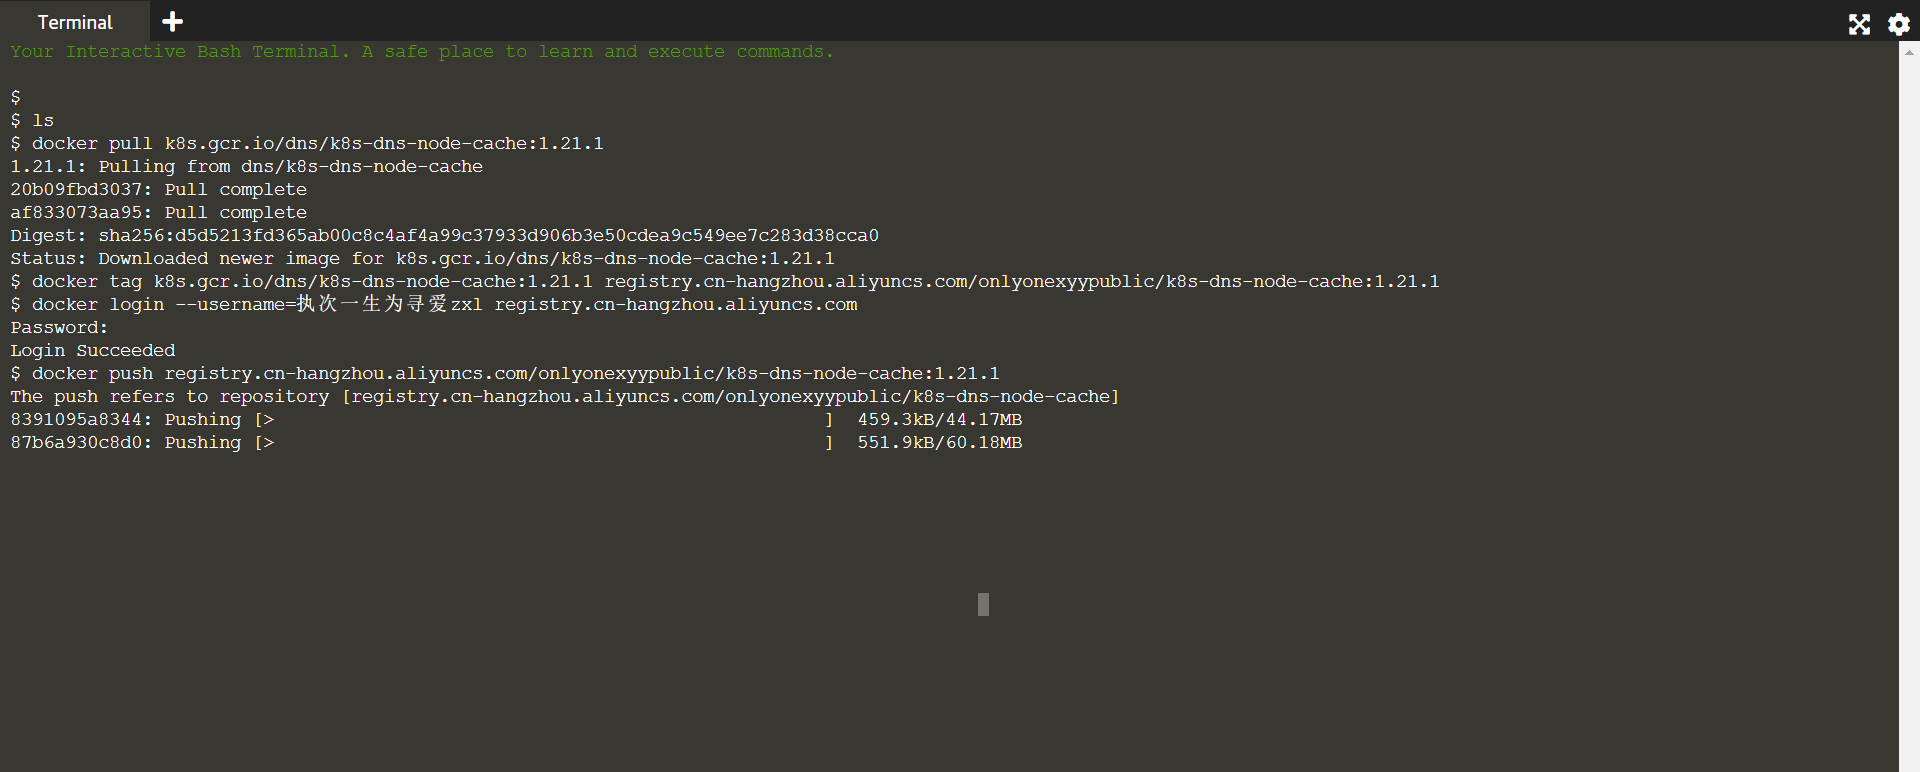
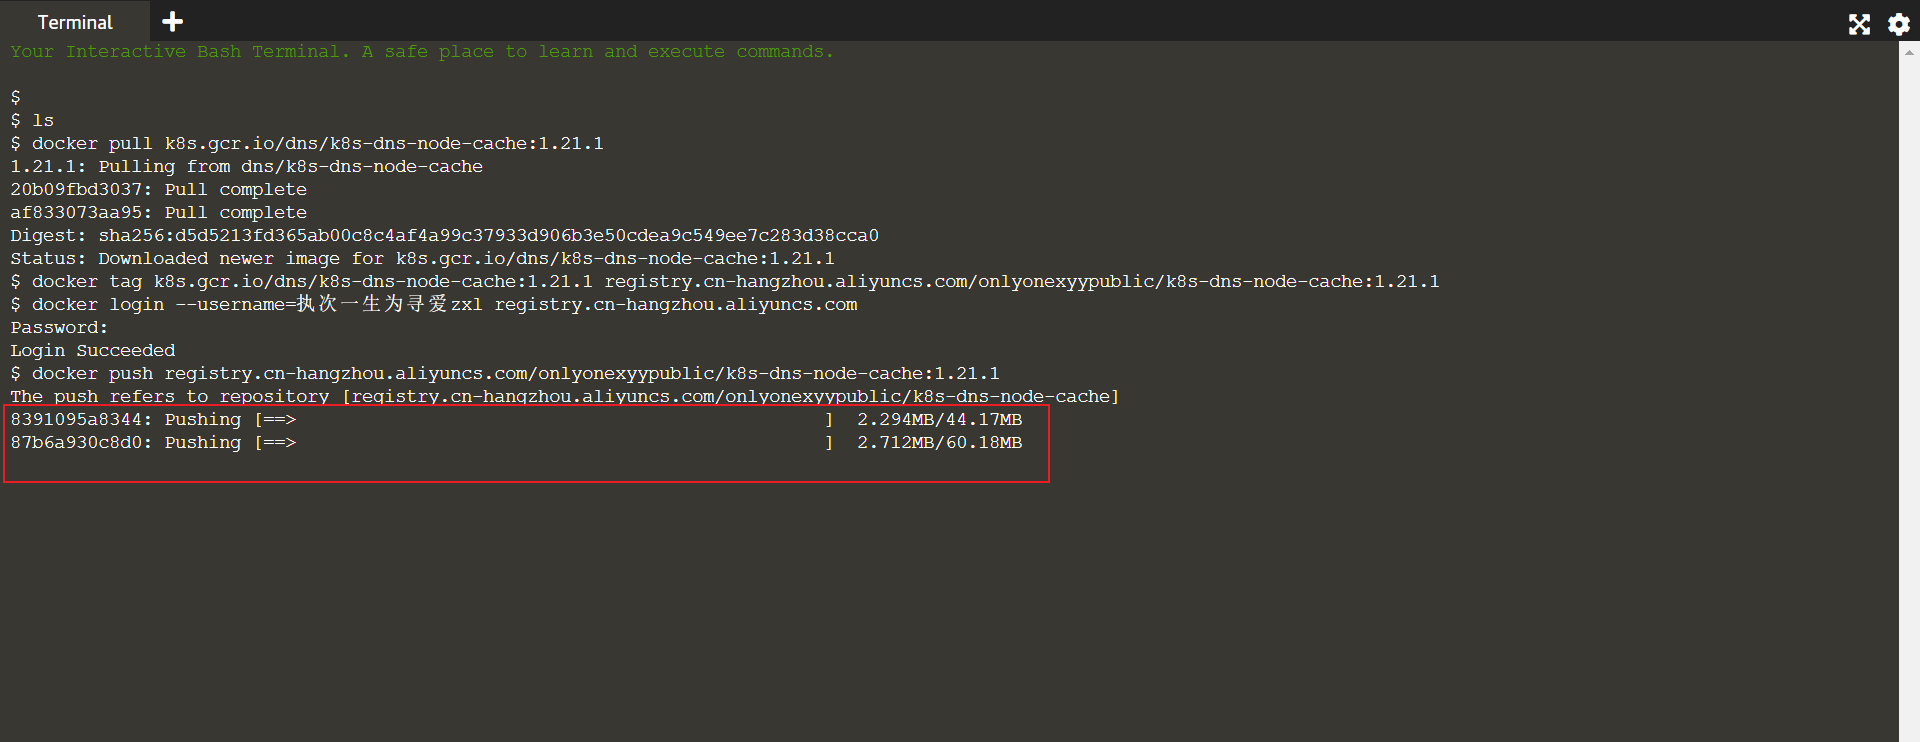
Note: the current time is 05:22:35, December 29, 2021. The speed of this push will be faster 😘, f**k, but the push failed later...
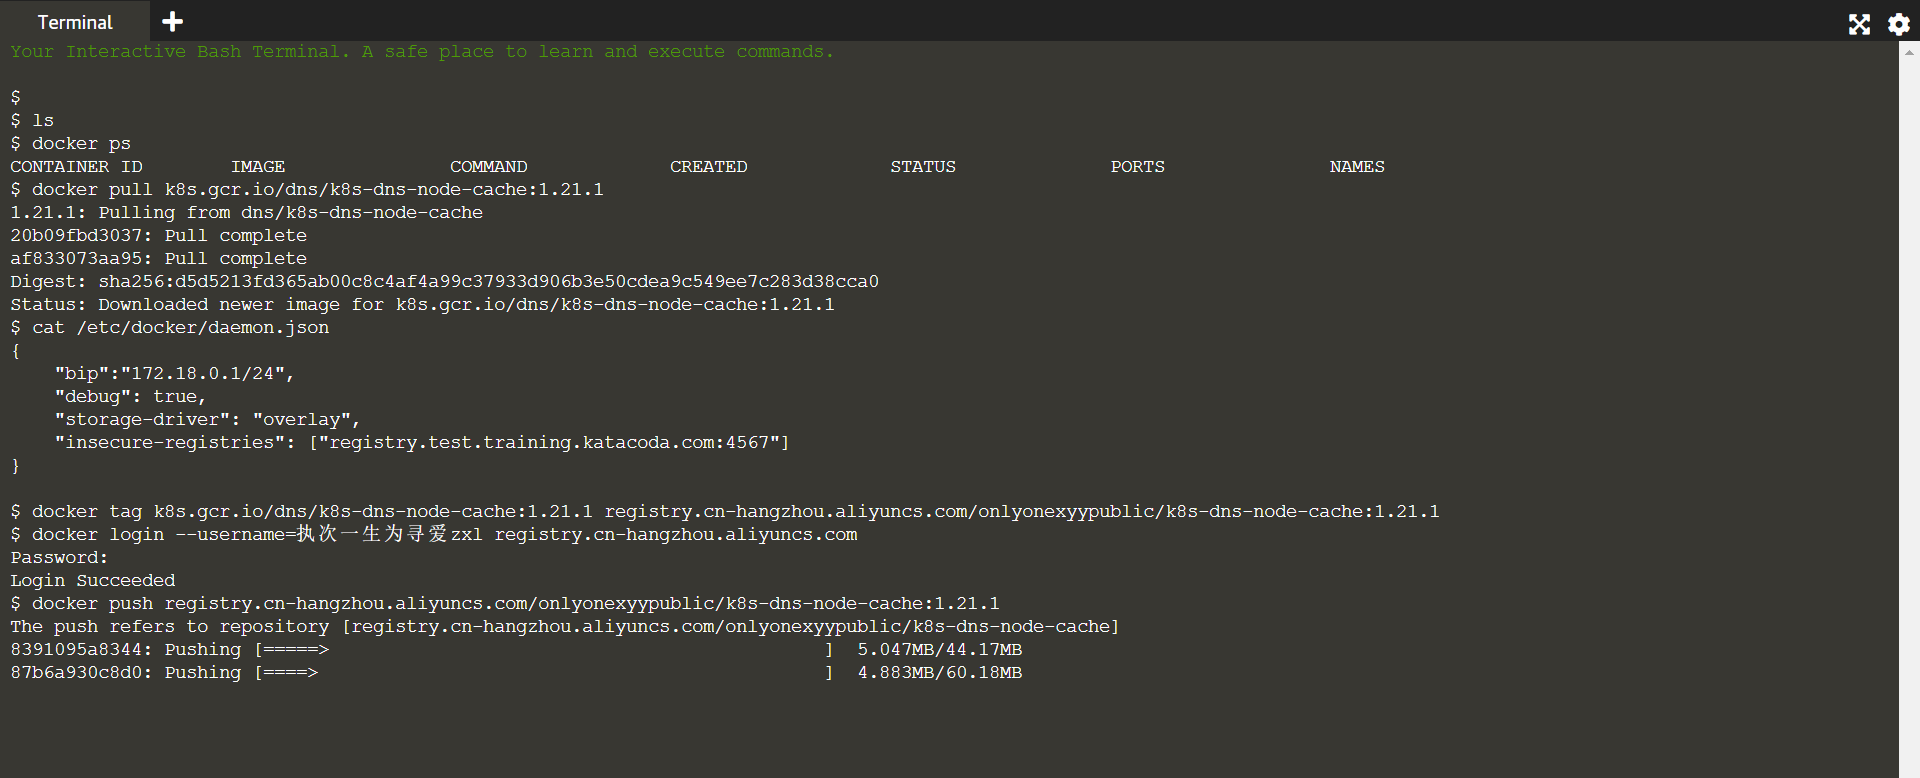
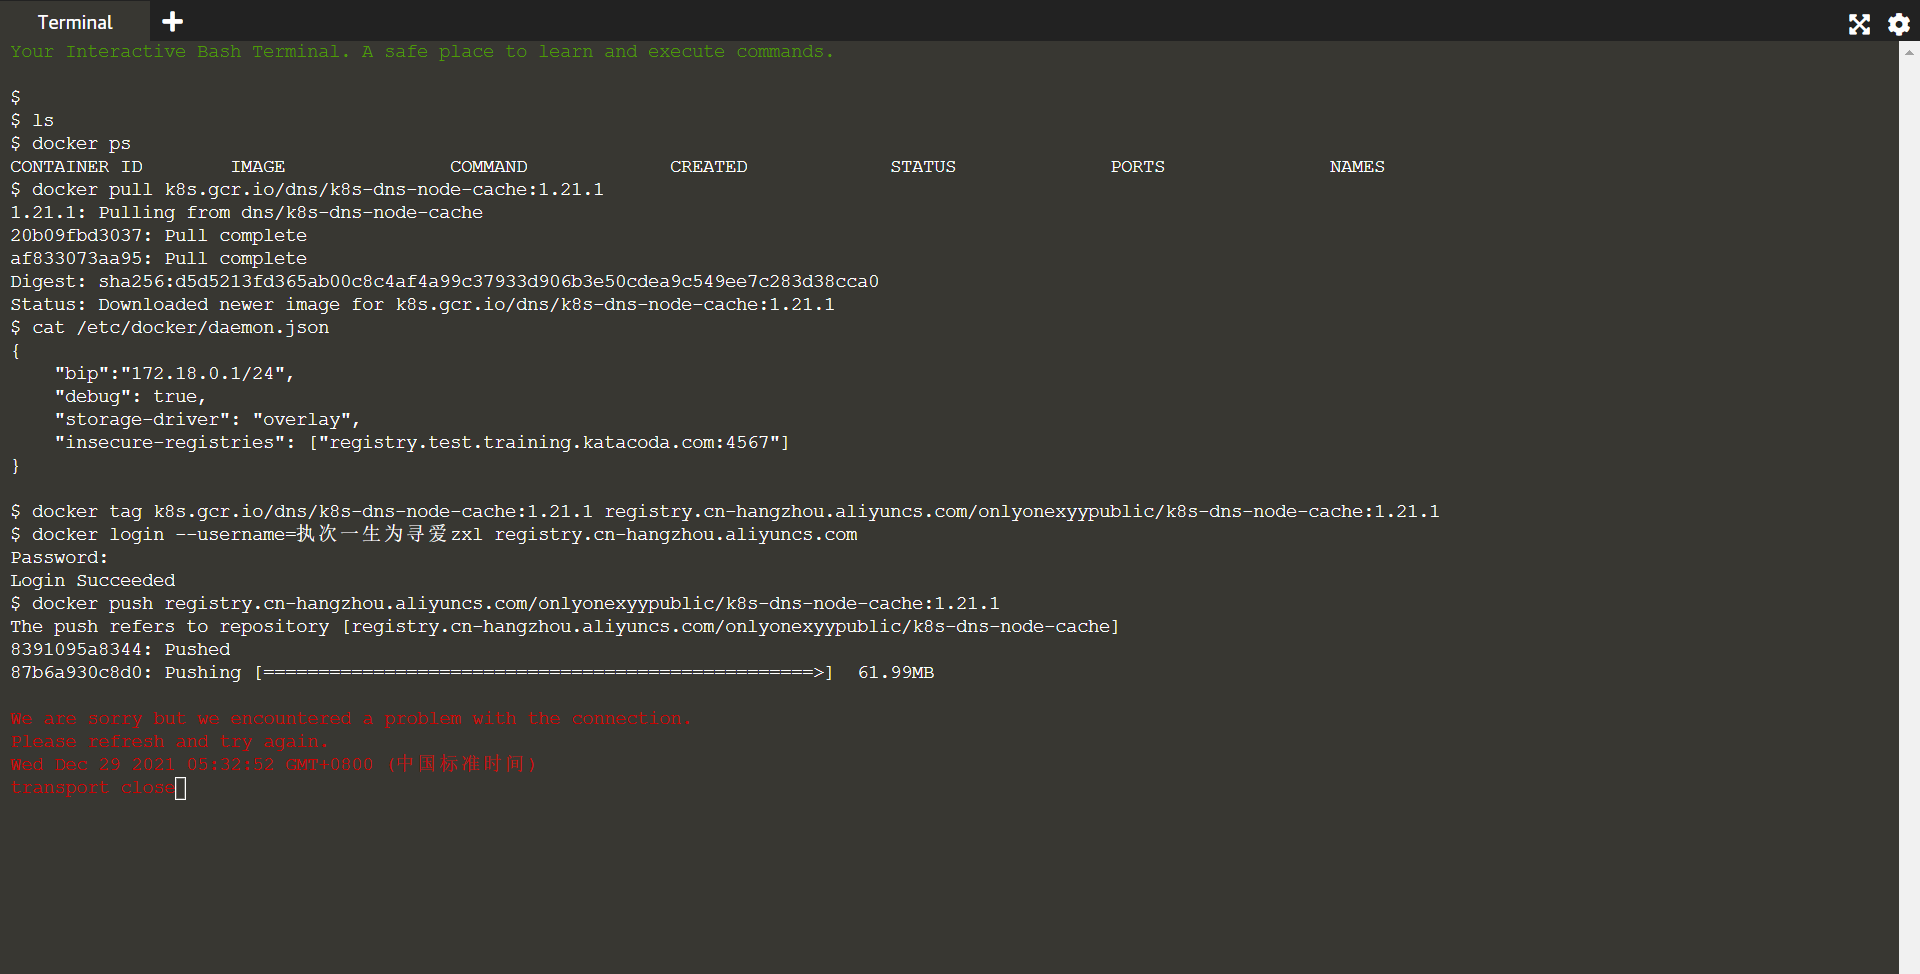
- The teacher has finished the image transfer here, and I will push it to my own warehouse.
View the image downloaded from the teacher's image transfer:

[root@master1 ~]#ctr -n k8s.io i ls -q|grep k8s-dns-node-cache
docker.io/cnych/k8s-dns-node-cache:1.21.1
docker.io/cnych/k8s-dns-node-cache@sha256:04c4f6b1f2f2f72441dadcea1c8eec611af4d963315187ceb04b939d1956782f
nerdctl -n k8s.io images|grep k8s-dns-node-cache

#Note: ctr command and nerdctl command need to be added in k8s, - n k8s IO namespace.
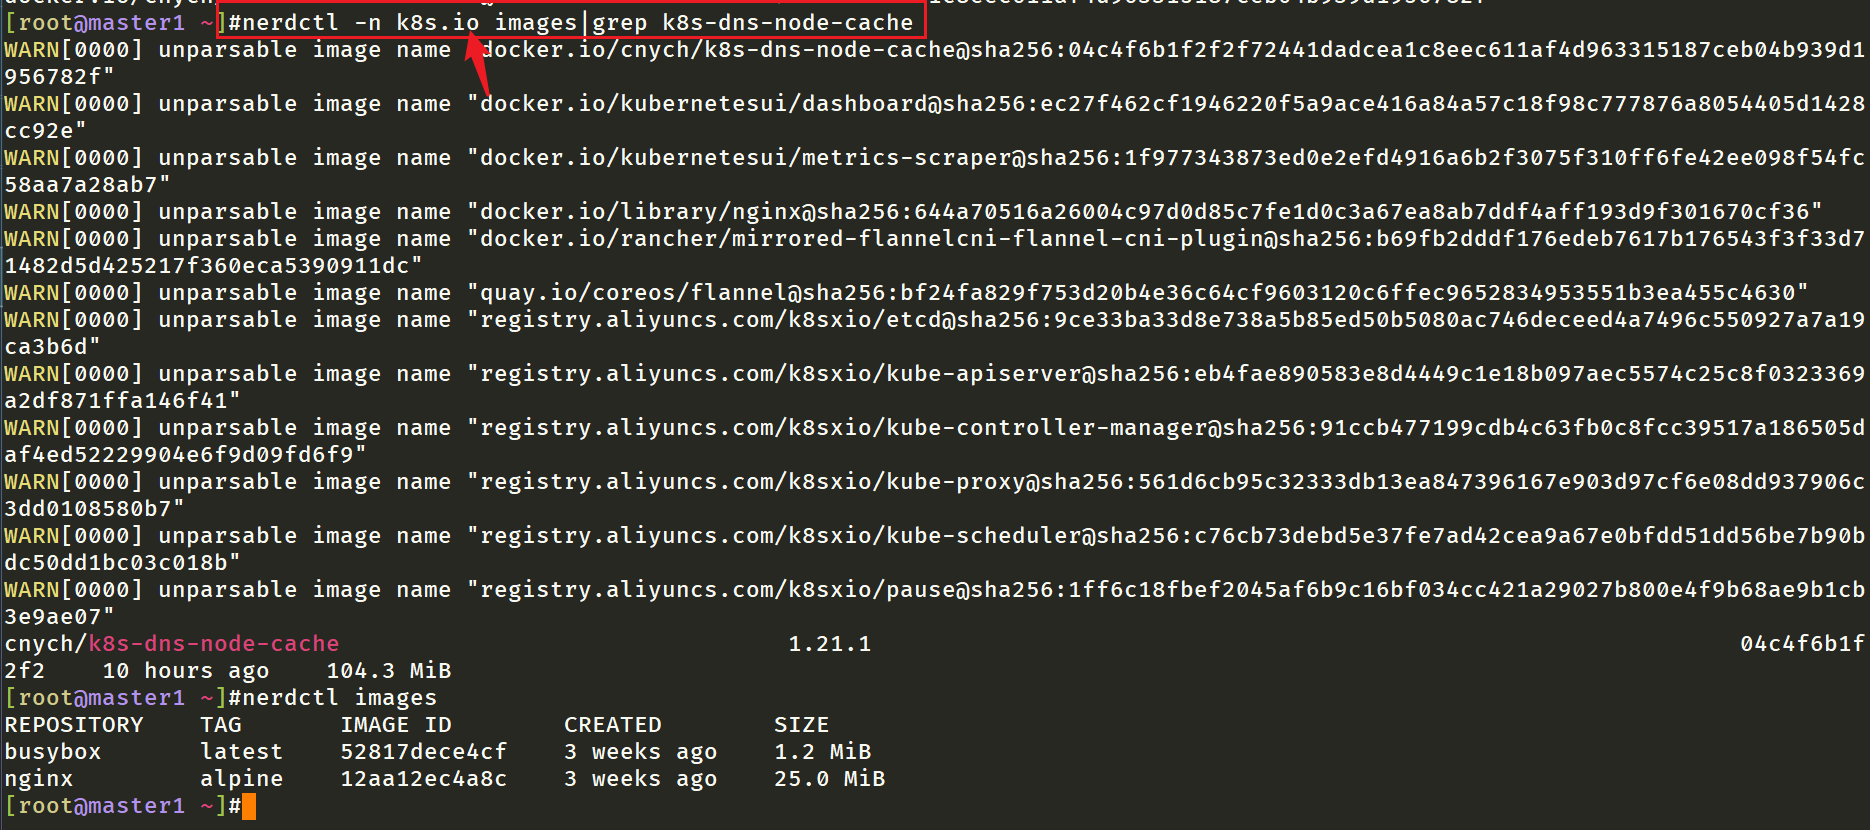
Start redeposit:
#Log in to your Alibaba cloud warehouse
[root@master1 ~]#nerdctl login --username = take a lifetime to find love zxl registry cn-hangzhou. aliyuncs. com
Enter Password: Login Succeeded

#Retype tag
[root@master1 ~]#nerdctl -n k8s.io tag cnych/k8s-dns-node-cache:1.21.1 registry.cn-hangzhou.aliyuncs.com/onlyonexyypublic/k8s-dns-node-cache:1.21.1

#Note: the tag is also in -n k8s Oh, yeah.
[root@master1 ~]#nerdctl -n k8s.io images|grep k8s-dns-node-cache
......
cnych/k8s-dns-node-cache                                                 1.21.1                                                              04c4f6b1f2f2    10 hours ago          104.3 MiB
registry.cn-hangzhou.aliyuncs.com/onlyonexyypublic/k8s-dns-node-cache    1.21.1                                                              04c4f6b1f2f2    About a minute ago    104.3 MiB
[root@master1 ~]#

#Start push ing
[root@master1 ~]#nerdctl -n k8s.io push registry.cn-hangzhou.aliyuncs.com/onlyonexyypublic/k8s-dns-node-cache:1.21.1
INFO[0000] pushing as a single-platform image (application/vnd.docker.distribution.manifest.v2+json, sha256:04c4f6b1f2f2f72441dadcea1c8eec611af4d963315187ceb04b939d1956782f)
manifest-sha256:04c4f6b1f2f2f72441dadcea1c8eec611af4d963315187ceb04b939d1956782f: waiting        |--------------------------------------|
layer-sha256:af833073aa9559031531fca731390d329e083cccc0b824c236e7efc5742ae666:    waiting        |--------------------------------------|
config-sha256:5bae806f8f123c54ca6a754c567e8408393740792ba8b89ee3bb6c5f95e6fbe1:   waiting        |--------------------------------------|
layer-sha256:20b09fbd30377e1315a8bc9e15b5f8393a1090a7ec3f714ba5fce0c9b82a42f2:    waiting        |--------------------------------------|
elapsed: 0.8 s                                                                    total:   0.0 B (0.0 B/s)
[root@master1 ~]#
Found that you have successfully pushed:
docker pull registry.cn-hangzhou.aliyuncs.com/onlyonexyypublic/k8s-dns-node-cache:1.21.1
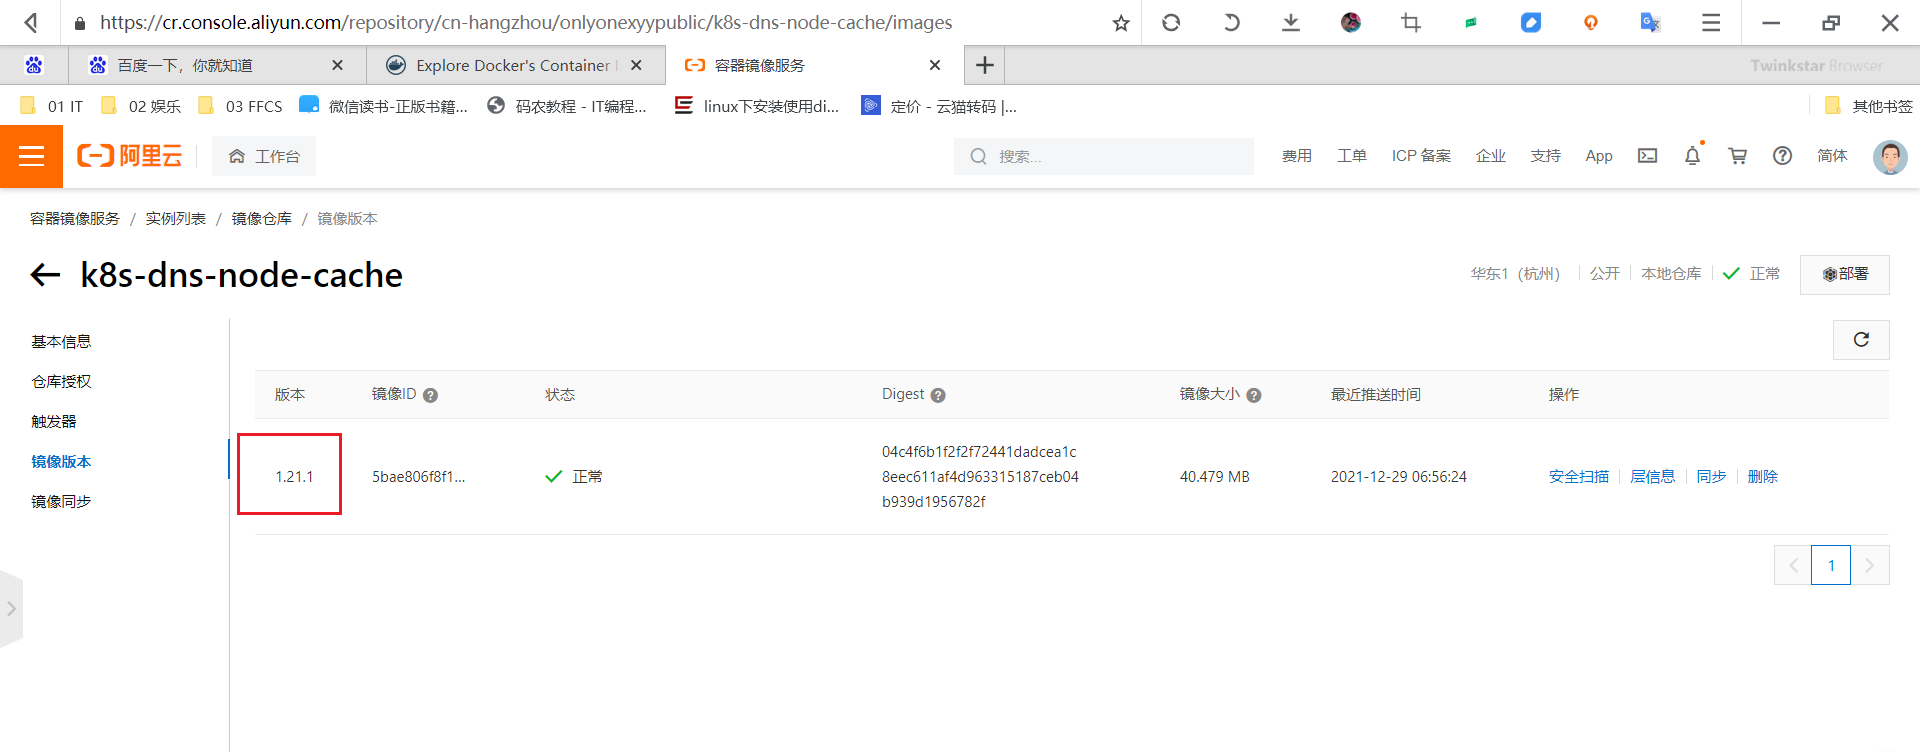
Go down and take out the test by yourself:
Here, I pull and test on the cloud virtual machine:

📍 Note 3: teacher, did you do domain name conversion for this image warehouse address? Why is it so short?
Alibaba cloud image service address:
docker pull registry.cn-hangzhou.aliyuncs.com/onlyonexyypublic/k8s-dns-node-cache:[Mirror version number]
Teacher's own mirror address:

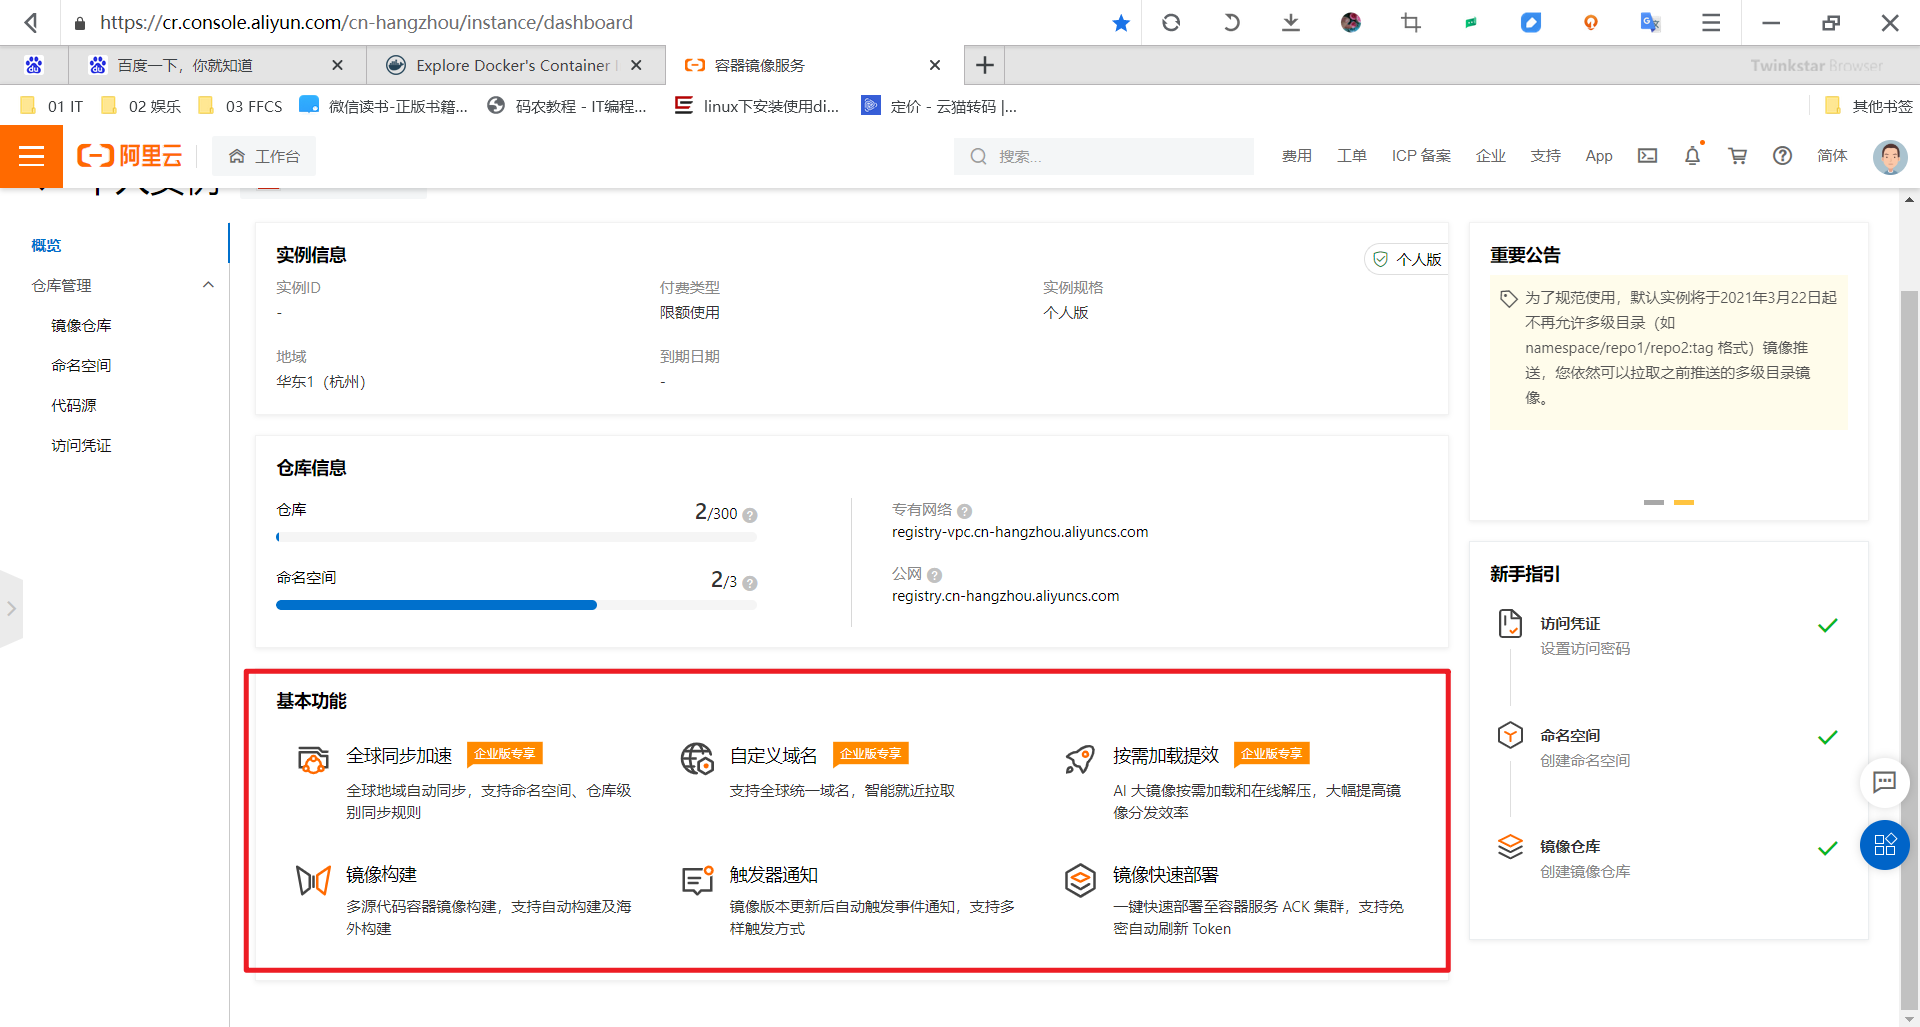
Oh, here it is, including the reason why the transfer speed is slow. Look at this later!!! 😘
About me
Theme of my blog: I hope everyone can make experiments with my blog, first do the experiments, and then understand the technical points in a deeper level in combination with theoretical knowledge, so as to have fun and motivation in learning. Moreover, the content steps of my blog are very complete. I also share the source code and the software used in the experiment. I hope I can make progress with you!
If you have any questions during the actual operation, you can contact me at any time to help you solve the problem for free:
-
Personal wechat QR Code: x2675263825 (shede), qq: 2675263825.

-
Personal blog address: www.onlyonexl.com cn

-
Personal WeChat official account: cloud native architect real battle

-
Personal csdn
https://blog.csdn.net/weixin_39246554?spm=1010.2135.3001.5421

-
Personal GitHub homepage: https://github.com/OnlyOnexl
last
Well, that's all for the LocalDNS experiment. Thank you for reading. Finally, paste the photo of my goddess. I wish you a happy life and a meaningful life every day. See you next time!
