Add fixed IP to Ubuntu instance of multipass
Multipass is a VM software discovered the day before yesterday. It is similar to Docker, but it feels that the instructions are relatively simple to use. The startup speed is much faster than Vmware, so Vmware, which has been used for many years, is abandoned. Recently, I found that many things, if not recorded, may take a lot of time to solve next time. So...
preface
Multipass entry-level tutorial.
The reason for writing this is because I want to install Mysql, but I don't want to install it on the host. I've been using Vmware to install desktop operating systems of various Linux versions before, but this time I want to install a server version of Ubuntu, but I've searched the official website of Ubuntu and found no place to download (there is a mirror image on the Chinese website of Ubuntu). There is a Multipass recommended on the official website, Just come down and study. This article is used to record the results of your tossing and turning, so as to prevent you from forgetting later.
The following is the main content of this article, which can be used for reference
1, What is Multipass?
The official explanation of multipass is that it is a mini cloud on your workstation. Using the native management program of all supported platforms (Windows, macOS and Linux), you can provide you with Ubuntu command line and even keyboard shortcuts by clicking ("open shell") or simple multipass shell command. Use multipass find to find available images and use multipass boot to create new instances. (Google translation results) ()
Personally, it is a virtual machine management software provided by Ubuntu, which can install Ubuntu, docker and other images.
2, Use steps
1. Software installation
After downloading the official website, click Install. Several points needing attention during installation. win platform
The virtual machine engine can choose the super-v or Virtualbox that comes with win11. Then add the command to the system Path for easy use.
2. Network settings
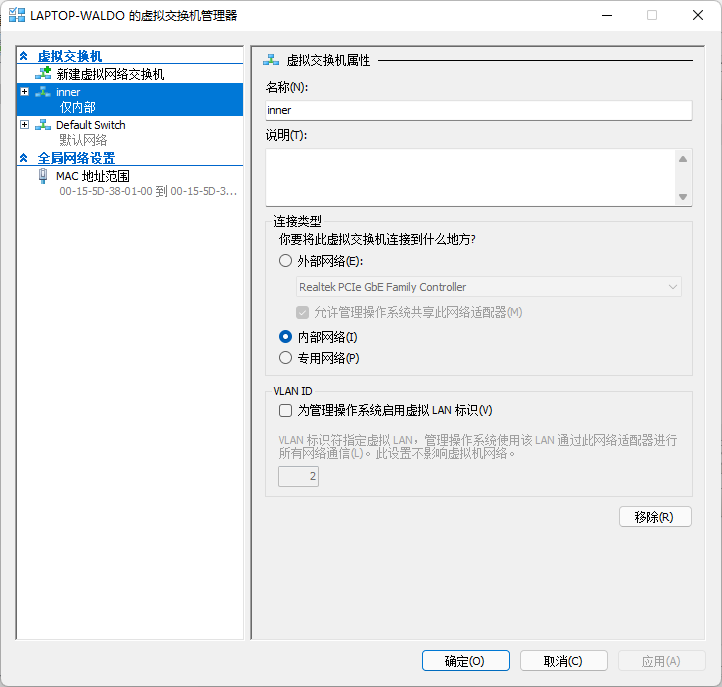
Because you use hyper-v to manage instances created by multipass. Before creating the standby network, you should first create the standby network. Open the virtual switch manager interface of hyper-v manager as follows. Generally, there is only Default Switch. Now we create an internal network, click new virtual network switch and select the connection type
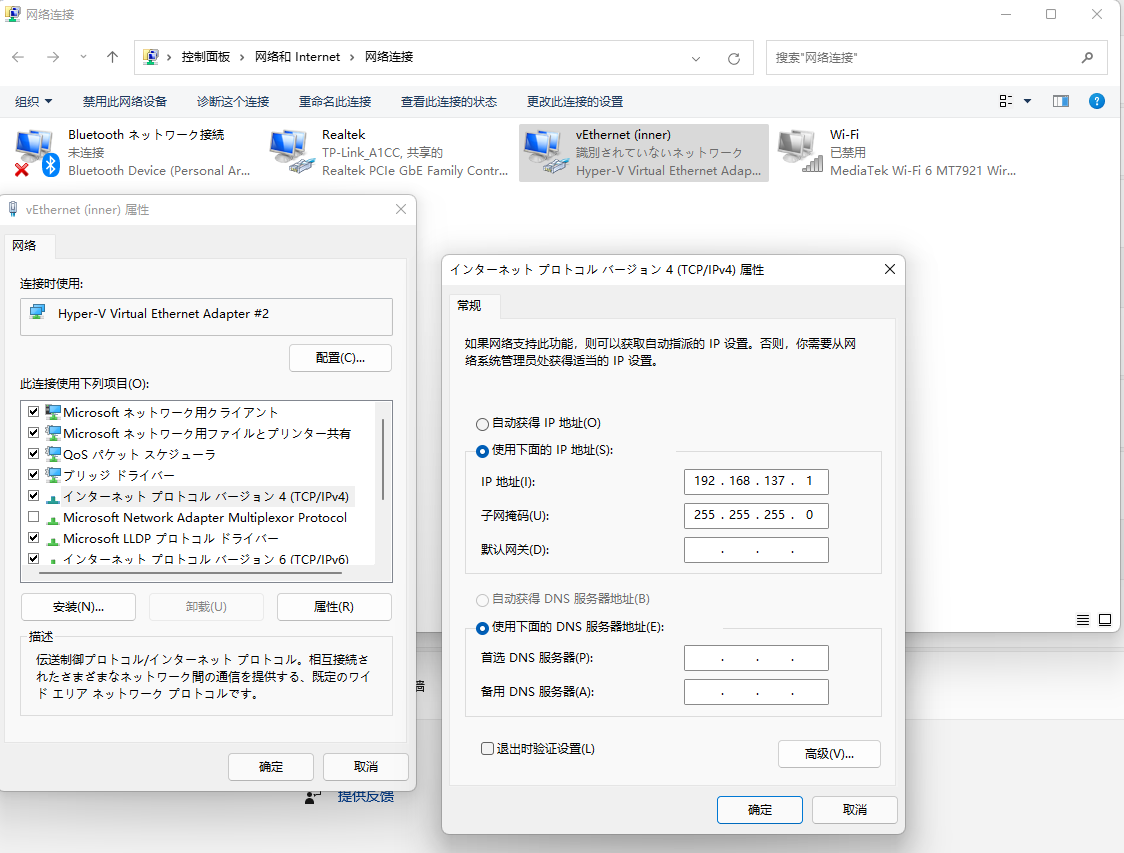
After the internal network switch is created, it cannot be networked. At this time, you only need to share the switches that can be connected to the network.
2. Create an instance
Create instance:
Before creating the instance, confirm the available network connection.
PS C:\Users\wangh> multipass networks
Name            Type      Description
Default Switch  switch    Virtual Switch with internal networking
Realtek         ethernet  Realtek PCIe GbE Family Controller
inner           switch    Virtual Switch with internal networking
If the internal switch does not specify the internal network, the default network will be used. If the internal switch does not specify the internal network, the default network will be used.
Start creating instance:
multipass launch -n primary -c 2 -m 2G -d 10G --network name=inner,mode=manual
Using the above commands, you can create an instance named primary, with 2 cores, 2G memory and 10G hard disk. The key point is -- network name=inner,mode=manual
- name: required value. The instance must be configured to connect to the host network
- mode: two options: Auto or manual; The default is auto. If it is the default, the network configuration will be read automatically.
- mac: Custom mac address for the device.
Note: name and mode are separated by, but there should be no spaces. Primary is the default instance of multipass. If you start multipass directly after installing multipass, the shell will start a primary instance directly. If the instance has been created, you can change the name or delete the original default instance.
3. Configure the instance network
Open the instance object that has been createdmultipass shell primary
Modify network profile
ubuntu@primary:~$ cd /etc/netplan/
ubuntu@primary:/etc/netplan$ ll
total 12
drwxr-xr-x  2 root root 4096 Mar  4 17:35 ./
drwxr-xr-x 96 root root 4096 Mar  4 17:37 ../
-rw-r--r--  1 root root  644 Mar  4 17:35 50-cloud-init.yaml
ubuntu@primary:/etc/netplan$ sudo vim 50-cloud-init.yaml
Modify the configuration file as follows and save it.
# This file is generated from information provided by the datasource.  Changes
# to it will not persist across an instance reboot.  To disable cloud-init's
# network configuration capabilities, write a file
# /etc/cloud/cloud.cfg.d/99-disable-network-config.cfg with the following:
# network: {config: disabled}
network:
    ethernets:
        eth0:
            dhcp4: true
            match:
                macaddress: 52:54:00:e0:93:a0
            set-name: eth0
        eth1:
            addresses: [192.168.137.2/24]
            gateway4: 192.168.137.1
            nameservers:
                addresses: [8.8.8.8, 1.1.1.1]
    version: 2
~                                                                                                                       ~                                                                                                                       ~                                                                                                                       ~                                                                                                                       ~                                                                                                                       ~                                                                                                                       ~                                                                                                                       ~                                                                                                                       ~                                                                                                                       ~                                                                                                                       ~
  "50-cloud-init.yaml" 18L, 644C
In the initial state, there should be only the network configuration of eth0. Each time the instance starts, the network will obtain a new IP address to access the external network.
At this point, we need to add a static network, eth1. If the adding method is, change addresses and gateway4 to corresponding ones. Pay attention to yaml syntax.
After adding, the network takes effect.
sudo netplan apply
After using this command, the network configuration will take effect. You need to log in to the instance again using the multipass shell primary. After re login, two Ip addresses will appear. as follows
PS C:\Users\wangh> multipass shell primary
Welcome to Ubuntu 20.04.4 LTS (GNU/Linux 5.4.0-100-generic x86_64)

 * Documentation:  https://help.ubuntu.com
 * Management:     https://landscape.canonical.com
 * Support:        https://ubuntu.com/advantage

  System information as of Sun Mar  6 10:03:28 JST 2022

  System load:  0.0               Processes:             125
  Usage of /:   21.3% of 9.52GB   Users logged in:       1
  Memory usage: 44%               IPv4 address for eth0: 172.25.97.139
  Swap usage:   0%                IPv4 address for eth1: 192.168.137.2


0 updates can be applied immediately.

Failed to connect to https://changelogs.ubuntu.com/meta-release-lts. Check your Internet connection or proxy settings


Last login: Sun Mar  6 09:55:52 2022 from 172.25.96.1
The second eth1 is the static address we want. Using this address, we can connect to the service we want when it is configured. Such as mysql.
summary
The above is the method of adding static network to my Ubuntu instance.
Add additional documents to the official website If necessary, you can refer to the official website tutorial.
above.