1, Display and hiding of elements
1. The diaplay property to set or retrieve whether and how the object is displayed.
display:none hide objects;
display:block not only converts to block level elements, but also has the meaning of display elements.
The feature is that after hiding, the position will no longer be reserved.
2. visibility
visibility: visible object;
visibility: hidden objects are hidden.
Features: keep the original position after hiding.
3. Overflow overflow
overflow: visible does not cut content or add scroll bars
overflow: Hidden does not display the content exceeding the object size, and the excess part is hidden
Scroll: the scroll bar is always displayed regardless of whether the content is exceeded or not
auto: beyond the automatic display of scroll bars, not beyond the display of scroll bars
<!DOCTYPE html>
<html>

<head>
    <meta charset="UTF-8">
    <title>CSS senior</title>
    <style>
        .box{
            position: relative;
            width: 222px;
            height: 220px;
            margin: 100px auto;
        }
        .mask{
            display: none;
            position: absolute;
            top: 0px;
            left: 0px;
            width: 222px;
            height: 220px;
            background-color: rgba(0, 0, 0, .3);
        }
        /* When the mouse passes by, the black translucent box inside a is displayed */
        .box a:hover .mask{
            display: block;
        }
    </style>
</head>

<body>
    <div class="box">
        <a href="#">
            <div class="mask"></div>
        <img src="images/touxiang.jpg" width="100%" height="100%">
        </a>
    </div>
</body>

</html>
Display effect:
Normal
Mouse passing
2, css user interface style
The so-called interface style is to change some user operation styles in order to improve the user experience.
- Change the user's mouse style (scroll bar compatibility is very poor)
- Form outline
- Prevent form field dragging
1. Mouse style cursor
Sets or retrieves which system predefined cursor shape the mouse pointer moves over the object.
| Attribute value | describe |
| default | default |
| pointer | Little hand |
| move | move |
| text | text |
| not-allowed | prohibit |
<!DOCTYPE html>
<html>

<head>
    <meta charset="UTF-8">
    <title>CSS senior</title>
    <style>

    </style>
</head>

<body>
   <ul>
       <li style="cursor: default;">default</li>
       <li style="cursor: pointer;">Little hand</li>
       <li style="cursor: move;">move</li>
       <li style="cursor: text;">text</li>
       <li style="cursor: not-allowed;">prohibit</li>
   </ul>
</body>

</html>
2. Form outline
The outline line of the form is a line drawn around the element, which is located at the periphery of the border edge and can highlight the element.

outline: outline-color|| outline-style|| outline-width
Usually, the most direct way we use is outline:0; Or outline: none;
3. Prevent dragging text fields
resize: none; Prevent users from dragging text fields at will, resulting in page confusion.
<!DOCTYPE html>
<html>

<head>
    <meta charset="UTF-8">
    <title>CSS senior</title>
    <style>
        textarea{
            width: 200px;
            height: 200px;
            /* Cancel contour */
            outline: none;
            border: 1px solid #036;
            /* Prevent users from dragging text fields */
            resize: none;
        }
    </style>
</head>

<body>
   <textarea>Every time, I am strong in wandering loneliness</textarea>
</body>

</html>
3, Vertical align vertical align
Block level elements with width are aligned in the center, which is margin: 0 auto; Align the text in the center, which is text align: Center; Vertical align is a vertically centered attribute. It is only used for inline elements or inline block elements, especially inline block elements. It is usually used to control the alignment of pictures / forms with text.
vertical-align: baseline | top | middle | bottom

<!DOCTYPE html>
<html>

<head>
    <meta charset="UTF-8">
    <title>CSS senior</title>
    <style>
        .one{
            /* Baseline alignment default */
            vertical-align: baseline;
        }
        .two{
            /* Centerline alignment */
            vertical-align: middle;
        }
        .three{
            /* Top line alignment */
            vertical-align: top;
        }
    </style>
</head>

<body>
    <div>
        <img src="images/touxiang.jpg" alt="" class="one" width="100px" height="100px"> Shao Han Zhang
    </div>
    <div>
        <img src="images/touxiang.jpg" alt="" class="two" width="100px" height="100px"> Shao Han Zhang
    </div>
    <div>
        <img src="images/touxiang.jpg" alt="" class="three" width="100px" height="100px"> Shao Han Zhang
    </div>
</body>

</html>
Remove the blank gap at the bottom of the picture
<!DOCTYPE html>
<html>

<head>
    <meta charset="UTF-8">
    <title>CSS senior</title>
    <style>
        div{
            border: 1px solid red;
        }
    </style>
</head>

<body>
    <div>
        <img src="images/background.jpg" alt="" class="one" width="100px" height="100px">
    </div>
</body>

</html>
The display effect of the above code is:
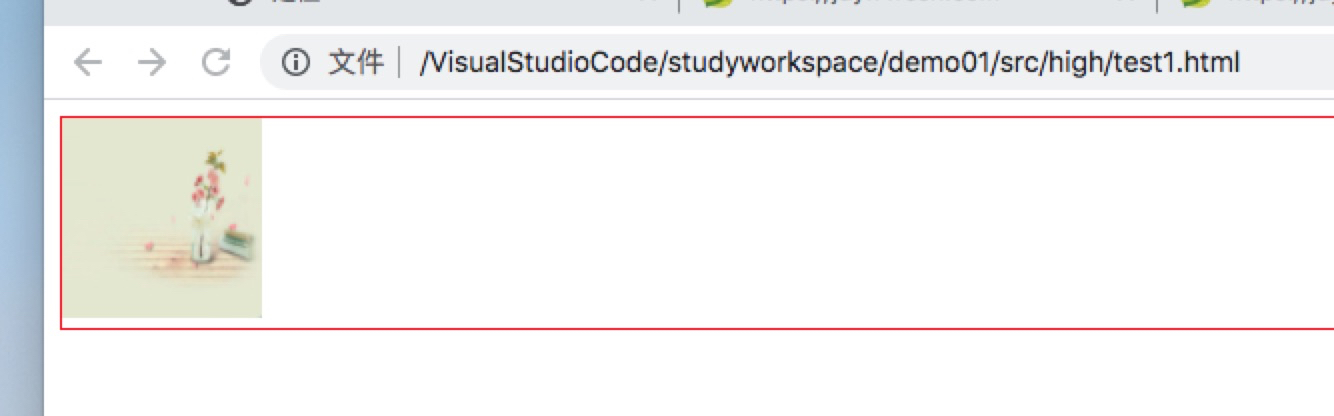
You can see that there will be a little space at the bottom of the picture, because the default vertical alignment of the picture is baseline alignment. If we change the vertical alignment of the picture, it won't be like this.
We can change the alignment of the above code image to not the baseline alignment, or change the image to block level elements, which can solve the problem of leaving gaps at the bottom of the image.
<!DOCTYPE html>
<html>

<head>
    <meta charset="UTF-8">
    <title>CSS senior</title>
    <style>
        div{
            border: 1px solid red;
        }
        img{
            /* The first solution is to set the alignment instead of baseline alignment */
            /* vertical-align: middle; */
            /* vertical-align: bottom; */
            /* vertical-align: top; */
            /* The second solution is set to block level elements */
            display: block;
        }
    </style>
</head>

<body>
    <div>
        <img src="images/background.jpg" alt="" class="one" width="200px" height="200px">
    </div>
</body>

</html>
The display effect is as follows

4, Overflow text is indicated by an ellipsis
Steps: 1) first force the text white space: nowrap to be displayed in one line; 2) The excess part is hidden: overflow; 3) Replace the text with an ellipsis. Text overflow: ellipsis
1. White space sets or retrieves the text display method in the object, which is usually used to force one line to display the content. while-space: normal; Default processing method. while-space: nowrap; Force all text to be displayed on the same line until the end of the text or encountering br label objects.
2. Text overflow sets or retrieves whether to use an ellipsis flag Represents an overflow of text within an object. text-overflow: clip; The ellipsis mark is not displayed, but simple cutting. Text overflow: ellipsis: displays an ellipsis flag when text overflows within an object.
5, CSS sprite Technology
When users visit a website, they need to send a request to the server. Each image on the web page can be displayed to users only after a request. However, a web page often uses many small background images as decoration. When there are too many images in the web page, the server will frequently accept and send requests, which will greatly reduce the loading speed of the page. Therefore, CSS sprite technology appears. CSS sprite is actually to integrate some background images in the web page into a large picture (sprite picture). Then, each web page element usually only needs a small picture in different positions in the sprite picture. In this way, when users visit the page, they only need to send a request to the server, and all the background images in the web page can be displayed. We need to use the background image, background repeat and background position of CSS.
It should be noted that CSS sprite technology is mainly for background images, and this technology is not required for inserted images img. The use steps are 1) accurately measure the size and position of each small background picture. 2) When you assign a small background picture to a box, the background positioning is basically negative.