preface
When using Travis CI some time ago, I found that its deployment log contains many colored logs.

And we know that these lovely colors will also appear when using the command line terminal.
Of course, I don't blow it to blow it. It has a practical role and can help us quickly locate the problem!
I was curious about this. How did Travis CI move these color logs to the browser?

I guess it's not done through the recognition of key word features, because it's too low.

After the query, we found a keyword, which is ANSI escape sequences.

ANSI escape sequence is the standard of in band signaling, which is used to control the cursor position, color and some other options on the terminal and terminal simulator.
– Wikipedia
Generally speaking, some escape sequence characters are contained in the color text output by the terminal, but we can't see them and they are parsed by the terminal. Then the terminal parses these characters into all kinds of colorful logs we see now (including some colors, underscores, bold, etc.).
For example, we can see npm installation and git branch switching at the terminal, including error reporting during operation.

With these colors, our debugging efficiency is greatly improved. At a glance, we can see which commands are wrong and how to solve them.
Now what we need to do is how to output these color logs to the browser. Before this step, we have to know what the form of these ANSI escape sequences looks like?
According to the wiki, we can know that ANSI escape sequence can operate many functions, such as cursor position, color, underline and other options. Now let's explain the color part.

ANSI escape sequence
ANSI escape sequence also develops with the development of terminals, and the color specification varies with different devices. For example, early devices only supported 3 / 4 bits and 8 / 16 colors respectively.
Most ANSI escape sequences start with ESC and '[' and are embedded in the text. The terminal will find and interpret them as commands rather than strings.
The ANSI value of ESC is 27, which is represented by \ 033 in octal and \ u001B in hexadecimal.
3/4 bit
The original specification has only 8 / 16 colors.
For example, ESC[30;47m] starts with ESC [and ends with m, with code code in the middle, which is divided by semicolon.
The value of color is 30-37 and the value of background is 40-47. For example:
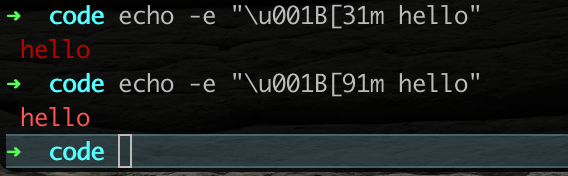
echo -e "\u001B[31m hello"
(if you want to clear the color, you need to use ESC [39;49m (not supported by some terminals) or ESC[0m]
Later terminals added the ability to directly specify "bright" colors of 90-97 and 100-107.
The effects are as follows:
The following is the color comparison table:

8-bit
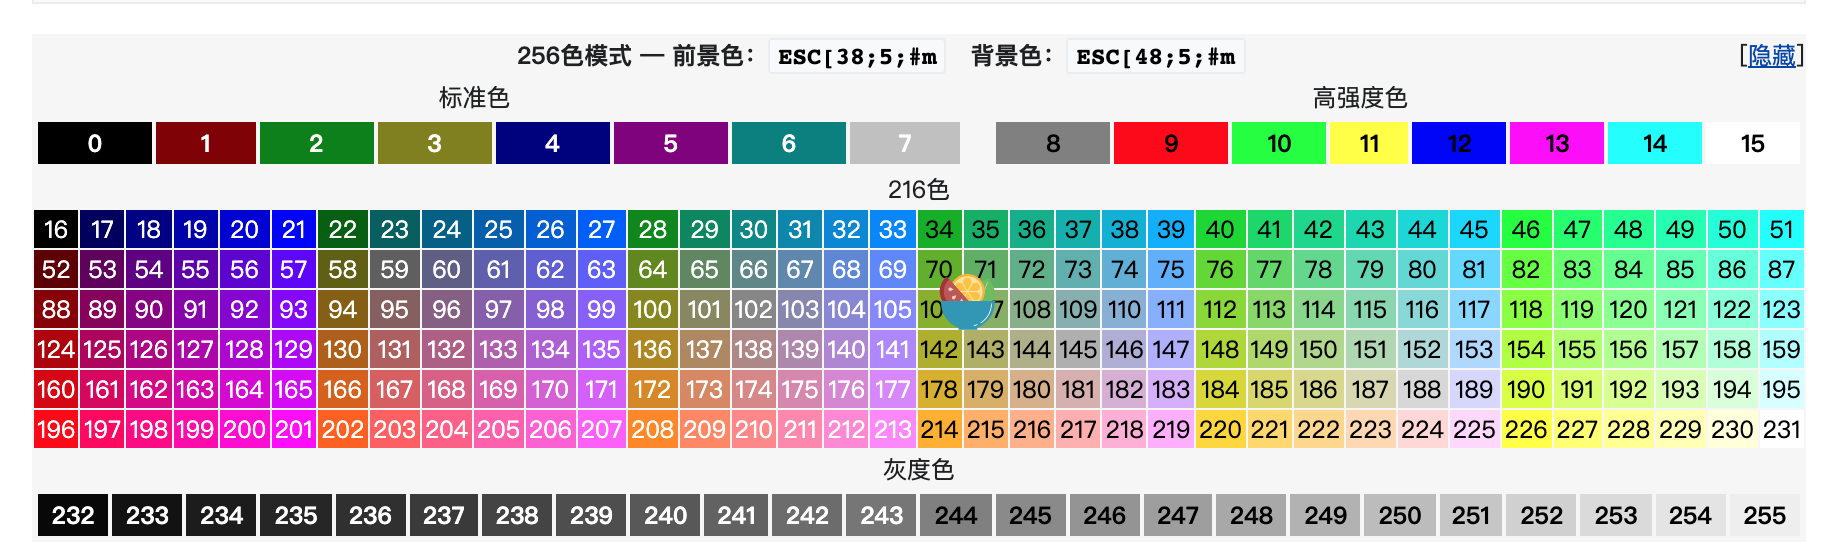
Later, because 256 colors are very common on the graphics card, an escape sequence was added to select from the predefined 256 colors, that is, a new bit was added to the original writing method to represent more colors.
ESC[ 38;5;<n> m // Set font color
ESC[ 48;5;<n> m // Set background color
    0-7:  standard colors (as in ESC [ 30–37 m)
    8-15:  high intensity colors (as in ESC [ 90–97 m)
    16-231:  6 × 6 × 6 cube (216 colors): 16 + 36 × r + 6 × g + b (0 ≤ r, g, b ≤ 5)
   232-255:  grayscale from black to white in 24 steps
In terminals that support more colors, for example:
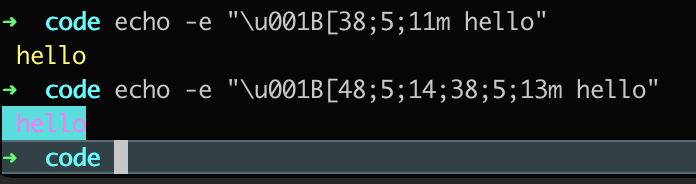
echo -e "\u001B[38;5;11m hello"
Represents the output yellow font.
echo -e "\u001B[48;5;14;38;5;13m hello"
Represents the output with blue background and pink font.
The following is the color comparison table:
24-bit
Further development is to support 24 bit true color graphics cards, Xterm, konsol of KDE, and all libvte based terminals (including GNOME terminals) support 24 bit foreground and background color settings.
ESC[ 38;2;<r>;<g>;<b>m // Foreground
ESC[ 48;2;<r>;<g>;<b>m // Background color
For example:
echo -e "\u001B[38;2;100;228;75m hello"
The output green font represents RGB (100228,75).

Parsing tool
After we know the escape specification, we need to parse ANSI characters.
Because there are many specifications, we first investigate the color libraries commonly used in js for a small exploration.
Due to the better compatibility of 3 / 4bit, most tools (such as chalk) will use this 8 / 16 color for highlighting, so we first implement an 8 / 16 color analysis.
Here, we refer to the * * ANSI parse * * parsing library:
The core idea is:


const ansiparse = require('ansiparse')

const ansiStr = "\u001B[34mHello \u001B[39m World \u001B[31m! \u001B[39m"

const json = ansiparse(ansiStr)
console.log(json)

// json output is as follows:
[
  { foreground: 'blue', text: 'Hello ' },
  { text: ' World ' },
  { foreground: 'red', text: '! ' }
]
Then we can write a function to traverse the JSON array parsed above and output HTML.
function createHtml(ansiList, wrap = '') {
    let html = '';
    for (let i = 0; i < ansiList.length; i++) {
        const htmlFrame = ansiList[i];

        const {background = '', text, foreground = ''} = htmlFrame;
        if(background && foreground) {
            if(text.includes('\n')) {
                html += wrap;
                continue;
            }
            html += fontBgCode(text, foreground, background);
            continue;
        }
        if (background || foreground) {
            const color = background ? `bg-${background}` : foreground;
            let textColor = bgCode(text, color);

            textColor = textColor.replace(/\n/g, wrap);

            html += textColor;
            continue;
        }
        if (text.includes('\n')) {
            const textColor = text.replace(/\n/g, wrap);
            html += textColor;
            continue;
        }
        html += singleCode(text);
    }
    html += ''
    return html;
}

function fontBgCode(value, color, bgColor) {
    return `<span class="${color} bg-${bgColor}">${value}</span>`
}

function bgCode(value, color) {
    return `<span class="${color}">${value}</span>`
}

function singleCode(value) {
    return `<span>${value}</span>`
}
Use examples are as follows:
const str = "\u001B[34mHello \u001B[39m World \u001B[31m! \u001B[39m";

console.log(createHtml(parseAnsi(str)));

// <span class="blue">Hello</span><span> World</span><span class="red">!</span>
Deployment practice
With the above part, let's actually demonstrate the deployment log with a simple demo!
// Project directory structure
demo
 |- package.json
 |- index.html
 |- webpack.config.js
 |- /src
   |- index.js
index.js
build.sh
We start a build script in index.js to simulate our real deployment scenario.
// index.js
const { spawn } = require('child_process');
const cmd = spawn('sh', ['build.sh']);

cmd.stdout.on('data', (data) => {
  console.log(`stdout: ${data}`);
});

cmd.stderr.on('data', (data) => {
  console.log(`stderr: ${data}`);
});

cmd.on('close', (code) => {
  console.log(`child process exited with code ${code}`);
});
// build.sh

cd demo

npx webpack
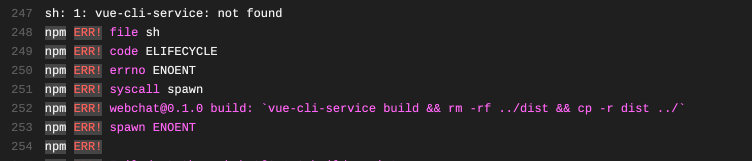
Let's try it on the terminal and enter node index.js on the console

It is found that the corresponding color is not seen in the output log.
Why can't we output color from the child_process, but if we package the project directly in the terminal, we can output color?
Why?
The first reaction is to find the source, that is, the library of the most frequently used color output.
Color the output of the console in a simple way.
https://github.com/Marak/colors.js
https://github.com/chalk/chalk
After looking at the source code of webpack cli, I found that it uses colorette as the color output library.
So let's take a look at the source code of colorette.
At the beginning of the entry file, you can see a variable isColorSupported to determine whether color output is supported.
https://github.com/jorgebucaran/colorette/blob/main/index.js#L17
// colorette/index.js
import * as tty from "tty"

const env = process.env || {}
const argv = process.argv || []

const isDisabled = "NO_COLOR" in env || argv.includes("--no-color")

const isForced = "FORCE_COLOR" in env || argv.includes("--color")
const isWindows = process.platform === "win32"
const isCompatibleTerminal = tty && tty.isatty && tty.isatty(1) && env.TERM && env.TERM !== "dumb"
const isCI = "CI" in env && ("GITHUB_ACTIONS" in env || "GITLAB_CI" in env || "CIRCLECI" in env)

export const isColorSupported = !isDisabled && (isForced || isWindows || isCompatibleTerminal || isCI)
You can see that this tool judges many conditions to process our output stream.
If the above conditions are true, the ANSI log will be output. If the above conditions are not met, the output mode will be switched to be easier to parse.
const isWindows = process.platform === "win32"
reference resources: https://stackoverflow.com/questions/8683895/how-do-i-determine-the-current-operating-system-with-node-js
Dumb: "dumb terminal"
Dumb terminal refers to a computer terminal that cannot execute some special ANSI escape sequences such as "delete line", "clear screen" or "control cursor position"
reference resources: https://zh.wikipedia.org/wiki/%E5%93%91%E7%BB%88%E7%AB%AF
In other words, the output stream of our child_process turns off the terminal mode (TTY), and the above four situations are not satisfied. Therefore, we can't get the color log with ANSI.
How?
We can solve this problem by displaying the passed in environment variable FORCE_COLOR=1 or the command with the parameter -- color to force the start color.
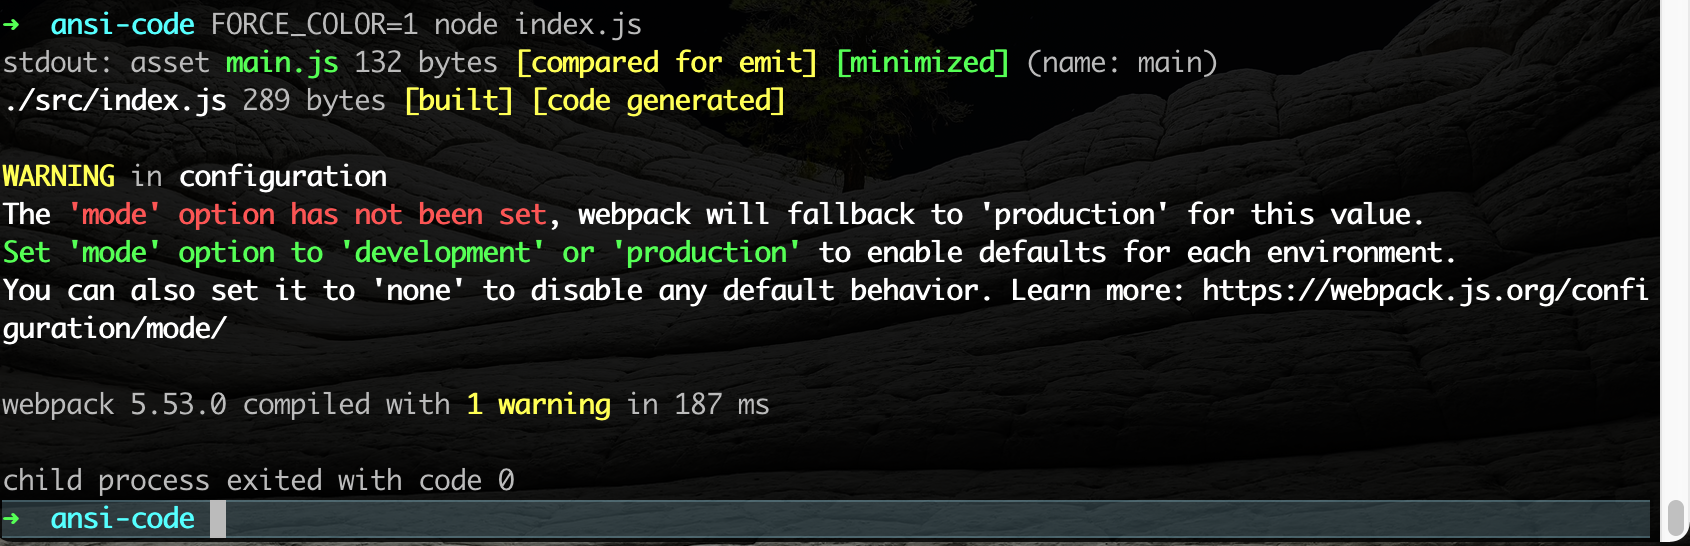
In this way, we get the output text with ANSI color information, and finally parse it to HTML.
<div>asset <span class="green">main.js</span><span> 132 bytes </span><span class="yellow">[compared for emit]</span><span> </span><span class="green">[minimized]</span> (name: main)</div><div><span>./src/index.js</span><span> 289 bytes </span><span class="yellow">[built]</span><span> </span><span class="yellow">[code generated]</span></div><div></div><div><span class="yellow">WARNING</span><span> in </span>configuration</div><div>The <span class="red">'mode' option has not been set</span>, webpack will fallback to 'production' for this value.</div><div><span class="green">Set 'mode' option to 'development' or 'production'</span> to enable defaults for each environment.</div><div>You can also set it to 'none' to disable any default behavior. Learn more: https://webpack.js.org/configuration/mode/</div><div></div><div>webpack 5.53.0 compiled with <span class="yellow">1 warning</span> in 201 ms</div><div></div>
Then we can display our color output log in the browser, which is consistent with the output in the terminal.


reference resources
https://www.twilio.com/blog/guide-node-js-logging
https://github.com/jorgebucaran/colorette/blob/main/index.js#L17
https://en.wikipedia.org/wiki/ANSI_escape_code#Colors
https://stackoverflow.com/questions/4842424/list-of-ansi-color-escape-sequences
https://stackoverflow.com/questions/15011478/ansi-questions-x1b25h-and-x1be
https://bluesock.org/~willg/dev/ansi.html
https://www.cnblogs.com/gamesky/archive/2012/07/28/2613264.html
https://github.com/mmalecki/ansiparse