Intranet penetration must be necessary for comrades who develop wechat. Most people first think of going online to find all kinds of ready-made ones, such as sunny ngrok or sunflower, but there is no free lunch in the world, and the free ones will collapse!!! Now I'll teach you how to use it Alibaba cloud Build an intranet penetration with ngrok!!!!
1. Preparation:
To achieve intranet penetration, you must have a domain name and then a server!! one can't do without the other
2. Add dns resolution:
It's up to you Alibaba cloud Add a dns resolution to the server, as follows:
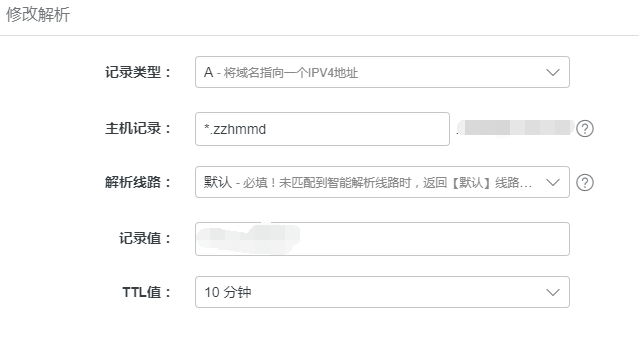

In this way, the parsing is added, and the next step is the setting of the server!
2. Server configuration ngrok:
Follow the command below and knock step by step
Step 1: install git and Golang
Git What is it and what is it used for? I will not elaborate more here!
# sudo apt-get install build-essential golang mercurial git
Golang, Go language support, because Ngrok is written based on Go language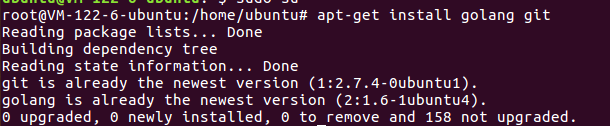
I have installed all of them here. If you don't install them, you can install them according to the prompts
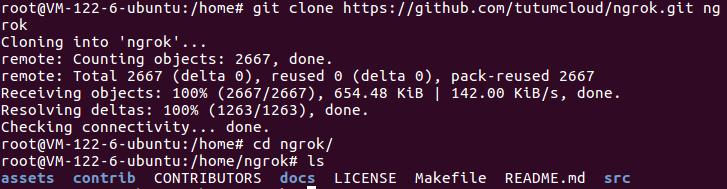
Step 2: get the source code of ngrok
The unofficial address is used here, which fixes that some packages cannot be obtained
# git clone https://github.com/tutumcloud/ngrok.git ngrok# cd ngrok
Step 3: generate self signed certificate
Use ngrok Com official service, we use the official SSL certificate. Self built ngrokd service. If we don't want to buy SSL certificate, we need to generate our own self signed certificate and compile an ngrok client with the certificate.
The certificate generation process requires an NGROK_BASE_DOMAIN. Take the address 693c358d randomly generated by the official ngrok ngrok.com as an example, its NGROK_BASE_DOMAIN is "ngrok.com". If the address you want to provide services is "example.ngrok.xxx.com", NGROK_BASE_DOMAIN should be "ngrok.xxx.com". Here, I replace it with my own domain name "ngrok.mdzz2333.cn"
In this place, you should also prepare your own domain name in advance. If you don't have extra domain names, you can add a secondary domain name to your domain name
*Note: the domain name in the following instructions should be changed to your own, otherwise it will be bound to my domain name~
$ cd ngrok NGROK_DOMAIN="ngrok.mdzz2333.cn" openssl genrsa -out base.key 2048 openssl req -new -x509 -nodes -key base.key -days 10000 -subj "/CN=$NGROK_DOMAIN" -out base.pem openssl genrsa -out server.key 2048 openssl req -new -key server.key -subj "/CN=$NGROK_DOMAIN" -out server.csr openssl x509 -req -in server.csr -CA base.pem -CAkey base.key -CAcreateserial -days 10000 -out server.crt
After execution

Replace:
cp base.pem assets/client/tls/ngrokroot.crt
Step 4: compile
sudo make release-server release-client
This step takes a long time. After successful compilation, you will find the two files ngrokd and ngrok in the bin directory.

Step 5: start the server
The ngrokd generated earlier is the server-side program. Specify the certificate, domain name and port to start it (the certificate is generated earlier, and pay attention to modifying the domain name):
# sudo ./bin/ngrokd -tlsKey=server.key -tlsCrt=server.crt -domain="ngrok.mdzz2333.cn" -httpAddr=":8081" -httpsAddr=":8082"
At this point, the ngrok service has been running. You can view more information through the log displayed on the screen. httpAddr and httpsAddr are the ports used by ngrok to forward http and https services, which can be specified at will. ngrokd also opens a 4443 port to communicate with clients (which can be specified through - tunnelAddr=":xxx"). If you configure iptables rules, you need to release the TCP protocol on these three ports.
Now, through http://ngrok.mdzz2333.cn:8081 And http://ngrok.mdzz2333.cn:8082 (you should visit your own domain name) you can access the forwarding service provided by ngrok. For ease of use, it is recommended to resolve the domain name to VPS, so that different sub domains can be used to forward different local services.
After visiting, you will see the following prompt:
Tunnel pub.imququ.com:8081 not found
This shows that everything is ready, only the client is needed to connect.
The following sentence is to compile windows client and mac client!!!
GOOS=windows GOARCH=amd64 make release-client

GOOS=darwin GOARCH=amd64 make release-client
There is a windows folder under the bin directory. Open the folder and transfer the exe file to your windows machine:
Then create a new configuration file under the same level directory, ngrok cfg:
server_addr: "zzhmmd.huahuayu.com.cn:4443"trust_host_root_certs: false
Finally, open cmd and run ngrok client to listen to port 8080:
ngrok.exe -config=ngrok.cfg -log=ngrok.log -subdomain=test 8080
In this way, you can basically connect to write wechat, so your command must be changed, because there can be no port in the server configured by wechat:
# sudo ./bin/ngrokd -tlsKey=server.key -tlsCrt=server.crt -domain="ngrok.mdzz2333.cn" -httpAddr=":80" -httpsAddr=":443"