Today, I will give you an interface document generator, JApiDocs.
swagger must have been used by everyone. It's very convenient and powerful. If you want to say what's wrong with swaager, it must be that annotations are more cumbersome to write. If I say that there is a tool that can generate documents without comments, are you excited? He is our leading actor today, JApiDocs.
Let's see how to use it!
1, Add dependency
<dependency>
  <groupId>io.github.yedaxia</groupId>
  <artifactId>japidocs</artifactId>
  <version>1.3</version>
</dependency>
2, Configure build parameters
We create a new project, then write a main method casually, increase the configuration of generating documents, and then run the main method.
DocsConfig config = new DocsConfig();
config.setProjectPath("F:\\Java journey\\japi-docs"); // Project root
config.setProjectName("japi-docs"); // entry name
config.setApiVersion("V1.0");       // Declare the version of the API
config.setDocsPath("F:\\test"); // Directory where API documents are generated
config.setAutoGenerate(Boolean.TRUE);  // Configure automatic generation
Docs.buildHtmlDocs(config); // Execute generate document
3, Coding specification
Because JApiDocs is implemented by parsing Java source code, if you want to implement the desired document, you need to follow certain specifications.
3.1 class notes, method notes, and attribute notes
If we want to generate class annotation, we can add annotation directly to the class, or we can generate it by adding @ description.
/**
 * User interface class
 */
@RequestMapping("/api/user")
@RestController
public class UserController {}

/**
 * @author Java journey
 * @Description User interface class
 * @Date 2020-06-15 21:46
 */
@RequestMapping("/api/user")
@RestController
public class UserController {}
If we want to generate the annotation of the method, we can only add the annotation directly, not by adding @description.
/**
 * Query users
 * @param age Age
 * @return R<User>
*/
@GetMapping("/list")
public R<User> list(@RequestParam int age){

    User user = new User("Java journey", 18);
    return R.ok(user);
}
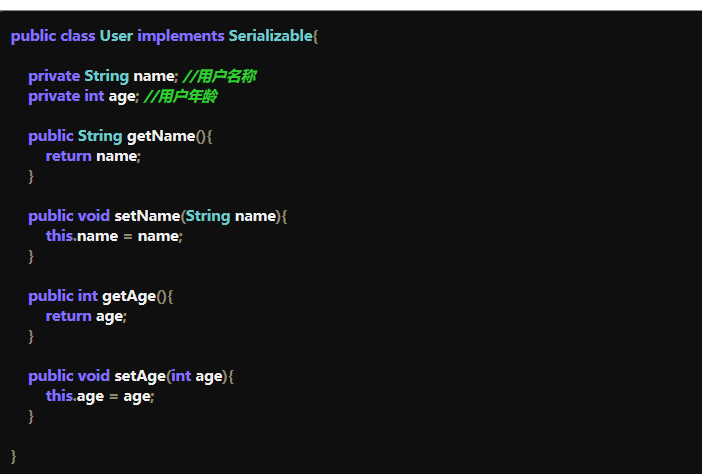
JApiDocs can automatically generate entity classes. There are three ways to annotate the attributes of entity classes. The generated effect is the same, as follows:
/**
 * User name
 */
private String name;
/**
 * User age
 */
private int age;
// User name
private String name;
// User age
private int age;
private String name;// User name
private int age;// User age
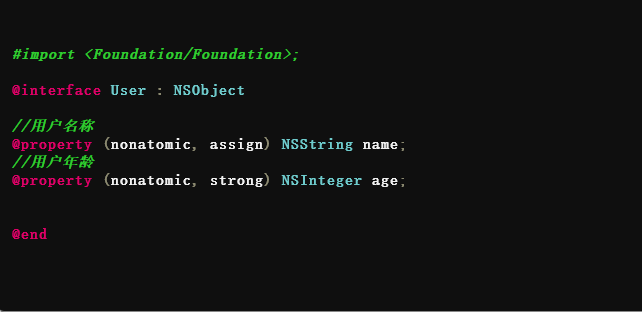
In addition to supporting our common models, he also supports IOS model generation as follows:


3.2 request parameters
If the submitted form is in the key/value format of application/x-www-form-urlencoded type, we can obtain parameters through @ param annotation, and add comments after the parameters. The example is as follows:
/**
  * @param age Age
  */
@GetMapping("/list")
public R<User> list(@RequestParam int age){
    User user = new User("Java journey", 18);
    return R.ok(user);
}
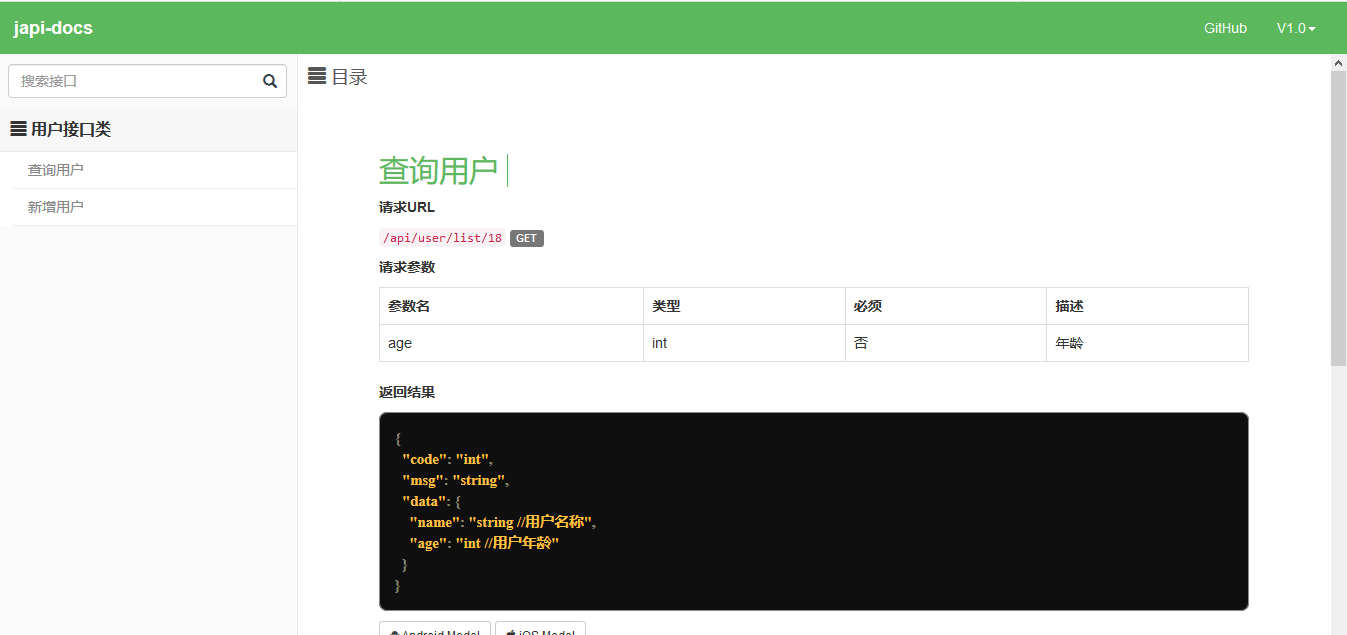
The generated documents are as follows:
Request parameters
| Parameter name | type | must | describe |
|---|---|---|---|
| age | int | no | Age |
If the submitted form is a json data format of application/json type, it is as follows:
/**
  * @param user
  * @return
  */
@PostMapping("/add")
public R<User> add(@RequestBody User user){
    return R.ok(user);
}
The generated documents are as follows:
Request parameters
{
  "name": "string //User name ",
  "age": "int //User age“
}
3.3 response results
We know that if the Controller declares @ RestController, SpringBoot will directly sequence the returned objects into Json data format and return them to the front end. JApiDocs also uses this feature to parse the returned results of the interface. However, since JApiDocs is static to parse the source code, you need to clearly point out the type information of the returned object. JApiDocs supports complex class parsing such as inheritance, generics, loop nesting, etc.
Therefore, we don't need to write any more comments, which will be parsed according to our returned results. The effect is as follows:
Return result:
{
  "code": "int",
  "msg": "string",
  "data": {
    "name": "string //User name ",
    "age": "int //User age“
  }
}
Finally, the interface documents we generated are as follows:

4, Advanced configuration
4.1 @ApiDoc
If you do not want to export all interfaces, we can set it in the configuration config.setAutoGenerate ( Boolean.FALSE ); then add @ ApiDoc to the generated interface.
@ApiDoc has the following three attributes:
- result: this object type can be declared directly. If you declare it, the return object of SpringBoot will be overwritten
- URL: request URL, extension field, used to support non SpringBoot projects
- Method: request method, extended field, used to support non SpringBoot projects
@ApiDoc(result = User.class, url = "/api/user/view", method = "post")
4.2 @Ignore
If you don't want to export a field in an object, you can add @ Ignore annotation to the field, so that it will be automatically ignored when JApiDocs exports the document.
public class User {
    @Ignore
    private int age;
}
5, Summary
This is where JApiDocs is introduced. You can easily see the advantages and disadvantages. Almost no comments are needed to generate interface documents, and only a few comments can be generated automatically through ide. However, JApiDocs does not have swagger online debugging function. If one day JApiDocs supports online debugging, there will be a wave of followers. After all, who writes code likes to write redundant comments! ~