1. Event mechanism
The interaction between javaScript and HTML is realized through events. Events refer to specific interactions in documents or browser windows.
The event consists of three parts
Event source event type event handler is also called event three elements
1. Event source: event triggered object = > button object
2. Event type: how to trigger? What event is triggered?
3. Event handler: by means of a function assignment
To execute an event
1. Get event source
2. Registration event (binding event)
3. Add an event handler in the form of function assignment
2. Event bubbling
<!DOCTYPE html>
<html lang="en">
<head>
    <meta charset="UTF-8">
    <meta http-equiv="X-UA-Compatible" content="IE=edge">
    <meta name="viewport" content="width=device-width, initial-scale=1.0">
    <title>Document</title>
    <style>
        *{
            color: white;
        }
        #outer{
            width: 300px;
            height: 300px;
            background-color: red;
        }
        #center{
            width: 200px;
            height: 200px;
            background-color: aqua
        }
        #inner{
            width: 100px;
            height: 100px;
            background-color: greenyellow;
        }
    </style>
</head>
<body>
    <div id="outer">
        outer
        <div id="center">
            center
            <div id="inner" onclick="myfun()">
                inner
            </div>
        </div>
    </div>
    <script>
        var outer = document.getElementById('outer')
        var center = document.getElementById('center')
        var inner = document.getElementById('inner')
        //Add a click event to each of the three nodes

        //inner
        inner.onclick = function(event){
            console.log('inner');
            console.log(event.target);
            //Prevent event bubbling
            // event.stopPropagation();
        }
        //center
        center.onclick = function(){
            console.log('center');
        }
        //outer
        outer.onclick = function(){
            console.log('outer');
        }
    </script>
</body>
</html>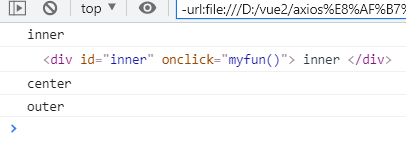
Click the div element of inner in the page, and the click event will occur in the following order
-
div#inner
-
div#center
-
div#outer
-
body
-
html
-
document
The clicked element triggers the click event first. Then, the click event goes up the DOM tree and triggers on each node in turn until it reaches the document object.
Prevent event bubbling
Use event.stopPropagation() directly in the method to prevent event bubbling. After the above example is used, clicking the div element of inner in the page will only return the first two lines.
3. Event handler
3.1 HTML event handler
Event handlers defined in HTML can contain precise action instructions or call methods defined elsewhere on the page.
<button onclick="click1()">switch</button>
<script>
  function click1() {
    console.log('HelloWolrd!');
  }
</script>
When the method is bound by an event, this points to the object to which the event is bound
<button onclick="this.innerHTML = 'helloworld'">Click me to switch</button>
3.2 DOM0 event handler
The traditional way to specify an event handler in JavaScript is to assign a function to an event handler attribute (of a DOM element). When you assign a value to an event handler in DOM0 mode, the assigned function is regarded as the method of the element. Therefore, the event handler runs in the scope of the element, that is, this is equal to the element.
<button id='btn'>switch</button>
<script>
  var btn = document.getElementById('btn');
  btn.onclick = function () {
    console.log('helloworld');
    console.log(this.id); //btn
  }
</script>
3.3 DOM2 event handler
There are mainly two methods: addEventListener() and removeEventListener()
These two methods receive three parameters on all DOM nodes: event name, event handler function and a Boolean value. true means to call the event handler in the capture phase, and false (default) means to call the event handler in the bubbling phase.
addEventListener()
The advantage of using DOM2 is that you can add multiple event handlers for the same event
  <button id='btn'>click</button>
        <script>
        var btn = document.getElementById("btn");
        btn.addEventListener("click", function () {
            console.log('Clicked');    // Clicked
        }, false);
        btn.addEventListener("click", function () {
            console.log(this.id); // btn
        });


        //Another way of writing
        btn.addEventListener("click", myfun, false);
        function myfun(event){
                console.log('I was clicked 2');
            }
        </script>
removeEventListener()
Event handlers added through addEventListener() can only be removed when removeEventListener() is used and the same parameters as those added need to be passed in. This means that the anonymous function added with addEventListener() cannot be removed. The wrong usage is as follows:
 <button id='btn'>click</button>
        <script>
        var btn = document.getElementById("btn");
        btn.addEventListener("click", function () {
            console.log('Clicked');    // Clicked
        }, false);

            btn.removeEventListener("click", function () {
                console.log(this.id); //No effect
            })
        </script>


 //Add an event handler using addEventListener(). Although the removeEventListener called appears to use the same parameters. But in fact, the second parameter is a completely different function from the one passed into addEventListener()
The correct usage is as follows:
<button id='btn'>click</button>
        <script>
        var btn = document.getElementById("btn");
        function myfun(event){
                console.log('I was clicked 2');
            }
            btn.addEventListener("click", myfun, false);
            btn.removeEventListener("click", myfun, false); // Effective
        </script>
3.4. Prevent default events
preventDefault()
The default action used to block a specific event.
<a href="https://Www.baidu. COM / "class =" A1 "> er</a>
    <script>
        var a1 = document.getElementsByClassName('a1')[0]

        a1.onclick = function () {
            // Block event default behavior
            event.preventDefault();
        }

    </script>
4. Event delegation
Using event bubbling, you can manage one type of event with only one event handler.
Event delegation has the following advantages.
1. The document object is available at any time. You can add event handlers to it at any time (without waiting for DOMContentLoaded or load events). This means that as long as the page renders clickable elements, it can work without delay.
2. Save time. Specifying only one event handler can save DOM reference and time.
3. Reduce the memory required for pages and improve performance.
<ul id="list1">
        <li id="li1">1</li>
        <li id="li2">2</li>
        <li id="li3">3</li>
      </ul>
    <script>
        var list1 = document.getElementById("list1");
        list1.addEventListener("click", able)

        function able(event){
            console.log(event);
             var target = event.target;
          console.log(target);
          switch (target.id) {
            case "li1":
              target.innerHTML = 'hello';
              break;
            case "li2":
              target.innerHTML = 'world';
              break;
            case "li3":
              target.innerHTML = '88';
              break;
          }
        }
      </script>