Learn a lot of ui knowledge, here to achieve a chat interface, first of all to achieve a layout xml, the code is as follows:
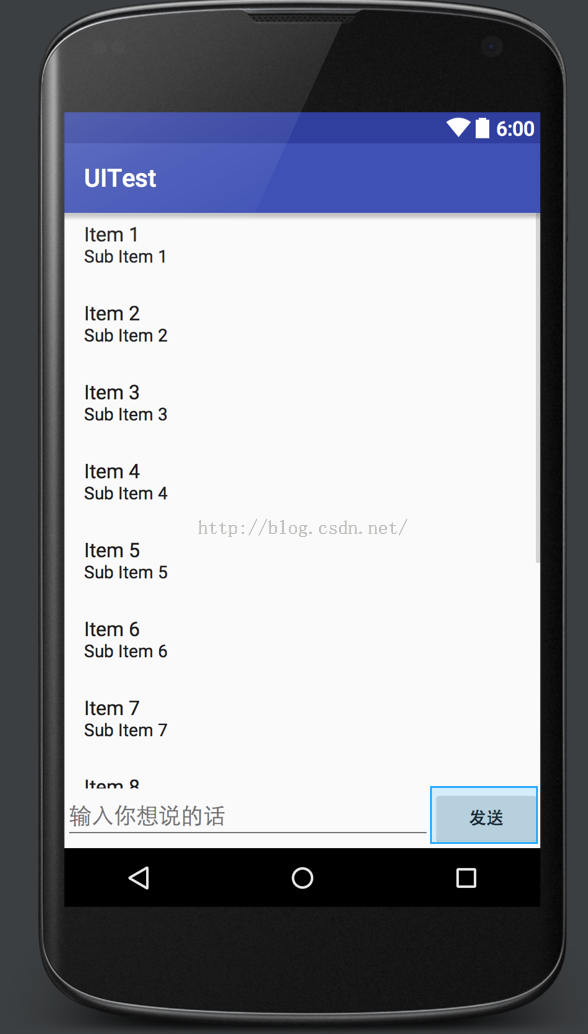
<?xml version="1.0" encoding="utf-8"?>
<LinearLayout
    xmlns:android="http://schemas.android.com/apk/res/android"
    android:layout_width="match_parent"
    android:layout_height="match_parent"
    android:orientation="vertical">

    <ListView
        android:id="@+id/msg_list_view"
        android:layout_height="0dp"
        android:layout_width="match_parent"
        android:layout_weight="1"
        android:divider="#0000"/>

    <LinearLayout
        android:layout_width="match_parent"
        android:layout_height="wrap_content">
        <EditText
            android:id="@+id/input_text"
            android:layout_height="wrap_content"
            android:layout_width="0dp"
            android:layout_weight="1"
            android:hint="Enter what you want to say."
            android:maxLines="2"/>
        <Button
            android:id="@+id/send"
            android:layout_height="wrap_content"
            android:layout_width="wrap_content"
            android:text="Send out"/>

    </LinearLayout>

</LinearLayout>
listview is the main way to realize the record display of chat, edittext is used to input information, button is used to send buttons. The results are as follows:
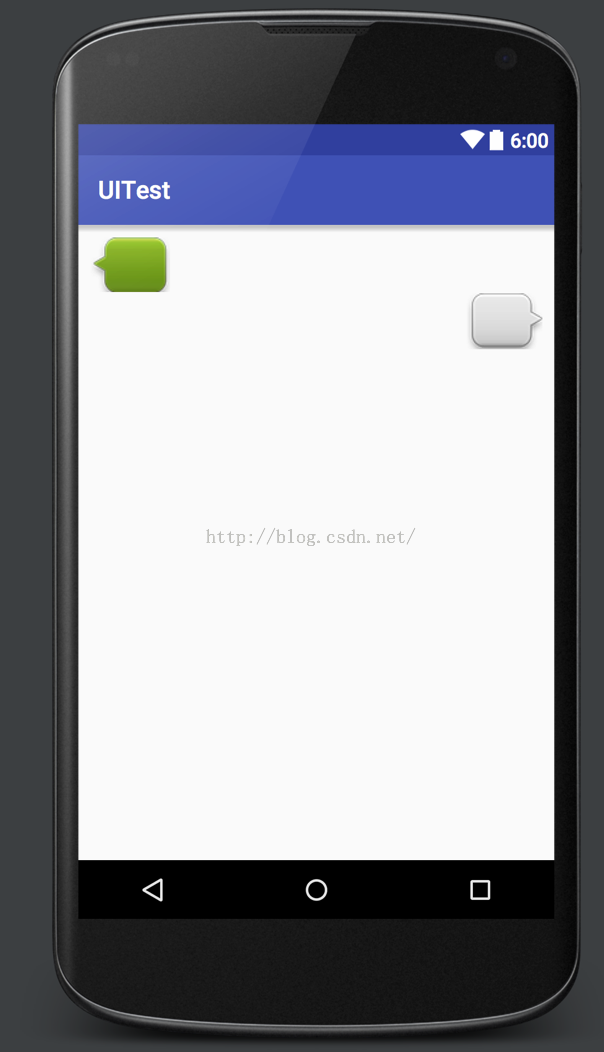
Then we implement a listView interface. Here we use two ready pictures, which are *.9.png, or 9-grid. The main purpose is to prevent stretching where we shouldn't stretch. The interface here uses bubbles, so as long as we stretch the background in the middle, we don't stretch the two sides. Build msg_item.xml, code as follows:
The effect is shown in the following figure:<?xml version="1.0" encoding="utf-8"?> <LinearLayout xmlns:android="http://schemas.android.com/apk/res/android" android:layout_width="match_parent" android:layout_height="match_parent" android:orientation="vertical" android:padding="10dp"> <LinearLayout android:id="@+id/left_layout" android:layout_height="wrap_content" android:layout_width="wrap_content" android:layout_gravity="left" android:background="@drawable/left_messages"> <TextView android:id="@+id/left_msg" android:layout_width="wrap_content" android:layout_height="wrap_content" android:layout_gravity="center" android:layout_margin="10dp" android:textColor="#fff"/> </LinearLayout> <LinearLayout android:id="@+id/right_layout" android:layout_height="wrap_content" android:layout_width="wrap_content" android:layout_gravity="right" android:background="@drawable/right_messages"> <TextView android:id="@+id/right_msg" android:layout_width="wrap_content" android:layout_height="wrap_content" android:layout_gravity="center" android:layout_margin="10dp"/> </LinearLayout> </LinearLayout>
The picture here is a png found on the internet, then ps changes its size. Finally, in android studio, right-click to select a new 9-patch image, and then select the stretch position, as shown in the following figure:
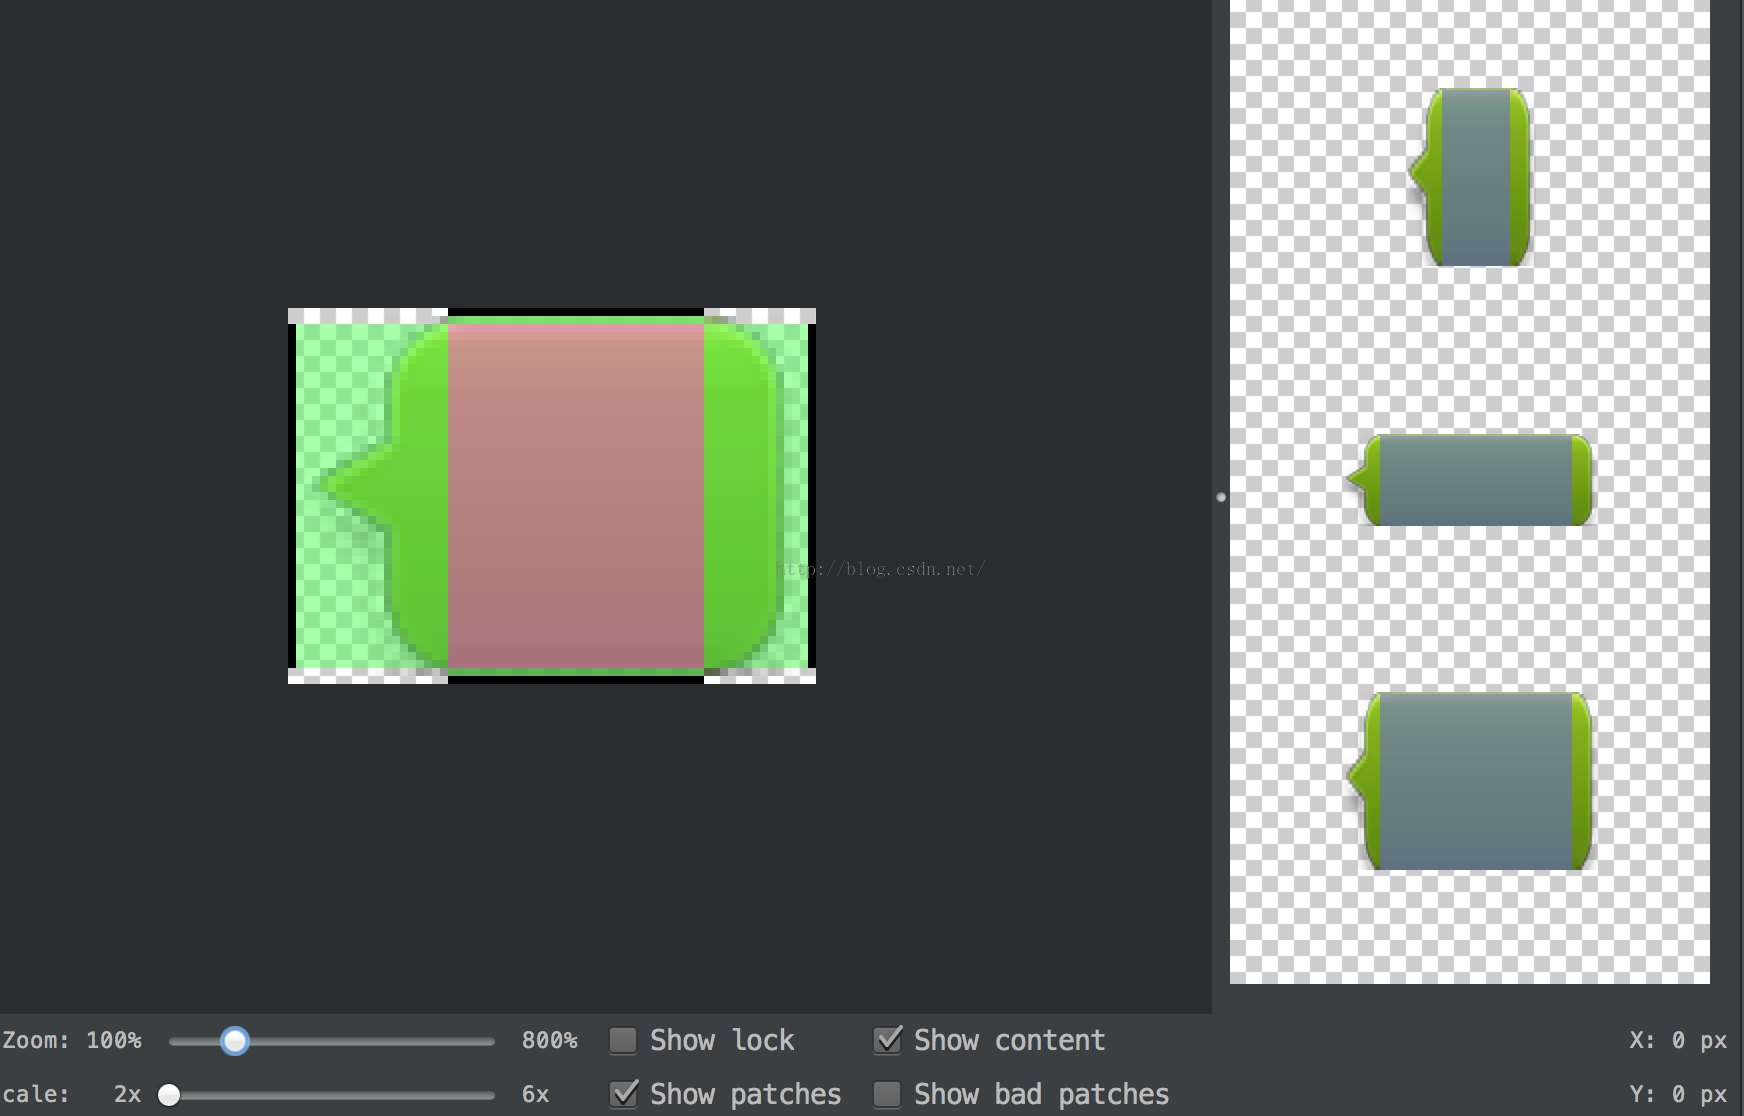
In this way, the green shows the whole background image, and then the red in the middle is where it can be stretched. Compared with png pictures, *.9.png pictures have more black lines around them. Here we will not elaborate on the production of *.9.png pictures.
Next, create a new Msg class with the following code:
package com.example.jared.uitest;

/**
 * Created by jared on 16/2/10.
 */
public class Msg {
    public static final int TYPE_RECEIVED = 0;
    public static final int TYPE_SEND = 1;

    private String content;
    private int type;

    public Msg(String content, int type) {
        this.content = content;
        this.type = type;
    }

    public String getContent() {
        return content;
    }

    public int getType() {
        return type;
    }
}
Then there's the Adapter. The MsgAdapter code is as follows:
package com.example.jared.uitest;

import android.content.Context;
import android.view.LayoutInflater;
import android.view.View;
import android.view.ViewGroup;
import android.widget.ArrayAdapter;
import android.widget.LinearLayout;
import android.widget.TextView;

import java.util.List;

/**
 * Created by jared on 16/2/10.
 */
public class MsgAdapter extends ArrayAdapter<Msg> {
    private int resourceId;

    public MsgAdapter(Context context, int textViewResourceId, List<Msg> objects) {
        super(context, textViewResourceId, objects);
        resourceId = textViewResourceId;
    }

    public View getView(int position, View convertView, ViewGroup parent) {
        Msg msg = getItem(position);
        View view;
        ViewHolder viewHolder;
        if(convertView == null) {
            view = LayoutInflater.from(getContext()).inflate(resourceId, null);
            viewHolder = new ViewHolder();
            viewHolder.leftLayout = (LinearLayout)view.findViewById(R.id.left_layout);
            viewHolder.rightLayout = (LinearLayout)view.findViewById(R.id.right_layout);
            viewHolder.leftMsg = (TextView)view.findViewById(R.id.left_msg);
            viewHolder.rightMsg = (TextView)view.findViewById(R.id.right_msg);
            view.setTag(viewHolder);
        } else {
            view = convertView;
            viewHolder = (ViewHolder) view.getTag();
        }
        if(msg.getType() == Msg.TYPE_RECEIVED) {
            viewHolder.leftLayout.setVisibility(View.VISIBLE);
            viewHolder.rightLayout.setVisibility(View.GONE);
            viewHolder.leftMsg.setText(msg.getContent());
        } else if(msg.getType() == Msg.TYPE_SEND) {
            viewHolder.rightLayout.setVisibility(View.VISIBLE);
            viewHolder.leftLayout.setVisibility(View.GONE);
            viewHolder.rightMsg.setText(msg.getContent());
        }
        return view;
    }

    class ViewHolder {
        LinearLayout leftLayout;
        LinearLayout rightLayout;
        TextView leftMsg;
        TextView rightMsg;
    }
}
Finally, we implement the MainActivity code:
package com.example.jared.uitest;

import android.os.Bundle;
import android.support.v7.app.ActionBar;
import android.support.v7.app.AppCompatActivity;
import android.view.View;
import android.widget.Button;
import android.widget.EditText;
import android.widget.ListView;

import java.util.ArrayList;
import java.util.List;

public class MainActivity extends AppCompatActivity {

    private ListView msgListView;
    private EditText inputText;
    private Button send;
    private MsgAdapter adapter;

    private List<Msg> msgList = new ArrayList<Msg>();

    @Override
    protected void onCreate(Bundle savedInstanceState) {
        super.onCreate(savedInstanceState);

        ActionBar actionBar = getSupportActionBar();
        actionBar.hide();

        setContentView(R.layout.activity_main);

        initMsgs();
        adapter = new MsgAdapter(MainActivity.this, R.layout.msg_item, msgList);
        inputText = (EditText)findViewById(R.id.input_text);
        send = (Button)findViewById(R.id.send);
        msgListView = (ListView)findViewById(R.id.msg_list_view);
        msgListView.setAdapter(adapter);
        send.setOnClickListener(new View.OnClickListener() {
            @Override
            public void onClick(View view) {
                String content = inputText.getText().toString();
                if(!"".equals(content)) {
                    Msg msg = new Msg(content, Msg.TYPE_SEND);
                    msgList.add(msg);
                    adapter.notifyDataSetChanged();
                    msgListView.setSelection(msgList.size());
                    inputText.setText("");
                }
            }
        });
    }

    private void initMsgs() {
        Msg msg1 = new Msg("Hello, how are you?", Msg.TYPE_RECEIVED);
        msgList.add(msg1);
        Msg msg2 = new Msg("Fine, thank you, and you?", Msg.TYPE_SEND);
        msgList.add(msg2);
        Msg msg3 = new Msg("I am fine, too!", Msg.TYPE_RECEIVED);
        msgList.add(msg3);
    }
}
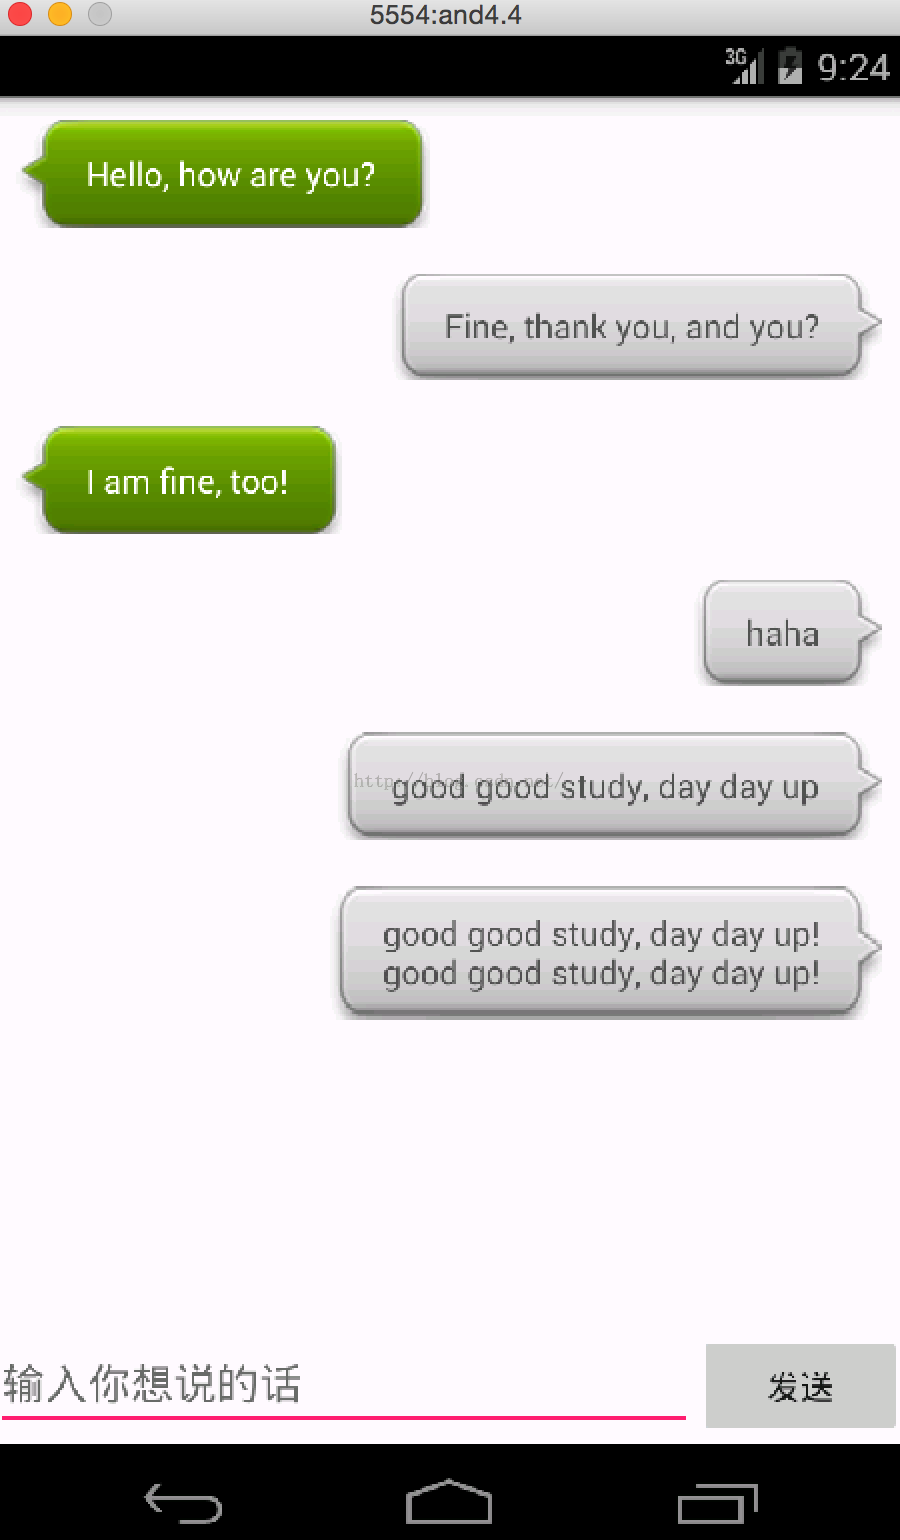
Run to see the effect, enter some text, and then send:
The interface above is a little similar to that of Wechat, so would it be better to add an avatar to it? Let's try. First of all, prepare two head images, simply named head1, head2, where the head is best to drink the same height pixels of the chat background, this example is 45. Then modify the msg_item.xml file, code as follows:
<?xml version="1.0" encoding="utf-8"?>
<LinearLayout xmlns:android="http://schemas.android.com/apk/res/android"
    android:layout_width="match_parent"
    android:layout_height="match_parent"
    android:orientation="vertical"
    android:padding="10dp">

    <LinearLayout
        android:layout_width="wrap_content"
        android:layout_height="wrap_content"
        android:orientation="horizontal">

        <ImageView
            android:id="@+id/head_left"
            android:layout_width="wrap_content"
            android:layout_height="wrap_content"
            android:layout_gravity="left"
            android:src="@drawable/head1"/>

        <LinearLayout
            android:id="@+id/left_layout"
            android:layout_height="wrap_content"
            android:layout_width="wrap_content"
            android:layout_gravity="left"
            android:background="@drawable/left_messages">

            <TextView
                android:id="@+id/left_msg"
                android:layout_width="wrap_content"
                android:layout_height="wrap_content"
                android:layout_gravity="center"
                android:layout_margin="10dp"
                android:textColor="#fff"/>
        </LinearLayout>
    </LinearLayout>

    <LinearLayout
        android:layout_width="wrap_content"
        android:layout_height="wrap_content"
        android:layout_gravity="right"
        android:orientation="horizontal">

    <LinearLayout
        android:id="@+id/right_layout"
        android:layout_height="wrap_content"
        android:layout_width="wrap_content"
        android:layout_gravity="right"
        android:background="@drawable/right_messages">

        <TextView
            android:id="@+id/right_msg"
            android:layout_width="wrap_content"
            android:layout_height="wrap_content"
            android:layout_gravity="center"
            android:layout_margin="10dp"/>

    </LinearLayout>
        <ImageView
            android:id="@+id/head_right"
            android:layout_width="wrap_content"
            android:layout_height="wrap_content"
            android:src="@drawable/head2"/>
    </LinearLayout>

</LinearLayout>
This is where the ImageView of the avatar and the TextView of the chat record need to be on the same line, so LinearLayout is nested here again.
Then modify the MsgAdapter code as follows:
package com.example.jared.uitest;

import android.content.Context;
import android.view.LayoutInflater;
import android.view.View;
import android.view.ViewGroup;
import android.widget.ArrayAdapter;
import android.widget.ImageView;
import android.widget.LinearLayout;
import android.widget.TextView;

import java.util.List;

/**
 * Created by jared on 16/2/10.
 */
public class MsgAdapter extends ArrayAdapter<Msg> {
    private int resourceId;

    public MsgAdapter(Context context, int textViewResourceId, List<Msg> objects) {
        super(context, textViewResourceId, objects);
        resourceId = textViewResourceId;
    }

    public View getView(int position, View convertView, ViewGroup parent) {
        Msg msg = getItem(position);
        View view;
        ViewHolder viewHolder;
        if(convertView == null) {
            view = LayoutInflater.from(getContext()).inflate(resourceId, null);
            viewHolder = new ViewHolder();
            viewHolder.leftLayout = (LinearLayout)view.findViewById(R.id.left_layout);
            viewHolder.rightLayout = (LinearLayout)view.findViewById(R.id.right_layout);
            viewHolder.leftMsg = (TextView)view.findViewById(R.id.left_msg);
            viewHolder.rightMsg = (TextView)view.findViewById(R.id.right_msg);
            viewHolder.head1 = (ImageView)view.findViewById(R.id.head_left);
            viewHolder.head2 = (ImageView)view.findViewById(R.id.head_right);
            view.setTag(viewHolder);
        } else {
            view = convertView;
            viewHolder = (ViewHolder) view.getTag();
        }
        if(msg.getType() == Msg.TYPE_RECEIVED) {
            viewHolder.leftLayout.setVisibility(View.VISIBLE);
            viewHolder.head1.setVisibility(View.VISIBLE);
            viewHolder.rightLayout.setVisibility(View.GONE);
            viewHolder.head2.setVisibility(View.GONE);
            viewHolder.leftMsg.setText(msg.getContent());
        } else if(msg.getType() == Msg.TYPE_SEND) {
            viewHolder.rightLayout.setVisibility(View.VISIBLE);
            viewHolder.head2.setVisibility(View.VISIBLE);
            viewHolder.leftLayout.setVisibility(View.GONE);
            viewHolder.head1.setVisibility(View.GONE);
            viewHolder.rightMsg.setText(msg.getContent());
        }
        return view;
    }

    class ViewHolder {
        LinearLayout leftLayout;
        LinearLayout rightLayout;
        TextView leftMsg;
        TextView rightMsg;
        ImageView head1;
        ImageView head2;
    }
}
Here viewHolder adds head1 and head2, and then accesses resources, and adds code to display and hide.
Pictures, code ready, then run to see the effect:
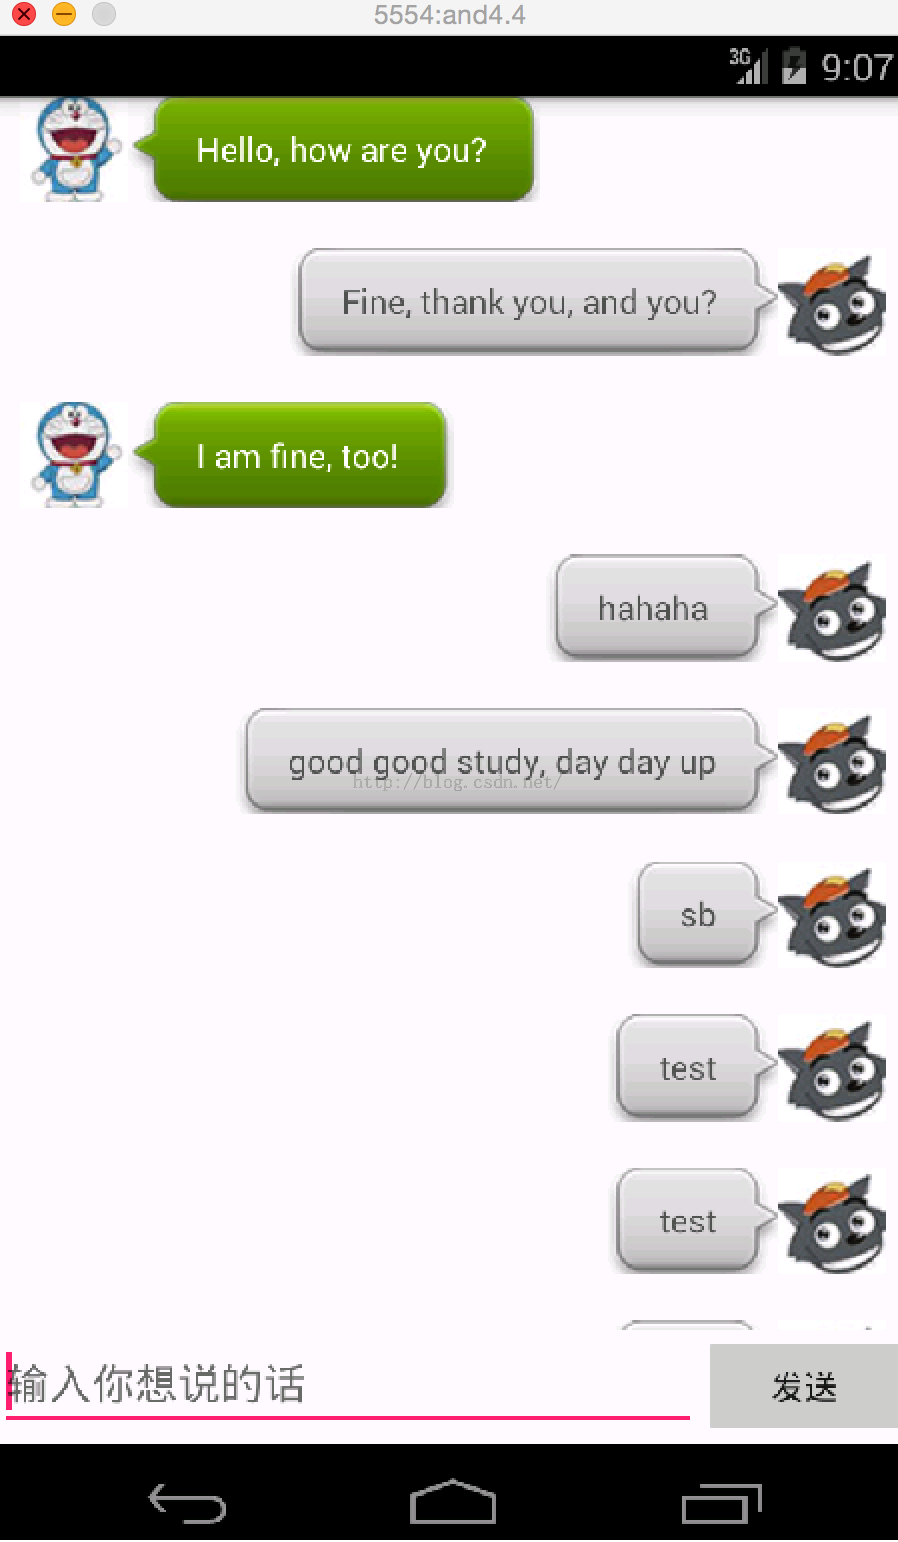
Basically, it's similar to the chat interface of Wechat. With so much knowledge of ui, it is possible to develop an interface simply. UI learns here first, and then goes on to learn something else.
Attachment: Refer to the First Line of Code.
Reproduced in: https://my.oschina.net/mayude/blog/614739