Although Android provides a database helper, developers still have many inconveniences in database programming. For example, each time a new table is added, developers have to manually implement the following code logic: 1. Rewrite the onCreate method of the database helper and add the table creation statement of the table; 2. When inserting a record, the attribute values of the data instance must be assigned to each field of the table one by one; 3. When querying records, you must traverse the result set cursor and assign each field value to the data instance one by one; 4. Before each read-write operation, you must first open the database connection; After the read-write operation, close the database connection again; There is no doubt that there is a lot of repetitive work in the above processing operations, which has attracted developers' complaints for several years. Therefore, various database processing frameworks have sprung up, including GreenDao, OrmLite, Realm and so on. Seeing that SQLite is becoming less and less popular, Google simply set up its own database framework called Room, which is also based on SQLite, but greatly simplifies database operation and reduces a considerable part of the original coding workload through annotation technology. Since the Room is not integrated into the SDK, but is provided as a third-party framework, you must first modify the module build Gradle file, add the following two lines of configuration to the dependencies node to import the specified version of Room Library:
implementation 'androidx.room:room-runtime:2.2.5'
annotationProcessor 'androidx.room:room-compiler:2.2.5'
After importing the Room library, you have to write several corresponding code files. Take entering book information as an example. At this time, you need to add, delete, modify and query the book information table. The specific coding process is divided into the following five steps:
1, Write the entity class corresponding to the book information table
Assuming that the book information class is called BookInfo, and its attributes correspond to each field of the book information table one by one, the "@ Entity" annotation should be added to the class, indicating that the class is a special data type for Room, and the corresponding table name is also called BookInfo. If the name field of the BookInfo table is the primary key of the table, you need to add "@ PrimaryKey" and "@ NonNull" annotations to the name attribute of the BookInfo class, indicating that the field is a non empty primary key. The following is an example of the definition code of the BookInfo class:
@Entity
public class BookInfo {
    @PrimaryKey // This field is a primary key and cannot be repeated
    @NonNull // The primary key must be a non empty field
    private String name;  // Book name
    private String author;  // author
    private String press;  // press
    private double price;  // Price
    // The set * * * method and get * * * method of each attribute are omitted below
}
2, Write the persistence class corresponding to the book information table
The so-called persistence refers to saving data to disk rather than memory. In fact, it is equivalent to SQL statements such as adding, deleting, modifying and querying. Assuming that the persistence class of the book information table is called BookDao, the record Query method of this class must add "@ Query" annotation, the record insertion method must add "@ Insert" annotation, the record Update method must add "@ Update" annotation, and the record deletion method must add "@ Delete" annotation (except conditional deletion methods). For the record Query method, you can add specific Query statements and Query conditions after @ Query; For the record insertion method and record Update method, it is necessary to specify which processing strategy should be adopted in case of duplicate records. The following is an example of the definition code of the BookDao class:
@Dao
public interface BookDao {
    @Query("SELECT * FROM BookInfo")  // Set query statement
    List<BookInfo> getAllBook();  // Load all book information

    @Query("SELECT * FROM BookInfo WHERE name = :name")  // Set query statement with condition
    BookInfo getBookByName(String name);  // Load books by name

    @Insert(onConflict = OnConflictStrategy.REPLACE)  // Replace the original record when duplicate records occur
    void insertOneBook(BookInfo book);  // Insert a Book message

    @Insert
    void insertBookList(List<BookInfo> bookList);  // Insert multiple book information

    @Update(onConflict = OnConflictStrategy.REPLACE)// Replace the original record when duplicate records occur
    int updateBook(BookInfo book);  // Update book information

    @Delete
    void deleteBook(BookInfo book);  // Delete book information

    @Query("DELETE FROM BookInfo WHERE 1=1")  // Set delete statement
    void deleteAllBook();  // Delete all book information
}
3, Write the database class corresponding to the book information table
Because there is a database before a table, the book information table must be placed in a database. The default book database can be derived from RoomDatabase. The following is an example of the definition code of the database class BookDatabase:
@Database(entities = {BookInfo.class},version = 1, exportSchema = false)
public abstract class BookDatabase extends RoomDatabase {
    // Get the persistent object of a table in the database
    public abstract BookDao bookDao();
}
4, Declare a unique instance of the book database in the custom Application class
In order to avoid memory leakage caused by repeatedly opening the database, each database should have only one instance during App operation. At this time, developers are required to customize a new Application class, declare and obtain the instance of book database in this class, and set the customized Application class to singleton mode to ensure that there is and only one Application instance during App operation. The following is a code example of the custom Application class:
public class MainApplication extends Application {
    private static MainApplication mApp;  // Declare a static instance of the current application
    private BookDatabase bookDatabase;  // Declare a book database object

    // Use singleton mode to obtain the unique instance of the current application
    public static MainApplication getInstance() {
        return mApp;
    }

    @Override
    public void onCreate() {
        super.onCreate();
        mApp = this;  // Assign a value to the static application instance when opening the application
        // An example of building a Book Database
        bookDatabase = Room.databaseBuilder(mApp, BookDatabase.class,"BookInfo")
                .addMigrations()  // Allow database migration (in case of database change, Room deletes the original database and creates a new database by default)
                .allowMainThreadQueries()  // Allow database operation in the main thread (Room cannot operate database in the main thread by default)
                .build();
    }

    // Get an instance of a Book Database
    public BookDatabase getBookDB(){
        return bookDatabase;
    }
}
5, Obtain the persistent object under the database where the book information table is operated
The code for obtaining persistent objects is very simple, and only the following line of code is enough:
// Get the unique book persistence object from the App instance
BookDao bookDao = MainApplication.getInstance().getBookDB().bookDao();
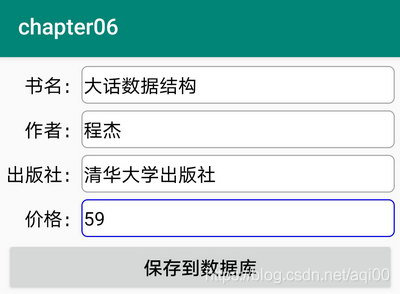
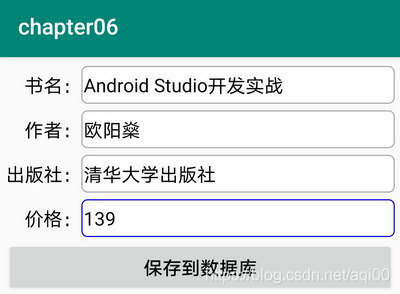
After completing the above five coding steps, then call the query * * *, insert * * *, update * * *, delete * * * and other methods of the persistent object to add, delete, modify and query book information. Run the test App, first open the record saving page, successively enter and save the information of the two books to the database, as shown in the following two figures.
Then open the record reading page, read the book information from the database and display it on the page, as shown in the figure below.

Click here to view the full directory of Android Development notes