Functional requirements
1. The page has a title
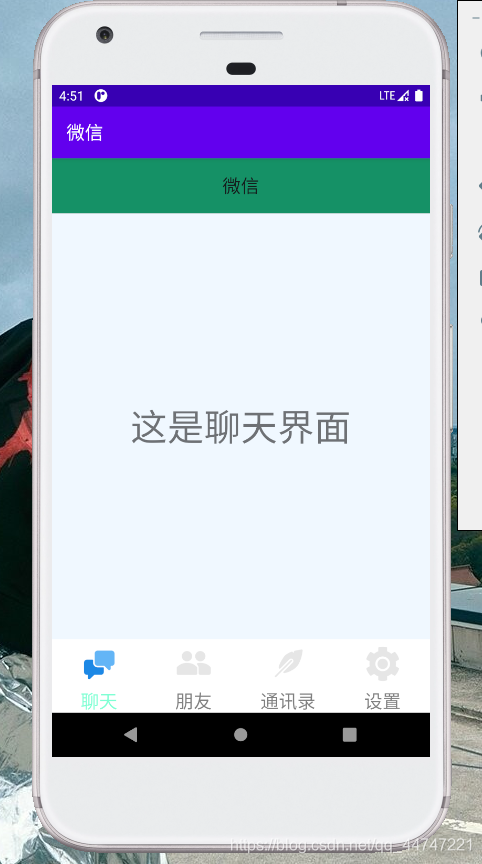
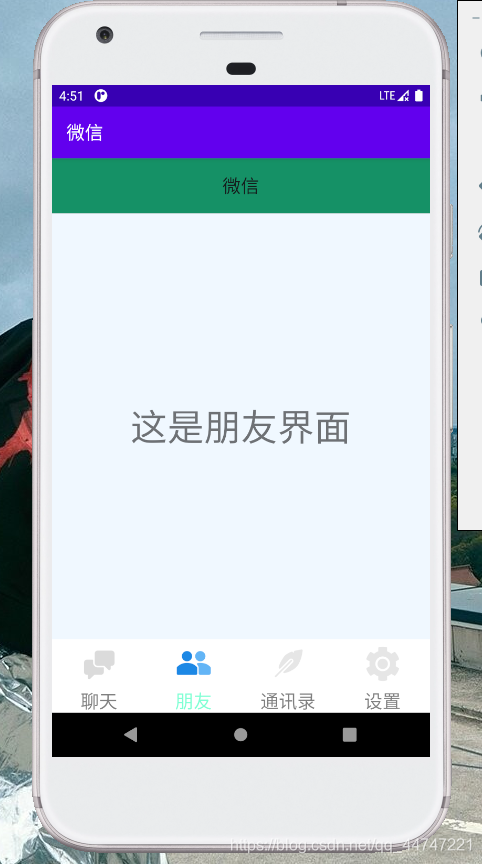
2. It has four pages. The page has a selection box at the bottom and a selection event. When you click the selection event, you can switch the page
3. The page content shall not exceed the boundary and shall be clear
Train of thought analysis
The wechat interface consists of three parts
- Title bar at the top of the page (top.xml)
- Intermediate content page
- Bottom navigation bar (bottom.xml)
Therefore, we need to write the above xml layout pages and analyze the layout contents and requirements of each part respectively: top title bar: this bar needs to have the title of the app. The size and color of the title are customized and displayed in the center, and the background color is optional middle content page: since this app is a simulated wechat interface, four pages are set to display different contents respectively bottom navigation bar: four icons. Click to switch the middle content page, so the layout file contains four imagebuttons, and the interface switching part needs to be implemented with Fragment
design process
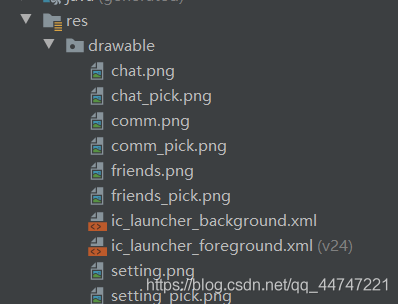
1. Resource file import
import resource files such as pictures into the / APP / RES / drawable directory
2. Layout design
this imitation wechat interface is divided into three parts: title bar, middle content page and bottom bar, so it is designed in parts.
Title Block
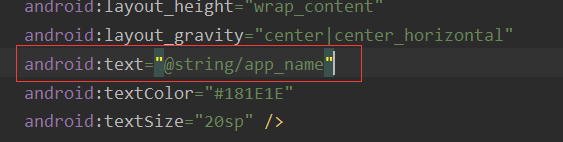
add a TextView, fill in the text, define the size and color, and set the background color. For text centering, we need to modify and add some configuration information. in the linearlayout, we modify the configuration information corresponding to gravity to center in TextView, we modify the layout_ The configuration information corresponding to gravity is center_horizontal
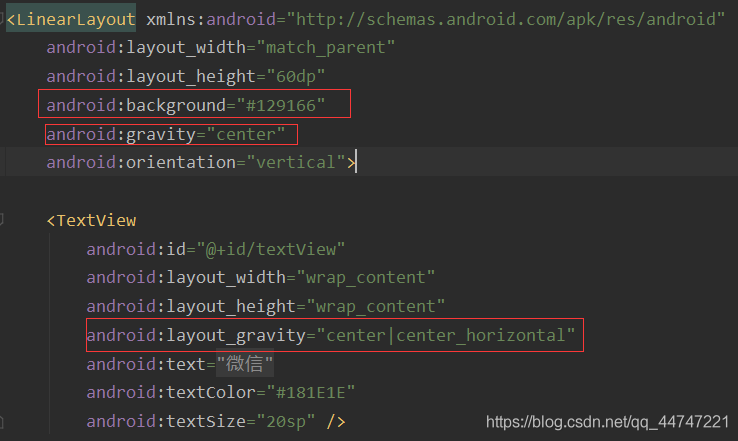
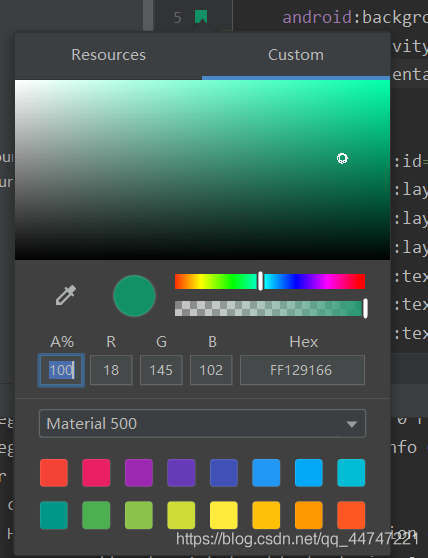
You can directly click the small box on the left to set the background color and other color settings
The App name is by calling strings. In values The value in XML is set
Middle page
the main page is set to four interfaces, namely four xml layout files, each of which is set with a TextView, which can be displayed in the middle
Bottom bar
set a horizontally placed LinearLayout, put four vertical linearlayouts under it, put an imagebutton under each vertical LinearLayout, and then put a TextView. Slowly drag and set it to a satisfactory level modify layout_width,layout_weight, orientation until the desired effect is achieved
activity_ Mainmain layout file
in activity_ In main, first set the vertical on the outermost side, configure the orientation, and start the configuration with v. Then put the title bar and the bottom bar in, import the top and bottom with include, and then put a FrameLayout in the middle.
3.java file writing
since the layout file and settings are written, we need to write a Java file that controls the code logic The most important thing here is Fragment. Here, we need to create a new Fragment class for each Fragment (corresponding to an xml layout file)
- ChatFragment.java
- FriendsFragment.java
- CommFragment.java
- SettingFragment.java
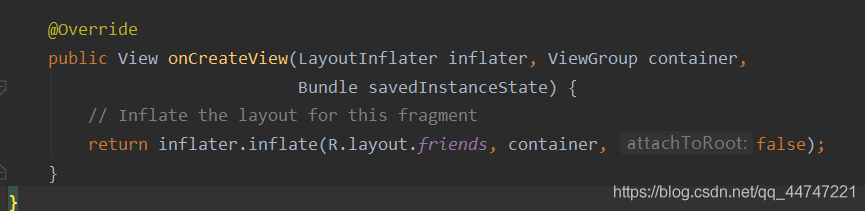
according to the above configuration, each class corresponds to a layout, so we turn the xml file corresponding to the four layouts into four class objects, so we can call it normally.
In mainactivity Control operation logic in Java First, you need to new out the objects of each interface (Fragment), and there is a Fragment manager to manage all fragments
	private Fragment chatFragment = new ChatFragment();
    private Fragment friendsFragment = new FriendsFragment();
    private Fragment commFragment = new CommFragment();
    private Fragment settingFragment = new SettingFragment();
And create a Fragment management variable
private FragmentManager fragmentManager;
Create a new initFragment function to initialize the Fragment page. In this function, add the previously defined four Fragment variables to the activity using the Fragment manager_ In the Framelayout layout of the mainw file
private void initFragment(){
        fragmentManager = getSupportFragmentManager();
        FragmentTransaction transaction = fragmentManager.beginTransaction();
        transaction.add(R.id.content,chatFragment);
        transaction.add(R.id.content,friendsFragment);
        transaction.add(R.id.content,commFragment);
        transaction.add(R.id.content,settingFragment);
        transaction.commit();
    }
Yes, bottom Four imagebutton controls and four linearlayout controls under XML create eight variables
	private LinearLayout chatLayout;
    private LinearLayout friendsLayout;
    private LinearLayout commLayout;
    private LinearLayout settingLayout;

    private ImageButton chatImageButton;
    private ImageButton friendsImageButton;
    private ImageButton commImageButton;
    private ImageButton settingImageButton;
Write the initview function to connect these 8 variables with the 8 controls in the bottom. First use the findviewbyid function to find the corresponding control, and then forcibly convert it to the corresponding variable type
private void initView(){
        chatLayout = findViewById(R.id.chatLayout);
        friendsLayout = findViewById(R.id.friendsLayout);
        commLayout = findViewById(R.id.commLayout);
        settingLayout = findViewById(R.id.settingLayout);

        chatImageButton = findViewById(R.id.chatImageButton);
        friendsImageButton = findViewById(R.id.friendsImageButton);
        commImageButton = findViewById(R.id.commImageButton);
        settingImageButton = findViewById(R.id.settingImageButton);

        chatText = findViewById(R.id.chatText);
        friendsText = findViewById(R.id.friendsText);
        commText = findViewById(R.id.commText);
        settingText = findViewById(R.id.settingText);
    }
Hide all textview. Click each icon to send different parameters to the interface selection function to realize interface selection. In the interface selection function, you need to hide the textview controls corresponding to the four interfaces first
private void hideFragment(FragmentTransaction transaction){
        transaction.hide(chatFragment);
        transaction.hide(friendsFragment);
        transaction.hide(commFragment);
        transaction.hide(settingFragment);
    }
Set listener
public class MainActivity extends AppCompatActivity implements View.OnClickListener
The color changes after clicking the icon. A resetBtn function is required at the beginning of the method body of this method. This function is used to initialize the four icons in the xml file as light colored icons, and then change the corresponding image to dark color when waiting for the selection
 @SuppressLint("ResourceAsColor")
    private void resetBtn(){
        chatImageButton.setImageResource(R.drawable.chat);
        friendsImageButton.setImageResource(R.drawable.friends);
        commImageButton.setImageResource(R.drawable.comm);
        settingImageButton.setImageResource(R.drawable.setting);

        chatText.setTextColor(this.getResources().getColor(R.color.nopickText));
        friendsText.setTextColor(this.getResources().getColor(R.color.nopickText));
        commText.setTextColor(this.getResources().getColor(R.color.nopickText));
        settingText.setTextColor(this.getResources().getColor(R.color.nopickText));
    }
Only listen to the four linerlayout s of the bottom
    private void initEvent(){
        chatLayout.setOnClickListener(this);
        friendsLayout.setOnClickListener(this);
        commLayout.setOnClickListener(this);
        settingLayout.setOnClickListener(this);
    }
Results page