Technical scheme for renewal of Andrea
Preset problems before scheme integration:
if payment is considered, Alibaba's sophix is recommended. Sophix is the product of comprehensive optimization, with perfect functions, simple and transparent development, distribution and monitoring management.
if you don't consider paying, you only need to support method level Bug repair, not resources and so. Robust is recommended.
if you don't consider paying, but you need to support resources and so at the same time, Tinker is recommended.
Normal development process:
When the new version goes online, if problems are found or user feedback bug s are found, it shall be repaired urgently. When the new version goes online, the user shall reinstall it, as shown in the following figure:

Thermal repair process:
When a new version is launched, problems or user feedback are found, emergency repair, online patch and automatic repair are carried out, as shown in the following figure:

Comparative analysis of schemes:
| programme | Tinker | Robust | Sophix |
|---|---|---|---|
| Class substitution | yes | no | yes |
| so substitution | yes | no | yes |
| Resource replacement | yes | no | yes |
| Full platform support | yes | yes | yes |
| Immediate effect | no | yes | yes |
| Patch package size | less | commonly | less |
| Complexity | commonly | complex | Fool access |
| Success rate | higher | Very high | Very high |
| charge | no | no | yes |
Sophix integration implementation:

1. Add project dependency
gradle depends on the remote warehouse. Open the project and find the build. Of the app gradle file, add the following configuration: add maven warehouse address:
repositories {
   maven {
       url "http://maven.aliyun.com/nexus/content/repositories/releases"
   }
}
Add gradle coordinate version dependency:
android {
    ......
    defaultConfig {
        applicationId "com.xxx.xxx" //Package name
        ......
        ndk {
            //Select the type of cpu to add so library.
            //Hot repair supports five
            abiFilters 'arm64-v8a', 'armeabi', 'armeabi-v7a', 'x86', 'x86_64'
        }
        ......
    }
    ......
}
dependencies {
    ......
        compile 'com.aliyun.ams:alicloud-android-hotfix:3.2.18'
    ......
}
2. Add application permission:
The following permissions are used by the Sophix SDK. maven dependency or aar dependency can be used without configuration. The specific configuration is in androidmanifest XML.
<uses-permission android:name="android.permission.INTERNET" />
<uses-permission android:name="android.permission.ACCESS_NETWORK_STATE" />
<uses-permission android:name="android.permission.ACCESS_WIFI_STATE" />
<uses-permission android:name="android.permission.READ_EXTERNAL_STORAGE"/>
3. Configure AndroidManifest file
At androidmanifest Add the following configuration under the application node in the middle of XML:
<meta-data
android:name="com.taobao.android.hotfix.IDSECRET"
android:value="App ID" />
<meta-data
android:name="com.taobao.android.hotfix.APPSECRET"
android:value="App Secret" />
<meta-data
android:name="com.taobao.android.hotfix.RSASECRET"
android:value="RSA secret key" />
4. Confusion configuration
#The baseline package is used to generate mapping txt
-printmapping mapping.txt
#Generated mapping Txt in the path of app/build/outputs/mapping/release, move to the path of / app
#Use the repaired items to ensure the consistency of confusion results
#-applymapping mapping.txt
#hotfix
-keep class com.taobao.sophix.**{*;}
-keep class com.ta.utdid2.device.**{*;}
#Prevent inline
-dontoptimize
5. Initialization
The initialization call should be as early as possible and must be in application At the beginning of attachbasecontext() (after super.attachBaseContext, if there is a Multidex, it also needs to be after Multidex.install). Other custom classes cannot be used before initialization, otherwise it is likely to crash. The operation of querying whether the server has available patches can be performed anywhere in the back. Not recommended in application Oncreate(), because with ContentProvider, the initialization time of Sophix will be too late, causing problems.
The latest version of Sophix introduces a new initialization method.
The original initialization method can still be used. However, the new method can provide more comprehensive function repair support, which will bring the following advantages:
Initialization is completely isolated from the original business code, so that the original real Application can be repaired, and the patch preloading time is reduced.
The new method can be more perfectly compatible with Android versions after 8.0.
Specifically, you need to add the following classes:
package com.my.pkg;
import android.app.Application;
import android.content.Context;
import android.support.annotation.Keep;
import android.util.Log;
import com.taobao.sophix.PatchStatus;
import com.taobao.sophix.SophixApplication;
import com.taobao.sophix.SophixEntry;
import com.taobao.sophix.SophixManager;
import com.taobao.sophix.listener.PatchLoadStatusListener;
import com.my.pkg.MyRealApplication;
/**
 * Sophix The entry class is specially used to initialize Sophix and should not contain any business logic.
 * This class must inherit from SophixApplication, and onCreate method does not need to be implemented.
 * This class should not have any logic calling each other with other classes in the project, and must be completely isolated.
 * AndroidManifest Set application as this class in, and set SophixEntry as the original application class.
 * Note that there is no need to initialize Sophix repeatedly in the original Application, and it is necessary to avoid confusing the original Application class.
 * If there are other custom modifications, please consult the official and deal with them properly.
 */
public class SophixStubApplication extends SophixApplication {
    private final String TAG = "SophixStubApplication";
    // Here, SophixEntry should specify the real Application and ensure that the realapplicationsub class name is not confused.
    @Keep
    @SophixEntry(MyRealApplication.class)
    static class RealApplicationStub {}
    @Override
    protected void attachBaseContext(Context base) {
        super.attachBaseContext(base);
//         If you need to use MultiDex, you need to call it here.
//         MultiDex.install(this);
        initSophix();
    }
    private void initSophix() {
        String appVersion = "0.0.0";
        try {
            appVersion = this.getPackageManager()
                             .getPackageInfo(this.getPackageName(), 0)
                             .versionName;
        } catch (Exception e) {
        }
        final SophixManager instance = SophixManager.getInstance();
        instance.setContext(this)
                .setAppVersion(appVersion)
                .setSecretMetaData(null, null, null)
                .setEnableDebug(true)
                .setEnableFullLog()
                .setPatchLoadStatusStub(new PatchLoadStatusListener() {
                    @Override
                    public void onLoad(final int mode, final int code, final String info, final int handlePatchVersion) {
                        if (code == PatchStatus.CODE_LOAD_SUCCESS) {
                            Log.i(TAG, "sophix load patch success!");
                        } else if (code == PatchStatus.CODE_LOAD_RELAUNCH) {
                            // If you need to restart in the background, it is recommended to save the status here with SharePreference.
                            Log.i(TAG, "sophix preload patch success. restart app to make effect.");
                        }
                    }
                }).initialize();
    }
}
// queryAndLoadNewPatch cannot be placed in attachBaseContext, otherwise it has no network permission. It is recommended to put it at any time later, such as onCreate
SophixManager.getInstance().queryAndLoadNewPatch();
The key points are:
    @Keep
    @SophixEntry(MyRealApplication.class)
    static class RealApplicationStub {}
SophixEntry should specify the real application in the project (specified by android::name of application in the original project). MyRealApplication is used here. And ensure that the realapplicationsub class name is not confused. The class name and package name of sophixstabapplication can be named by itself.
Keep here is Android The purpose of the class in the support package is to prevent the class name of this internal static class from being confused, because sophix will reflect and obtain the SophixEntry of this class. If the project does not rely on Android For support, you need to manually specify realapplicationsub in progurad to avoid confusion.
The following contents need to be added to the proguard file:
-keepclassmembers class com.my.pkg.MyRealApplication {
    public <init>();
}
-keep class com.my.pkg.SophixStubApplication$RealApplicationStub
The purpose is to prevent the construction method of real Application from being confused by proguard.
Finally, you need to change the application in AndroidManifest to this new sophixstabapplication class:
    <application
        android:name="com.my.pkg.SophixStubApplication"
        ... .../>
        ... ...
        ... ...
        ... ...
Implementation of Bugly hot update integration
1. Add plug-in dependency
Add to the "build.gradle" file under the project root directory:
buildscript {
    repositories {
        jcenter()
    }
    dependencies {
        // tinkersupport plug-in, where lastest Release refers to pulling the latest version. You can also specify a specific version number, such as 1.0.4
        classpath "com.tencent.bugly:tinker-support:1.1.5"
    }
}
Note: since tinkersupport version 1.0.3, there is no need to configure the classpath of tinker plug-in.
Version correspondence:
tinker-support 1.1.3 corresponding tinker 1.9.8
tinker-support 1.1.2 corresponding tinker 1.9.6
tinker-support 1.1.1 corresponding tinker 1.9.1
tinker-support 1.0.9 corresponding tinker 1.9.0
tinker-support 1.0.8 corresponding tinker 1.7.11
tinker-support 1.0.7 corresponding tinker 1.7.9
tinker-support 1.0.4 corresponding tinker 1.7.7
tinker-support 1.0.3 corresponding tinker 1.7.6
tinker-support 1.0.2 corresponding tinker 1.7.5(Configuration required tinker Plug in classpath)
2. Integrated SDK
gradle configuration
Add in the "build.gradle" file of app module (sample configuration):
android {
        defaultConfig {
          ndk {
            //Set the supported SO Library Architecture
            abiFilters 'armeabi' //, 'x86', 'armeabi-v7a', 'x86_64', 'arm64-v8a'
          }
        }
      }
      dependencies {
          compile "com.android.support:multidex:1.0.1" // Multi dex configuration
          //Comment out the original bugly warehouse
          //compile 'com.tencent.bugly:crashreport:latest.release '/ / where latest Release refers to the latest version number. You can also specify a specific version number, such as 1.3.4
          compile 'com.tencent.bugly:crashreport_upgrade:1.3.6'
          // Specify tinker dependent version (Note: tinker is no longer built in since the application is upgraded to version 1.3.5)
          compile 'com.tencent.tinker:tinker-android-lib:1.9.9'
          compile 'com.tencent.bugly:nativecrashreport:latest.release' //Of which latest Release refers to the latest version number. You can also specify a specific version number, such as 2.2.0
      }
When updating and upgrading the SDK later, you only need to change the version number in the configuration script.
Note: the SDK upgrade has integrated crash reporting. Users who have integrated bugly need to comment out the jcenter Library of the original bugly; Bugly users who have configured the symbol table retain the original symbol table configuration; The Bugly SDK (version 2.1.5 and above) has separated the Java Crash and Native Crash capture functions. If you want to use the NDK library, you need to configure: compile 'com tencent. bugly:nativecrashreport:latest. release’
Add in the "build.gradle" file of app module:
// Dependent plug-in script
apply from: 'tinker-support.gradle'
tinker-support. The content of gradle is as follows (example configuration):
Note: you need to create Tinker support in the same level directory Gradle file.
apply plugin: 'com.tencent.bugly.tinker-support'

def bakPath = file("${buildDir}/bakApk/")

/**
 * Fill in the benchmark package directory generated by each build here
 */
def baseApkDir = "app-0208-15-10-00"

/**
 * For detailed analysis of plug-in parameters, please refer to
 */
tinkerSupport {

    // Open the tinker support plug-in. The default value is true
    enable = true

    // Specify the archive directory. The default value is tinker, a subdirectory of the current module
    autoBackupApkDir = "${bakPath}"

    // Whether to enable the function of overriding tinkerPatch configuration. The default value is false
    // The tinkerPatch configuration does not take effect after it is enabled, that is, there is no need to add tinkerPatch
    overrideTinkerPatchConfiguration = true

    // When compiling the patch package, the apk of the baseline version must be specified, and the default value is null
    // If it is empty, it means that the patch package is not compiled
    // @{link tinkerPatch.oldApk }
    baseApk = "${bakPath}/${baseApkDir}/app-release.apk"

    // Corresponding tinker plug-in applyMapping
    baseApkProguardMapping = "${bakPath}/${baseApkDir}/app-release-mapping.txt"

    // Corresponding tinker plug-in applyResourceMapping
    baseApkResourceMapping = "${bakPath}/${baseApkDir}/app-release-R.txt"

    // Different tinkerids should be specified for both the benchmark package and the patch package, and the uniqueness must be guaranteed
    tinkerId = "base-1.0.1"

    // Used when building multi-channel patches
    // buildAllFlavorsDir = "${bakPath}/${baseApkDir}"

    // Whether to enable reinforcement mode. The default is false (supported from Tinker spport 1.0.7)
    // isProtectedApp = true

    // Turn on reflection mode
    enableProxyApplication = false

    // Whether new non export activities are supported (Note: set to true to modify the AndroidManifest file)
    supportHotplugComponent = true

}

/**
 * Generally speaking, we do not need to make any changes to the following parameters
 * For detailed introduction of each parameter, please refer to:
 * https://github.com/Tencent/tinker/wiki/Tinker-%E6%8E%A5%E5%85%A5%E6%8C%87%E5%8D%97
 */
tinkerPatch {
    //oldApk ="${bakPath}/${appName}/app-release.apk"
    ignoreWarning = false
    useSign = true
    dex {
        dexMode = "jar"
        pattern = ["classes*.dex"]
        loader = []
    }
    lib {
        pattern = ["lib/*/*.so"]
    }

    res {
        pattern = ["res/*", "r/*", "assets/*", "resources.arsc", "AndroidManifest.xml"]
        ignoreChange = []
        largeModSize = 100
    }

    packageConfig {
    }
    sevenZip {
        zipArtifact = "com.tencent.mm:SevenZip:1.1.10"
//        path = "/usr/local/bin/7za"
    }
    buildConfig {
        keepDexApply = false
        //tinkerId = "1.0.1-base"
        //Applymapping = "${bappath} / ${appName} / APP release mapping. TXT" / / optional. Set the mapping file. It is recommended to keep the proguard confusion mode of the old apk
        //Applyresourcemapping = "${bappath} / ${appName} / app-release-R.txt" / / optional. Set the R.txt file and maintain the allocation of ResId through the old apk file
    }
}
3. Initialize SDK
enableProxyApplication = false
This is the access method recommended by Tinker, which will increase the access cost to a certain extent, but has better compatibility.
After integrating Bugly and upgrading the SDK, we need to customize ApplicationLike to implement the Application code in the following way (the following is an example):
Custom Application
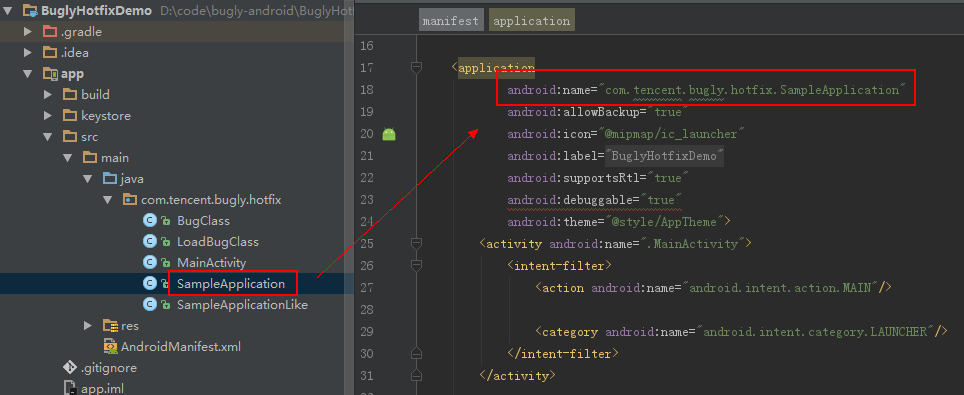
public class SampleApplication extends TinkerApplication {
    public SampleApplication() {
        super(ShareConstants.TINKER_ENABLE_ALL, "xxx.xxx.SampleApplicationLike",
                "com.tencent.tinker.loader.TinkerLoader", false);
    }
}
Note: this class integrates the TinkerApplication class, which does not do any operation. All Application code will be placed in the ApplicationLike inheritance class
Parameter analysis
Parameter 1: tinkerFlags indicates the types supported by Tinker: dex only, library only or all suuport, default: TINKER_ENABLE_ALL
Parameter 2: delegateClassName Application proxy class. Fill in your customized ApplicationLike here
Parameter 3: loaderClassName Tinker loader. Use the default
Parameter 4: tinkerLoadVerifyFlag whether to verify md5 when loading dex or lib. The default value is false
Configure the previous application as a class that inherits TinkerApplication:
Customize ApplicationLike
public class SampleApplicationLike extends DefaultApplicationLike {

    public static final String TAG = "Tinker.SampleApplicationLike";

    public SampleApplicationLike(Application application, int tinkerFlags,
            boolean tinkerLoadVerifyFlag, long applicationStartElapsedTime,
            long applicationStartMillisTime, Intent tinkerResultIntent) {
        super(application, tinkerFlags, tinkerLoadVerifyFlag, applicationStartElapsedTime, applicationStartMillisTime, tinkerResultIntent);
    }


    @Override
    public void onCreate() {
        super.onCreate();
        // SDK initialization is implemented here, and appId is replaced by your appId applied on the Bugly platform
        // When debugging, change the third parameter to true
        Bugly.init(getApplication(), "900029763", false);
    }


    @TargetApi(Build.VERSION_CODES.ICE_CREAM_SANDWICH)
    @Override
    public void onBaseContextAttached(Context base) {
        super.onBaseContextAttached(base);
        // you must install multiDex whatever tinker is installed!
        MultiDex.install(base);

        // Install tinker
        // TinkerManager.installTinker(this);  Replace with the method provided by Bugly below
        Beta.installTinker(this);
    }

    @TargetApi(Build.VERSION_CODES.ICE_CREAM_SANDWICH)
    public void registerActivityLifecycleCallback(Application.ActivityLifecycleCallbacks callbacks) {
        getApplication().registerActivityLifecycleCallbacks(callbacks);
    }

}
Note: tinker requires you to enable MultiDex. You need to configure it in dependencies. Only compile "com.android.support:multidex:1.0.1" can use MultiDex Install method; SampleApplicationLike is a proxy class of Application. All previous implementations in Application must be all copied here. In onCreate method, SDK initialization method is invoked and Beta. is invoked in onBaseContextAttached. installTinker(this);.
enableProxyApplication = true
Note: there is no need for you to modify the Application. The main reason is to reduce the access cost. Our plug-in will dynamically replace the Application in the AndroidMinifest file and define the class for us to reflect the real Application (you need to access SDK version 1.2.2 and plug-in version 1.0.3 or above).
public class MyApplication extends Application {

    @Override
    public void onCreate() {
        super.onCreate();
        // SDK initialization is implemented here, and appId is replaced by your appId applied on the Bugly platform
        // When debugging, change the third parameter to true
        Bugly.init(this, "900029763", false);
    }

    @Override
    protected void attachBaseContext(Context base) {
        super.attachBaseContext(base);
        // you must install multiDex whatever tinker is installed!
        MultiDex.install(base);


        // Install tinker
        Beta.installTinker();
    }

}
4. AndroidManifest.xml configuration
In Android mainfest XML for the following configuration:
1. Permission configuration
<uses-permission android:name="android.permission.READ_PHONE_STATE" />
<uses-permission android:name="android.permission.INTERNET" />
<uses-permission android:name="android.permission.ACCESS_NETWORK_STATE" />
<uses-permission android:name="android.permission.ACCESS_WIFI_STATE" />
<uses-permission android:name="android.permission.READ_LOGS" />
<uses-permission android:name="android.permission.WRITE_EXTERNAL_STORAGE" />
2. Activity configuration
<activity
    android:name="com.tencent.bugly.beta.ui.BetaActivity"
    android:configChanges="keyboardHidden|orientation|screenSize|locale"
    android:theme="@android:style/Theme.Translucent" />
3. Configure FileProvider
Note: if you want to be compatible with Android N or above devices, you must be in Android manifest Configure FileProvider in XML file to access the file of shared path.
<provider
    android:name="android.support.v4.content.FileProvider"
    android:authorities="${applicationId}.fileProvider"
    android:exported="false"
    android:grantUriPermissions="true">
    <meta-data
        android:name="android.support.FILE_PROVIDER_PATHS"
        android:resource="@xml/provider_paths"/>
</provider>
If the third-party library used is also configured with the same FileProvider, the merging conflict can be solved by inheriting the FileProvider class. An example is as follows:
<provider
    android:name=".utils.BuglyFileProvider"
    android:authorities="${applicationId}.fileProvider"
    android:exported="false"
    android:grantUriPermissions="true"
    tools:replace="name,authorities,exported,grantUriPermissions">
    <meta-data
        android:name="android.support.FILE_PROVIDER_PATHS"
        android:resource="@xml/provider_paths"
        tools:replace="name,resource"/>
</provider>
The FileProvider class is in the support-v4 package. Check whether your project introduces this class library.
Create a new xml folder in the res directory and create a provider_ paths. The xml file is as follows:
<?xml version="1.0" encoding="utf-8"?>
<paths xmlns:android="http://schemas.android.com/apk/res/android">
    <!-- /storage/emulated/0/Download/${applicationId}/.beta/apk-->
    <external-path name="beta_external_path" path="Download/"/>
    <!--/storage/emulated/0/Android/data/${applicationId}/files/apk/-->
    <external-path name="beta_external_files_path" path="Android/data/"/>
</paths>
Note: the two external storage paths configured here are the possible paths of the files downloaded from the upgrade SDK. Be sure to configure them according to the above format, otherwise errors may occur.
Version 1.3.1 and above can be configured without the above configuration. aar has been configured in AndroidManifest and contains the corresponding resource file.
5. Confusion configuration
To avoid confusing the SDK, add the following configuration to the Proguard obfuscation file:
-dontwarn com.tencent.bugly.**
-keep public class com.tencent.bugly.**{*;}
# tinker confusion rule
-dontwarn com.tencent.tinker.**
-keep class com.tencent.tinker.** { *; }
If the support-v4 package is used, the following confusion rules need to be configured:
-keep class android.support.**{*;}
robust integration
1. Add plug-in dependency
1. In App build Gradle, add the following dependencies:
apply plugin: 'com.android.application'
//Open this when making a patch, and auto patch plugin follows com android. application
//apply plugin: 'auto-patch-plugin'
apply plugin: 'robust'

compile 'com.meituan.robust:robust:0.4.99'
2. In the build of the whole project Gradle adds classpath:
buildscript {
    repositories {
        jcenter()
    }
    dependencies {
         classpath 'com.meituan.robust:gradle-plugin:0.4.99'
         classpath 'com.meituan.robust:auto-patch-plugin:0.4.99'
   }
}
3. Configure robust in the src peer directory of the project XML file
Note that R8 is enabled by default for gradle 3.6 and above, and the inserted ChangeQuickRedirect variable will be optimized. It needs to be in the confusion file Proguard rules Add the following code to pro:
-keepclassmembers class **{ public static com.meituan.robust.ChangeQuickRedirect *; }
Robust patch automation, which automatically generates patches for robust
Users only need to submit the modified code, run the same gradle command as online apk packaging, and generate patches in the app/build/outputs/robust directory of the project.
Automated patch tool
gradle command:/ gradlew clean assembleRelease --stacktrace --no-daemon
2. Repair and use
1. When using the plug-in, you need to place the auto patch plugin on COM android. After the application plug-in, before the other plug-ins.
apply plugin: 'com.android.application'
apply plugin: 'auto-patch-plugin'
2. Save the saved mapping file and methodsmap The boost file is placed in the app / boost / folder.
3. Modify the code and add @ modify annotation on the modified method. For Lambda expression, please call robustmodify in the modified method Modify() method
@Modify
    protected void onCreate(Bundle savedInstanceState) {
        super.onCreate(savedInstanceState);
     }
     //Or call robustmodify in the modified method Modify() method
     protected void onCreate(Bundle savedInstanceState) {
        RobustModify.modify()
        super.onCreate(savedInstanceState);
     }
The newly added methods and fields are annotated with @ Add
   //Increase method
    @Add
    public String getString() {
        return "Robust";
    }
    //Add class
    @Add
    public class NewAddCLass {
        public static String get() {
           return "robust";
         }
    }
4. Run the same command as apk online to generate patches. The patch directory is app / build / outputs / boost / patch jar
5. After the patch is successfully made, the apk will be stopped, and a prompt similar to the following will appear, indicating that the patch is successfully generated

3. Sample use
-
Generate the sample apk and execute the gradle command:
./gradlew clean assembleRelease --stacktrace --no-daemon
-
Install the sample apk. Save mapping Txt file and app / build / outputs / boost / methodsmap Robust file
-
After modifying the code, add * * @ modify * * annotation or call robustmodify Modify() method
-
Save the mapping Txt and methodsmap Put boost in APP / boost directory
-
Execute the same gradle command as the generation style apk:
./gradlew clean assembleRelease --stacktrace --no-daemon
-
After the patch is successfully made, the apk will be stopped. A prompt similar to the following appears, indicating that the patch is successfully generated

-
copy the patch file to the mobile directory / sdcard/robust
adb push ~/Desktop/code/robust/app/build/outputs/robust/patch.jar /sdcard/robust/patch.jar
The patch path / sdcard/robust is specified in PatchManipulateImp
4. Precautions:
1. When the construction method of the internal class is private (private will generate an anonymous constructor), you need to manually modify the access domain of the construction method to public during the patch making process
2. The return value of the method is this, which is not supported well now, such as the builder mode, but when making the patch code, it can be solved by adding a class to wrap it (such as class B below),
method a(){ return this; }
Change to
method a(){ return new B().setThis(this).getThis(); }
3. The field adding capability is in the internal test, but for the time being, the field adding capability can be realized by adding a new class and putting the field into the new class
4. The new class support includes static internal classes and non internal classes
5. Functions accessed only by fields cannot be repaired directly, but can be repaired indirectly through calls
Summary:
In terms of application, Alibaba's Sophix scheme is the best, but the scheme charges. Meituan's robot does not support resource modification, so there are great restrictions. Moreover, the technology has not been maintained officially for a long time, and the integration has greatly changed the company's projects. Therefore, in general, the scheme with the highest sex price ratio is Tencent's Tinker, which is hot updated for Tinker, Tencent has Bugly's integration for Tinker. Patch files can be managed in a one-stop way. In addition, it can be independent of Bugly and maintained by the company's own server. The management of patch files is more flexible.