preface
NDK, or Native Development Kit, is a development kit used to develop c/c + + on Android. Installation steps: developer.android.com/studio/proj...
1, Basic usage
- Configure the ndk directory in local.properties:
ndk.dir=/Users/bc/android-ndk-r17c
sdk.dir=/Users/bc/Library/Android/sdk
- Create a new cpp directory and write native code:
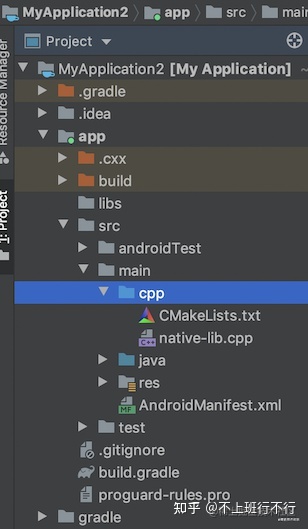
0673bd44559649e6a0d8b2110617f758~tplv-k3u1fbpfcp-watermark.image.png
The cpp file is a c + + code file, and CMakeLists.txt is a CMake build script (described in detail later).
3. Configure ndk compilation options in build.gradle:
android {
    defaultConfig {
        ndk {
            // Specifies the compiled abi schema
            abiFilters "armeabi-v7a", "arm64-v8a"
        }
        externalNativeBuild {
            // cmake configuration
            cmake {
                //Sets optional flags for the C++ compiler.
                cppFlags "-std=c++11 -frtti -fexceptions"
                // Passes optional arguments to CMake.
                arguments "-DANDROID_STL=c++_shared"
                arguments "-DANDROID_TOOLCHAIN=gcc"
            }
        }
    }

    // Use this block to link Gradle to your CMake or ndk-build script
    // Associate grade to cmake build script
    externalNativeBuild {
        cmake {
            // Build script path
            path "src/main/cpp/CMakeLists.txt"
            version "3.10.2"
        }
    }
}- After compiling, Gradle will generate so from c + + code according to the external build script CMakeLists.txt and package it into APK, which is located in / lib/{abi} /.
- Load so in java code:
public class NativeDemo {
    private String libPath = "/data/data/com.bc.sample/files/download/nativeLib2.so";

    public void initNativeLib() {
        // 1. Use loadLibrary to load so files in APK
        System.loadLibrary("nativeLib");
        // 2. Use load() to load so files in the file system
        System.load(libPath);
    }
}
2, NDK compilation basis
NDK supports two compilation methods: (1) CMake: NDK's default build tool. You can configure the compilation options in the CMakeLists.txt build script. The default value of CMake's C + + runtime is c++_static, CMake and independent tool chain enable C + + exceptions by default and RTTI by default. (2) NDK build: compile options can be configured in Android.mk and Application.mk files. The default value of C + + runtime of NDK build is none. C + + exceptions are disabled by default in NDK build, and RTTI is disabled by default.
2.1 CMake Foundation
CMake is an open source and cross platform compilation tool, which can generate corresponding makefile s according to the specified compilation environment.
CMake is an open-source, cross-platform family of tools
designed to build, test and package software.
CMake is used to control the software compilation process
using simple platform and compiler independent configuration
files, and generate native makefiles and workspaces that can
be used in the compiler environment of your choice.
CMake uses tool chains to perform compilation, linking and other tasks. Different tool chains are required for different languages; The NDK tool chain file is located in {NDK_root}/build/cmake/android.toolchain.cmake in the NDK directory, and parameters can be passed to the CMake tool chain under the android.defaultConfig.externalNativeBuild.cmake.arguments closure in build.gradle.
2.1.1 CMake build script
CMakeLists.txt is the cmake build script. In CMakeLists.txt, you can use some cmake commands to customize the build process. Some common cmake commands are listed below:
# Sets the minimum version of CMake required to build your native library.
# This ensures that a certain set of CMake features is available to
# your build.
# cmake minimum version number
cmake_minimum_required(VERSION 3.4.1)

# set: assign value to variable
set(libs "${CMAKE_SOURCE_DIR}/../jniLibs")
set(SOURCES src/main/cpp/native-lib.cpp src/main/cpp/native-lib2.cpp)

# Message: print message
message("jniLibs folder: " ${libs})

# option: define macro
option(IS_ANDROID "compile ANDROID Is defined as'ON',Others are defined as'OFF'" ON)

# If ENDIF: logic control of cmake
if(IS_ANDROID)
    message("Building for Android")
    add_definitions(-DIS_ANDROID)
else()
    message("Building for others")
endif(IS_ANDROID)

# include_directories:Add the given directories to those the compiler uses to search for include files
include_directories(Thirdparty/opencv)

# find_library:This command is used to find a library
find_library( # Sets the name of the path variable.
        # You can also directly use log, like JNI graphics below
        log-lib

        # Specifies the name of the NDK library that
        # you want CMake to locate.
        log)

# Specifies a library name, specifies whether the library is STATIC or
# SHARED, and provides relative paths to the source code. You can
# define multiple libraries by adding multiple add_library() commands,
# and CMake builds them for you. When you build your app, Gradle
# automatically packages shared libraries with your APK.
# add_library: add a library to the project
add_library( # Specifies the name of the library.
             native-lib

             # Sets the library as a shared library.
             # SHARED for dynamic library and STATIC for STATIC library
             SHARED

             # Provides a relative path to your source file(s).
             # Add all CPPs needed; Or use the SOURCES variable of the previous set
             src/main/cpp/native-lib.cpp
             src/main/cpp/native-lib2.cpp)

# Add a built library and use IMPORTED
add_library(opencv_java3 SHARED IMPORTED)
# Corresponding to the built library, you need to specify the path of the library
set_target_properties(opencv_java3
        # Specifies the target library.
        PROPERTIES IMPORTED_LOCATION
        # Provides the path to the library you want to import.
        "${libs}/${ANDROID_ABI}/libopencv_java3.so")

# target_ link_ Libraries (< target >... < item >...) associate target and item
# Links your native library against one or more other native libraries.
# The first parameter is target, and the following parameter is item; Target must use add first_ Library() has been created;
target_link_libraries( # Specifies the target library.
            native-lib
            opencv_java3
            jnigraphics
            ${log-lib} )
2.1.2 grade association cmake
Configure cmake in build.gradle to associate the two. After the association, the native code will be built during the construction of grade:
android {
    defaultConfig {
        ndk {
            // Specifies the compiled abi schema
            abiFilters "armeabi-v7a", "arm64-v8a"
        }
        externalNativeBuild {
            // cmake configuration
            cmake {
                //Sets optional flags for the C++ compiler.
                cppFlags "-std=c++11 -frtti -fexceptions"
                // Passes optional arguments to CMake toolchain.
                arguments "-DANDROID_STL=c++_shared"
                arguments "-DANDROID_TOOLCHAIN=gcc"
            }
        }
    }

    // Use this block to link Gradle to your CMake or ndk-build script
    // Associate grade to cmake build script
    externalNativeBuild {
        cmake {
            // Build script path
            path "src/main/cpp/CMakeLists.txt"
            version "3.10.2"
        }
    }
}
2.1.3 multiple CMake projects
If the project contains multiple CMake projects, you can use a CMakeLists.txt file as the top-level CMake build script and add other CMake projects as dependencies of this build script. For example, if the project needs to build two so's: native-lib1 and native-lib2, you can create a new top-level CMakeLists.txt, configure the top-level CMakeLists.txt to build.grade, and then add native-lib1 and native-lib2 to the top-level CMakeLists.txt:
cmake_minimum_required(VERSION 3.4.1)

# add_subdirectory: specify another CMakeLists.txt file as a build dependency, and then associate its output;
add_subdirectory(
    # Specifies the directory of the CMakeLists.txt file.
    ./src/main/cpp/native-lib1
    # Specifies the directory for the build outputs.
    ./src/main/cpp/native-lib1/outputs
    )
add_subdirectory(
    # Specifies the directory of the CMakeLists.txt file.
    ./src/main/cpp/native-lib2
    # Specifies the directory for the build outputs.
    ./src/main/cpp/native-lib2/outputs
    )
2.2 NDK build foundation
For details, see developer.android.com/ndk/guides/... (not highlighted in this article), the configuration in build.gradle is as follows:
externalNativeBuild {
    ndkBuild {
        path file('src/main/jni/Android.mk')
    }
}
2.3 native api
As described in the common cmake command, cmake can use find_ The library command finds the NDK native api library and stores its path as a variable; Or it can be in target_link_libraries directly use the NDK native api.
find_library( # Sets the name of the path variable.
        log-lib

        # Specifies the name of the NDK library that
        # you want CMake to locate.
        log)
Here are some common NDK native APIs:
- c library: < stdlib. H > and < stdio. H > and other standard C11 library header files; No need to display links;
- c + + Library: provide C++17 support;
- Log: < Android / log. H > API for outputting log to logcat. Starting from API Level 3;
- Bitmap: the libjnigraphics library is used to access the pixel buffer of Java Bitmap objects;
- OpenGL ES 1.0 - 3.2: open graphics library;
- EGL: used to allocate and manage OpenGL ES context and Surface;
- Vulkan: a low overhead, cross platform API for high-performance 3D graphics rendering.
For more NDK native APIs, please refer to the official documentation developer.android.com/ndk/referen... .
3, NDK construction products
After the native code is built, there are two products. Which product is generated is determined by the compilation configuration: (1) The native shared library dynamic library, i.e. the. so file, is configured in CMakeList.txt as follows:
add_library(native-lib
            SHARED
            src/main/cpp/native-lib.cpp)
(2) The native static library, i.e. the. a file, is configured in CMakeList.txt as follows:
add_library(native-lib
            STATIC
            src/main/cpp/native-lib.cpp)
Difference between the two:. So file can be called and loaded by java code during operation, while. A file cannot be directly loaded by java code during operation; So files can load other so files or a files during operation; The readelf command in the ndk directory can view the relevant information of so (symbol table, etc.).
4, JNI Foundation
JNI, namely java native interface, is the interface between java and native code;
4.1 basic usage
Use the native keyword to declare jni methods in java:
public class NativeDemo {
    public native String stringFromJNI();

    public static native void invole();
}
Declare jni methods with externl keyword in kotlin:
class NativeDemo {
    external fun stringFromJNI(): String;
}
There are two ways to implement the corresponding native code: (1) Static registration Under CPP directory, create a new native_lib.cpp, add the corresponding native implementation:
#include <jni.h>
#include <string>

// Jniexport, jnicall, the first two parameters jnienv * Env and jobobject obj are fixed formats; Jobobject obj in the fixed parameter represents this
extern "C"
JNIEXPORT jstring JNICALL
Java_com_bc_sample_NativeDemo_stringFromJNI(
        JNIEnv* env,
        jobject obj) {
    std::string hello = "Hello from C++";
    return env->NewStringUTF(hello.c_str());

// static's native method. The default parameter is jclass
extern "C"
JNIEXPORT void JNICALL
Java_com_bc_sample_NativeDemo_stringFromJNI(
        JNIEnv* env,
        jclass clazz) {

}
(2) Dynamic registration Under CPP directory, create a new native_lib.cpp, in JNI_ When onload, call env - > registernatives to register (JNI_OnLoad is called by the system when the dynamic library is loaded):
// You need to register the class where the jni method is located
static const char *jniClassName = "com/bc/sample/NativeDemo";

// jni methods to be registered represent java method name, method signature and native function pointer respectively
// Method signatures can be viewed with the javap command:
// javap -s /Users/bc/Demo/app/build/intermediates/javac/debug/classes/com/bc/sample/NativeDemo.class
static JNINativeMethod methods[] = {{"stringFromJNI", "()Ljava/lang/String", (jstring *) native_stringFromJNI}};

JNIEXPORT jint JNICALL JNI_OnLoad(JavaVM *vm, void *reserved) {
    JNIEnv *env = NULL;
    jint result = -1;

    if (vm->GetEnv((void **) &env, JNI_VERSION_1_6) != JNI_OK)
        return JNI_ERR;

    if (!registerNatives(env))
        return JNI_ERR;

    result = JNI_VERSION_1_6;
    return result;
}

static int registerNatives(JNIEnv *env) {
    jclass clazz = env->FindClass(jniClassName);
    if (clazz == NULL)
        return JNI_FALSE;

    jint methodSize = sizeof(methods) / sizeof(methods[0]);
    if (env->RegisterNatives(clazz, methods, methodSize) < 0)
        return JNI_FALSE;

    return JNI_TRUE;
}

// native implementation
jstring native_stringFromJNI(JNIEnv *env, jobject obj) {
    return env->NewStringUTF("hello");
}
4.1 JavaVM and JNIEnv
JNI defines two key data structure "JavaVM" and "JNIEnv" are essentially secondary pointers to function tables. Only one Java VM is allowed per process in Android. The scope of JNIEnv is a single thread. The JNIEnv of the current thread can be obtained through getEnv of JavaVM, and JNIEnv can obtain JavaVM through GetJavaVM.
// Save the JavaVM for easy access in the child thread
static JavaVM *_my_jvm;

JNIEXPORT jint JNICALL JNI_OnLoad(JavaVM *vm, void *reserved) {
    env->GetJavaVM(&_my_jvm)
    JNIEnv *env = NULL;
    jint result = -1;
    if (vm->GetEnv((void **) &env, JNI_VERSION_1_6) != JNI_OK)
        return JNI_ERR;
    return result;
}
4.2 threads and JavaVM
In java code, you can start a thread through Thread.start(); For pthread in native code_ The thread started by create() or std::thread does not have JNIEnv, so JNI cannot be called. You can attach JavaVM to the thread using AttachCurrentThread() or attachcurrentthreadaemon() functions. The attached thread can call JNI Code:
// Save the JavaVM for easy access in the child thread
static JavaVM *_my_jvm;
// Save the java layer obj to facilitate the callback result after the sub thread obtains it
static java_obj;

JNIEXPORT jint JNICALL JNI_OnLoad(JavaVM *vm, void *reserved) {
    env->GetJavaVM(&_my_jvm)
    JNIEnv *env = NULL;
    jint result = -1;
    if (vm->GetEnv((void **) &env, JNI_VERSION_1_6) != JNI_OK)
        return JNI_ERR;
    return result;
}

jstring native_stringFromJNI(JNIEnv *env, jobject obj) {
    java_obj = env->NewGlobalRef(obj);
}

void native_callback() {
    JNIEnv *env = NULL;
    _my_jvm->AttachCurrentThread(&env, nullptr);
    jmethodId method_call_back = env->GetMethodId(user_class, "callback", "()V");
    env->CallVoidMethod(java_obj, method_call_back);
    // detach is required after use
    _my_jvm->DetachCurrentThread();
}
4.3 JNI data type
4.3.1 basic data type
/* jni.h Source code */

/* Primitive types that match up with Java equivalents. */
/* jni The basic data types correspond to java one by one, and they can be converted directly */
typedef uint8_t  jboolean; /* unsigned 8 bits */
typedef int8_t   jbyte;    /* signed 8 bits */
typedef uint16_t jchar;    /* unsigned 16 bits */
typedef int16_t  jshort;   /* signed 16 bits */
typedef int32_t  jint;     /* signed 32 bits */
typedef int64_t  jlong;    /* signed 64 bits */
typedef float    jfloat;   /* 32-bit IEEE 754 */
typedef double   jdouble;  /* 64-bit IEEE 754 */

/* "cardinal indices and sizes" */
typedef jint     jsize;

#ifdef __cplusplus
/*
 * Reference types, in C++
 */
class _jobject {};
class _jclass : public _jobject {};
class _jstring : public _jobject {};
class _jarray : public _jobject {};
class _jobjectArray : public _jarray {};
class _jbooleanArray : public _jarray {};
class _jbyteArray : public _jarray {};
class _jcharArray : public _jarray {};
class _jshortArray : public _jarray {};
class _jintArray : public _jarray {};
class _jlongArray : public _jarray {};
class _jfloatArray : public _jarray {};
class _jdoubleArray : public _jarray {};
class _jthrowable : public _jobject {};

typedef _jobject*       jobject;
typedef _jclass*        jclass;
typedef _jstring*       jstring;
typedef _jarray*        jarray;
typedef _jobjectArray*  jobjectArray;
typedef _jbooleanArray* jbooleanArray;
typedef _jbyteArray*    jbyteArray;
typedef _jcharArray*    jcharArray;
typedef _jshortArray*   jshortArray;
typedef _jintArray*     jintArray;
typedef _jlongArray*    jlongArray;
typedef _jfloatArray*   jfloatArray;
typedef _jdoubleArray*  jdoubleArray;
typedef _jthrowable*    jthrowable;
typedef _jobject*       jweak;

#else /* not __cplusplus */

/*
 * Reference types, in C.
 */
typedef void*           jobject;
typedef jobject         jclass;
typedef jobject         jstring;
typedef jobject         jarray;
typedef jarray          jobjectArray;
typedef jarray          jbooleanArray;
typedef jarray          jbyteArray;
typedef jarray          jcharArray;
typedef jarray          jshortArray;
typedef jarray          jintArray;
typedef jarray          jlongArray;
typedef jarray          jfloatArray;
typedef jarray          jdoubleArray;
typedef jobject         jthrowable;
typedef jobject         jweak;

#endif /* not __cplusplus */
4.3.2 string type
extern "C"
JNIEXPORT jstring JNICALL
Java_com_bc_sample_NativeDemo_stringFromJNI(
        JNIEnv* env,
        jobject obj, jstring str) {
    jstring loacl_str = env->NewStringUTF("local_str");
    const char * c  = env->GetStringUTFChars(str, false);
    // Delete to avoid memory leaks
    env->ReleaseStringUTFChars(str, c);
    return env->NewStringUTF(hello.c_str());
}
4.3.3 reference type
For example, a User class is defined in java as follows:
package com.bc.sample;

class User {
    public String userName;
    public static String TAG;

    public void setName() {
    }

    public static void show() {
    }
}
The way to call User related methods in jni is as follows:
extern "C"
JNIEXPORT jobject JNICALL
Java_com_bc_sample_NativeDemo_objectFromJNI(
        JNIEnv* env,
        jobject obj, jobject user) {
    jclass user_class = env->GetObjectClass(user);
    // 1.1 variables
    jfieldID user_name_id = env->GetFiledId(user_class, "userName", "Ljava/lang/String");
    jstring name = env->NewStringUTF("jack");
    env->SetObjectFiled(user, user_name_id, name);
    // 1.2 static variables
    env->GetStaticFieldID(user_class, "TAG", "Ljava/lang/String");

    // 2.1 method
    jmethodId method_set_name = env->GetMethodId(user_class, "setName", "()V");
    env->CallVoidMethod(user, method_set_name);
    // 2.2 static method
    jmethodId method_show = env->GetStaticMethodId(user_class, "show", "()V");
    env->CallStaticObjectMethod(user_class, method_show);

    // 3 constructor, represented by < init >
    jclass usr_class = env->FindClass("com/bc/sample/User");
    jmethodId method_init = env->GetMethodId(user_class, "<init>", "()V");
    jobject usr = env->NewObject(usr_class, method_init);
    jobjectArray usr_array = env->NewObjectArray(5, usr_class, nullptr);

    // If the local reference exceeds 512, an error will be reported: local reference table overflow (max=512); So release it after use
    env->DeleteLocalRef(user_class);
}
4.3.4 array type
Whether it is the array of basic type, jintararray, jbooleanArray or the array of reference type, jobjectArray, it inherits jarray and is a reference type.
extern "C"
JNIEXPORT jobject JNICALL
Java_com_bc_sample_NativeDemo_objectFromJNI(
        JNIEnv* env,
        jobject obj, jintArray int_array,
        jstringArray str_array,
        jobjectArray user_array) {
    int len = env->GetArrayLength(user_array);
    // 1 basic data type array
    jint n = env->GetIntArrayElement(int_array, 0);
    // 2 string data type array
    jstring str = static_cast<jstring>(env->GetObjectArrayElement(str_array, 0));
    const char * c  = env->GetStringUTFChars(str, false);
    env->ReleaseStringUTFChars(str, c);

    // 3 reference type array; After obtaining the job object, the user data can be obtained according to 4.3.3
    jobject user = env->GetObjectArrayElement(user_array, 0);
    env->DeleteLocalRef(user);
}
4.4 java signature
You can use the javap command to generate class method and parameter signatures:
>javap -s java.lang.String
The corresponding relationship between java type and signature is as follows:
# Basic type
V    void   Generally used to represent the return value of a method
Z    boolean
B    byte
C    char
S    short
I    int
J    long
F    float
D    double

# L should be added before the reference type
String   Ljava/lang/String
Class    Ljava/lang/Class

# Before the array[
int[]    [I
Object[] [Ljava/lang/Object

# Method signature: parameters are indicated in parentheses, and return types are indicated after parentheses (reference types should be separated by;)
String fun()                 () Ljava/lang/String;
int fun( int i, String str)   (ILjava/lang/String;)I
4.5 JNI global reference local reference weak reference
static java_obj;

jstring native_stringFromJNI(JNIEnv *env, jobject obj) {
    // Local reference
    jclass str_clazz = env->FindClass("Ljava/lang/String");
    env->DeleteLocalRef(str_clazz);
    // Global reference, which is released only after manually calling DeleteGlobalRef
    java_obj = env->NewGlobalRef(obj);
    env->DeleteGlobalRef(obj);
    // Weak reference. You need to judge whether it is null before use
    java_obj = env->NewWeakGlobalRef(obj);
    jboolean is_null = env->IsSameObject(java_obj, nullptr);
}
4.6 JNI exception capture
Suppose the user class in java is defined as follows
class User {
    public void setName() throws RuntimeException {
    }

    public native void stringFromJNI();
}
When an exception occurs when calling java code in the native layer, it can be caught as follows:
jstring native_stringFromJNI(JNIEnv *env, jobject obj) {
   jclass user_class = env->GetObjectClass(user);
   jmethodId method_set_name = env->GetMethodId(user_class, "setName", "()V");
    env->CallVoidMethod(user, method_set_name);
    // 1. If an exception occurs when calling the java method setName, you can use the following methods to judge whether a crash occurs and catch it; otherwise, it will crash directly
    jthrowable throwable_occurred = env->ExceptionOccurred();
    if (throwable_occurred) {
        env->ExceptionDescribe();
        env->ExceptionClear();
    }

    // 2. Or when an exception occurs, the native layer can throw an exception to the java layer and complete the try catch in the java layer
    jclass throwable_clazz = env->FindClass("java/lang/RuntimeException");
    env->ThrowNew(throwable_clazz, "exception occurred");
}
4.7 JNI threads
Common thread libraries for native development:
- Posix API: <pthread.h>;
- < thread. H > supported by c++11 (not introduced in this paper);
#include<pthread.h>
// Thread mutex
pthread_mutex_t mutex;
// Thread condition variable
pthread_cond_t cont;

// Methods that need to be executed in child threads
void *sayHello(void * arg) {
    pthread_mutex_lock(&mutex);
    jstring local_arg = static_cast<jstring > (arg);
    LOG(local_arg);
    pthread_mutex_unlock(&mutex);
    return nullptr;
}

jstring native_stringFromJNI(JNIEnv *env, jobject obj) {
    // 1 create thread
    pthread_t handle;
    jstring loacl_str = env->NewStringUTF("local_str");
    int result = pthread_create(&handle, nullptr, sayHello, loacl_str);

    // 2 common methods of thread synchronization
    // pthread_mutex_lock() pthread_mutex_unlock()
    pthread_mutex_init(&mutex, nullptr);
    pthread_mutex_destroy(&mutex);
    // pthread_cond_wait() pthread_cond_signal()
    pthread_cond_init(&cond, nullptr);
    pthread_cond_destroy(&cond);
}
5, Introduction to ABI
Different Android devices use different CPUs, and different CPUs support different instruction sets. Each combination of CPU and instruction set has its own application binary interface (ABI). Each combination of CPU and instruction set has its own application binary interface (ABI). By default, Gradle will build for all non deprecated ABIS. To limit the ABI set supported by the application, you can set the following configuration in build.gradle:
android {
    defaultConfig {
        ndk {
            // Qualified compiled abi
            abiFilters "armeabi", "arm64-v8a"
        }
    }
}
cpu architecture and supported abi are as follows:
cpu \ abi | armeabi | armeabi-v7a | arm64-v8a | x86 | x86_64 | mips | mips64 |
|---|
At present, the mainstream CPU architecture in the market is ARM v7; mips/mips64 and x86 / x86_64 have little market share and can be ignored;
6, crash stack analysis
Common native crash: source.android.com/devices/tec...
When a crash occurs in the native layer, the crash stack is as follows:
A/libc: Fatal signal 11 (SIGSEGV), code 1, fault addr 0x0 in tid 8427 (com.bc.sample), pid 8427 (com.bc.sample)
A/DEBUG: *** *** *** *** *** *** *** *** *** *** *** *** *** *** *** ***
A/DEBUG: Build fingerprint: 'Meizu/meizu_16th_CN/16th:8.1.0/OPM1.171019.026/1554749207:user/release-keys'
A/DEBUG: Revision: '0'
A/DEBUG: ABI: 'arm64'
A/DEBUG: pid: 8427, tid: 8427, name: com.bc.sample  >>> com.bc.sample <<<
A/DEBUG: signal 11 (SIGSEGV), code 1 (SEGV_MAPERR), fault addr 0x0
A/DEBUG: Cause: null pointer dereference
A/DEBUG:     x0   0000000000000000  x1   0000000000000000  x2   000000000000000e  x3   0000007feb60313f
A/DEBUG:     x4   0000000000000000  x5   0080000000000000  x6   7266206f6c6c6548  x7   2b2b43206d6f7266
A/DEBUG:     x8   0101010101010101  x9   406a834e06fb5ba3  x10  0000000000000000  x11  000000000000000e
A/DEBUG:     x12  0000000000000001  x13  0000000000000004  x14  00000074aa8bca40  x15  00000074a9b7a8a8
A/DEBUG:     x16  000000740b3bae98  x17  00000074a9aa1890  x18  0000007425800080  x19  00000074256c2a00
A/DEBUG:     x20  0000007425288220  x21  00000074256c2a00  x22  0000007feb60340c  x23  000000740b68273a
A/DEBUG:     x24  0000000000000004  x25  00000074aa8bca40  x26  00000074256c2aa0  x27  0000000000000001
A/DEBUG:     x28  0000000000000002  x29  0000007feb603070  x30  000000740b3957f4
A/DEBUG:     sp   0000007feb603060  pc   00000074a9aa18a0  pstate 0000000080000000
A/DEBUG: backtrace:
A/DEBUG:     #00 pc 000000000001d8a0  /system/lib64/libc.so (strlen+16)
A/DEBUG:     #01 pc 000000000000f7f0  /data/app/com.bc.sample-2gV8CATI0EfKhLhzjuP6sA==/lib/arm64/libnative-lib.so (std::__ndk1::char_traits<char>::length(char const*)+20)
A/DEBUG:     #02 pc 000000000000fdf8  /data/app/com.bc.sample-2gV8CATI0EfKhLhzjuP6sA==/lib/arm64/libnative-lib.so (std::__ndk1::basic_string<char, std::__ndk1::char_traits<char>, std::__ndk1::allocator<char>>::assign(char const*)+44)
A/DEBUG:     #03 pc 000000000000f2f4  /data/app/com.bc.sample-2gV8CATI0EfKhLhzjuP6sA==/lib/arm64/libnative-lib.so
A/DEBUG:     #04 pc 000000000000f1f8  /data/app/com.bc.sample-2gV8CATI0EfKhLhzjuP6sA==/lib/arm64/libnative-lib.so (Java_com_bc_sample_MainActivity_stringFromJNI+76)
A/DEBUG:     #05 pc 000000000000909c  /data/app/com.bc.sample-2gV8CATI0EfKhLhzjuP6sA==/oat/arm64/base.odex (offset 0x9000)
It can be seen that the crash information describes the abi architecture of the crash, the cause of the crash, and the stack backtrace; There are generally two ways to analyze the backtrace of native layer crash:
6.1 NDK stack command
The NDK stack command is located at {ndk_root} / NDK stack. When using it, you need to copy the crash log to a TXT file. This command will be copied from the txt file
A/DEBUG: *** *** *** *** *** *** *** *** *** *** *** *** *** *** *** ***
Start the analysis later, and use the following methods:
# Usage: NDK stack - sym ${so_parent_dir} - dump crash_log.txt
# -The directory where sys so is located, that is, ${SO_PARENT_DIR}. Note that it must be a directory name, not a so path;
# -dump the log information of crash, i.e. crash_log.txt;
# Example:
>ndk-stack -sym /Users/bc/demo/MyApplication2/app/build/intermediates/merged_native_libs/debug/out/lib/arm64-v8a -dump /Users/bc/crash.txt
# The results are as follows:
********** Crash dump: **********
Build fingerprint: 'Meizu/meizu_16th_CN/16th:8.1.0/OPM1.171019.026/1554749207:user/release-keys'
pid: 8427, tid: 8427, name: com.bc.sample  >>> com.bc.sample <<<
signal 11 (SIGSEGV), code 1 (SEGV_MAPERR), fault addr 0x0
Stack frame #00 pc 000000000001d8a0  /system/lib64/libc.so (strlen+16)
Stack frame #01 pc 000000000000f7f0  /data/app/com.bc.sample-2gV8CATI0EfKhLhzjuP6sA==/lib/arm64/libnative-lib.so (std::__ndk1::char_traits<char>::length(char const*)+20): Routine std::__ndk1::char_traits<char>::length(char const*) at /Users/bc/Library/Android/sdk/ndk/21.0.6113669/toolchains/llvm/prebuilt/darwin-x86_64/sysroot/usr/include/c++/v1/__string:217
Stack frame #02 pc 000000000000fdf8  /data/app/com.bc.sample-2gV8CATI0EfKhLhzjuP6sA==/lib/arm64/libnative-lib.so (std::__ndk1::basic_string<char, std::__ndk1::char_traits<char>, std::__ndk1::allocator<char>>::assign(char const*)+44): Routine std::__ndk1::basic_string<char, std::__ndk1::char_traits<char>, std::__ndk1::allocator<char> >::assign(char const*) at /Users/bc/Library/Android/sdk/ndk/21.0.6113669/toolchains/llvm/prebuilt/darwin-x86_64/sysroot/usr/include/c++/v1/string:2385
Stack frame #03 pc 000000000000f2f4  /data/app/com.bc.sample-2gV8CATI0EfKhLhzjuP6sA==/lib/arm64/libnative-lib.so: Routine std::__ndk1::basic_string<char, std::__ndk1::char_traits<char>, std::__ndk1::allocator<char> >::operator=(char const*) at /Users/bc/Library/Android/sdk/ndk/21.0.6113669/toolchains/llvm/prebuilt/darwin-x86_64/sysroot/usr/include/c++/v1/string:890
Stack frame #04 pc 000000000000f1f8  /data/app/com.bc.sample-2gV8CATI0EfKhLhzjuP6sA==/lib/arm64/libnative-lib.so (Java_com_bc_sample_MainActivity_stringFromJNI+76): Routine Java_com_bc_sample_MainActivity_stringFromJNI at /Users/bc/Demo/app/src/main/cpp/native-lib.cpp:9
Stack frame #05 pc 000000000000909c  /data/app/com.bc.sample-2gV8CATI0EfKhLhzjuP6sA==/oat/arm64/base.odex (offset 0x9000)
6.2 addr2line command
The addr2line command is located at {ndk_root} / toolchains / ${ABI} / prebuild / darwin-x86_64 / bin / x86_64 Linux Android addr2line. The usage method is as follows:
# Usage: arm linux Android addr2line - C - F - E ${sopath} ${address}
# -C -f name of the function where the number of error lines is printed
# -e. corresponding path and number of lines of printing error address
# ${SOPATH} so path
# ${Address} crash stack address
# Examples are as follows:
>arm-linux-androideabi-addr2line -C -f -e libnative-lib.so 000000000000f1f8
# The results are as follows: the line number of crash can be obtained:
>Java_com_bc_sample_MainActivity_stringFromJNI
/Users/bc/demo/MyApplication2/app/src/main/cpp/native-lib.cpp:9
Relevant video recommendations
Actual combat of NDK ID card identification technology project Zero foundation of Android (Android) development, from entry to mastery
This article is transferred from https://juejin.cn/post/6952049081464127518 , in case of infringement, please contact to delete.