jwt has never been used in a project because of the fear that token will reveal problems.But it's really hot right now, so I'll do some research when I'm free.
Implementing jwt in aspnetcore is very simple. It feels that Microsoft has done a lot of work. Although the development efficiency is improved, it makes c#programmers silly. Many things are known but they don't know why. They can only be tied to the ship Microsoft and go farther and farther.
jwt is commonly used in webapi projects, but the code below is tested on a MVC environment and should not make any difference in usage.
1. Add and configure JWT
1. Introducing nuget packages
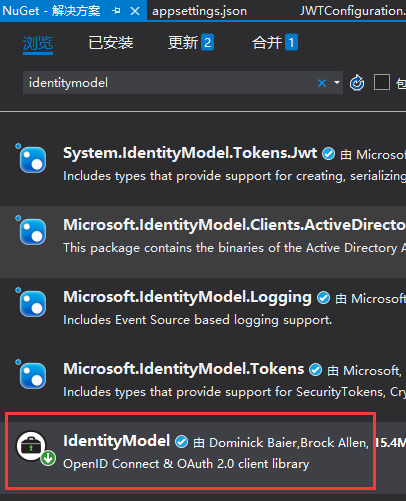
VS Click Tools > Management Solution NuGet Package, Search IdentityModel, Install to Project
2. Add JWT Configuration Items
Open appsettings.json to add nodes
"Authentication": {
    "JwtBearer": {
        "IsEnabled": "true",
        "SecurityKey": "JWTStudyWebsite_DI20DXU3",
        "Issuer": "JWTStudy",
        "Audience": "JWTStudyWebsite"
    }
}
3. Create a new JWTConfiguration.cs file as follows:
using Microsoft.Extensions.Configuration;
using Microsoft.Extensions.DependencyInjection;
using Microsoft.IdentityModel.Tokens;
using System;
using System.Text;

namespace JWTStudent.Website.Extensions
{
    public static class JwtConfiguration
    {
        public static void AddJwtConfiguration(this IServiceCollection services, IConfiguration configuration)
        {
            if (bool.Parse(configuration["Authentication:JwtBearer:IsEnabled"]))
            {
                services.AddAuthentication(options => {
                    options.DefaultAuthenticateScheme = "JwtBearer";
                    options.DefaultChallengeScheme = "JwtBearer";
                }).AddJwtBearer("JwtBearer", options =>
                {
                    options.Audience = configuration["Authentication:JwtBearer:Audience"];

                    options.TokenValidationParameters = new TokenValidationParameters
                    {
                        // The signing key must match!
                        ValidateIssuerSigningKey = true,
                        IssuerSigningKey = new SymmetricSecurityKey(
                            Encoding.ASCII.GetBytes(configuration["Authentication:JwtBearer:SecurityKey"])),

                        // Validate the JWT Issuer (iss) claim
                        ValidateIssuer = true,
                        ValidIssuer = configuration["Authentication:JwtBearer:Issuer"],

                        // Validate the JWT Audience (aud) claim
                        ValidateAudience = true,
                        ValidAudience = configuration["Authentication:JwtBearer:Audience"],

                        // Validate the token expiry
                        ValidateLifetime = true,

                        // If you want to allow a certain amount of clock drift, set that here
                        ClockSkew = TimeSpan.Zero
                    };
                });
            }
        }
    }
}
4. Inside the Configuration Services method of StartUp.cs, add the following code:
services.AddJwtConfiguration(Configuration);
2. Create AccessTokenController to apply for and issue JWT
public IActionResult Post([FromBody]LoginModel model)
{
    var user = TempData.Users.FirstOrDefault(m => m.Account == model.Account && m.Pw == model.Pw);

    if (user != null)
    {
        var claims = new[]
        {
            new Claim(ClaimTypes.Name, user.Account),
            new Claim(ClaimTypes.Role, user.Role)
        };

        var key = new SymmetricSecurityKey(
            Encoding.UTF8.GetBytes(_configuration["Authentication:JwtBearer:SecurityKey"]));
        var credentials = new SigningCredentials(key, SecurityAlgorithms.HmacSha256);

        var token = new JwtSecurityToken(
            _configuration["Authentication:JwtBearer:Issuer"],
            _configuration["Authentication:JwtBearer:Audience"],
            claims,
            expires: DateTime.Now.AddMinutes(30),
            signingCredentials: credentials
        );

        return Ok(new AccessTokenResult {Token = new JwtSecurityTokenHandler().WriteToken(token), Code = 200});
    }

    return Ok(new AccessTokenResult {Code = 0, Token = ""});
}
LoginModel is a custom login model that is simple and contains only two fields: user name and password.AccessTokenResult is a custom return, Code of type int returns 200 for success, 0 for failure, and Token is the generated JWT
3. Testing
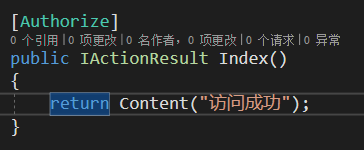
1. Create a TestController and add an Authorization description to it
2. Run the program, open Postman, access http://localhost:5000/test
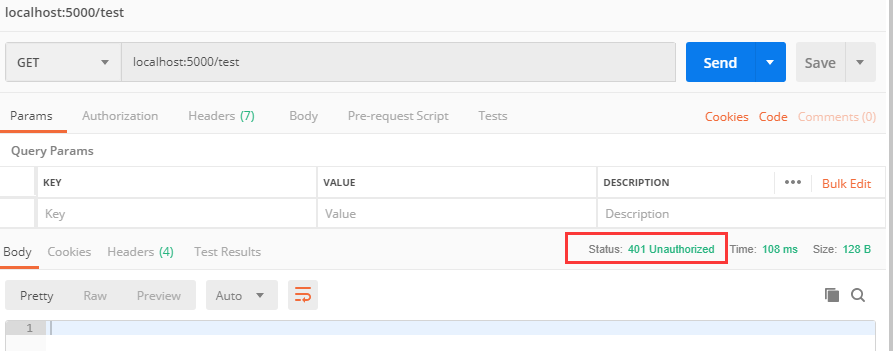
Unexpectedly, access was denied, indicating no authorization.
3. Get JWT
Access http://localhost:5000/api/accesstoken
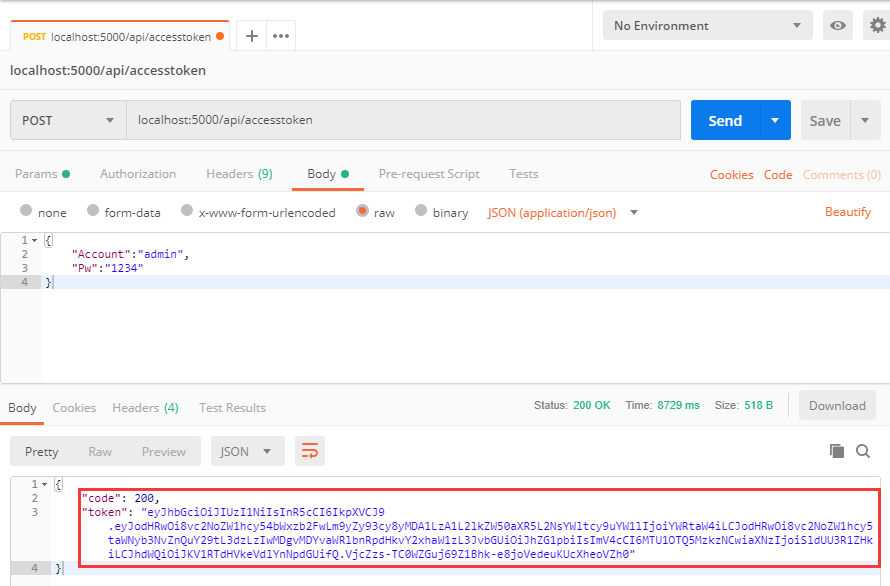
4. Re-access restricted actions using Token
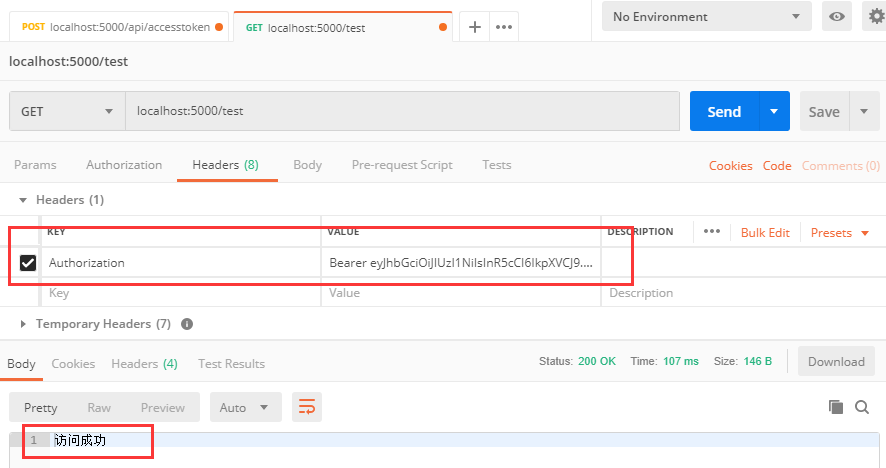
Copy the value of token, re-request http://localhost:5000/test, add an entry to Headers, KEY is Authorization, VALUE is Bear+Space+token
