1, Foreword
For a system, user module is very basic and important. The test platform also needs to manage users and user permissions. The following explains how to quickly make a user login authentication interface through DRF.
2, Verification login explanation
1) Create user
Enter the project directory of django and execute the following command to create the user:
python manage.py createsuperuser --email admin@example.com --username admin
Follow the prompts to set the user's password and other information step by step:

After the user is created successfully, it will be displayed in the auth of the database_ See the user's record in the user table:

2) Develop login interface
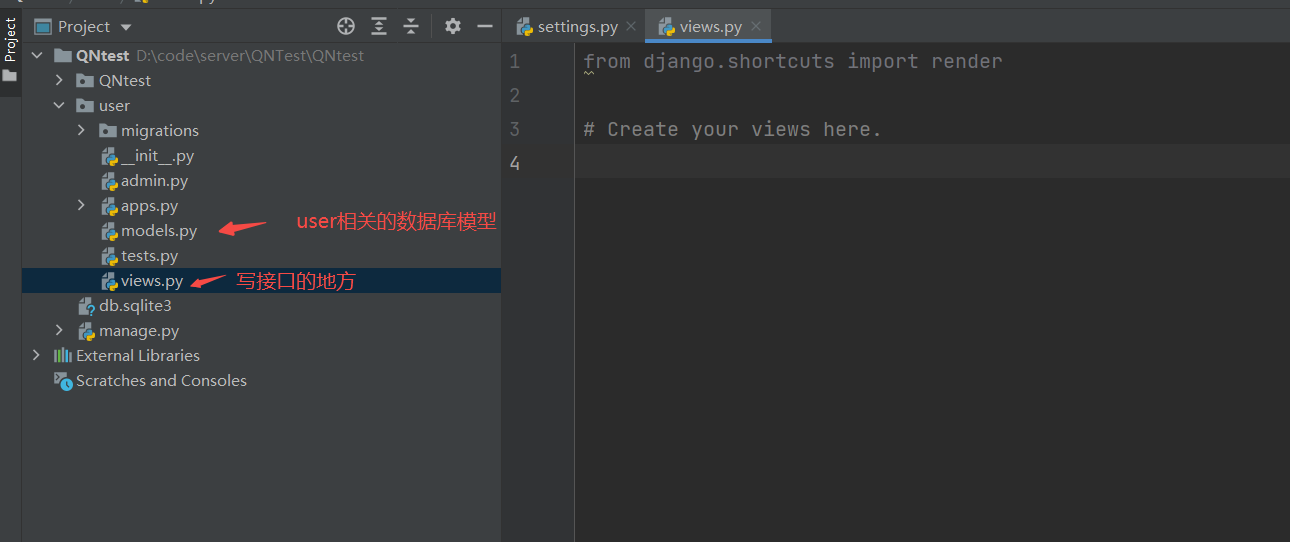
1) django project directory structure creation
Execute the following command in the root directory of django project to create a user related app:
django-admin startapp user
2) Register app into configuration item
Add user to installed in settings.py_ App list, complete INSTALLED_APP contents are as follows:
INSTALLED_APPS = [
    'django.contrib.admin',
    'django.contrib.auth',
    'django.contrib.contenttypes',
    'django.contrib.sessions',
    'django.contrib.messages',
    'django.contrib.staticfiles',
    'user',
    'rest_framework',
    'rest_framework.authtoken'
]
3) Define interface description
For our login interface, the user needs to pass two parameters: user name, password, interface path and parameter passing requirements are as follows:
Interface address: / user/login
Request method: POST
Parameter transmission requirements:
{
    "user_name":"admin",
    "password":"123456"
}
4) Development interface
After the interface description is given, we can develop the corresponding interface. Enter the following code in the views.py file:
from django.contrib.auth import authenticate
from rest_framework import status
from rest_framework.decorators import api_view
from rest_framework.response import Response
from rest_framework.authtoken.models import Token


@api_view(['POST'])  # The elements in the list represent which request methods are supported
def login(request):
    """
    Login interface
    """
    # Built in method for verifying user account password
    user = authenticate(username=request.data['username'], password=request.data['password'])
    if user:
        Token.objects.filter(user_id=user.id).delete()  # Delete the original token
        token = Token.objects.create(user=user)  # Create a new token
        return Response(data={'msg': 'Login succeeded!', 'token': token.key})  # Return login information and token
    return Response(data={'msg': 'User name or error!'}, status=status.HTTP_401_UNAUTHORIZED)
5) Specify routing url
1. Add the file urls.py in the user folder and add the following code:
from django.urls import path
from user.views import login

app_name = "accounts"

urlpatterns = [
    path('login', login),  # Represents the path of the request interface
]
6) Configure routing prefix for main entry
1. In urls.py file under QNtest:
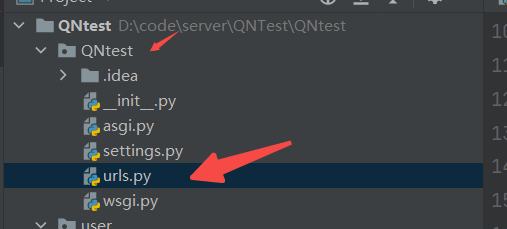
Add the following code:
from django.contrib import admin
from django.urls import path
from django.urls import include

urlpatterns = [
    path('admin/', admin.site.urls),
    path('user/', include('user.urls', namespace='user')),
]
The purpose is to register the route of user app here and add the interface address prefix user/
7) Verification effect
After the project is started, carry the interface parameters through postman or jmeter (jmeter is taken as an example here) to make a request:
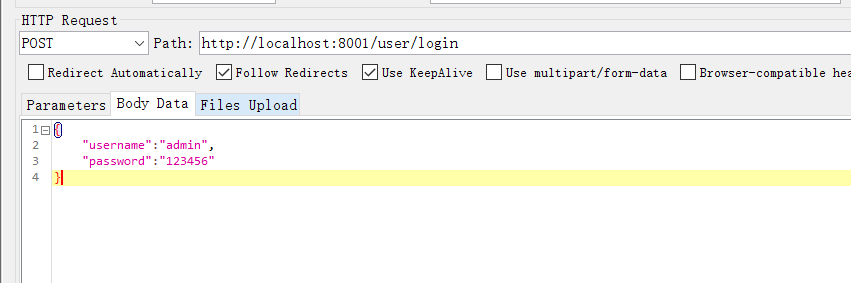
Request result
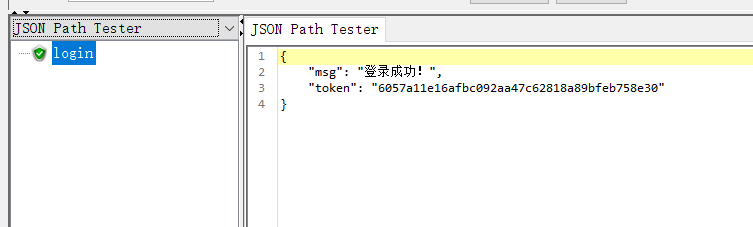
So far, we have completed an interface for user login authentication.
3, Summary
In our actual application scenario, after a user logs in successfully, it is also necessary to query some information of the user (name, gender, email, role, user name, address, etc.). The token authentication and login here are based on the mysql database, and the query of user information is also obtained from the mysql database, Each time an interface involving permission verification and verification needs to check the database. Here, we can verify the login information through redis and store the user information in redis to improve the performance.
You can refer to the tutorial on how to perform redis authentication [DRF] django restframework how to use redis for token authentication Learn.
Pay attention to the official account [Qu bird speaking test development], reply: python 👇🏻 Get the tutorial "learning Python in 21 days", and more testing and python knowledge sharing 👇🏻