This deployment is not a cluster deployment and is suitable for individual or small company projects.
Because GitHub is a foreign platform, the code pulling speed is not particularly ideal. Therefore, CODING is used as the code hosting platform.
Hyperf is a spool framework. If it is developed on Mac, you can directly install the spool extension on the host for development. If Docker is used on Mac, the speed will be slower.
If you are developing with windows, you can use WSL2 and install Docker for development. However, it is still slow. It is recommended to use PhpStorm's Deployment service to automatically upload files to the server, and then install the Docker environment on the server for development.
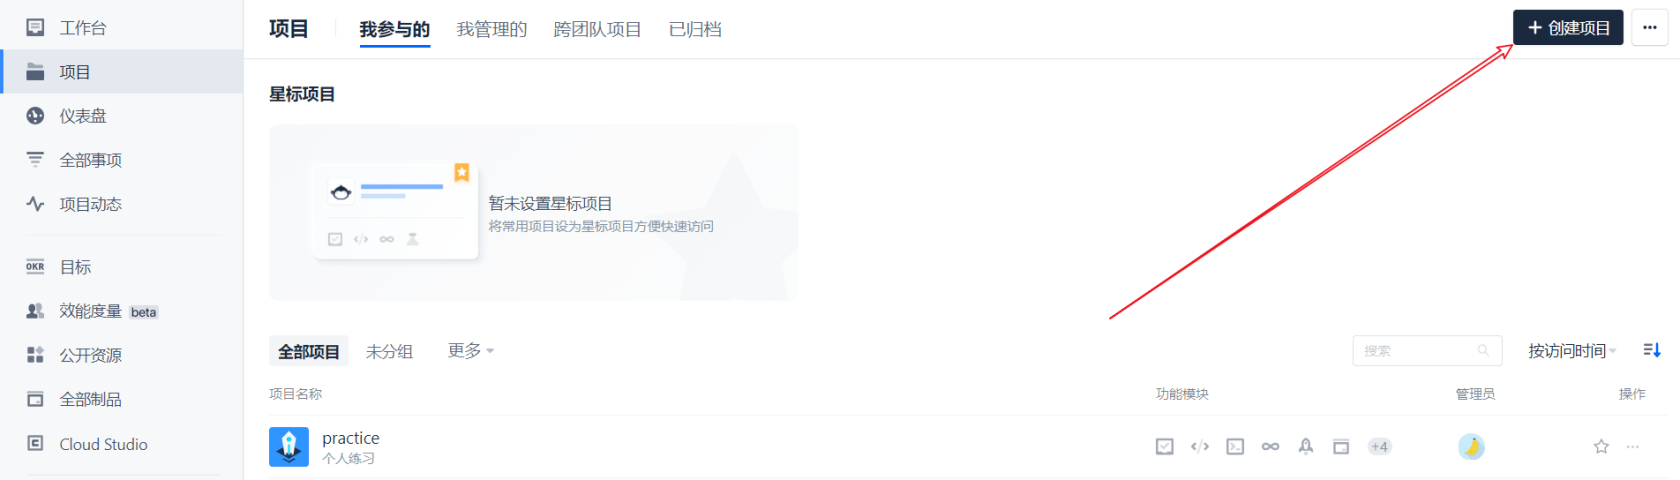
Create base project
- First, we click on the upper right corner to create a project
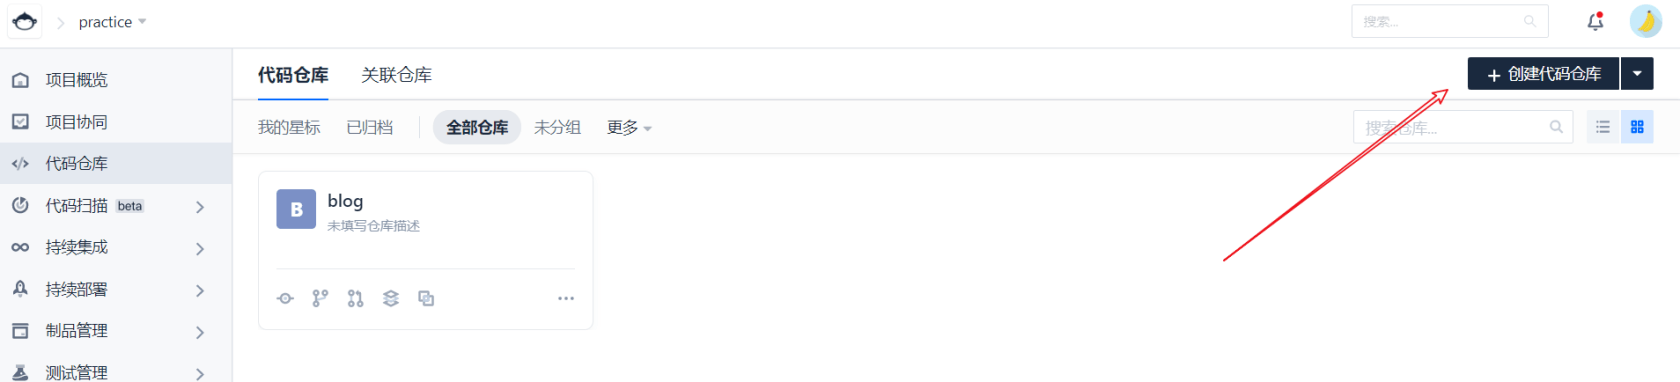
After entering the project, click the upper right corner to create a code warehouse
- Installing Hyperf
Installation mode
Then it is associated with the remote warehouse we just created (everyone has this capability by default)
Write build plan
Let's talk about our overall deployment process first.
First check out the branch, then generate an image according to the Dockerfile under the branch, and then push the image to the coding product warehouse. Finally, log in to the server and pull the image for deployment.
The process is clear, so let's start writing a build plan
- Create build plan
First, we create a build plan. The build plan is to get a set of instructions and let it execute according to the rules we set ourselves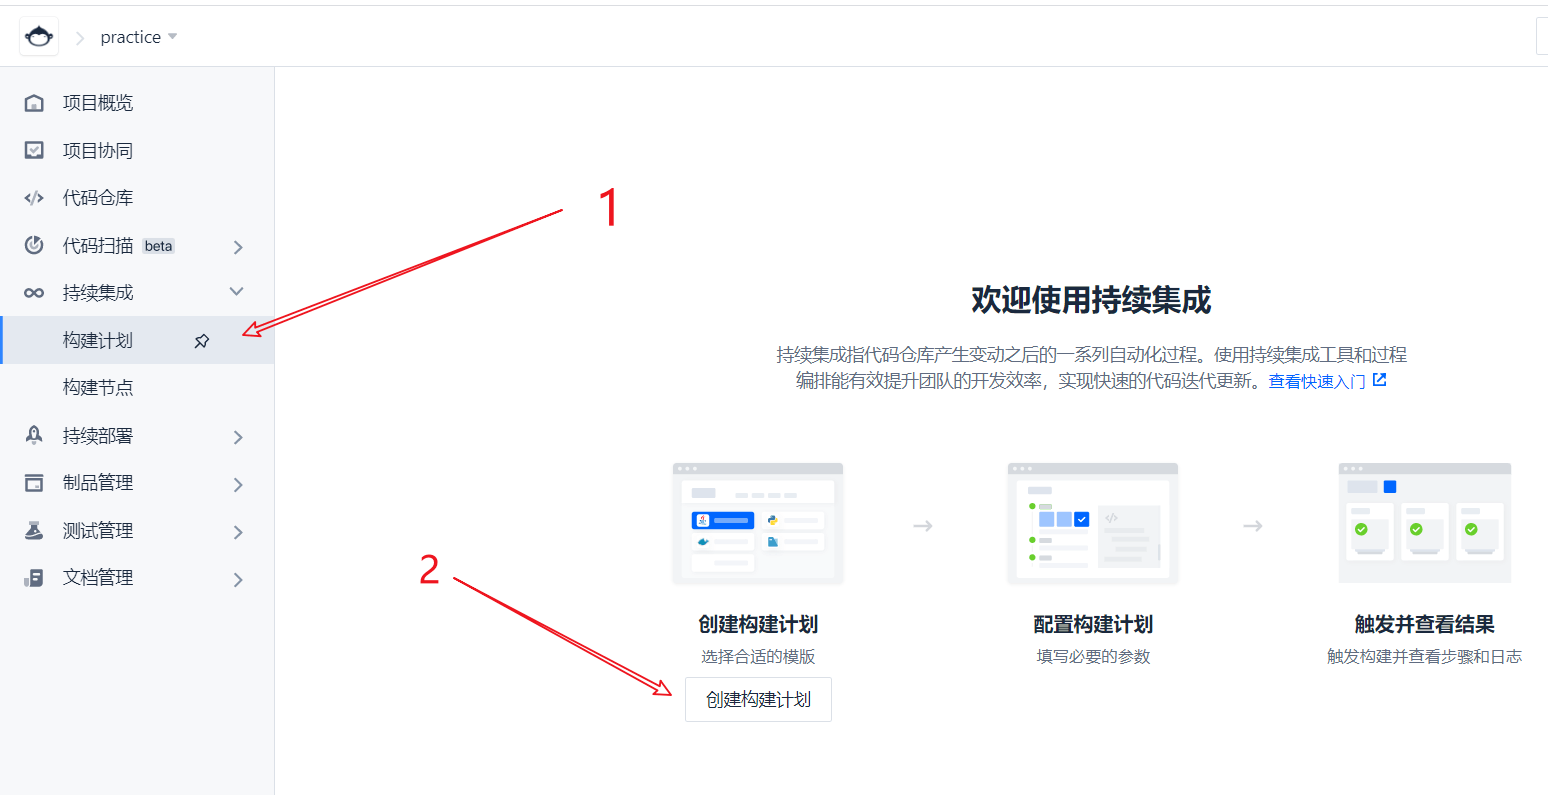
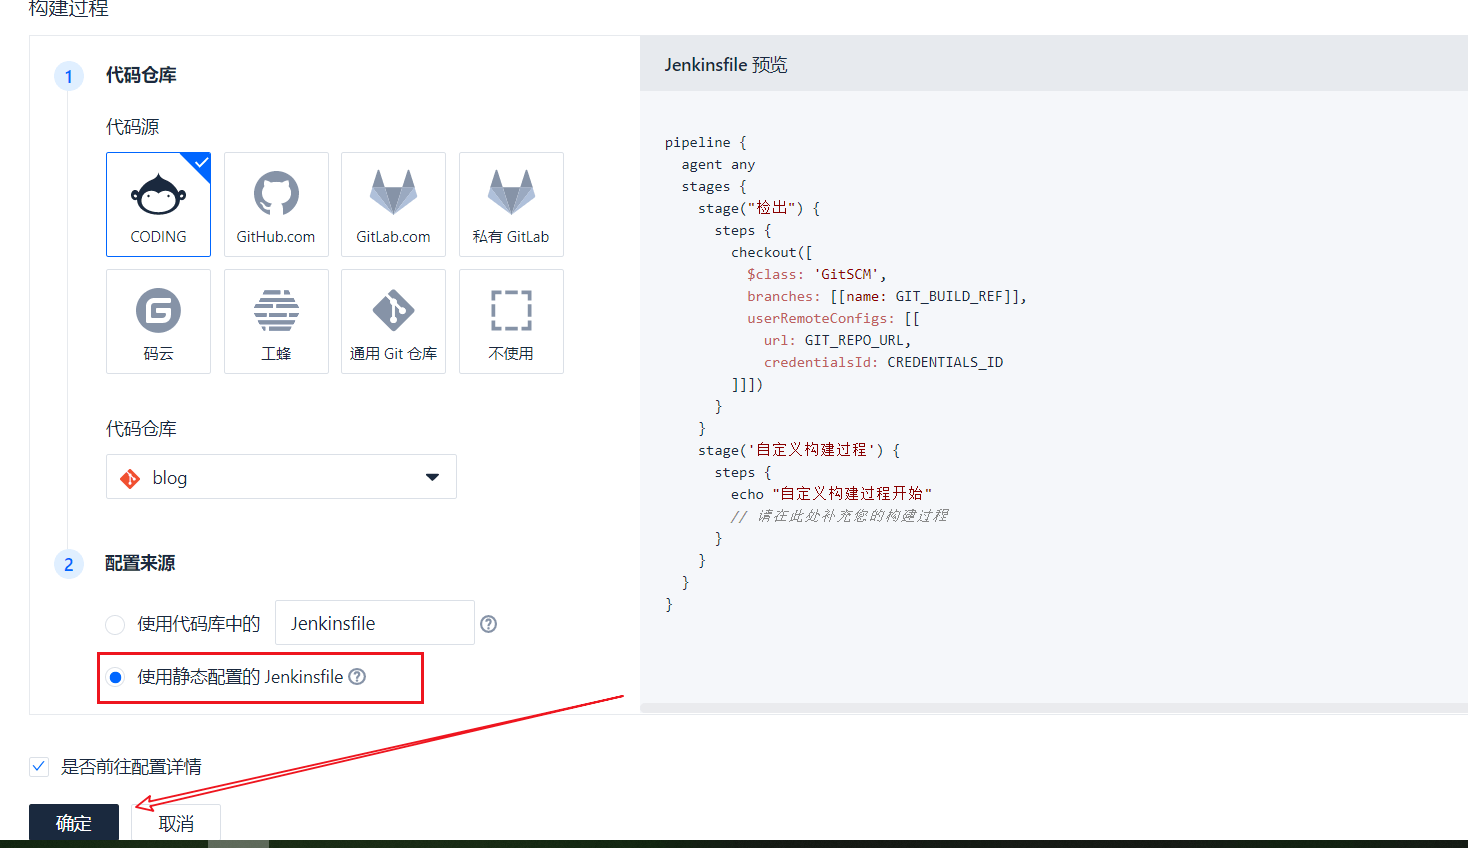
Then select the construction plan template. Here we select the custom template
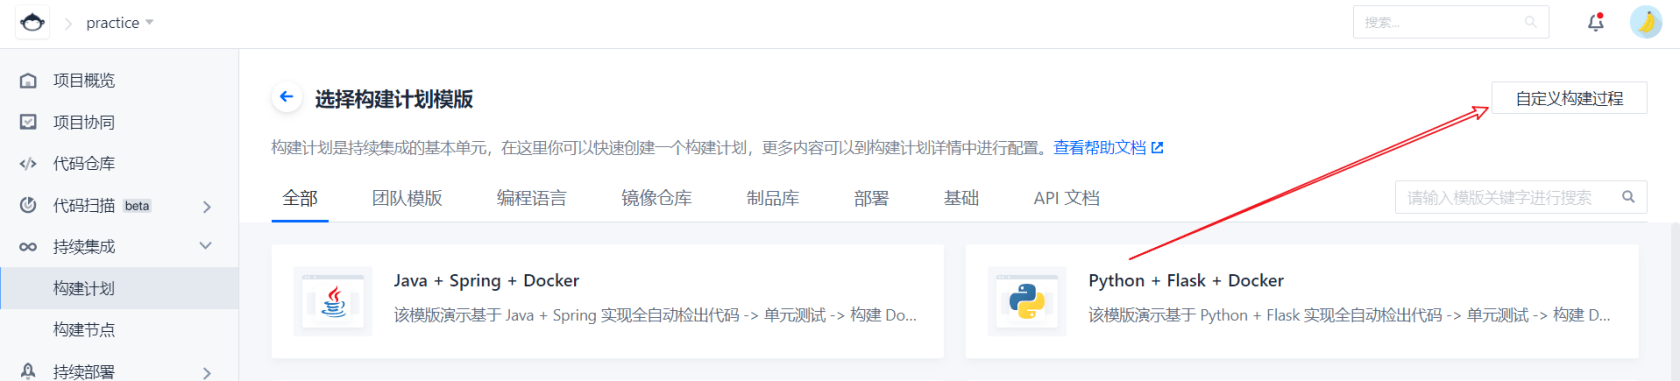
According to the default configuration, we first use the online Jenkinsfile, and then we can use the Jenkinsfile in the code warehouse according to our own needs
Start process configuration
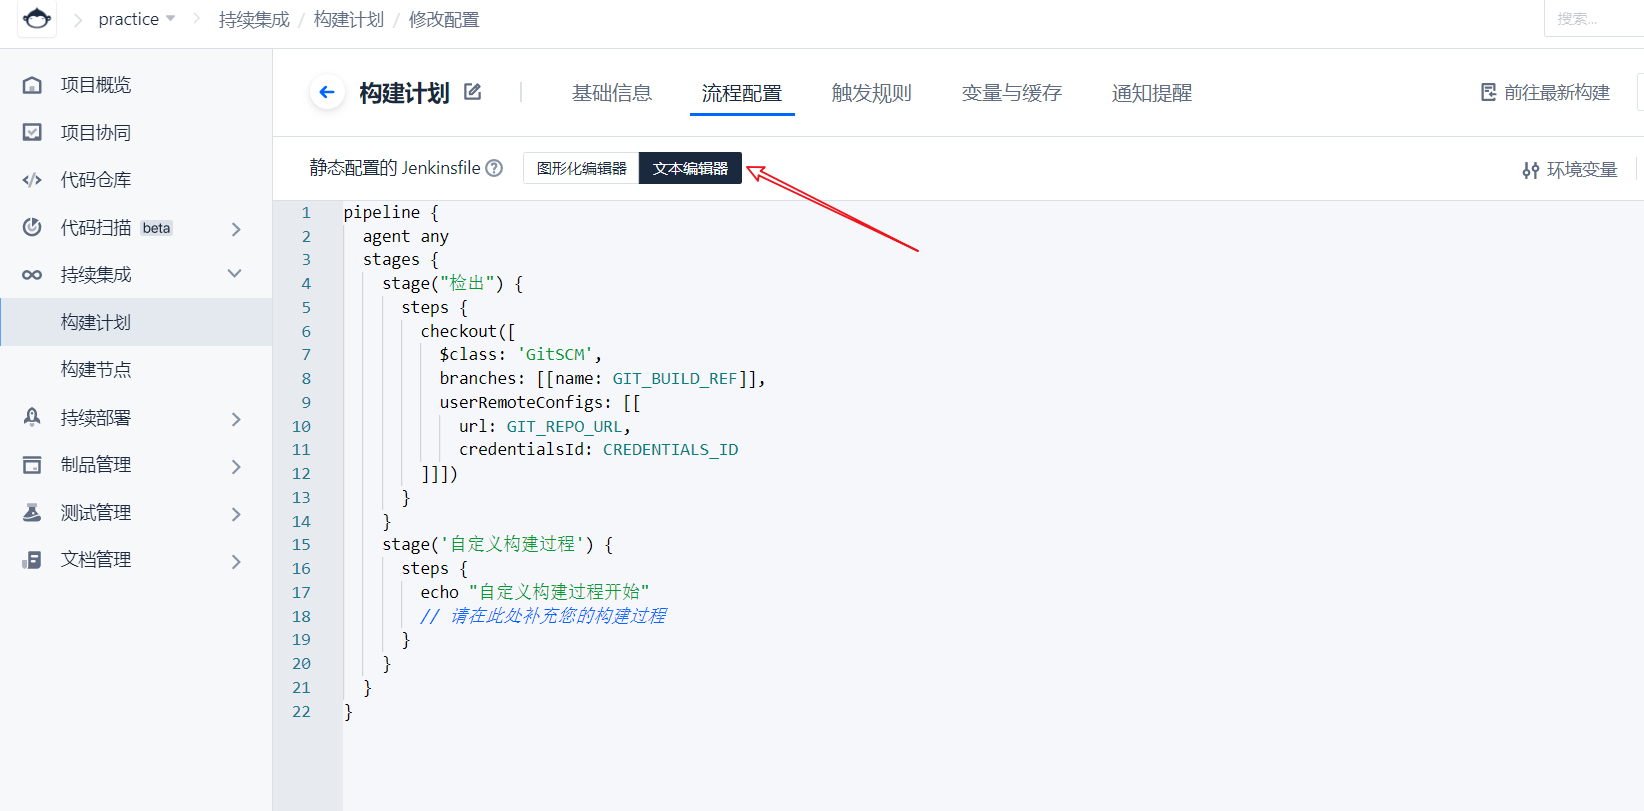
Generate image and push
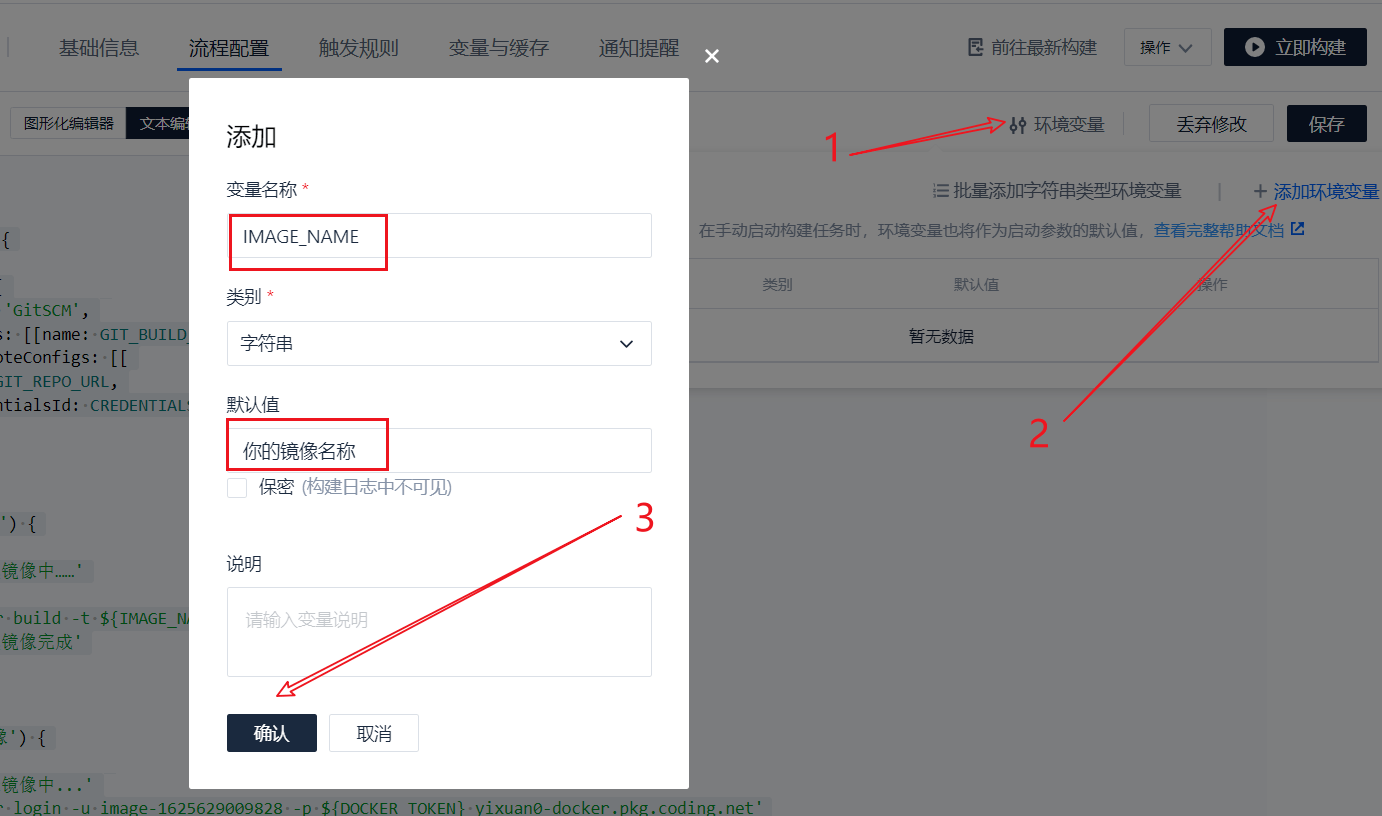
pipeline {
agent any
stages {
 stage("detection") {
   steps {
     checkout([
       $class: 'GitSCM',
       branches: [[name: GIT_BUILD_REF]],
       userRemoteConfigs: [[
         url: GIT_REPO_URL,
         credentialsId: CREDENTIALS_ID
     ]]])
   }
 }

stage('Generate image') {
   steps {
     echo 'Generating images'
     sh 'ls'
     sh 'docker build -t ${IMAGE_NAME} -f Dockerfile ./'
     echo 'Image generation complete'
   }
 }

 stage('Push image') {
   steps {
     echo 'Push image...'
     sh 'docker login -u image-xxxx -p ${DOCKER_TOKEN} xxx-docker.pkg.coding.net'
     sh 'docker tag ${IMAGE_NAME} xxx-docker.pkg.coding.net/practice/blog/${IMAGE_NAME}'
     sh 'docker push xxx-docker.pkg.coding.net/practice/blog/${IMAGE_NAME}'
     echo 'Push complete'
   }
 }
}
}
Let's first look at generating an image, because Hyperf has officially written a Dockerfile in the project. We can change it according to our own needs and use it directly. It is very simple to execute a docker command, but there is an image name in it. Let's take it out and define a variable, and then access it in the file through ${IMAGE_NAME}.
Define variables:
The image is generated. Where to push it? Don't worry, let's save the build plan first.
Then create a new artifact library, which is the place to store our docker images
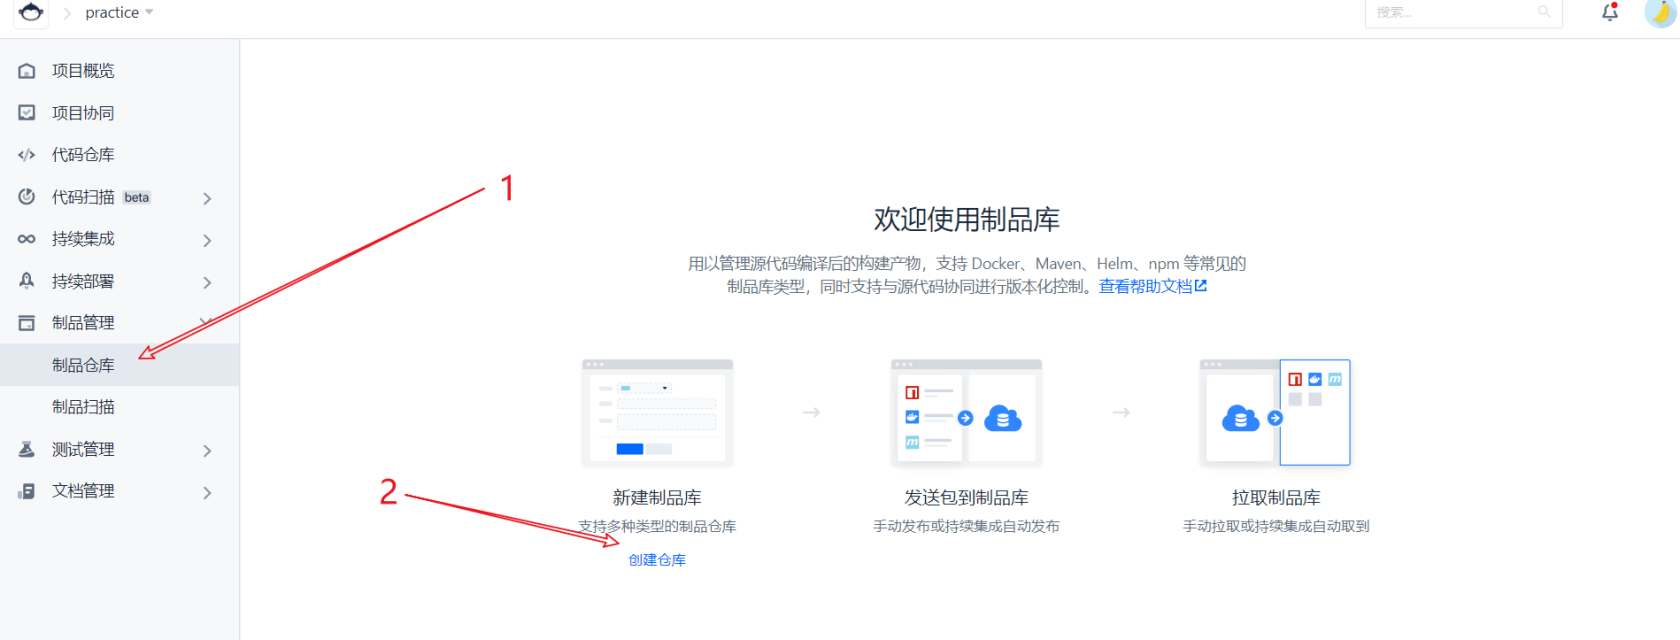
After successful creation, as shown in the figure
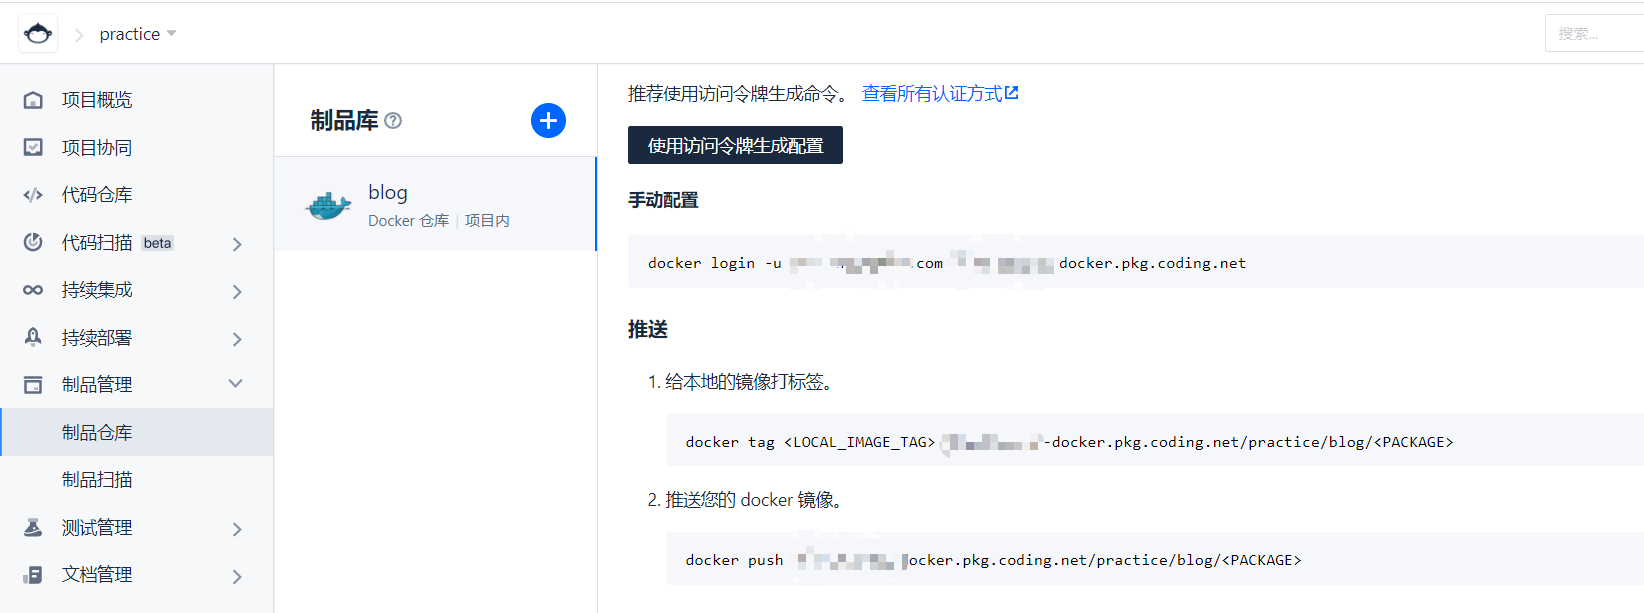
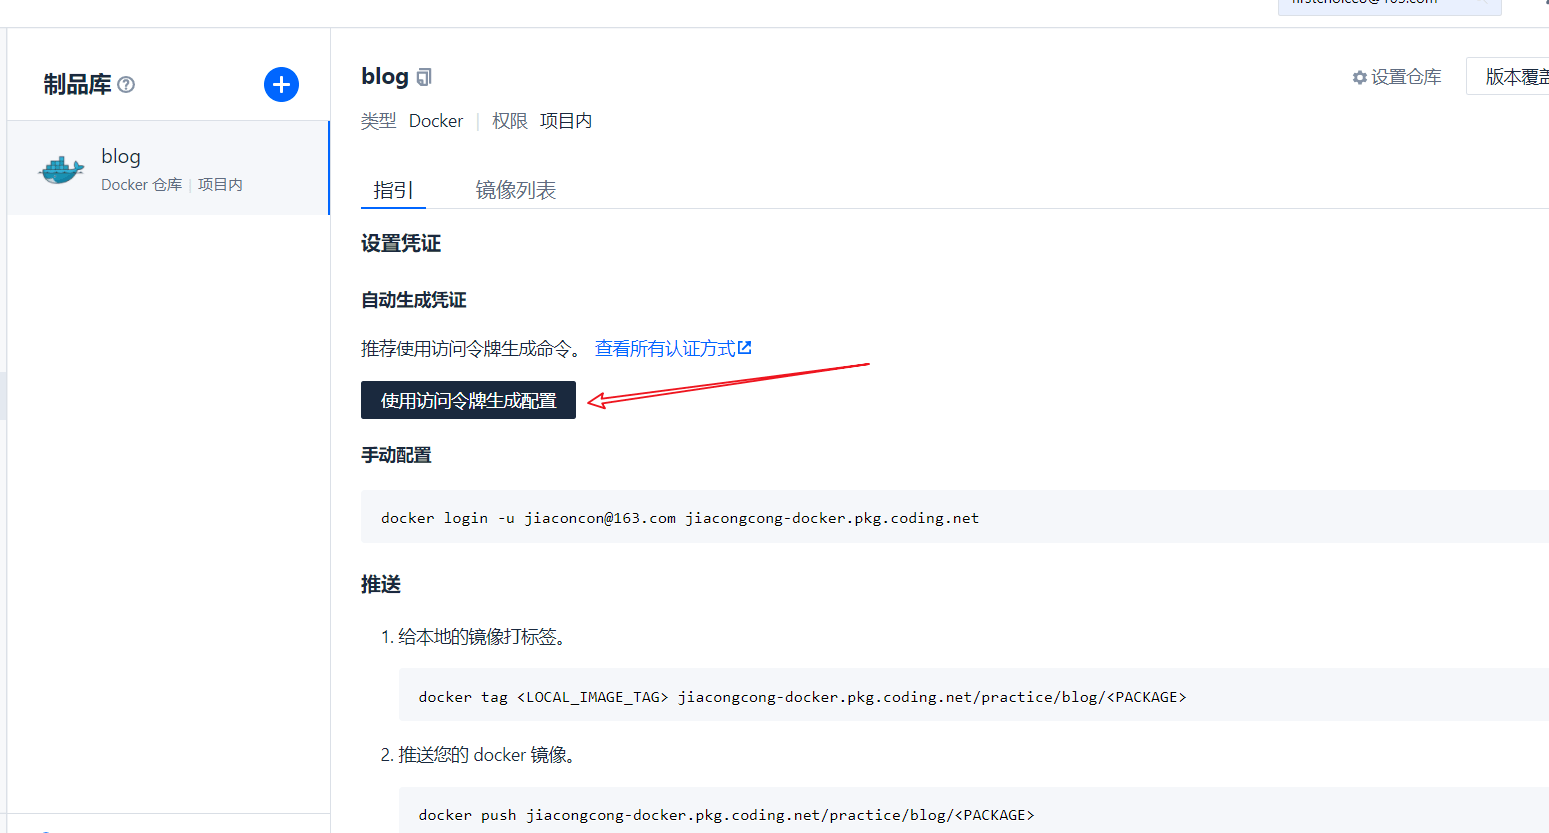
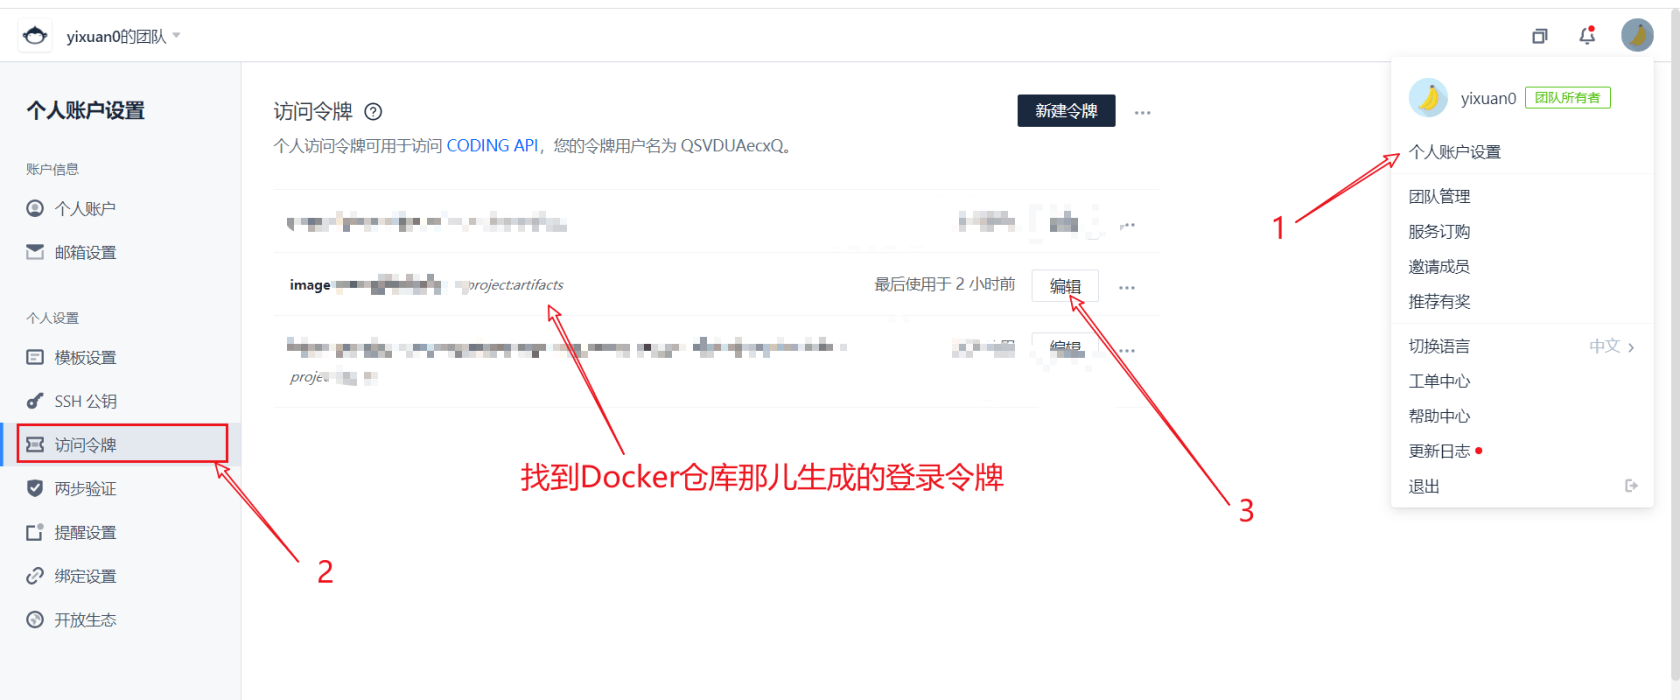
Then copy the login and push command configuration in the warehouse to our construction plan file
Here, we choose to log in with a token. Click this button to copy the generated token. Replace the login command just now
Since the login password is sensitive, we add another variable ${dock_token} to replace the login password in the way of creating the environment variable for the first time
So far, in fact, the project has been completed to automatically generate images and upload them to the warehouse. You can manually pull and deploy Docker images on the server. (Docker needs to be installed on the server, otherwise it will be fun)
- Automatic deployment
stage('deploy') {
      steps {
        echo 'In deployment...'
        script {
          def remote = [:]
          remote.name = 'my-server'
          remote.allowAnyHosts = true
          // Host address
          remote.host = '123.123.123.132'
          remote.port = 22
          // user name
          remote.user = 'root'
         // credentialsId: coding the secret key of the login host
          withCredentials([sshUserPrivateKey(credentialsId: 'coding of key', keyFileVariable: 'id_rsa')]) {
            remote.identityFile = id_rsa
            // Log in and pull the image
            sshCommand remote: remote, command: "docker login -u image-xxxx -p ${DOCKER_TOKEN} xxx-docker.pkg.coding.net"
            sshCommand remote: remote, command: "docker pull xxx-docker.pkg.coding.net/practice/blog/${IMAGE_NAME}:latest"
            // Stop the old service and add "true", otherwise an error will be reported for the first deployment
            sshCommand remote: remote, command: "docker stop ${PROJECT_NAME} || true"
            sshCommand remote: remote, command: "docker rm ${PROJECT_NAME} || true"
            // Start a new service
            sshCommand remote: remote, command: "docker run -d --restart always -p 10090:9501 -v /www/go_pocket_api.env:/opt/www/.env --name ${PROJECT_NAME} -d xxx-docker.pkg.coding.net/practice/blog/${IMAGE_NAME}:latest"
            // Start another container to prevent service interruption
            sshCommand remote: remote, command: "docker stop ${PROJECT_NAME}2 || true"
            sshCommand remote: remote, command: "docker rm ${PROJECT_NAME}2 || true"
            sshCommand remote: remote, command: "docker run -d --restart always -p 10091:9501 -v /www/go_pocket_api.env:/opt/www/.env --name ${PROJECT_NAME}2 -d xxx-docker.pkg.coding.net/practice/practice/blog/${IMAGE_NAME}:latest"
          }

        }
        echo 'Deployment complete'
      }
    }
The configuration above refers to the Hyperf author's article
How to deploy a Hyperf project standalone
Above, we notice that there is a credentialsId, which is the key for coding to log in to our server. This thing will read the secret key in condig, and then use the secret key to log in to our server for operation.
Therefore, the server needs to support ssh secret key login.
Generation method:
Click project settings:
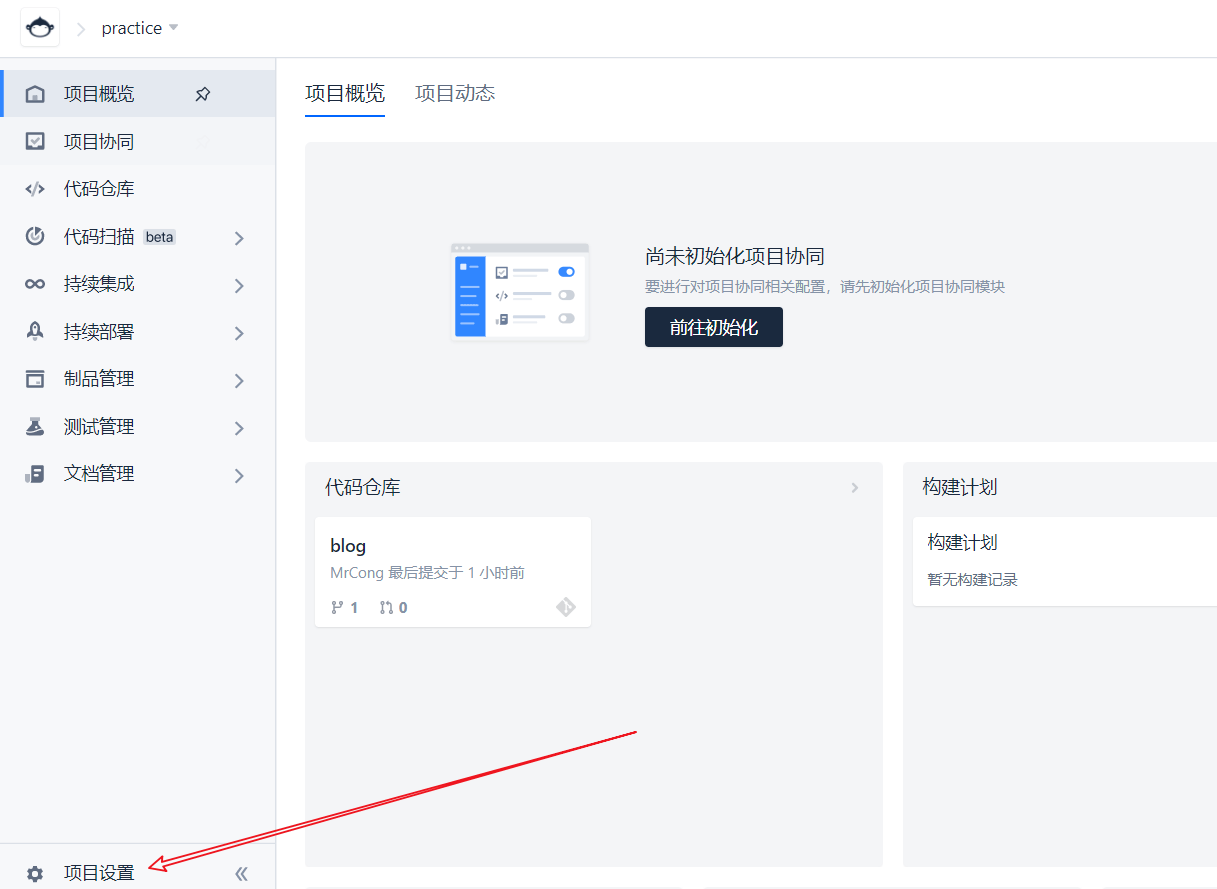
Then enter the credentials, and finally fill in the credentialsId above with the credential id
Method of entering credentials
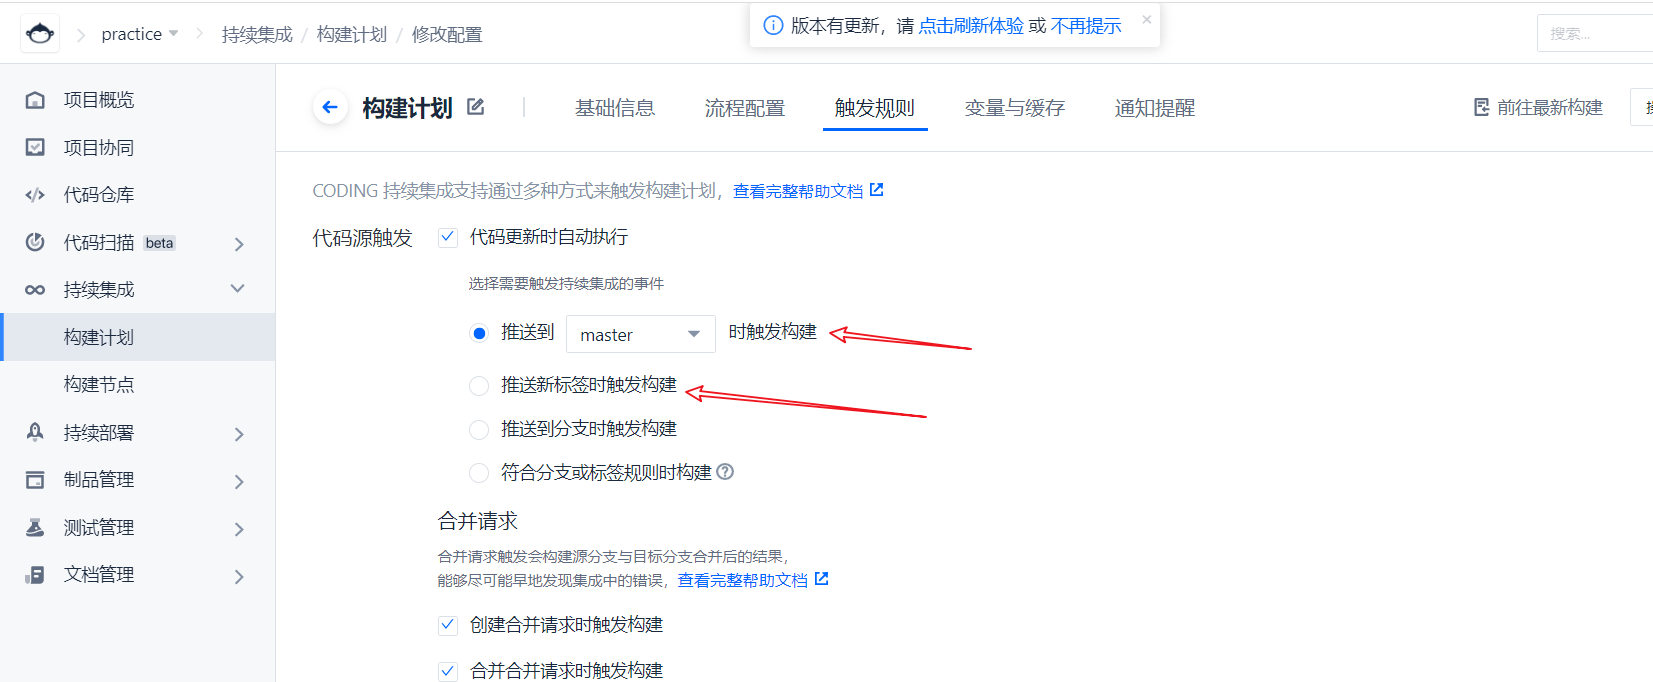
Finally, we also need to configure trigger rules, that is, when deployment is performed. Triggered after pushing to the master or pushing a new label.
Another point to note is that automatic deployment requires access to our docker image repository. Therefore, we need to add the server IP to the white list of docker image warehouse.
(because we use the free one, we use our own server, which is basically enough. If not enough, we can buy the build server provided by coding. It doesn't seem expensive either.)
First, copy and build the server ip
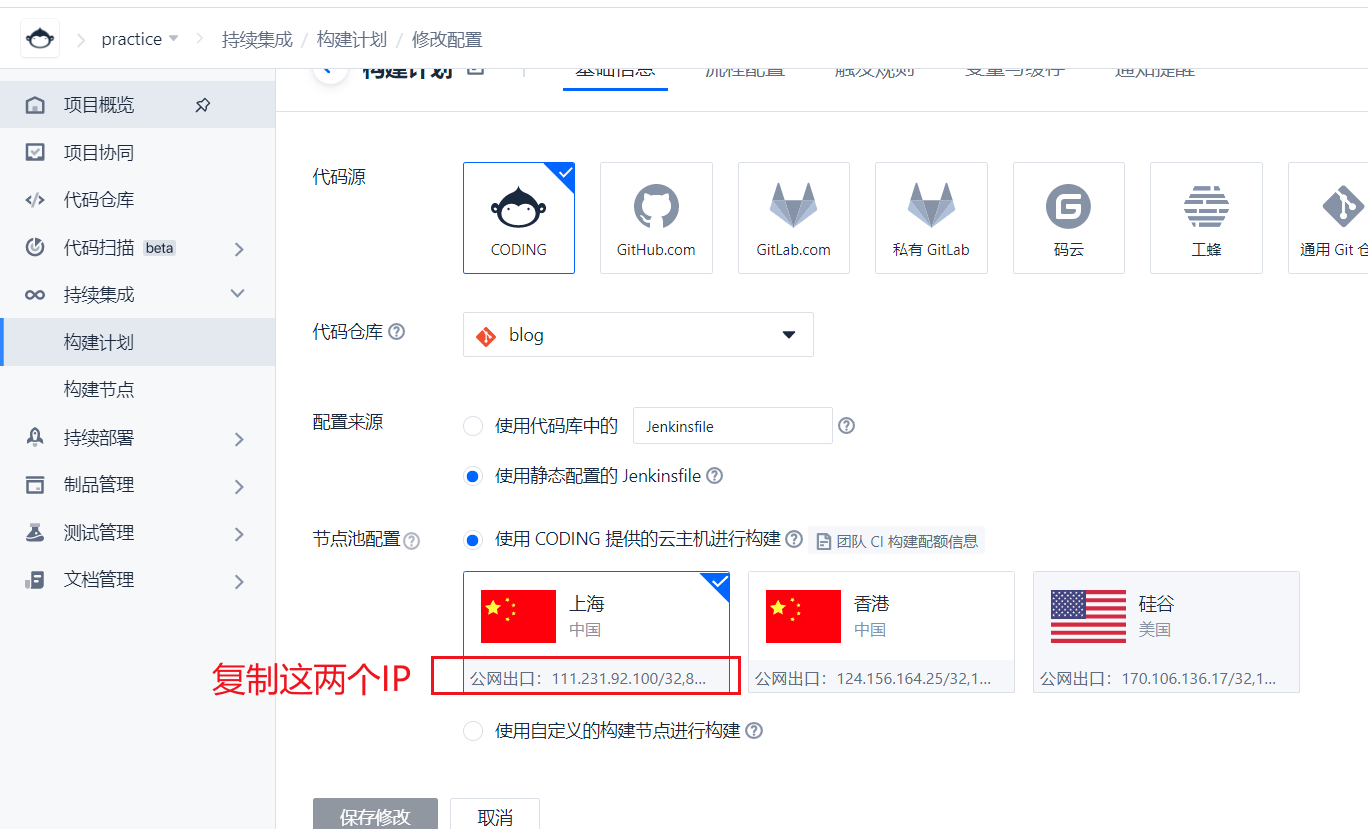
Write to whitelist
Then add two IP addresses to the white list
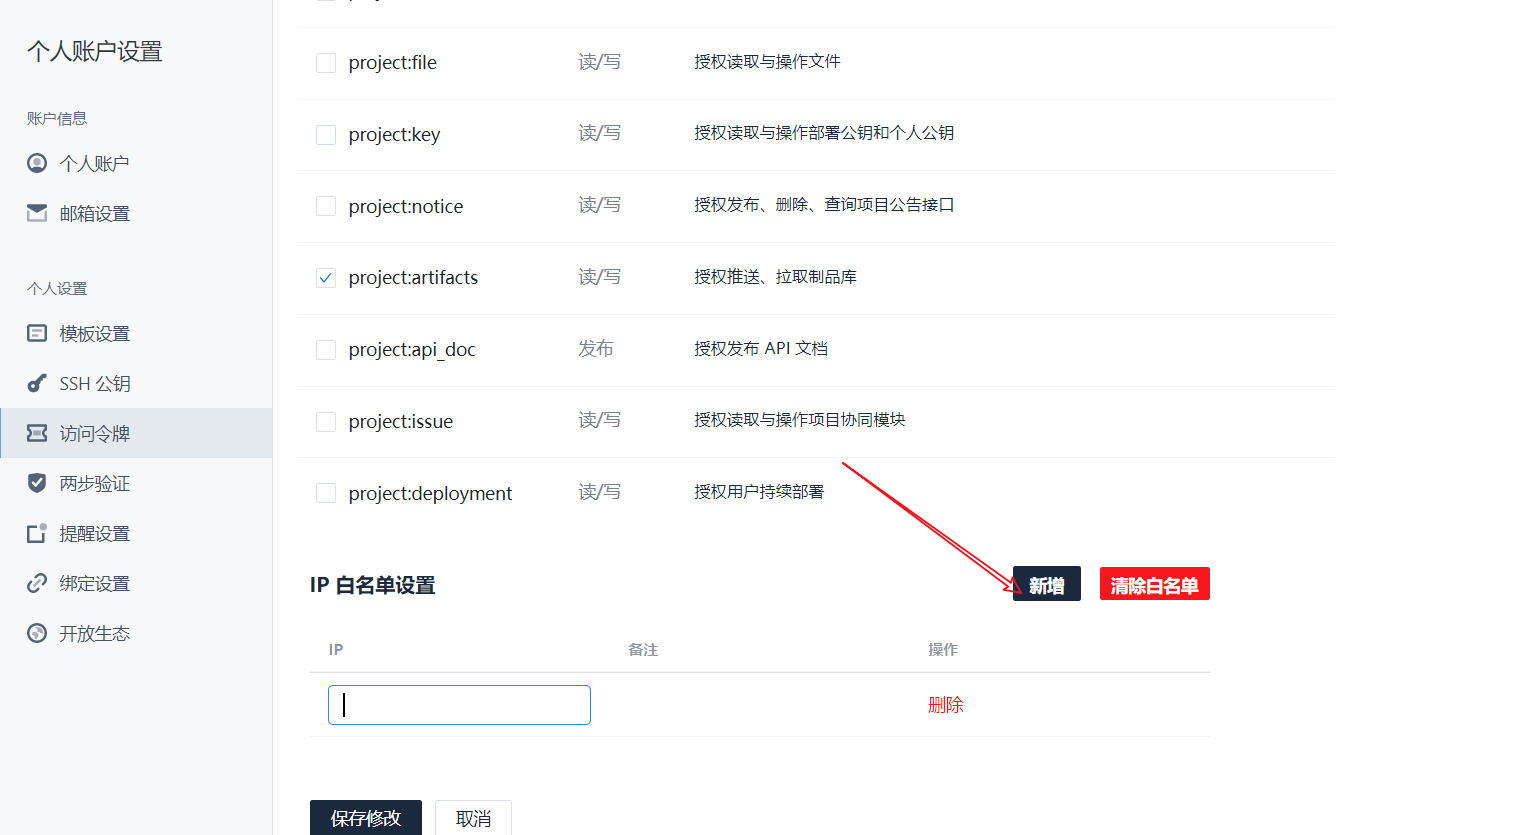
Save it
Full Jenkinsfile
pipeline {
  agent any
  stages {
    stage("detection") {
      steps {
        checkout([
          $class: 'GitSCM',
          branches: [[name: GIT_BUILD_REF]],
          userRemoteConfigs: [[
            url: GIT_REPO_URL,
            credentialsId: CREDENTIALS_ID
        ]]])
      }
    }

   stage('Generate image') {
      steps {
        echo 'Generating images'
        sh 'ls'
        sh 'docker build -t ${IMAGE_NAME} -f Dockerfile ./'
        echo 'Image generation complete'
      }
    }

    stage('Push image') {
      steps {
        echo 'Push image...'
        sh 'docker login -u image-xxxx -p ${DOCKER_TOKEN} xxx-docker.pkg.coding.net'
        sh 'docker tag ${IMAGE_NAME} xxx-docker.pkg.coding.net/practice/blog/${IMAGE_NAME}'
        sh 'docker push xxx-docker.pkg.coding.net/practice/blog/${IMAGE_NAME}'
        echo 'Push complete'
      }
    }

    stage('deploy') {
      steps {
        echo 'In deployment...'
        script {
          def remote = [:]
          remote.name = 'my-server'
          remote.allowAnyHosts = true
          // Host address
          remote.host = '123.123.123.132'
          remote.port = 22
          // user name
          remote.user = 'root'
         // credentialsId: coding the secret key of the login host
          withCredentials([sshUserPrivateKey(credentialsId: 'coding of key', keyFileVariable: 'id_rsa')]) {
            remote.identityFile = id_rsa
            // Log in and pull the image
            sshCommand remote: remote, command: "docker login -u image-xxxx -p ${DOCKER_TOKEN} xxx-docker.pkg.coding.net"
            sshCommand remote: remote, command: "docker pull xxx-docker.pkg.coding.net/practice/blog/${IMAGE_NAME}:latest"
            // Stop the old service and add "true", otherwise an error will be reported for the first deployment
            sshCommand remote: remote, command: "docker stop ${PROJECT_NAME} || true"
            sshCommand remote: remote, command: "docker rm ${PROJECT_NAME} || true"
            // Start a new service
            sshCommand remote: remote, command: "docker run -d --restart always -p 10090:9501 -v /www/go_pocket_api.env:/opt/www/.env --name ${PROJECT_NAME} -d xxx-docker.pkg.coding.net/practice/blog/${IMAGE_NAME}:latest"
            // Start another container to prevent service interruption
            sshCommand remote: remote, command: "docker stop ${PROJECT_NAME}2 || true"
            sshCommand remote: remote, command: "docker rm ${PROJECT_NAME}2 || true"
            sshCommand remote: remote, command: "docker run -d --restart always -p 10091:9501 -v /www/go_pocket_api.env:/opt/www/.env --name ${PROJECT_NAME}2 -d xxx-docker.pkg.coding.net/practice/practice/blog/${IMAGE_NAME}:latest"
          }

        }
        echo 'Deployment complete'
      }
    }

  }
}
It should be noted that the env file needs to be created before execution, because when Docker is mounted, if the source file does not exist, the directory will be automatically created. reference resources Docker mount file does not exist
The. env file has not figured out how to automatically write it into the image environment variable without creating it??
We have good ideas to communicate
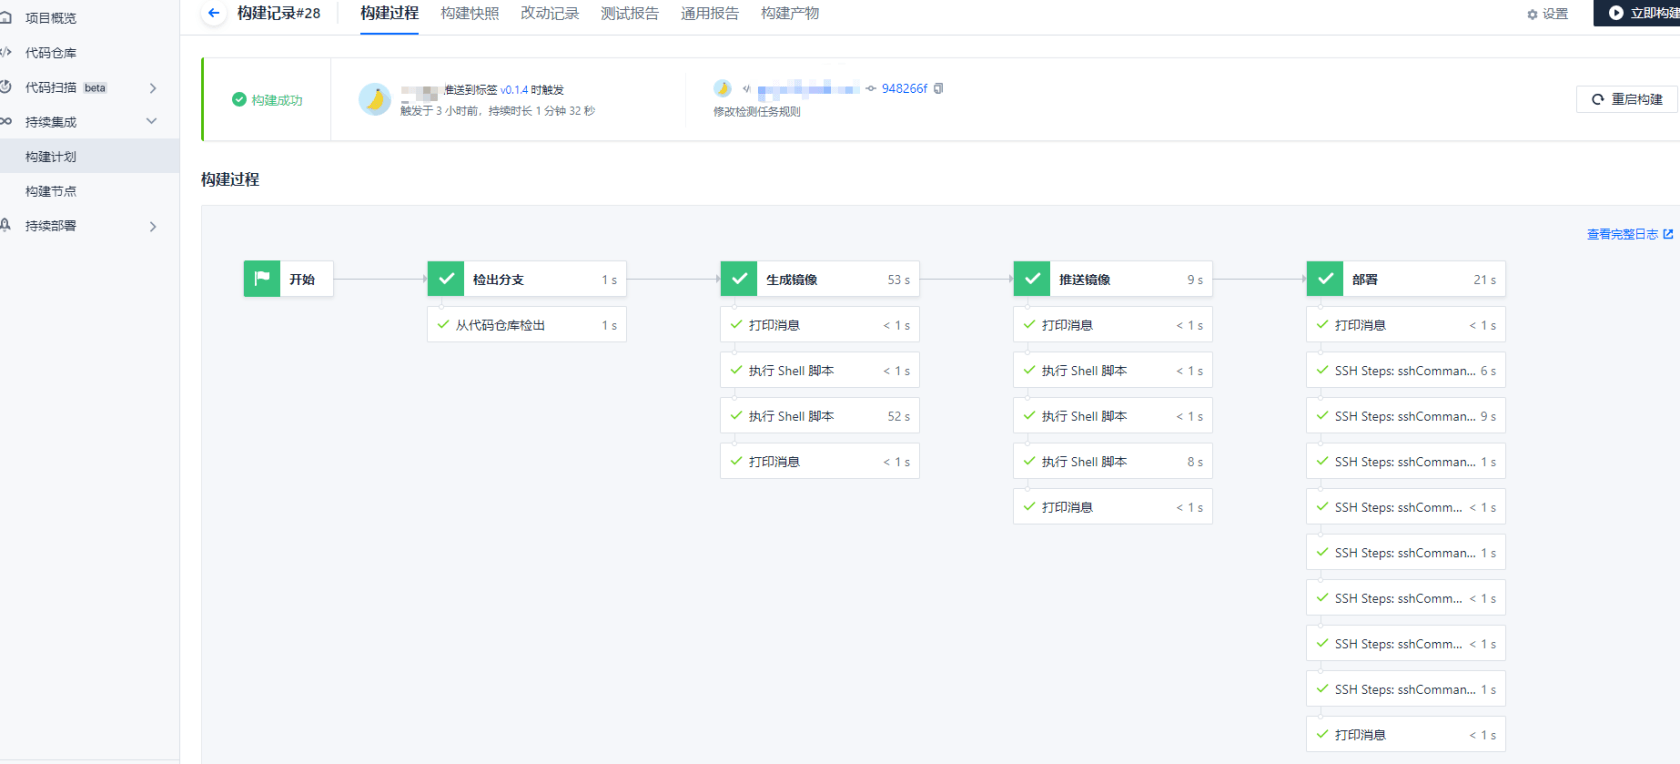
Then we modify the code locally and push it to the master or push the tag according to the trigger rules set by ourselves. The artifact happened.
Nginx configuration
upstream test {
    server 127.0.0.1:10090;
    server 127.0.0.1:10091;
}
server {
    listen       80;
    server_name  www.xxx.com;
    location / {
        proxy_pass          http://test;
        proxy_set_header    Host                $host:$server_port;
        proxy_set_header    X-Real-IP           $remote_addr;
        proxy_set_header    X-Real-PORT         $remote_port;
        proxy_set_header    X-Forwarded-For     $proxy_add_x_forwarded_for;
    }
}
At this point, the deployment is complete.