How to send network requests
- Traditional ajax (based on XHR, XMLHttpRequest)
- The configuration and calling methods are confused
- Less use (jQuery AJAX is generally used for real-world development)
- JQuery-Ajax
- It works better than traditional ajax
- JQuery is not required for general Vue project development
- Vue resource (based on Vue1.0)
- Volume less than JQuery
- Vue2. After 0 is launched, you will not continue to maintain or update Vue resource
- axios framework
- Send XHR request in browser
- In node Send http request in JS
- Promise support
- Intercept requests and responses
- Transform request and response data
- ......
axios request mode and basic usage
Request mode
axios(config)
axios.request(config)
axios.get(url[, config])
axios.delete(url[, config])
axios.head(url[, config])
axios.post(url[, data[, config]])
axios.put(url[, data[, config]])
axios.patch(url[, data[, config]])
Basic usage (take get request as an example)
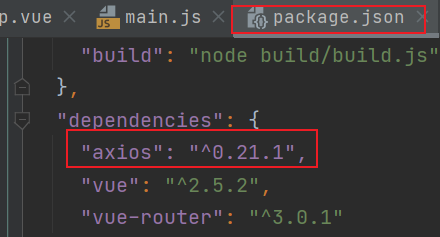
Installing axios
Enter the command npm install axios --save on the terminal
Installation succeeded

get request
No request parameters
code:
<script>
import axios from 'axios'
export default {
  name: "getReq",
  created() {
    // No request parameters
    axios.get('http://123.207.32.32:8000/category')
    .then(res => {
      console.log(res);
    }).catch(err => {
      console.log(err);
    })
  }
}
</script>
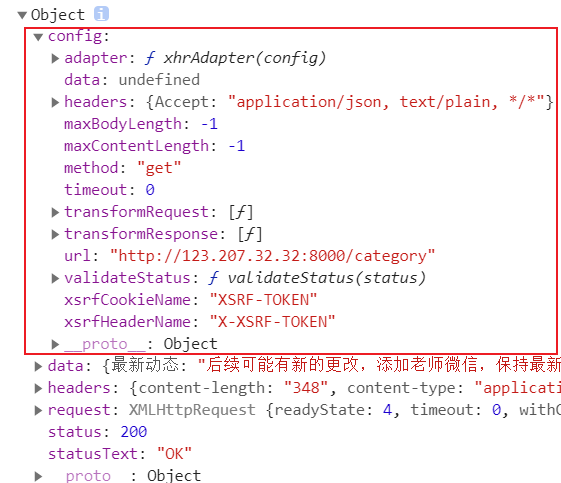
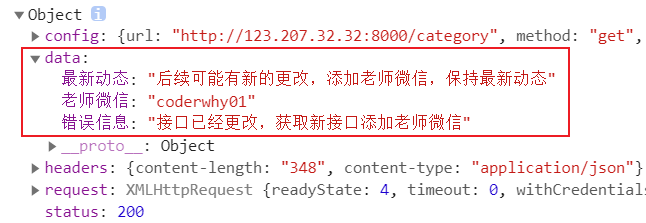
effect:

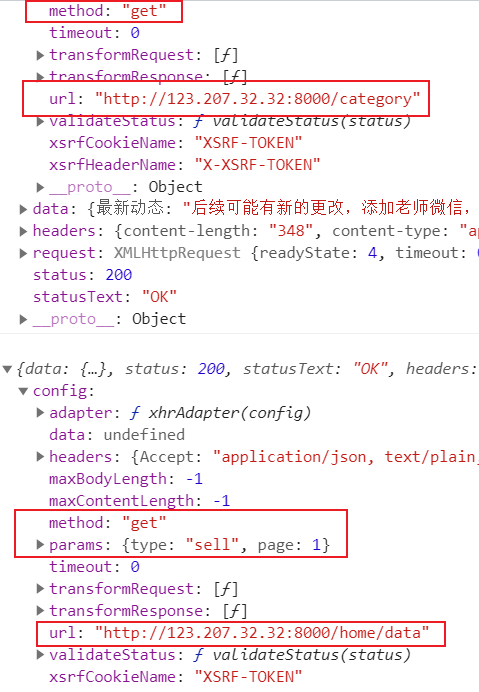
configuration information
Data information
There are request parameters
code:
<script>
import axios from 'axios'
export default {
  name: "getReq",
  created() {
    // There are request parameters
    axios.get('http://123.207.32.32:8000/home/data', {
      params: {
        type: 'sell',
        page: 1
      }
    })
    .then(res => {
      console.log(res)
    }).catch(err => {
      console.log(err);
    })
  }
}
</script>
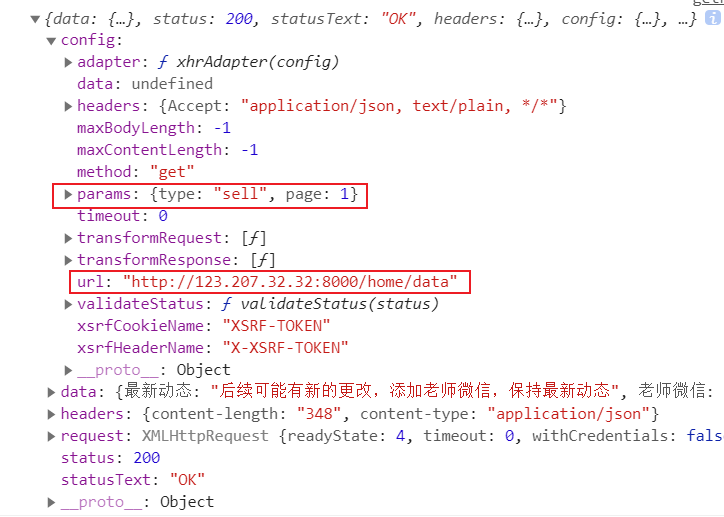
effect:
Concurrent request
- Use Axios All, which can be put into an array of multiple requests.
- axios. The result returned by all ([]) is an array
- Use Axios Spread can expand the array [res1,res2] into res1,res2
code:
<script>
import axios from 'axios'
export default {
  name: "getReq",
  created() {
  	// Concurrent request
    axios.all([
      axios.get('http://123.207.32.32:8000/category'),
      axios.get('http://123.207.32.32:8000/home/data', {
        params: {
          type: 'sell',
          page: 1
        }
      })
    ]).then(axios.spread((res1, res2) => {
      console.log(res1);
      console.log(res2);
    }))
  }
}
</script>
effect:

Global configuration
- baseURL
For example: Axios defaults. Baseurl = 'address' - headers
Such as Axios defaults. headers. post[‘Content-Type’] = ‘application/x-www-form-urlencoded’
configuration option
- Request address
For example: url: '/ user', - Request type: get, post, head, put, delete, options, trace, connect
For example, method: 'get/post /...' - Please the root path
For example: baseURL:‘ http://www.mt.com/api ’ - Data processing before request
For example: transformRequest:[function(data) {}] - Post request data processing
For example: transformResponse: [function(data) {}] - Custom request header
For example, headers: {'x-Requested-With': 'XMLHttpRequest'} - URL query object
For example: params: {ID: 12} - Query object serialization function
paramsSerializer: function(params){ } - request body
data: { key: 'aa'} - Timeout setting (MS)
For example: timeout: 1000 - Cross domain with Token
For example: withCredentials: false - Custom request processing
For example: adapter: function(resolve, reject, config) {} - Authentication information
For example: auth: {uname: ', pwd:' 12 '} - The data format of the response is json, blob, document, arraybuffer, text, stream
For example: responseType: 'json'
Basic use
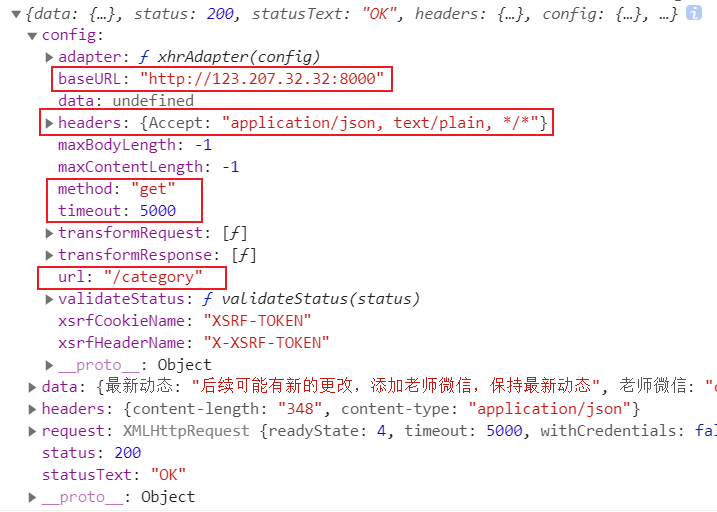
Create an axios instance
When we import objects from the axios module, the instance used is the default instance (some fixed configurations have been set), but some configurations may be changed in subsequent development. For example, some requests need to use specific baseURL, timeout or content type, so we need to create a new axios instance and pass in the configuration information belonging to the instance.
......
// axios instance
const axiosInstance = axios.create({
  baseURL: 'http://123.207.32.32:8000',
  timeout: 5000,
  headers: {
    'Content-Type': 'application/x-www-form-urlencoded'
  }
})
......
Send request through axios instance
code:
axiosInstance({
 url: '/category',
  method: 'get'
}).then(res => {
  console.log(res);
}).catch(err => {
  console.log(err);
})
effect:
axios interceptor
axios provides interceptors for processing requests or responses every time.
Basic use of interceptors
code:
// axios instance
const axiosInstance = axios.create({
  baseURL: 'http://123.207.32.32:8000',
  timeout: 5000,
  headers: {
    'Content-Type': 'application/x-www-form-urlencoded'
  }
})

// Configure request interception
// The request succeeded or failed
axiosInstance.interceptors.request.use(config => {
  console.log('request intercept seccess in')
  return config
}, err => {
  console.log('request intercept failure in')
  return err
})
// Configure response interception
// Response success or failure
axiosInstance.interceptors.response.use(resp => {
  console.log('response intercept success in')
  return resp.data
}, err => {
  console.log('response intercept failure in')
  return err
})

axiosInstance({
  url: '/home/data',
  method: 'get',
  params: {
    type: 'sell',
    page: 1
  }
}).then(res => {
  console.log(res);
}).catch(err => {
  console.log(err);
})
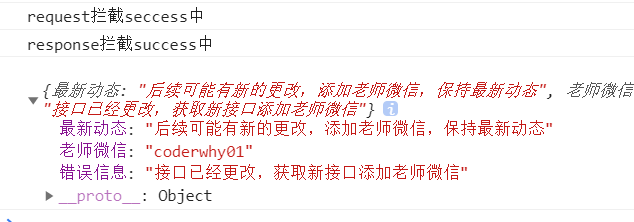
effect:
Main purpose of request interception
-
Successfully intercepting
- When sending a network request, add a loading component in the page as an animation loading effect
- Send some requests (such as those requiring the user to log in) to judge whether the user has a token. If not, jump to the login page, otherwise send the request
- Serialize the requested parameters
-
Error intercepting
- Configure related interception. For example, if the request times out, jump to 404 and other error pages
Main purpose of response interception
-
Successfully intercepting
- It mainly filters the data.
-
Error intercepting
- You can judge the error code according to the status and jump to different error prompt pages.
For example: 400 syntax problem, 401 access denied, 403 request prohibited
- You can judge the error code according to the status and jump to different error prompt pages.
supplement
Learn about Jsonp (a common network request method)
Jsonp(JSON with Padding) is a "usage mode" of json, which allows web pages to obtain data from other domain names (websites), that is, read data across domains.
The main reason for using Jsonp is often to solve the problem of cross domain access.
Principle of Jsonp
The core of Jsonp is to request data through the src of the < script > tag.
When the project is deployed in domain 1 COM server, you can't directly access domain2 COM server (cross domain problem). At this time, you can use the src of the < script > tag to request data from the server, execute the data as a javascript function, and pass in the required json during execution. Therefore, the core of encapsulating sonp lies in the name when we listen for the callback of jsonp on window.
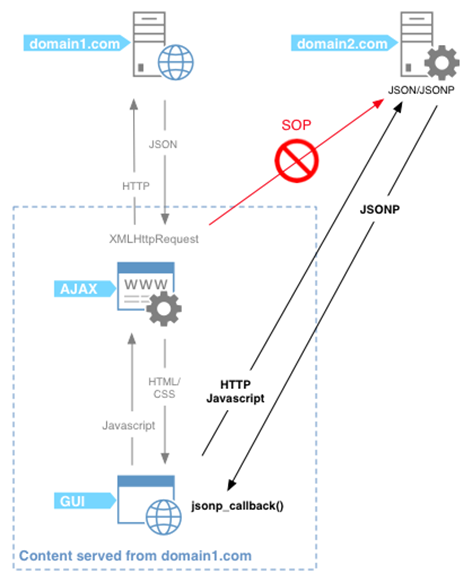
If the customer wants to access: https://www.runoob.com/try/ajax/jsonp.php?jsoncallback=callbackFunction .
Suppose the customer expects to return data: ["customername1", "customername2"].
The data actually returned to the client is displayed as: callback function (["customername1", "customername2"]).
supplement
Why does it take a special technology (JSONP) to access data from different domains (websites)?
Because of the homology policy (a famous security policy proposed by Netscape). Now all browsers that support JavaScript will use this strategy.