Related websites
Install Docker
Docker introduction
Why use Docker
- More efficient use of system resources
- Faster startup time
- Consistent operating environment
- Continuous delivery and deployment
- Easier migration
- Easier maintenance and expansion
Summary of comparison with traditional virtual machines
| characteristic | container | virtual machine |
|---|---|---|
| start-up | Second order | Minute level |
| Hard disk usage | Typically MB | Generally GB |
| performance | Near primary | weaker than |
| System support | A single machine supports thousands of containers | Generally dozens |
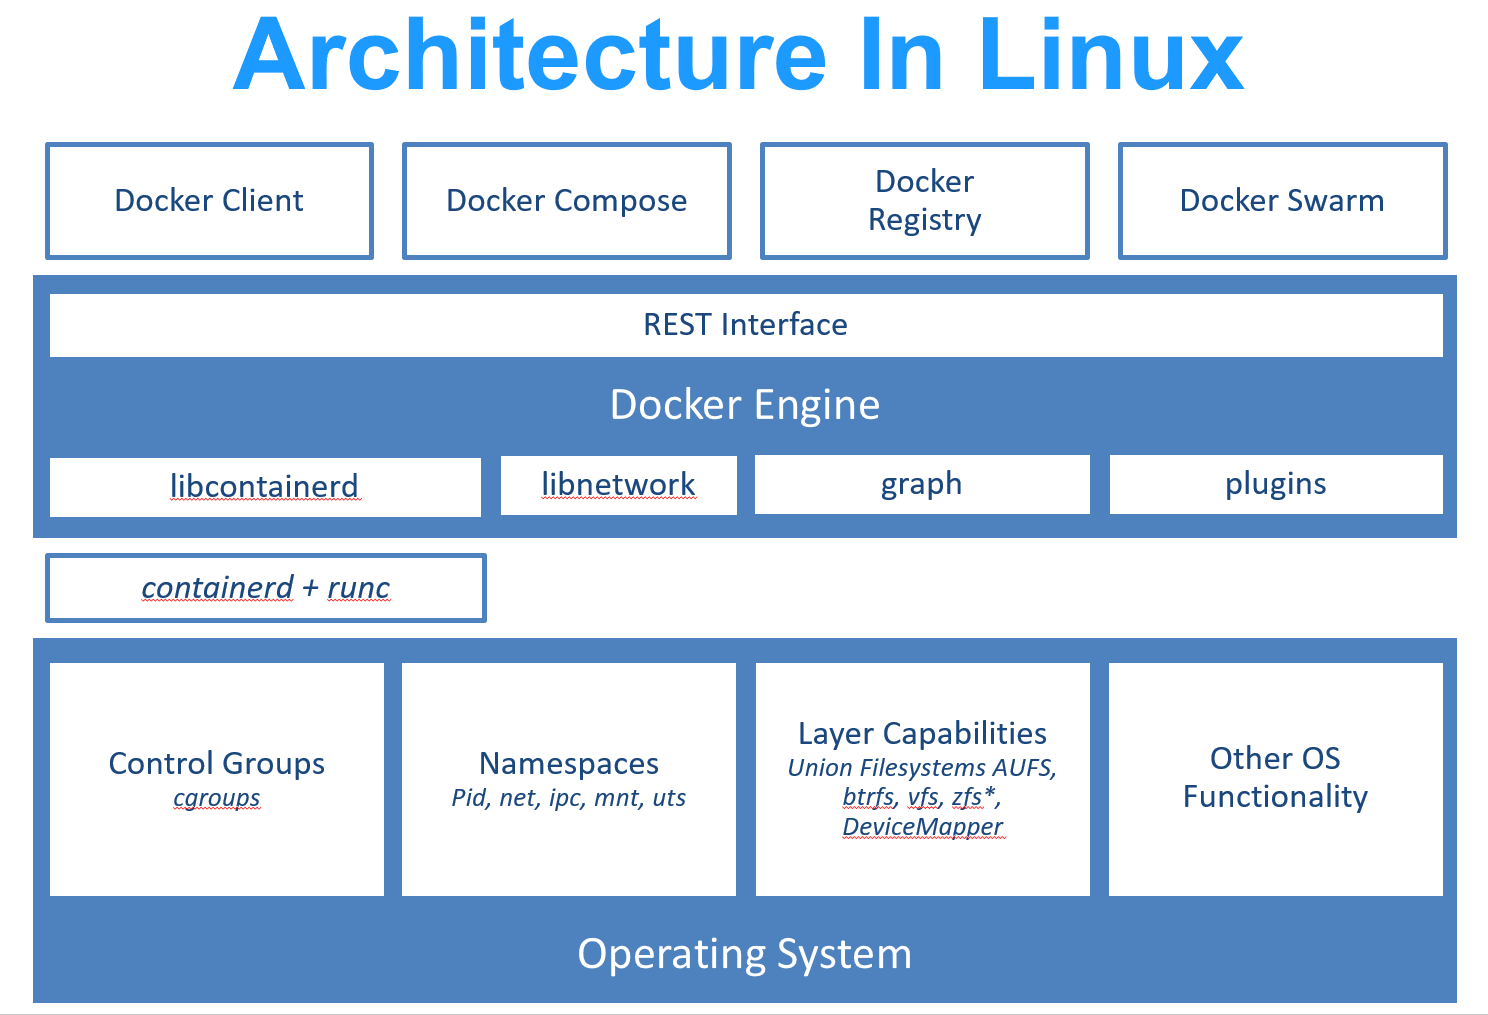
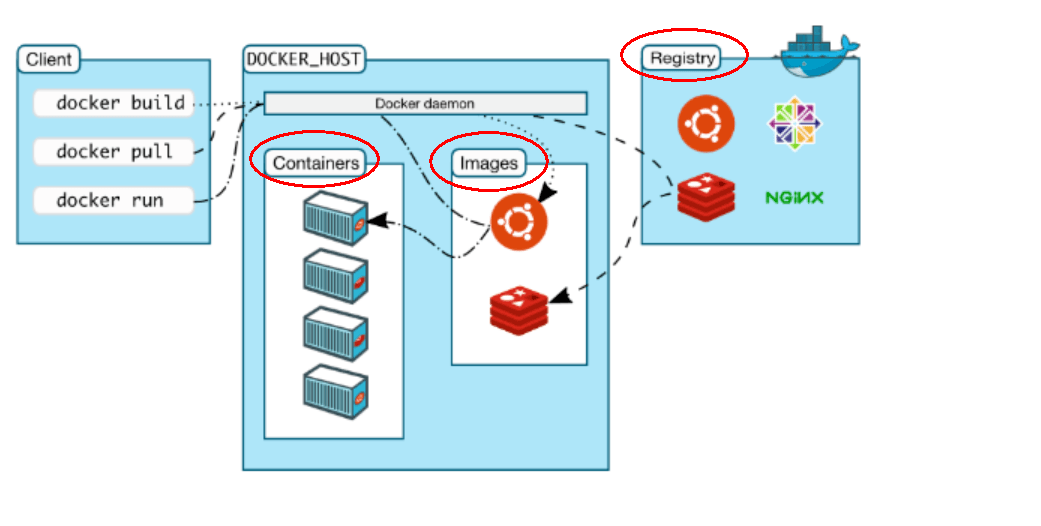
Docker is a client server system. The docker daemon runs on the host and then accesses from the client through a Socket connection. The daemon receives commands from the client and manages containers running on the host. Container is a runtime environment, which is the container we mentioned earlier.
Docker architecture diagram
Basic concepts
Docker is divided into three basic concepts: image, container and warehouse
image
Docker Image is a read-only template. Images can be used to create docker containers. One Image can create many containers.
Docker images are read-only. When the container is started, a new writable layer is loaded on the top of the image. This layer is usually called "container layer", and those under "container layer" are called "image layer".
Common commands
- docker images view the current image
- -a: list all local mirrors (including intermediate image layer)
- -q: only the image ID is displayed.
- – digests: displays the summary information of the image
- – no TRUNC: displays the complete image information
- docker search nginx search https://hub.docker.com Mirror image of
- – no TRUNC: displays the full image description
- -s: list the images with the number of collections not less than the specified value.
- – automated: only images of automated build type are listed;
- docker pull nginx:latest pull remote image to local
- docker rmi -f nginx:latest delete local image
- docker rmi -f image name 1:TAG image name 2:TAG delete multiple images
- docker rmi -f $(docker images -qa) delete all images
- docker system df view the space occupied by images, containers and data volumes.
container
Docker uses a Container to run one or a group of applications independently. Containers are running instances created with images.
It can be started, started, stopped and deleted. Each container is an isolated and secure platform.
Containers as like as two peas can be seen as a simple version of Linux environment (including root user rights, process space, user space and network space) and the application running in it. The definition and mirror of containers are almost the same, and also a unified view of a stack. The only difference is that the top layer of the container is readable and writable.
According to the requirements of Docker best practice, containers should not write any data to their storage layer, and the container storage layer should remain stateless. All file write operations should use Data Volume , or Bind host directory , reading and writing at these locations will skip the container storage layer and directly read and write to the host (or network storage), which has higher performance and stability.
Common commands
- docker run [OPTIONS] IMAGE [COMMAND] [ARG...] Create container based on image
- OPTIONS description (common): some are one minus sign, and some are two minus signs
- – name = "new container name": specify a name for the container;
- -d: Run the container in the background and return the container ID, that is, start the daemon container;
- -i: Run the container in interactive mode, usually at the same time as - t;
- -t: Reassign a pseudo input terminal to the container, usually used with - i;
- -P: Random port mapping;
- -p: Specify port mapping in the following four formats
  ip:hostPort:containerPort
  ip::containerPort
  hostPort:containerPort
  containerPort
- docker ps [OPTIONS] lists the currently running containers
- -a: list all currently running containers + those that have been run in history
- -l: displays recently created containers.
- -n: Displays the last n containers created.
- -q: silent mode, only the container number is displayed.
- – no TRUNC: do not truncate the output.
- docker start container Id
- docker restart container Id restart container
- docker stop container Id stop container
- docker kill container ID force container stop
- docker rm container ID deletes a container that has been stopped
- docker rm -f $(docker ps -a -q) delete all containers
- docker ps -a -q | xargs docker rm delete all containers
- docker logs -f -t --tail container ID view container logs
- -t is the time stamp added
- -f follow the latest log print
- – tail number shows the last number
- docker top container ID view the processes running in the container
- docker inspect container ID view container details
- docker exec -it container ID bashShell enters the container
- docker cp container ID: path in container destination host path copy files in container to local
Warehouse
A Repository is a centralized place for storing image files.
Warehouses are divided into Public warehouses and Private warehouses.
The largest public warehouse is docker hub( https://hub.docker.com/),
A large number of images are stored for users to download. Domestic public warehouses include Alibaba cloud, Netease cloud, etc
Dockerfile
Dockerfile is a build file used to build Docker images. It is a script composed of a series of commands and parameters.
Three steps of construction
- Write Dockerfile file
- docker build
- docker run
appointment
1: Each reserved word instruction must be uppercase followed by at least one parameter
2: Instructions are executed from top to bottom
3: # indicates a comment
4: Each instruction creates a new mirror layer and commits the mirror
Common commands
- ARG setting environment variables
- FROM basic image. Which image is the current new image based on
- MAINTAINER name and email address of the image MAINTAINER
- Commands to RUN when the RUN container is built
- Export the exposed port of the current container
- WORKDIR specifies the default login working directory of the terminal after creating the container, which is a foothold
- ENV is used to set environment variables during image building
- ADD copies the files in the host directory into the image, and the ADD command will automatically process the URL and decompress the tar compressed package
- COPY is similar to ADD, which copies files and directories to the image. COPY the file / directory from the < source path > in the build context directory to the < target path > location in the mirror of the new layer
- VOLUME container data VOLUME, which is used for data saving and persistence
- CMD specifies a command to run when the container is started. There can be multiple CMD instructions in Dockerfile, but only the last one takes effect. CMD will be replaced by the parameters after docker run
- ENTRYPOINT specifies a command to be run when the container is started. The purpose of ENTRYPOINT is the same as CMD, which is to specify the container startup program and parameters
- onbuild runs the command when building an inherited Dockerfile. After the parent image is inherited by the child, the onbuild of the parent image is triggered
Building PHP environment instances
# Build environment variables and freely configure different PHP versions
ARG PHP_VERSION
FROM php:${PHP_VERSION}-fpm

# Replace with Tsinghua University source acceleration. How fast
COPY ./resources/sources.list /etc/apt/

# Install composer and some php extensions
RUN curl -sS https://getcomposer.org/installer | php
    && mv composer.phar /usr/local/bin/composer
    && composer config -g repo.packagist composer https://mirrors.aliyun.com/composer/
    && apt-get update -y
    && apt-get install -y --no-install-recommends apt-utils
    && apt-get install -qq git curl libmcrypt-dev libjpeg-dev libpng-dev libfreetype6-dev libbz2-dev libzip-dev unzip
    && docker-php-ext-configure gd --with-freetype-dir=/usr/include/  --with-jpeg-dir=/usr/include/
    && docker-php-ext-install pdo_mysql zip gd opcache bcmath pcntl sockets

WORKDIR /tmp

# Install redis extension
ADD ./resources/redis-5.1.1.tgz .
RUN mkdir -p /usr/src/php/ext
    && mv /tmp/redis-5.1.1 /usr/src/php/ext/redis
    && docker-php-ext-install redis

# The following comments are opened on demand (some projects require npm)
# install python3#ADD ./resources/Python-3.8.0.tgz .
#RUN cd /tmp/Python-3.8.0 && ./configure && make && make install && rm -rf /tmp/Python-3.8.0 Python-3.8.0.tgz

# install nodejs#ADD ./resources/node-v12.13.0-linux-x64.tar.xz .
#RUN ln -s /tmp/node-v12.13.0-linux-x64/bin/node /usr/bin/node
#    && ln -s /tmp/node-v12.13.0-linux-x64/bin/npm /usr/bin/npm

# install swoole#COPY ./resources/swoole-src-4.4.12.zip .
#RUN cd /tmp && unzip swoole-src-4.4.12.zip
#    && cd swoole-src-4.4.12 && phpize && ./configure
#    && make && make install && rm -rf /tmp/swoole*

ADD ./resources/mcrypt-1.0.3.tgz .
RUN cd /tmp/mcrypt-1.0.3 && phpize && ./configure && make && make install && rm -rf /tmp/mcrypt-1.0.3

ADD ./resources/mongodb-1.6.0.tgz .
RUN cd /tmp/mongodb-1.6.0 && phpize && ./configure && make && make install && rm -rf /tmp/mongodb-1.6.0

ADD ./resources/xdebug-3.0.1.tgz .
RUN cd /tmp/xdebug-3.0.1 && phpize && ./configure && make && make install && rm -rf /tmp/xdebug-3.0.1

CMD php-fpm
Docker-Compose
Basic concepts
Compose project is the official open source project of Docker, which is responsible for the rapid arrangement of Docker container clusters.
Its code is currently in github Open source.
Compose is positioned as "an application that defines and runs multiple Docker containers". Its predecessor is the open source project Fig.
We know that using a Dockerfile template file can easily define a separate application container. However, in the work, we often encounter the situation that multiple containers need to cooperate with each other to complete a task. For example, to implement an lnmp project, in addition to the Nginx service container itself, you often need to add the back-end database service container, and even the load balancing container.
Compose just meets this requirement. It allows users to use a separate docker - compose YML template file (YAML format) to define a set of associated application containers as a project.
There are two important concepts in Compose:
- Service: an application container can actually include several container instances running the same image.
- Project: a complete business unit composed of a group of associated application containers, which is located in docker-compose.com Defined in the YML file.
The default management object of Compose is the project, which can easily manage the life cycle of a group of containers in the project through subcommands.
install
Windows
Docker Desktop for Windows includes Compose and other docker applications, so most Windows users do not need to install Compose separately

Linux & mac
Self Baidu
Compose template file
- Build specifies the path of the folder where the Dockerfile is located (either absolute or relative to the docker-compose.yml file). Compose will use it to automatically build the image and then use it.
You can use the context command to specify the path of the folder where the Dockerfile is located.version: '3' services: php72: build: ./dir
Use the arg instruction to specify the variables when building the mirror.version: "3" services: php72: build: context: . args: PHP_VERSION: 7.2 - container_name specifies the container name. The project name will be used by default_ Service name_ The format of serial number.
version: "3" services: php72: build: context: . args: PHP_VERSION: 7.2 container_name: php72 - Environment sets the environment variable. You can use both array and dictionary formats.
A variable with only a given name will automatically obtain the value of the corresponding variable on the host running Compose, which can be used to prevent unnecessary data disclosure.version: "3" services: php72: build: context: . args: PHP_VERSION: 7.2 container_name: php72 environment: TZ: "$TZ" # time zone WEB_ENV: "local" # Environment variable settings - extra_hosts is similar to the – add host parameter in Docker, specifying additional host name mapping information. The following two entries will be added to the / etc/hosts file in the service container after startup.
version: "3" services: php72: build: context: . args: PHP_VERSION: 7.2 container_name: php72 environment: TZ: "$TZ" # time zone WEB_ENV: "local" # Environment variable settings extra_hosts: - home.kukewang.li:172.20.128.2 - admin.kukewang.li:172.20.128.2 - api.kukewang.li:172.20.128.2 - api.kukecrm.li:172.20.128.2 - networks configures the network to which the container is connected.
version: "3" services: php72: build: context: . args: PHP_VERSION: 7.2 networks: static-network: ipam: config: - subnet: 172.20.0.0/16 - networks configures the network to which the container is connected.
version: "3" services: php72: build: context: . args: PHP_VERSION: 7.2 container_name: php72 environment: TZ: "$TZ" # time zone WEB_ENV: "local" # Environment variable settings extra_hosts: - home.kukewang.li:172.20.128.2 - admin.kukewang.li:172.20.128.2 - api.kukewang.li:172.20.128.2 - api.kukecrm.li:172.20.128.2 networks: static-network: #Use configured network - ports exposes port information. Use the host port: container port (HOST:CONTAINER) format, or just specify the port of the container (the host will randomly select the port)
version: "3" services: nginx: image: nginx:alpine container_name: nginx ports: - 8080:80 - 443:443 - volumes data volume mounted path settings. It can be set as host path (HOST:CONTAINER) or data volume name (VOLUME:CONTAINER). The path in this instruction supports relative paths.
version: "3" services: nginx: image: nginx:alpine container_name: nginx ports: - 8080:80 - 443:443 volumes: - ./config/nginx/conf.d:/etc/nginx/conf.d # nginx configuration - ./logs/nginx:/var/log/nginx/ # nginx log - Restart specifies that the restart policy after the container exits is always restart. This command is very effective to keep the service running all the time. It is recommended to configure it as always or unless stopped in the production environment.
version: "3" services: nginx: image: nginx:alpine container_name: nginx ports: - 8080:80 - 443:443 restart: always - working_dir specifies the working directory in the container.
version: "3"
services:
     php72:
         build:
             context: .
             args:
                 PHP_VERSION: 7.2
         working_dir:/var/www
Read variable
The Compose template file supports dynamic reading of the host's system environment variables and the current directory Variables in the env file.
version: "3"
services:
        php72:
            build:
                context: .
                args:
                    PHP_VERSION: 7.2
            volumes:
                - ~/.ssh:/root/.ssh/
                - ${WEB_ROOT}:/var/www:cached
                - ${COMPOSER}/php72:/root/.composer/
                - ${PHP72_INI}:/usr/local/etc/php/php.ini
Compose start
Generally, docker compose up - D is used to build, create, start and run services in the background
- Build can run docker compose build in the project directory at any time to rebuild the service.
- Restart restart the service in the project.
- start starts an existing service container.
- stop stops a container that is already running, but does not delete it. These containers can be started again through docker compose start.
- Up it will attempt to automatically complete a series of operations, including building an image, (RE) creating a service, starting a service, and associating a service related container. All linked services will be started automatically unless they are already running. By default, all containers started by docker compose up are in the foreground, and the console will print the output information of all containers at the same time, which is convenient for debugging.
When you stop the command through Ctrl-C, all containers will stop.
If docker compose up - D is used, all containers will be started and run in the background. This option is generally recommended for production environments.
Using tools to connect to MySql
Environment: Windows
Docker: Docker Desktop for Windows
Connection tool: Navicat
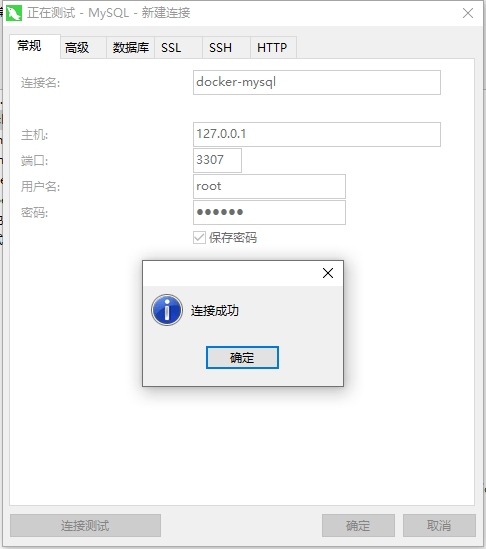
- The host address is the local loop address
- Local port mapping 3307:3306,
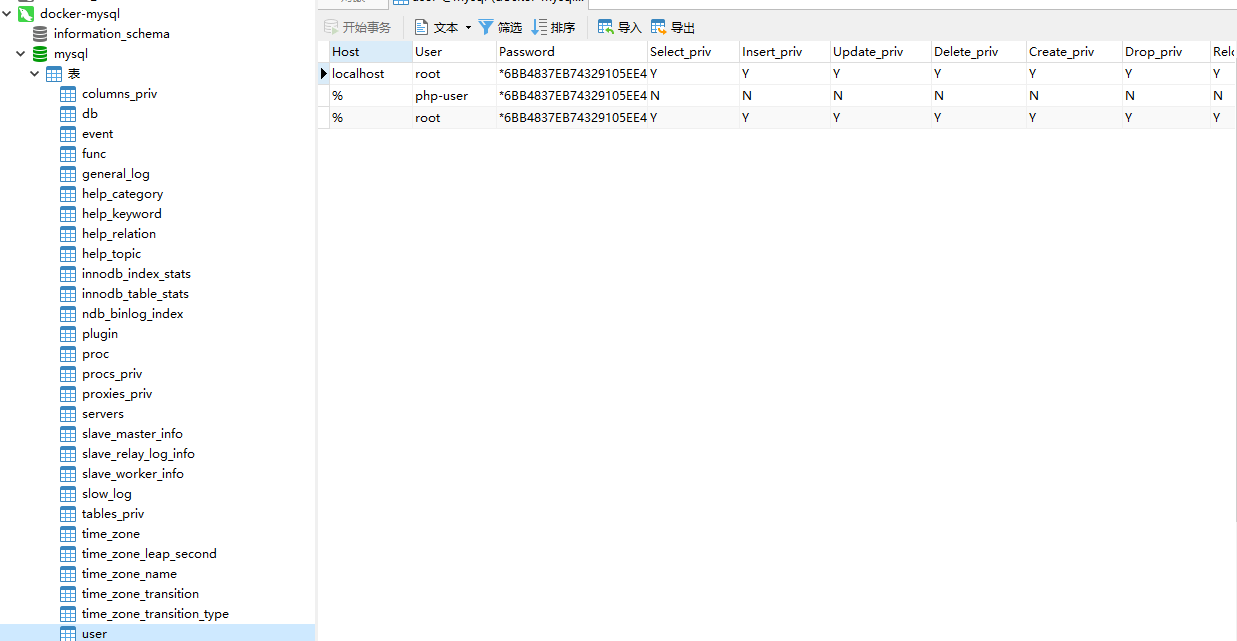
- The account password is root, and you can configure your own account password
- Access docker MySQL by connecting to the local 3307 port
Use tools to connect to Redis
Environment: Windows
Tool: RedisClient
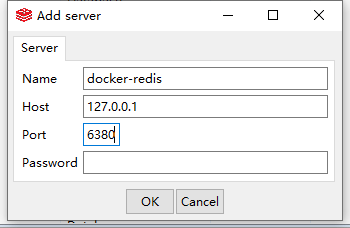
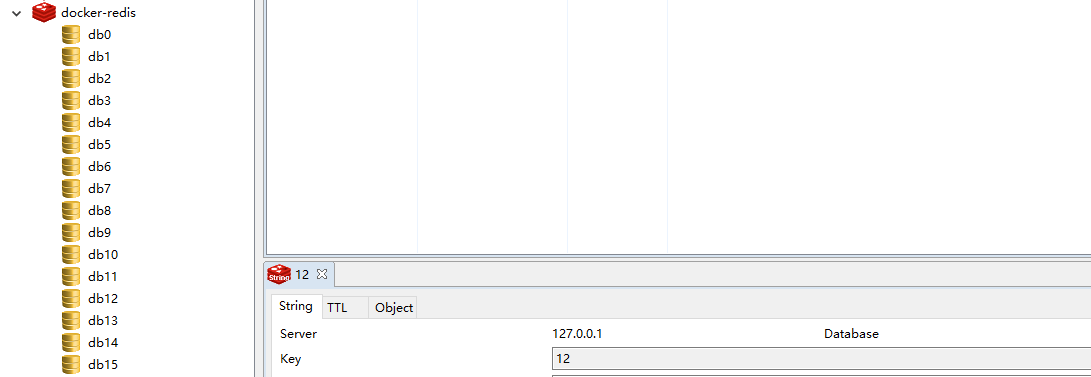
- host local loop address
- Port mapping 6380:6379
Connect RabbitMQ
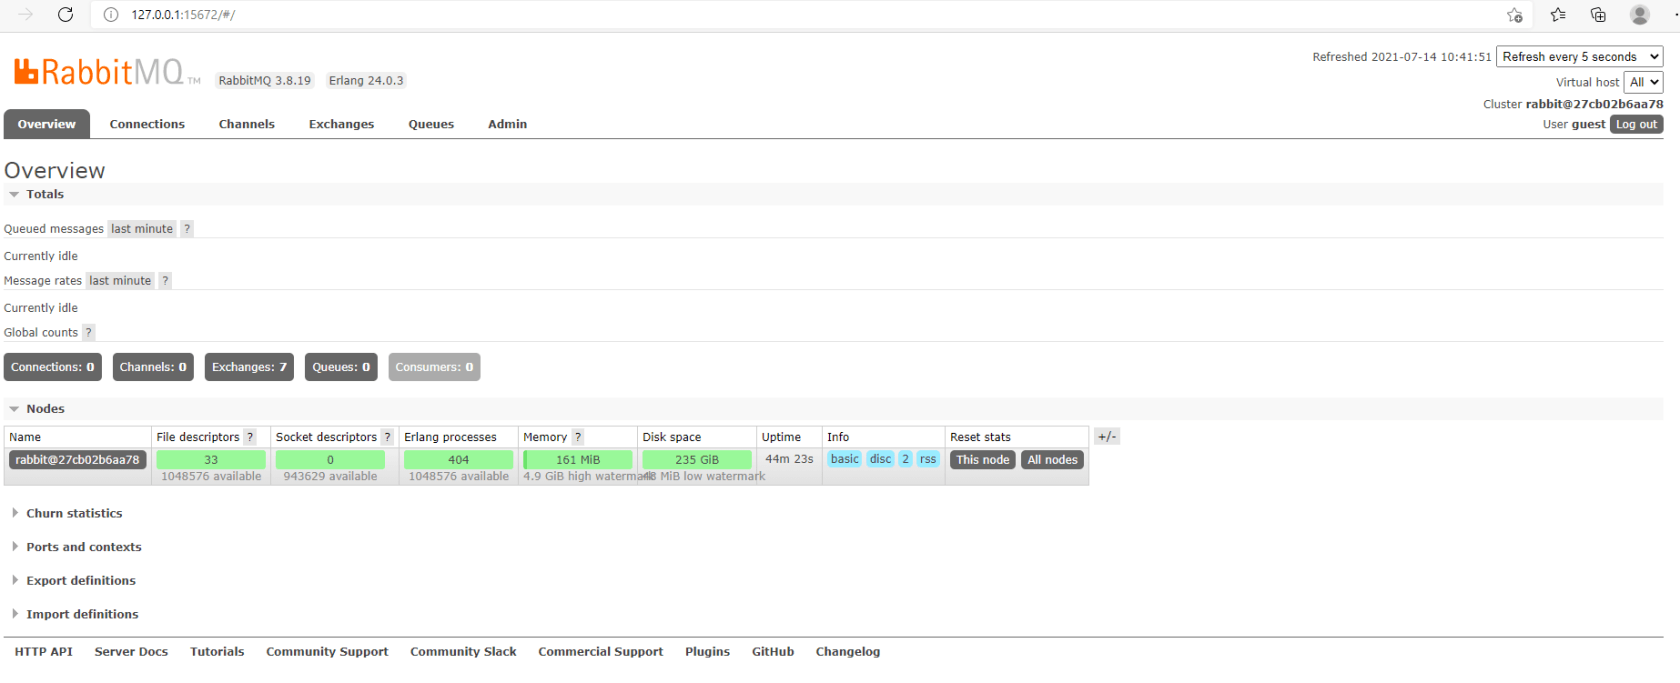
The browser connects directly through the access address
Domain name: 127.0.0.1
Port mapping
  ports:
      - 15672:15672 #  15672 mq default management interface ui port
      - 5672:5672 # 5672 client end communication port
RabbitMQ default account password guest
Run project
dnmp/config/nginx/conf.d add configuration file
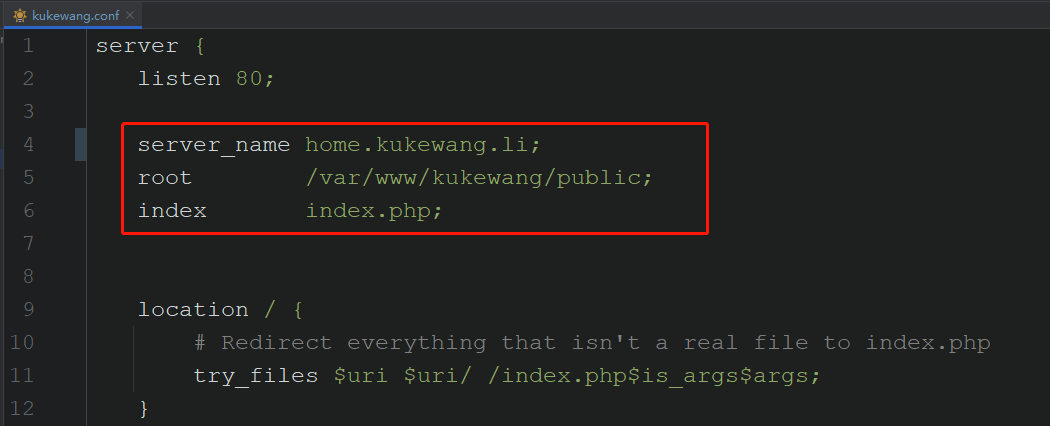
Add local Host file
127.0.0.1 home.kukewang.li
Mysql and Redis of the configuration project are in their respective configuration files or project root directories env file
 [DATABASE]
 TYPE = mysql
 HOSTNAME = mysql # Name of mysql container
 DATABASE = database_name #database
 USERNAME = root # User, you can add users by yourself
 PASSWORD = root_password # password
 HOSTPORT = 3306 # port

 [REDIS]
 HOST = redis # redis container name
 PORT = 6379 # port
 PASSWORD = # Password, no password
Restart the Nginx service
docker-compose restart nginx
Access by domain name
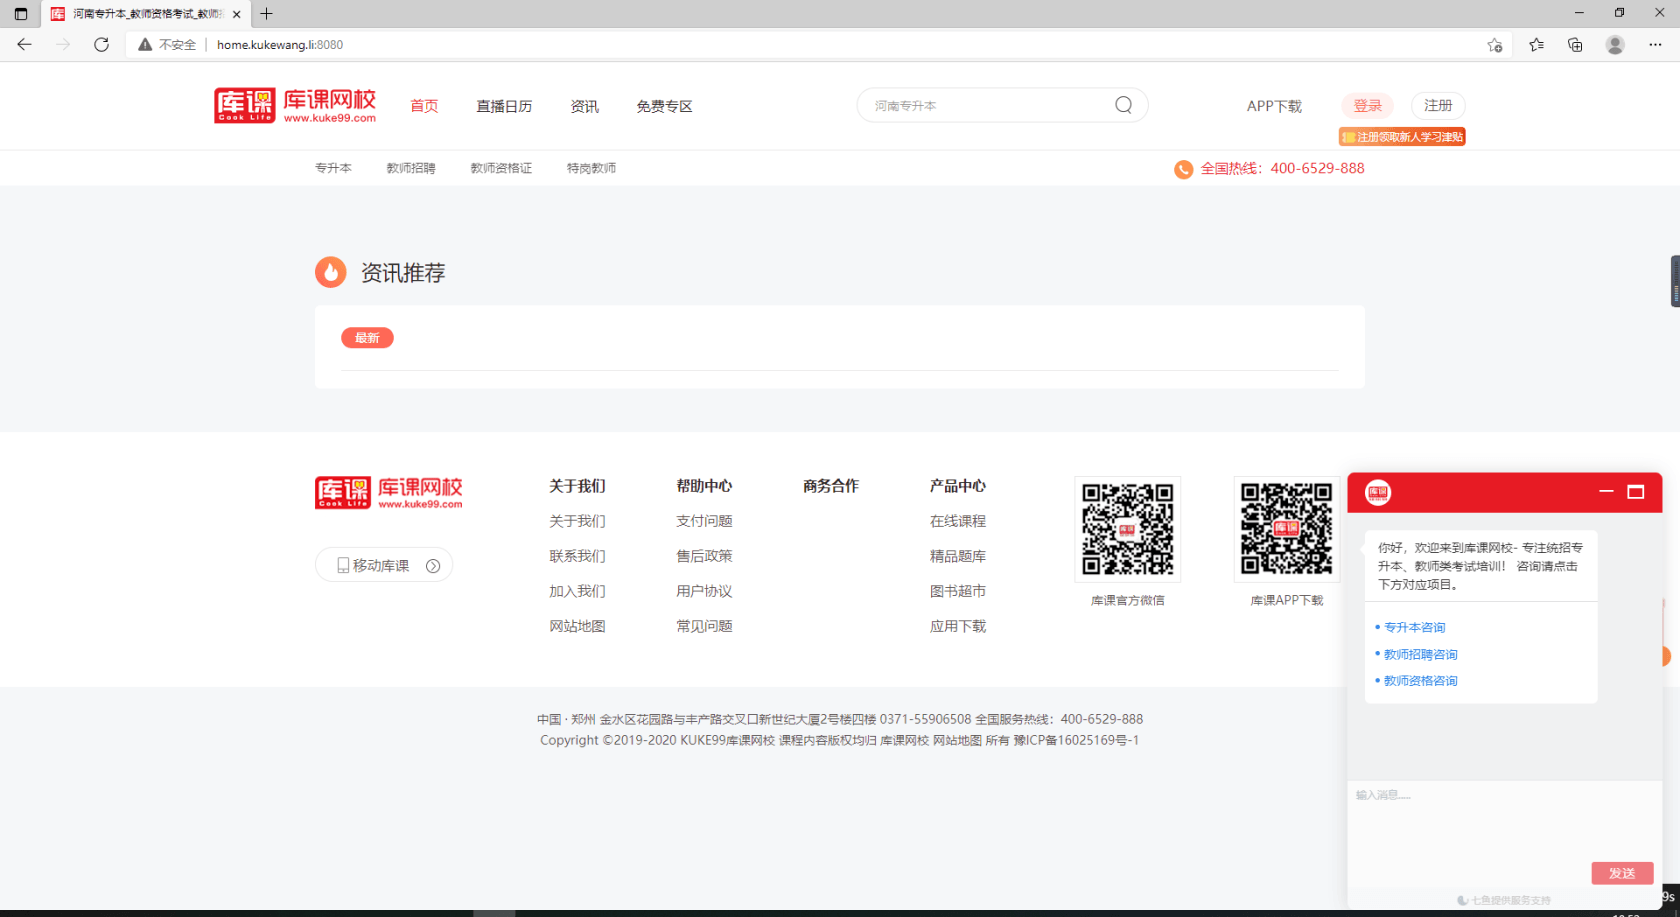
nginx port mapping on my side 8080:80