This article is original by the author. I summarize, review and share my experience. Please correct me
- Installation of routing
- Route creation component
- Routing is simple to use
- Global front guard
- Route nesting use
- other
1. Installation of routing
Referring to the official documents of Vue router, we can see that there are methods of direct download / CDN, NPM and adding vue cli. The author uses the NPM method to input at the terminal
npm install vue-router
The author selects version 3.5.2, so enter the following contents in the terminal to install version 3.5.2 routing
npm i vue-router@3.5.2 -S
The subsequent content of the article will also be based on version 3.5.2 routing
2. Route creation component
-
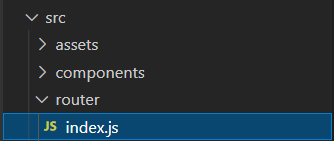
Create a router folder under src folder, and create a router folder named index JS file
-
In index Import Vue and Vue router from the. JS file
//Import Vue import Vue router
import Vue from 'vue'
import VueRouter from 'vue-router'
-
Install Vue router plug-in
//Installing the Vue router plug-in
Vue.use(VueRouter)
-
Declare a Vue router instance
//Declare a Vue router instance const router = new VueRouter({ routes: [] }) -
Shared router
//Shared router
export default router
-
In main JS JS file
// Import routing module
import router from '@/router/index.js'
-
In main JS file added to Vue instance
new Vue({
  render: h => h(App),
  router: router
}).$mount('#app')
3. Routing is simple to use
Router view component: placeholder for matching the component to be rendered to the target location
<template>
  <!-- placeholder  -->
  <router-view></router-view>
</template>
1. In index JS file to import the Login component
import Login from '@/components/MyLogin.vue'
2. In index The Vue router instance in the. JS file writes its corresponding properties
//Render Login component on behalf of XXXXXXXX / # / Login hash address
const router = new VueRouter({
  routes: [
    { path: '/login', component: Login }
  ]
})
3. Since the default url of the website is xxxxxxxx / # /, it is added in routes
//When it is detected that the hash address is' / ', it will automatically jump to' / Login 'to automatically render the login component
{ path: '/', redirect: '/login' }
redirect means to force a jump to a hash address
4. Global front guard
1. Bind a click event for the Login button in the Login component
<button type="button" @click="login">Sign in</button>
2. Store the login information token in the local storage space as the login credentials
 methods: {
    login() {
      if (this.username === 'admin' && this.password === '666666') {
        // Login succeeded
        // 1. Store token
        localStorage.setItem('token', 'Bearer xxxx')
        // 2. Jump to the background home page
        this.$router.push('/home')
      } else {
        // Login failed
        localStorage.removeItem('token')
      }
    }
  }
Here, if the login is successful, the token information will be recorded, and the hash address will jump to / home. If it fails, the token information will be removed
3. Encapsulate the hash address that can be viewed only after login, and share it
Create patharr. In the router folder JS file
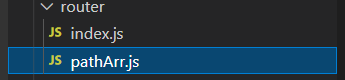
Write the hash address you want to encapsulate inside
export default ['/home', '/home/users', '/home/rights']
4. In index JS to import the encapsulated hash address
import pathArr from '@/router/pathArr.js'
5. Use the beforeEach function to create a global preamble
router.beforeEach(function(to, from, next) {
  if (pathArr.indexOf(to.path) !== -1) {
    const token = localStorage.getItem('token')
    if (token) {
      next()
    } else {
      next('/login')
    }
  } else {
    next()
  }
})
The function method needs to be written in beforeEach, where the formal parameter to represents the hash address to jump, from represents the hash address to jump from, and next represents the passage. If the address to be jumped belongs to the encapsulated hash address, check whether there is a 'token' in the local storage space. If it exists, next() passes. If it does not exist, it is forced to jump to '/ login'; If the hash address to be jumped does not belong to the encapsulated hash address, pass directly to next()
6. Bind the click event with the exit button in the home component
<button type="button" @click="logout">Log out</button>
methods: {
    logout() {
      // 1. Clear token
      localStorage.removeItem('token')
      // 2. Jump to the login page
      this.$router.push('/login')
    }
  }
Clear the token, jump to the login page, and return the page to the unregistered state
5. Route nesting
1. Similarly, create a < router View > component to provide rendering space occupation
<div>
  <router-view></router-view>
</div>
2. Use the < router link > component to provide the link jump hash address (note that this component will automatically render as a < a > component)
<ul>
  <li>
    <router-link to="/home/users">user management </router-link>
  </li>
  <li>
    <router-link to="/home/rights">Authority management</router-link>
  </li>
  <li>
    <router-link to="/home/goods">Commodity management</router-link>
  </li>
  <li>
    <router-link to="/home/orders">Order management</router-link>
  </li>
  <li>
    <router-link to="/home/settings">System settings</router-link>
  </li>
</ul>
3. Create a child attribute of an attribute in the router instance of index
{
  path: '/home',
  component: Home,
  redirect: '/home/users',
  children: [
    { path: 'users', component: Users },
    { path: 'rights', component: Rights },
    { path: 'goods', component: Goods },
    { path: 'orders', component: Orders },
    { path: 'settings', component: Settings },
  ]
}
The hash address in path: '' in children should not write '/',
4. Realize the backward function
<!-- Bind a click event on the back button to return to the previous historical access -->
<button type="button" @click="$router.back()">back off</button>
5. Implement the dynamic hash address in the path
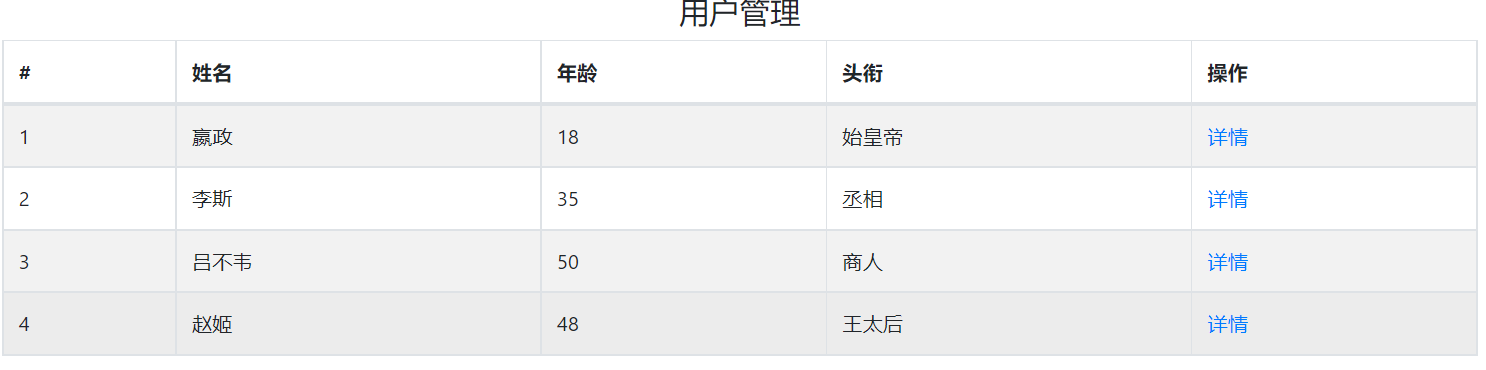
To complete the operations in the figure, click Details to jump to each detailed introduction interface. If each line corresponds to a hash address, when the number of lines exceeds, the code will be bloated. Therefore, we use the dynamic hash address, as follows:
-
Bind a click event to the hyperlink (prevent prevents the jump, but executes the following methods)
<a href="#"@ click. Prevent =" gotdetail (item. ID) "> details</a>
-
Writing method (Note: the '+' here cannot be replaced by:)
methods: { gotoDetail(id) { this.$router.push('/home/userinfo/' + id) } -
In the router instance, it is written as follows (note that the in front of id here is dynamic binding) to realize simple replication
const router = new VueRouter({
  routes: [
    {
      path: '/home',
      component: Home,
      redirect: '/home/users',
      children: [
        { path: 'users', component: Users },
        { path: 'rights', component: Rights },
        { path: 'goods', component: Goods },
        { path: 'orders', component: Orders },
        { path: 'settings', component: Settings },
        // Routing rules for user details page
        { path: 'userinfo/:id', component: UserDetail }
      ]
    }
  ]
})
6. other
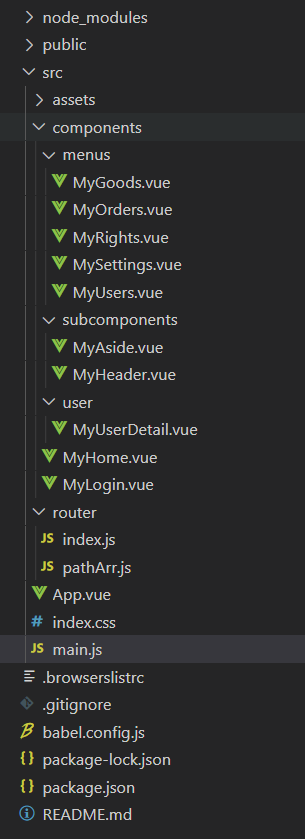
This project comes from the network dark horse programmer, and its project file composition is as follows
***