Bidirectional authentication of Nginx
1, Foreword
Reference link
OPENSSL encryption DSA,RSA introduction
By default, the client trusts the authoritative CA organization, and the operating system has built-in CA certificate.
To put it bluntly, the operating system has the public key of CA certificate by default. For example, we can access it https://www.baidu.com (Baidu) it is because Baidu is among CA certification bodies in our own operating system.
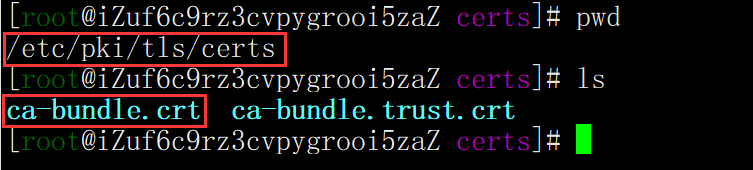
centos The trusted certificate in the operating system is usually in this file
cat /etc/pki/tls/certs/ca-bundle.crt
We can check a communication process of visiting Baidu
curl -v https://www.baidu.com
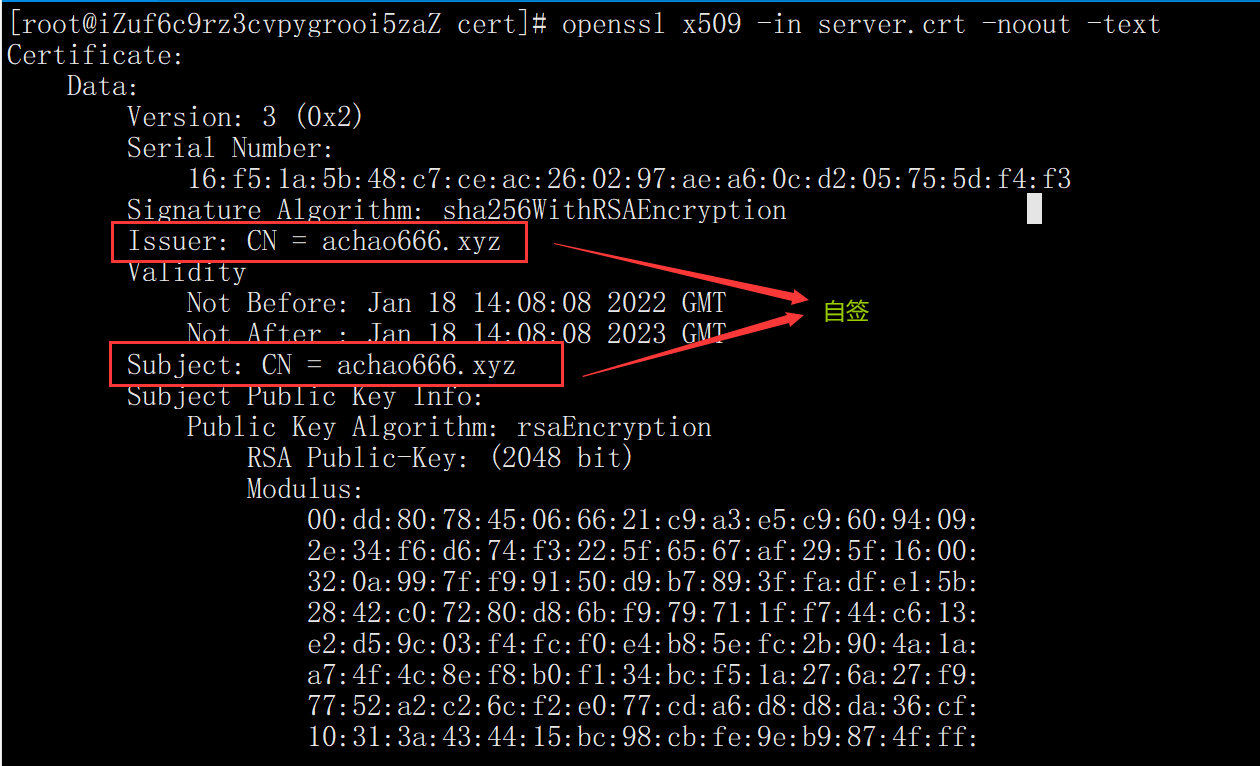
Subject: the subject represents the entity Name of the server. The organization applies for a certificate from the CA organization. The corresponding Name type is the same as that of the issuer. CN represents the domain Name of the server entity class.
Issuer: issuer, which represents the Name of the CA organization. The corresponding Name type is very important, which is abbreviated as DN
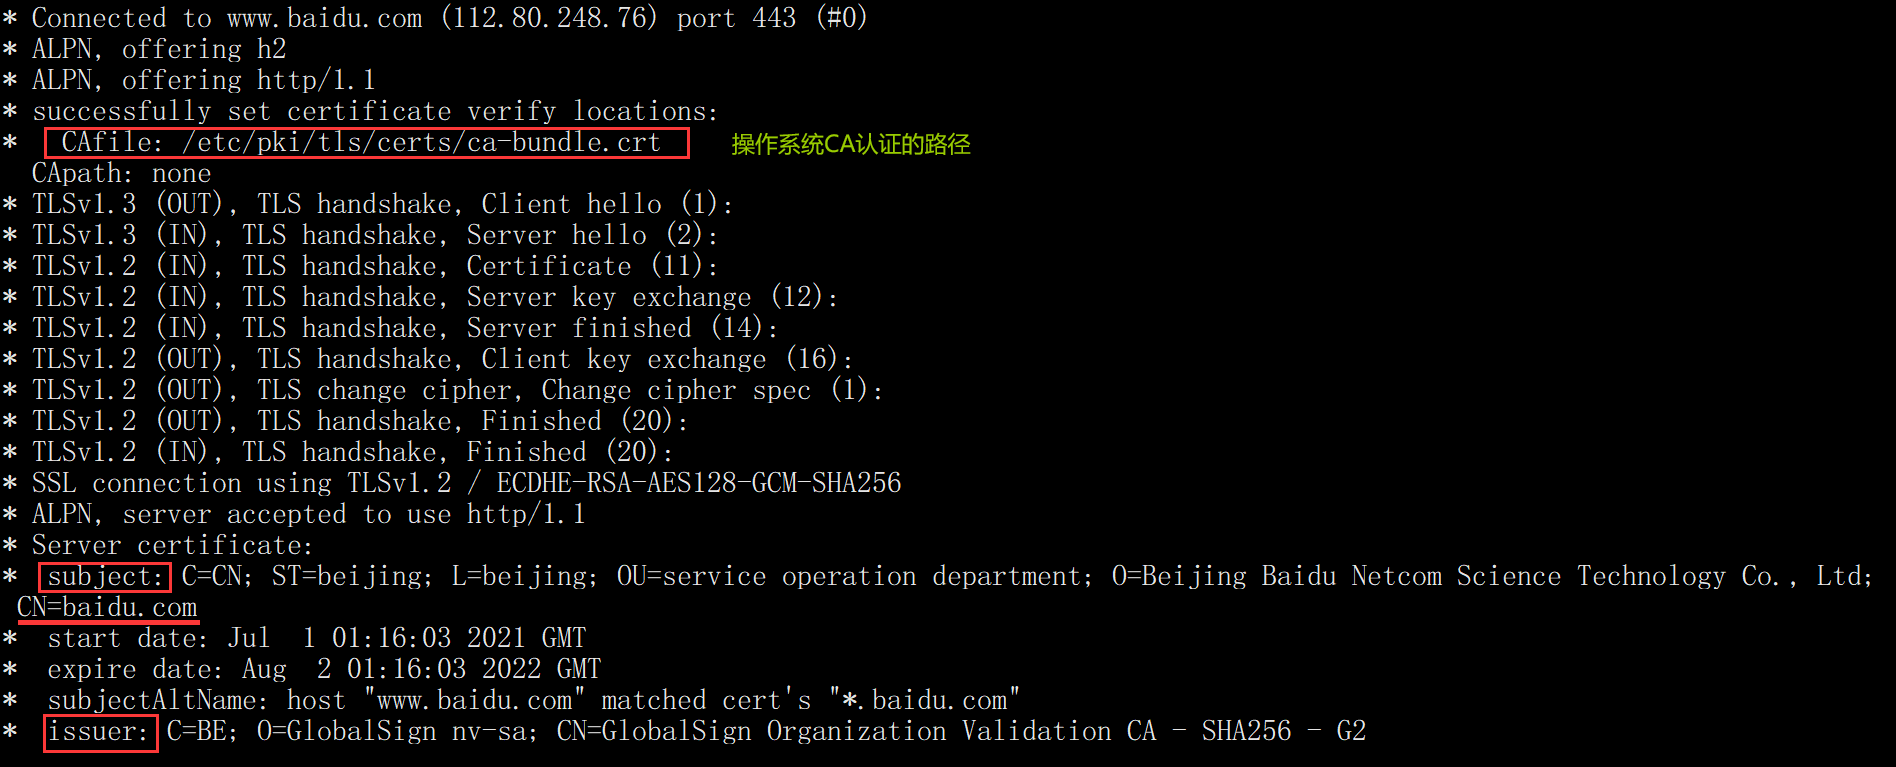
We can check whether the issuer GlobalSign in the process of accessing Baidu communication exists in the CA authentication of our operating system

If you are interested in learning about ECC Root CA - R4,Root CA - R6... You can refer to this article What is Globalsign Root CA?
2, What is CA
CA is the issuing authority of the certificate
- CA is also hierarchical. The most advanced CA is called RootCA, that is, the CA certificate of the lower level of root certificate is issued and signed by it
- In this way, we trust RootCA, and those CAS with certificates signed by RootCA can issue certificates to entities or other CAS
- Who signed RootCA? The answer is that they sign for themselves. Ha ha, it's called self signature.
We can see the certificate information of Baidu
openssl s_client -connect www.baidu.com:443
For the specific parameters of openssl instruction, those interested can refer to openssl s_client Blog. Or use the instruction: openssl s_client help to query.
3, Certificate issuing process
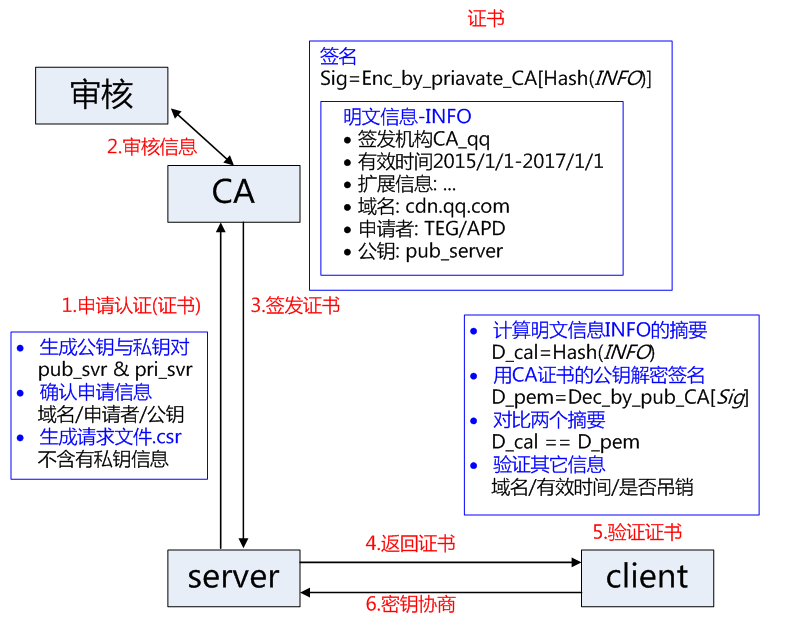
- Service provider S submits public key, organization information, personal information (domain name) and other information to the third-party CA and applies for authentication;
- CA verifies the authenticity of the information provided by the applicant through online and offline means, such as whether the organization exists, whether the enterprise is legal, whether it has the ownership of the domain name, etc;
- If the information is approved, CA will issue the certification document certificate to the applicant. The certificate contains the following information: the applicant's public key, the applicant's organization information and personal information, the information of the issuing authority Ca, the effective time, the certificate serial number and other information in clear text, and includes a signature; Signature generation algorithm: firstly, the hash function is used to calculate the information summary of the public plaintext information, and then the private key of Ca is used to encrypt the information summary, and the ciphertext is the signature;
- When client C sends a request to server S, S returns the certificate file;
- Client C reads the relevant plaintext information in the certificate and calculates the information summary by using the same hash function. Then, decrypt the signature data by using the public key of the corresponding CA and compare the information summary of the certificate. If it is consistent, the legitimacy of the certificate can be confirmed, that is, the public key is legitimate;
- The client then verifies the domain name information, validity time and other information related to the certificate;
- The client will build in the certificate information of the trusted Ca (including the public key). If the CA is not trusted, the certificate of the corresponding CA cannot be found, and the certificate will also be judged illegal.
4, Nginx Https self signed certificate
First install Nginx (I've already installed a brief tape here)
yum -y install nginx
Modify nginx Conf configuration file
cat > /usr/local/nginx/conf/nginx.conf <<EOF
server {
        listen       443 ssl;
        server_name  localhost;

        ssl_certificate      /cert/server.crt;
        ssl_certificate_key  /cert/server.key;

        ssl_session_cache    shared:SSL:1m;
        ssl_session_timeout  5m;

        ssl_ciphers  HIGH:!aNULL:!MD5;
        ssl_prefer_server_ciphers  on;

        location / {
            root   html;
            index  index.html index.htm;
        }
    }
EOF
Create a self signed certificate file
mkdir /cert
cd /cert
openssl genrsa -out server.key 2048
openssl req -x509 -new -nodes -key server.key -subj "/CN=achao666.xyz" -days 365 -out server.crt
openssl x509 -in server.crt -noout -text View Certificate
Restart Nginx
./nginx -s reload
Test access self signed certificate scenario:
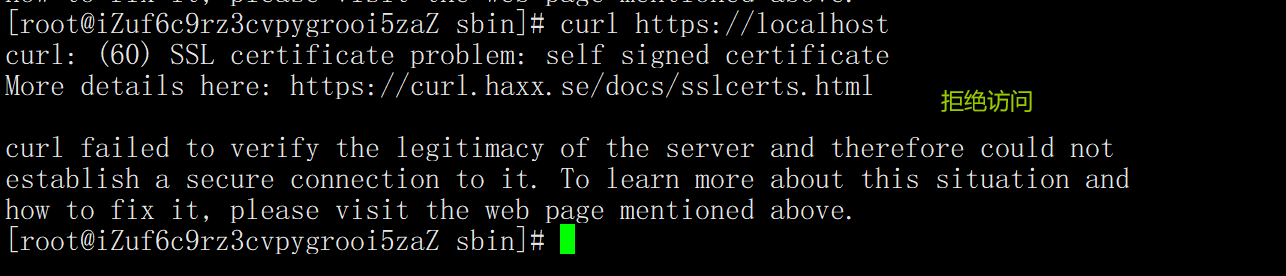
1. Direct access to the server
curl https://localhost
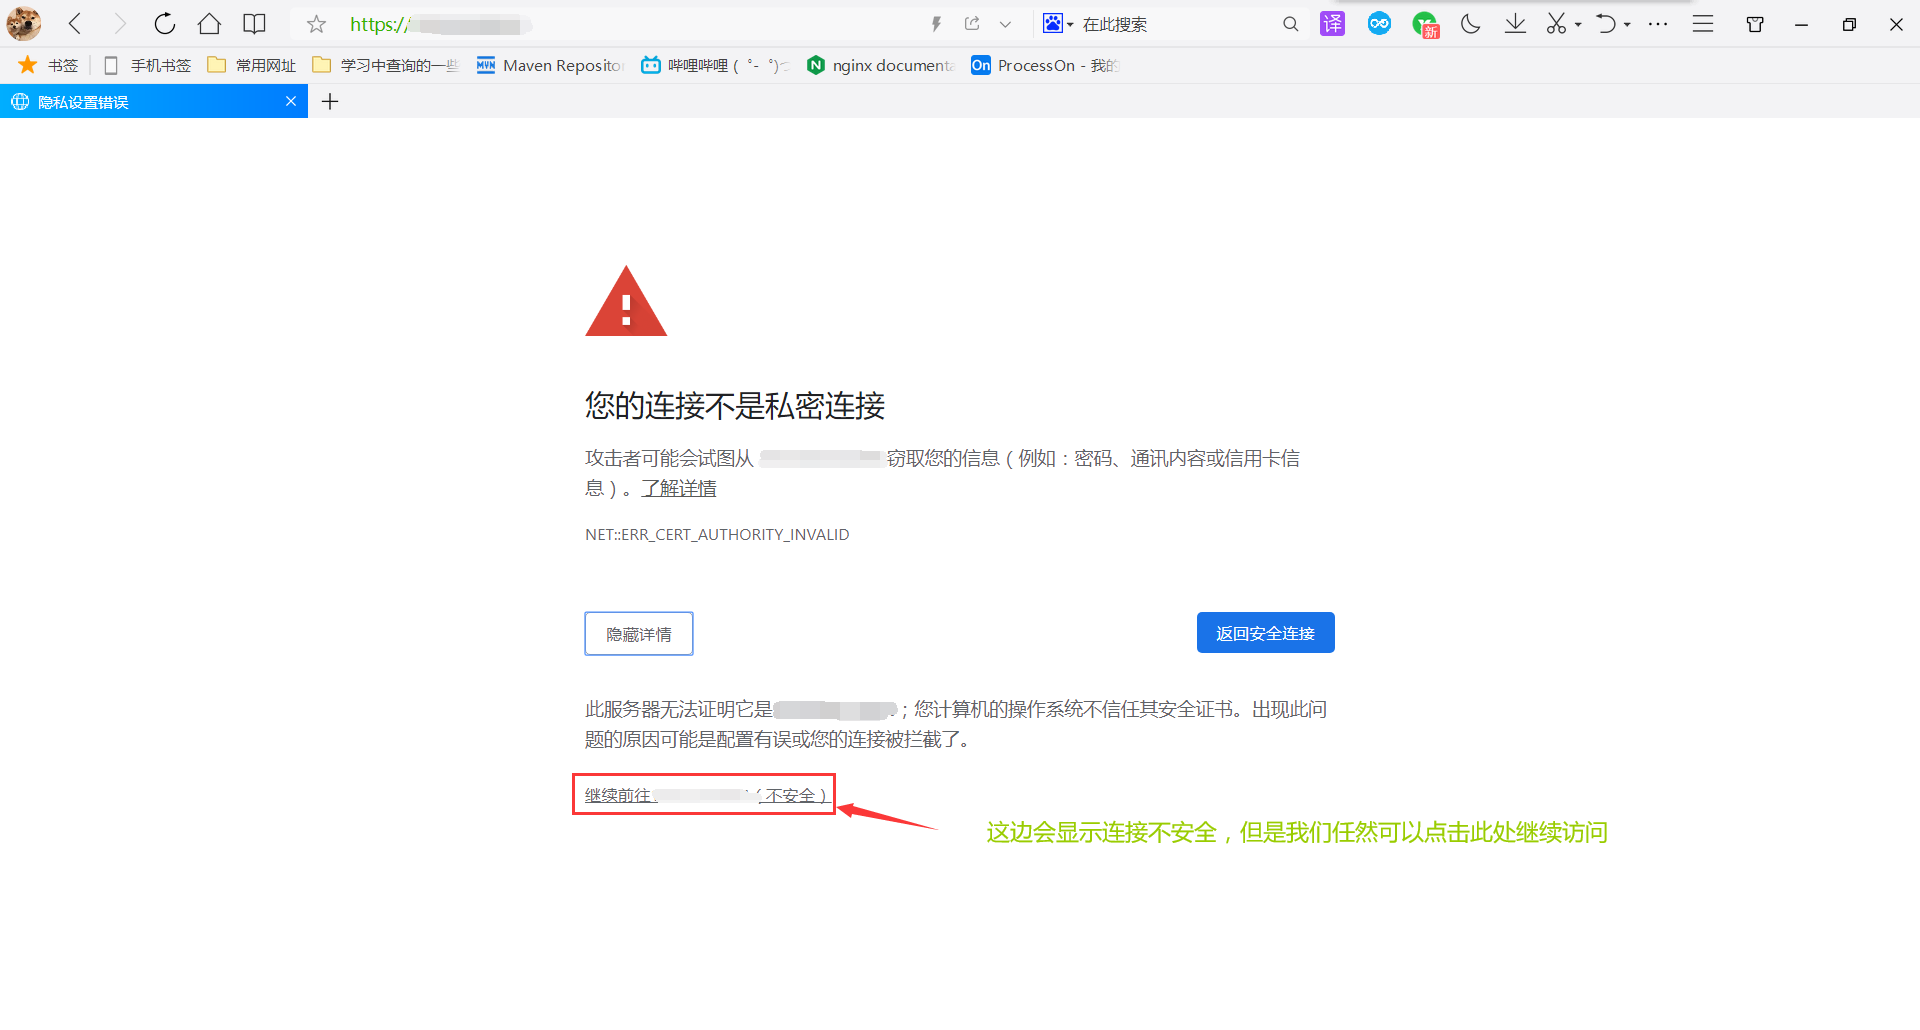
2. Access directly with browser
3. Direct access without verifying the certificate (skip verification)
curl -k https://localhost

4. Visit with certificate
curl https://localhost --cacert /cert/server.crt

We clearly carried the certificate. Why did we still be rejected? The reason is that our domain name has not been resolved
Then let's try to resolve the domain name and carry the certificate or let the client resolve the domain name
Mode 1:
curl https://achao666.xyz --cacert /cert/server.crt --resolve achao666.xyz:443:"ip address"

Mode 2:
Backup configuration, etc. to restore
cp /etc/hosts /opt/
echo "ip address achao666.xyz" >> /etc/hosts
curl https://achao666.xyz --cacert /cert/server.crt

Restore after test
cp /opt/hosts /etc/

5. Direct access does not want to carry certificates
Make a backup of the CA authentication of the system
cp /etc/pki/tls/certs/ca-bundle.crt /opt/
Put the certificate generated by ourselves into the CA authentication of the system
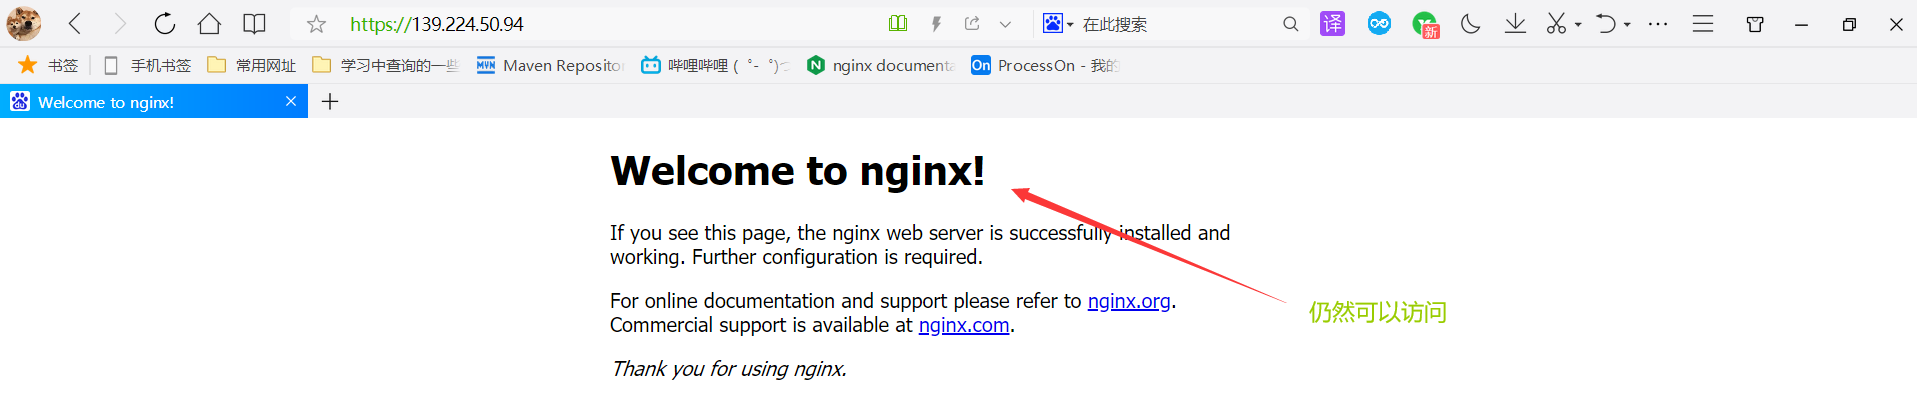
cat /cert/server.crt >> /etc/pki/tls/certs/ca-bundle.crt
visit
curl https://achao666.xyz --resolve achao666.xyz:443:"ip address"

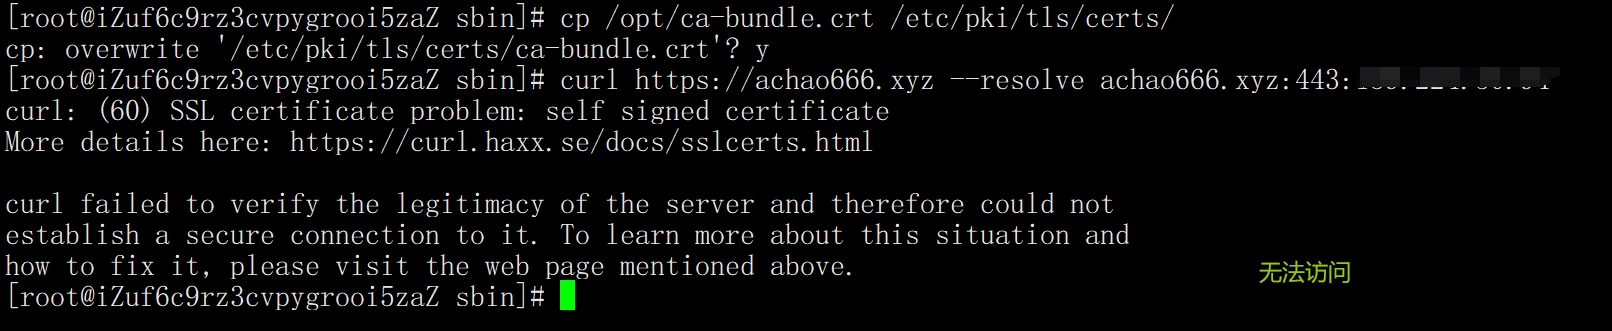
Restore configuration after test
cp /opt/ca-bundle.crt /etc/pki/tls/certs/
5, Use CA to issue certificate
Create CA certificate file
rm -rf /cert/
mkdir /cert
cd /cert
openssl genrsa -out ca.key 2048
openssl req -x509 -new -nodes -key ca.key -subj "/CN=achao666-ca.xyz" -days 365 -out ca.crt
openssl x509 -in ca.crt -noout -text View Certificate
Create a server certificate and give it to CA for signature
openssl genrsa -out server.key 2048
openssl req  -new  -key server.key -subj "/CN=achao666.xyz" -out server.csr
openssl x509 -req -in server.csr -CA ca.crt -CAkey ca.key -CAcreateserial -out server.crt -days 365
openssl x509 -in server.crt -noout -text View Certificate
nginx.conf remains unchanged, restart Ng
./nginx -s reload
Test access scenario
1. Carry the server Whether the CRT certificate and domain name can be accessed
curl https://achao666.xyz --cacert /cert/server.crt --resolve achao666.xyz:443:139.224.50.94

2. Carry ca.crt certificate to test whether it can be accessed
curl https://achao666.xyz --cacert /cert/ca.crt --resolve achao666.xyz:443:139.224.50.94

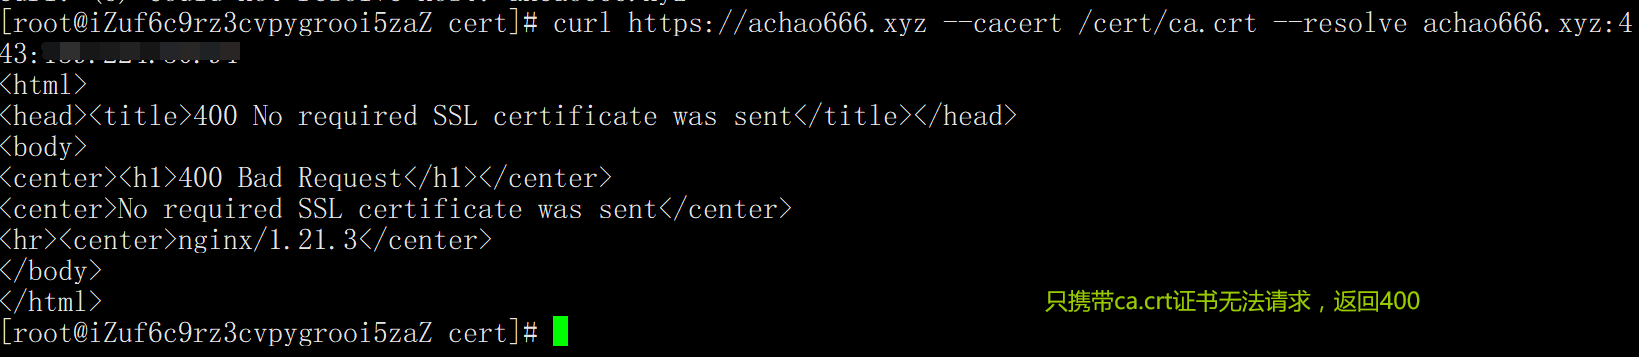
3. Carry the ca.crt certificate, but do not resolve the domain name
curl https://achao666.xyz --cacert /cert/ca.crt

6, The client uses a self signed certificate for the server to verify (two-way authentication)
Modify nginx Conf configuration file
cat > /usr/local/nginx/conf/nginx.conf <<EOF
server {
        listen       443 ssl;
        server_name  localhost;

        ssl_certificate      /cert/server.crt;
        ssl_certificate_key  /cert/server.key;
        ssl_client_certificate  /cert/client.crt;
		ssl_verify_client on;

        ssl_session_cache    shared:SSL:1m;
        ssl_session_timeout  5m;

        ssl_ciphers  HIGH:!aNULL:!MD5;
        ssl_prefer_server_ciphers  on;

        location / {
            root   html;
            index  index.html index.htm;
        }
    }
EOF
Generate a client key and certificate
openssl genrsa -out client.key 2048
openssl req -x509 -new -nodes -key client.key -subj "/CN=client" -days 365 -out client.crt
Restart Nginx
./nginx -s reload
Test scenario:
1. Carry ca.crt certificate and resolve domain name
curl https://achao666.xyz --cacert /cert/ca.crt --resolve achao666.xyz:443:139.224.50.94
2. Carry ca.crt certificate and client certificate crt
curl https://achao666.xyz --cacert /cert/ca.crt --cert /cert/client.crt --key /cert/client.key --resolve achao666.xyz:443:139.224.50.94
--cacert /cert/ca.crt Client authentication server
--cert /cert/client.crt --key /cert/client.key Server authentication client

7, Use root certificate to issue client certificate and provide server authentication (two-way authentication)
Modify nginx Conf configuration file
cat > /usr/local/nginx/conf/nginx.conf <<EOF
server {
        listen       443 ssl;
        server_name  localhost;

        ssl_certificate      /cert/server.crt;
        ssl_certificate_key  /cert/server.key;
        ssl_client_certificate  /cert/client-ca.crt;
		ssl_verify_client on;

        ssl_session_cache    shared:SSL:1m;
        ssl_session_timeout  5m;

        ssl_ciphers  HIGH:!aNULL:!MD5;
        ssl_prefer_server_ciphers  on;

        location / {
            root   html;
            index  index.html index.htm;
        }
    }
EOF
Generate a root certificate
openssl genrsa -out client-ca.key 2048
openssl req -x509 -new -nodes -key client-ca.key -subj "/CN=client-ca" -days 365 -out client-ca.crt
Generate a client private key and a certificate signing request
openssl genrsa -out client.key 2048
openssl req -new -key client.key -subj "/CN=client" -out client.csr
enlarge file
Because it is a client authentication file plus an extended configuration file
This is about extended key usage, not key usage (this is a different setting). What is required depends on the purpose of the certificate, i.e. server authentication (usually required on the server side) and / or client authentication (client, less common).
cat > client.ext << EOF
extendedKeyUsage=clientAuth
EOF
CA signs the certificate request
openssl x509 -req -in client.csr -CA client-ca.crt -CAkey client-ca.key -CAcreateserial -extfile client.ext -out client.crt -days 356
Restart nginx
./nginx -s reload
Test scenario
1. Carry ca.crt certificate and client certificate crt
curl https://achao666.xyz --cacert /cert/ca.crt --cert /cert/client.crt --key /cert/client.key --resolve achao666.xyz:443:139.224.50.94

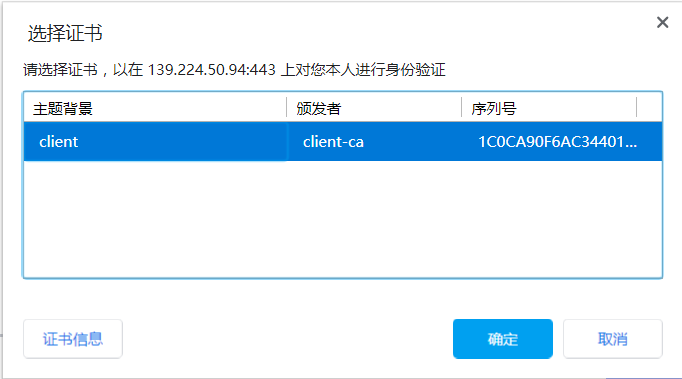
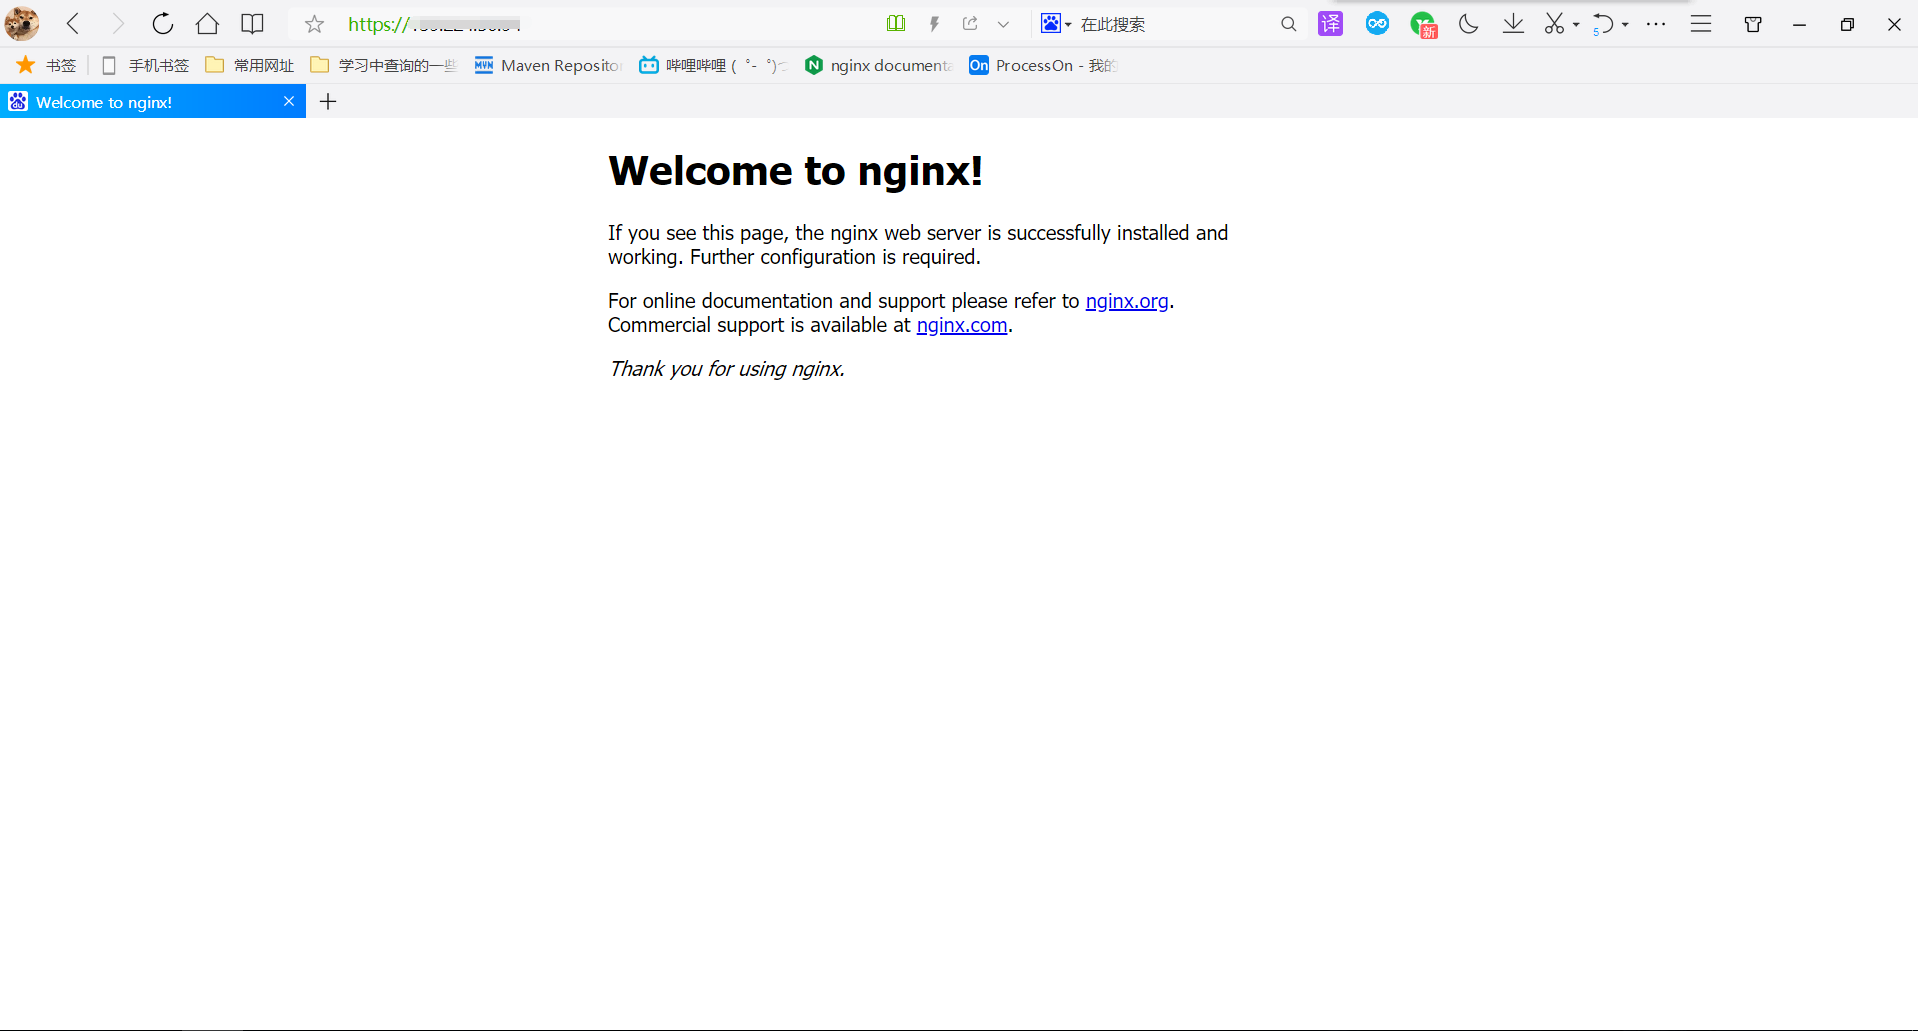
2. Browser Test
Since it is a two-way authentication, accessing the https address directly through the browser is informed of 400 Bad Request (No required SSL certificate was sent), and the client certificate needs to be installed locally.
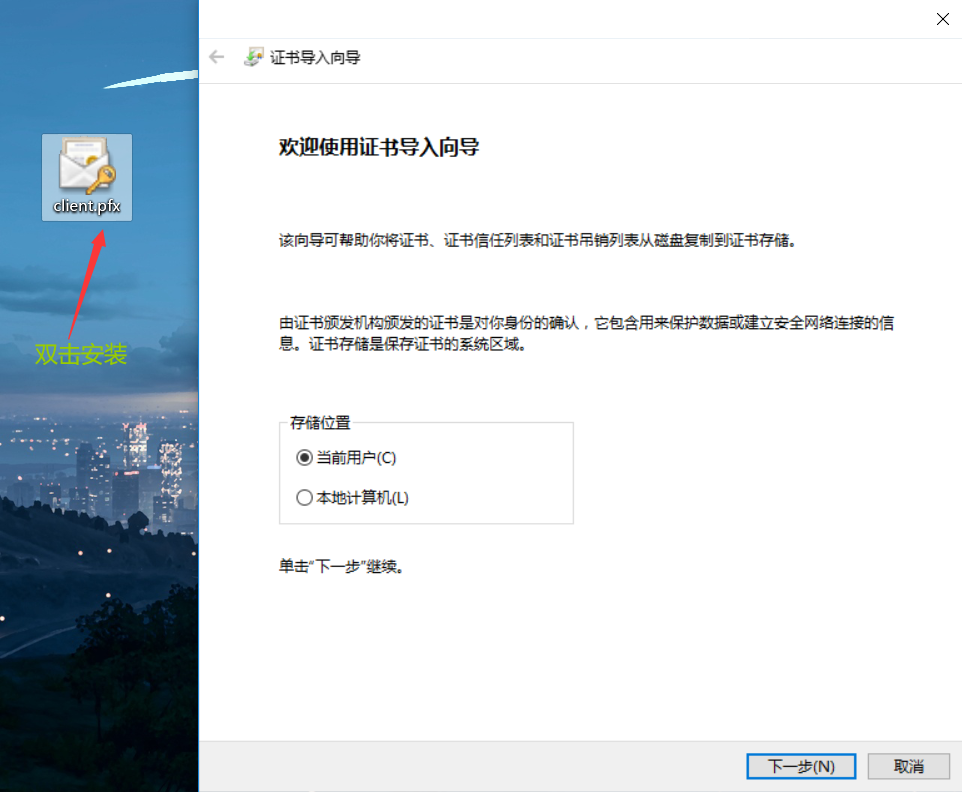
The certificate installed on windows needs pfx format, also known as p12 format. The generation method is as follows:
openssl pkcs12 -export -inkey /cert/client.key -in /cert/client.crt -out client.pfx
sz client.pfx Download to windows
Installation certificate
3. Whether multiple client certificates generated can be accessed successfully
Generate secret key and request signing certificate
openssl genrsa -out client2.key 2048
openssl req -new -key client2.key -subj "/CN=client2" -out client2.csr
Sign it with the CA certificate you created earlier
openssl x509 -req -in client2.csr -CA client-ca.crt -CAkey client-ca.key -CAcreateserial -extfile client.ext -out client2.crt -days 356
Generate pfx format required by browser
openssl pkcs12 -export -inkey /cert/client2.key -in /cert/client2.crt -out client1.pfx

export
sz client1.pfx
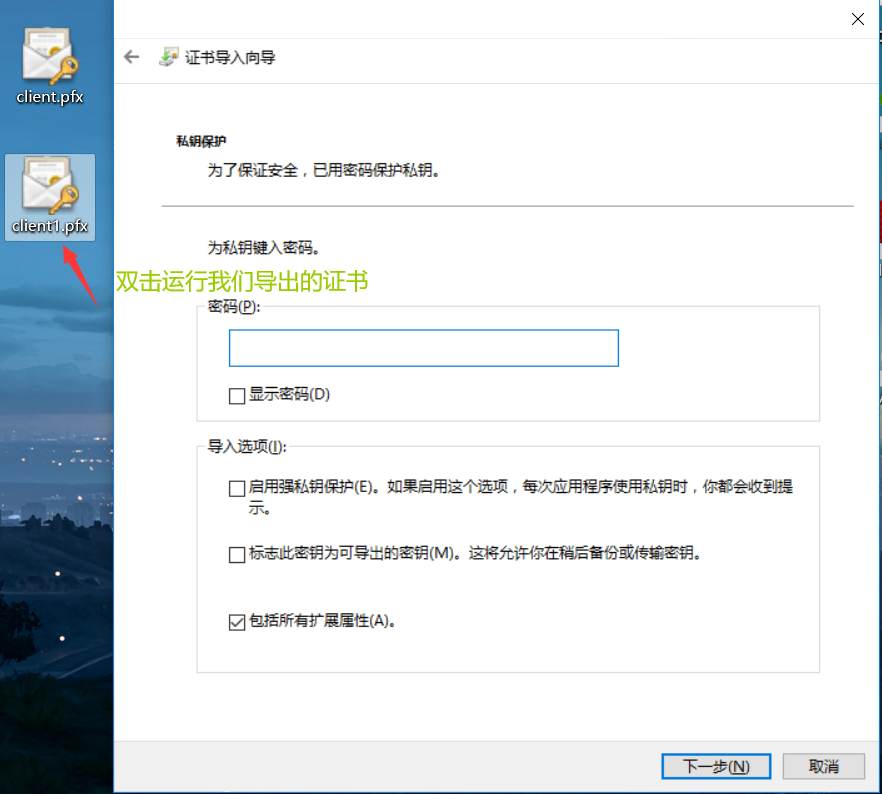
[external link image transfer failed. The source station may have anti-theft chain mechanism. It is recommended to save the image and upload it directly (img-t7pguxu5-1643041751129)( https://s2.loli.net/2022/01/20/QJSv9o1GKd6cj3r.png )]