1, Flask Foundation
[example 1] write the first flash program, and the code is as follows:
from flask import Flask  # 1. Import Flask class

"""
2.Create an instance of this class. The first parameter is the name of the application module or package. If a single module is used(Such place),Should be used__name__.
The name of the module will vary depending on whether it is launched as a separate application or imported as a module. such Flask Just know where to find templates, static files, etc.
"""
app = Flask(__name__)


@app.route("/")  # 3. Use the route() decorator function to tell Flask what kind of URL can trigger the executed function
def index():  # 4. View function, which returns the information displayed in the user's browser.
    return 'Hello Flask!'


# app.debug = True the first way: turn on debugging mode

if __name__ == '__main__':
    app.run(debug=True, port=8000)  # The second way: pass it in as a parameter of the run() method. You can also set other parameters, such as port number
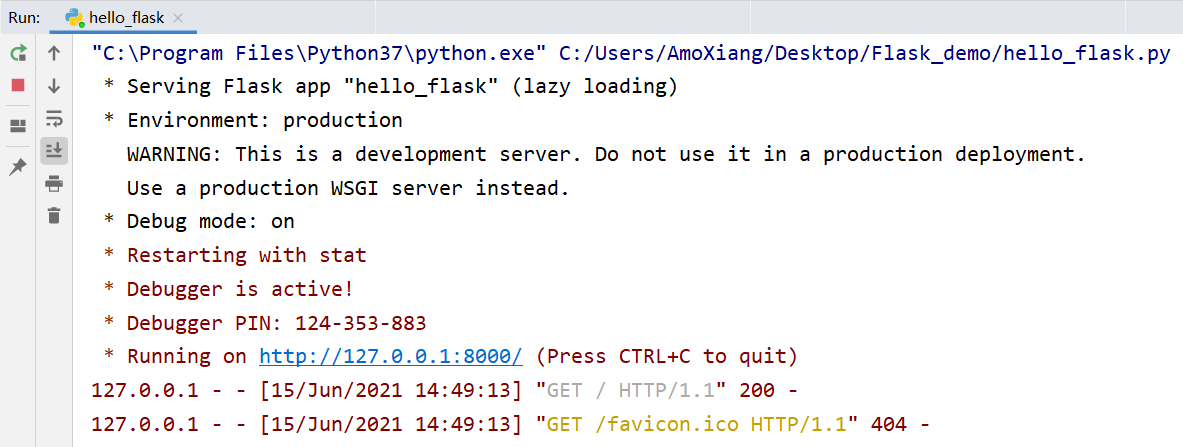
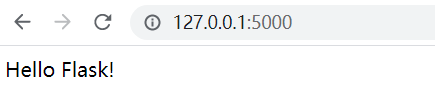
The program execution results are as follows:
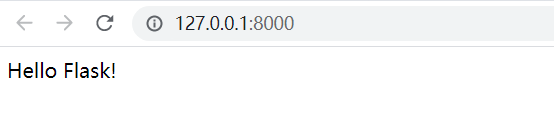
Then in the browser, enter the web address: http://127.0.0.1:8000/ , the operation effect is shown in the figure below:
2, Routing
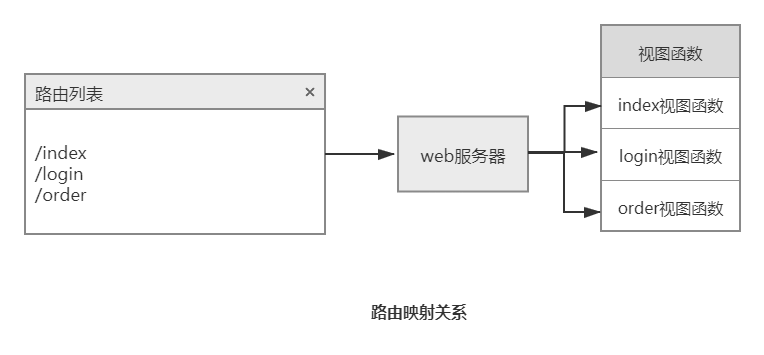
After the client (e.g. Web browser) sends the request to the web server, the web server sends the request to the flash program instance. The program instance needs to know what code each URL request runs, so it saves a mapping relationship between URL and Python function. The program that handles the relationship between URLs and functions is called routing.
The easiest way to define a route in a flash program is to use the app provided by the program instance Route decorator, which registers the decorated function as a route. The route mapping relationship is shown in the figure:
Description: at @ app When adding a URL to the route() function, the URL sometimes changes. For example, the ID s of different articles of the same author vary, as follows:
https://blog.csdn.net/xw1680/article/details/117434720
https://blog.csdn.net/xw1680/article/details/117854388
In this case, you can construct URLs with dynamic parts, or attach mu lt iple rules to a function. To add a variable part to the URL, you can mark these special fields as < variable name >, which will be passed to the function as a named parameter. If you want to limit the type of variable name, you can specify an optional type converter with < variable type: variable name >.
[example 2] output corresponding user information according to different user name parameters. The code is as follows:
from flask import Flask # Import Flask class
app = Flask(__name__)
@app.route("/")
def index():
return 'Hello Flask!'
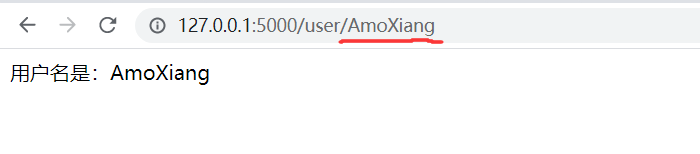
@app.route("/user/<username>")
def show_user_info(username):
# Displays the user information for the user name
return f"The user name is:{username}"
@app.route("/post/<int:post_id>") # Int converter: receive integers. float: same as int, but receiving floating point number. path: similar to the default, but also receives slashes.
def show_post(post_id):
# The article is displayed according to the ID, which is integer data
return f"ID Yes:{post_id}"
if __name__ == '__main__':
app.run(debug=True)
Test 1 in browser:
Test 2 in browser:
Test 3 in browser:
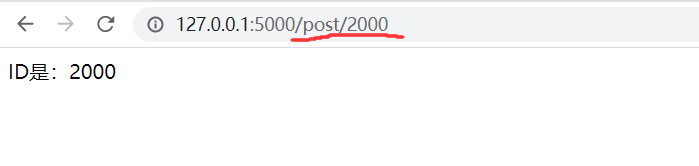
Test 4 in browser:

[example 3] simulate the effect of page jumping to the home page after successful login. The code is as follows:
from flask import Flask, url_for, redirect  # Import Flask class

app = Flask(__name__)


@app.route("/")
def index():
    return 'Hello Flask!'


@app.route("/login")
def login():
    # Simulate login process
    flag = True
    # If the login is successful, jump to the home page
    if flag:
        return redirect(url_for("index"))
    return "Login page"


if __name__ == '__main__':
    app.run(debug=True)
The operation effect is shown in the figure below:
Summary: using URLs_ The for function can construct a URL, so it is often used in combination with the redirect() function to jump to the constructed URL page.
# Returns the route "/" corresponding to the index function
url_for('index')
# Return to show_ Route corresponding to post function "/ post/2"
url_for('show_post', post_id=2)
# Return to show_ user_ Route corresponding to info function "/ user/AmoXiang"
url_for('show_user_info', username='AmoXiang')
HTTP (protocol for session with Web Applications) has many different ways to access URL s. By default, routes only respond to GET requests, but this behavior can be changed by passing the methods parameter through the route() decorator. For example:
@app.route("/login", methods=["GET", "POST"])
def login():
    if request.method == "POST":
        do_the_login()
    else:
        show_the_login_form()
HTTP methods (also often called predicates) can tell the server what the client wants to do with the requested page. Common methods are as follows:
| Method name | explain |
|---|---|
| GET | The browser tells the server: only get the information on the page and send it to me. This is the most commonly used method |
| HEAD | The browser tells the server that it wants to get information, but only cares about the message header. |
| POST | The browser tells the server that it wants to publish new information on the URL. Also, the server must ensure that the data is stored and stored only once. This is how HTML forms usually send data to the server |
| PUT | Similar to POST, but the server may trigger the stored procedure many times and overwrite the old value many times. Considering that the connection may be lost during transmission, in this case, the system between the browser and the server may safely receive the request for the second time without damaging anything else. Because POST is triggered only once, you need to use PUT |
| DELETE | Delete information for a given location |
| OPTIONS | Give the client an agile way to figure out which HTTP methods this URL supports. Starting from flash 0.6, automatic processing is realized |
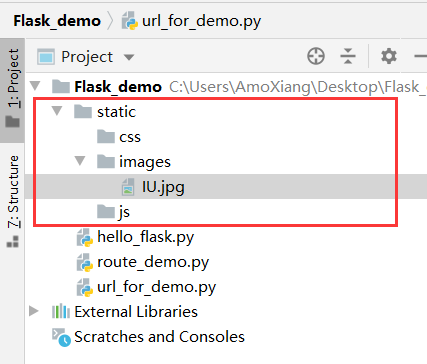
Dynamic Web applications also need static files, which are usually CSS and JavaScript files. By default, as long as a folder named static is created in the package or in the directory where the module is located, it can be accessed by using / static in the application. For example, flask_ The demo folder is the application directory in flash_ Create a static folder under the demo directory. The directory structure is shown in the following figure:
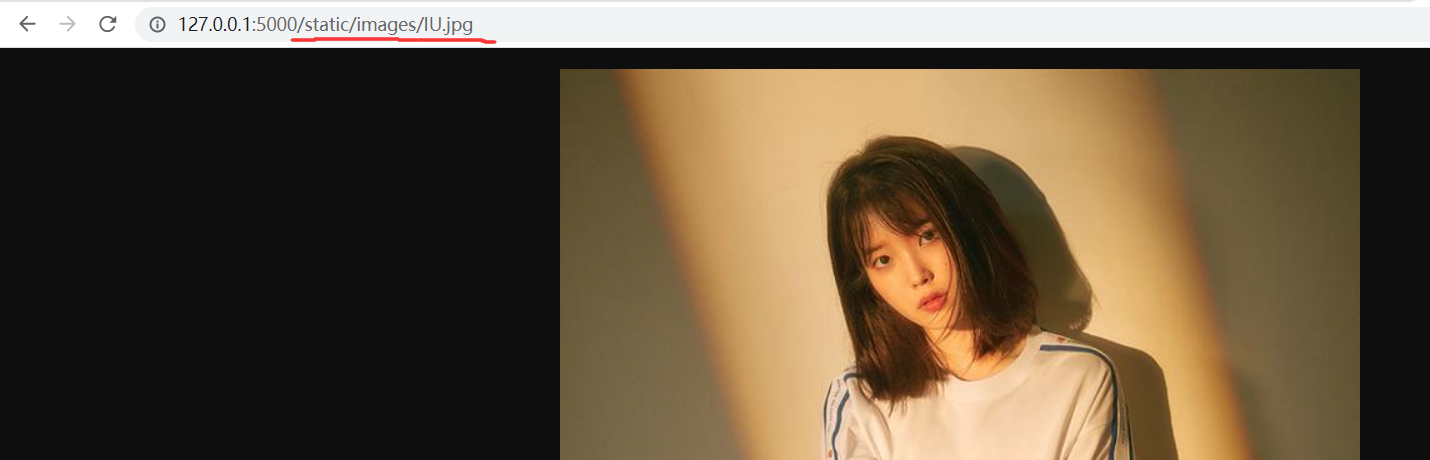
To generate a URL for a static file, you can use a special static endpoint name. The test in the browser is as follows:
Three, template
A template is a file containing the response text, which contains the dynamic part represented by a placeholder variable. Its specific value can only be known in the context of the request. Replacing variables with real values and returning the resulting response string is called rendering. To render templates, Flask uses a powerful template engine called Jinja2.
By default, Flask looks for templates in the templates subfolder in the program folder. Flash uses render_ The template() function renders a template. The syntax is as follows:
def render_template(template_name_or_list, **context):
Note: render_ The template function needs to be imported from the Flask package. Its first parameter is the name of the rendered template, and the other parameters are the values of variables in the template. For example:
return render_template('user.html',username=name)
If the above code is invoked in the view function, the user. in the templates directory will be rendered. HTML template file, and replace {{username}} in the template file with the value of name.
[example 4] render the home page template. In flask_ Create a templates folder in the demo directory, and create a new index. In the templates folder HTML template file, as shown in the following figure:
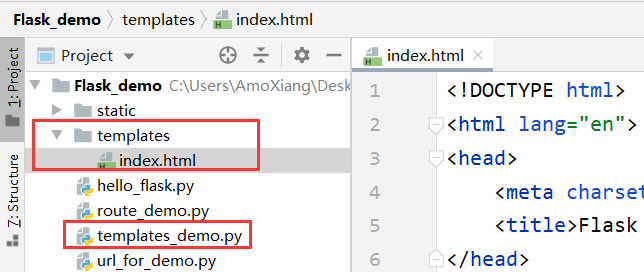
index. The code in html is as follows:
<!DOCTYPE html>
<html lang="en">
<head>
    <meta charset="UTF-8">
    <title>Flask Render template case demo</title>
</head>
<body>
    <h1>AMO's Python daily practice </h1>
    <ul id="practice_list">
        <li>{{value1}}</li>
        <li>{{value2}}</li>
        <li>{{value3}}</li>
        <li>{{value4}}</li>
    </ul>
</body>
</html>
templates_ demo. The code in py is as follows:
from flask import Flask, render_template

app = Flask(__name__)


@app.route('/')
def index():
    value1 = "Python daily practice (20)-use Python make mini translator"
    value2 = "Python daily practice (19)-Realized by crawler GitHub Simulated Login of web page"
    value3 = "Python daily practice (18)-Grab the catalogue and full text of the novel"
    value4 = "Python daily practice (17)-Get the download address of the movie quickly through regular expression"
    # value1=value1 keyword parameter
    # Value1 = = > parameter name on the left, corresponding to the placeholder in the template
    # Value1 = = > the variable in the current scope on the right represents the value of this parameter
    return render_template("index.html", value1=value1, value2=value2, value3=value3, value4=value4)


if __name__ == '__main__':
    app.run(debug=True)
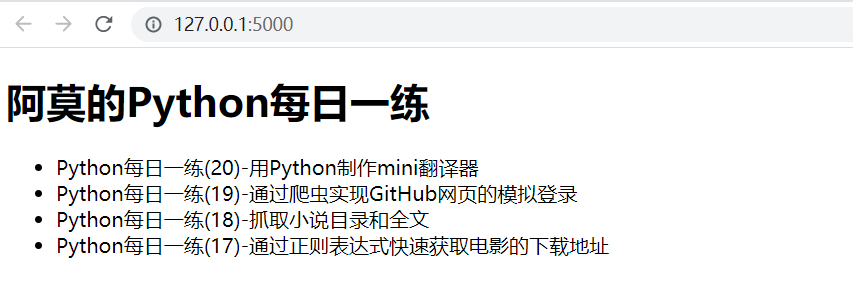
The operation effect is shown in the figure below:
Jinja2 can recognize all types of variables, even some complex types, such as lists, dictionaries and objects. Some examples of using variables in templates are as follows:
<li>Take a value from the list:{{value5[2]}}</li>
<li>Take an indexed value from the list:{{value5[index]}}</li>
<li>Take a value from the dictionary:{{my_dict['key']}}</li>
<li>Take a value from the object's method:{{obj.method()}}</li>
You can use filters to modify variables. The filter name is added after the variable name, separated by a vertical line. For example, the following template displays the value of the variable name in uppercase:
<li>Hello, {{name|capitalize}}</li>
Some common filters provided by Jinja2 are shown in the following table:
| name | explain |
|---|---|
| safe | Do not escape when rendering values |
| capitalize | Convert the first letter of the value to uppercase and the other letters to lowercase |
| lower | Convert values to lowercase |
| upper | Convert values to uppercase |
| title | Converts the first letter of each word in the value to uppercase |
| trim | Remove the leading and trailing spaces of the value |
| striptags | Delete all HTML tags in the value before rendering |
| default() | Set the default value. The default value is passed in as a parameter, and the alias is d |
| escape(s) | Escape HTML text, alias e |
| first (seq) | Returns the first element of the sequence |
| last(seq) | Returns the last element of the sequence |
| length(object) | Returns the length of the variable |
| random(seq) | Returns a random element in a sequence |
| max() | Returns the maximum value in the sequence |
| min() | Returns the minimum value in the sequence |
| unique() | Returns non repeating values in a sequence |
| wordcount(s) | Count words |
| tojson() | Convert variable values to JSON format |
| truncate() | The truncated string is often used to display the article summary, and the length parameter sets the truncated length The killwords parameter sets whether to truncate words, and the end parameter sets the symbol at the end |
[example 5] count the length of the article. Create a new article in the templates folder HTML template file, the code is as follows:
<!DOCTYPE html>
<html lang="en">
<head>
    <meta charset="UTF-8">
    <title>Count the length of the article</title>
</head>
<body>
<p style="color: red">Full text total{{content|count_length}}word</p>
<p style="color: blue">Full text total{{content | length()}}word</p>
<p>{{content}}</p>
</body>
</html>
templates_ demo2. The code in py is as follows:
from flask import Flask, render_template

app = Flask(__name__)


# def count_length(arg):  # # Implement a function that can find the length
#     return len(arg)
#
#
# app.add_template_filter(count_length, 'count_length')


@app.template_filter()  # Use decorator
def count_length(arg):  # Implement a function that can find the length
    return len(arg)


@app.route('/')
def index():
    content = """
    Flask Is a use Python Written lightweight Web Application framework, based on Werkzeug WSGI Toolbox and Jinja2 Template engine. Flask Called a microframe,
    Because it uses a simple core and uses extensions to add other functions. Flask There is no default database, form validation tool, etc. However, Flask Retained the elasticity of amplification,
    Can use Flask Extend and add these functions, such as:ORM,Form verification tools, file upload, various open authentication technologies and so on.
    """
    return render_template("article.html", content=content)


if __name__ == '__main__':
    app.run(debug=True)
The operation effect is shown in the figure below:

Jinja2 provides a variety of control structures that can be used to change the rendering process of templates. Use conditional control statements in the template. The code is as follows:
{% if user %}
hello, {{user}}!
{% else % }
hello, Paul!
{% endif %}
Use the for loop to render a set of elements in the template. The code is as follows:
<ul>
    {% for comment in comments %}
    <li>{{comment}}</li>
    {% endfor %}
</ul>
The Flask framework has a context, and the Jinja2 template also has a context. Typically, render is called when rendering a template_ The template() function passes variables into the template. In addition, you can use the set tag to define variables in the template, for example:
{% set navigation = [('/', 'home'), ('/about', 'About')] %}
You can also define some template data as variables and declare the start and end with set and endset tags, for example:
{% set navigation %}
<li><a href="/">home page</a></li>
<li><a href="/about">About us</a></li>
{% endset %}
Flask provides some built-in global variables in the template context, which can be used directly in the template. The built-in global variables and their descriptions are shown in the following table:
| attribute | explain |
|---|---|
| config | Current configuration object |
| request | The current request object is available in the activated request environment |
| session | The current session object is available in the active request environment |
| g | The global variable bound to the request, which is available in the activated request environment |
Template inheritance is similar to class inheritance in Python. Jinja2 allows you to define a base template (also known as the parent template), put the navigation bar, footer and other general contents on the web page in the base template, and each sub template that inherits the base template will automatically include these parts when rendered. In this way, you can avoid writing duplicate code in multiple templates. In jinja2, the child template inherits from the parent template using the extensions tag. Parent template, code as follows:
{% include '_nav.html' %}
{% block content %}
{% endblock %}
{% include '_footer.html' %}
Note: in the above code, the include tag is used to introduce_ nav.html navigation bar and_ footer.html files such as the information bar at the bottom of html. Then use the block tag as a placeholder and name it content. The placeholder in the parent template will be replaced by the content of the block tag named content in the child template.
Sub template, code as follows:
{% extends 'base.html' %}
{% block content %}
use block Label replace in parent template content Content.
{% endblock %}
In the development process, users often need to be prompted about the success or failure of the current operation. For example, on the add product information page, if the addition is successful, you should prompt for the success of the addition, otherwise you should prompt for the failure of the addition. To meet this demand, flash provides a very useful flash () function, which can be used to flash messages that need to be displayed to users. The syntax format of flash() function is as follows:
flash(message,category)
Parameter Description:
- Message: messag e content.
- category: message type, used to classify different message contents.
flash() function is usually called in view function, and a message is flashed when the content of the message is introduced. Of course, it doesn't pop up a message in the user's browser. In fact, the messages sent using the flash() function will be stored in the Session. You need to use the global function get in the template_ flashed_ Messages() gets the list of messages and displays it.
Note: the message sent through the flash() function will be stored in the session object, so you need to set the key for the program. You can use app SECRET_KEY attribute or configuration variable SECRET_KEY setting.
[example 6] register the error handling function and customize the error page. 404.html template content code is as follows:
<!DOCTYPE html>
<html lang="en">
<head>
    <meta charset="UTF-8">
    <title>404 page</title>
</head>
<body>
<img src="{{url_for('static',filename='images/404.png')}}" alt="404 page">
</body>
</html>
error. The code in py is as follows:
from flask import Flask, render_template

app = Flask(__name__)
# app.secret_key = "amoxiang"  # Set secret_key


@app.route('/')
def index():
    return render_template("index.html")


@app.errorhandler(404)
def page_not_found(e):
    return render_template('404.html')


if __name__ == '__main__':
    app.run(debug=True)  # Run program
The operation effect is shown in the figure below: